Microsoft Azure and HyWorks/HyLabs Configuration
To set up Azure for HyWorks/HyLabs with Azure Virtual Desktop, follow the detailed configuration steps:
This section will provide detailed information on the configurations and prerequisites for delivering desktops using HyLabs.
Azure App registrations, Access Control, and Permission
Following are the requirements basic requirements for AVD:
-
Azure Active Directory (Microsoft Entra ID): An Azure AD tenant is needed for app registration, which will be done through Microsoft Entra ID.
-
Administrator Access: Sufficient permissions to register applications and configure API permissions in Azure AD.
-
Subscription Access: Access to the Azure subscription where you will configure roles and permissions.
-
API Permissions: Microsoft Graph API permissions, both Delegated and Application.
-
Role Assignment: Ensure you can assign roles such as Desktop Virtualization Power On Off Contributor to the service principals.
The following steps from the Azure portal must be done to enable the AVD support:
-
Configure Azure App
-
Create Secret
-
Configure Access Control
All of these steps are covered in detail in the section Prepare Azure with following mandatory requirements for AVD:
-
The permissions mentioned in the online document are contributor, whereas, it will need an Owner role.
-
For App registration: Azure active directory option mentioned in online documentation, it is now Microsoft Entra ID.
Additional API Permissions for Azure App
Enabling AVD support will require the following additional mandatory configurations:
-
Open the web browser and go to Azure Portal.
-
In the search bar, search for Microsoft Entra ID and select it.
-
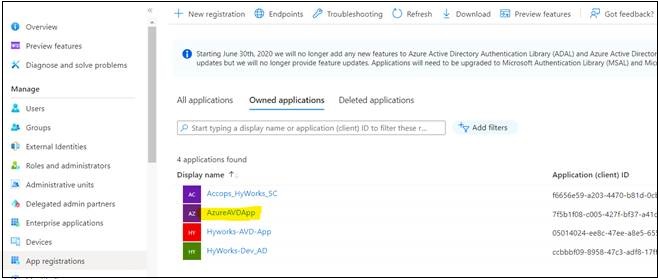
Select App registrations from the left navigation pane to open the App registrations page.
-
Select the App.
-
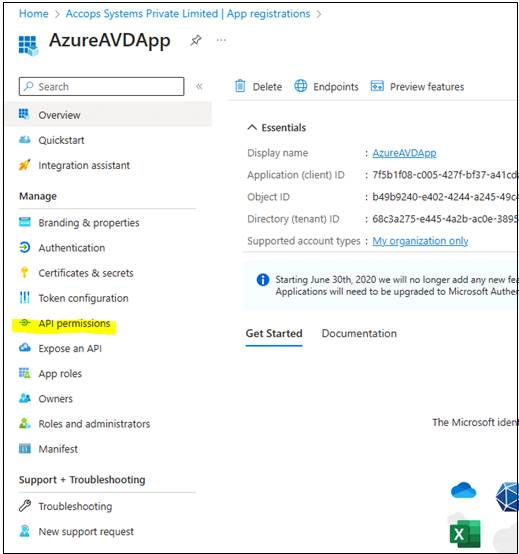
Click API permissions from the left navigation pane.
-
Click Add a permission to start configuring API permissions.
-
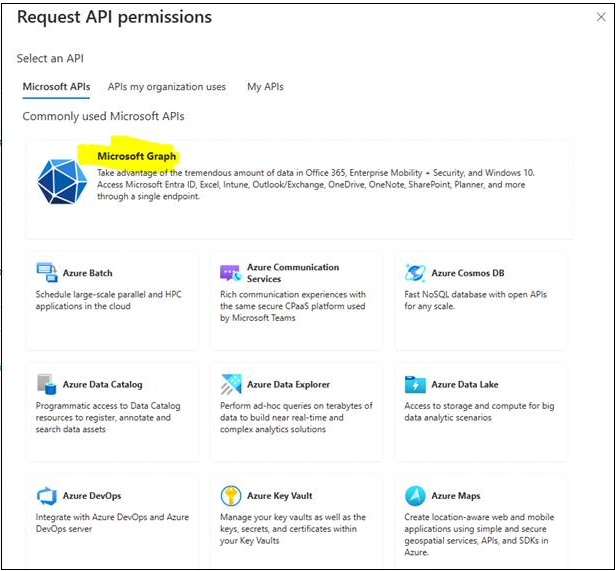
Select API: Choose Microsoft Graph.
-
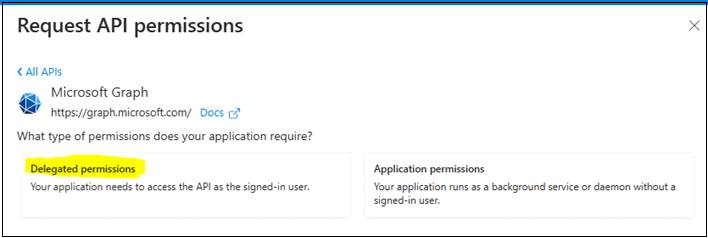
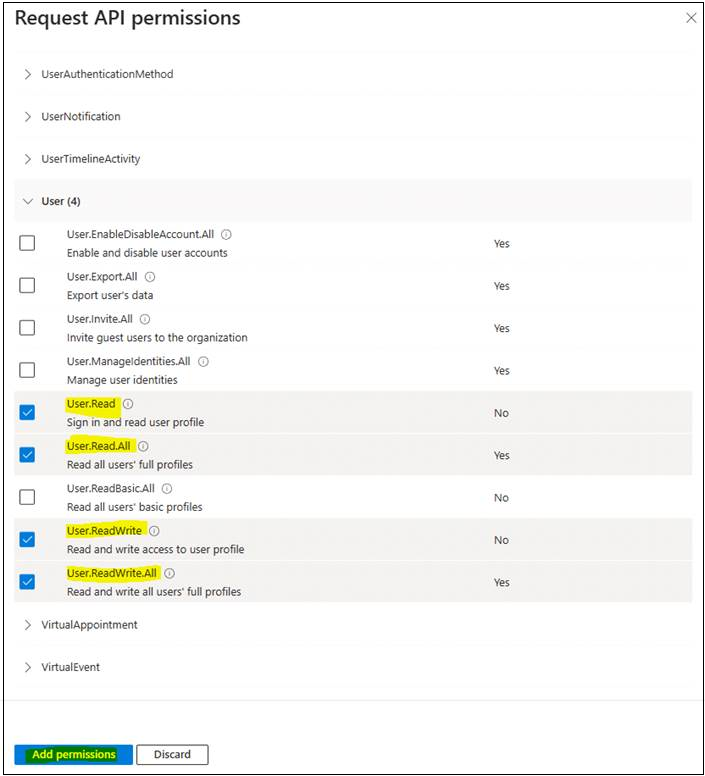
Delegated permissions:
-
Under Microsoft Graph select Delegated permissions.
-
Select the following permissions under Users:
-
User.Read
-
User.Read.All
-
User.ReadWrite
-
User.ReadWrite.All
-
-
Click the Add permissions tab.
-
-
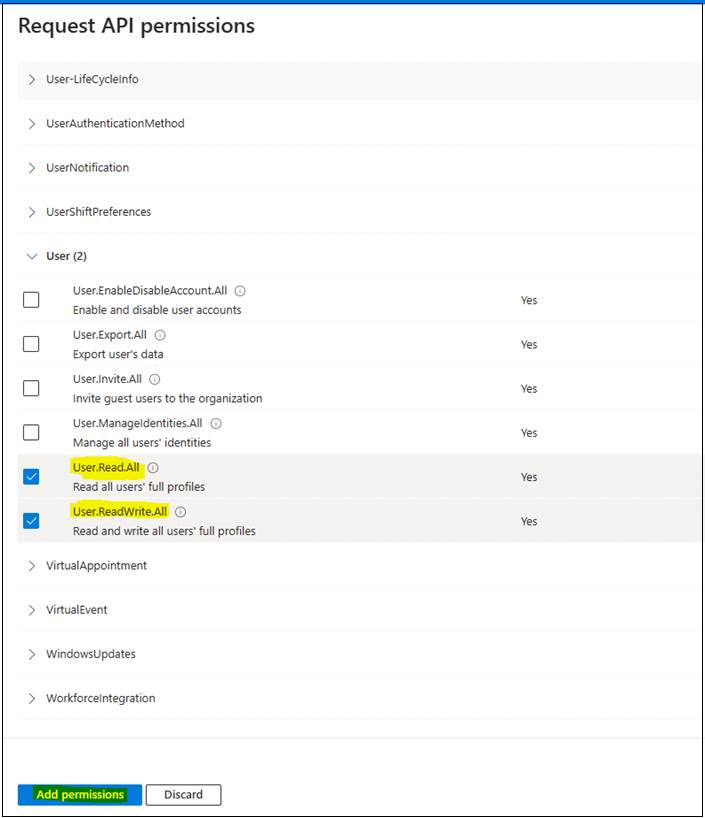
Application permissions:
-
Under Microsoft Graph select Application permissions.

-
Select the following permissions under Users:
-
User.Read.All
-
User.ReadWrite.All
-
-
Click on the Add permissions tab
-
-
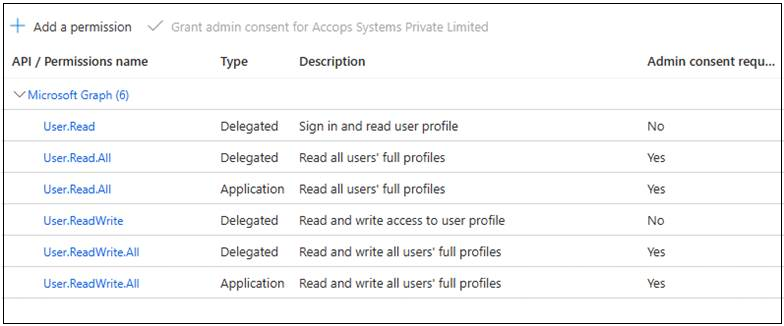
Permission Verification: Ensure that the following permissions are listed under API permissions for the registered app.
-
Grant Admin Consent: If the app requires admin consent, an administrator must give consent to these permissions.
-
Permission to Assign Scale Plan to Host Pool
-
Sign in to the Azure portal.
-
In the search box, enter Microsoft Entra ID and select the matching service entry.
-
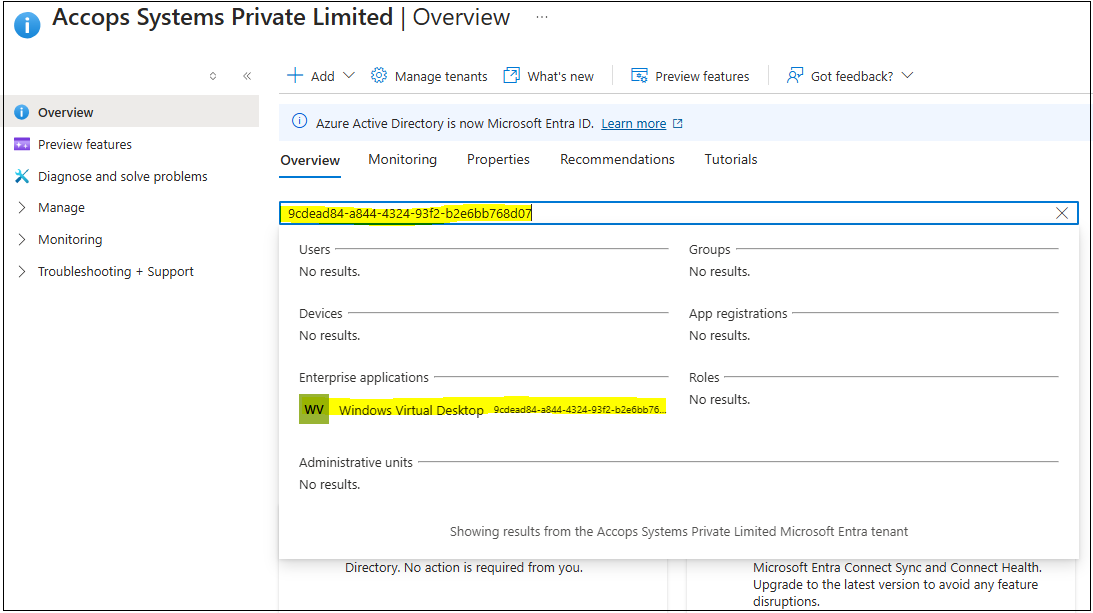
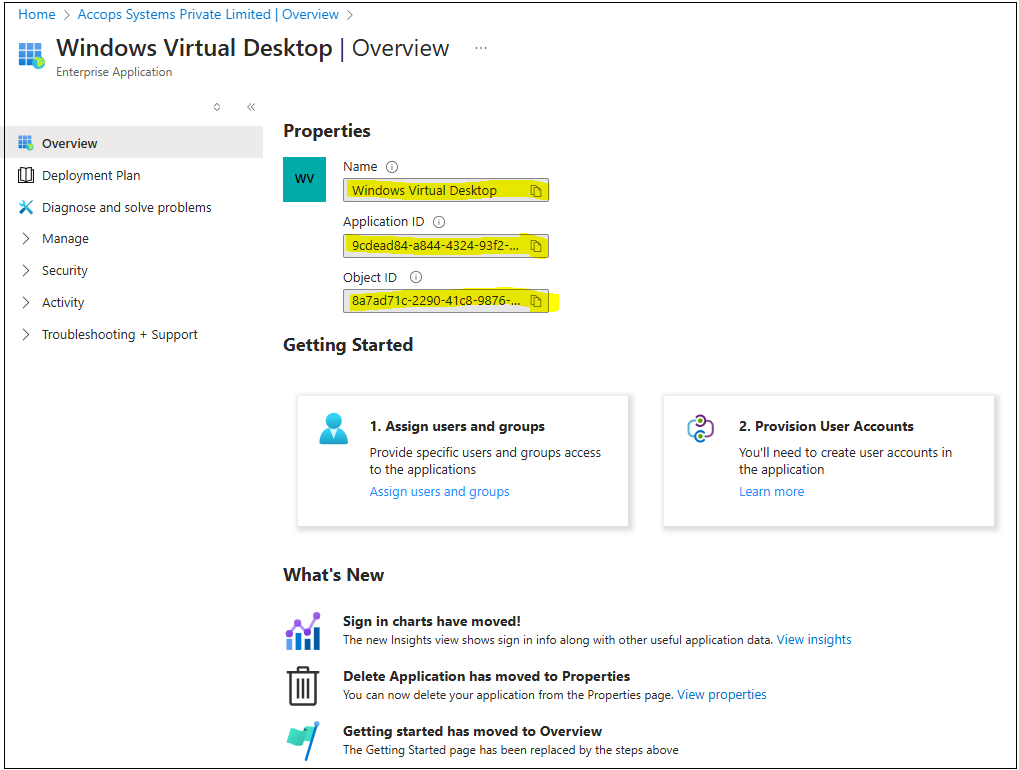
In the search box, search for your tenant on the Overview page. Enter the application ID: < 9cdead84-a844-4324-93f2-b2e6bb768d07> for the service principal > It can be either Azure Virtual Desktop or Windows Virtual Desktop.
-
Select the matching enterprise application for the service principal you want to assign from the search result. It can be either Azure Virtual Desktop or Windows Virtual Desktop.
-
Under Properties, make a note of the Name and the Object ID. The Object ID correlates to the Application ID and is unique to your tenant.
-
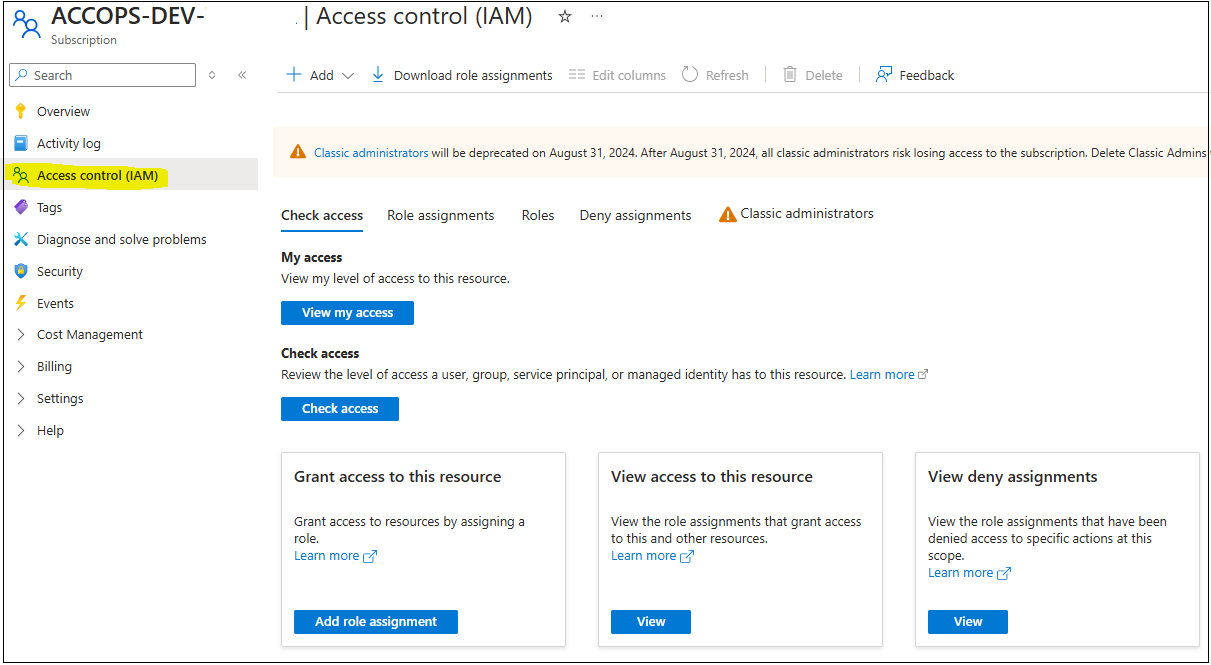
In the search box, enter the Subscriptions and select the matching service entry.
-
Select the subscription you want to add the role assignment to.
-
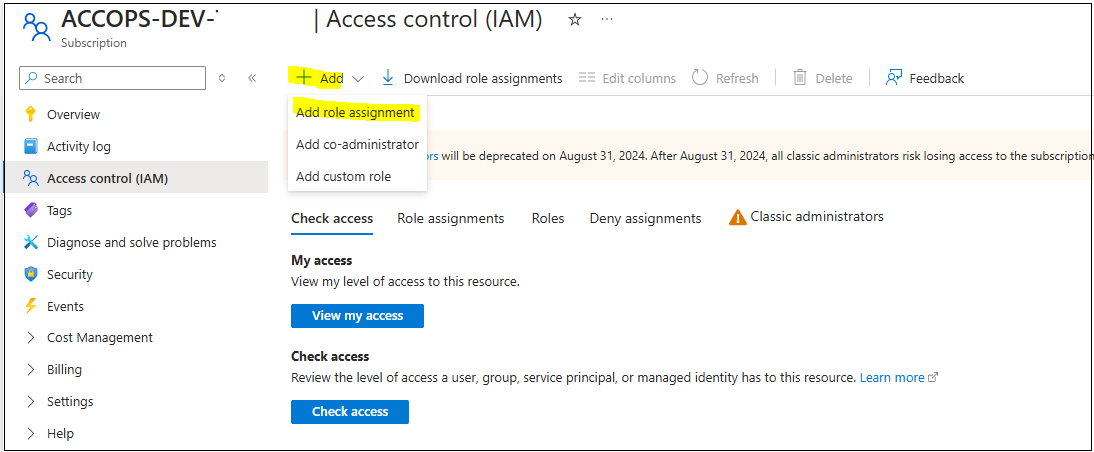
Select Access control (IAM), then select + Add followed by Add role assignment.
-
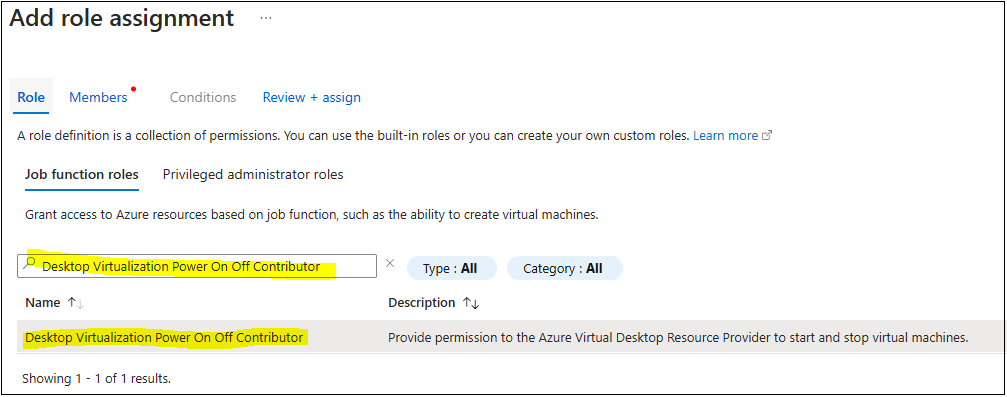
Select the role Desktop Virtualization Power On Off Contributor to assign to the Azure Virtual Desktop service principal, then select Next.
-
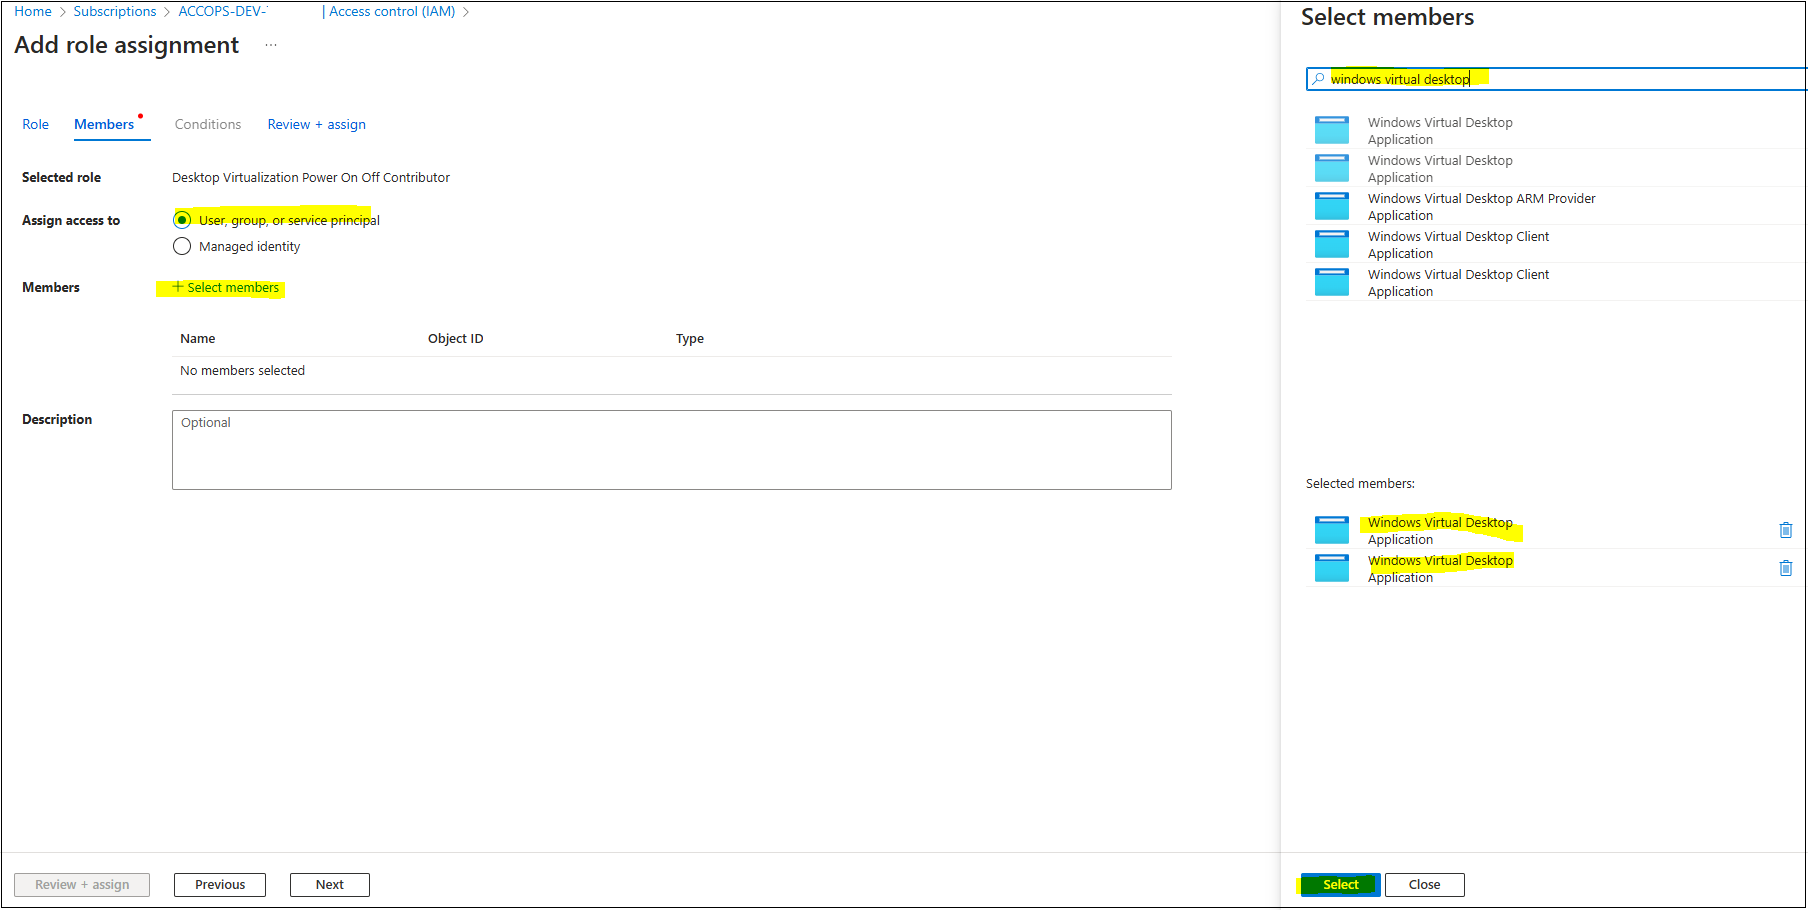
Ensure that the option Assign access to is set to Microsoft Entra user, group, or service principal, then select the members.
-
Enter the name of the enterprise application as per the previosly note.
-
Select the matching entry from the results. If you have two entries with the same name, select both the options for now.
-
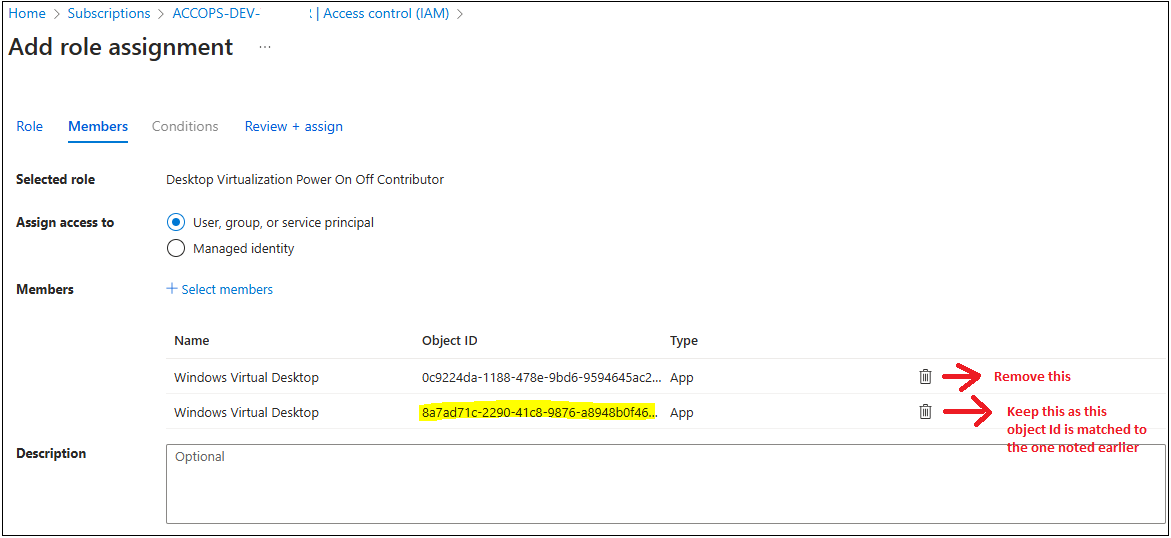
Review the list of members in the table. If there are two entries, remove the entry that doesn't match the Object ID you made a note of earlier.
-
Click Next, then select Review and assign to complete the role assignment.
-
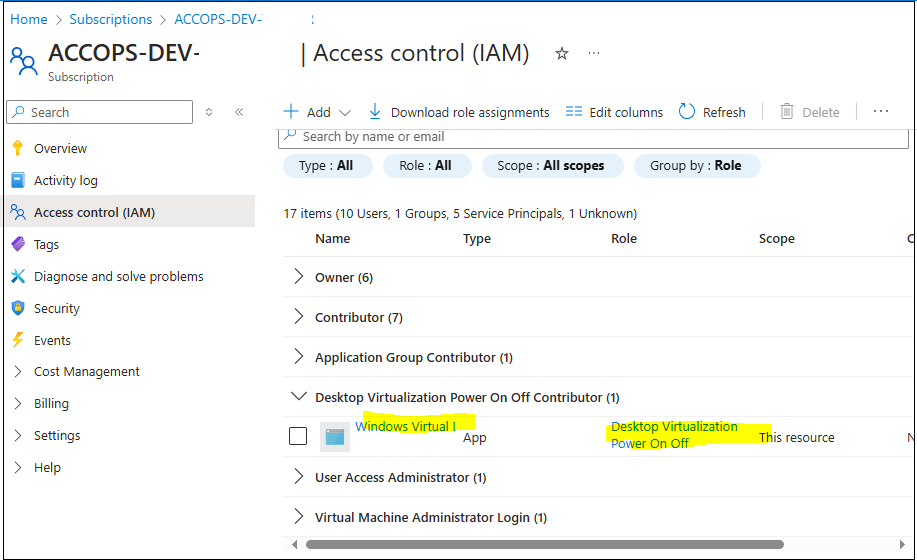
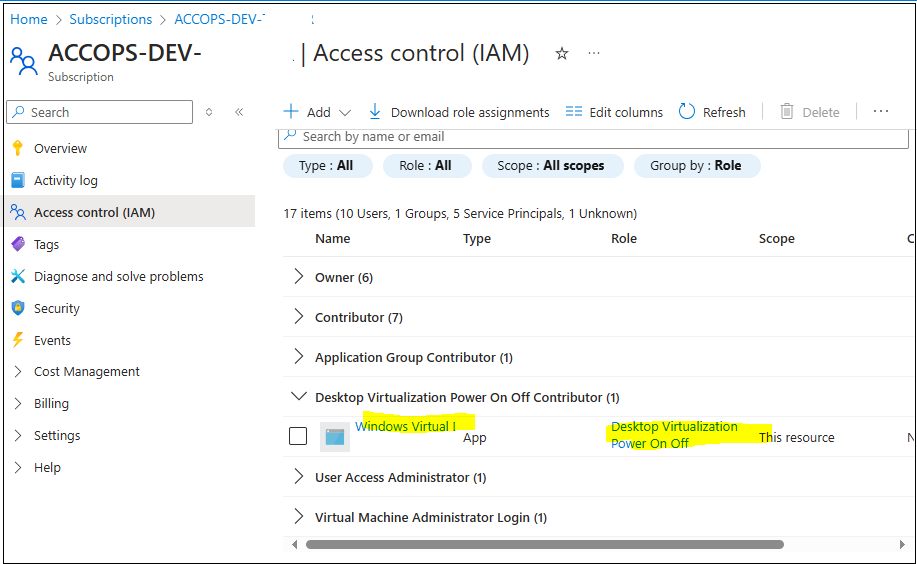
Verify if the role is added under the Subscriptions > IAM.
Additional permissions can be configured to the app for the multi-session environment, which can be done via the following steps:
-
Store the subscription ID in a variable by running the following command, replacing the subscription ID in this example with your own:
$subId = "<SubscriptionID>" -
Assign the role to an Azure Virtual Desktop service principal by running the following command, replacing the value for the RoleDefinitionName parameter with the name of the role you need to assign, and the ApplicationId parameter with application ID of the service principal you want to assign from the earlier table. This example assigns the Desktop Virtualization Power On Off Contributor role to the Azure Virtual Desktop service principal on the subscription:
$parameters = @{
RoleDefinitionName = "Desktop Virtualization Power On Off Contributor"
ApplicationId = "9cdead84-a844-4324-93f2-b2e6bb768d07"
Scope = "/subscriptions/$subId"
}
New-AzRoleAssignment @parameters
Online documents for reference:
- https://learn.microsoft.com/en-us/powershell/azure/install-azps-windows?view=azps-11.2.0&tabs=windowspowershell&pivots=windows-psgallery
- https://learn.microsoft.com/en-us/azure/virtual-desktop/service-principal-assign-roles?tabs=powershell
The Azure app registration, access control, and special permission configuration are now complete.
Gold Master Preparation for Azure Virtual Desktop
The Gold Master preparation will require the following additional steps:
Operating Systems Support:
- Refer AVD Prerequisites to understand the OS and Licensing methods:
Important
-
The prerequisite section in reference article mentions following items not to be supported (The article can be visited for updated information on supported OSes and limitations):
-
Not Supported Systems: The following systems are not supported:
-
32-bit operating systems
-
N, KN, LTSC, and other editions of Windows operating systems not listed in the previous table
-
Support for Windows 7 ended on January 10, 2023
-
-
Not supported Features:
-
Ultra disks for the OS disk type
-
Ephemeral OS disks for Azure VMs
-
Virtual Machine Scale Sets
-
-
VM Security Type
Important: When creating the Gold Master VM, the Security Type should be selected as Standard since cloning in HyWorks is supported with a Standard Security Type.
Network Requirements
-
A virtual network and subnet are required to be configured for Gold Master. This virtual network is to be created in advance to appear in the drop-down list. Your virtual network must be in the same Azure region as the Gold Master.
-
If you're using AD DS or Azure AD DS, make sure this virtual network can connect to your domain controllers and relevant DNS servers. You'll need to join Gold Master and clone session hosts to the domain.
Download and Install HyWorks DVM Agent
-
The latest HyWorks DVM Tools, released with v3.4-SP2 or later, should be installed.
-
Release details can be found here.
-
If any newer releases are there, those can be used.
-
Download and Install RD Agent
It is very important to install the latest AVD agent and AVD agent bootloader on the desktops. The following process should be followed carefully to achieve this:
-
Connect the Gold Master virtual machine with the user who has administrative rights.
-
Navigate to the C drive or the installation directory.
-
Create a folder with the name InstallRDAgent. The folder will consist of the following items:
-
Download and keep the latest AVD Agent in this directory: This link can be used to download the latest AVD agent
-
Download and keep the latest AVD Agent Bootloader: Use this link to download the latest AVD agent bootloader.
-
Appropriate PowerShell script InstallRDAgent.ps1 has been updated to have MSI filenames of AVD agent and AVD agent bootloader. Below is the sample script:
-
Update with exact filenames. Here, the file names mentioned are Microsoft.RDInfra.RDAgent.Installer-x64-1.0.7909.2600.msi and Microsoft.RDInfra.RDAgentBootLoader.Installer-x64.msi to be changed as per the downloaded filenames.
```
<#
.SYNOPSIS
This script installs RD Agent and RD Agent Boot Loader with registration.

.DESCRIPTION
The script takes a registration token as a mandatory parameter to register the RD Agent
with the host pool. It logs the installation process and errors.

.PARAMETER RegistrationInfoToken
The token used for registration with the host pool.

#>
param
(
    [Parameter(Mandatory = $true)]
    [string]$RegistrationInfoToken
)

function LOG ($logString) {
    process {
        if ($logString -eq $null)   {
            $logString = $_
                                    }
        $LogFileName = "log_" + (Get-Date).ToString("yyyyMMdd") + ".txt"
        $logDirectory = $PSScriptRoot
        if (-not (Test-Path -PathType container $logDirectory)) {
            New-Item -Path $logDirectory -ItemType Container
                                                                }
        $LOG_FILE = Join-Path -Path ($logDirectory) -ChildPath $LogFileName
        $LogEntry = (Get-Date).ToString("yyyy/MM/dd HH:mm:ss.fff") + " " + $logString
        Write-Output $LogEntry | Out-File -FilePath $LOG_FILE -Encoding utf8 -append
        return $logString
            }
                        }

try {
    "Started installation for Microsoft.RDInfra.RDAgent.Installer" | LOG
    Start-Process -FilePath "msiexec.exe" -ArgumentList @("/i C:\InstallRDAgent\Microsoft.RDInfra.RDAgent.Installer-x64-1.0.7909.2600.msi", "/quiet", "/qn", "/norestart", "/passive", "REGISTRATIONTOKEN=$RegistrationInfoToken") -Wait -Passthru

    "Started installation for Microsoft.RDInfra.RDAgentBootLoader.Installer" | LOG
    Start-Process -FilePath "msiexec.exe" -ArgumentList @("/i C:\InstallRDAgent\Microsoft.RDInfra.RDAgentBootLoader.Installer-x64.msi", "/quiet", "/qn", "/norestart", "/passive") -Wait -Passthru

    "Installation Completed!!!" | LOG
    }
catch{
    $_.Exception.Message | LOG
    $_.Exception.StackTrace | LOG
    "Error while registering with host pool." | LOG
    }

```
-
-