Introduction
The document provides the necessary steps and configuration details to create a Certificate Authority with a certificate template for SSO configuration using Accops HyWorks.
Prerequisites
-
Domain-Joined Windows Server: This server will be designated as the Certificate Authority (CA) Server.
-
Domain-Joined Server(s): These servers will be used as Accops HyWorks Controllers.
Important
- Do not create a CA server on Active Directory or the Controller.
- For multi-node setups, ensure that all controller servers are joined to the domain.
Installation And Configurations
Certificate Authority Configuration
Note
This step is optional and can be skipped if an appropriate CA server(s) is already available in the environment.
For installing the certificate authority role, consider a Domain-joined Windows Server machine other than the controller or the Active Directory server.
Steps to configure a Domain-joined Windows Server as a Certificate Authority:
-
Open the Server Manager.
-
Navigate to Manage > Add Roles and Feature Wizard.
-
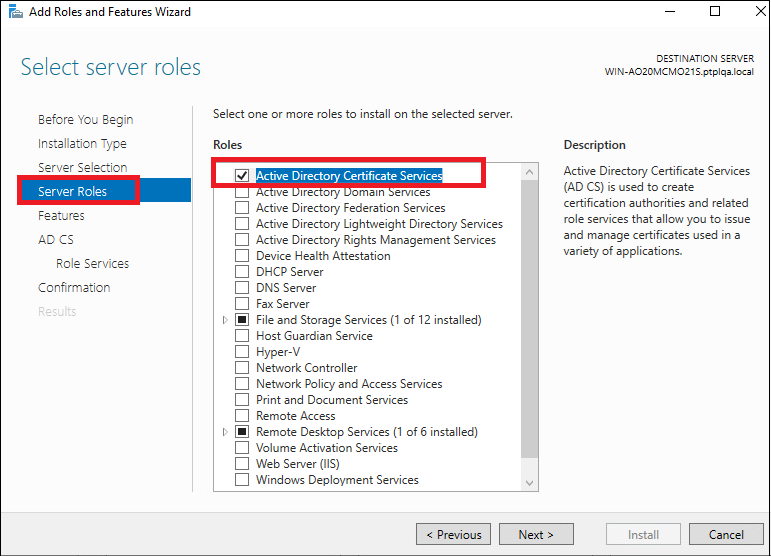
Select the Server Roles menu option and select the role to install on the server.
-
Select the Role Services menu option. Select the role service as Certification Authority and click Next.

-
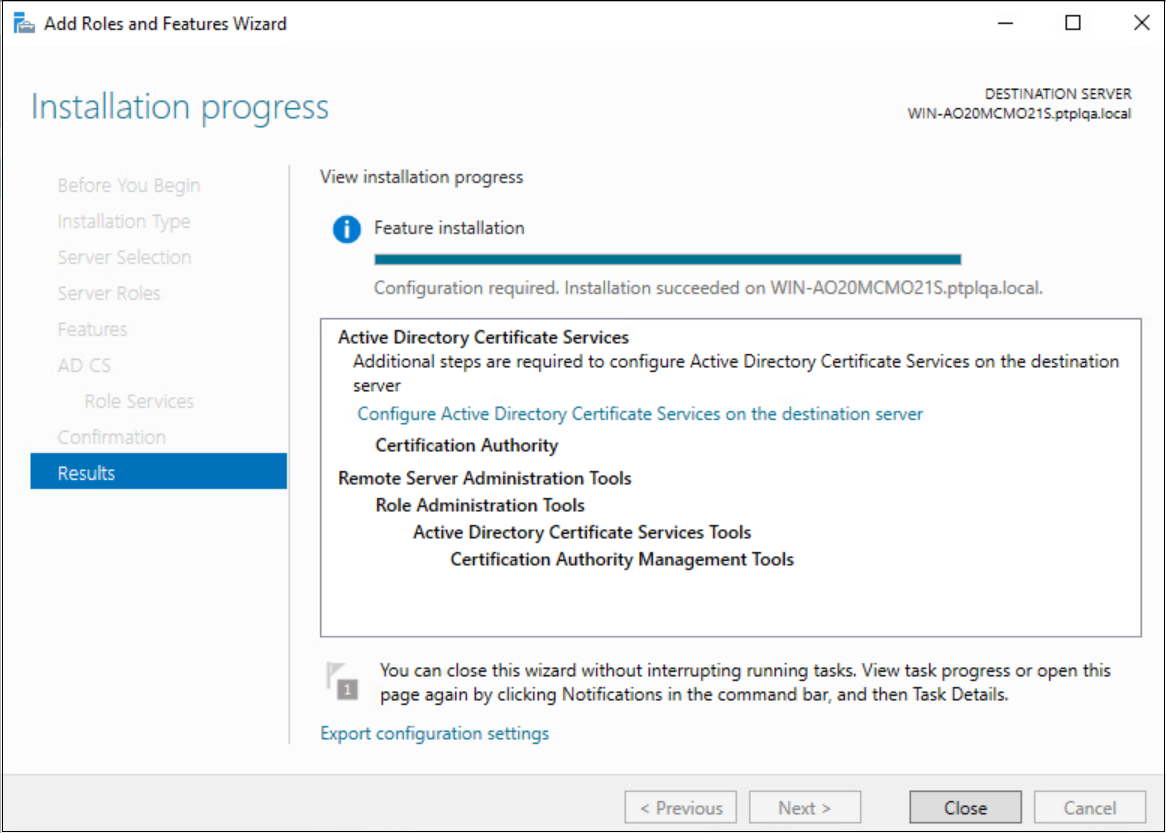
Confirm and install the role on the machine. The role will be installed on the server.
-
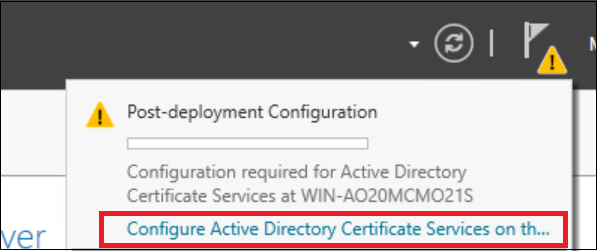
A flag will be generated in the Server Manager to Configure Active Directory Certificate Services on the destination server.
-
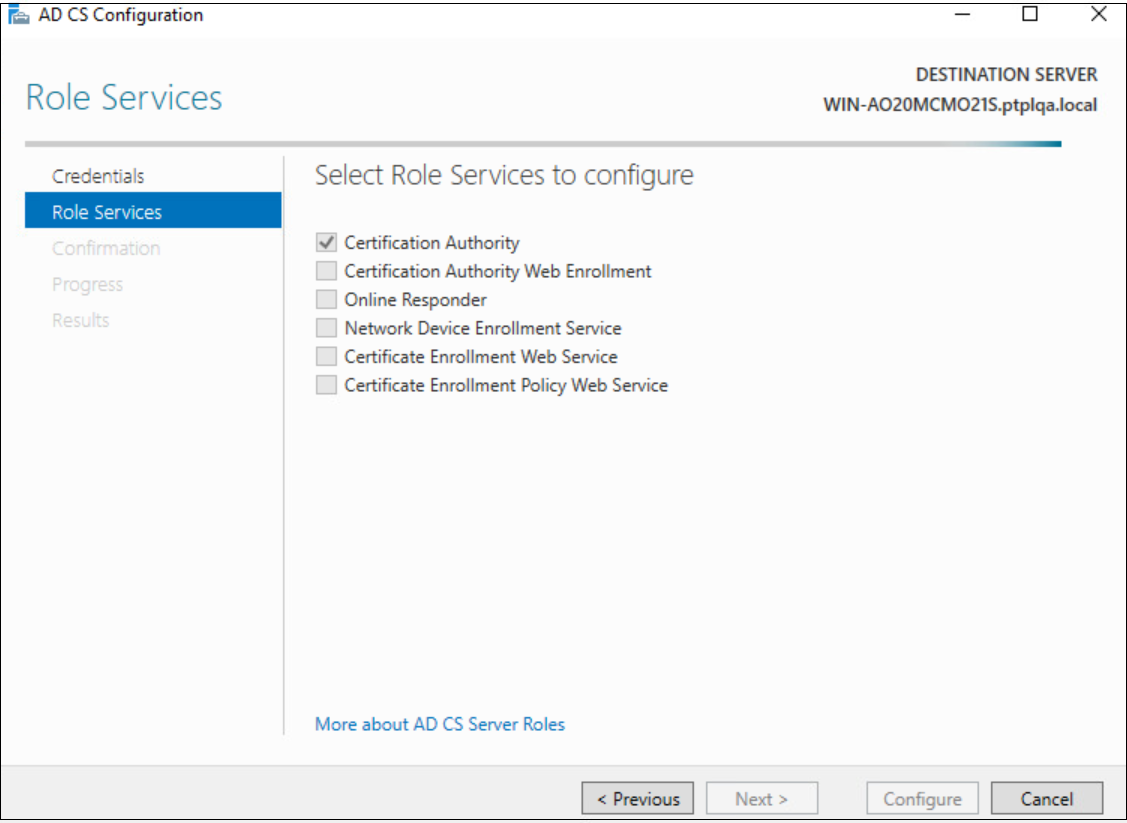
Navigate to the Role Services menu option and select the Certification Authority option, and click Next.
-
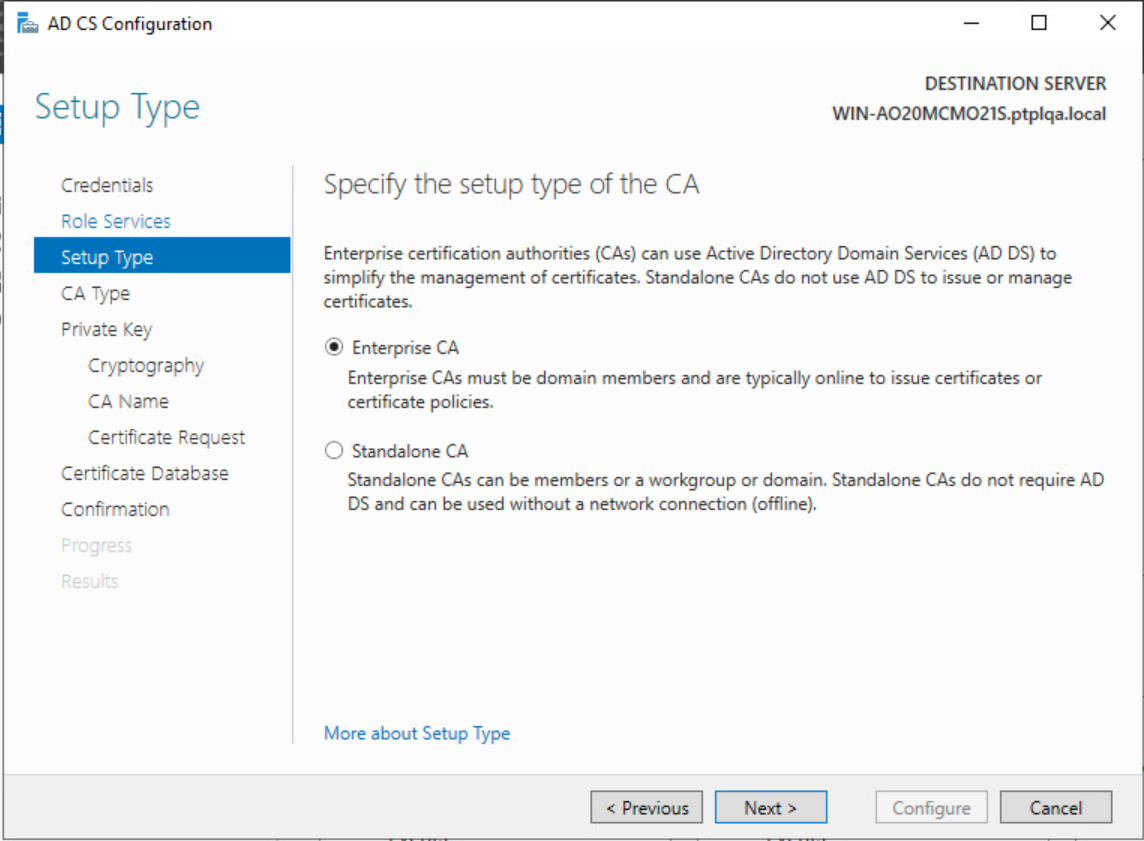
Navigate to the Setup Type menu option. Enable the option Enterprise CA. Ensure the user logged into the machine is the domain admin; otherwise, this option will be disabled and remain greyed out, and click Next.
-
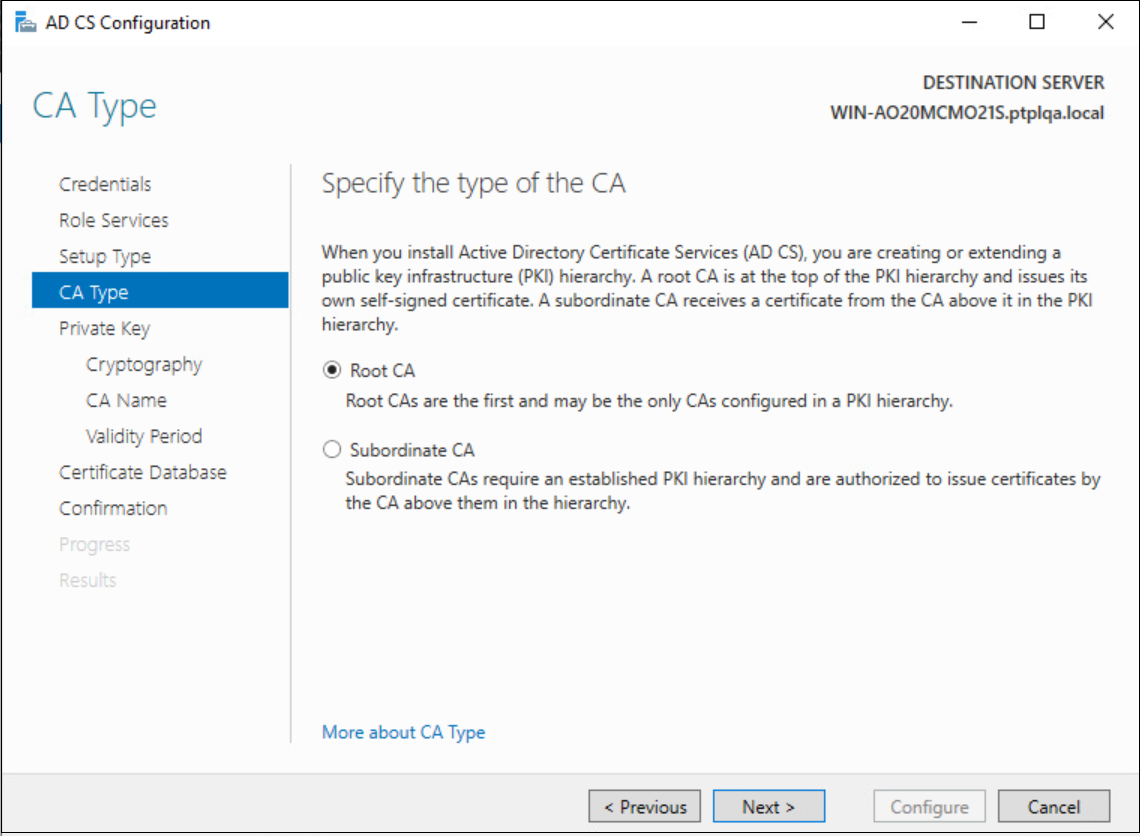
Navigate to the CA Type menu option. Select the option Root CA and click Next.
-
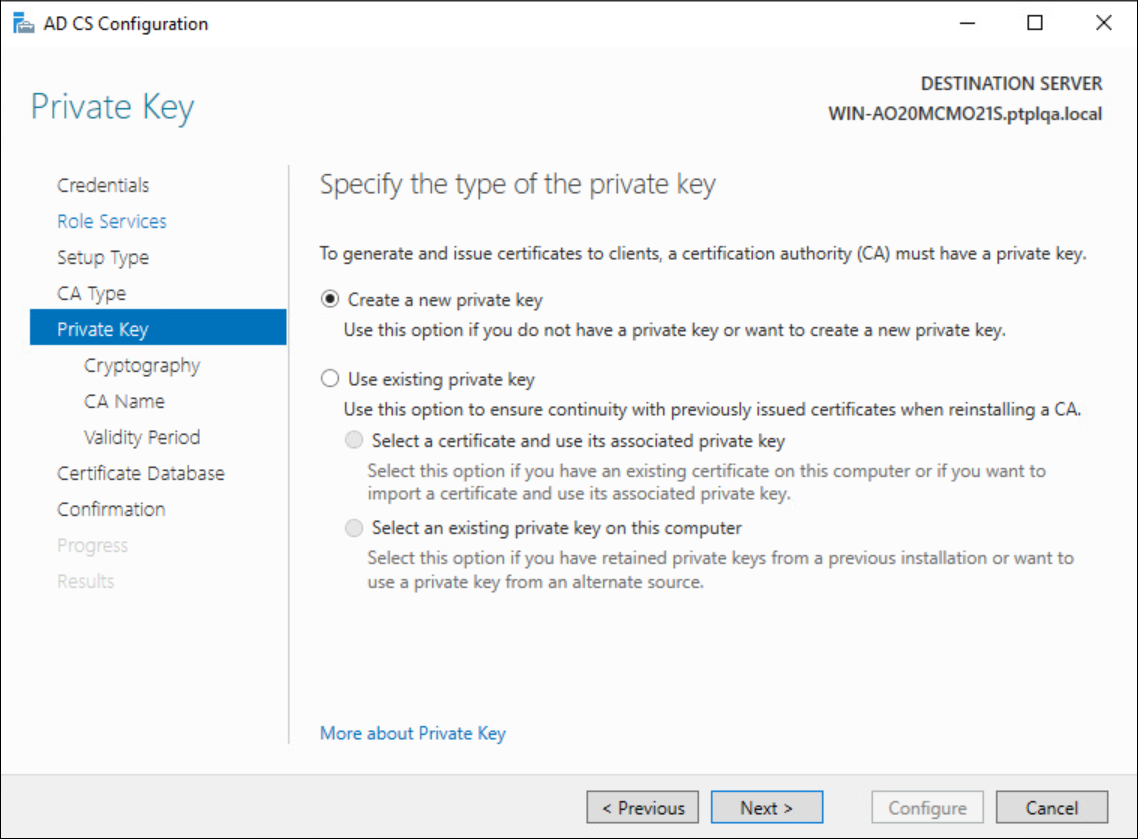
Navigate to the Private Key menu option. Select the Create a new private key option to create a new private key and click Next.
-
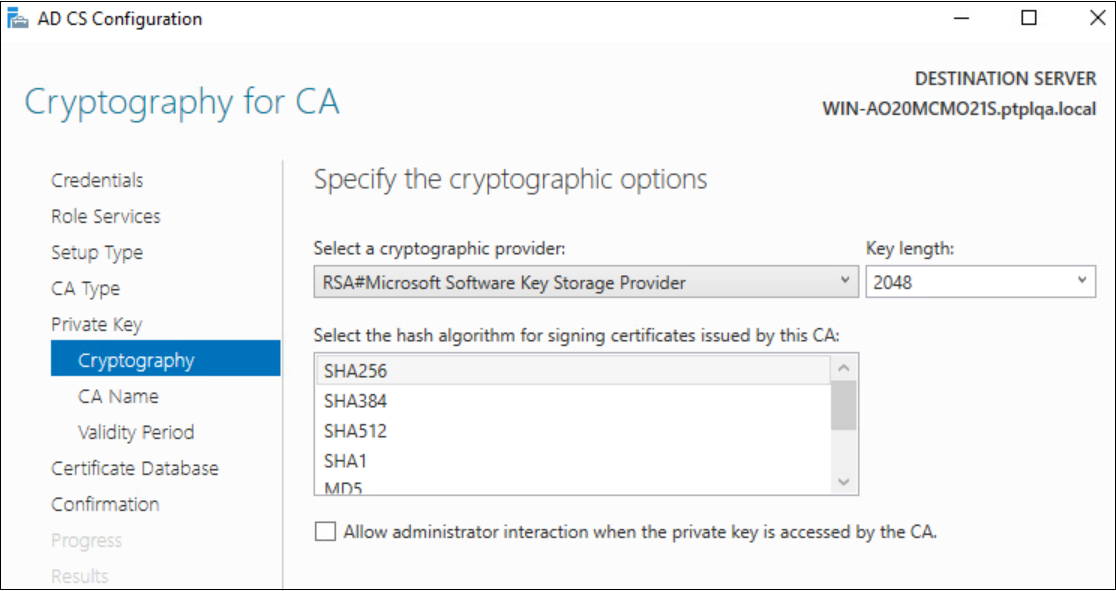
Navigate to the Cryptography menu option, keep the default values in the fields of Cryptographic provider as Microsoft Software Key Storage Provider, key length as 2048, and hash algorithm as SHA256.
-
Next, enter the CA Name, Validity Period, and Certification database.
-
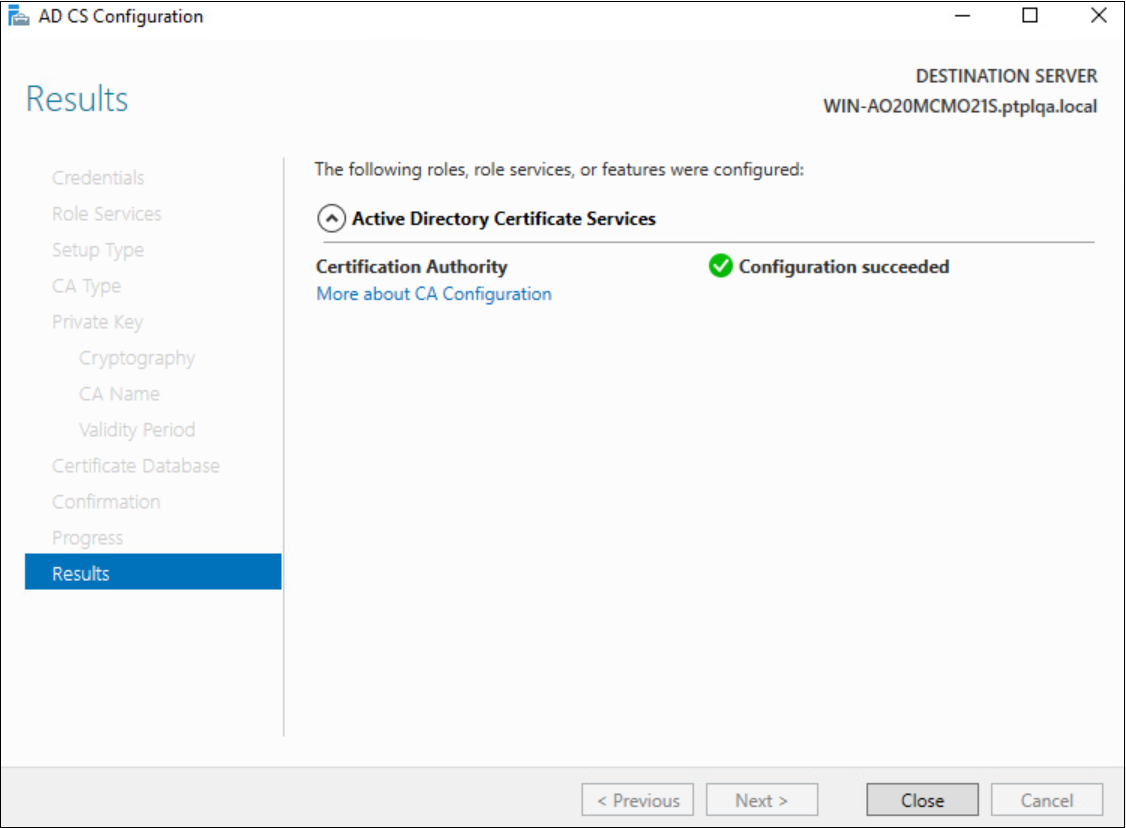
On the Confirmation window, validate all the data and select Configure.
-
Restarting the Windows Server is recommended after adding the server role and completing the installation.
-
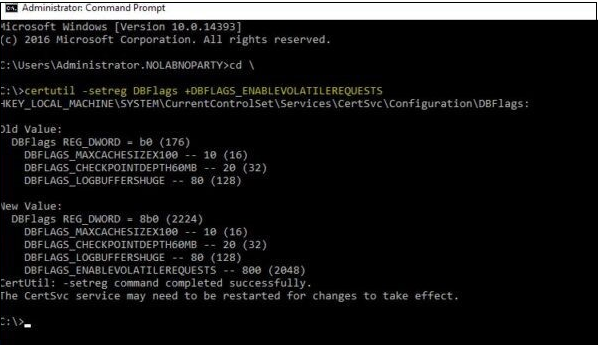
Once the Certification Authority is installed, open the Command Prompt and execute the following command to configure the CA for non-persistent certificate processing:
C:> certutil -setreg DBFlags +DBFLAGS_ENABLEVOLATILEREQUESTS
-
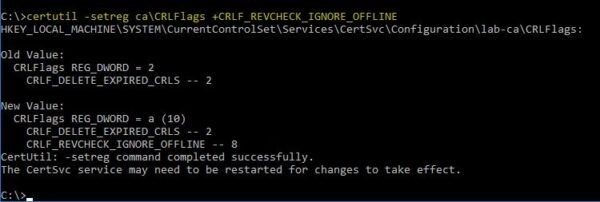
Execute the following command to ignore offline CRL (certificate revocation list) errors on the CA:
C:> certutil -setreg ca\CRLFlags +CRLF_REVCHECK_IGNORE_OFFLINE
-
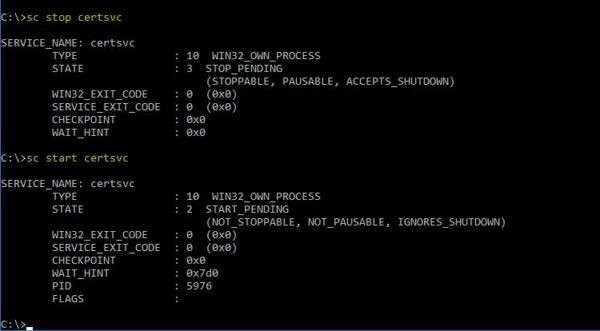
Restart the service.
C:> sc stop certsvc C:> sc start certsvc
Certificate Template Configuration
Note
These steps can be skipped if the CA server already has an appropriate Enrollment Agent and Smart Card Logon templates.
Steps to configure an appropriate template on the CA server:
-
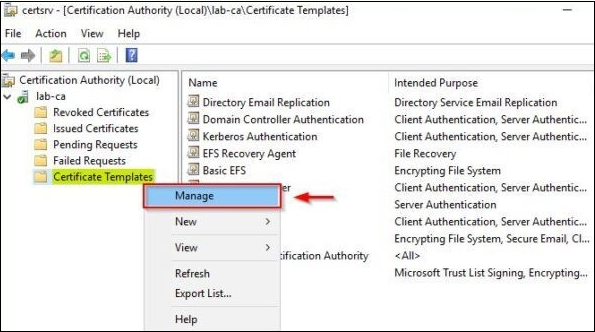
Open the Certification Authority and right-click the Certificate Templates folder. Select the Manage option.
-
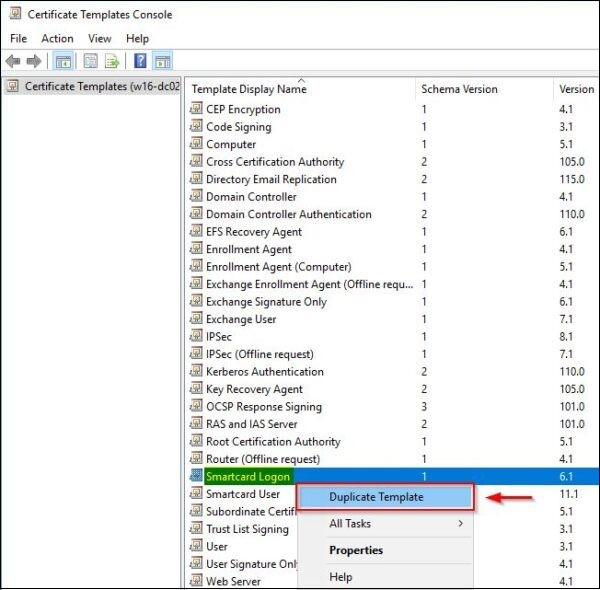
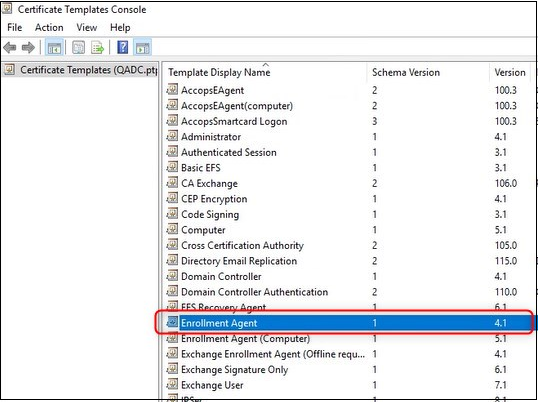
Configuring Smart Card Logon Template: Navigate to the Certificate Template Console. From the list, right-click the Smartcard Logon template and select Duplicate Template.
-
In the duplicated template, configure the following properties of the New Template:
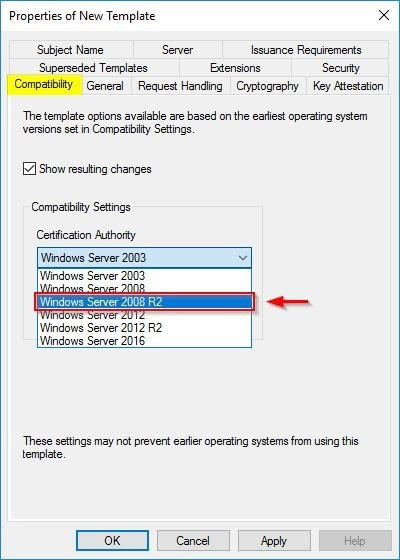
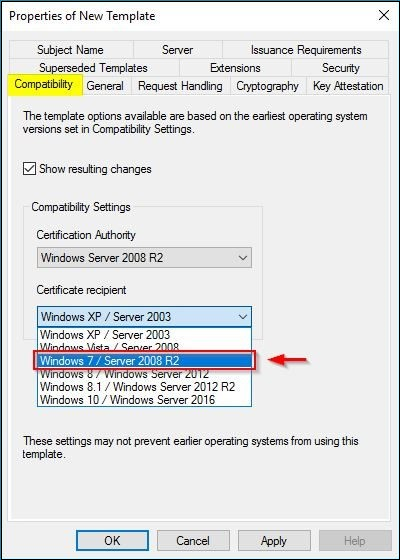
a. Compatibility
-
Select Windows Server 2008 R2 from the Certification Authority drop-down menu.
-
Click OK to confirm.
-
Select Windows 7 / Server 2008 R2 from the Certificate Recipient drop-down menu.
-
Click OK to confirm.
b. General
-
Specify a Template display name.
-
Set 1 day as a Validity period and 18 hours for the Renewal period.

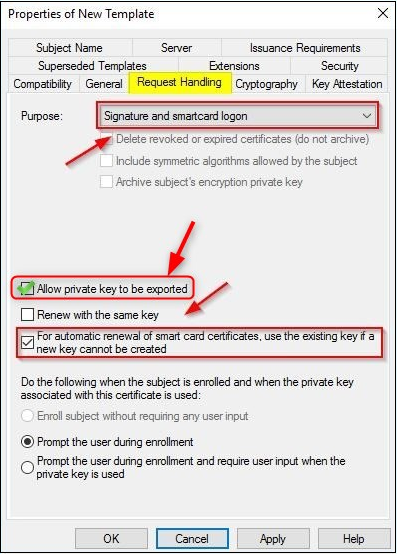
c. Request Handling
-
Select Signature and smartcard logon in the Purpose field.
-
Enable the option: Allow private key to be exported.
-
Enable the option For automatic renewal of smart card certificates, use the existing key if a new key cannot be created.
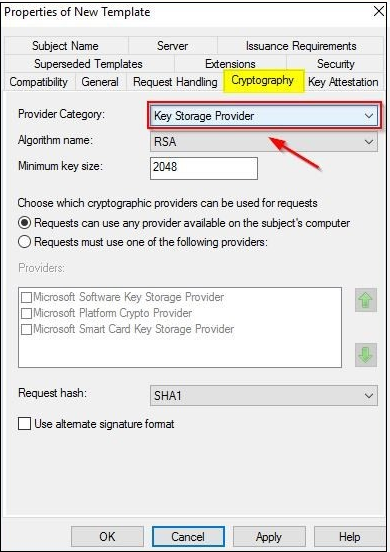
d. Cryptography
-
Select the option Key Storage Provider from the Provider Category drop-down.
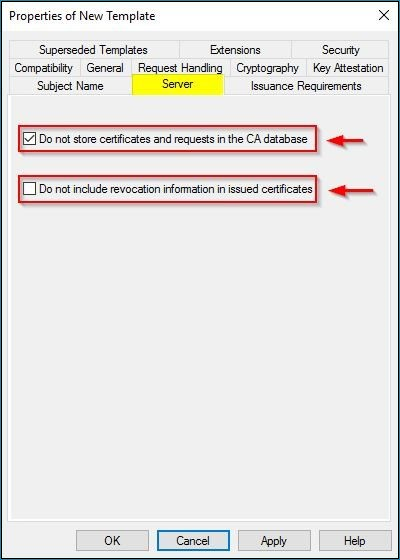
e. Server
-
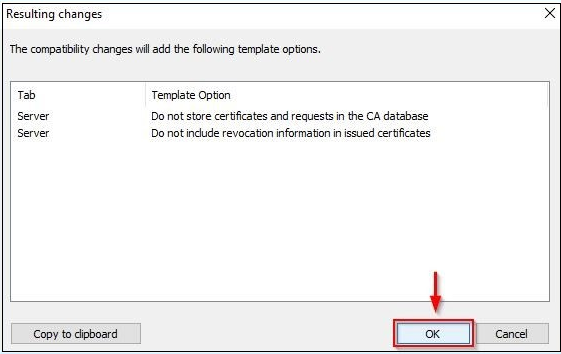
Enable the Do not store certificates and requests in the CA database option.
-
Disable/Uncheck the Do not include revocation information in issued certificates option.
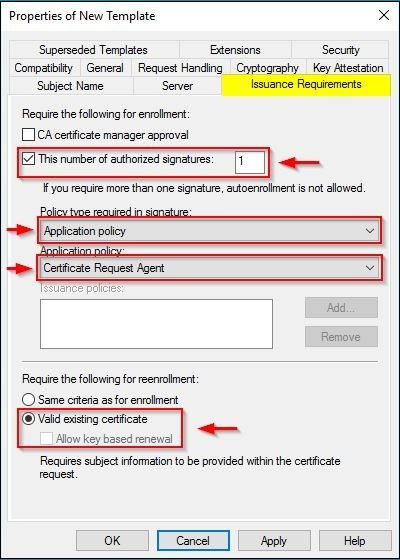
f. Issuance Requirements
-
Enable the This number of authorized signatures option and enter the value as 1.
-
Select the Application policy option from the drop-down menu, and the Policy type required in the signature.
-
Select Certificate Request Agent option from the drop-down menu under Application policy.
-
Select the Valid existing certificate option.
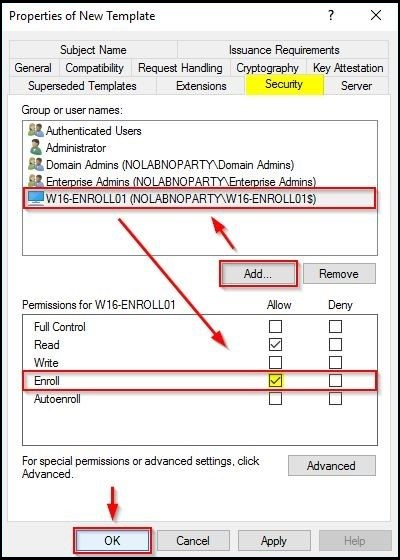
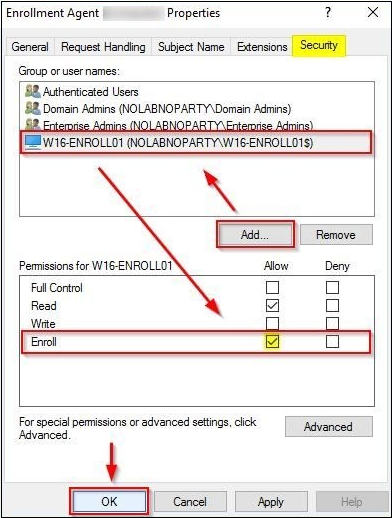
g. Security
-
Click Add and add the Enrollment Server/Controller.
-
Select the added Enrollment Server and check the Allow option for the Enroll and Read permission.
-
Add all broker nodes and provide the same Read and Enroll permission.
-
Click OK to save the template configuration.
-
The newly created Certificate Template will be added.
-
-
Configuring Enrollment Agent Template
-
Right-click the Enrollment Agent template and select Duplicate Template.

-
Open the properties of the New Template. Click the General tab. Specify a Template display name.

-
In the Security tab. Click Add and add the Enrollment Server/Controller (all controller nodes) and check Allow option for the Enroll permissions.
-
Issue the Certificate Template
-
Right-click Certificate Templates configured above (Smart Card Logon and Enrollment Agent) and select New > Certificate Template to Issue.
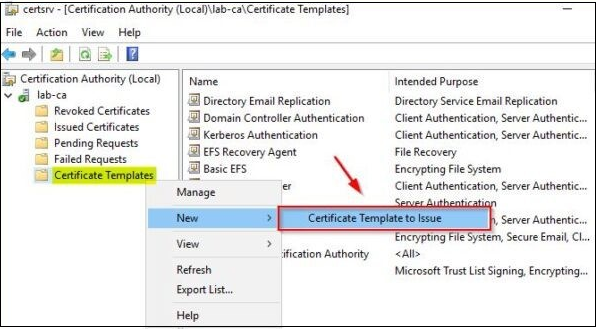
-
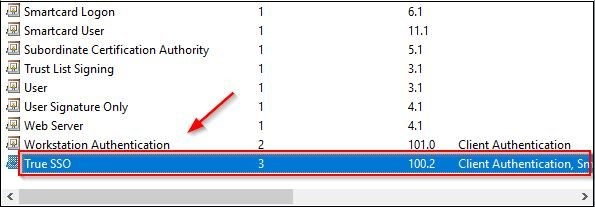
Select the previously created template (True SSO in the example) and click OK.

-
Right-click Certificate Templates again and select New > Certificate Template to Issue once again.
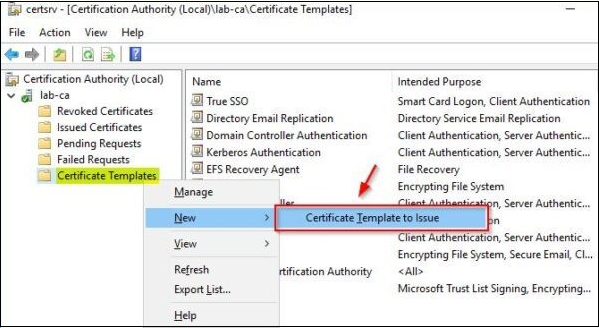
-
Select the Enrollment Agent template and click OK.
Certificate Enrollment (Created on CA server) to Controller
For a multi-node environment, enroll the certificates on all the controller nodes.
-
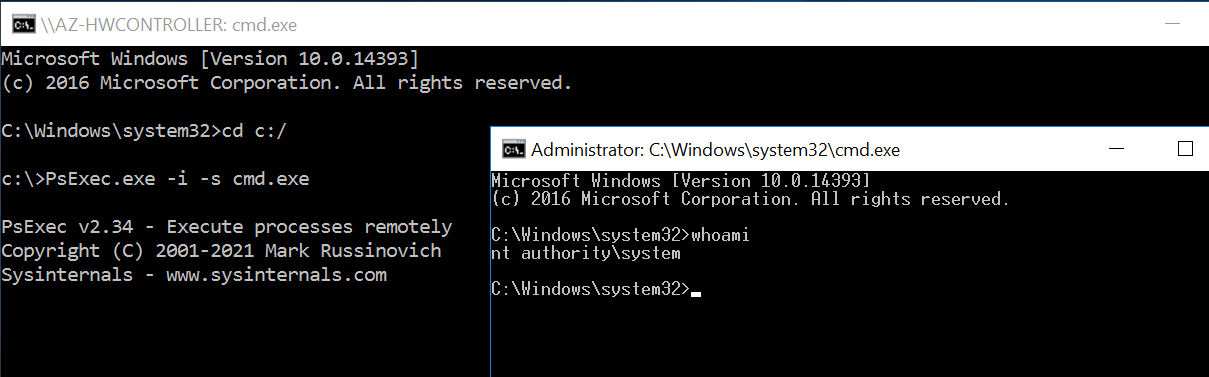
Open MMC in system context:
-
Download and extract the SysInternal tools.
-
Open the command prompt with administrator rights and change the directory to the path where the SysInternals Tools are extracted.
-
Pass the following command on the command terminal.
PsExec –i –s cmd.exe
-
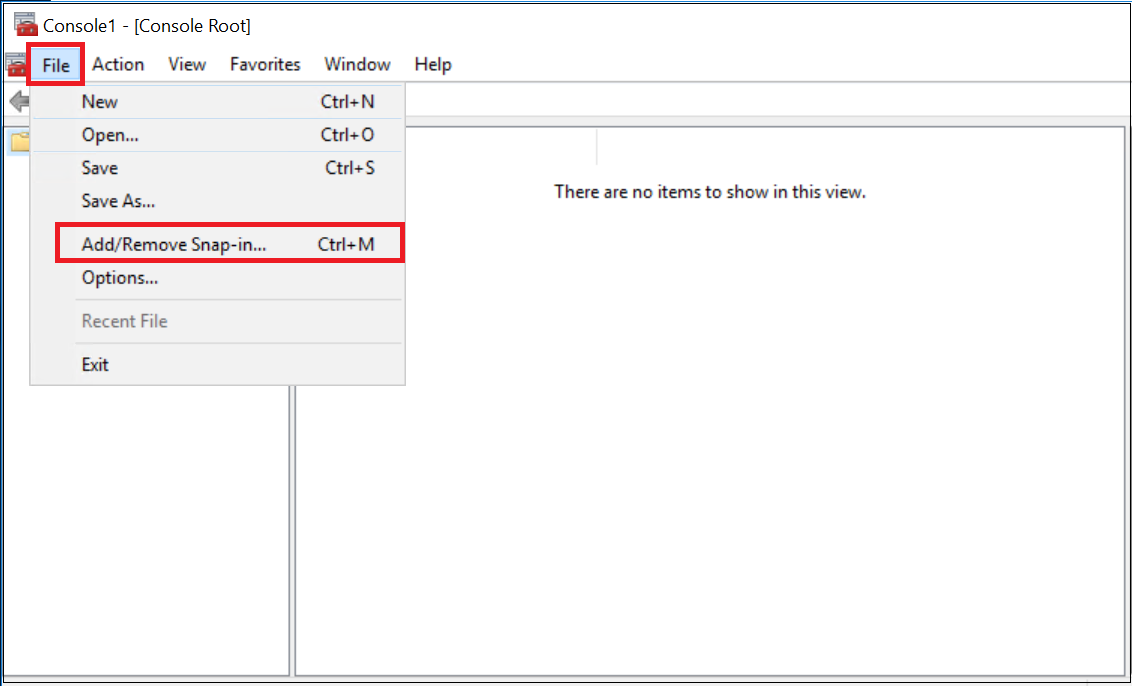
In a new command terminal (running in system context), enter mmc. In the MMC console, navigate to File > Add/Remove snap-in..
-
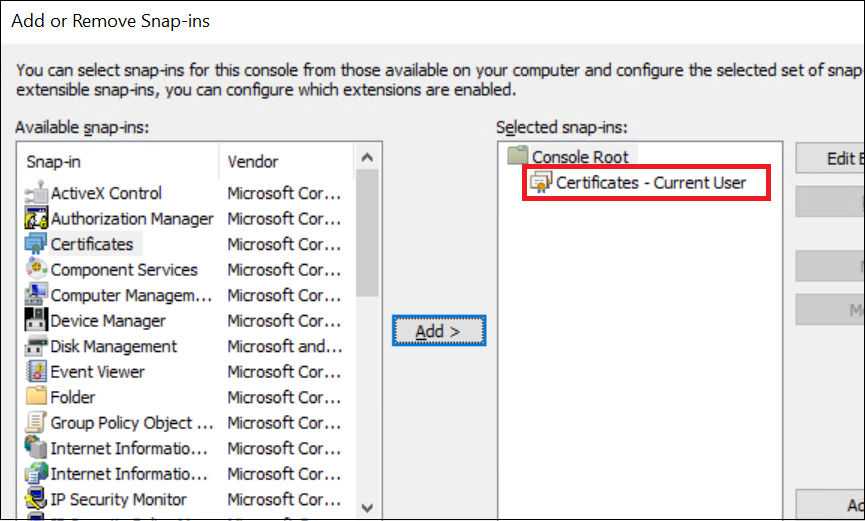
The available snap-ins box will pop up. Select Certificates and click Add > My account.

-
The added Certificate will appear under the Selected snap-ins section.
-
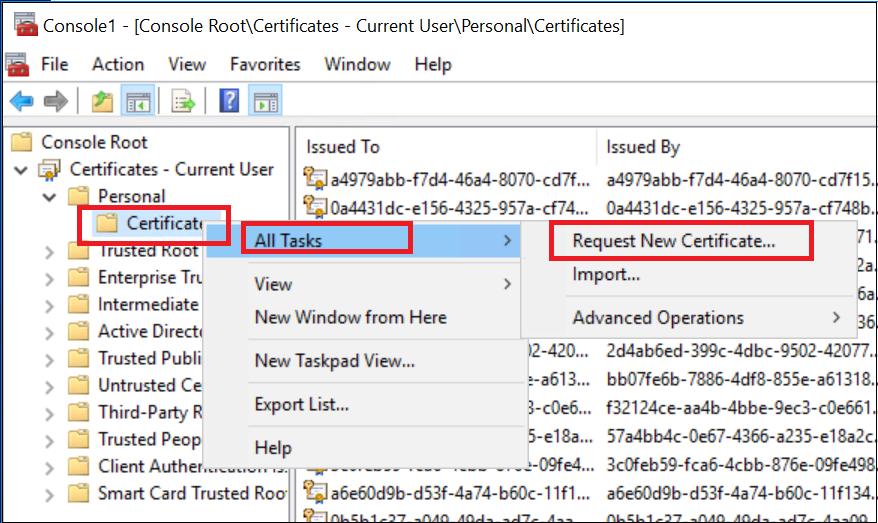
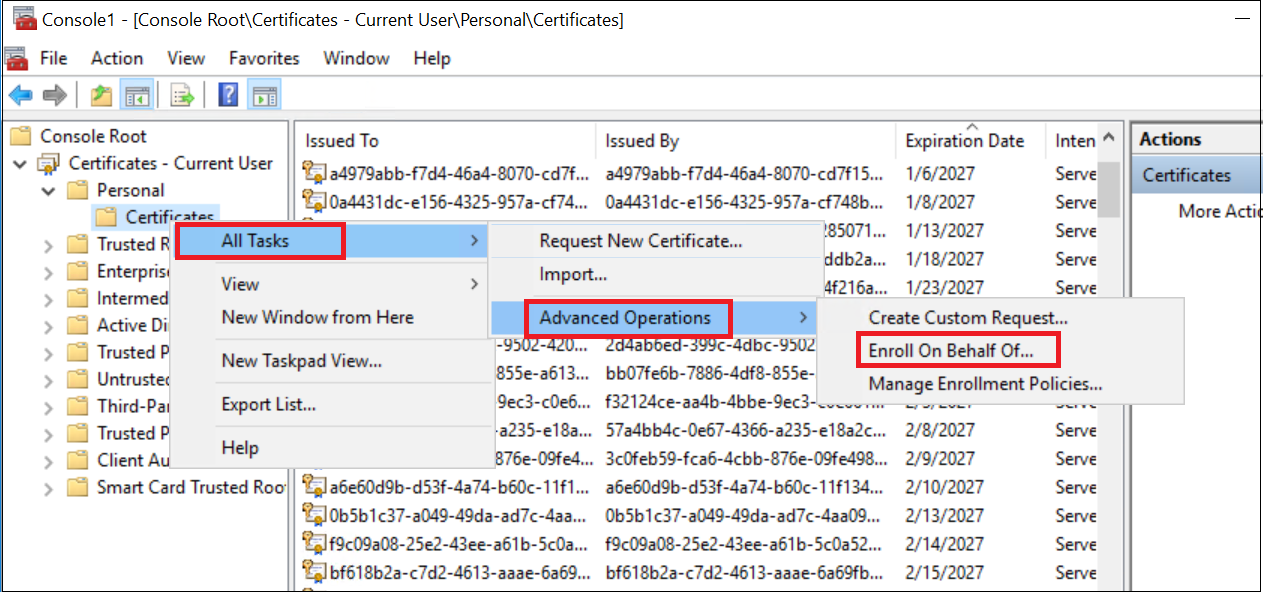
Once Certificate-Current User is added, go back to the Console root and select Certificate > All Tasks > Request New Certificate.
-
By default, the Active Directory Enrollment Policy will be selected. Press Next.
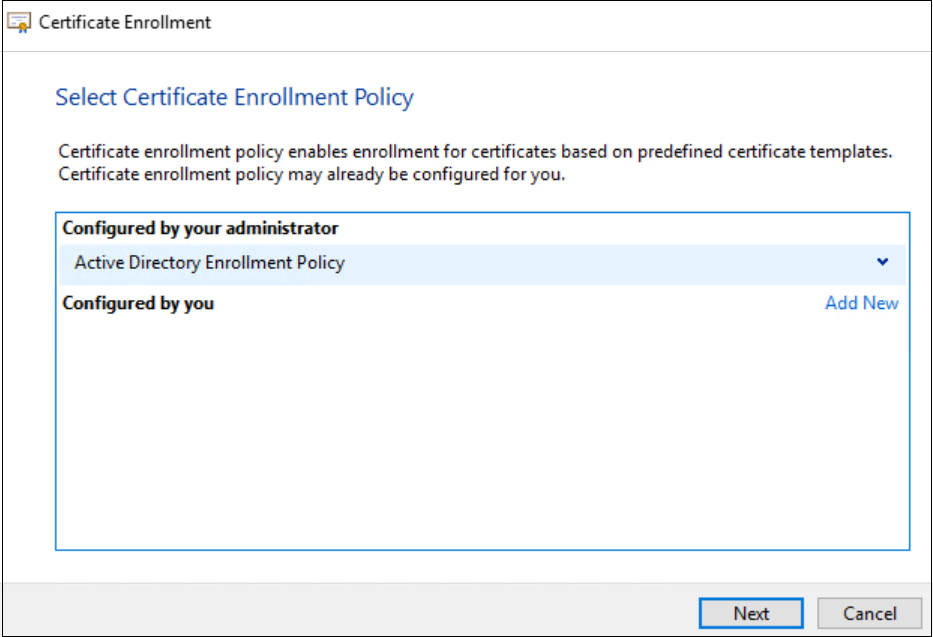
-
Select the Enrollment Agent template that was created while configuring the CA server. Click Enroll.
-
Return to the Console root for Smart card template enrollment and navigate to Certificate > All Tasks > Advanced Operations > Enroll On Behalf Of..
-
-
A guide titled Before You Begin will outline the prerequisites. Click Next.
-
A Select Enrollment Agent Certificate prompt will appear.
-
Click Browse, and select the Enrollment agent template that will appear as a signing certificate.
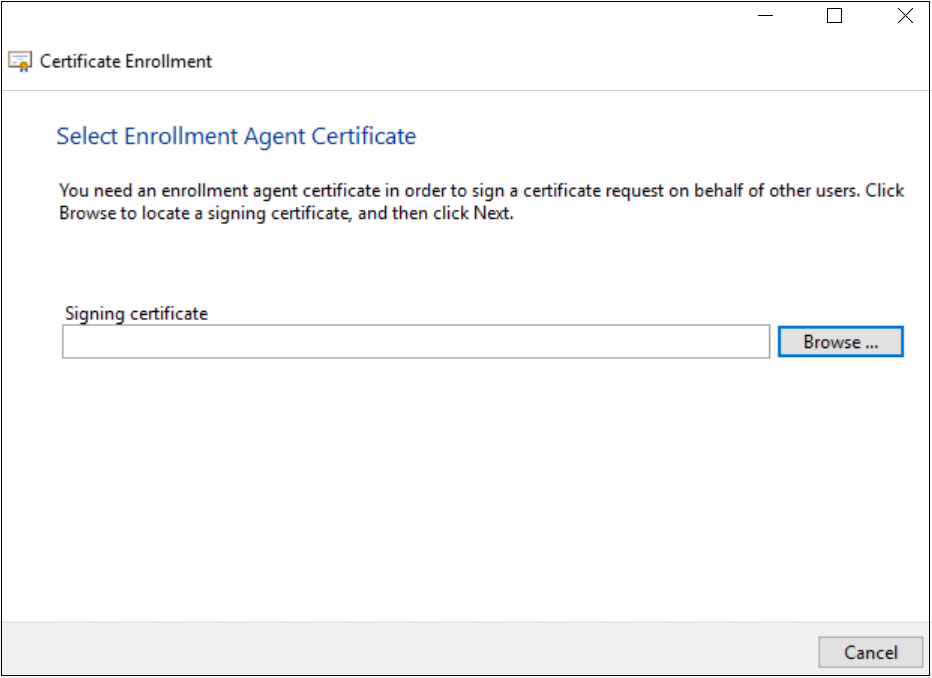
-
Click OK and proceed.
-
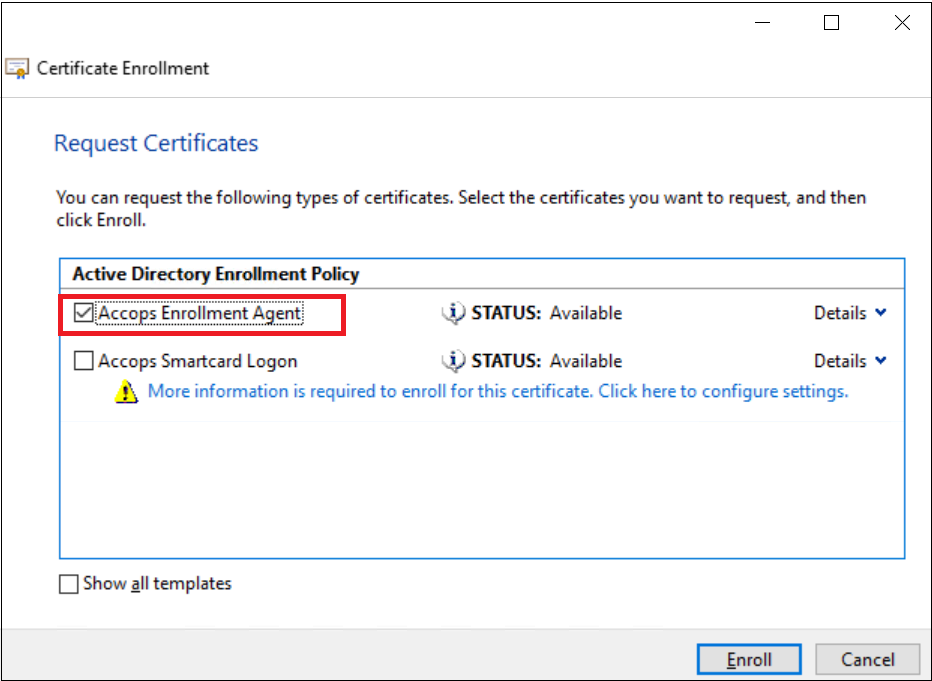
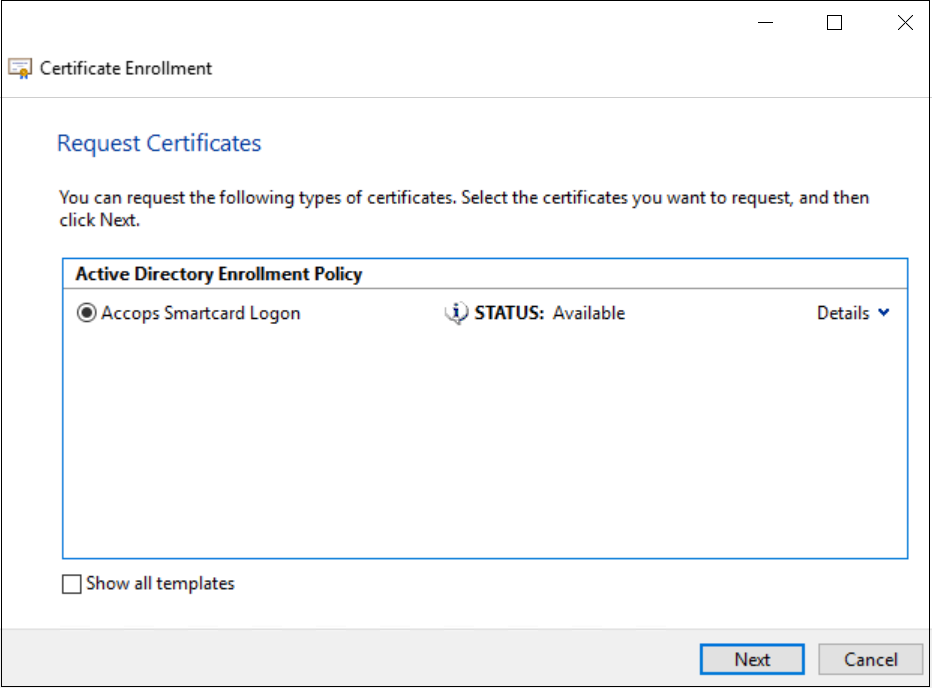
The Request Certificates enrollment prompt will appear. Select the Smart Card logon template created on the CA server and click Next.
-
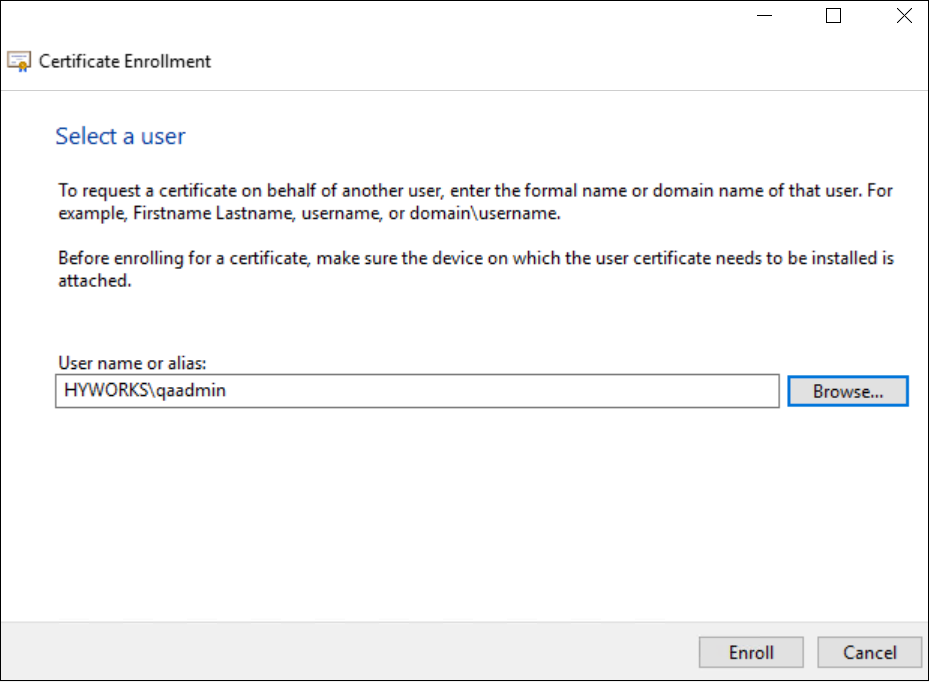
Enter a User name or alias name for this smart card template. Click Browse and select any user from the domain.
-
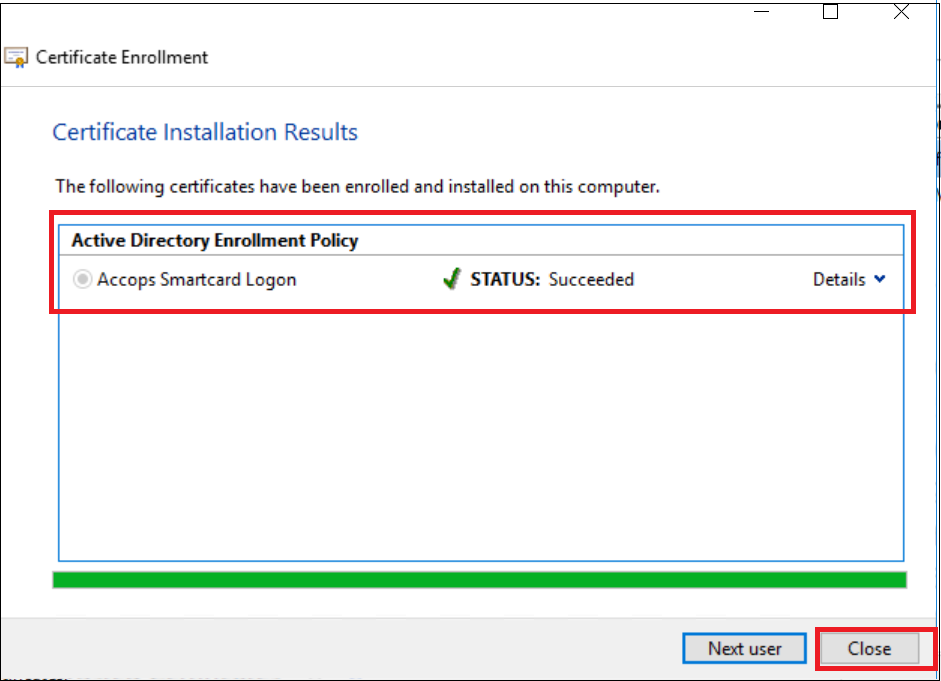
Once this is done, click Enroll to confirm the Smart card template enrollment.
-
If the end user wants to add another user or alias name for the same smart card, an option will appear. If they choose to do so, they should select Next User. If not, this prompt can be closed, as the certificates have now been enrolled.
-
Upon enrolling in both certificates, the user can verify the status under the Personal Certificates tab. Both templates will appear in this section.

-
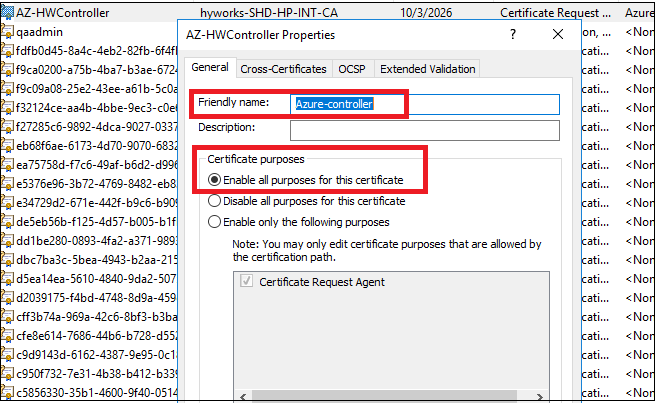
Once the Certificate is enrolled, right-click the Enrollment agent certificate and open properties. Add Friendly Name, and select Enable all purposes for the certificate and click Apply.
Note
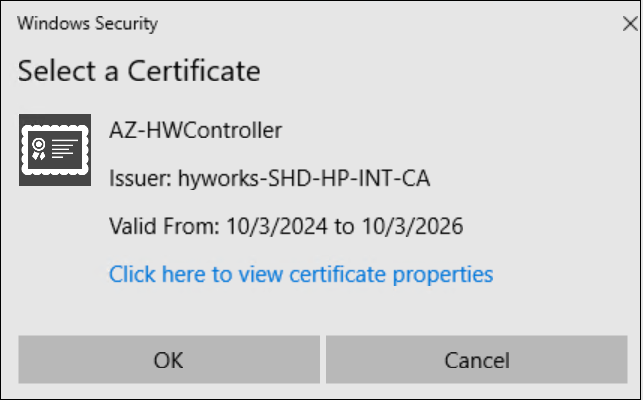
This is the same location where the certificates are enrolled on behalf of the user logging in through the Accops HyWorks SSO-enabled environment.
-
Certificate enrollment on the controller: Before making any changes on the controller side, verify that the controller is upgraded to at least version 3.5.0.19649 with all the respective patches.
-
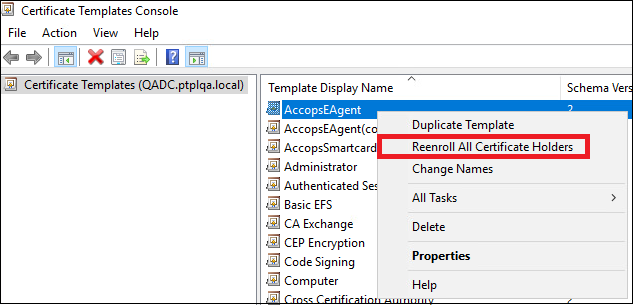
Re-enrolling Certificate Holders
For making any changes in the enrollment certificate or smart card certificate in the CA server, it is recommended to re-enroll them to push the newly added changes.
-
Open the CA server and open the Certificate Authority Console.
-
Right-click on Certificate Templates and select Manage.
-
The Certificate Templates Console will open.
-
Right-click on the enrollment agent or smart card template that is modified and needs to be re-enrolled.
-
Select Reenroll All Certificate Holders and likewise perform the same operation on all the Smart card templates or enrollment agent templates on the CA server.
Controller Configuration For SSO
Steps to add changes to the respective controller’s settings:
-
Open the Controller’s management Console Setting > General > Advanced Settings.
-
In Tag Filter, add “SSO”.
-
The following options will appear:
-
Enable SSO – True
-
Delete expired certificate time internally – to be set as per requirement
-
SSO Generation Type – Set 0 to reuse the certificate for a single individual and set 1 for generating a new certificate every time, regardless of expiration time.
-
Template name – Use the name of the template that is given when the “smart card logon” template was duplicated, and the new template was created from it on the CA server.
-
SSO certificate wait timeout – set as per the requirement.
-
Override user domain name for SSO – provide the NetBIOS name of the domain, and if a different domain name will be added, the provided domain will override for the SSO generation.
-
Request friendly name – Provide the friendly name given for the enrollment agent template in the controller when it was enrolled.
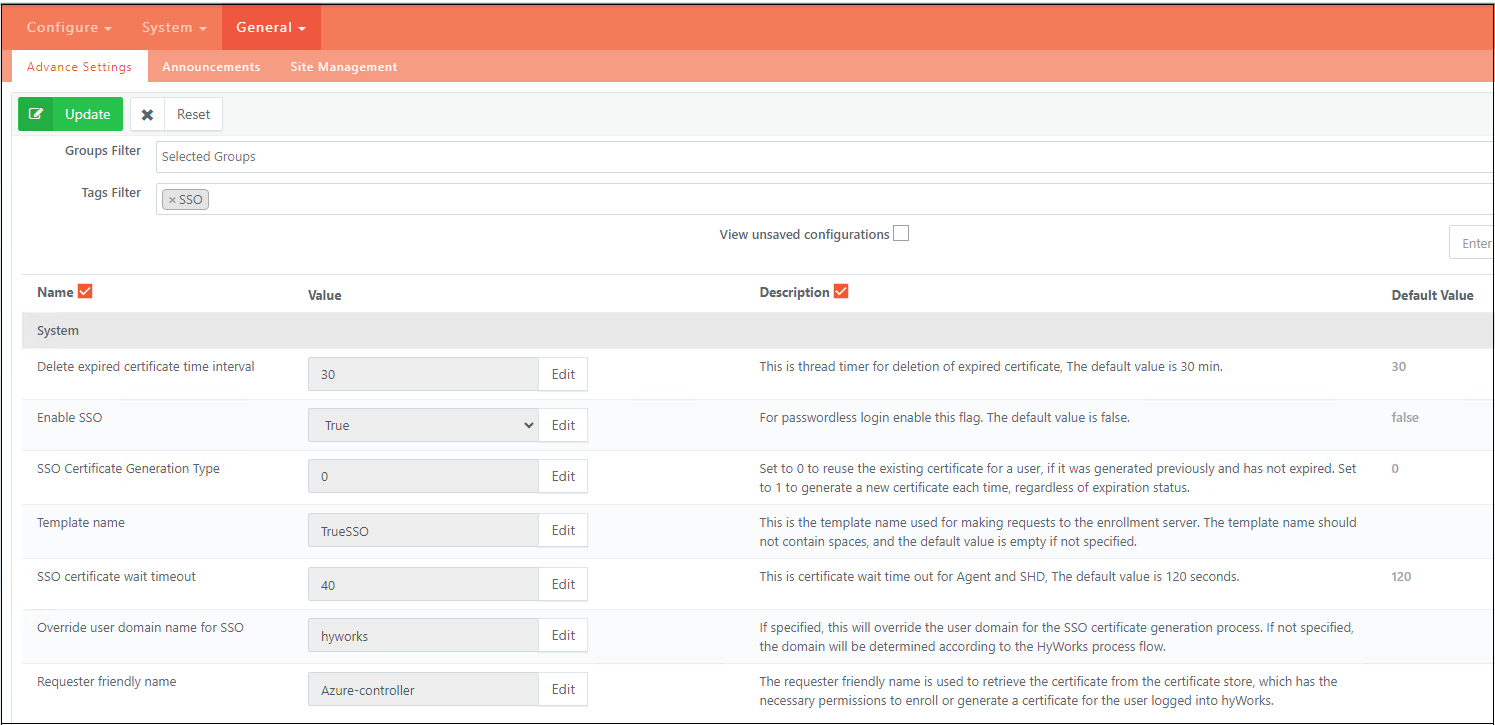
-
The end user can now operate the SSO-enabled controller.
Possible Enrollment Troubleshooting
-
RPC Server Unavailable
While enrolling a certificate on the controller or enrollment server during lab testing, it was found that in some instances, when the user attempts to enroll the enrollment agent certificate, a pop-up appears stating "RPC server is unavailable."
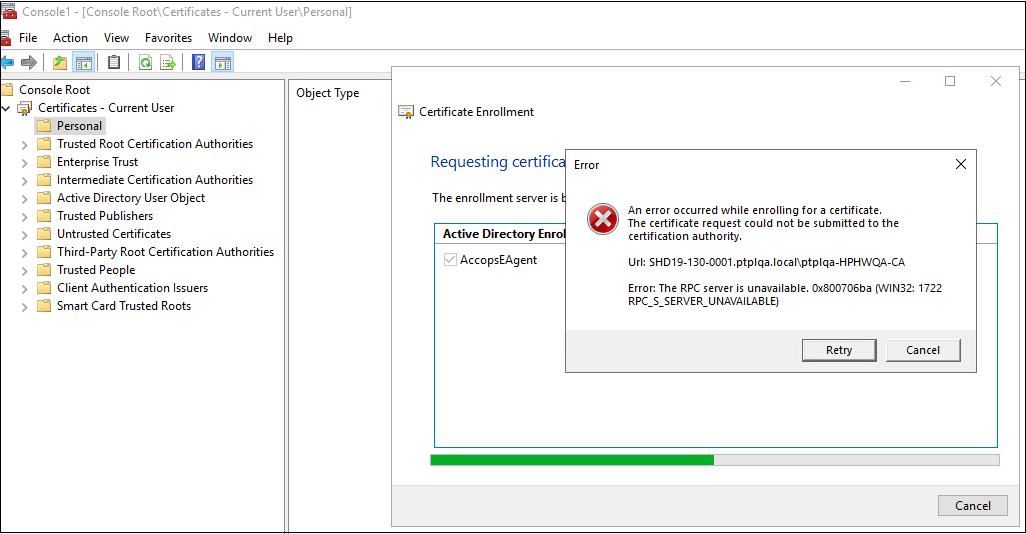
The RPC service and system updates on the machines were checked, and no issues were found. This issue is not consistent across all machines but has been observed in a few instances. The Root cause issue is yet to be found; once found, the solution will be added to the document.
-
No Certificates are visible on the enrollment server
There could be a situation where, on the controller/enrollment server, one cannot find certificates that are enrolled in the CA server for the very same controller or enrollment server.
Steps to check:
-
There could be a chance that Active Directory is not able to recognize or has no entry in Active Directory for a specific workstation/VM.
-
In such cases, try changing the hostname and rejoining the controller to the domain, and try re-enrolling the certificate again.
-
-
Connect Desktop Failed
A common misconfiguration that can lead to connection failures to the desktop is the "Override user domain name for SSO" setting under Advanced Settings. Ensure that only the NETBIOS name of the domain is specified, not the full domain name. For example, if the domain name is example.com, only example should be entered in the "Override user domain name for SSO settings.