Fresh Installation
Follow the steps given below to install HyWorks Controller version v3.3-R3 or later including the latest v3.4.
Note
- Running HyWorks setup from the UNC path is not supported and will result in setup failure. It is required to copy HyWorks setups locally on the target servers instead of running them from the UNC path.
- Running HyWorks setup may also fail during the file extraction, if the logged-in user has a roaming profile. In this case, logging with a local administrator user is required.
Important Options in HyWorks Controller Installation Wizard
The following components of HyWorks management layer can be installed during the installation:
- HyWorks Controller Service: Select this option, if server is to be configured as HyWorks Controller node.
- HyWorks Controller Management Console: Select this option, if server is to be used for hosting Management Console web application as well. Management Console should not be installed on servers functioning in broker role.
- Accops HyWorks Reservation Management Service: Option will be enabled only when management console is installed on the same server. HyLabs or Reservation Management Services should only be installed, if deployment is intended to have HyLabs as well.
Deployment Modes
HyWorks Controller can be installed in the following modes:
-
Two-node Active-Passive Cluster: HyWorks controller nodes can be installed on two identical Windows servers and can be joined from a cluster with one HyWorks controller acting as the master or primary node. This deployment mode can be used to serve up to 2500 concurrent user sessions. This mode should be used for deploying a standalone HyWorks Controller, which can be used for some quick verification or evaluation.
-
Multi-node Active-Active Cluster: Multiple HyWorks Controller nodes are installed with appropriate roles (node type) to form a multi-node cluster. Two HyWorks nodes function as management nodes to manage the complete HyWorks infrastructure, whereas one or more HyWorks nodes can be installed as broker nodes to handle client and session host server requests. Multi-node setup requires an external load balancer to distribute traffic among broker (session) nodes. This deployment mode should be used for larger deployments, having more than 2500 concurrent user sessions.
Database High-availability Configuration
Database high availability can be achieved using the following mechanisms:
-
SQL Server Managed Database High Availability: In this mechanism, HyWorks requires clustered SQL servers behind a single access point. Database availability will be managed by SQL Servers and HyWorks will simply access it at the address provided.
-
HyWorks Managed Database High Availability: In this mechanism, HyWorks manages the database’s high availability. HyWorks initiates syncing of databases every minute using Microsoft Sync Framework.
Roles (Node) Types
HyWorks Controllers can have the following roles:
-
Management Node: Responsible for communication with session providers and managing HyWorks deployments. But will not participate in endpoint request handling (Login, connections, etc.) or session updates by session host servers.
-
Broker (Session) Node: Responsible for performing all the brokering tasks i.e. taking endpoint requests and getting session updates. Broker nodes will not participate in management activities.
SQL Server Authentication Mechanism
HyWorks Controller supports the following authentication mechanism:
-
SQL Server Authentication: Uses username and password to connect to SQL Server for database creation and management by HyWorks Controller service.
-
Windows Authentication: Requires HyWorks Controller service to run with user credentials. The configured user must have rights to log on as a service on the server and must have access to the SQL server for database creation and management.
-
If either of the databases (Service database or Log database) is configured to use Windows authentication, the HyWorks Controller service must be configured to run with the user account having logon as a service right on the server.
-
While installing the broker node, if HyWorks Controller management nodes are installed with Windows authentication, the broker node will also use Windows authentication and will be required to run with a user account having logon as a service right on the server.
-
High-level Workflow for Cluster Deployments (Combinations)
Using HyWorks Controller installation wizard administrator will be able to configure Windows server to perform specific role in HyWorks management. This section provides steps to deploy HyWorks Controller in specific role.
Two-node Active-Passive Cluster
Note
- Two node active-passive cluster requires MS Sync Framework v2.1 to be installed on HyWorks Controller servers.
- MS Sync Framework - English is already included in HyWorks Controller Setup.
- MS Sync Framework - Japanese requires installation separately. It can be downloaded from here.
High Level Steps:
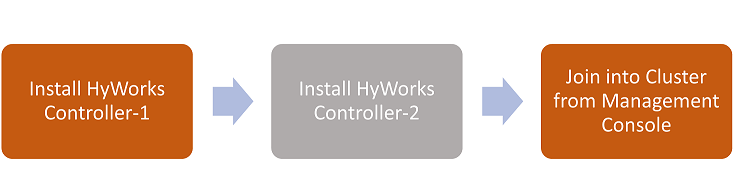
- Install HyWorks Controller# 1: Using the instructions given below:
- Welcome screen: Proceed with the default option.
- License and Agreement screen: Proceed by agreeing to the terms and conditions.
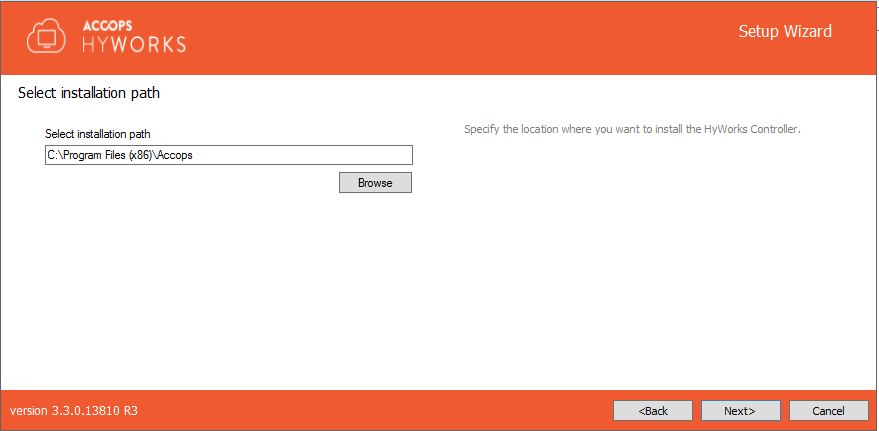
- Installation Path screen: Configure as per requirements.
- Component Selection Screen: Select the following components:
- HyWorks Controller Service
- HyWorks Controller Management Console
- Deployment Type: Select Two-node Active-Passive Cluster.
- Service Database Configuration Screen: SQL Server address with the instance name, database, and authentication configuration (Windows authentication or SQL Server Authentication), as per requirement.
- Log Database Configuration Screen: SQL Server address with the instance name, database, and authentication configuration (Windows authentication or SQL Server Authentication), as per requirement. We recommend to have a different instance of SQL server for log database and not to use same instance on which HyWorks service database is configured.
- Restore Database: Don't select anything and proceed.
- HyWorks Controller Administrators: As per requirement and setup.
- Service Login Credentials: As per requirement and setup.
- Port Settings: Use the default (38866 for Controller service and 443 for management console) or as required.
- Finish the setup and one management node of the HyWorks controller will be ready for two-node active-passive cluster deployment.
- Install HyWorks Controller# 2: Follow the same steps as used for HyWorks Controller# 1 installation:
- A different Windows Server with identical configuration should be used.
- Service Database Configuration and Log Database Configuration should use a different instance of SQL servers, than HyWorks Controller# 1, and the authentication mechanism should be the same.
- The installation will be completed and the second node of the HyWorks controller will be ready for two-node active-passive cluster deployment.
- Joining to the Cluster: The two HyWorks controllers can be joined into the Cluster from the Management Console of either of them to form a two-node active-passive cluster.
Multi-node Active-Active Cluster with HyWorks Managed Database High Availability
Note
- Two node active-passive cluster requires MS Sync Framework v2.1 to be installed on HyWorks Controller Management nodes.
- MS Sync Framework - English is already included in HyWorks Controller Setup.
- MS Sync Framework - Japanese requires installation separately. It can be downloaded from here.
High Level Steps:

- Install HyWorks Controller Management Node# 1: Using the instructions given below:
- Welcome screen: Proceed with the default option.
- License and Agreement screen: Proceed by agreeing to the terms and conditions.
- Installation Path screen: Configure as per requirements.
- Component Selection Screen: Select the following components:
- HyWorks Controller Service
- HyWorks Controller Management Console
- Deployment Type: Select Multi-node Active-Active Cluster.
- Cluster Configuration:
- Roles to install: Set as Management Node
- Database High Availability: Select HyWorks Managed Database High Availability
- Service Database Configuration Screen: SQL Server address with the instance name, database, and authentication configuration (Windows authentication or SQL Server Authentication), as per requirement.
- Log Database Configuration Screen: SQL Server address with the instance name, database, and authentication configuration (Windows authentication or SQL Server Authentication), as per requirement. It is recommended to have a different instance of SQL server for the log database and not to use the same instance on which the HyWorks service database is configured.
- Restore Database: Keep default selections and proceed.
- HyWorks Controller Administrators: As per requirement and setup.
- Service Login Credentials: As per requirement and setup.
- Port Settings: Use the default (38866 for Controller service and 443 for management console) or as required.
- Finish the setup and one node of the HyWorks controller will be ready for two-node active-passive cluster deployment.
- Install HyWorks Controller Management Node# 2: Follow the same steps as used for installing the HyWorks Controller Management Node# 1.
- A different Windows Server with identical configuration should be used.
- Service Database Configuration and Log Database Configuration should use a different instance of SQL server than HyWorks Controller# 1 and the authentication mechanism should be the same.
- The installation will be completed and the second node of the HyWorks controller will be ready for two-node active-passive cluster deployment.
- Joining to the Cluster: The two HyWorks controllers can be joined into the Cluster from the Management Console of either controller server. Broker nodes will be added to the cluster later.
- Install HyWorks Controller Broker Nodes: Follow the below steps to install one or more broker nodes and configure them into this multi-node active-active HyWorks managed database high availability cluster:
- Welcome screen: Proceed with the default option.
- License and Agreement screen: Proceed by agreeing to the terms and conditions.
- Installation Path screen: Configure as per requirements.
- Component Selection Screen: Select only HyWorks Controller Service. Do not install the management console on the broker node.
- Deployment Type: Select Multi-node Active-Active Cluster.
- Cluster Configuration:
- Roles to install: Set as Broker Node.
- Broker Node Configuration: Set as HyWorks Controller Management Node# 1 and HyWorks Controller Management Node# 2 as installed and configured in steps # 1 & 2.
- Log Database Configuration Screen: SQL Server address with the instance name, database, and authentication configuration same as used for log-database configuration of Management node# 1 log-database. The broker node will push logs to the current primary management node.
- Service Login Credentials: Same as management nodes.
- Port Settings: Use the default (38866 for Controller service) or as per requirement.
- Finish the setup. One node of the HyWorks controller broker node will be installed and become a member of multi-node cluster deployment with the HyWorks managed database availability.
- Repeat these steps to add more broker nodes in the deployment.
Multi-node Active-Active Cluster with SQL Managed Database High Availability
High Level Steps:
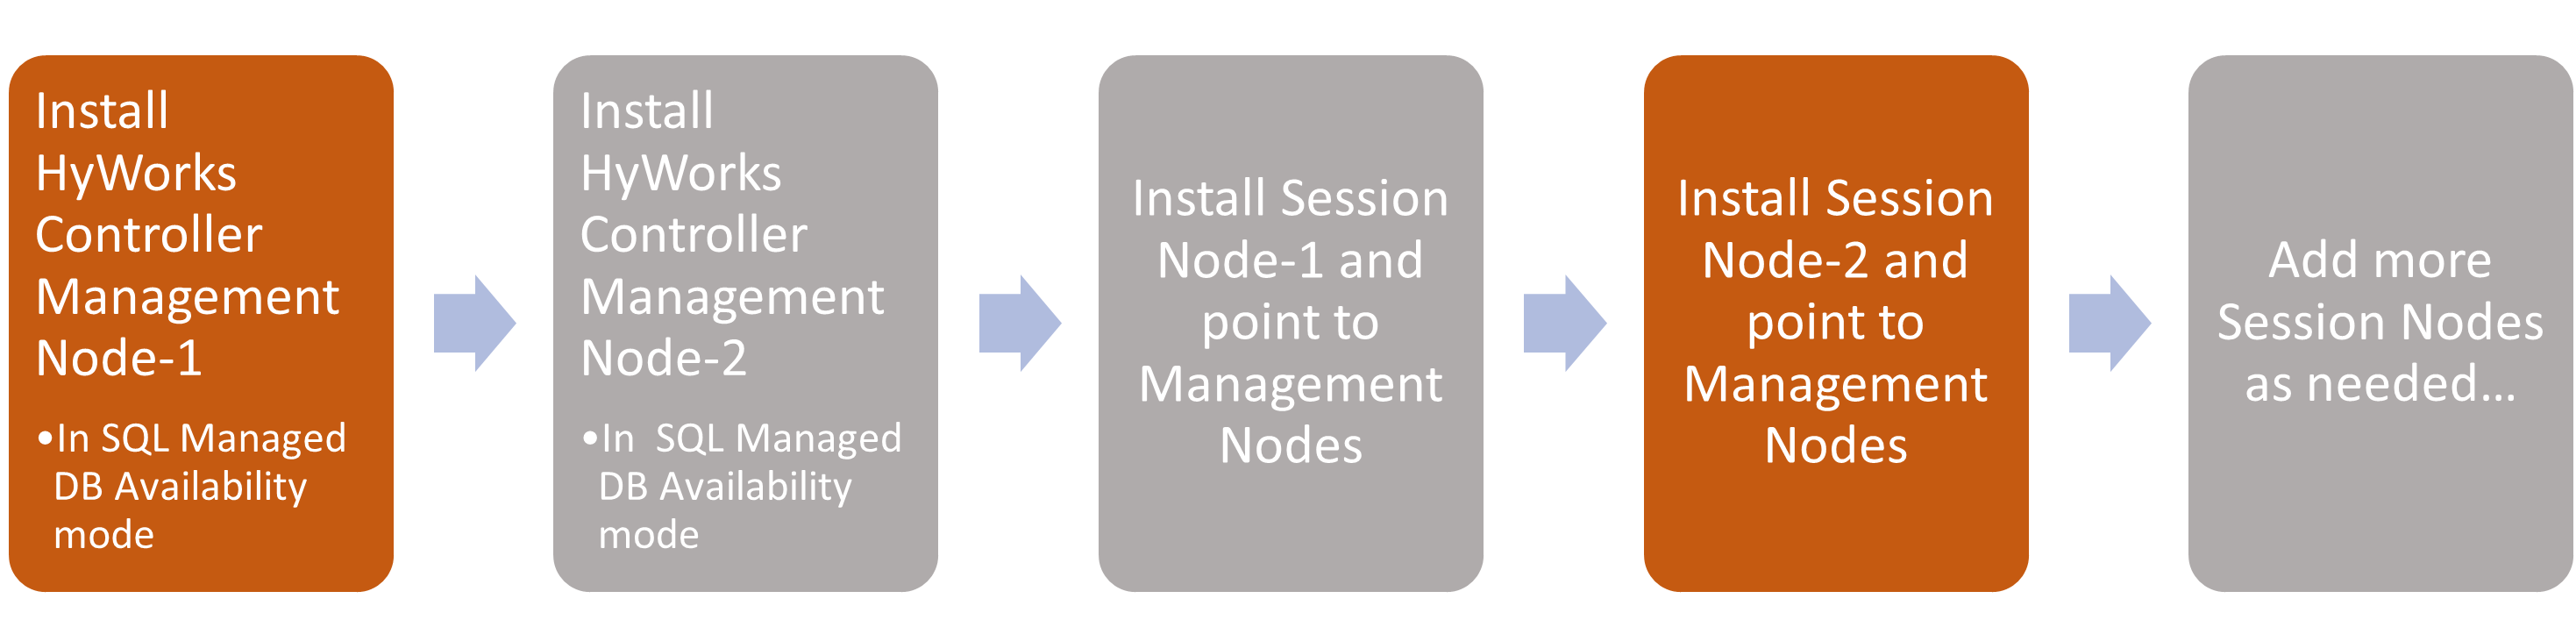
- Install HyWorks Controller Management Node# 1: Follow the steps given below:
- Welcome screen: Proceed with the default option.
- License and Agreement screen: Proceed by agreeing to the terms and conditions.
- Installation Path screen: Configure as per requirements.
- Component Selection Screen: Select the following components: - HyWorks Controller Service - HyWorks Controller Management Console
- Deployment Type: Select Multi-node Active-Active Cluster.
- Cluster Configuration: 1. Roles to install: Set as Management Node. 2. Database High Availability: Select SQL Server Managed Database High Availability.
- Service Database Configuration Screen: SQL Server cluster address with instance name, database, and authentication configuration (Windows authentication or SQL Server Authentication), as per the requirement.
- Log Database Configuration Screen: SQL Server address with instance name, database, and authentication configuration (Windows authentication or SQL Server Authentication), as per the requirement. It is recommended to have a different instance of SQL server for the log database and not to use the same instance on which the HyWorks service database is configured.
- Restore Database: Keep the default selection and proceed.
- HyWorks Controller Administrators: As per requirement and setup.
- Service Login Credentials: As per requirement and setup.
- Port Settings: Use the default (38866 for Controller service and 443 for management console) or as per the requirement.
- Finish the setup. One management node of the HyWorks controller will be ready for two-node active-passive cluster deployment.
- Install HyWorks Controller Management Node# 2: Follow the same steps as used for HyWorks Controller Management Node# 1 installation:
- A different Windows Server with identical configuration should be used.
- Service Database Configuration: This Should be the same as configured for the first management node. Both controllers will be pointing to the same database instance and the SQL server will manage the database’s high availability.
- During the installation of the second management node, it will prompt to confirm reconfiguration of the database and select No to proceed without reconfiguring the database.
- Log Database Configuration should use a different instance than HyWorks Controller# 1. However, the authentication mechanism should be the same.
- The installation will be completed and the second management node of the HyWorks controller will be ready for two-node active-passive cluster deployment.
- Install HyWorks Controller Broker Nodes: Follow the steps given below to install one or more broker nodes and configure them into this multi-node active-active HyWorks managed database high availability cluster.
- Welcome screen: Proceed with the default selection.
- License and Agreement screen: Proceed by agreeing to terms and conditions.
- Installation Path screen: Configure as per requirements.
- Component Selection Screen: Select only HyWorks Controller Service. Do not install the management console on the broker node.
- Deployment Type: Select Multi-node Active-Active Cluster.
- Cluster Configuration:
- Roles to install: Set as Broker Node.
- Broker Node Configuration: Set as HyWorks Controller Management Node# 1 and HyWorks Controller Management Node# 2 as installed and configured in steps # 1 & 2.
- Log Database Configuration Screen: SQL Server address with the instance name, database, and authentication configuration same as used for log-database configuration of Management node# 1 log-database. Currently, the broker node will push logs to the primary management node.
- Service Login Credentials: Same as management nodes.
- Port Settings: Use the default (38866 for Controller service) or as per the requirement.
- Finish the setup. One node of the HyWorks controller broker node will be installed and become a member of multi-node cluster deployment with HyWorks-managed database availability.
- Repeat the above steps to add more broker nodes in the deployment.
HyWorks Controller Installation Wizard Flow
This section provides details of HyWorks Controller installation for different types of deployments.
-
Log in to Windows Server as a local administrator.
-
Copy the Accops HyWorks Controller installer to Windows Server having all the prerequisites configured. Refer Software Requirements to check the Software Requirements for Accops HyWorks Controller.
Important
- HyWorks Controller v3.3-R3 or later setup is having integrated Microsoft Sync framework and thus it is not required to be installed separately.
-
Right click the installer to launch the Installation wizard and select option Run as Administrator

-
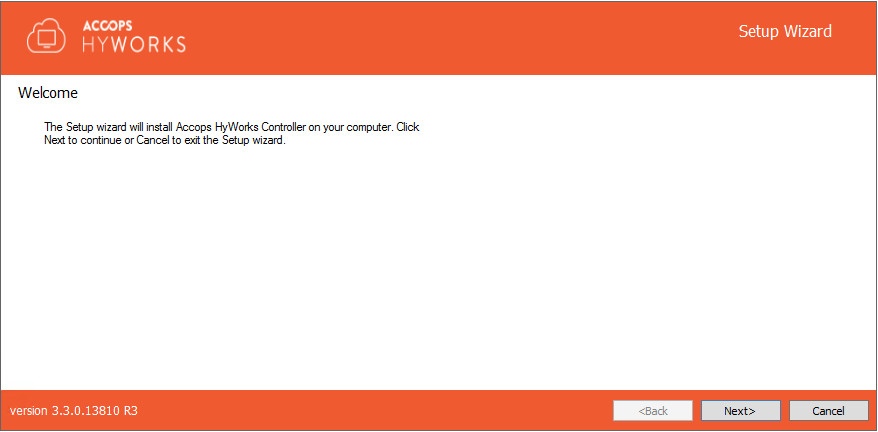
Click Next on the welcome Screen to proceed with the installation.
-
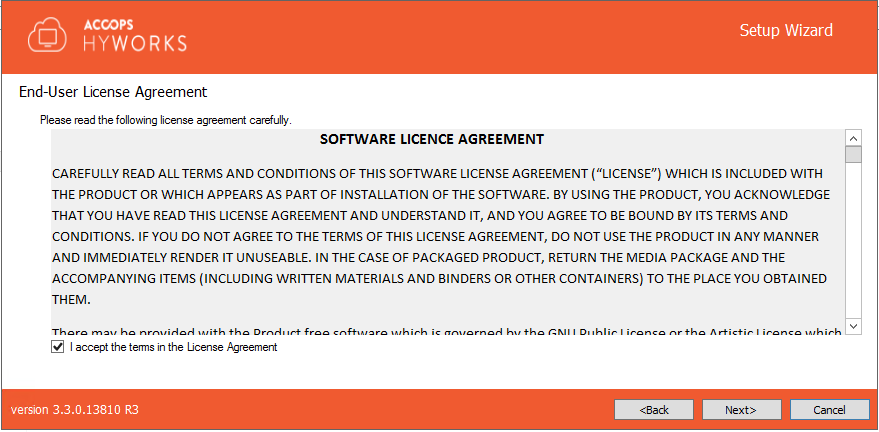
Accept license agreement and click Next to proceed.
-
Change the installation directory, if required and click Next to proceed. The default installation folder is "C:\Program Files (x86)\Accops".
-
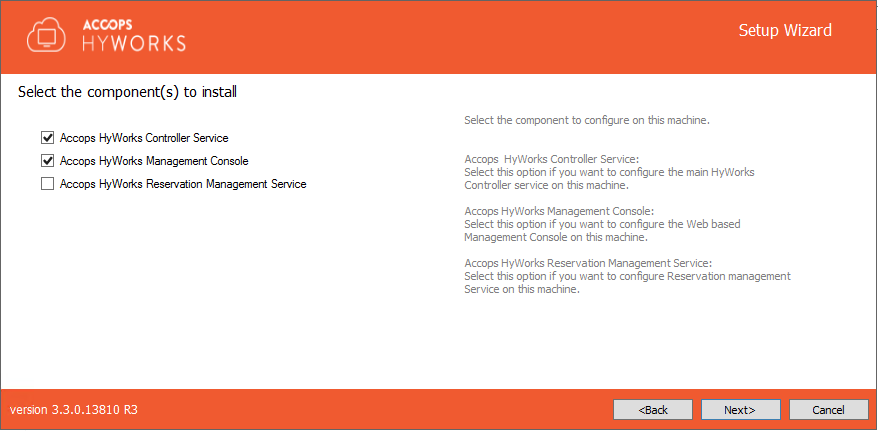
Select the following HyWorks Components to be installed
-
Accops HyWorks Controller Service: Must be selected
-
Accops HyWorks Management Console: Should be selected. Usually in two-node deployments, management console is installed with HyWorks controller service.
-
Accops HyWorks Reservation Management Service: Not to be selected. It should be selected only if same HyWorks server to be used for HyLabs deployment and usage.
-
-
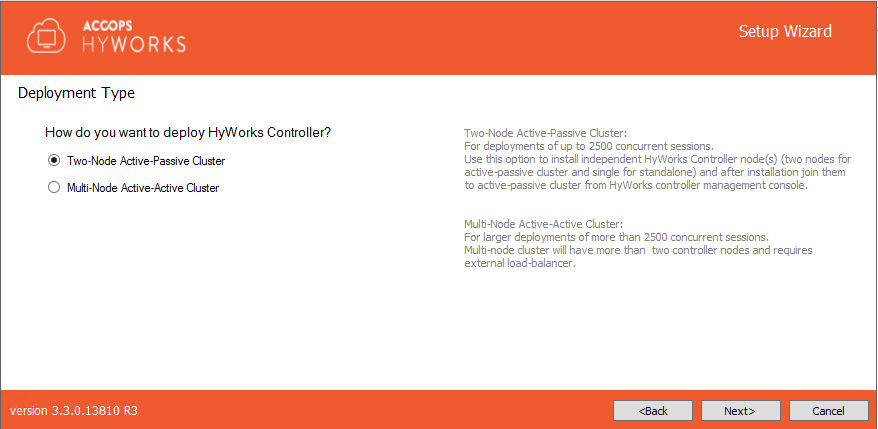
Deployment Type: Select deployment type as per your requirement and click Next. Installer wizard flow will be decided from deployment type selected at this step.
- Two-node Active-Passive Cluster: Select this to deploy two-node cluster with one node working as active at a time. Choosing this option will not require cluster configuration screen, jump to step# 10 for two node deployment.
- Multi-node Active-Active Cluster: Select this mode to deploy multiple HyWorks Controllers and configure with appropriate roles (management/ Broker node). Choosing this option will require administrator to set cluster configuration options.
-
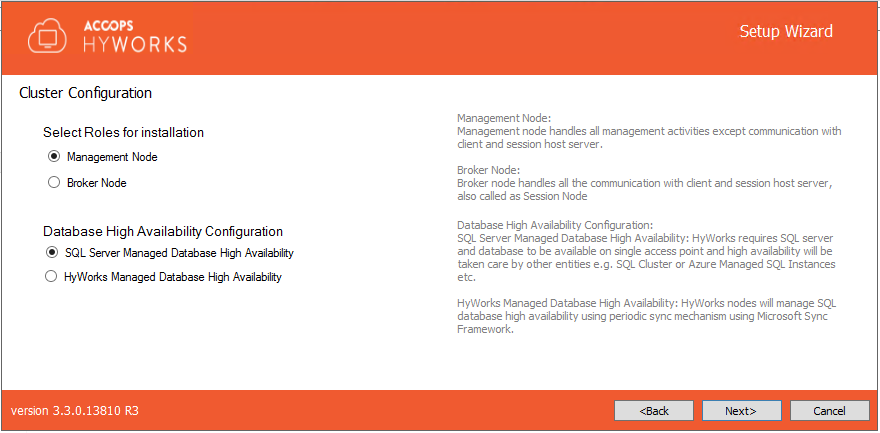
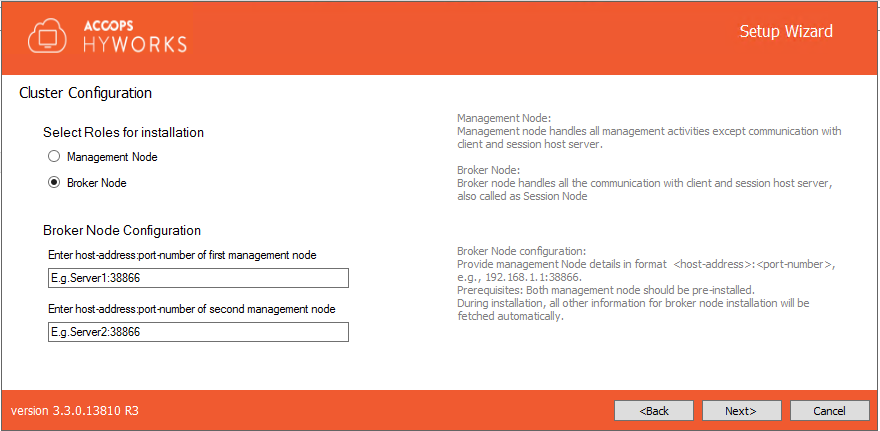
Cluster Configuration: Choosing Deployment Type as Multi-node Active-Active Cluster Deployment, will require administrator to select Roles to install. In multi-node deployment, HyWorks Controller will be installed to function as management node or broker node and will perform role specific tasks.
-
Management Node: Select Roles to install as Management Node, to configure server as HyWorks Controller Management node for multi-node deployment. Management node installation will require configuring database high availability. HyWorks supports following two mechanisms:
-
SQL Server Managed Database High Availability: HyWorks will be configured with SQL cluster, available on single access point. Database high availability will be taken care by SQL cluster. Both HyWorks Management nodes will be pointing to same database.
-
HyWorks Managed Database High Availability: HyWorks will be managing database availability by syncing databases between primary and secondary HyWorks management nodes. Both management nodes will be having their own databases.
-
-
Broker Node: If this server should be installed as HyWorks Controller broker node. While configuring this server as broker node, administrator will be needed to provide host address of both of the management nodes.
- Broker Node Configuration: Provide information of host-address and port-number of both management nodes, e.g. mgmtsrv1:38866 or 192.168.1.1:38866. On providing management node address, broker node will automatically get database configurations and will not require database configurations. Jump to step# 11 for broker node installation.
-
-
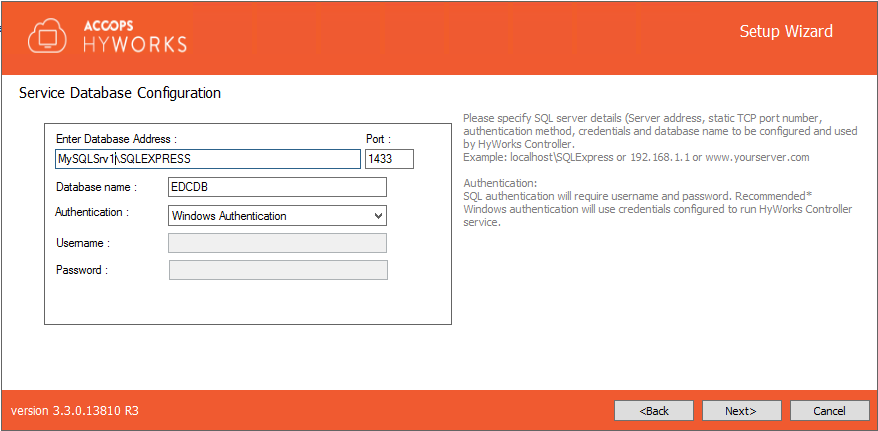
Click Next and proceed to configure Service database. (Not applicable for broker nodes, jump to step# 11 for broker node installation). Configure service database appropriately using following configurations and click on next button to proceed:
- Database Information: Database Server address, static TCP port to connect to SQL Server, database name.
- Database Address in the format - <Server IP or FQDN>\\<SQL Instance Name>. e.g. if SQL Express is installed on the same instance then Database address could be localhost\SQLExpress for Microsoft SQL Server standard and Enterprise: localhost\MSSQLSERVER (for named instance)
-
Port: Provide the static port of Microsoft SQL Server e.g. 1433 (Default TCP Port for SQL Server)
- Database Name: Provide the name of the database to be created. Default name is EDCDB.
-
Authentication mechanism: HyWorks supports following two authentication mechanism:
- SQL Server Authentication. It will require SQL Server User and Password.
- Windows Authentication. Use user credentials to connect to SQL Server. User credentials will be taken in next screen and will be used to run HyWorks Controller service.
- Service Database Configurations as per Deployment and Node Type: Here we will try to list out database configurations to be followed for different types of deployments and node types:
- Management Nodes for Two-node cluster or Multi-node cluster with HyWorks Managed Database High Availability
- Both management nodes should point to different SQL servers to be configured for database.
- Management Nodes for Multi-node cluster with SQL Server Managed Database High Availability
- Both the management nodes must use same SQL server cluster address, port number and database name.
- Management Nodes for Two-node cluster or Multi-node cluster with HyWorks Managed Database High Availability
Important
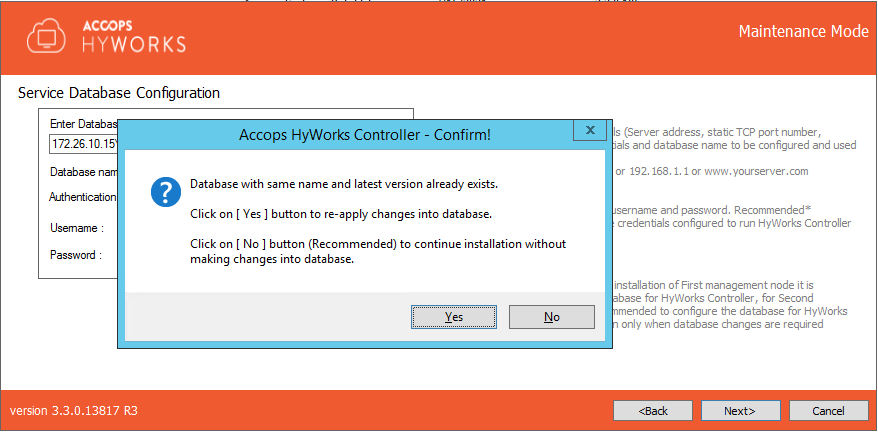
During installation of 2nd management node for multi-node deployment with SQL server managed database, on providing service database information same as first management node, prompt will be shown to confirm action:
-
Recommended to click on No button, to avoid re-configuration of database as it is already configured during installation of first management node and 2nd management node is pointing to same database.
-
Re-configure existing database: Click on Yes button to proceed with re-configuring database, which was already configured during installation of first management node. The action is not recommended during installation of 2nd management node in SQL server managed database high availability case.
- In cases, where lower version of database exists and change prompt comes up or administrator is not knowing if database configurations are done previously or not, then administrator can opt to click on Yes button and re-configure database.
- Database Information: Database Server address, static TCP port to connect to SQL Server, database name.
-
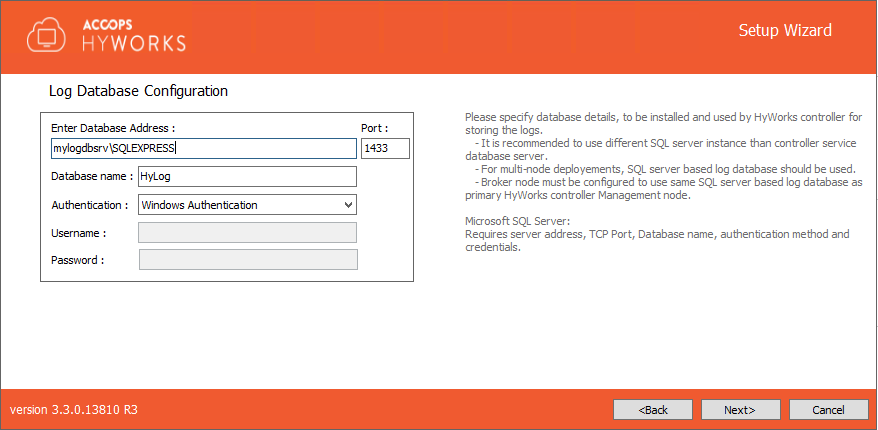
Click Next to proceed to configure Log server. Log database configuration should be done as specified below:
- Database Information: Database Server address, static TCP port to connect to SQL Server, database name.
- Database Address in the format - <Server IP or FQDN>\\<SQL Instance Name>. e.g. if SQL Express is installed on the same instance then Database address could be localhost\SQLExpress for Microsoft SQL Server standard and Enterprise: localhost\MSSQLSERVER (for named instance)
- Port: Provide the static port of Microsoft SQL Server e.g. 1433 (Default TCP Port for SQL Server) 3. Log Database Name: Provide the name of the database to be created. Default name is HyLog.
- Select appropriate Authentication mechanism:
- SQL Server Authentication. It will require SQL Server User and Password.
- Windows Authentication. Use user credentials to connect to SQL Server. User credentials will be taken in next screen and will be used to run HyWorks Controller service.
- Log Database Configurations as per Deployment and Node Type:
- Management Nodes for Two-node cluster or Multi-node cluster with HyWorks or SQL Managed Database High Availability
- Both management nodes should point to different instance of SQL server to be configured as log database.
- Broker Nodes
- Broker nodes should use log-database configurations, same as primary management node. This will help administrator to check any failures occurring on broker nodes from management console of primary management node itself.
- Broker nodes also fetch log database information of secondary management node and in case of switching between management nodes, broker nodes also switch log-database.
- During broker node log-database configuration and pointing to log-database of primary management node, prompt will be shown, stating 'Database already exists', click on Yes button to proceed.
- Management Nodes for Two-node cluster or Multi-node cluster with HyWorks or SQL Managed Database High Availability
- Database Information: Database Server address, static TCP port to connect to SQL Server, database name.
-
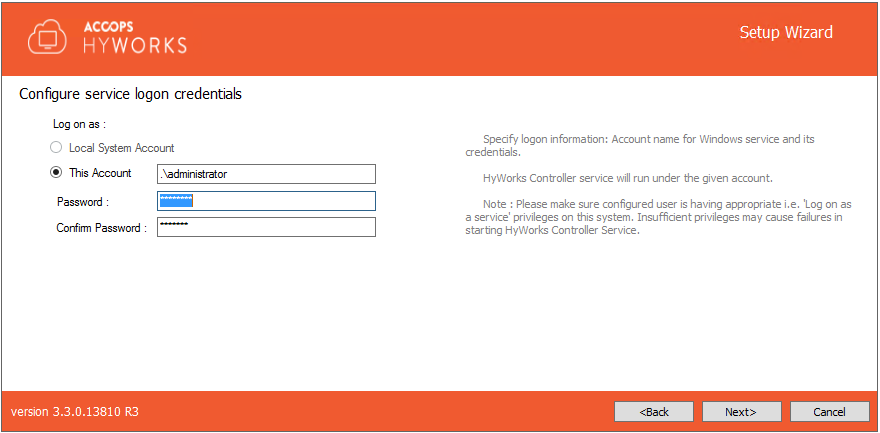
Click Next to configure the Service Logon Credentials for HyWorks Controller Service. You can either set Local System Account or use current account to log on.
- Local System Account: HyWorks controller service will run using Local System Account as service logon credentials.. The option will be used when HyWorks Controller service database configuration uses SQL Server Authentication.
- This Account: Configuring SQL Server with Windows Credentials require logon credentials to run the HyWorks Controller service. When HyWorks Controller database connection is made using Windows Authentication, option to run service with specific user credentials in shown. When service runs with specific user credentials, the same user is used to connect to SQL server.
- Refer section Logon as a service for detailed instructions on how to provide logon as a service rights to user.
- Refer section Logon as a service for detailed instructions on how to provide logon as a service rights to user.
-
Click Next to move to Restore database screen. For first time installation, click on Next button to move to next screen.
- Select Restore database option Only in cases, where HyWorks node should be restored from backed-up database to use existing data.
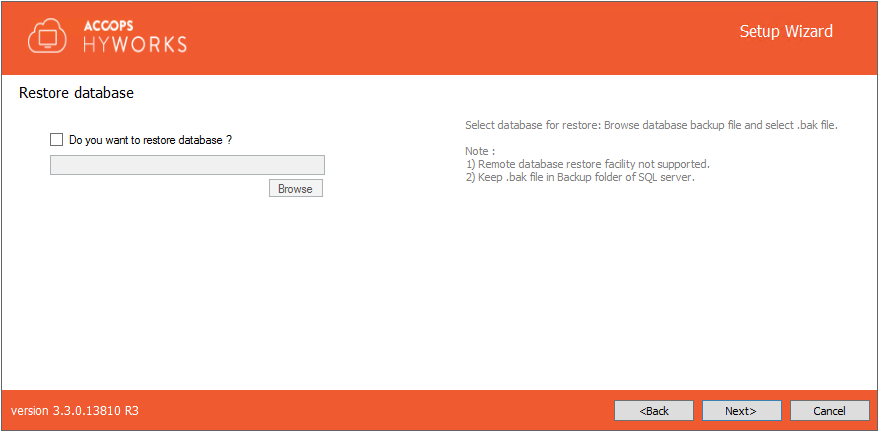
- Refer HyWorks Backup and Restore for detailed instructions on database back and restoration.
-
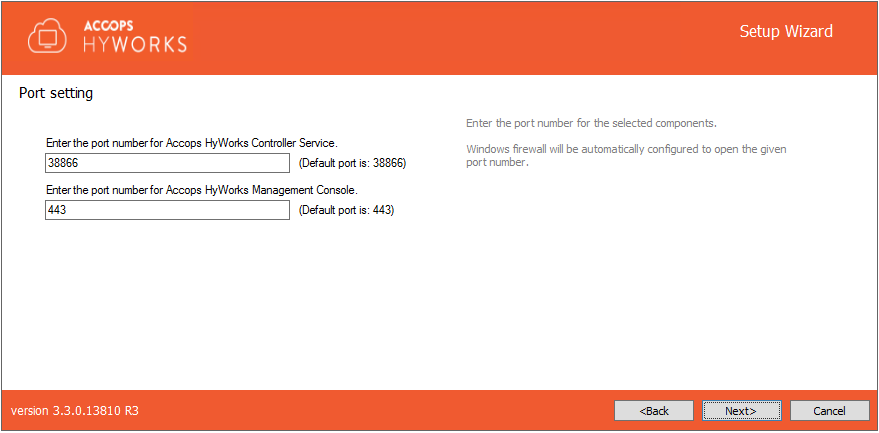
Click Next to configure communication ports.
-
Default port for Accops HyWorks Controller Service is 38866. Change if required.
-
Default port for Accops HyWorks Management Console is 443. Change if required.
-
-
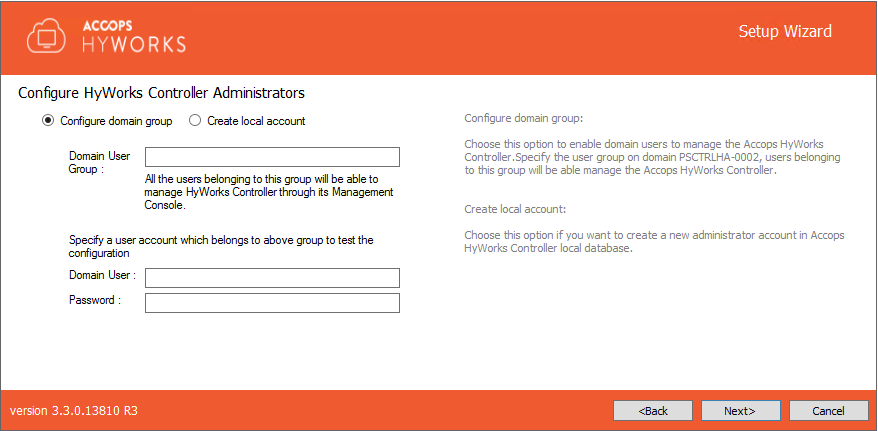
Click Next to configure HyWorks Controller administrators. You can either set Domain User Group or Local User as administrator:
-
Domain Group Configuration: Domain User Group configured as super-administrator. To configure Domain User group, make sure:
-
System is in domain
-
User is logged in with domain credentials and having administrative privileges on server.
-
-
Local User Configuration: Local HyWorks user created and designated as Super-administrator. To create a local user administrator, provide the username (default is HyWorksAdmin) and password.
-
-
Click Next. Verify information displayed on Confirmation screen and click Install to start the installation.
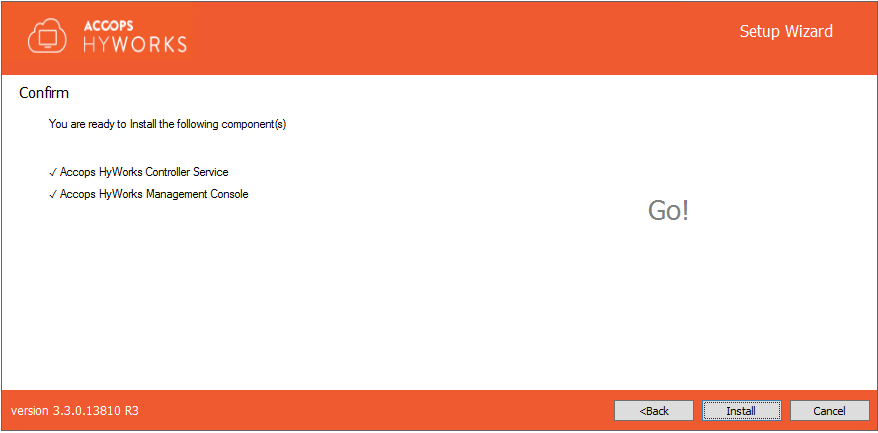
-
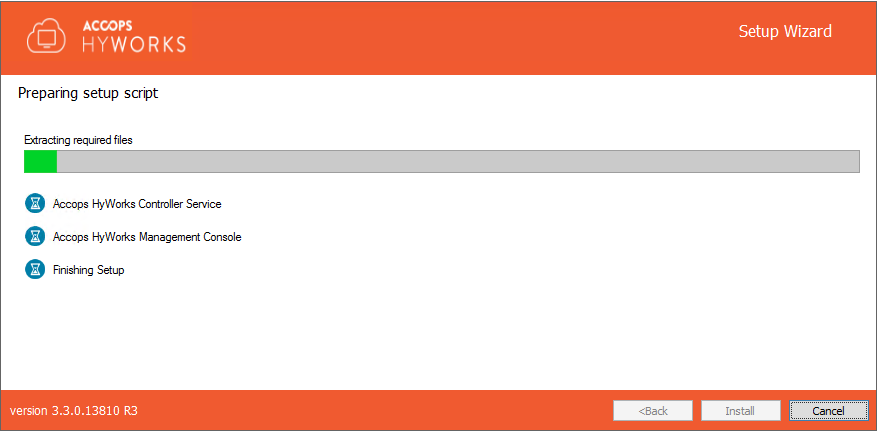
This will start installation and appropriate roles and feature will be installed. Screen will display status and updates of installation progress as:
- Component being installed
- Installation status of the component
- Progress bar and related information of the changes being made to the system
-
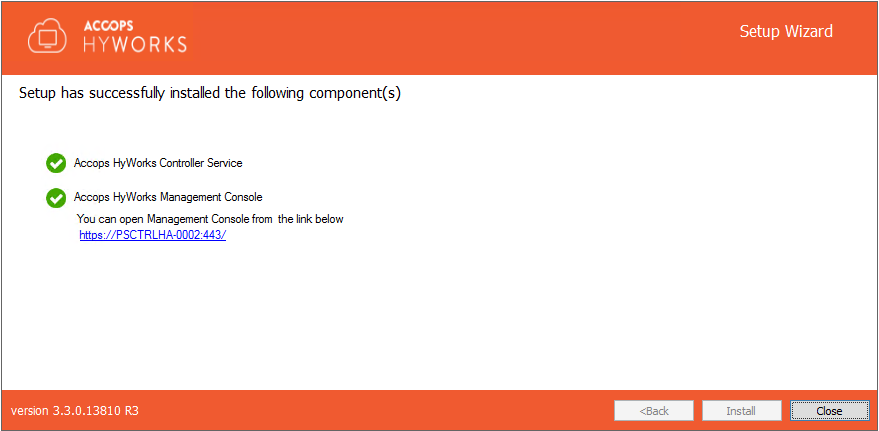
Once the installation is complete, screen displays:
- Installation status of individual components
- URL of Accops HyWorks Management Console (if Installed)
Installation Verification
Administrator can verify the successful installation by checking the installation logs and services running as given below:
-
Setup Status Prompt
Setup Status is displayed on the last screen of installation. It displays details about all the installed components and their respective status.
-
Access and log in to Accops HyWorks Management Console
-
After the successful installation, open Supported browser (IE11, Firefox or Google Chrome) and type the URL: https://\<IP of HyWorks Controller>:\<port number> e.g.,
-
Provide appropriate credentials to log in.
-
Installation Logs
For troubleshooting or verification purpose, HyWorks installation logs can be used. Installation logs are created at the following location:
%appdata%\HyWorksController\Logs