RHEL/Cent OS Gold Master Preparation
This page describes preparing a Gold Master image for cloning on a Cent OS server. The Gold Master image can be used to deliver Virtual Cent OS-based desktops.
Refer to the sections below to setup and configure a Linux Server for desktop delivery:
Required Packages
A deployment of Linux-based desktops will require the following packages to be installed and configured:
-
Installing Linux-based Dedicated Virtual Desktops
-
Assistive/Dependency Packages:
-
Must have the dependency packages for HyWorks deployments
-
HyWorks DVM Tools for Linux
-
-
Optional - HyWorks DVM Tools for Linux: If the assistive package does not contain the latest HyWorks DVM Tools for Linux
Step 1: Getting RHEL/CentOS
Visit the official website for RHEL or CentOS to download ISOs of the supported versions. The supported versions are listed below:
- RHEL v7.9
Note
- HyWorks supports only listed Linux flavors and OS versions, any other version or flavor will result in installation and delivery issues.
Step 2: RHEL/CentOS VM Installation
RHEL Installation
There are no special instructions for the installation of RHEL. The standard steps provided on the official RHEL website should be followed.
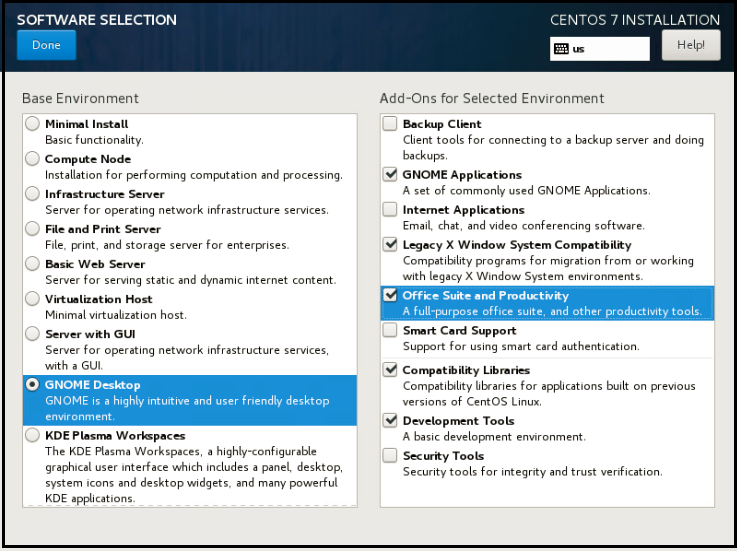
CentOS Installation - Package Selection and Configuration during OS Installation
The following packages must be selected during the installation of the CentOS image, as the HyWorks package has dependencies on them. To change the selected package, contact the Accops team.
Network Configuration
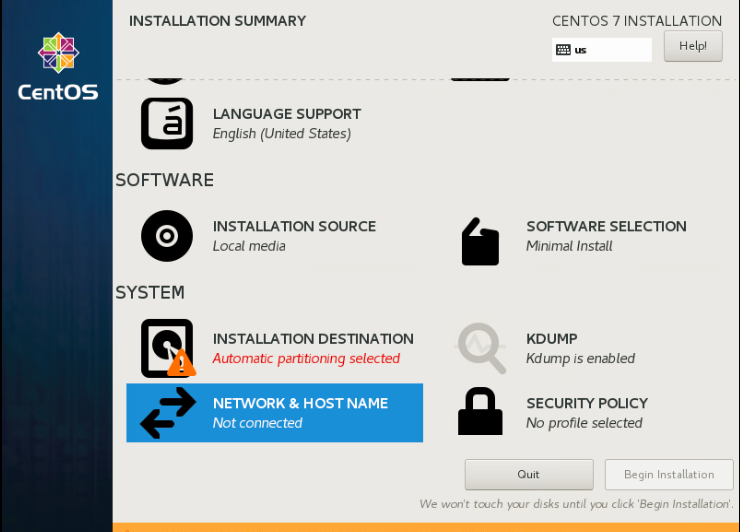
It has been observed that the CentOS network is not connected by default. The network will have to be enabled to connect automatically during installation. Follow the steps listed below to enable the network to connect automatically:
-
Click Network & Hostname
-
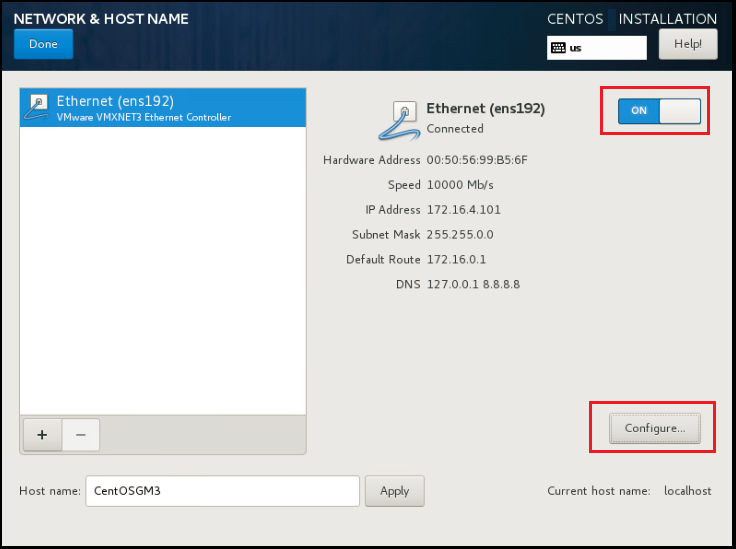
Specify your system's FQDN (Fully Qualified Domain Name) in the Hostname field. Then, click the Ethernet toggle switch to turn it ON, which will enable your Network interface.
-
A functional DHCP server on your network will automatically configure all your network settings for enabled NIC, which should appear under your active interface.
-
Click Configure to change the network configuration.
-
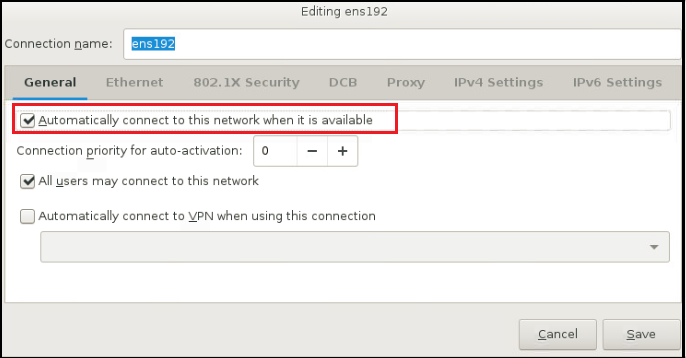
Select the checkbox to Connect Automatically under the General tab.
-
Save the settings
Step 3: Post-OS-Installation Configurations
Follow the steps provided in the Post OS-Installation Configurations section for post-OS installation configuration.
-
If CentOS VMs are used, disable the libvirtd.service using these commands:
systemctl stop libvirtd.service
systemctl disable libvirtd.service -
For RHEL/CentOS 6,7 systems interfaces, virbr0 has an IP address of range 192.168.x.x assigned to it. When this image is used in VMware, multiple IPs are reported.
Having multiple IPs can affect the functioning of HyWorks and HyLabs. Disabling the virbr0 interface is required. The steps listed below will disable the virbr0 interface:
-
Open the terminal and run the command:
sudo systemctl stop libvirtd.service
sudo systemctl disable libvirtd.service
-
Reboot the system to save the configurations.
-
Step 4: Accops Dependency Package Installation
To install dependency packages on the Ubuntu server, follow the steps in the Accops Assistive/Dependency Package Installation section.
Step 5: Configurations and Environment Preparation
Basic Configuration
Follow the steps provided in the Basic Configuration For Environment Preparation section for basic configuration steps for authentication.
The RHEL subscription must be set on prepared machines. Follow the standard RHEL process to update subscription details. Example steps are given here.
Troubleshooting
Refer to the Troubleshooting and basic HowTos section for detailed debugging steps and the paths for the log file.