Overview
Accops HyWorks
Accops HyWorks provides flexibility and agility to work from anywhere, anytime, and on any device, enhancing job satisfaction and engagement.
It simplifies how the IT team manages and secures apps, devices, and networks to provide safe and seamless access to all the tools employees need to perform at their best. It provides centralized endpoint management makes it easy to control and manage all devices, virtual desktops, and applications from a central location.
HyWorks helps create a secure work environment and reduces complexities, allowing your workforce to focus their creativity on core business activities rather than worrying about system glitches, software updates, or cyber threats, increasing productivity and reducing costs.
About this document
This guide will help you install and configure the HyWorks client for Windows 11.
The document is divided into the following sections:
1) Installation of HyWorks Client V3.2.8232.328232
2) Configuration
Applicable Version
-
HyWorks Version 3.4
-
HyWorks Client Version 3.2.8232.328232
Install HyWorks Client on Windows Desktops
-
Log in to the desktop with local administrator privileges.
-
Download the HyWorks Client for Windows.
-
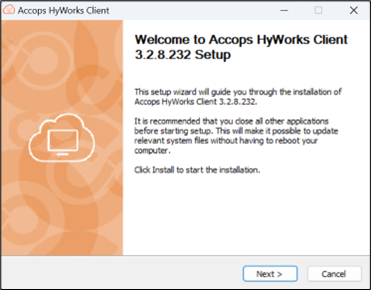
Double-click the setup file to run the installer.
-
Click the Next on the Welcome screen.
-
On the License and Agreement screen, click the I Agree to proceed.
-
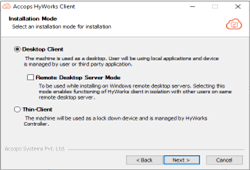
In the Installation Mode screen, select Desktop Client and click the Next.
-
Desktop Client: Recommended mode for user desktops, where HyWorks Client does not install/ enable security features like KIOSK mode, file filters, etc. The end user will completely handle desktop management.
-
Remote Desktop Server Mode: It can be installed on Windows Remote Desktop Servers to use the client in multi-user scenarios and is not recommended for personal desktop systems.
-
Thin-Client: To enable restricted mode on end-user PCs. It is recommended for thin PCs and thin clients running Windows embedded systems and must be used in restricted mode with features like KIOSK mode and file filtering. It should be used only after serious consideration and due advice from Accops teams.
-
-
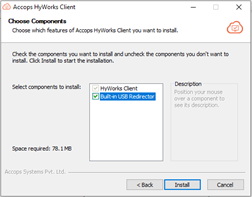
On the Components Selection screen,
-
The HyWorks Client option will be selected by default.
-
Select the option Built-in USB Redirector to enable USB redirection (Do not use this option if deployment is not using USB redirection)
-
-
Select the Install to proceed with the installation of the selected components.
-
Once completed, click Finish.
Note
If prompted for a reboot, save the unsaved files and reboot the system for changes to take effect.
HyWorks Client Configuration
First-time HyWorks Client configuration
-
Once installation is completed, there will be a shortcut on the Desktop and Start menu. Double-click on the shortcut to invoke the client.
-
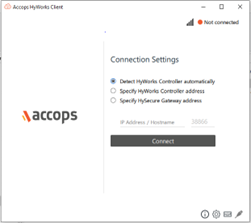
The Connection Settings screen will be displayed on the first launch. Select the appropriate connection mode as described below and click Connect.
-
Select the option Specify HyWorks Controller Address if HyWorks Controller and VDI machines are reachable.
-
Requires HyWorks Controller address (IP or Hostname)
-
Port number (Default 38866)
-
Select the option Specify HySecure Gateway Address if the connection to the HyWorks Controller and assigned VDI can be made via the HySecure server.
-
Requires HySecure Gateway address (IP or Hostname)
-
Port number (Default 443)
-
-
Once connected successfully, in the case of multiple organizations, the Organization Selection dropdown will be displayed; otherwise, it will be skipped. In that case, the user will be navigated directly to the login screen.
-
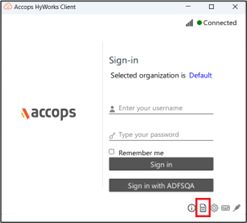
Provide an appropriate username and password on the Login Screen and click the Sign In button.
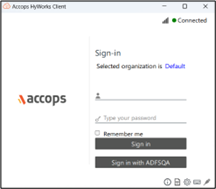
The user can sign in With SAML Authentication, as shown in the below screenshot. For example, the user can sign in with IDP ADFSQA by selecting “Sign in with ADFSQA IDP.”
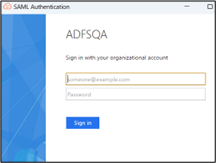
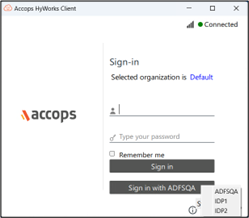
Multiple IDPs can also be configured, and the user can select the particular IDP from the drop-down list to log in through SAML Authentication.
-
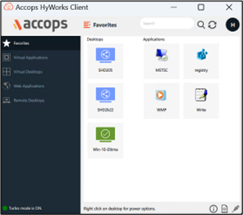
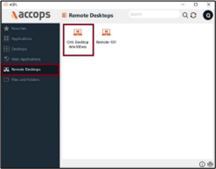
On successful login, the user will be presented with an application tray, displaying the Favorites tab consisting of assigned desktops and favorite applications.
-
In the case of a single desktop, a desktop session will be launched automatically; with multiple desktops or applications, an application tray will be displayed, and the user can click on the desktop or application icon to launch it.
HyID Authentication with HyWorks Client in HySecure mode
Users can be authenticated with dual authentication like SMS OTP, Email OTP, Mobile Token, and Hardware Token when connected to Gateway.
-
When SMS OTP HyID authentication is enabled, the user will get OTP on the registered mobile number. Upon entering OTP user will get authenticated and log in successfully.

-
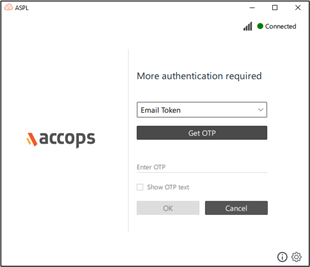
When Email OTP HyID authentication is enabled, the user will get OTP on the registered mail id; upon entering the OTP user will get authenticated and log in successfully.
-
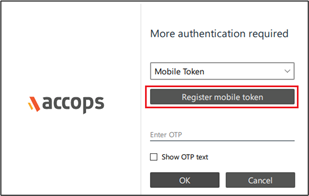
Through Mobile tokens
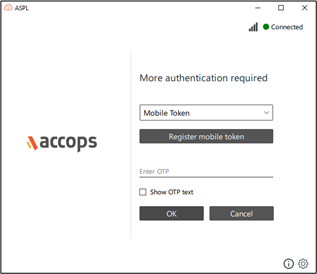
-
Option to register mobile token
Users can be registered through the Accops HyID application on Android/iOS devices. When the user chooses to enter a Mobile token, a button to register a mobile token will be displayed. Clicking will open the browser and navigate to the mobile registration page.
-
-
Through Push Notification
-
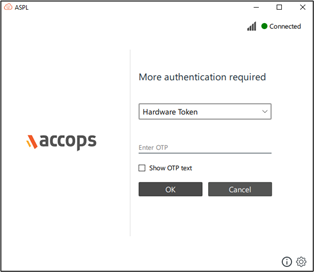
Through Hardware Token
Support for the hardware token has been added, and after entering the credentials, if Hardware token HyID policies are configured, the hardware token window will be displayed. On providing the appropriate hardware token user will be able to connect to HySecure and then HyWorks.
HySecure Application supported with HyWorks client in HySecure Mode
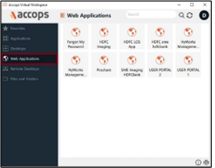
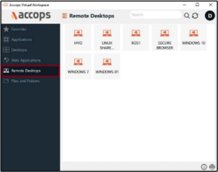
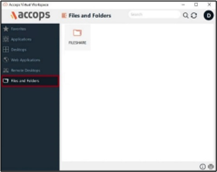
HySecure applications can be launched by the user through the HyWorks client. Following types of HySecure Application are supported:
-
Web Application
-
RDP Type Application
-
Files and Folders
-
My Desktop
HyWorks Client Screen Elements
Let’s look at the HyWorks login screen and its various elements and understand what they stand for.
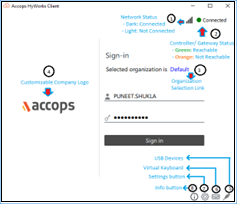
Pre-Login Screen Elements
You will be presented with the following screen when you launch the client.
-
Network Status: Displaying the status of the network on the system.
-
Dark Grey: Network is available.
-
Light Grey: Network is not available.
-
-
Controller/ Gateway Status Dot
-
Green – Connected: Represents Controller/ Gateway is connected.
-
Orange – Not Connected: Represents Controller/ Gateway is disconnected.
-
-
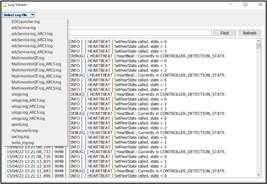
Log viewer: There is a way to look at the logs from the client screen.
-
Upon clicking on the Log Viewer user can see all the required logs of the client, like, edcservice, ui, uac, etc.
-
-
Organization Selection Link: Selecting the Organization Name will display a dropdown list of organizations, which can be used to switch the organizations.
- If deployment is only for one organization, the option will not be displayed, and the user will log in to the default organization.
- To change the organization, unregister the device from one organization and register the device to a newly selected organization. Any device-specific assignments will also be deleted from the previous organization.
- Once selected, the user’s choice is remembered, and the last selected organization will be displayed on the next client login.
-
Organization Logo: The customizable organization logo can be changed from HyWorks Controller Management Console > Workspace > Organization > Portal Settings.
Best-suited logo image size: 200x49
-
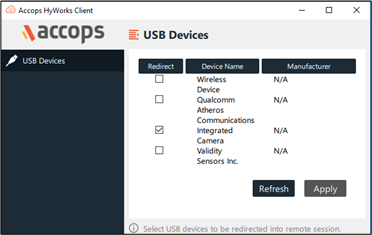
USB Devises Button: This control, by default, is hidden. Make changes from HyWorks Controller Management Console > Endpoints > Devices Settings to make it visible. Clicking on the USB Devices button opens the USB Devices screen, providing the following information and configurable settings.
- List of USB devices with the option to select them.
- To redirect any device, select the device and click Apply.
- User choice will be remembered for the future, and in subsequent sessions, the devices will be in by default redirection mode.
-
HIDs (Human Interface Devices, e.g., USB Keyboard, Mouse, etc.) do not work in redirected mode and, thus, are unchecked by default.
-
Virtual Keyboard: The control is, by default, hidden and can be made visible from HyWorks Controller Management Console > Endpoints > Devices Settings. Clicking on the Virtual Keyboard button invokes the system’s default on-screen keyboard.
-
Settings button: To invoke the Settings screen with multiple user-configurable options. The control can be hidden from HyWorks Controller Management Console > Endpoints > Device Settings.
- The Settings is not displayed post-logon; however, multiple tabs and buttons will be displayed to allow users to configure a few settings.
-
Following configurations options are available:
-
HyWorks Controller Configuration: To make changes in the Controller configuration.

-
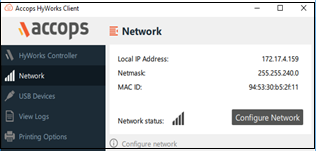
Network: To view and modify network configurations.
-
USB Devices: To view and modify USB Device configurations (explained in point 6 above)
-
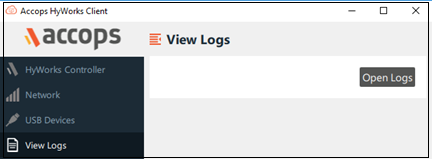
View Logs: To open UI and Service log files
-
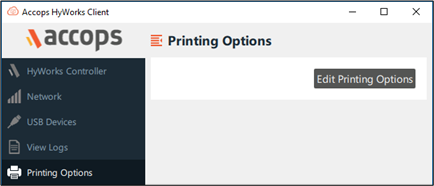
Printing Options: To configure HyPrint printing options from HyWorks Client. Printing options are explained in detail in the later section of the document.
-
-
Info Button: Clicking on the Info button will display the client information screen, displaying the following important information.
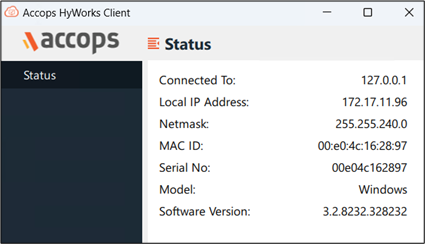
- Connected To: Currently connected HyWorks Controller/ Gateway address.
- Local Address/Netmask: IP Address and Netmask of network
- MAC ID: MAC ID of the client machine
- Serial Number: Device/ Machine serial number
- Model: Client model, possible values: Windows/ Windows On-demand
- Software Version: Version of HyWorks Client
Post Logon
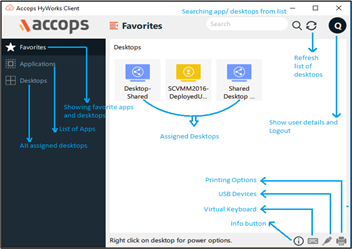
The UI gets reorganized once the user has logged in, and the following information will be available.
-
Resource Tabs:
- Favorites: Displays favorite applications and all assigned desktops.
- Applications: Displays all assigned desktops.
- Desktops: Displays all assigned desktops.
-
Info Button: Displaying necessary client configurations, same as above.
-
Virtual Keyboard: Invokes a virtual keyboard.
-
USB Devices: Modifies USB device configurations.
-
Printing Options: Configure or update HyPrint PDF Printer configurations.
-
Search: Search from the list of apps and desktops.
-
Refresh: Internal refresh control to refresh the list of desktops/ applications.
-
Username: The initial letter of the username; clicking on this will show the full username and logout option.
-
Desktop List: All the desktops assigned to the user are listed here:
-
Different icons for shared and dedicated desktops
-
Dedicated Desktop Status: The power state of assigned desktops are shown with different color and icons:
-
Green: The desktop is ready for connection
-
Yellow: The desktop is powered on but not ready for connection.
- Wait for the desktop to be readied; if not gets ready, initiate appropriate power operations.
-
Red: The desktop is powered off
- Right-click to power on the desktop and wait for it to get ready.
-
Right-click on the respective dedicated desktop will show the available power operations. E.g., a suspended VM can only be resumed.
-
-
Added Turbo Tunnel support
Turbo is Layer3 (Network Layer) VPN Tunnel protocol. It aims to be faster, simpler, leaner, and more useful than IPsec. When the user logs in, Turbo Client will create a tunnel between the client and the HySecure gateway.
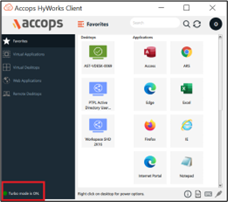
All functionalities will be the same as per the HySecure client. On HyWorks, client Turbo Status will be shown as Turbo is Not configured/Enabled or Turbo is Active.
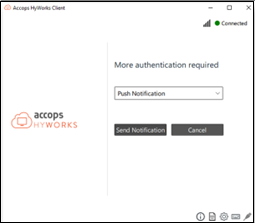
Added Push Notification support
This release gives Push Notification option support in Two-Factor Authentication (2FA). Please refer configuration document for Push Notification.
Types of Push Notifications
1. User consent only

2. User consent with additional tokens
Note
You must install the Accops HyID app from the Android or Apple store to use this functionality.
Configure Push Notification
-
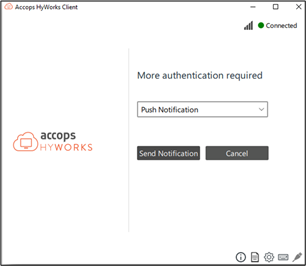
Once it is enabled, the user needs to log in from the client. Then the user must select the Push Notification option from the 2FA drop-down list.
-
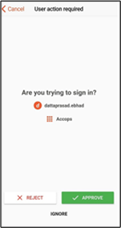
When you select Send Notification, the user will get a notification on the mobile phone’s HyID application. The HyID application has three options:
-
Reject: The user will log out from the client with a message: Consent rejected by the user.
-
Approve: The user gets logged into the client.
-
Ignore: No action will be taken.
-
-
If the administrator sets User Consent with Additional Tokens, then after approval, the user will be presented with one more consent as below.

Users must select an additional token option from the list mentioned. Once the user selects an option from the list, OTP will get triggered as per the option chosen. Once the user enters a valid OTP, the user will get logged in successfully.
Note
-
To use this feature Mobile Token of the HyID Application should be configured on mobile.
-
HyID Tray agent should be installed and configured (Admin sets user consent with additional tokens option).
Logout Page setting
Users can configure HySecure client settings from HyWorks and the logout page. Below are the settings on the Logout page.

Option to Change Password
HyWorks clients connected via HySecure or directly through the controller will now have the option to change their password.
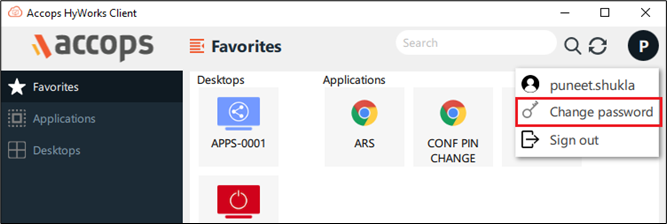
Users can change the password directly from the client when connected to HySecure and HyWorks.
Web Application Setting
This option is enabled by default.
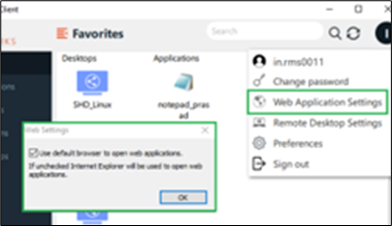
This feature lets users decide whether Web Applications will be launched from the default browser or Internet Explorer.
Remote Desktop Application
This feature is already integrated with HySecure Client and will work the same as on the HySecure client. To update the Remote Desktop Settings, users must open Remote Desktop Settings from the dropdown when clicking on username upon login through the HyWorks client.
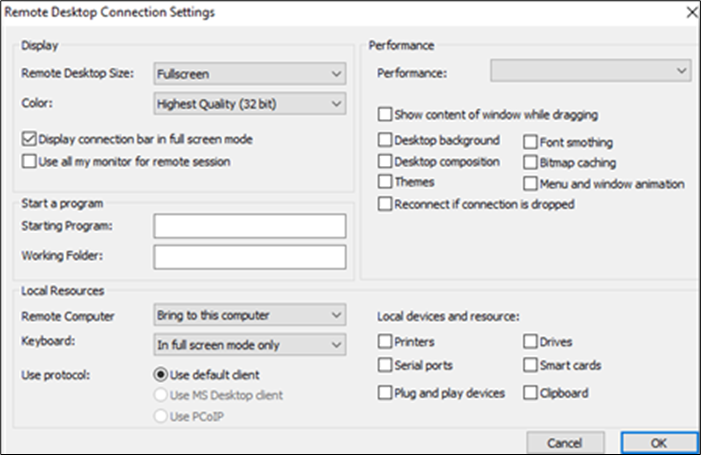
For a detailed understanding of this, please refer to Supported RDP properties with Remote Desktop Services on the Microsoft website.
Note
Remote Desktop Setting only applies if VDI is launched through MSTSC/MSRDC.
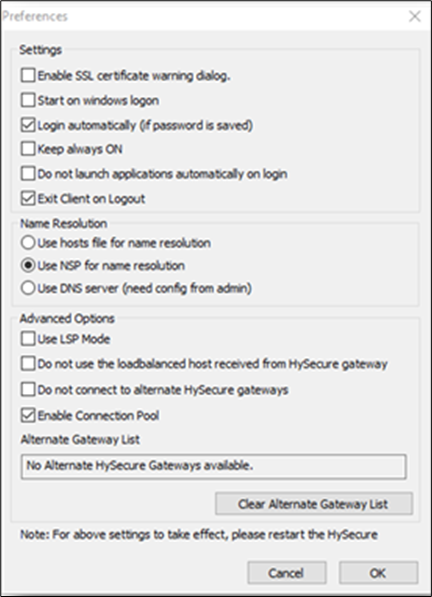
Preferences
The same feature is already integrated with the HySecure client and will work the same.
To update the setting, the user must open the Preferences option from the dropdown when clicking on the username upon login through the HyWorks client.
-
Enable SSL certificate warning dialog: This option is useful when the HySecure server is published using an IP only, and the admin wants to avoid a certificate error message on every client login.
-
Start Windows on logon: Once the Windows OS boots, it will auto-launch.
-
Login Automatically (if the password is saved): If the user credentials are saved, the user will get auto-login on the next login.
-
Keep always ON: With this option; the service remains ON.
-
Do not launch applications automatically on login: The application will not launch automatically if this option is enabled.
-
Exit Client on Logout: The client exits the system tray when the user logs out.
-
Use Hosts file for Name Resolution: When the user logs into the HyWorks Client, it automatically inserts a client application entry in the machine’s host file. On logout, it will automatically remove the client application entry.
-
Use NSP for name resolution: Selecting this value will force the use of the NSP server of the Gateway, for name resolution.
-
Use DNS server (need config from admin) Enable: Selecting this value will force the use of the DNS server configured in the Gateway for name resolution.
-
Use LSP Mode: This option is used for hooking.
-
Do not use the load-balanced host received from HySecure gateways: Enable/disable load balancing from HySecure Gateway.
-
Do not connect to alternate gateways: With the help of this option, the user can decide to connect to an alternate gateway if the connected gateway goes down.
-
Enable connection Pool: Enables connecting to a pool of gateways.
-
Alternate Gateway List: It will display a list of alternate Gateways.
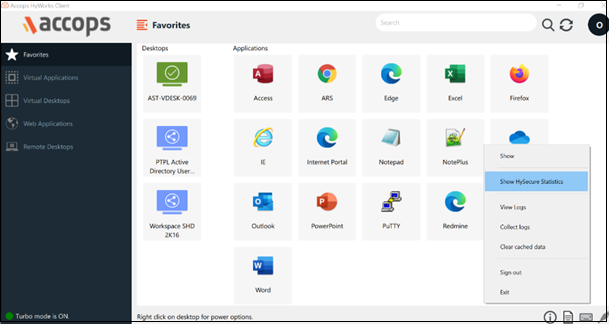
System Tray Settings
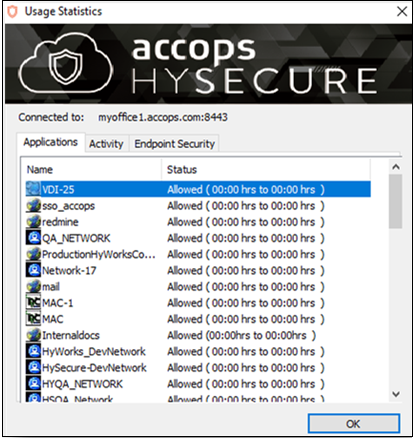
HySecure Statistic
The user can track all applications running on the machine. Additionally, he can look at which applications are active and which EPS policy is applied from HySecure Gateway.
-
Applications: This tab will display which applications are running on the system. Also, it will show the status of that application.
-
Activity: The Activity Tab shows the applications that are currently active. 0 means not active. 1 means active.
The Bandwidth Tab shows how much total bandwidth has been consumed with all prospective compressed and Encrypted BW.
-
Endpoint Security: The EPS policy applied from the gateway will be displayed in this tab.
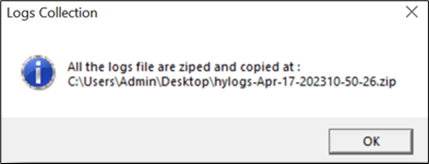
Collect Logs
On selecting Collect Logs, the logs get downloaded to the desktop.
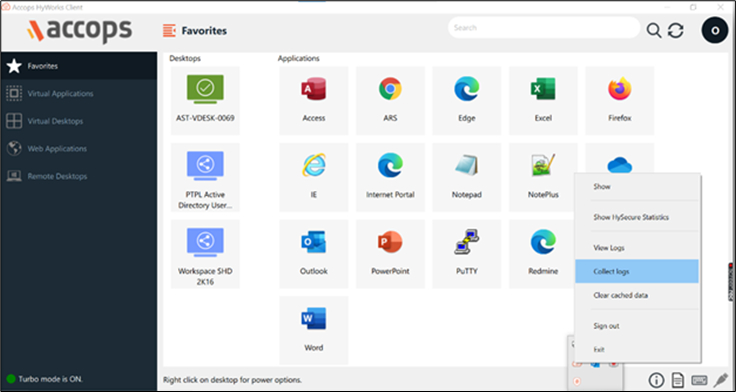
Logs of the client and agent can be collected directly from the client machine in a Zip file format.
View Logs
On selecting View Logs, the log viewer will open.
Clear cached data
The client will clear the cached date by selecting the Clear Cashed Date option.
Sign out
The user will get logged out from the client.
Exit
The client will exit on selecting this option.