SRMS Installation
This section guides on installing the HyWorks Session Recording Manager Server (SRMS), which is a critical component of session recording.
Note
-
Copy the HyWorks Session Recording Manager Server (SRMS) setup locally on the target server. Running the HyWorks SRMS setup from the UNC path is not supported and will fail.
-
Running the HyWorks SRMS setup may also fail during the file extraction process if the logged in user has a roaming profile. Hence, it is recommended to log in as a local administrator.
Overview
The session recording feature is integrated into the monitor and records the activities performed on the VDI.
SRMS (Session Recording Management Server) is used to manage, upload, and stream user session recordings. The sessions can be recorded and uploaded to a given location (local/remote).
The recordings can be accessed from the HyWorks management console by the user having appropriate privileges. One can also automatically clean up the old records as per the configured number of days.
While installing SRMS on Windows servers the following modules will be installed:
-
SRMS Aggregator Service
-
SRMS Manager Service
-
AutoClean Task (Optional)
System Requirements
Hardware Requirements
Minimum configuration for Windows server:
-
Minimum 4GB RAM
-
4 vCPUs
-
10 GB of free space on the installation disk for installation, dependencies, and post-installation management files
Note
Upgrade server size as per the required recording file size and history to be maintained.
Supported Operating Systems
SRMS can be installed on any Windows operating system having prerequisites installed, but for performance and ease of functioning, it should be installed on Windows Server OS.
Prerequisites for SRMS
To configure the Windows Server with the HyWorks Controller, the following software must be installed and configured on the system:
Installation Modes
SRMS can be configured with HyWorks in two different modes:
-
Two-Node Active-Passive/Multi-Node HyWorks Managed Database Sync
-
Multi-Node SQL Managed High Availability
For each mode, two types of installation are supported:
-
First-time Installation
-
Maintenance
a. Upgrade
b. Uninstall (Using the control panel)
Important Installation Configurations
-
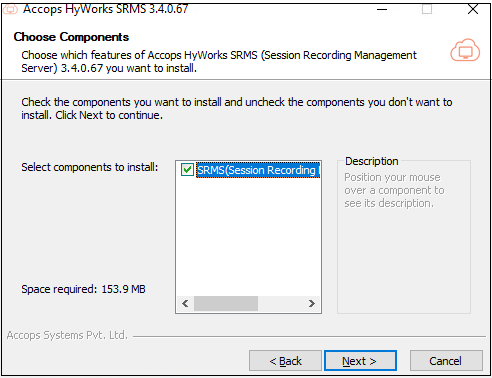
Components: SRMS (Session Recording Management Server).
-
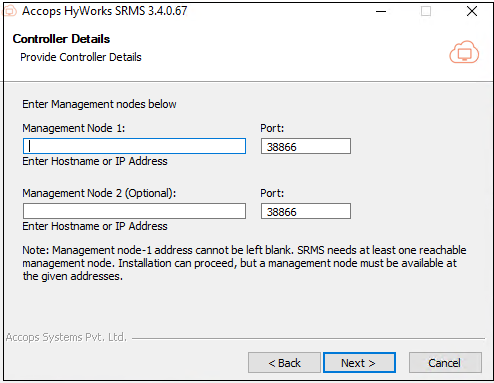
Controller Details:
-
Management Node 1 and Port: The IP address and port number of the HyWorks controller. It can not be empty.
-
Management Node 2 and Port: The IP address and port number of the secondary HyWorks controller. It can be empty as it is optional.
-
The installer will check for the reachability of both controllers and will display a message box only if one of the controllers isn't reachable.
-
Unreachable controllers can also be selected.
-
-
-
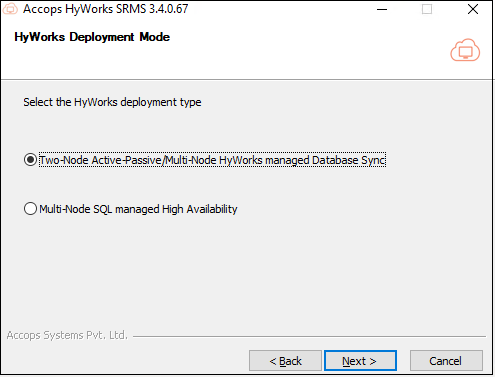
Deployment Mode: Select deployment mode.
-
Two-Node Active-Passive/Multi-Node HyWorks Managed Database Sync
-
Multi-Node SQL Managed High Availability
-
-
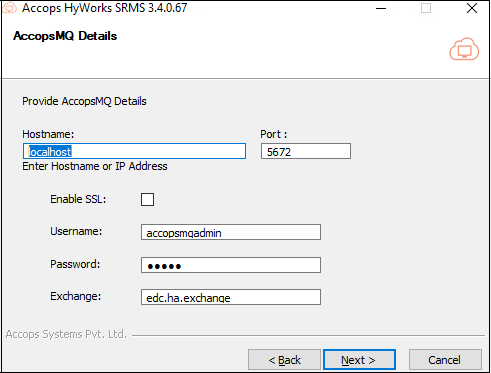
AccopsMQ Details:
-
This page contains information and credentials of AccopsMQ.
-
This page will show up only if the user selects Two-Node Active-Passive/Multi-Node HyWorks Managed Database Sync as the deployment mode.
-
Reachability would be checked here for the IP of AccopsMQ, message box with a warning will be shown in case of failure.
-
The configuration is required for handling the Controller’s high availability and in cases of failover switching to the primary controller.
-
-
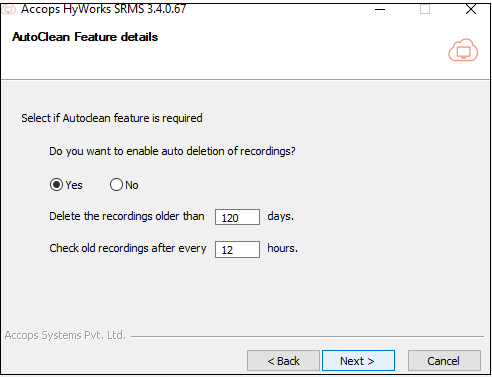
AutoClean Feature details:
-
The user must select if the AutoClean feature is required.
-
If it is required then the following fields are needed:
-
Number of days, to delete the recordings that are older than the given number of days.
-
The valid range for the number of days is 1 - 365 days.
-
Number of hours, the interval to run the task in a day.
-
The valid range for the number of hours is 1 - 24 hours.
-
-
-
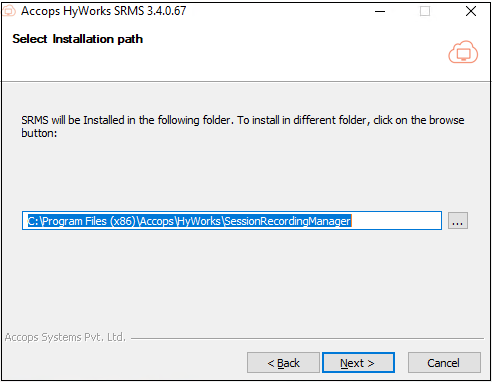
Installation Path: The path where SRMS needs to be installed can be changed here:
-
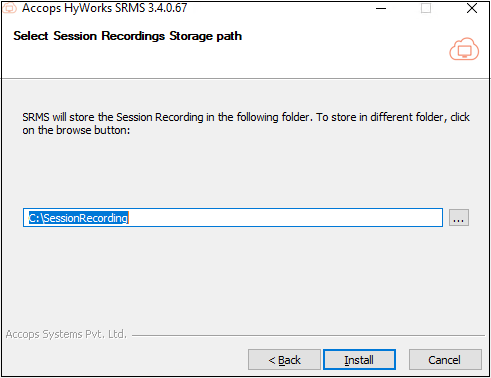
Session recordings storage path: SRMS will upload the user session recordings on this given location.
Installation steps
-
Log in as a local administrator user on the dedicated desktop or server machine.
-
Download HyWorksSessionRecordingManager.exe. Verify the MD5 sum of the downloaded file.
-
Double click and launch the Installer. Click Next to proceed.
-
Accept the License Agreement by clicking I Agree.

-
The component to be installed will be selected by default. Click Next to proceed.
-
Enter the controller IP on the next window. Click Next to proceed. [If the controller is standalone, then the second field to add controller details is optional].
-
Select the HyWorks deployment type from the following option. Click Next to proceed.
-
Two-Node Active-Passive/Multi-Node HyWorks Managed Database Sync: Select this option if the controller is deployed in HA.
Note
For this deployment method, RabbitMQ installation is mandatory. RabbitMQ can be installed on the same machine, where SRMS is installed or any other machine.
-
Multi-Node SQL Managed High Availability: Select this option if your controller is deployed in an Active-Active setup.
-
-
Enter the IP address of the host where RabbitMQ is installed. The port number, username, password, and details of the queue will be present by default. Click Next to proceed.
-
This screen will only be displayed for deployment type as Two-Node Active-Passive/Multi-Node HyWorks Managed Database Sync.
-
SRMS uses the configuration for handling controller failover cases and switching to the primary HyWorks controller. Important to know that SRMS does not have any other mechanism of controller HA handling and thus, this is a must-have configuration for HA deployments mentioned in point# 1.
-
For HA handling using Accops MQ, the following flag must be configured as enabled: Settings > General > Advanced Settings > HA notify control: Set as True.
-
If deployment is using multiple Accops MQ servers or having VM scale booster deployed in HA, then the VIP of Accops MQ should be provided as configuration.
-
-
Select Yes if the Auto-Clean feature is required. Click Next to proceed. Admin can configure the days and hours, after which recordings will be deleted.
-
Choose the destination folder and click Next to proceed.
-
Browse and enter the session recording storage path where you want to save the recordings. Click Install to start the installation process.
-
Once the installation is complete, click Finish.
-
Run the ConfigureRabbitMQ script at the end to configure RabbitMQ. And Follow the steps mentioned in the script.
Note
If SRMS is to be configured in HA, then the admin should follow the same installation procedure to prepare two SRMS servers and then use a third party load balancer for load balancing and failover conditions.
HyWorks Database Authentication Mode is Windows Authentication
When HyWorks database configuration operates in Windows authentication mode, the SRMS services must also run using the same user credentials employed for running the HyWorks Controller services. SRMS employs the identical authentication mechanism utilized by HyWorks Controllers to establish connections with databases.
In the mentioned deployment scenario, if SRMS is installed (where it usually runs as the Local System Account by default), it becomes necessary to reconfigure its services to operate under the same user credentials as those used by the HyWorks Controller services. To perform this configuration, follow these steps:
-
Connect to Windows server hosting SRMS services with administrator privileges.
-
Open the Run prompt and type services.msc > Press Enter.
-
Locate the SRMS Service named Accops HyWorks Session Recording Aggregator. Right-click on it and select Properties.
-
Navigate to Log on and change the configuration from Local System Account to This account.
-
Provide appropriate user credentials (Same credentials used for running HyWorks Controller).
Important
The configured user credentials must have log on as a service rights on the Windows server.
-
Save the configurations and restart the Accops HyWorks Session Recording Aggregator service.
-
Follow the same steps (# 1 to #6) for the other SRMS service Accops HyWorks Session Recording Manager.