Hardware Tokens
Overview
HySecure supports use of Hardware tokens as the second factor of Authentication. The individual tokens can be assigned to users to perform the additional authentication. Hardware tokens can be assigned to local, AD, LDAP and RADIUS users. Follow the steps mentioned here to configure the use of hardware tokens
- Import Hardware Tokens
- Assign Hardware Token to Specific Users
- Register Hardware Token
- Create HyID Policy, with Hardware Token enabled, for the user
Hardware token List
To get the list of imported Hardware Tokens, perform the following steps:
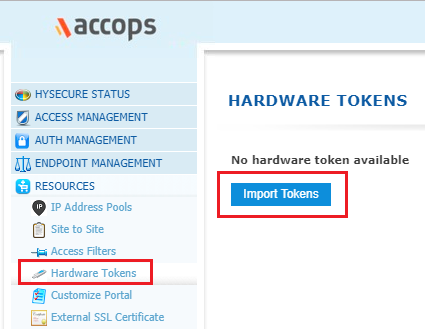
- Open the Management console and expand RESOURCES
- Select Hardware Tokens from the sub menu
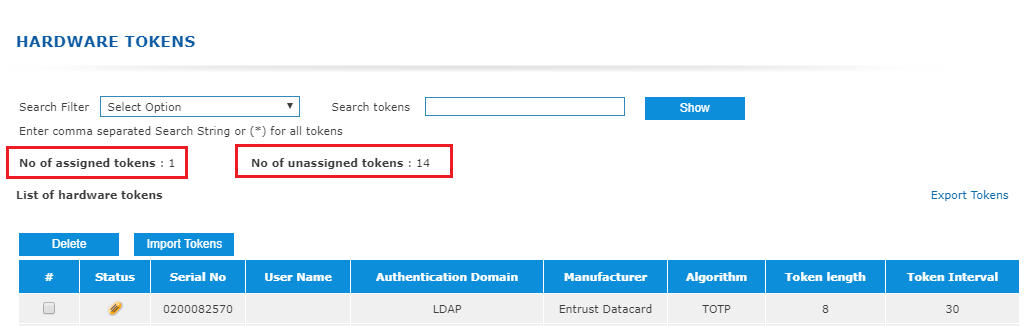
- List of imported Hardware Tokens will be displayed on this page in a tabular manner with the following fields displayed
| # | Column | Description |
|---|---|---|
| 1 | Status | This indicates whether the token has been assigned to a user or not |
| 2 | Serial No. | This represents the Serial number of the token which needs to be associated with the user profile |
| 3 | User Name | This represents the User Name to whom this hardware token is assigned to. |
| 4 | Authentication Domain | This represents the Authentication Domain to which the 2FA authentication using Hardware tokens is assigned to. |
| 5 | Manufacturer | This represents the manufacturer of the hardware token |
| 6 | Algorithm | This represents the algorithm used by the tokens and can be HOTP (event based) or TOTP (Time Based) |
| 7 | Token Length | This represents the length of the token |
| 8 | Token Interval | This represents the token interval |
Export Tokens
To get complete token information as a report, click on "Export Tokens" link on the top right of the page to download the list in CSV format.
Search Tokens
In case there are a large number of tokens imported, then the list on the Imported Hardware Tokens page can be filtered for one or more Tokens by specifying the supported criteria on the "Search Filter" and entering the value on which the list needs to be filtered. Click on the "Show" button to get the filtered list.
Import Hardware Tokens
Go to Import Hardware Tokens page under RESOURCES and click on the "Import Tokens" button.
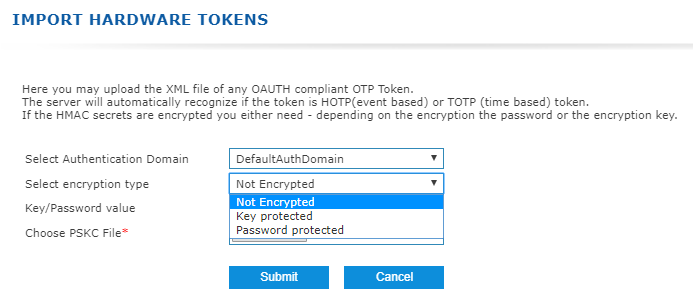
Enter the information needed for importing the tokens.
| # | Field | Description |
|---|---|---|
| 1 | Select Authentication Domain | Enter the Authentication Domain for which the Hardware tokens are to be imported |
| 2 | Select Encryption Type | Select one of the types indicated in the drop down list Not Encrypted: If the HMAC secrets are not encrypted Key Protected: If the HMAC secrets are key protected. The "Key/Password value" will need to be filled up with the relevant key. Password Protected: If the HMAC secrets are password protected. The "Key/Password value" will need to be entered with the relevant password. |
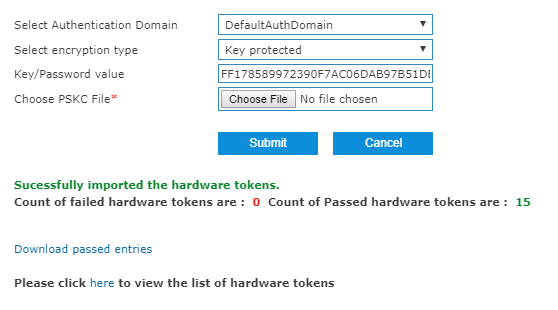
| 3 | Key/Password value | This field is disabled if the Encryption Type is selected as "Not Encrypted". Enter the Key or password, as appropriate, as per the encryption type selected. |
| 4 | Choose PSKC File | Browse and select the xml file of any OAUTH compliant OTP tokens file. |
Click on the "Submit" button to import the hardware tokens. If everything is ok, then all hardware tokens will be imported automatically, and the administrator can see the list of hardware tokens on the Hardware Tokens page.
Delete Token
On the Import Hardware Tokens page, select the token(s) which needs to be deleted and click on the "Delete" button. The selected token(s) will get deleted on confirmation.