Route Configuration
HySecure Gateway provides an SO or an administrator to manage the routing entry maintained by the system. S/he can list, add and delete routing entries.
Route Entry Listing
To configure the routing table perform the following steps after logging in to the Management console, as an SO.
- Open the Management console and expand HOST CONFIGURATION
- Select Route Configuration from the sub-menu
- The complete list of existing route entries will be displayed with the fields as described in the table below
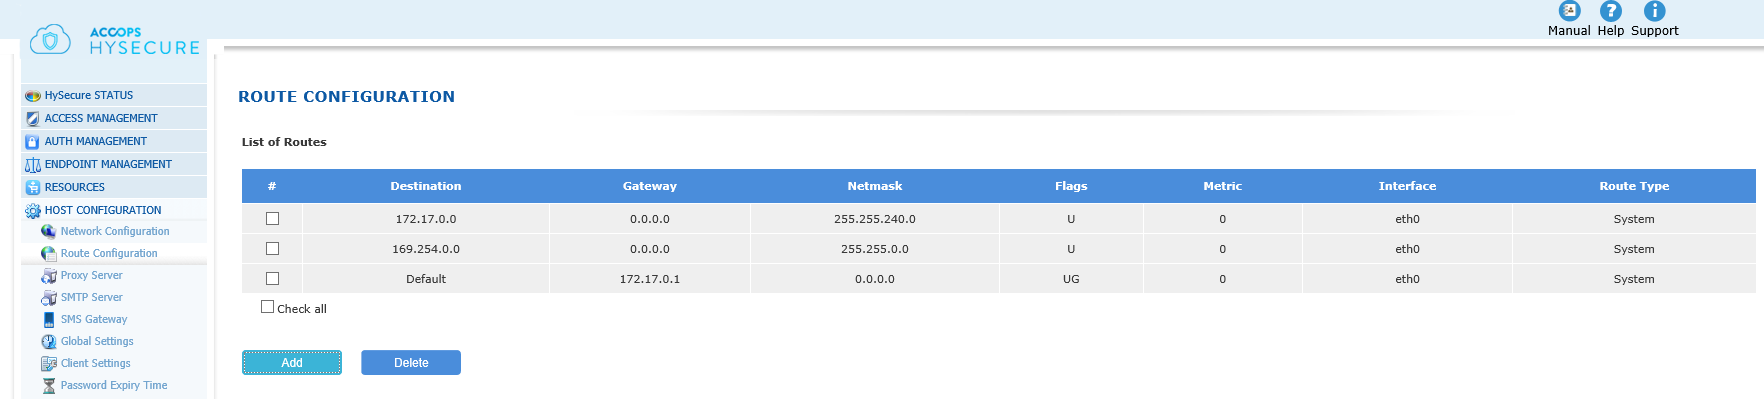
| # | Field | Description |
|---|---|---|
| 1 | Destination | If the destination network matches the destination address of any request/response, then this interface will be used for routing the packet out. In case none of the entries match, then the entry with "Default" destination gets used for routing the request/response out |
| 2 | Gateway | This represents the gateway IP address to use for routing any request/response matching the destination network of the interface. In case, the gateway is not specified then the gateway of the "Default" entry gets used |
| 3 | Netmask | This represents the netmask used to derive at the network for the interface |
| 4 | Flags | This represents the flag status of the interface. Some common flags are: U: Route is Up G: Default Gateway Route H: Route is for a host |
| 5 | Metric | This identifies the cost associated with using this particular route. It can be valued in terms of link speed, hop count or time delay |
| 6 | Interface | This represents the interface for which the route entry exists |
| 7 | Route Type | This field can have following values: System: Route entry created by OS Non-persistent routes created by administrator. Persistent: Persistent route entry created by administrator |
Warning
Be careful while deleting a route. Currently there is no check for active routes while deleting the entries. If the active route to reach the HySecure gateway remotely is deleted, HySecure gateway will become unreachable. In such situation reboot the HySecure gateway from OS console.
Adding a Route Entry
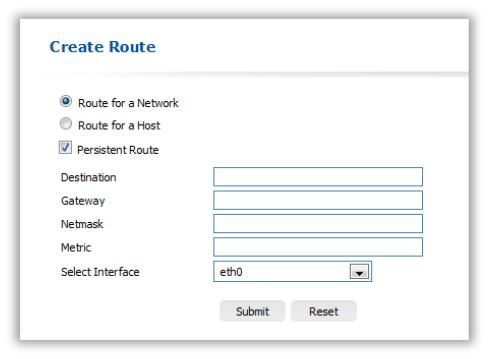
On the Route Configuration page, click on the "Add" button to create route entry for a network or a host. Description of each field is provided in the table below.
| Field | Description |
|---|---|
| Route for a Network | Select the radio button, if route entry is to be created for a Network. |
| Route for a Host | Select the radio button, if route entry is to be created for a host. |
| Persistent Route | Check this option, if the route entry being created, is expected to be persistent across reboots. |
| Destination | Enter the Target network or host for which the entry is being created |
| Gateway | Enter the Gateway IP to be used to reach the target. |
| Netmask | Enter the Subnet mask for the target network for which the entry is being created. If route for a host is being created, then the Netmask should be set to 255.255.255.255. |
| Metric | Enter the Cost associated with this particular route. The field can be left blank. |
| Select Interface | Select the Routing Network Interface on which the request / response will need to be sent out after matching the destination |
Click Submit to create the route entry. In case changes are made before saving, the fields can be reset to the original settings by clicking on the "Reset" button.
Deleting a Route Entry
On the Route Configuration page, select the route entries which need to be deleted and click on the "Delete" button. The selected entries will get deleted after confirmation.