Application Groups
Overview
Application Groups allow you to organize applications on the basis of function, logistics or any criteria that suits your organization. HySecure Administrator can create two types of Application Groups:
- High Security Application Group
- Basic Security Application Group
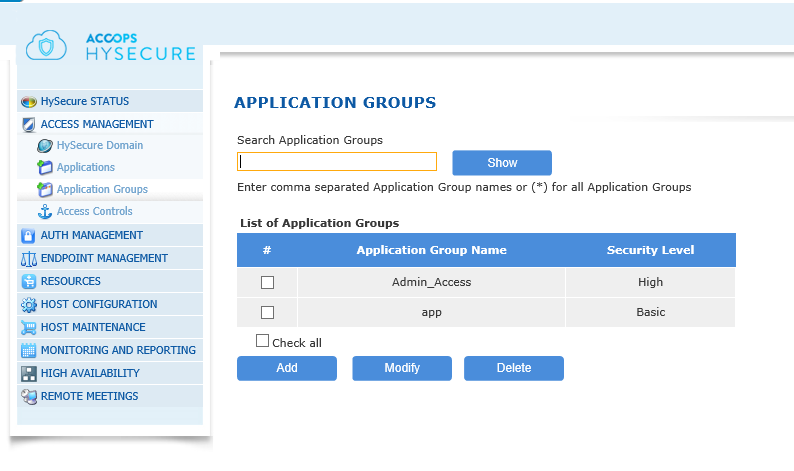
Search Application Groups:
List of Application Groups
| # | Field | Description |
|---|---|---|
| 1 | Application Group Name | Application Group Identifier |
| 2 | Security Level | Security profile of the application group.Basic: This application group can be associated with any group.High: This application group can be associated with high security level user groups only. That means application in this application group can be accessed by authorized users who login into HySecure using Certificates. |
The registered applications can be added to multiple Application Groups of any type. The User Groups and Application Groups make it easier to administer access controls.
Important
When creating Access Control Lists, the Basic Security User Groups can be assigned to only the Basic Security Application Groups whereas the High Security User Groups can be assigned to both Basic as well as High Security Application Groups.
Add Application Group
-
In the management console, click Access Management \ Application Groups.
-
On the Application Groups page, click on the Add button to create a new Application Groups , provide the following information and click on Submit button or click Reset to clear all data from this screen. A success message confirms that the Application Group has been created.
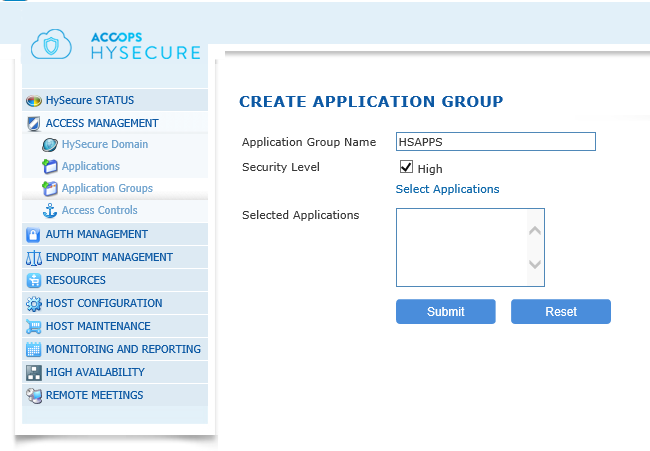
| # | Field | Description |
|---|---|---|
| 1 | Application Group Name | Type the group name in this field. |
| 2 | Security Level | High Security Application Group: To create a High Security Application Group, click on the check box for High. Basic Security Application Group: To create a Basic Security Application Group, leave the check box High unchecked. |
| 3 | Select Applications | Click on the Select Applications link to add applications to this group. |
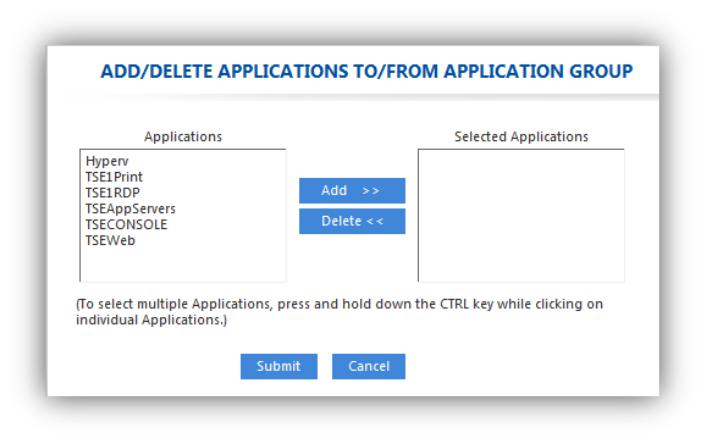
Adding Applications to Group
When creating an Application Group, you can add applications to it using these steps:
-
On the Create Application Group screen click on the Select Applications link. The Add/Delete Applications to/from Application Group screen appears.
-
Select the applications in the Applications table that you want to apply to this group and click Add. The selected applications move from the Applications table to the Selected Applications table on the opposite side of the screen.
-
Click Submit to select the applications for this group, or click Cancel to abort. The popup window will close and the name of the applications will appear in the Selected Applications box on the Create Application Group page.
-
Click Submit to save changes or click Reset to remove all data from the screen.
Note
Changes to Application Groups are not applied until after you have clicked the Submit button on the Create Application Group or the Modify Application Group screen.
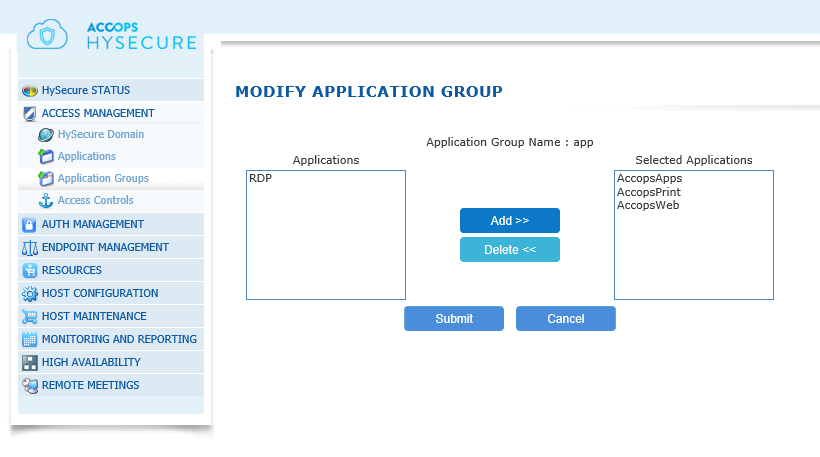
Modifying Application Groups
-
In the management console, expand Access Management \ Application Groups.
-
Select the application you wish to edit and click Modify. The Modify Application Group screen appears.
-
To add application(s) to the group, select names from the Applications table.
-
Click Add. Added applications will be listed in the Selected Applications table.
-
To delete applications from the Application Group,
-
Select applications from the Selected Applications table.
-
Click Delete. The applications will return to the Applications table on the opposite side of the screen.
-
-
Click Submit to update the list of applications for this group or click Cancel to abort.
Deleting Application Groups
-
When in the Application Group screen, click on select all Application Groups.
-
Click on the Check all the checkbox for the Application Group(s) you want to delete. To checkbox below the table.
-
Click Delete to delete the selected Application Group(s). When prompted for deletion confirmation, click OK to delete the group(s) or click Cancel to abort.