Enabling Device Access Control
Enabling Endpoint Protection Based Access Controls

With end point protection based access controls, Administrator will have more control over client network traffic by using HySecure client. Administrator can disable Internet access, Deny HySecure access if proxy is enabled or disconnect all active connections if client is connected to HySecure server.
For creating Endpoint Protection based access control,
- Go to Accops HySecure management console \ Access control management.
- Create an Access control type as Endpoint Protection.
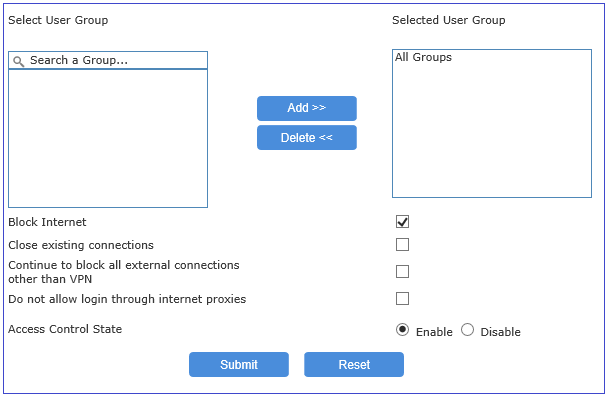
- Close all Existing connections and Keep VPN Session Safe**
- In access control management, create access control type Endpoint Protection.
- If close existing connections is enabled, when the user logs in previously connected external packets will be disconnected.
- If continue to block all external connections other than VPN is also turned ON, then no external connections are allowed. HySecure VPN client will keep checking for applications that are connected to external servers and will kill those applications.
- Disable Internet for end users.
- In access control management, create access control with Endpoint Protection policy type. If Block Internet is enabled for the user, Internet access will be disabled for the user after login.
- Do not allow login through internet proxies. If proxy is enabled on client machine's browser, end user will not to be allowed to login to HySecure VPN Gateway.
Creating Access Controls
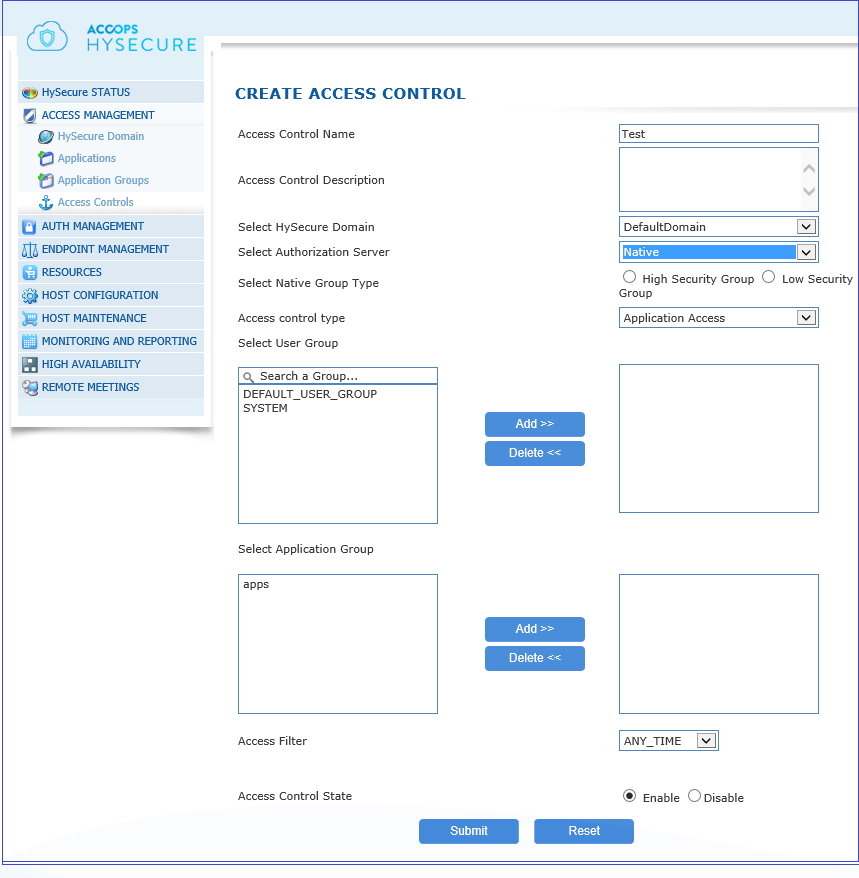
- In the management console, click Access Management and then choose Access Controls. Click on the Add button.
- Give the Access Control a Name and optionally a description.
- In the Select Authorization Server dropdown menu choose your Authorization server from which to fetch list of groups.
- Native: Select Native to use HySecure local database groups. You can filter the Native local groups by clicking the radio button for High Security Group and Low Security Group.
The following default groups can be used for authorization when using local database (Native):
- DEFAULT_USER_GROUP: All users and groups
- SYSTEM: All Security Officers and administrators.
- DEFAULT_BA_USER_GROUP: All users authenticating with basic username/password/token.
- Active Directory / LDAP: If you have setup AD / LDAP as an authorization server choose the server from the dropdown menu.
The following default group can be used for authorization when using AD/LDAP server:
All Groups: All groups exiting on Ad/LDAP server. In this case the application group would be available to any user authorized by AD/LDAP server.
- Radius: The following default group is used for authorization when using RADIUS server:
-
DEFAULT_RADIUS_USER_GROUP: All users authenticated and authorized by RADIUS server.
-
In Access Control Type choose Device ID or Endpoint Protection type policy to create an ACL for restricting the number of devices per user and type of authentication or else choose Application type in order to define which Application Groups the user group has access to.
- In the Select User Group box select the User Group you wish to create an access control for from the list and click Add.
- In the Select Application Group click on the Application Group to which access is required and click Add. The Application Groups already assigned to a User Group are not shown in the list. Only BA Application Groups are shown in the list for BA, AD/LDAP, and RADIUS User Groups.
- Click on the Access Filter drop-down arrow and select the access filter you wish to assign for the Application Group in the same row. The users belonging to the selected User Group can now access the applications in the Application Group during the time slot provided by the access filter.
- Click to Enable or Disable ACL in Access Control State.
- Click Submit to create access control or click Reset to clear all data from the screen. A success message confirms that the access control is created.
Editing Access Control
- In the management console, click Access Management \ Access Controls.
- Click on the check box for the Access Control you want to edit.
- Click Modify to update the access control(s). You can modify multiple access controls at the same time.
Deleting Access Control
- In the management console, click Access Management \ Access Controls.
- Click on the check box for the Access Control you want to edit.
- Click Delete to delete the selected access control(s).
- When prompted for deletion confirmation, click OK to delete the access control(s) or click Cancel to abort.