Installation on AWS
Prerequisites
- Existing or New Tenant in AWS
- Global AWS Admin Access
- Role : Owner
- Download putty, puttygen
Steps
- Create and launch an EC2 instance
- Create Security group for access permissions
- Configure Hysecure
- Download & Install Hysecure client
Step 1 Create and launch an EC2 instance
-
Launch AWS management console. Select the region in which you want to setup your instance.
-
Search and select EC2

-
Click Launch Instance

-
Selecting the image by clicking Community AMI

-
Search Hysecure and select HySecure(5200)

-
Select the type of instance (Memory CPU HDD) as suggested by Accops team

-
Click Review and launch
-
Select an existing Key pair or create a new one

Note
To access the server you need to create a key and keep it secure(putty is required)
-
Acknowledge the terms and conditions

The instance should be launched successfully now.
-
Go back to EC2 console and confirm that the instance is running

Now we need to change the security group and allow 443 port
Step 2 Create Security Group for access permissions
-
Click the Security group name (launch-wizard)

- Click Inbound rules.
- Click Edit

-
Click Add Rule

-
Select the instance and select the Public IP or DNS

Step 3 Configure HySecure
-
Enter the copied DNS or IP in browser and click Configure Hysecure now

-
Read the License Agreement carefully and accept the terms and conditions

-
Select the 2nd option Hysecure on AWS

-
Under Date and Time setting, set time and Time Zone and click Continue

-
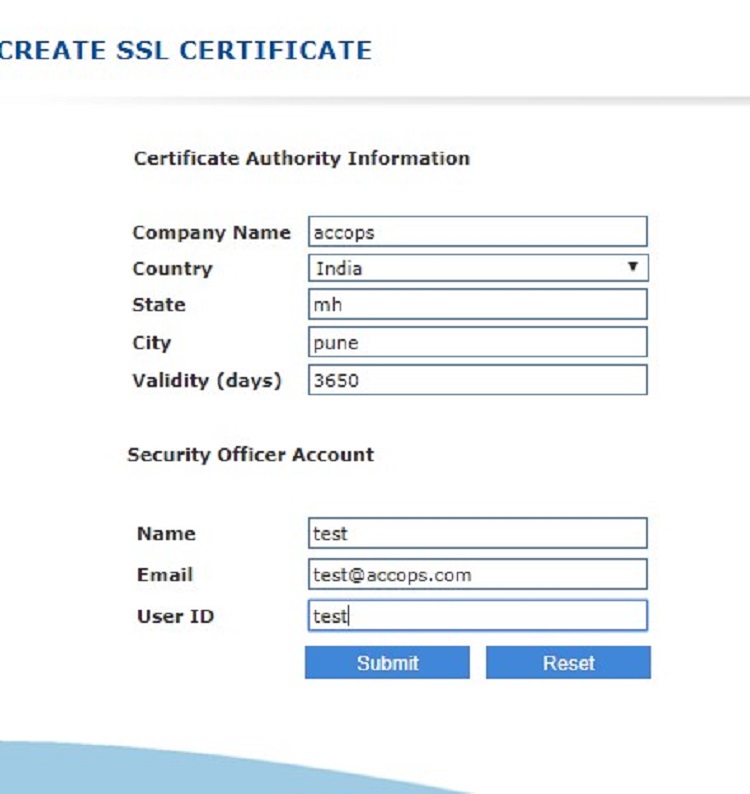
For Installation Type, select Standalone installation

a. For CA certificate, select Default Propalms CA
b. Provide details as mentioned int eh screen
 -
Copy passphrase and save it

Note
Do not close the browser and copy the passphrase and save it somewhere safe as this will be your first SO user
Step 3 Download & Install HySecure Client
-
Visit www.accops.com to download and install the latest Hysecure client. You will need Administrator permission to download hysecure client.
-
Download client from (https://propalmsnetwork-my.sharepoint.com/personal/support_accops_com/_layouts/15/onedrive.aspx?id=%2Fpersonal%2Fsupport_accops_com%2FDocuments%2FDOWNLOADS%2FACCOPS%2FACCOPS%20HYSECURE%2FHySecure%20Windows%20client%2F5105%2FVPNClientSetup%2Eexe&parent=%2Fpersonal%2Fsupport_accops_com%2FDocuments%2FDOWNLOADS%2FACCOPS%2FACCOPS%20HYSECURE%2FHySecure%20Windows%20client%2F5105&cid=1ebd90b2-6c82-41de-86fa-b7ef74d53578)
-
Login to the Console and enter the public IP or DNS of AWS instance.

-
Click Login with a digital certificate

-
Click Action to enroll the certificate.
-
Click Rnroll Client SSL certificate.
-
Enter the Passphrase which was saved earlier while setting up.
-
Set password for the SO user login. It will pop up that certificate is successfully imported.

-
Login into the Management console.

