Azure Configurations
Azure Logic App Trigger Interaction With Controller
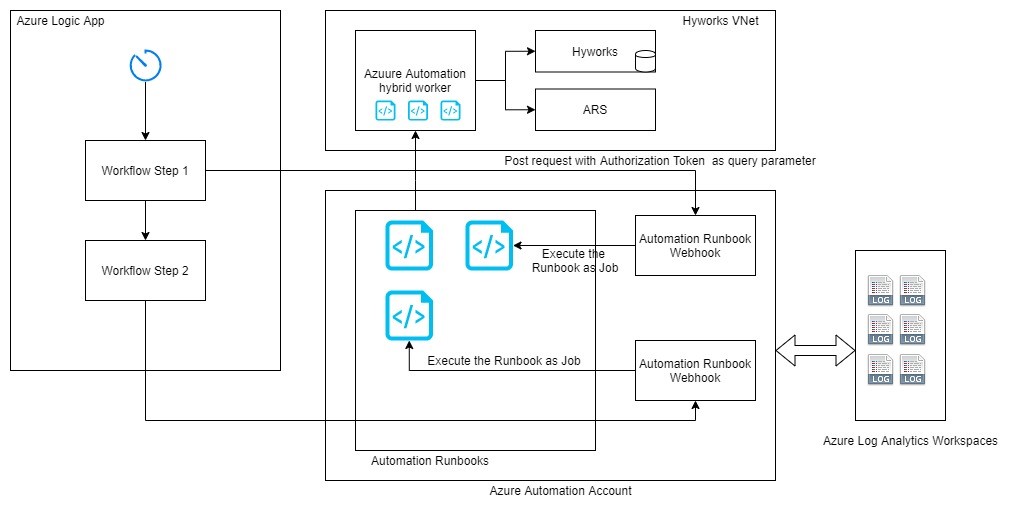
Power management needs an external trigger/scheduler to calculate the SHD servers to be powered on or powered off for session team based on applicable capacity plan. Currently we have Azure Logic Apps implementation as trigger/scheduler which helps to trigger an event to Runbooks and Runbooks execute scripts to calculate the SHD servers to be powered on or powered off for session team based on capacity plan. Azure Logic Apps and Runbooks can only be used if Controller is installed on Azure infrastructure.
Refer Azure Configuration section for configuring and managing Azure Logic Apps and Runbooks.
Below Diagram shows the interaction of Logic App with Controller which is installed on Azure Cloud VM.

Figure: Logic App triggered interaction with controller
Architecture
Azure Entities Used in Power Management
-
- Management Controller as Worker (Recommended to re-use controller VM)
Power Management Configuration in Azure
Prerequisites
-
Azure Portal Creds
-
Azure Subscription Details
Create Azure Resource Group
A resource group is a container that holds related resources for an Azure solution.
-
Already have a resource group - In case you already have a resource group and you want to use the same for the installation, you can skip this step.
-
New Resource group - Follow the instructions mentioned here to create a Azure Resource group.
-
Note down the resource group name
Note
The location of the Azure resource group should be the same as the location of the other entities.
Create Azure Log Analytics Workspace
A Log Analytics workspace is a unique environment for Azure Monitor log data. Each workspace has its own data repository and configuration, data sources and solutions are configured to store their data in a workspace.
- To create Azure Log Analytics Workspace follow the instructions mentioned here.
Note
Use the same resource group and respective location while creating the workspace.
Create Azure Automation Account
Azure Automation delivers a cloud-based automation and configuration service that supports consistent management across your Azure and non-Azure environments. It comprises process automation, configuration management, update management, shared capabilities, and heterogeneous features. Automation gives you complete control during deployment, operations, and decommissioning of workloads and resources
- To create a new Azure Automation Account, follow the instructions mentioned here.
Note
Use the same resource group and respective location while creating the automation account.
Link Azure Automation Account & Log Analytics Workspace
The Azure Automation account should be linked with the Azure Log Analytics workspace for it to function properly and with respective monitoring.
Follow the below listed steps to link the newly created Automation Account with newly created workspace :
-
Log in to https://portal.azure.com/
-
In Search Resources, type Automation Accounts. Select Automation Accounts Services in the drop down.
-
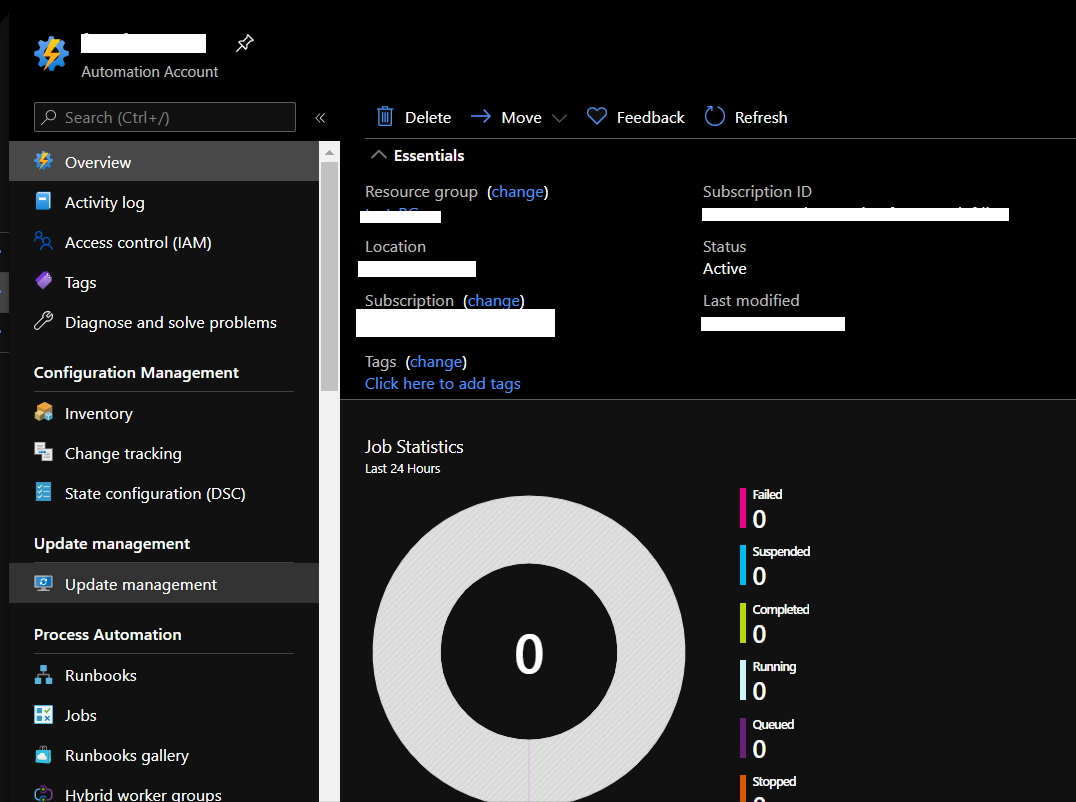
In the List of the Azure Automation Accounts, select the one created recently.
-
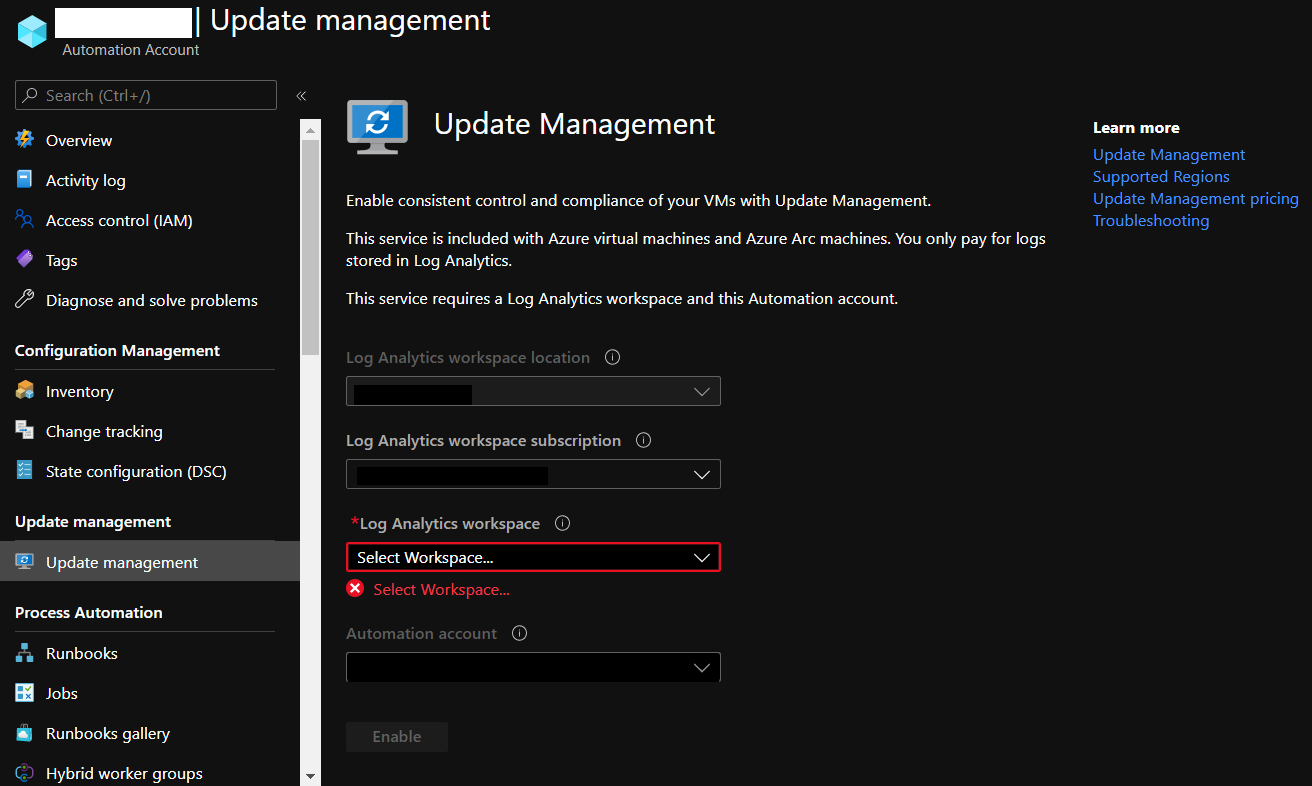
Select Update Management.
-
Select the workspace along with other details like Location, Subscription and Automation Account Name and click Enable.
-
After Enabling update management, in the left panel click Linked Workspace under Related Resources and you should see the details of the linked workspaces as follows:

Azure Hybrid Worker Group
Runbooks in Azure Automation might not have access to resources in other clouds or in your on-premises environment because they run on the Azure cloud platform. You can use the Hybrid Runbook Worker feature of Azure Automation to run runbooks directly on the machine that's hosting the role and against resources in the environment to manage those local resources. Runbooks are stored and managed in Azure Automation and then delivered to one or more assigned machines.
Prerequisites
You should have a minimum of 2 Azure Windows 2019 Data Center VMs so that they can be added as hybrid worker group nodes to the azure automation account. Please note that they should be under the same resource group but in the desired Azure VNet. We can add HyWorks Management controllers as worker in hybrid worker group , to reuse VM. (recommended)
Important
Make sure that the required ports are open as per mentioned here.
Configure VM (HyWorks Management controller) as Hybrid Worker Group Node
On the VM, perform the following steps to automate the installation and configuration of the Windows Hybrid Worker role using the PowerShell script New-OnPremiseHybridWorker.ps1.
-
Open Windows PowerShell command line shell and run the script as Run as administrator.
-
Run the PowerShell script as follows:
- Install-Script -Name New-OnPremiseHybridWorker
- cd 'C:\Program Files\WindowsPowerShell\Scripts'
- .\New-OnPremiseHybridWorker.ps1 -AutomationAccountName "
" -AAResourceGroupName " " -OMSResourceGroupName " " -HybridGroupName
-SubscriptionID "" -WorkspaceName " " - Script will ask you to log in to the azure account.
- The script will show a successful message after completion as “Registering the hybrid runbook worker...” and exit after successfully registering the node as a hybrid worker group worker.
*New-OnPremiseHybridWorker.ps1* performs the following steps: (informational purpose only)
1. Installs the necessary modules 2. Signs in with your Azure account 3. Verifies the existence of specified resource group and Automation account 4. Creates references to Automation account attributes 5. Creates an Azure Monitor Log Analytics workspace if not specified 6. Enable the Azure Automation solution in the workspace 7. Download and install the Log Analytics agent for Windows 8. Register the machine as Hybrid Runbook Worker -
Verify the deployment
-
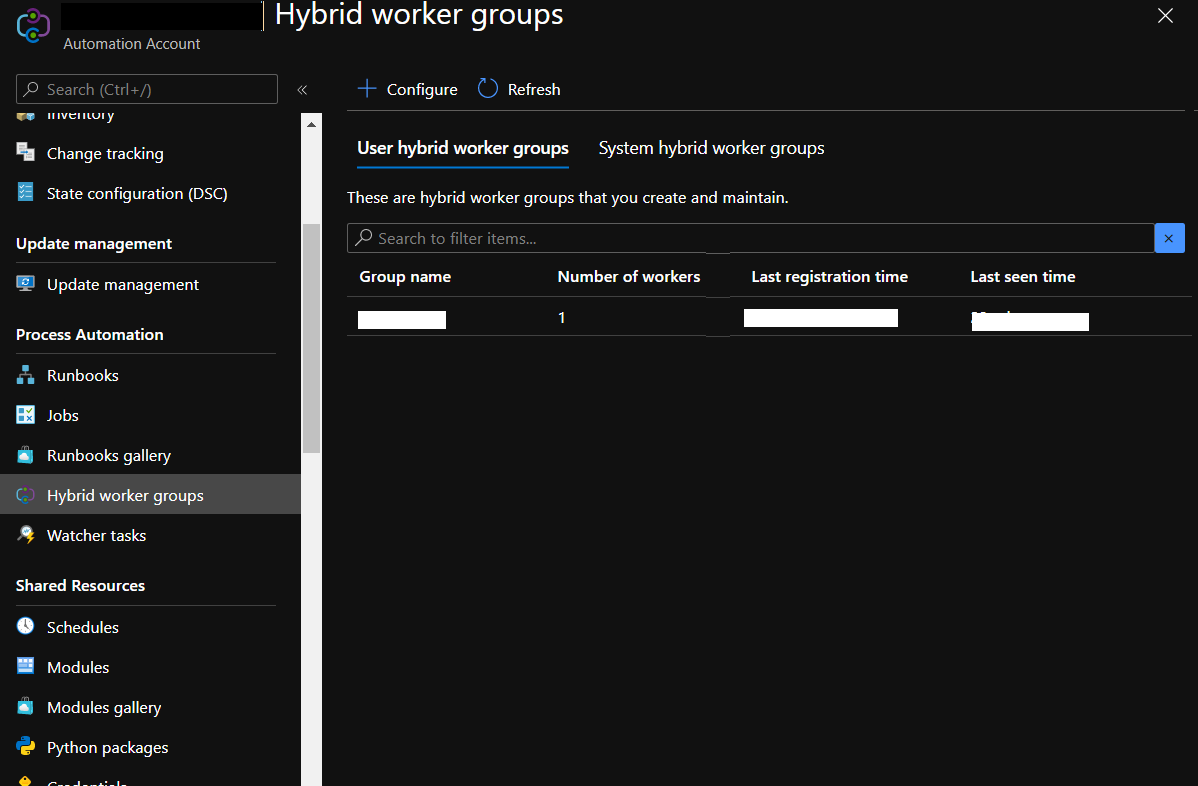
After the script is finished, the Hybrid Worker Groups page in your Automation account shows the new group and the number of members. If it's an existing group, the number of members is incremented. You can select the group from the list on the Hybrid Worker Groups page and choose the Hybrid Workers tile. On the Hybrid Workers page, you can see each member of the group listed.
-
You should also be able to see the VM under Log Analytics Workspace’s Agent Management as follows
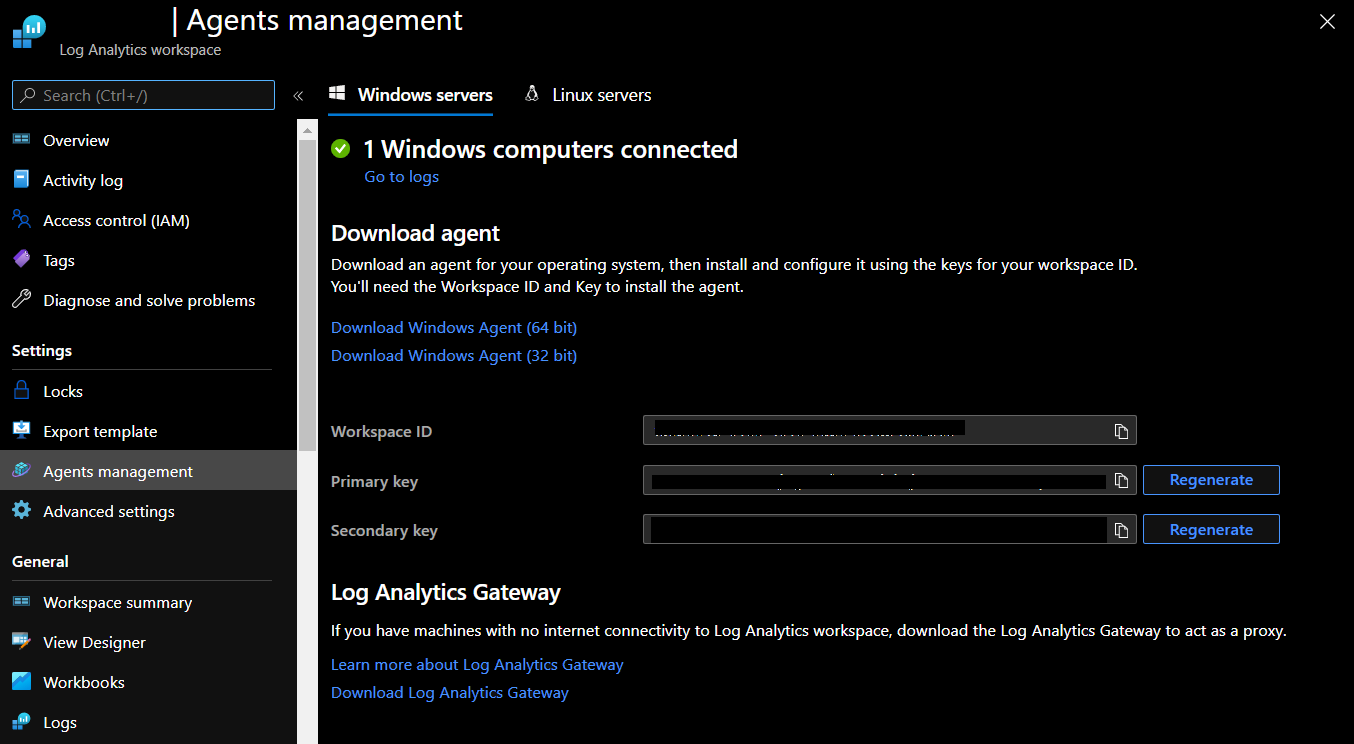
Repeat this step on other HyWorks Controller VM.
Azure Runbooks
Create Runbooks
You are required to create 2 Azure PowerShell Runbooks for this installation to be completed. Please follow the instructions mentioned below: -
-
Open your Automation account.
-
Click Runbooks under Process Automation. The list of runbooks is displayed.
-
Click Create a runbook at the top of the list.
-
Under Name enter Dynamic Scale, Runbook Type as PowerShell.
-
Click Create. The runbook is created, and the Edit PowerShell Runbook page opens.
-
Copy paste the content of the AccopsDynamicScale.ps1(Present here) into the edit pane.
-
Click Save to save a draft copy of the runbook and then click Publish to publish the runbook as the official version of the runbook in the account
-
Similarly create another runbook with the name ServerTeamFixedCapacityUpdate with Runbook Type as PowerShell , with content of AccopsPlanImplementation.ps1 and publish the same.
Create Webhooks
Every runbook should have a webhook published so that the Runbooks can execute on demand through logic Apps.
-
From the Runbooks page in the Azure portal, click the runbook to view the runbook details. Ensure that the runbook Status field is set to Published.
-
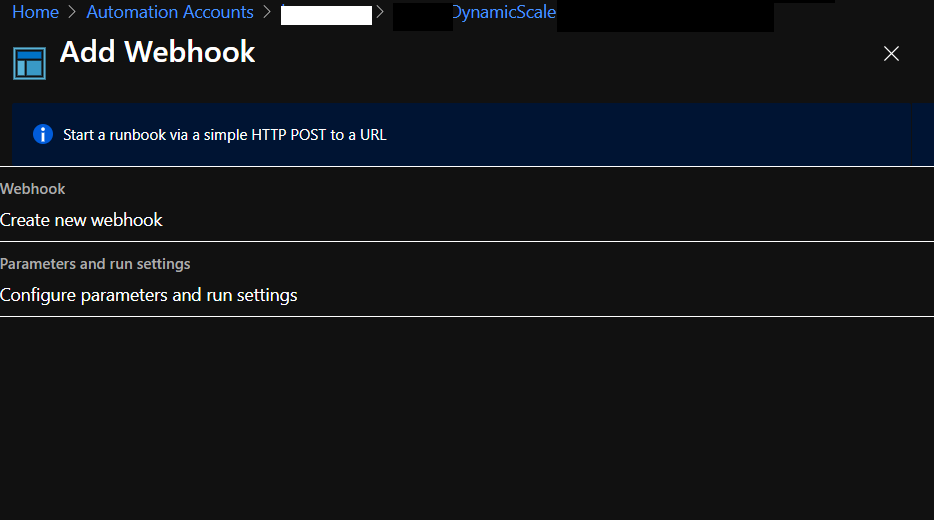
Click Webhook at the top of the page to open the Add Webhook page
-
Click Create new webhook to open the Create Webhook page
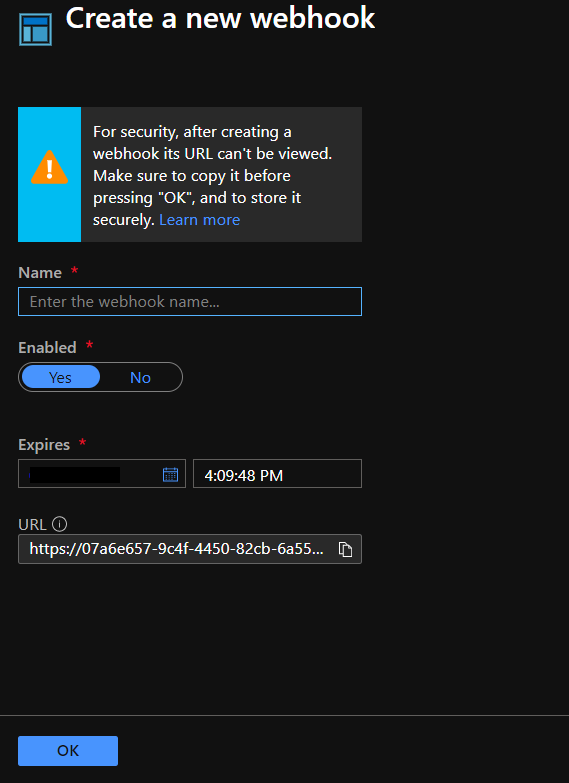
-
Fill in the Name and Expiration Date fields for the webhook and specify if it should be enabled. See Webhook properties for more information about these properties.
-
Click the copy icon and press Ctrl+C to copy the URL of the webhook. Then record it in a safe place.
- Please note that once you create the webhook you cannot retrieve this URL again.
-
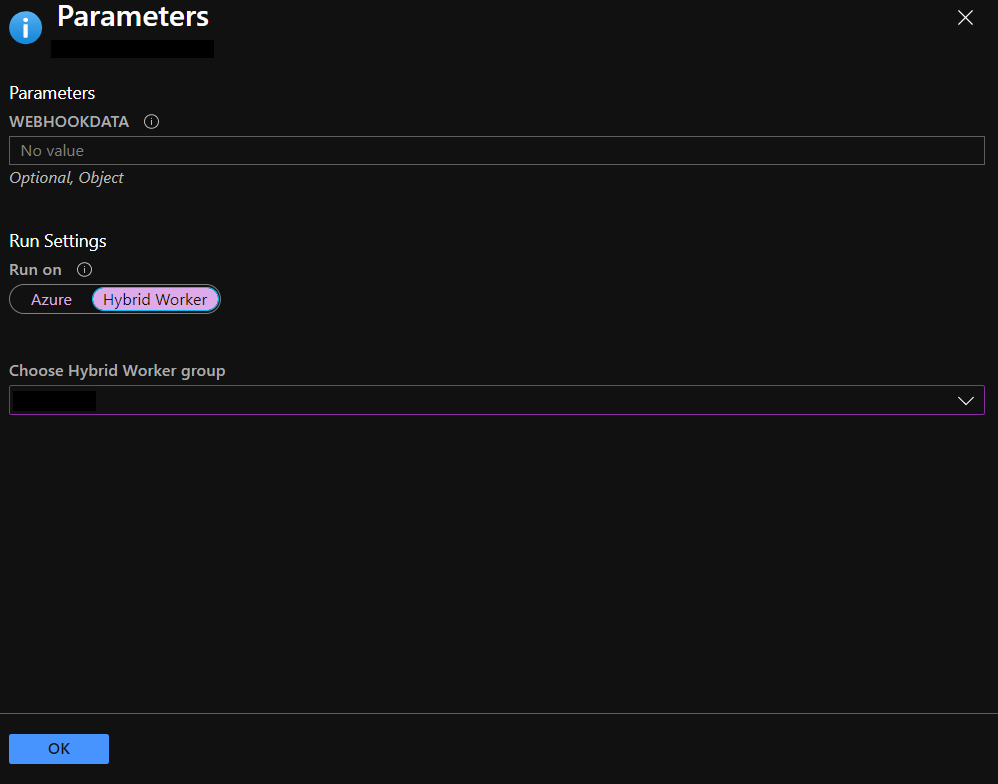
Click ok to go back to webhook creation page and select Configure parameters and Run Settings
- Select Hybrid Worker under Run Settings and choose the respective hybrid worker group from the drop down.
-
Click ok to go back to the webhook creation page and Click Create to create the webhook. You must create webhooks for both the runbooks created in the above-mentioned steps.
Runbook Execution Logs
Currently the Runbooks dump the logs on the hybrid worker group node. The path of the log file is received in the webhook data. The Runbook creates the log file and respective recursive path if not exists.
The log files created are per Runbooks.
Azure Logic Apps
Azure Logic Apps is a cloud service that helps you schedule, automate, and orchestrate tasks, business processes, and workflows when you need to integrate apps, data, systems, and services across enterprises or organizations. Logic Apps simplifies how you design and build scalable solutions for app integration, data integration, system integration, enterprise application integration (EAI), and business-to-business (B2B) communication, whether in the cloud, on premises, or both.
Dynamic Scale Azure Logic App
-
Sign into the Azure portal with your Azure account credentials.
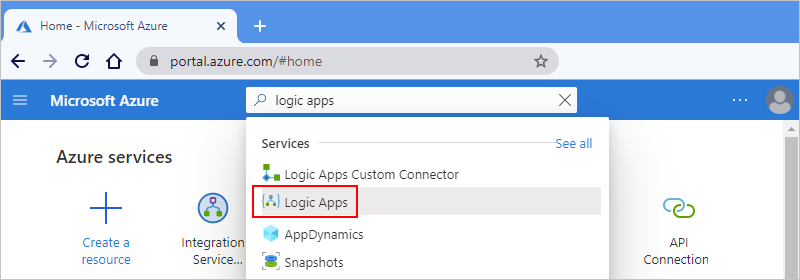
-
In the Azure portal search box, enter logic apps, and select Logic Apps.
-
On the Logic Apps page, select Add.
-
On the Logic App pane, provide details about your logic app as below:-
- Select the same resource group as used for the above entities.
- Select the location as same as for the above entities.
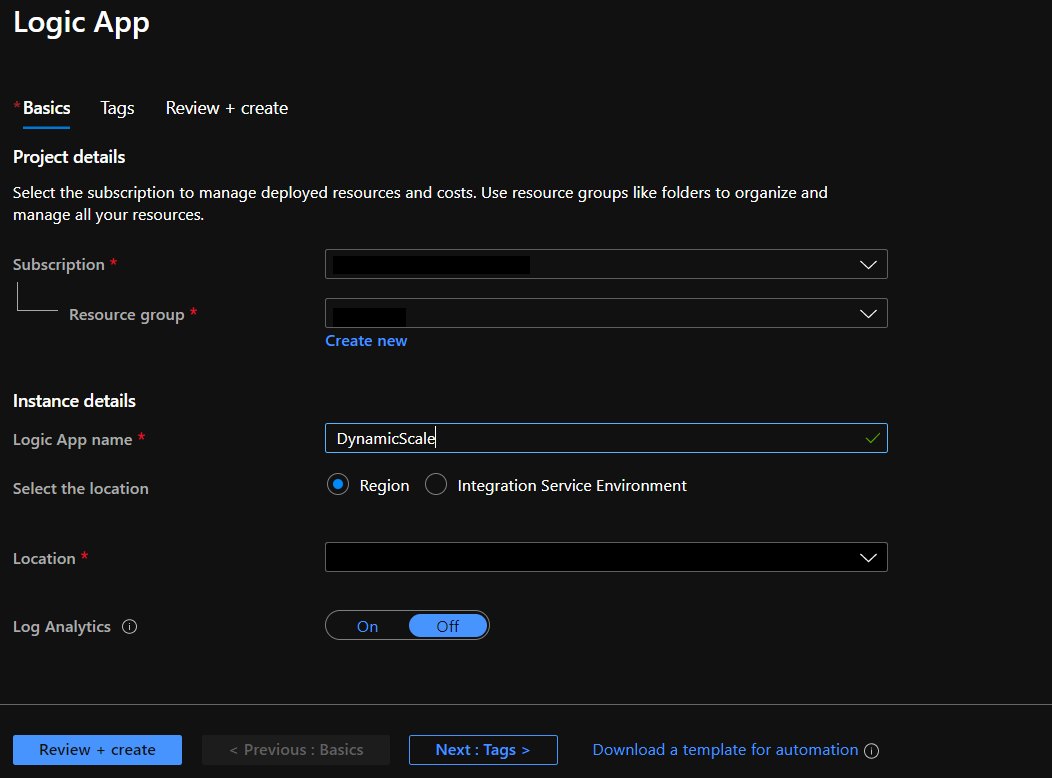
-
When you're ready, select Review + Create. Confirm the details that you provided, and select Create
-
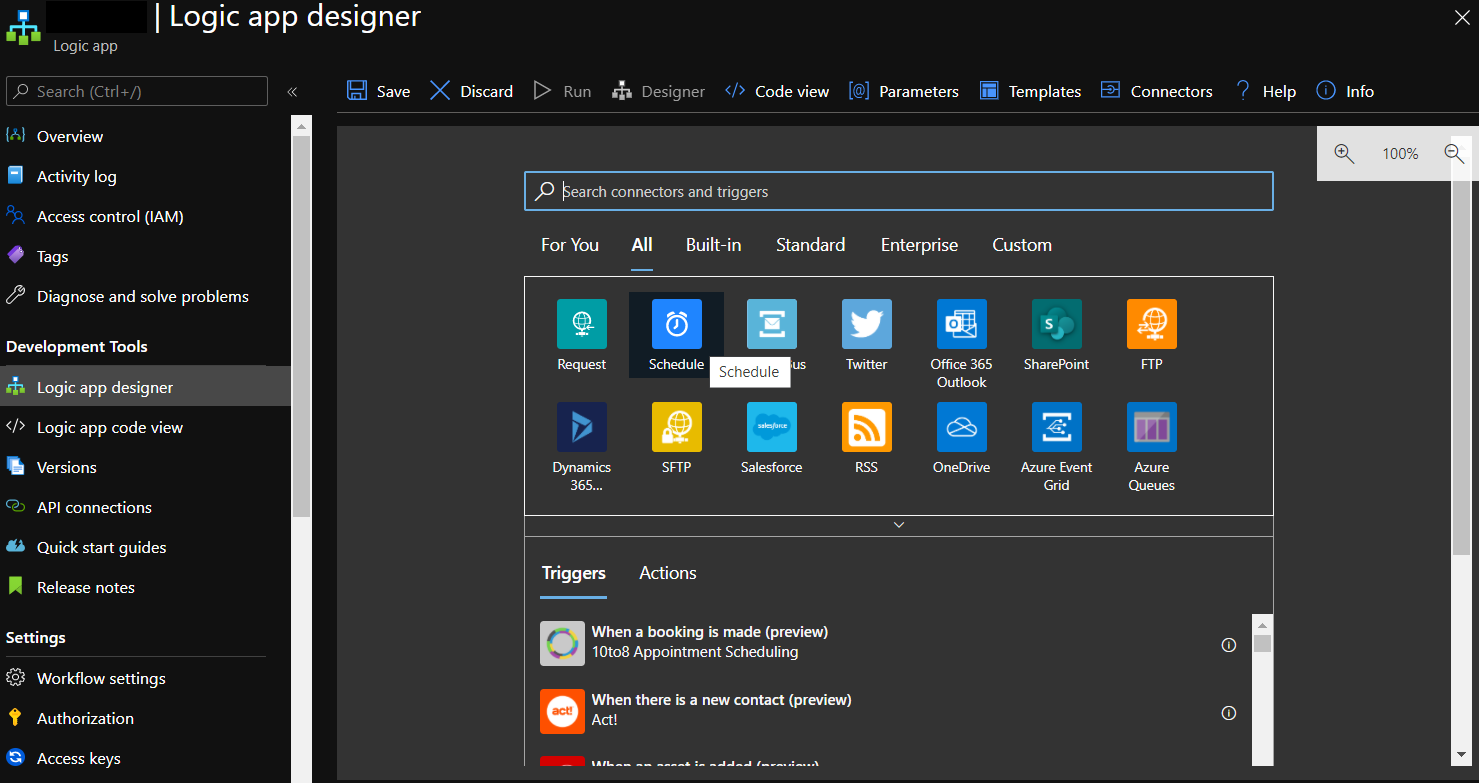
Once the logic app is created, open the Logic App Designer
-
Select the Schedule as Trigger

-
Click on +New Step to add another step in the logic App
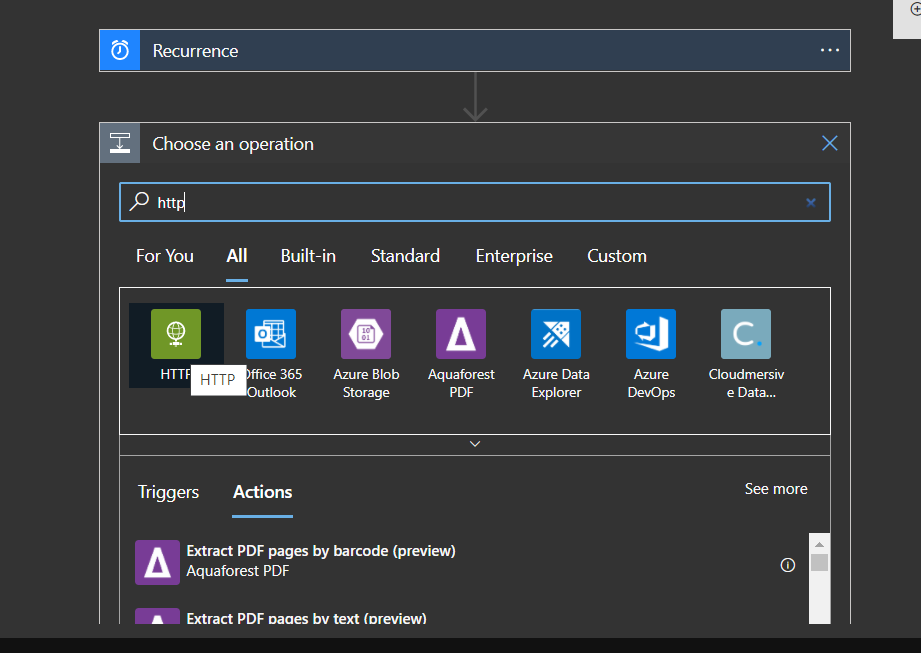
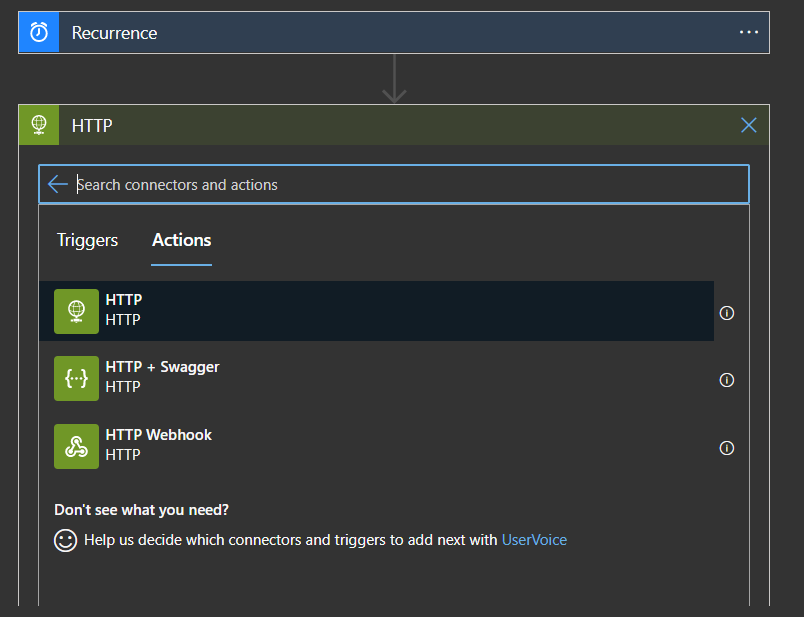

-
In the URL section, please paste the Dynamic Scale Runbook’s Webhook and under the Body please paste the following (Please note that you must update the highlighted values ):
{ "HwInitialEndpoints" : ["https://<HyWorks-Endpoint>"],"ResMgmtApiPath" : "/ResourceManagementController.svc/api","HwNodesApiPath" : "/node", "ActionApiPath": "/action","GetHyWorksNodeApiTimeOut" : 10, "ApiTimeOutInSecs": 120, "ForceLogOffUser": false, "ForceShutDownDelayInSecs": 3600, "GetDesktopProviderApiPath": "/desktopprovider/", "GetServerTeamApiPath": "/serverteam/", "IsForceShutdownEnabled": true, "LogFileName": "newdynamicscale.log", "LogFolder": "C:\Logs", "LogFileSizeInMB": 1,"LogFileCount": 10, "Message": "Logout from this desktop and relogin to get new desktop. This server planned to shutdown at [DisplayEndTime]", "MessageDisplayMechanism": 0, "MessageDisplayType": 0, "MessageIntervalInMins": 15, "MessageLevel": 3, "MessageTitle": "Save your work !", "NotificationPath": "/usernotification", "ReccurenceIntervalInMins": 15, "ResMgmtEndpoint": "https://<HyWorks-Endpoint>/ResourceManagementController.svc/api/", "SleepDuration": 300, "TeamId": "<TeamId>", "UpdateCapactityApiPath": "/capacity"}
-
Click Save to save the Logic App.
-
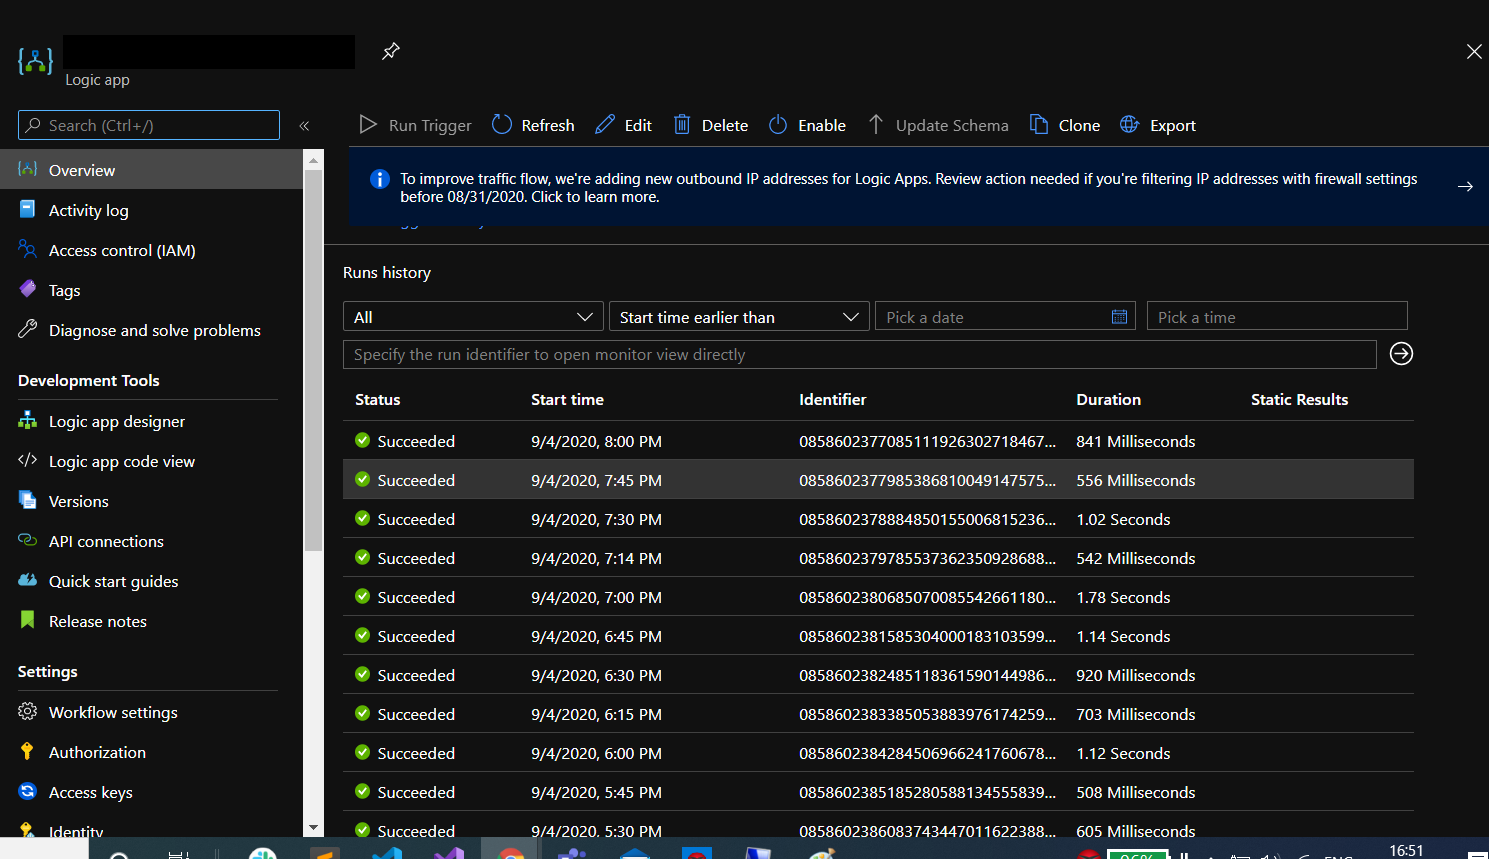
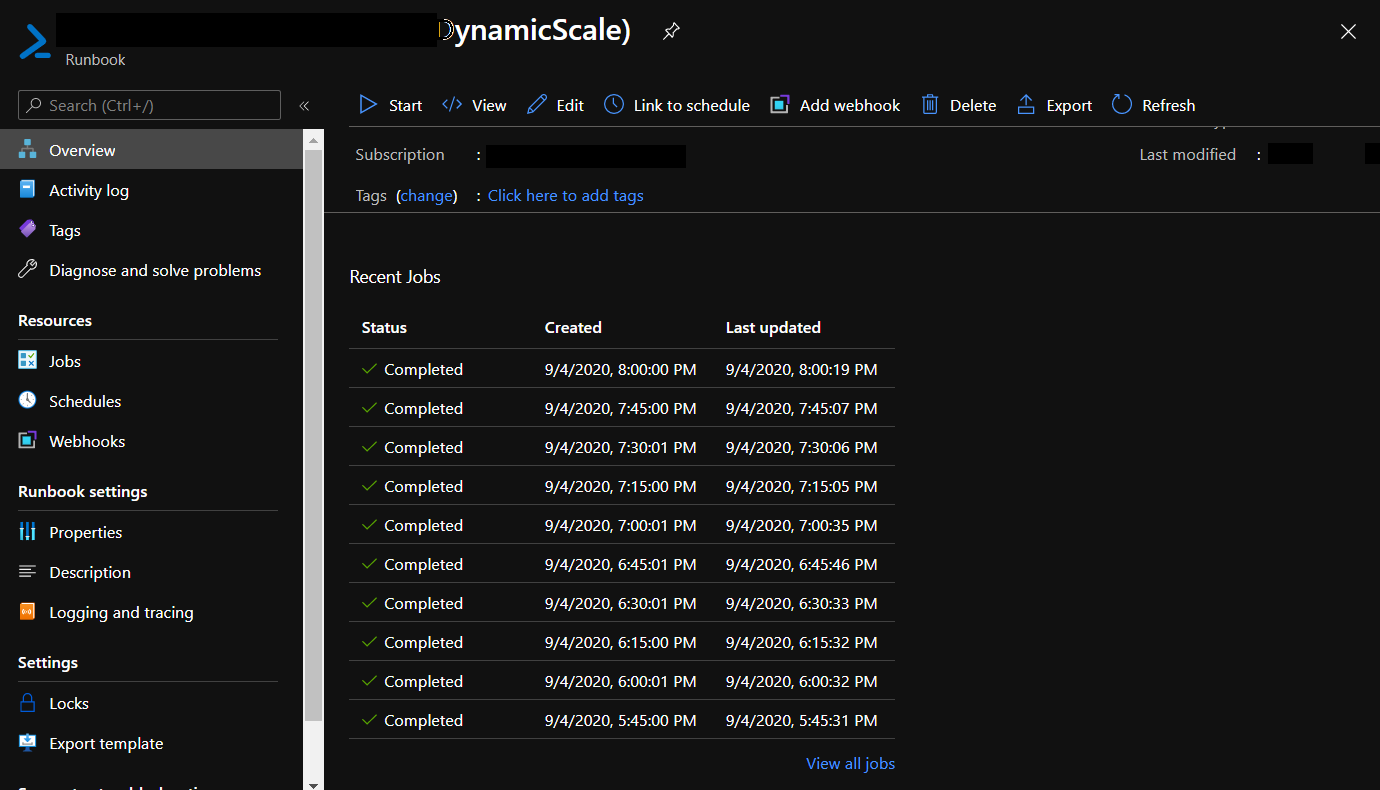
Make sure your logic app is enabled

-
You will be able to see the executions every 15 mins in Logic Apps Run History and respective Runbook’s Job Executions.
-
Parameter definition
-
ActionApiPath - Action Sub Api Path. Example = "/action"
-
ApiTimeOutInSecs - Resource Management API Time Outs
-
ForceLogOffUser - If Enabled, user will be logged out forcefully out of the session
-
ForceShutDownDelayInSecs - Give some time to the user before the VMs is shutdown forcefully
-
GetDesktopProviderApiPath - Get Desktop Provider API Subpath. Example = "/desktopprovider/",
-
GetHyWorksNodeApiTimeOut - API Timeout in secs for Get HyWorks Active Nodes
-
GetServerTeamApiPath - Get Server Team API Sub Path. Example = "/serverteam/",
-
HwInitialEndpoints - Array of Known HyWorks endpoints
-
HwNodesApiPath - HyWorks Get Nodes Sub API Path ="/node",
-
IsForceShutdownEnabled - If enabled, user will be given a configured time before shutting down the VM.
-
LogFolder - Full Directory path of the log file.
-
LogFileName - Name of the file to dump logs.
-
LogFileSizeInMB - Maximum size of file, new file will be generated if the current file exceeds this size.
-
LogFileCount - Maximum number of file to be created, old file will be deleted if file count exceeds this count.
-
Message - Message to be shown to the user. Example = Logout from this desktop and re-login to get new desktop. This server planned to shut down at [DisplayEndTime].
-
MessageDisplayMechanism - Display Mechanism to be used for message.
-
0 = Normal Message (Windows/Zenity)
-
1 = Virtual Channel (Windows only)
-
2 = Tray Agent (in future)
-
-
MessageDisplayType - Display type of the message. Only one type of message is active in SHD, if multiple messages to be show in SHD
- 0 - Resource Msg (Recommended) (to be used send regarding SHD shutdown)
- 1 - Maintenance Msg
- 2 - General Msg
-
MessageIntervalInMins - Interval for displaying the message.
- 0 - One time..
- 0> - Show message x after interval
-
MessageLevel - Level of the message
- 0 = Information
- 1 = Alert
- 2 = Warning (Recommended for shutdown)
- 3 = Error
- 4 = User Action Required.
-
MessageTitle - Title of the message.
-
NotificationPath - Notification Sub API Path. Example ="/usernotification"
-
ReccurenceIntervalInMins - Interval in mins of recurrence for this script.
-
ResMgmtApiPath - Resource management sub api path.
Example="/ResourceManagementController.svc/api". -
SleepDuration - Number of secs to sleep after showing the notification to users. (recommended in 1 secs)
-
TeamId - Id of the team to target.
-
UpdateCapactityApiPath - Sub Api Path for Update Capacity. Example="/capacity"
Capacity Plan Update Azure Logic App
-
Like the logic app creation for dynamic scale, logic app can be created for Max/Min Limits update on team. Since at the time of Dynamic Scale Logic App Creation, the details have already been covered, we will just focus on the logic app designer part.
-
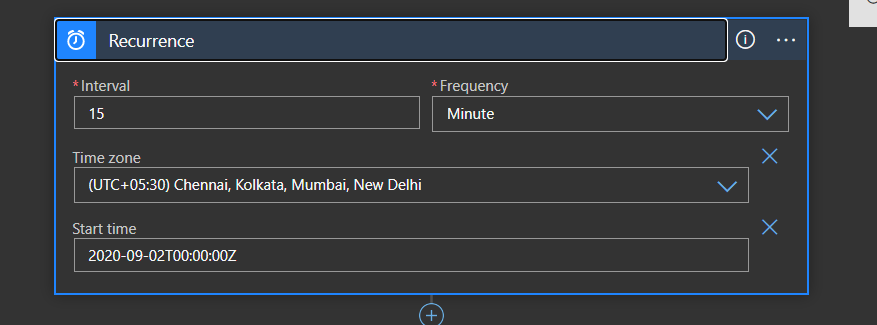
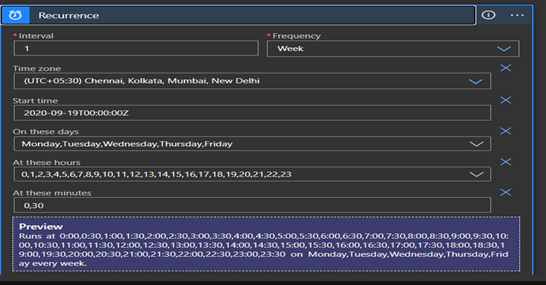
Create the Schedule of the logic app as per the requirement which can be as follows :
-
Add Next Step as Current Time, show as below( add using dynamic content)

-
Add Next Step as Convert Time Zone, shown as below :-
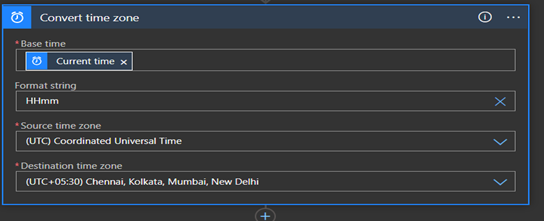
Note : Format string “HHmm”
-
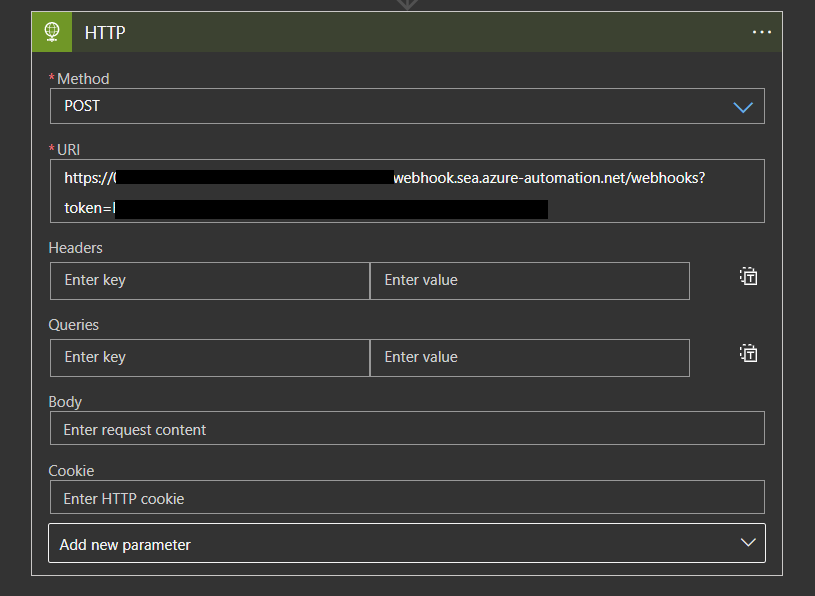
Add Next step as Http to invoke the Fixed Capacity Update runbook’s webhook as it was done while creating the http step for Dynamic scale logic app :-
-
In the URL Section paste the webhook URL of the Fixed capacity update runbook.
-
In the Body Request, copy paste the following -(Please note to change the highlighted fields):- {"HwInitialEndpoints": [ "https://<HyWorks-endpoint>" ], "ResMgmtApiPath": "/ResourceManagementController.svc/api", "HwNodesApiPath": "/node","GetHyWorksNodeApiTimeOut": 10, "CapacityPlanPath": "/capacityplan", "CurrentTimeInMins": @{body('Convert_time_zone')}, "ImplementPath": "/implement", "LogFileName": "PlanImplementation.log", "LogFolder": "C:\Logs", "LogFileSizeInMB": 1,"LogFileCount": 10, "PlanIds": [ "<PlanId>" ], "ResMgmtEndpoint": "https://<HyWorks-endpoint>/ResourceManagementController.svc/api/"}
-
-
Click Save and enable the Logic Apps.
Parameters definition:
-
CapacityPlanPath - Update Capacity sub api path. Example ="/capacityplan"
-
CurrentTimeInMins - Current time in mins(IST). Example ="@{body('Convert_time_zone')}"
-
GetHyWorksNodeApiTimeOut - Api Timeout in secs for Get HyWorks Active Nodes
-
HwInitialEndpoints - Array of Known HyWorks endpoints
-
HwNodesApiPath - HyWorks Get Nodes Sub Api Path =/node.
-
ImplementPath - HyWorks Plan implement sub api path. Example="/implement"
-
LogFolder - Full Directory path of the log file.
-
LogFileName - Name of the file to dump logs.
-
LogFileSizeInMB - Maximum size of file, new file will be generated if the current file exceeds this size.
-
LogFileCount - Maximum number of file to be created, old file will be deleted if file count exceeds this count.
-
ResMgmtApiPath - Resource management sub api path. Example=/ResourceManagementController.svc/api.
-
PlanIds - Array of plan ids to implement.