MSIX App Attach
About MSIX App Attach
MSIX is a Windows app package format that provides a modern packaging experience to all Windows apps. The MSIX package format preserves the functionality of existing app packages and/or install files in addition to enabling new, modern packaging and deployment features to Win32, WPF, and Windows Forms apps.
MSIX enables enterprises to stay current and ensure their applications are always up to date.
References
Operating Systems Supporting MSIX App Attach
-
Azure WVD: Windows 10 Enterprise Multi-session 2004 (or later)
-
Windows 10 Enterprise, Pro, or Education (version 2002 or later)(single session limit)
Note
Microsoft has not yet released Windows Serer official ISO to be used into production. Currently this feature is tested on-premise with "Windows Server vNext Insider Preview (build 20270)" and with Azure WVD (Windows 10 Enterprise Multi-session 2004).
Various Stages of MSIX App Attach
MSIX app attach has four phases that must be performed in the following order:
- Stage (System Context: once while first HyShell call, call via SessionHost Service)
- Register (User Context: on every user login, call via HyShell)
- Deregister (User Context: automated on user logout, nothing from SessionHost side)
- De-stage (System Context: optional on SessionHost service stop or automatically on VM reboot)
Staging
Staging involves two steps:
- Mounting the VHD(x) or CIM to the VM.
- Notifying the OS that the MSIX package is available for registration.
Registration
Registration makes a staged MSIX package available for your users. Registeration is on per-user basis. If you haven't explicitly registered app for that specific user, they won't be able to run the app.
There are two types of registration: regular and delayed.
Regular registration
In regular registration, each application assigned to a user is fully registered. Registration happens during the time the user signs in to the session, which might impact the time it takes for them to start using Windows Virtual Desktop.
Delayed registration (default)
In delayed registration, each application assigned to the user is only partially registered. Partial registration means that the Start menu tile and double-click file associations are registered. Registration happens while the user signs in to their session, so it has minimal impact on the time it takes to start using Windows Virtual Desktop. Registration completes only when the user runs the application in the MSIX package.
Delayed registration is currently the default configuration for MSIX app attach.
De-registration
De-registration removes a registered but non-running MSIX package for a user. De-registration happens while the user signs out of their session. During de-registration, MSIX app attach pushes application data specific to the user to the local user profile.
De-stage
De-staging notifies the OS that an MSIX package or application that currently isn't running and isn't staged for any user can be unmounted. This removes all reference to it in the OS.
Set registry to true and restart the Session Host Service.
HKLM\SOFTWARE\Accops\Controller\EDC\SESSIONHOST\(DestageAppsOnServiceStop)
MSIX App Attach in HyWorks
MSIX App Attach in Accops/ HyWorks
Install and package applications separately, publish and use them as per entitlements and requirements.
-
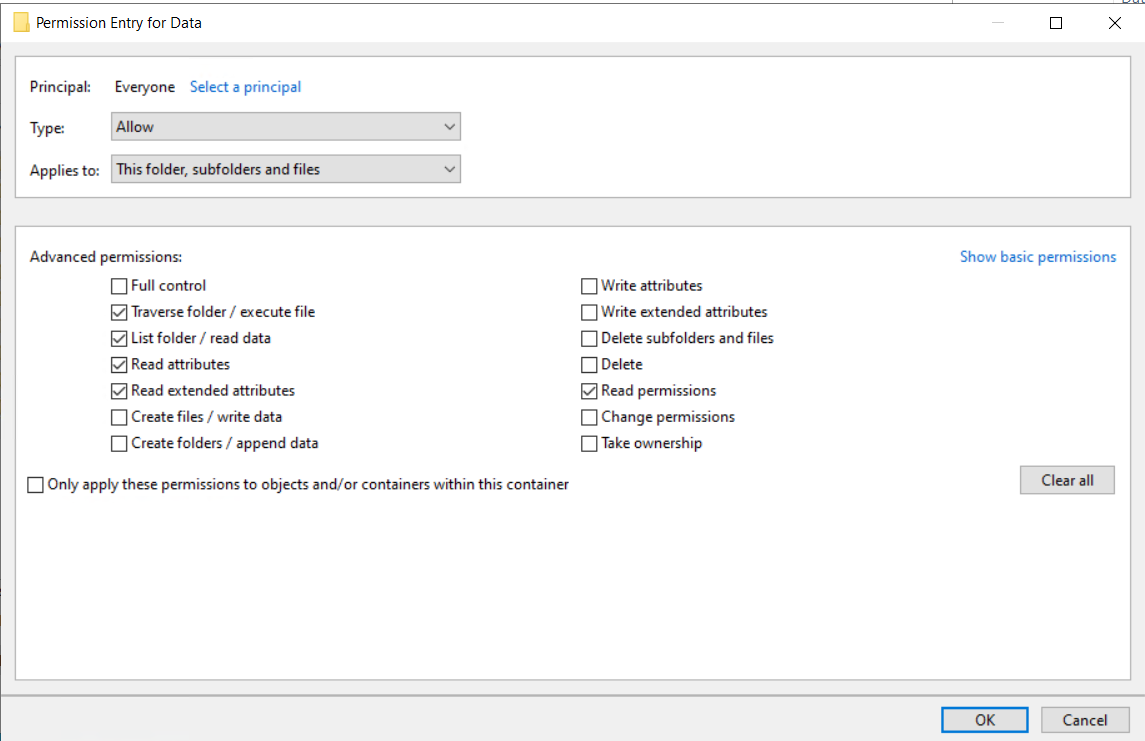
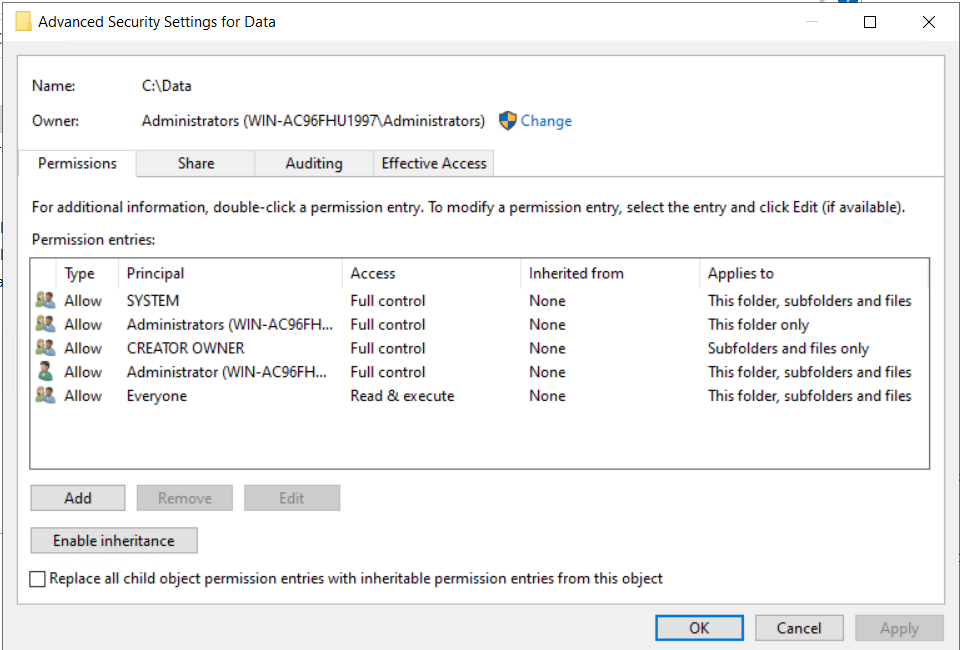
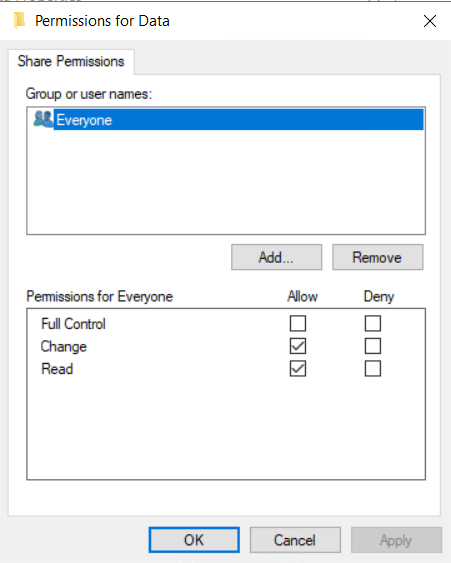
Copy to a remote/local shared location with appropriate permissions. Refer Network shared folder permission settings for more details
-
Prepare Session Host Server:
-
Update CN names (Semicolon ';' separated) into registry on each Session Host Server(s)
1. The information should be corresponding the certificate used for signing application package 2. Registry Location > HKLM\SOFTWARE\Accops\Controller\EDC\SESSIONHOST\\(AppAttachCnNames) -
Make sure registry flag IsDesktopCustomizationEnabled is also set to 'true' in SessionHost Registry.
-
Restart Session Host service.
-
-
Launch Shared Desktop from Accops Clients.
-
Now HyShell will get executed and user will be able to see attached applications shortcuts at the Desktop or Start menu (as configured).
How to create a MSIX file from installer setup file
Prerequisites (for creating MSIX package):
- Windows 10, version 1809 (or later)
-
Microsoft account may require to be logged-in
-
Install MSIX Packaging tool MSIX Packaging Tool
-
Launch MSIX Packaging tool from start menu
-
In MSIX Package Tool, "Select Task", click "Application package" icon.
-
Check "Create package on this computer".
-
Wait "Additional preparations" section to complete scanning, once done select all "recommended action items" and click on "Disable selected" button below.
-
Wait for the pervious step to finish then click on next.
-
Select the installer exe you want to make MSIX package for, followed by any arguments(if required). (e.g. C:\Installers\7z1900-x64.exe)
-
Signing Preference:
-
In "Signing Preference" select "Sign with a certificate (.pfx)" and browse to certificate file. For publishing apps with self-signed certificate, refer (steps to create self signed certificate)
-
If the certificate is password protected, type the password in the password box.
-
-
Enter the timestamp server as "http://timestamp.digicert.com" and press next.
-
Package Name (3 and 50 characters in length that consists of alpha-numeric, period, and dash characters.):
-
Required and corresponds to package identity Name in the manifest to describe the contents of the package.
-
Is not shown to the end user.
-
-
Package display name:
- Required and corresponds to package in the manifest to display a friendly package name to the user, in start menu and settings pages.
- Field accepts A string between 1 and 256 characters in length and is localizable.
-
Publisher name:
-
Required and corresponds to package that describes the publisher information.
-
The Publisher attribute must match the publisher subject information of the certificate used to sign a package.
-
-
Version:
-
Required and corresponds to the package in the manifest to describe the version number of the package.
-
This field accepts a version string in quad notation: "Major.Minor.Build.Revision". e.g. 1.9.0
-
-
Set description and press next.
-
Follow installation steps of the installer.
-
Click restart button if required.
-
Press next and say "Yes, mode on".
-
Press Next -> select destination path -> click on Create -> Close.
-
The final MSIX package will be available at the path provided.(e.g. 7Zip_1.9.0.0_x64__a222a09sg3tv2.msix)
How to create a App Attach Container (Virtual Disk (VHD)) from an MSIX file
Prerequisites to create VHD file:
- Windows 10 Enterprise, Pro, or Education [Update 20H2]
- Hyper-v role should be enabled
Use PowerShell script below to create a VHD from MSIX package created previously. Update following entries:
- $vhdSrc (full path for output vhd file)
- $msixSrc (full path of input msix file)
- $parentFolder (parent folder name to be used inside VHD)
- 50MB (replace with a approx size to be used by your package)
- Download and Unzip the msixmgr tool.
- Replace path [path]\msixmgr.exe for executable and update drive letter "f:" with a available one at below command:
msixmgr.exe -Unpack -packagePath $msixSrc -destination "f:\$parentFolder" -applyacls
Note
Change drive letter if error comes similar to "Failed with HRESULT 0x8bad0001 when trying to unpack
create_vhd.ps1:
#region variables
$vhdSrc = "c:\temp\7Zip_1.9.0.0.vhd"
$msixSrc = "E:\Dash\GIT-HUB\MSIX\7Zip_1.9.0.0_x64__a222a09sg3tv2.msix"
$parentFolder = '7Zip_1.9.0.0'
#endregion

#region cleaneup
try
{
    if (Test-Path -LiteralPath $vhdSrc)
    {
        Remove-Item $vhdSrc
    }
}
catch{}
#endregion


New-VHD -SizeBytes 50MB -Path $vhdSrc -Dynamic -Confirm:$false

$vhdObject = Mount-VHD $vhdSrc -Passthru
$disk = Initialize-Disk -Passthru -Number $vhdObject.Number
$partition = New-Partition -AssignDriveLetter -UseMaximumSize -DiskNumber $disk.Number
Format-Volume -FileSystem NTFS -Confirm:$false -DriveLetter $partition.DriveLetter -Force

E:\Dash\GIT-HUB\MSIX\msixmgr\x64\msixmgr.exe -Unpack -packagePath $msixSrc -destination "f:\$parentFolder" -applyacls

#Unmount the disk
Dismount-DiskImage -ImagePath $vhdSrc
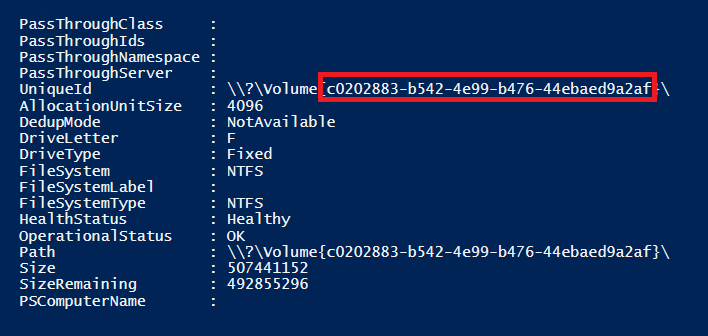
VolumeGuid
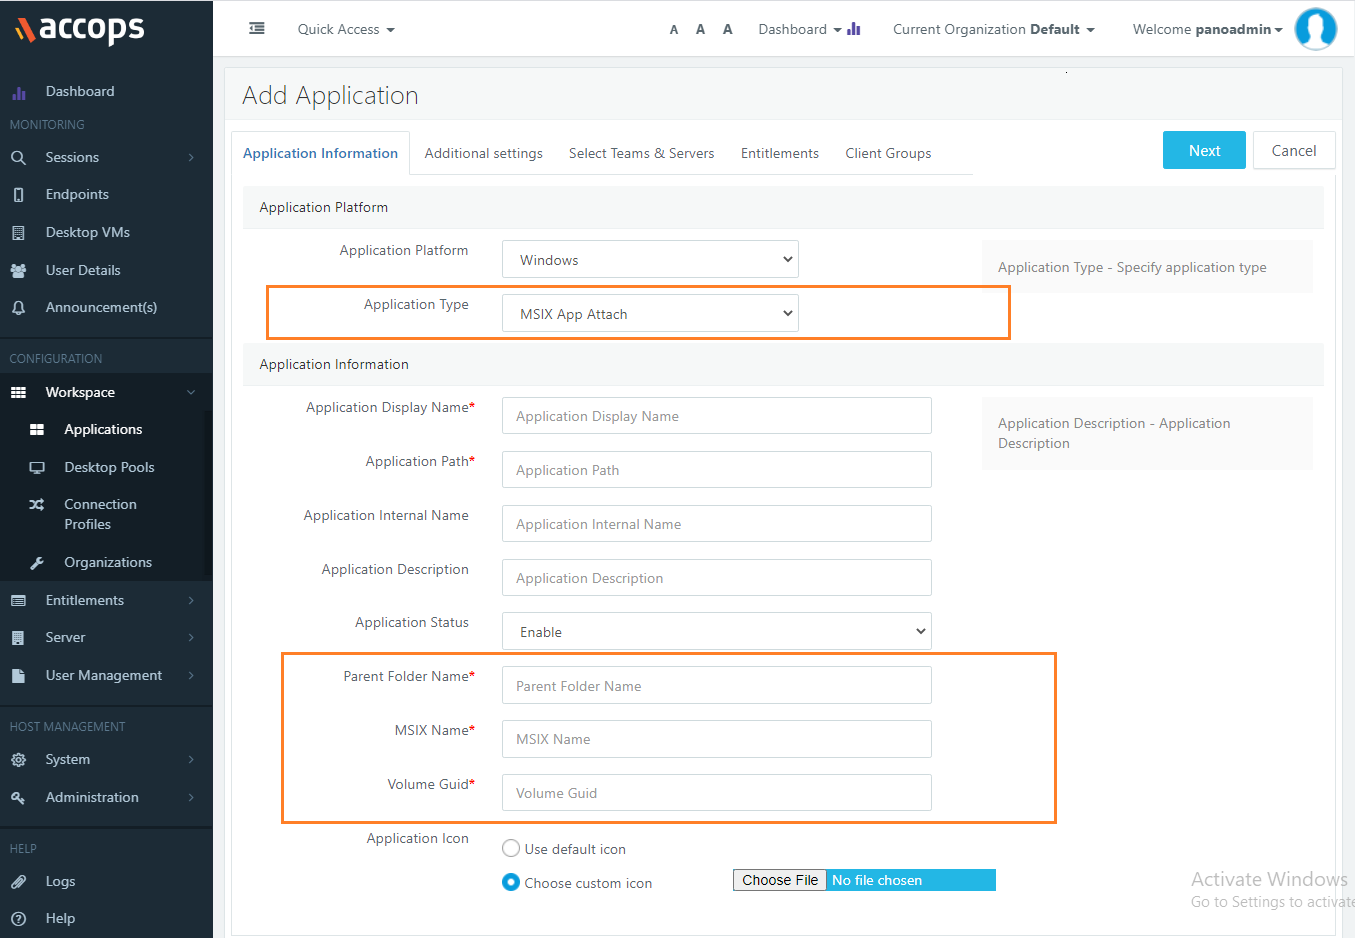
Configure MSIX App Attach into HyWorks Management Console
Settings to configure MSIX App into Application Information tab
- Application Type
- Option-1: "Installed App" (supports "Browse Application Details")
- Option-2: "MSIX App Attach" (hides "Browse Application Details")
- Parent Folder Name
- Parent folder name provided while VHD file creation
- e.g. "7zip"
- MSIX Name
- MSIX package file name (remove .msix extension)
- e.g. "7Zip_1.9.0.0_x64__a222a09sg3tv2"
- Volume Guid
- Value can be obtained from output of the create_vhd.ps1 script
- e.g. "9f273139-5476-4560-b64f-78d985f24684"
Only MSIX App related existing settings are now visible into Additional Settings tab
Verify that the provided path is available (green tick)
Limitations of MSIX App Attach Integration
-
MSIX App Attach applications are currently accessible from shared hosted desktops through HyShell only. MSIX App Attach applications are not supported in remote App or shell mode.
-
As described in above section, configuration will require access to session host server
Appendix
Create and configure self signed trusted certificate
How to create self signed trusted certificate
Launch PowerShell with admin privilege and execute command: (replace CN=Accops as per your requirement)
New-SelfSignedCertificate -Type Custom -Subject "CN=Accops" -KeyUsage DigitalSignature -KeyAlgorithm RSA -KeyLength 2048 -CertStoreLocation "cert:\LocalMachine\My"

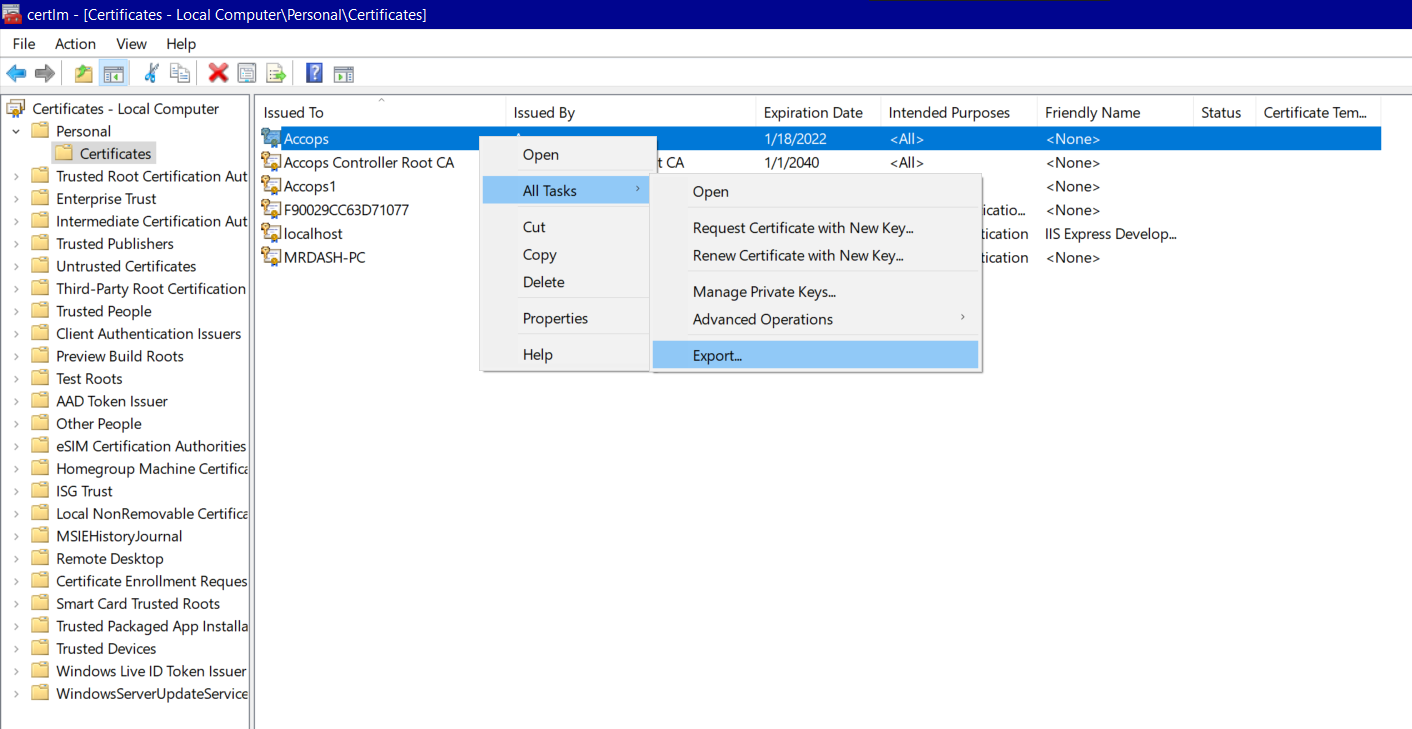
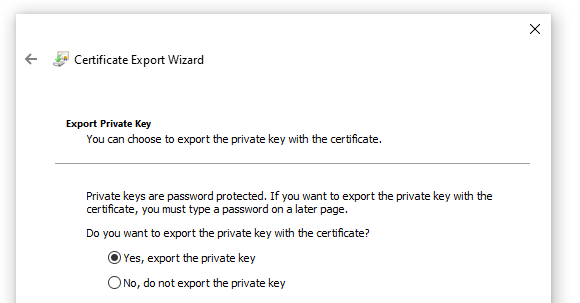
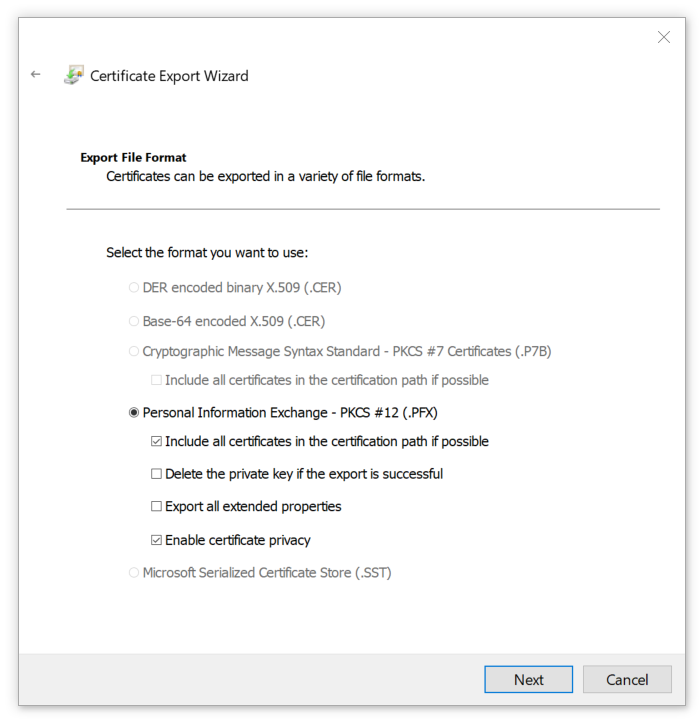
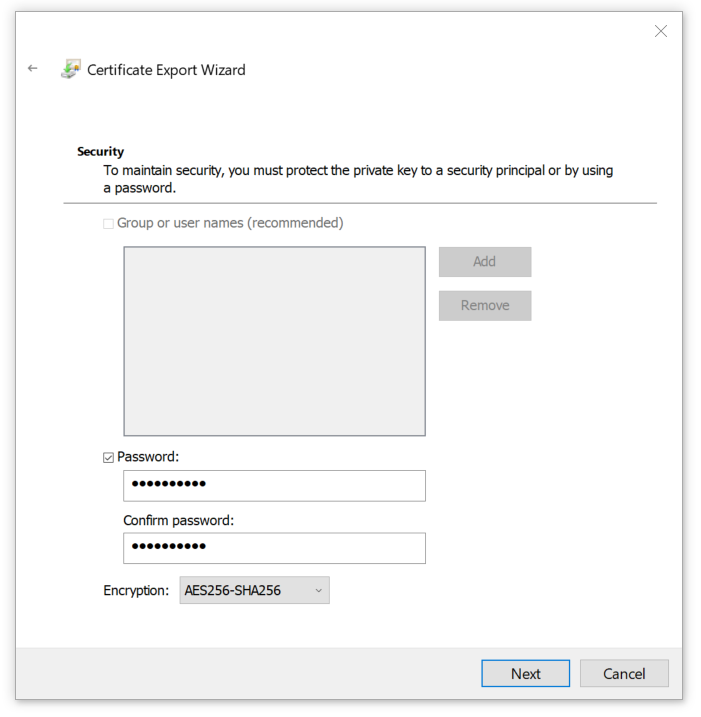
Export self-signed certificate
Export self-signed certificate into a .pfx file with privatekey and use it in the “Signing preference” menu.
Open "Manage Computer Certificates" from start menu [ or via run -> certmgr.msc] and follow the steps below:
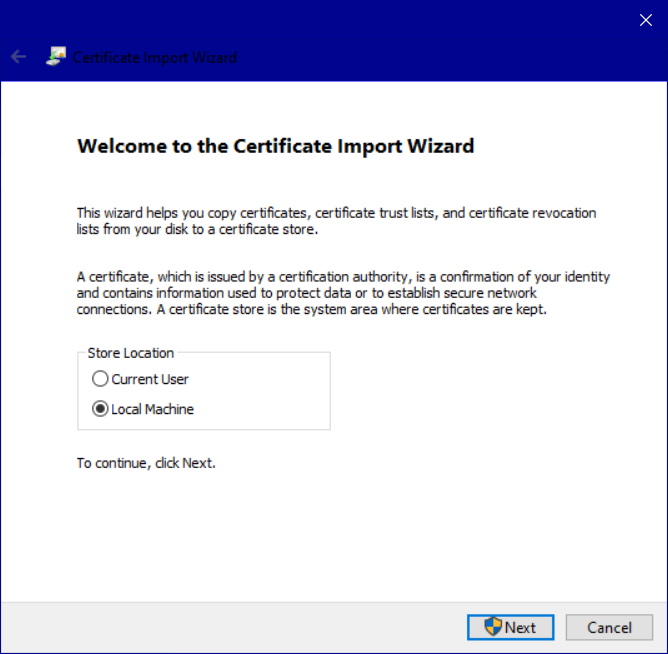
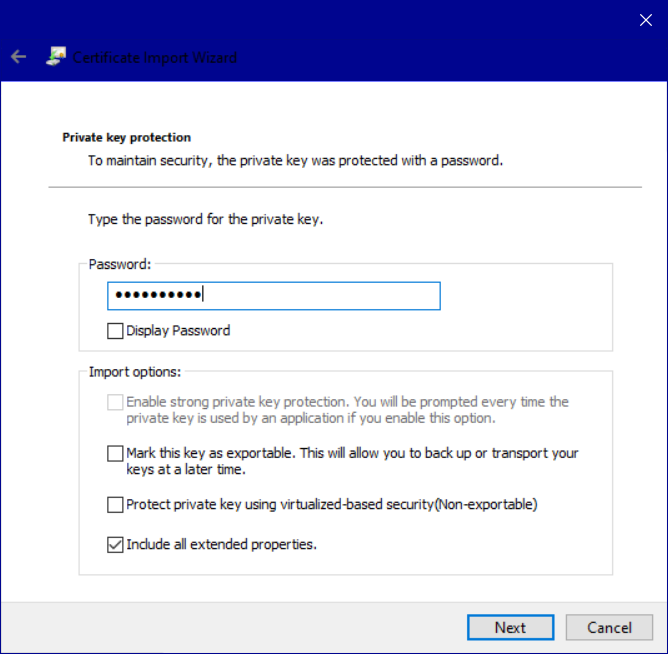
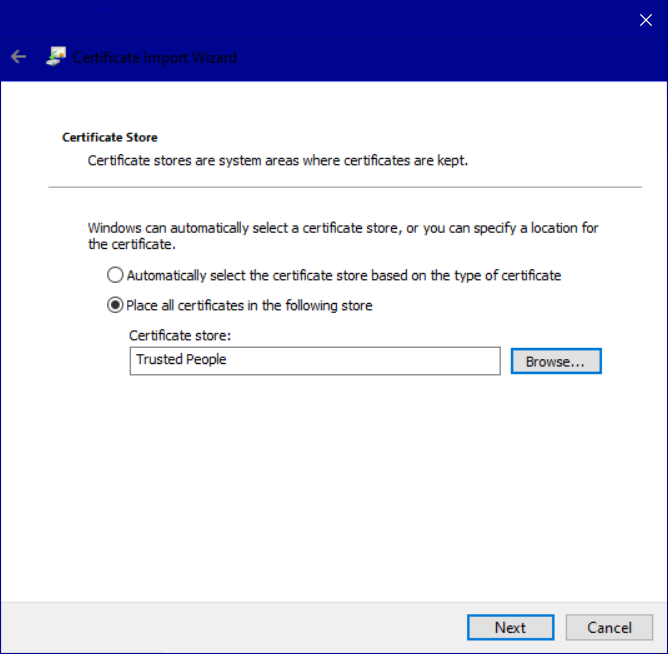
Import self-signed certificate
Import the previously exported self-signed certificate into the Trusted People LocalMachine store.

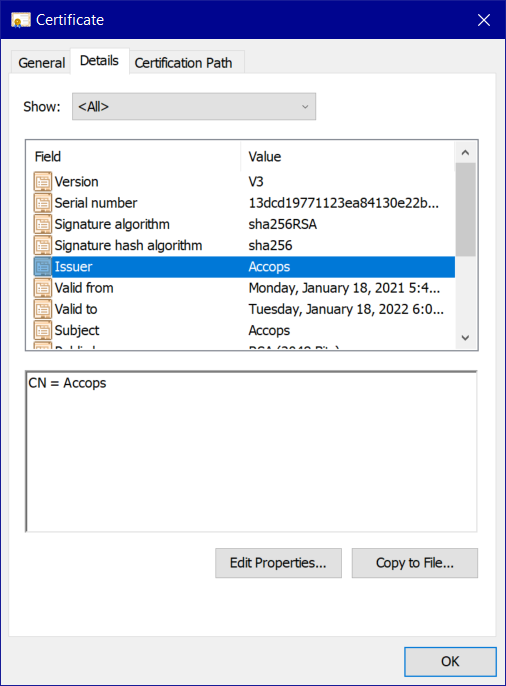
The CN must look like this…
### Network shared folder permission settings