Add Applications
Accops HySecure supports a wide range of multi-port TCP/UDP applications. Sections on this page explains how to add Accops TSE/VDI as an application and manage them.
Add Applications to Application Group
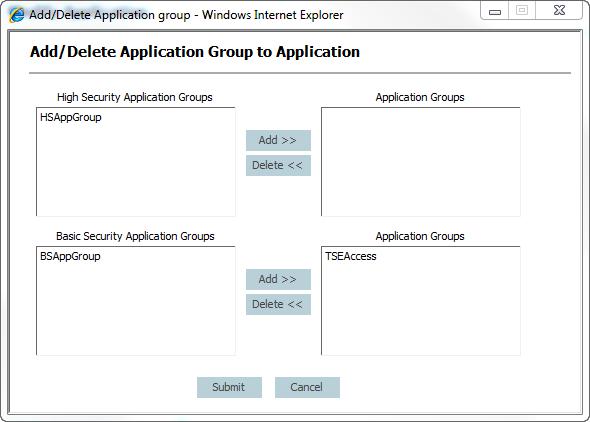
Applications can be organized into Application Groups. In the Create Application screen or the Modify Application screen, click the Add Application to Application Group link. The Add/Delete Application Group to Application screen should appear.
To add the Application to High Security Application Groups:
- Select the Application Group(s) in the High Security Application Groups table to which this application should belong.
- Click Add. The selected Application Group(s) move from the High Security Application Groups table to the Application Groups table on the opposite side of the screen.
- To add the Application to Basic Security Application Groups, select the Application Group(s) in the Basic Security Application Groups table to which this application should belong,
- Click Add. The selected Application Group(s) move from the Basic Security Application Groups table to the Application Groups table on the opposite side of the screen.
-
Click the Submit button to update the list of selected Application Groups. The Application Group name(s) will be listed in the Selected Application Groups list on this application's Create Application and Modify Application screens. !!! NOTE
Subscription to Application Groups is not applied until you submit button .
Modify Applications
- In the Management Console, click Access Management\Applications.
- Click against for the application you want to edit and click Modify. The Modify Application screen should appear.
- Modify application details as needed.
- Modify Application Groups by clicking the Add/Delete Application Group to Application option.
- Click Submit to save changes.
Delete Applications
- In the Applications screen described above, select the Application(s) you want to delete. To select all applications, select the Check all check box below the table.
- Click Delete.
- When prompted for deletion confirmation, click OK.