Registered Users
Overview
Whenever a user logs in to the HySecure Gateway, a profile gets created for the user, which the administrator can manage. The list of profiles can be viewed in the User > Registered Users.
As part of the profile management, the Administrator can perform the following actions:
-
Add a user profile.
-
Enable the user if the administrator locks out a user or the user gets locked out due to multiple password failure attempts.
-
Disable the user to prevent them from logging into HySecure.
-
Delete the selected user profile.
-
View the Profile details and perform various actions such as:
-
Activate / Deactivate the Mobile Token.
-
Assign / Unassign Hardware Token.
-
Reset the user password on their behalf if they are locked out of HySecure.
-
Generate an Offline OTP on behalf of the user.
-
-
Export all the user profiles in a .csv format.
View Registered Users List
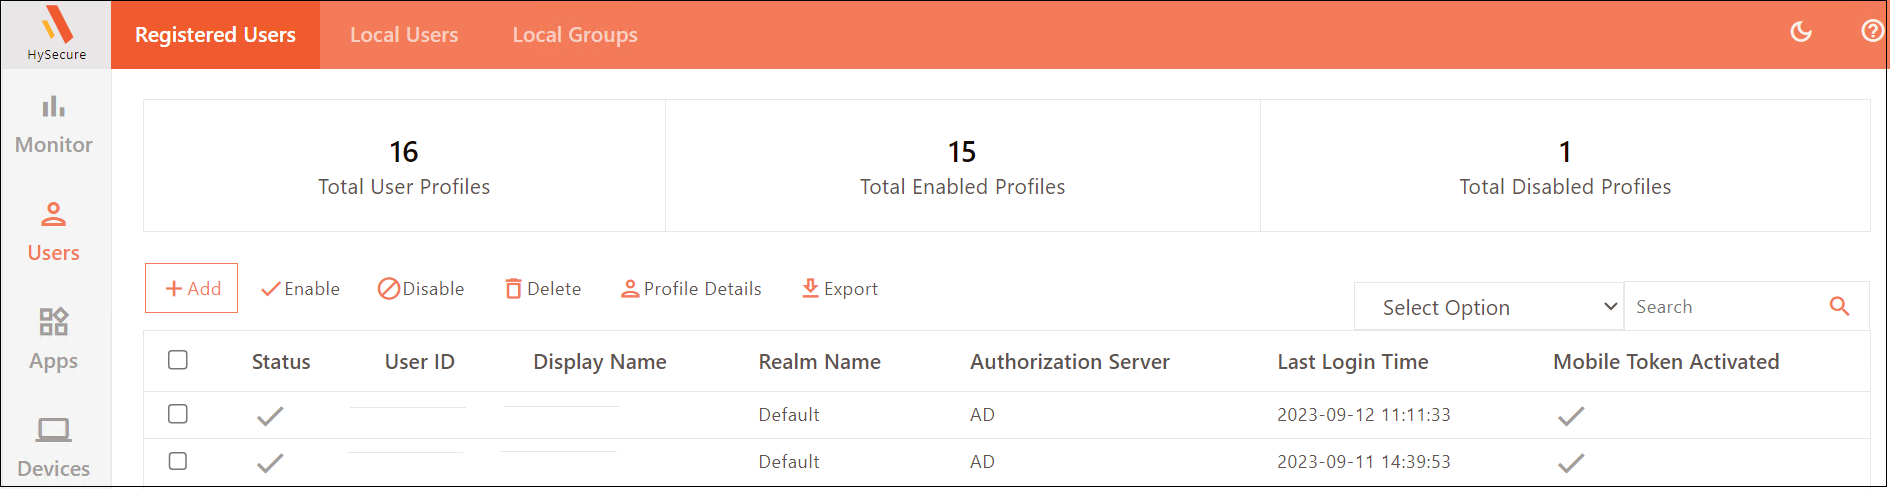
To view the details of the Registered Users:
- Log on to the Management console.
- Navigate to Users > Registered Users.
- The page has the following details:
| Field | Description |
|---|---|
| Status | Displays the status of the profile as Enabled (ticked) or Disabled (blank). |
| User ID | Displays the ID of the user with which the user logs into the Gateway. |
| Display Name | Displays the name given to the user. |
| Realm Name | Displays the domain name to which the user connects while logging in to the Gateway. |
| Authorization Server | Displays the authorization Server that authorizes the user. |
| Last Login Time | Displays the timestamp when the user last logged on to the Gateway. |
| Mobile Token Activated | Displays whether or not a mobile token is activated for the user. |
| Hardware Token | Displays whether a hardware token is assigned to a user or not. |
| FIDO Security Key | Displays whether a FIDO Security Key is activated for the user or not. |
Add Users
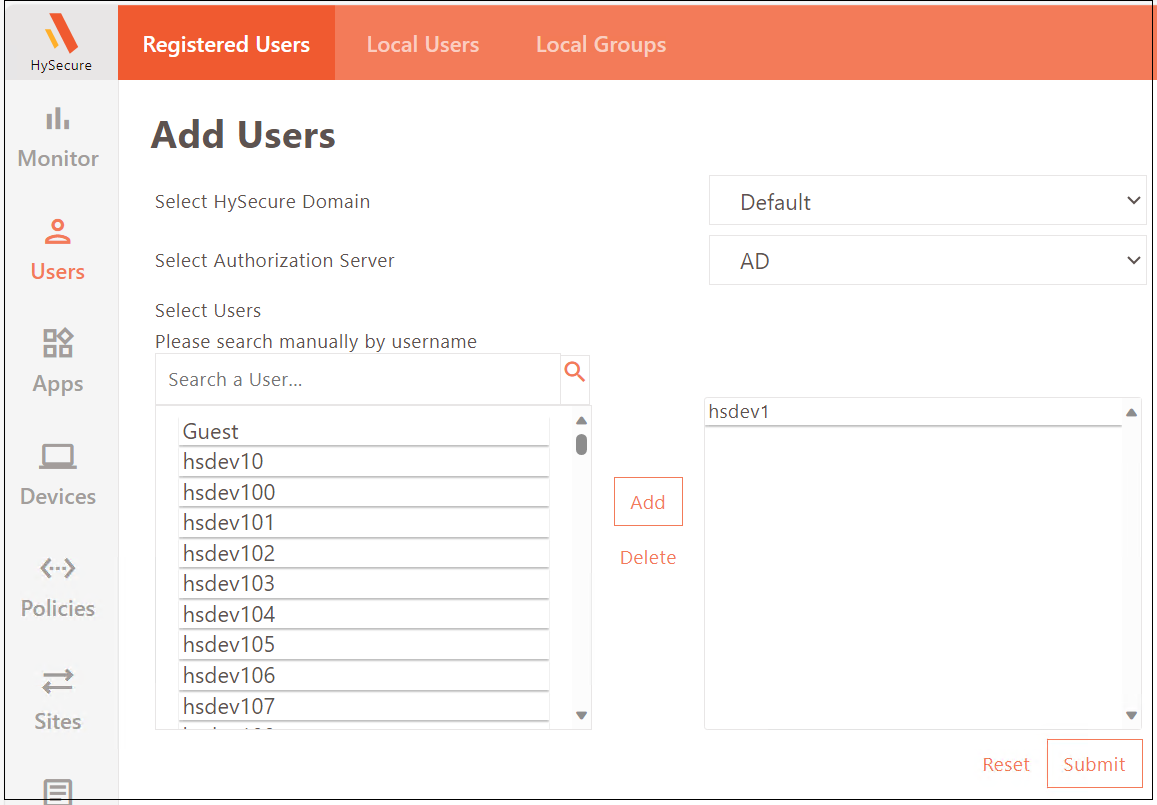
- Go to Users > Registered Users and click Add.
- Enter the following details:
- Select HySecure Domain: Select the HySecure Domain for user login.
- Select Authorization Server: Select the HySecure Domain’s authorization server for user authorization.
- Select Users: Select the user from the list or search manually by typing the username.
- Click Add to confirm the user.
- Click Submit to complete the user profile creation.
Enable User
- Go to Users > Registered Users.
- Select the user profiles you want to enable.
- Click Enable.
Upon confirming, the user profiles will be enabled and be able to log in to HySecure.
Disable User
- Go to Users > Registered Users.
- Select the user profile you want to disable.
- Click Disable.
Upon confirming, the user profile will be disabled and will no longer be able to log in to HySecure.
Delete User
- Go to Users > Registered Users.
- Select the user profile you want to delete.
- Click Delete.
Upon confirming, the user profile will be deleted.
View Profile Details
- Go to Users > Registered Users.
- Select the user to view its Profile Details.
- Click Profile Details.
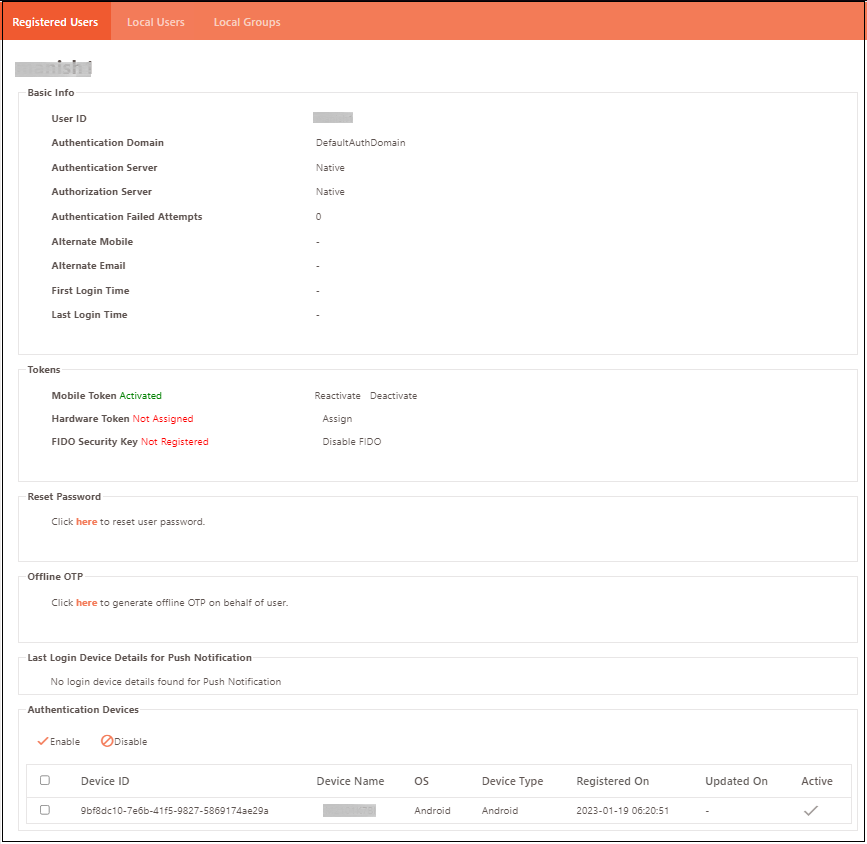
Basic Info
| Field | Description |
|---|---|
| User ID | Displays the user ID with which the user logs in to HySecure. |
| Authentication Domain | Displays the Authentication Domain used to authenticate the user. |
| Authentication Server | Displays the Authentication Server configured in the Domain - responsible for authenticating the user. |
| Authorization Server | Displays the Authorization Server configured in the Domain - responsible for authorizing the user. |
| Authentication Failed Attempts | Displays the number of failed authentication attempts. |
| Alternate Mobile | Displays the mobile number of the user. |
| Alternate Email | Displays the email address of the user. |
| First Login Time | Displays the timestamp when the user logged in, for the first time. |
| Last Login Time | Displays the timestamp when the user logged in the last time. |
Tokens
| Field | Description |
|---|---|
| Mobile Token | Mobile Token-based authentication can be activated/deactivated by clicking the toggle link Activate/not Activate. |
| Hardware Token | Hardware Token-based authentication can be assigned/de-assigned by clicking the toggle link Assign/ Not Assign. |
| FIDO Security Key | FIDO allows users to simply sign in with passkeys across their devices with a biometric or a security key. Click the toggle link Enable FIDO/Disable FIDO. |
Hardware tokens cannot be registered by the user, it can only be assigned by the administrator from the Management Console. The assigned hardware token for the particular user can be verified from the Profile Details under Registered Users. Navigate Users > Registered Users and click on any user, details of Hardware Token being assigned or not can be viewed here.
Reset Password
Click the link to reset the user's password.

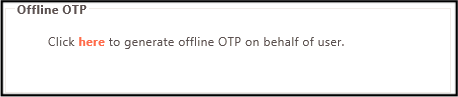
Offline OTP
Click the link to generate Offline OTP on behalf of the user.
Last Login Device Details for Push Notification
This section displays the information of the previous device used to log in using the push notification.
Authentication Devices
This section displays a list of all devices used to authenticate the user. The administrator can Enable/Disable devices by toggling the relevant option.
| Field | Description |
|---|---|
| Device ID | Displays the unique ID of the device. |
| Device Name | Displays the Name of the device. |
| OS | Displays the Operating System running on the device. |
| Device Type | Displays the type of the device, e.g., Android or iPhone. |
| Registered On | Displays the date and time on which the device was first registered with HySecure. |
| Updated On | Displays the date on which the device details were last updated with HySecure. |
| Active | Indicates if the device is currently active (tick mark) or not (blank). |
Export Registered Users
-
Go to Users > Registered Users.
-
Click Export.
This will download a list of users in a .CSV format.
Search User Profiles
In case there are a large number of user profiles, the administrator can filter or search a particular profile based on any one of the following fields:
- Status
- User ID
- Display Name
- Authorization Server
- Mobile Token
- Last Login