Turbo Tunnel
HySecure Turbo Tunnel is a new mechanism that functions at the L3 level to route IP traffic from an end-user machine to the corporate network. It uses a UDP-based tunnel to assign a virtual IP address to the end-user PC, enabling the exchange of TCP, UDP, or ICMP traffic between the end-user PC and the corporate network.
Turbo Tunnel enhances support for real-time applications, such as VoIP apps, and provides better performance for heavy graphics apps over VDI. Turbo Tunnel also supports applications that require a reverse connection (i.e., a connection originated by a server-side application towards end-users). It can be enabled for specific applications and users.
For more information on how the turbo tunnel works, refer to the HySecure Turbo Tunnel Guide.
View the Turbo Tunnel list
-
Log in to the HySecure Management console.
-
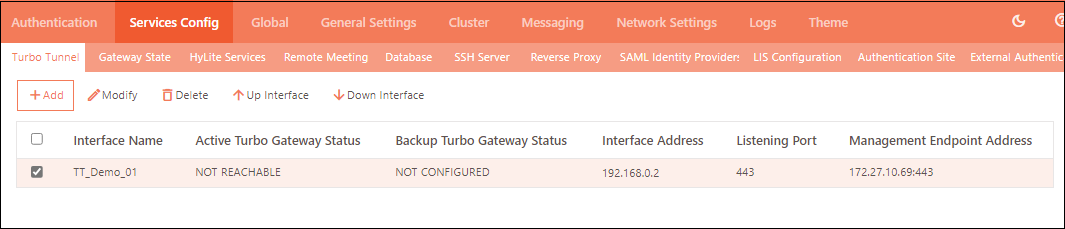
Go to Settings > Services Config > Turbo Tunnel.
All the existing Turbo Tunnel interfaces will be listed here.
From here, the administrator can Add, Modify, Delete, or Switch an interface up or down.
Create a Turbo Interface
- Log in to the HySecure Management console.
- Navigate to Settings > Services Config > Turbo Tunnel.
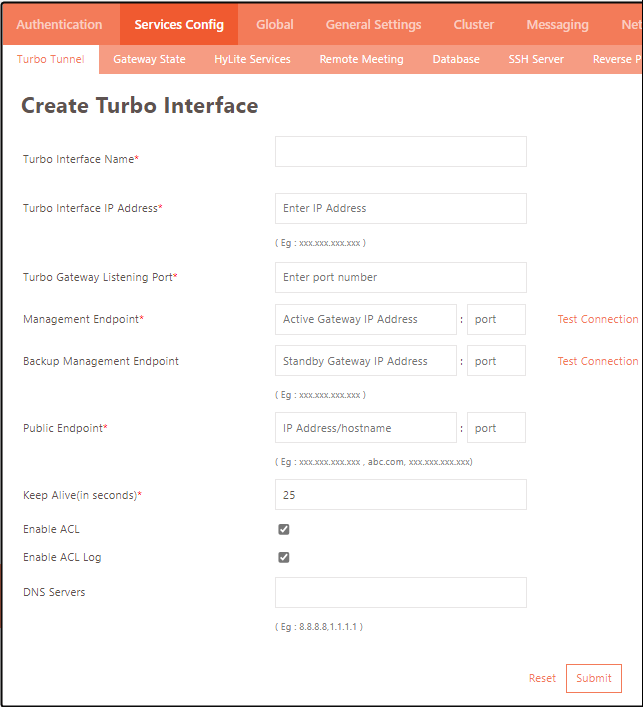
- Click Add.
| Field | Description |
|---|---|
| Turbo Interface Name | The interface identifier through which the Turbo traffic will flow. |
| Turbo Interface IP address | The IP address of the Turbo interface. |
| Turbo Gateway Listening Port | Listening port for Turbo traffic. |
| Management Endpoint | The IP address of the primary management endpoint, which is usually the primary gateway. |
| Backup Management Endpoint | The IP address of the backup management endpoint, typically the standby gateway. |
| Public Endpoint | The Public IP Address/hostname of the gateway through which the user logs into the HySecure Gateway. |
| Keep Alive | After the specified duration, a Keep Alive probe packet is sent to verify whether the connection is still active. |
| Enable ACL | Select this option to enforce a port restriction for Turbo traffic via an ACL. |
| Enable ACL Log | Select to enable logging of the port restriction enforced above. |
| DNS Servers | IP address of the DNS server. |
Important
- After creating the interface, the administrator must manually activate it by selecting the interface and clicking the Up Interface option from the list.
- The administrator will also need to configure the IP Address Pool, Turbo-based applications, and ACLs prior to enabling the Turbo interface.
Modify a Turbo Interface
Select the interface whose details you need to modify on the Turbo Interface list page, then click the Modify button. Modify the details as appropriate and click the Submit button for the changes to take effect.
Delete Turbo Interfaces
Select the interface to delete on the Turbo Interface list page, then click the Delete button.
Switch Turbo Interfaces On or Off

Select the desired interface from the Turbo Interface list page and switch its status using the appropriate button: Up Interface or Down Interface.