JumpCloud as an IdP in HySecure Gateway
Purpose of the document
The document provides step-by-step instructions on configuring JumpCloud as an IdP for Accops HySecure. The subsequent section provides simple-to-follow instructions (along with screenshots).
There are two steps in this configuration:
-
JumpCloud configuration
-
Configuring the Authentication Server in HySecure
Note
The configuration details provided are for demonstration purposes only and may not reflect real-world configurations.
Prerequisites
-
A JumpCloud user account.
Ensure you have one of the following roles:
- Administrator
-
Accops HySecure Gateway.
Make sure you have the following details ready:
-
The public DNS name of the Accops HySecure Gateway
-
Valid SSL Certificate installed on the gateway
-
-
Management Console access.
You should have access to the Accops HySecure Gateway management console using a Security Officer account.
Configuring the JumpCloud Application
To configure the JumpCloud application. Follow the steps given below:
-
Access the JumpCloud Portal
-
Log in to the JumpCloud portal with Administrator Login.
-
Navigate to the SSO Application.
-
-
Create a New Application
-
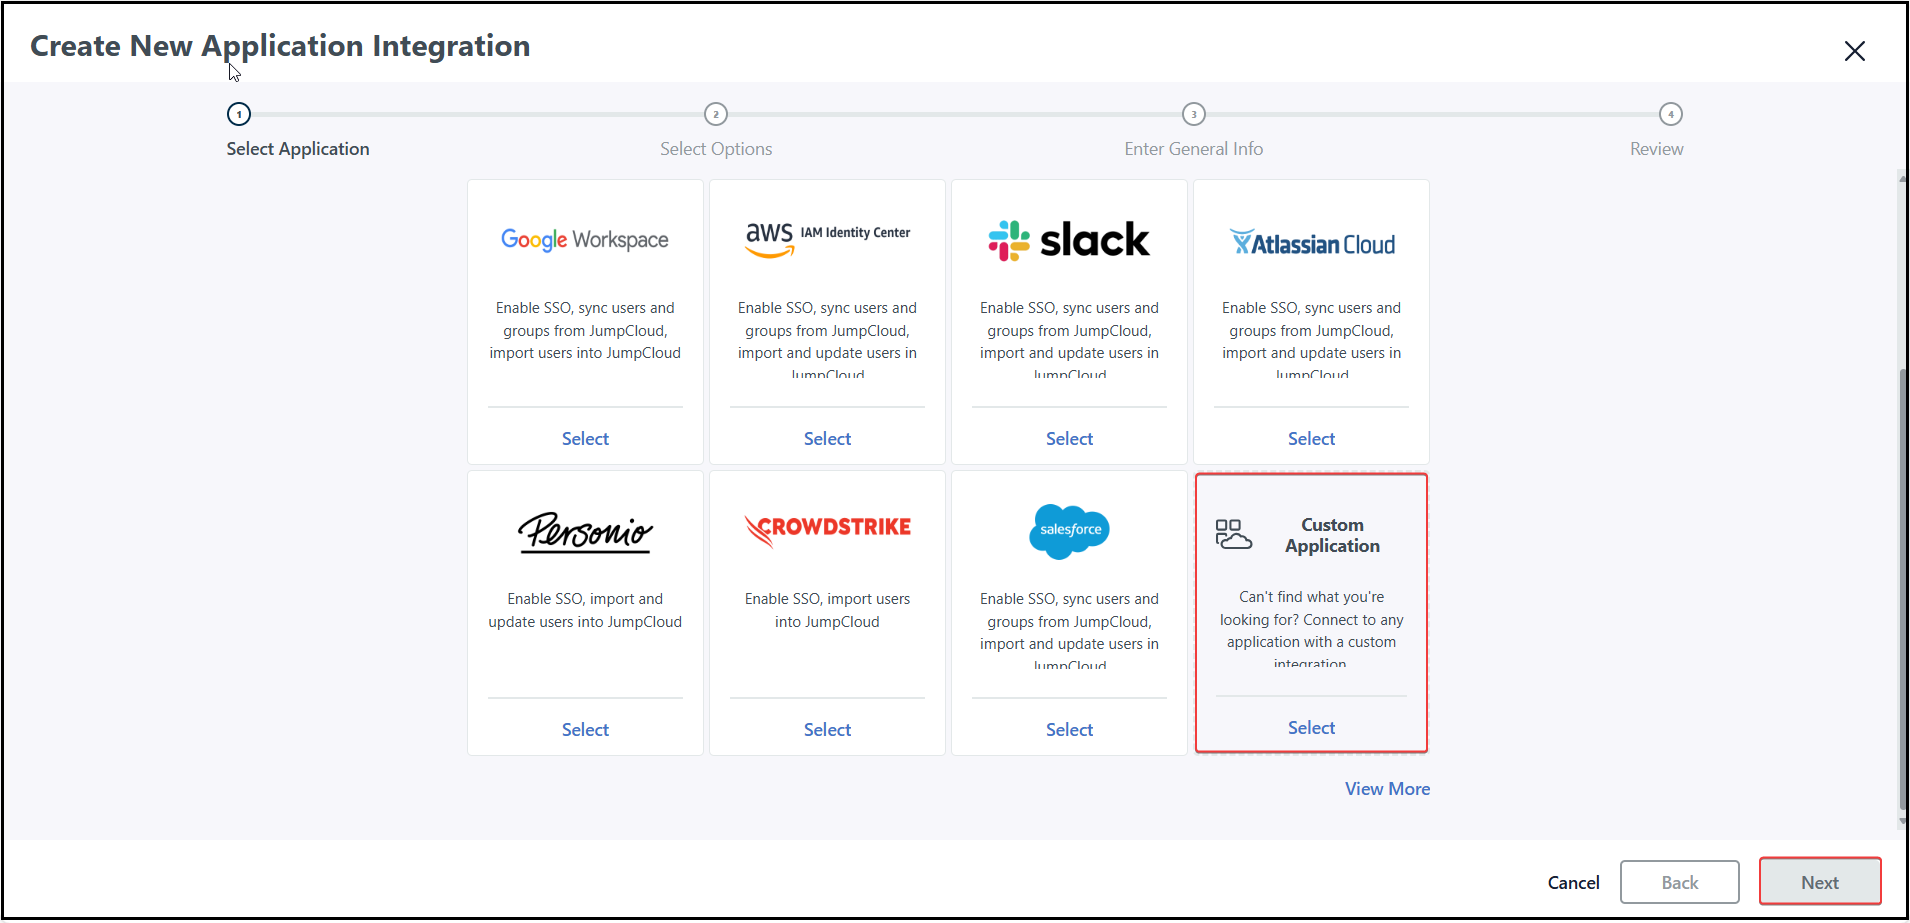
Navigate to the Create New Application Integration section.
-
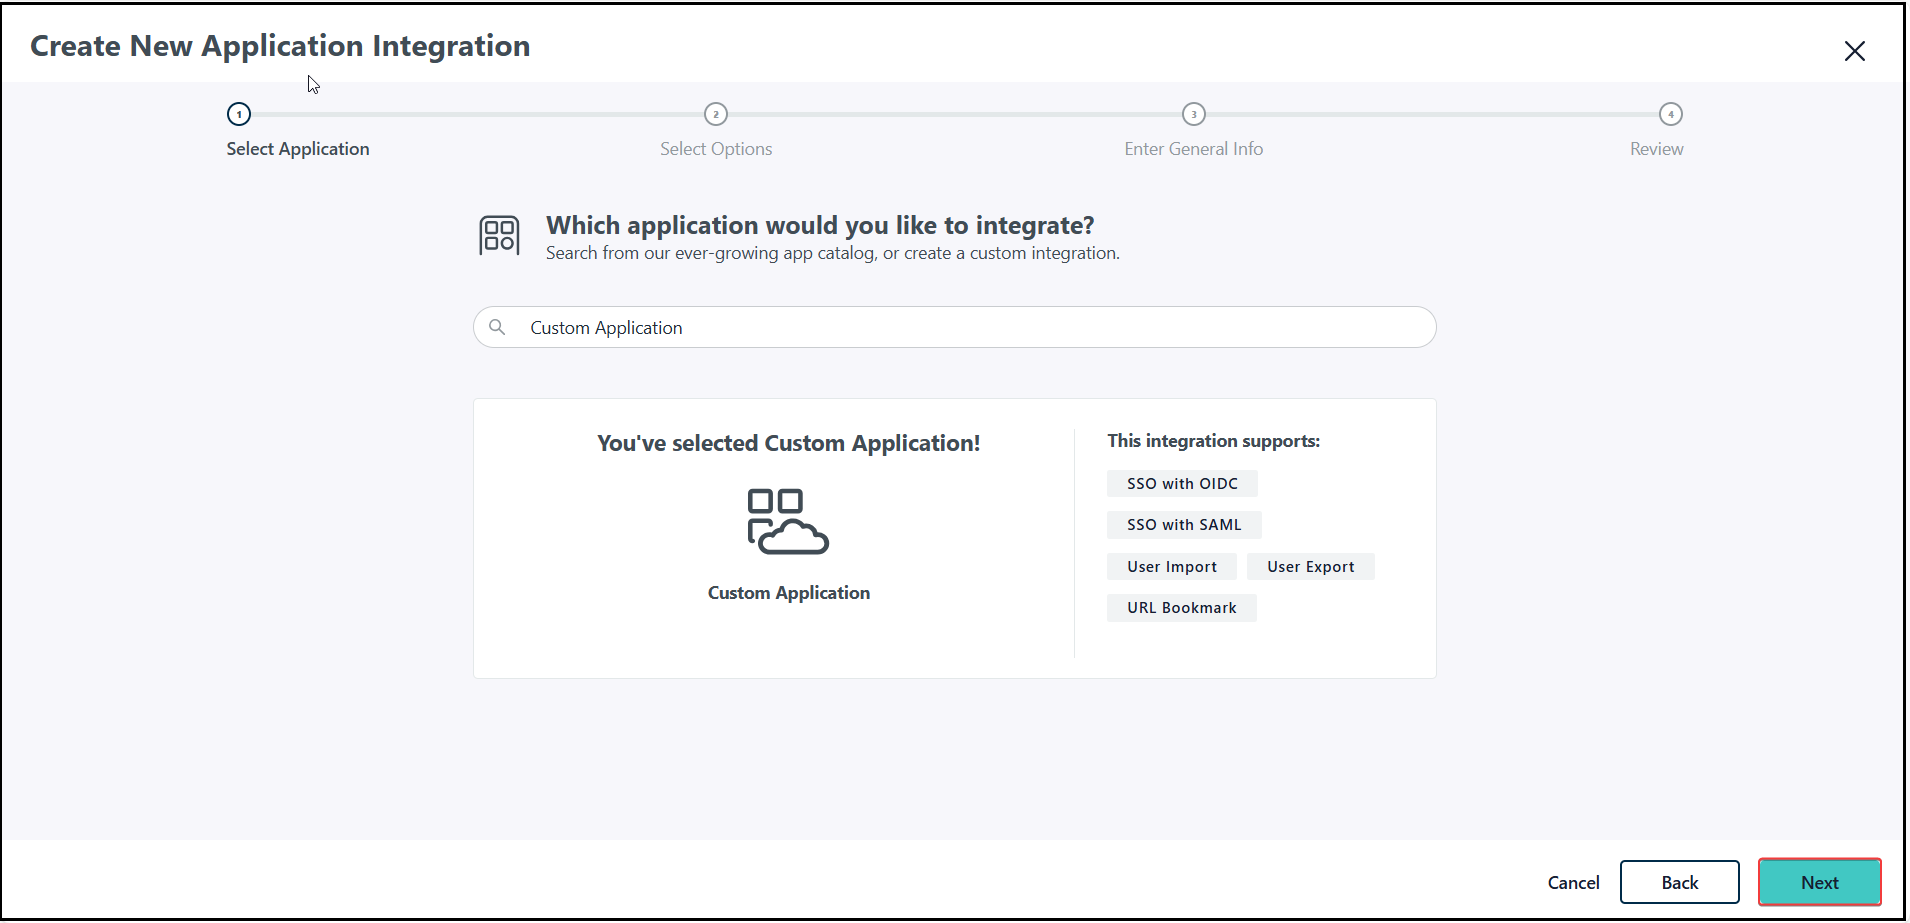
Click Custom Application to create a new application for Accops HySecure.
-
Click Next.
-
-
Configure Single Sign-On (SSO)
-
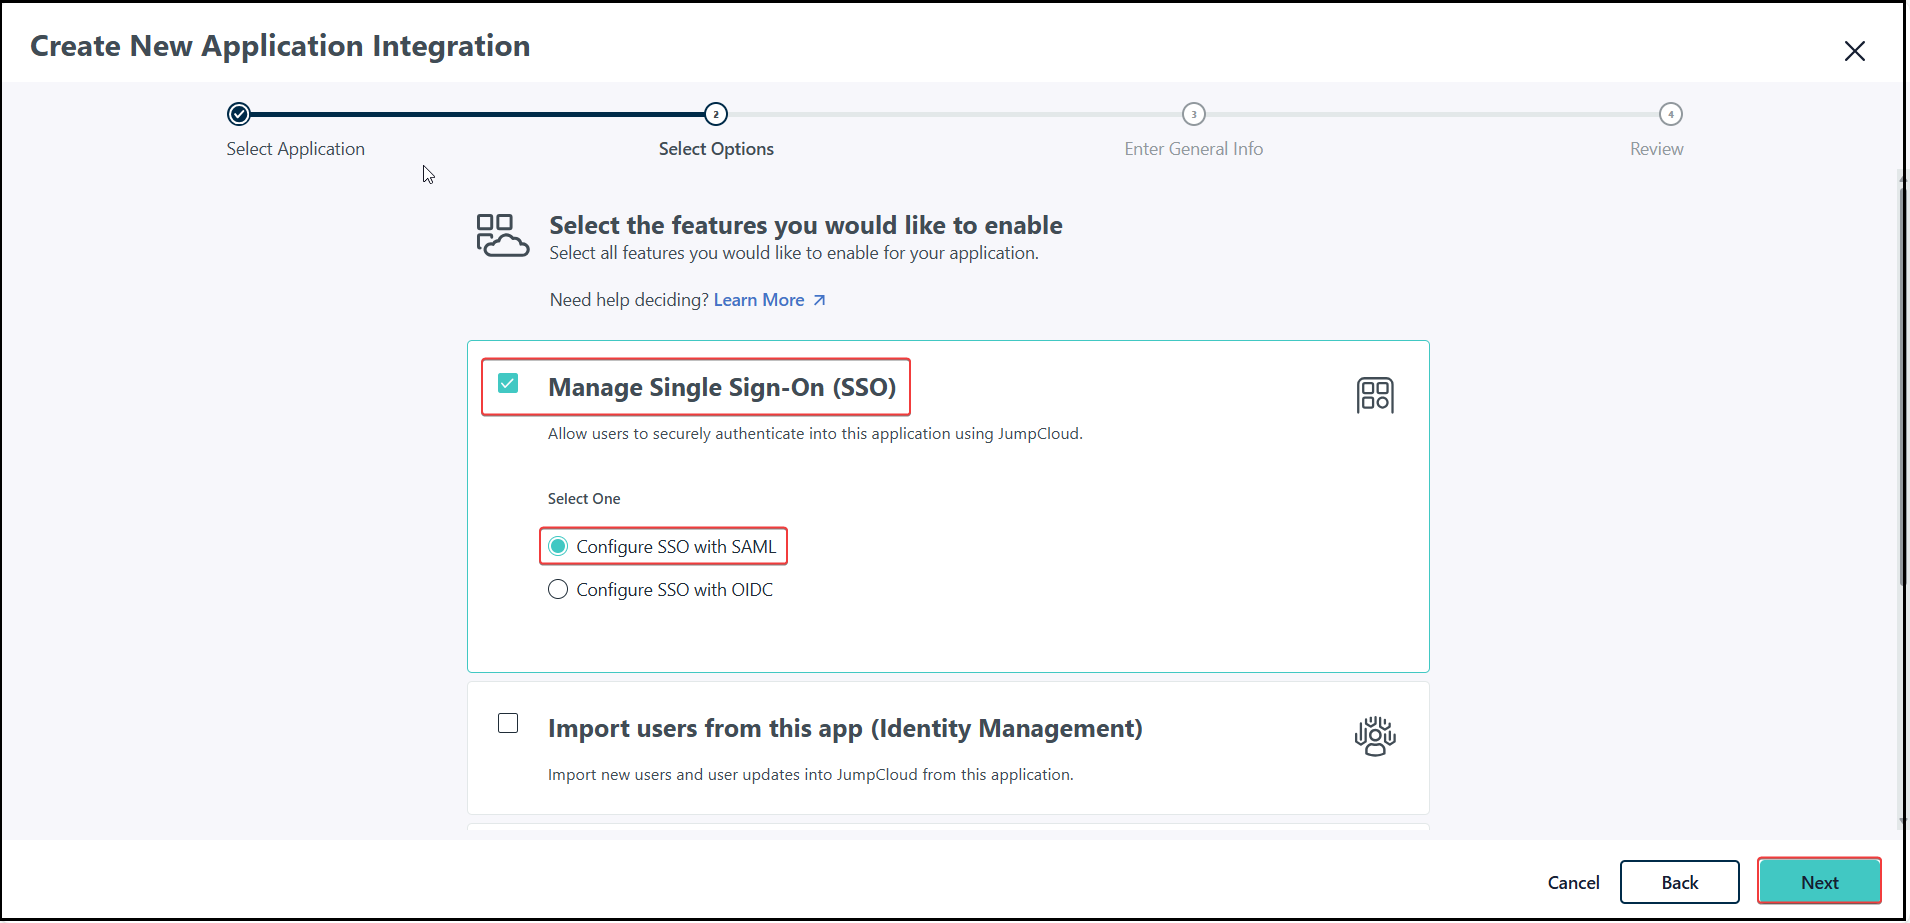
Select the Manage Single Sign-On (SSO) option.
-
Select the Configure SSO with SAML option.
-
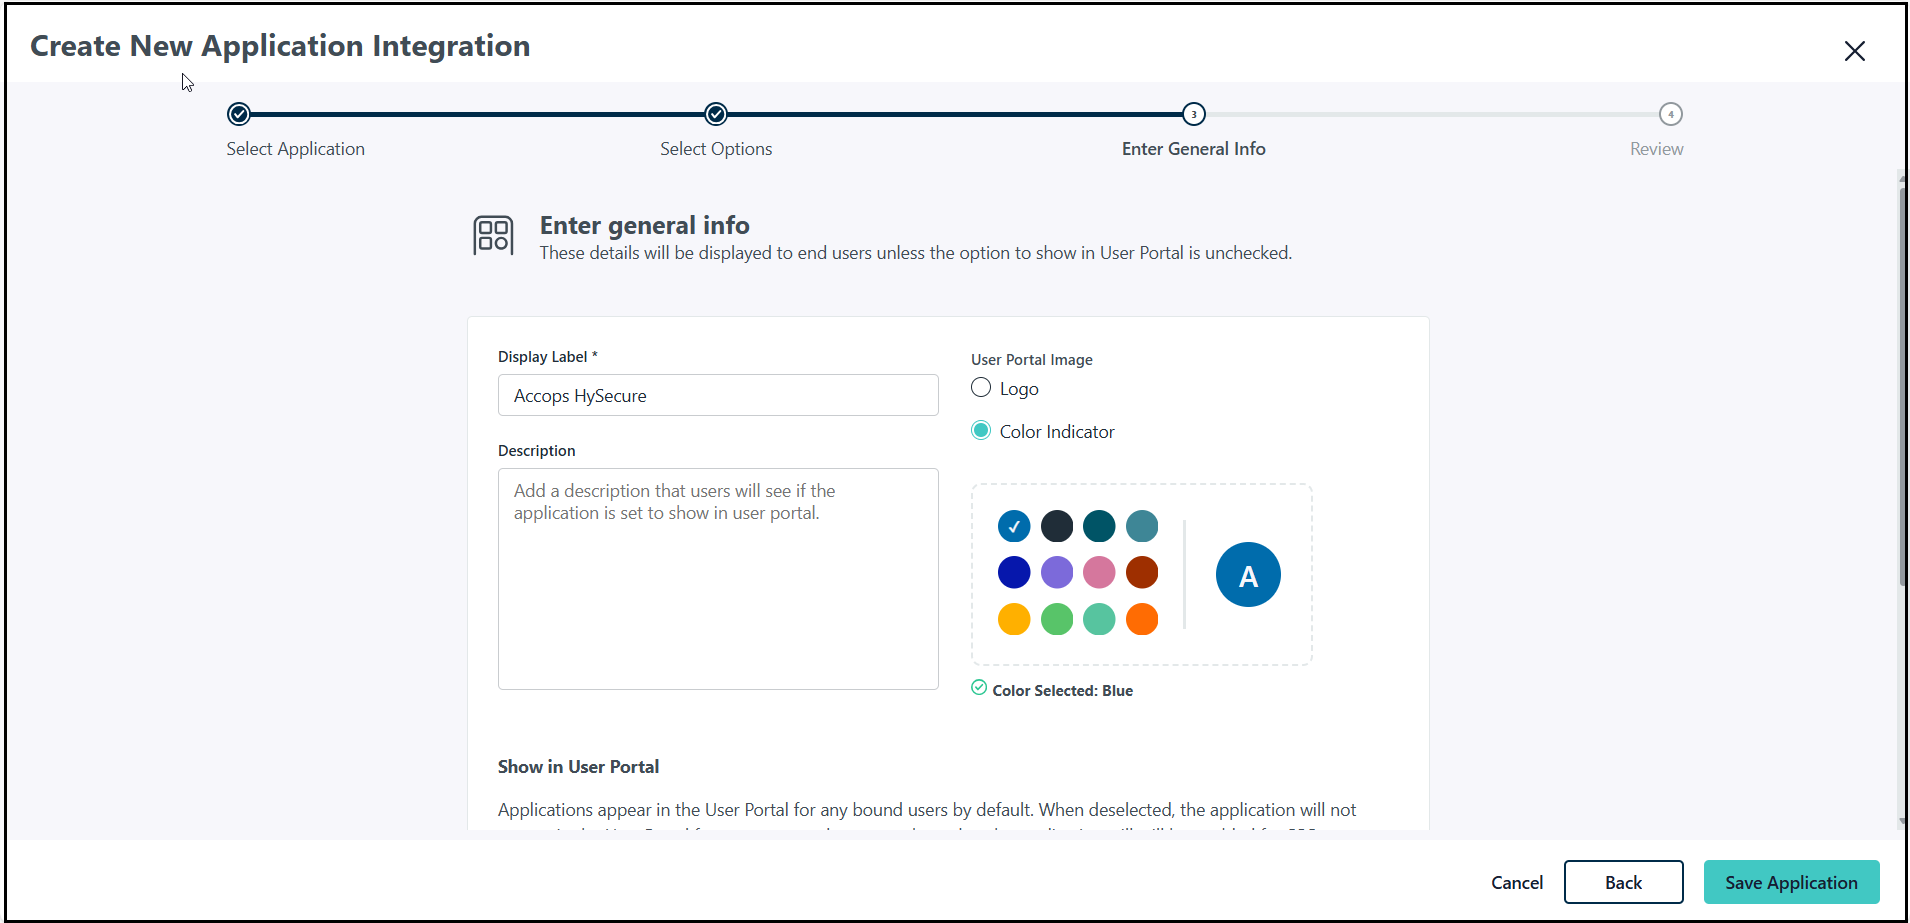
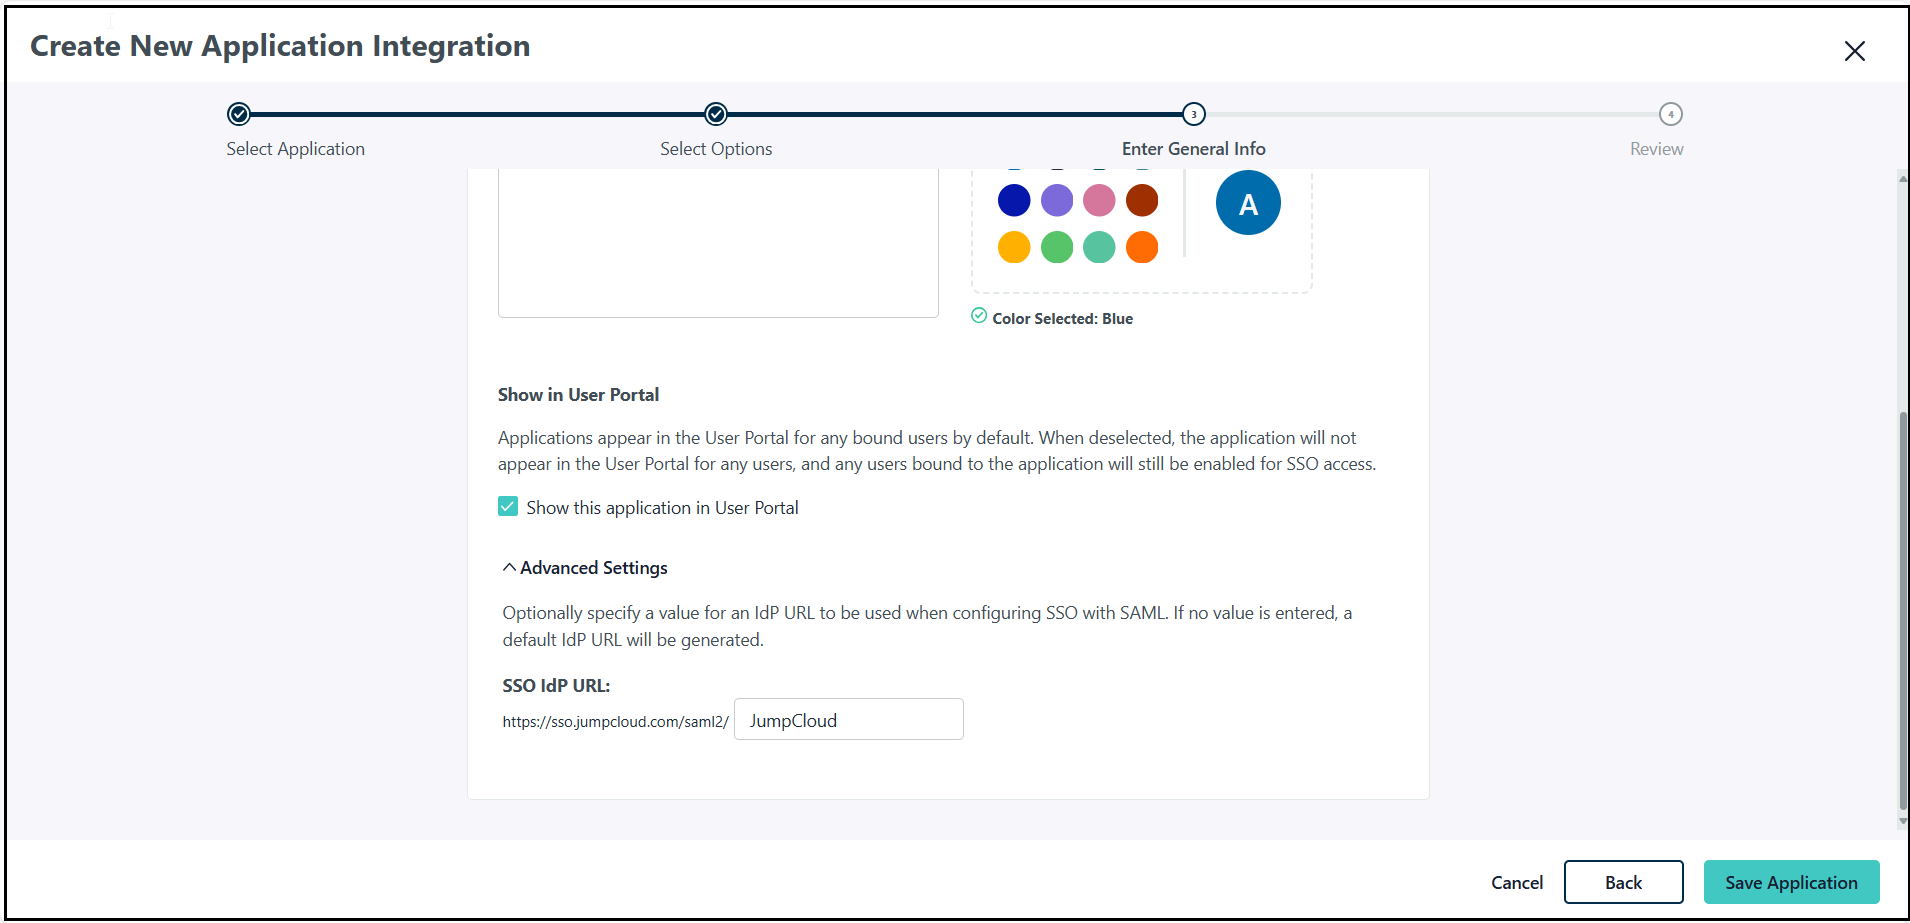
Enter general information. Enter a user-friendly display name to identify the application for the user.
-
Navigate to the Advanced Settings.
-
Configure SSO with SAML. Enter a value to be used for the IdP URL.
-
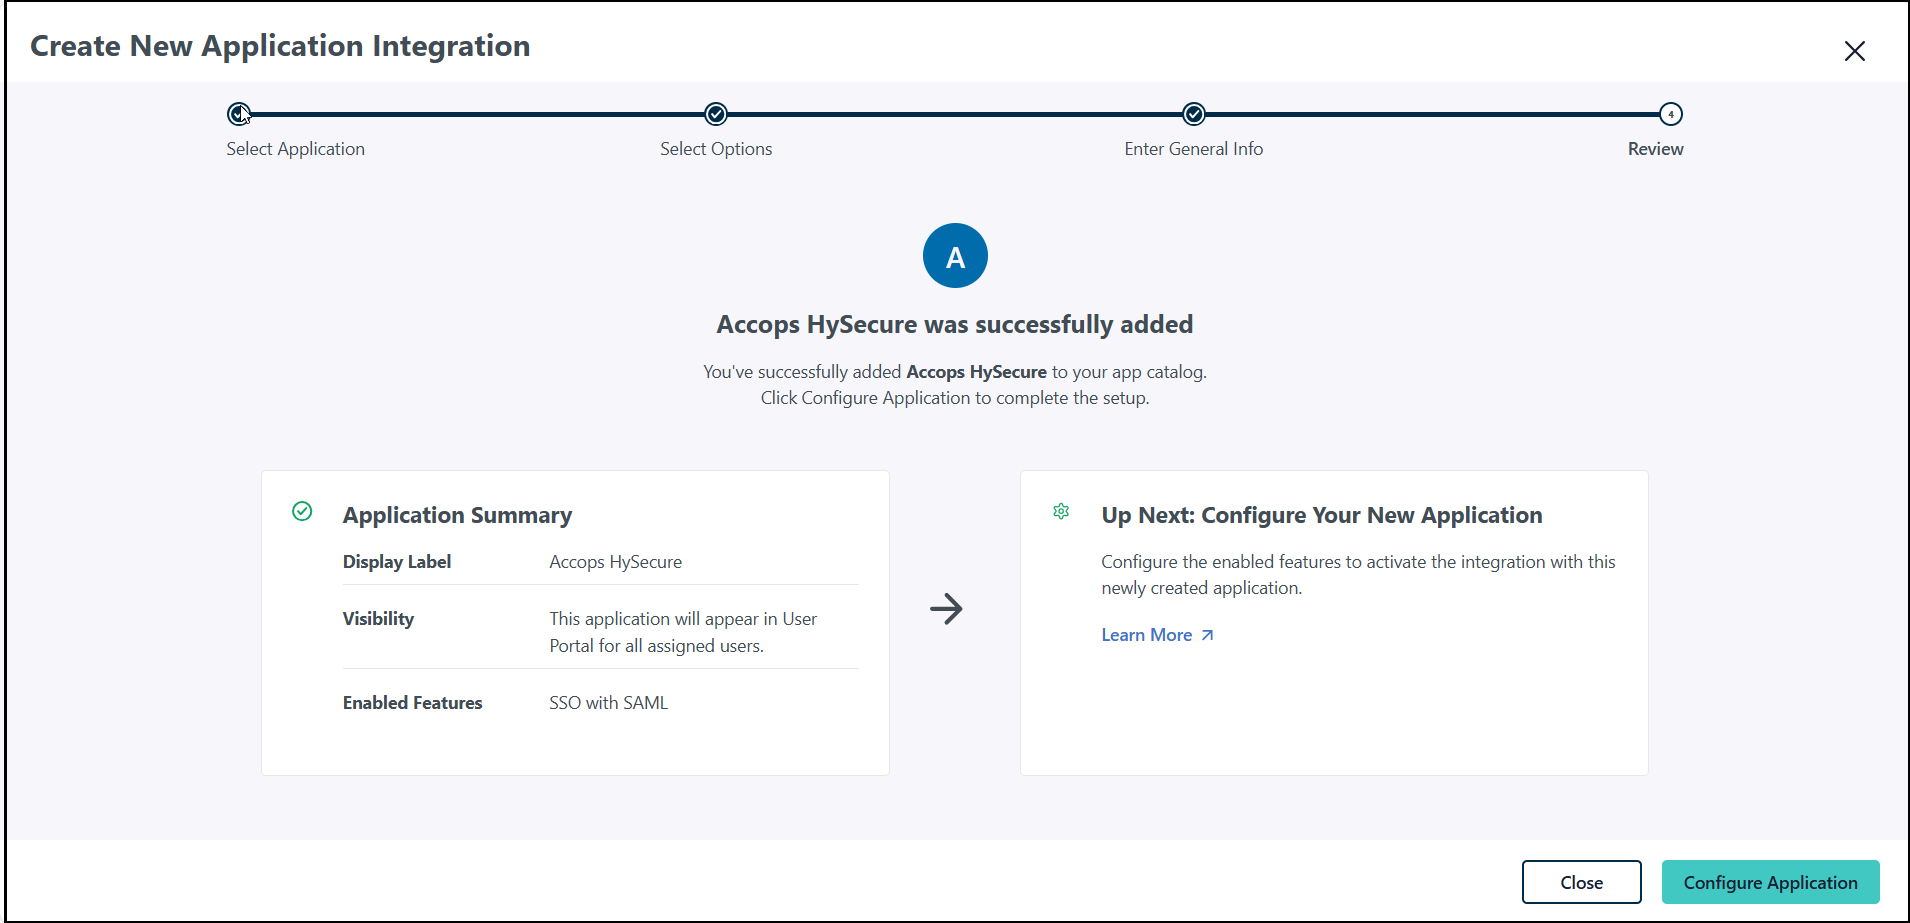
Click Save Application.
A new JumpCloud application has been created successfully.
-
-
Configure the Application
- Click Configure Application to complete the setup.
-
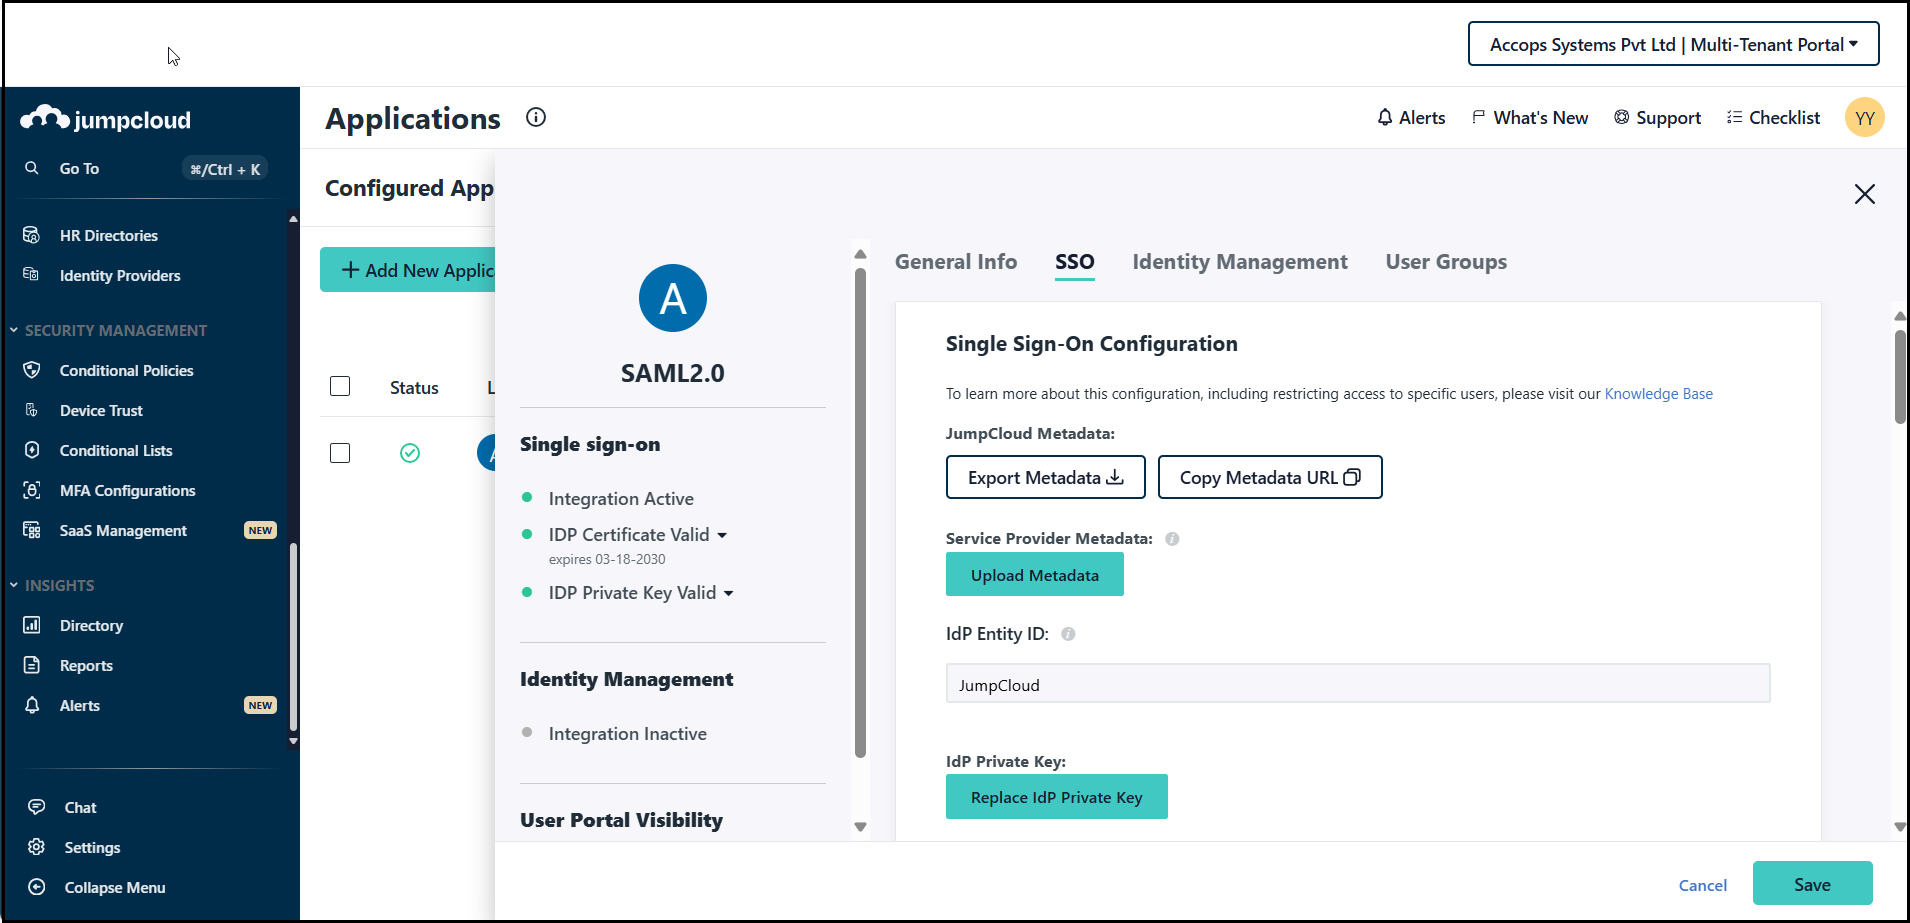
Navigate to Single Sign-On (SSO).
-
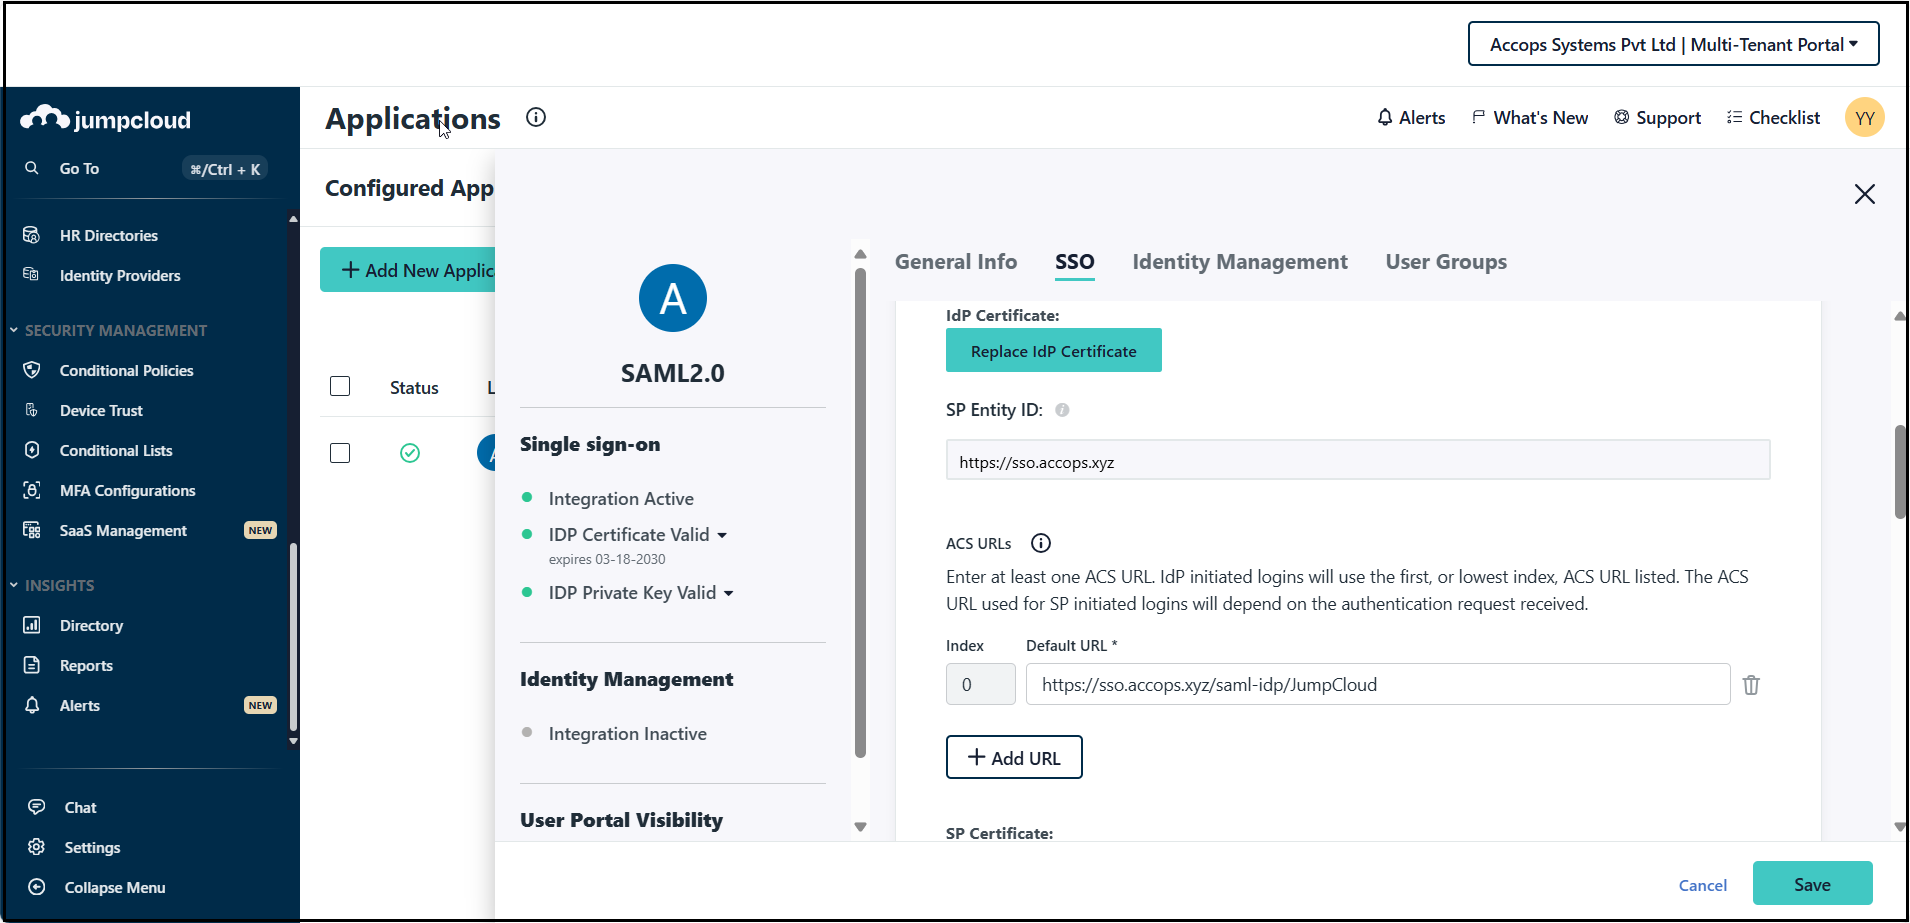
Enter the SAML details such as the IdP Entity ID, SP Entity ID.
- Add the ACL URLs, SAML Subject NameID and SAML Subnet NameID Format.
- Select the Signature Algorithm.

- Select the Sign as Assertion. Enter the Login URL.

- Enter the IDP URL and add User Attributes.

- Click Save to confirm.
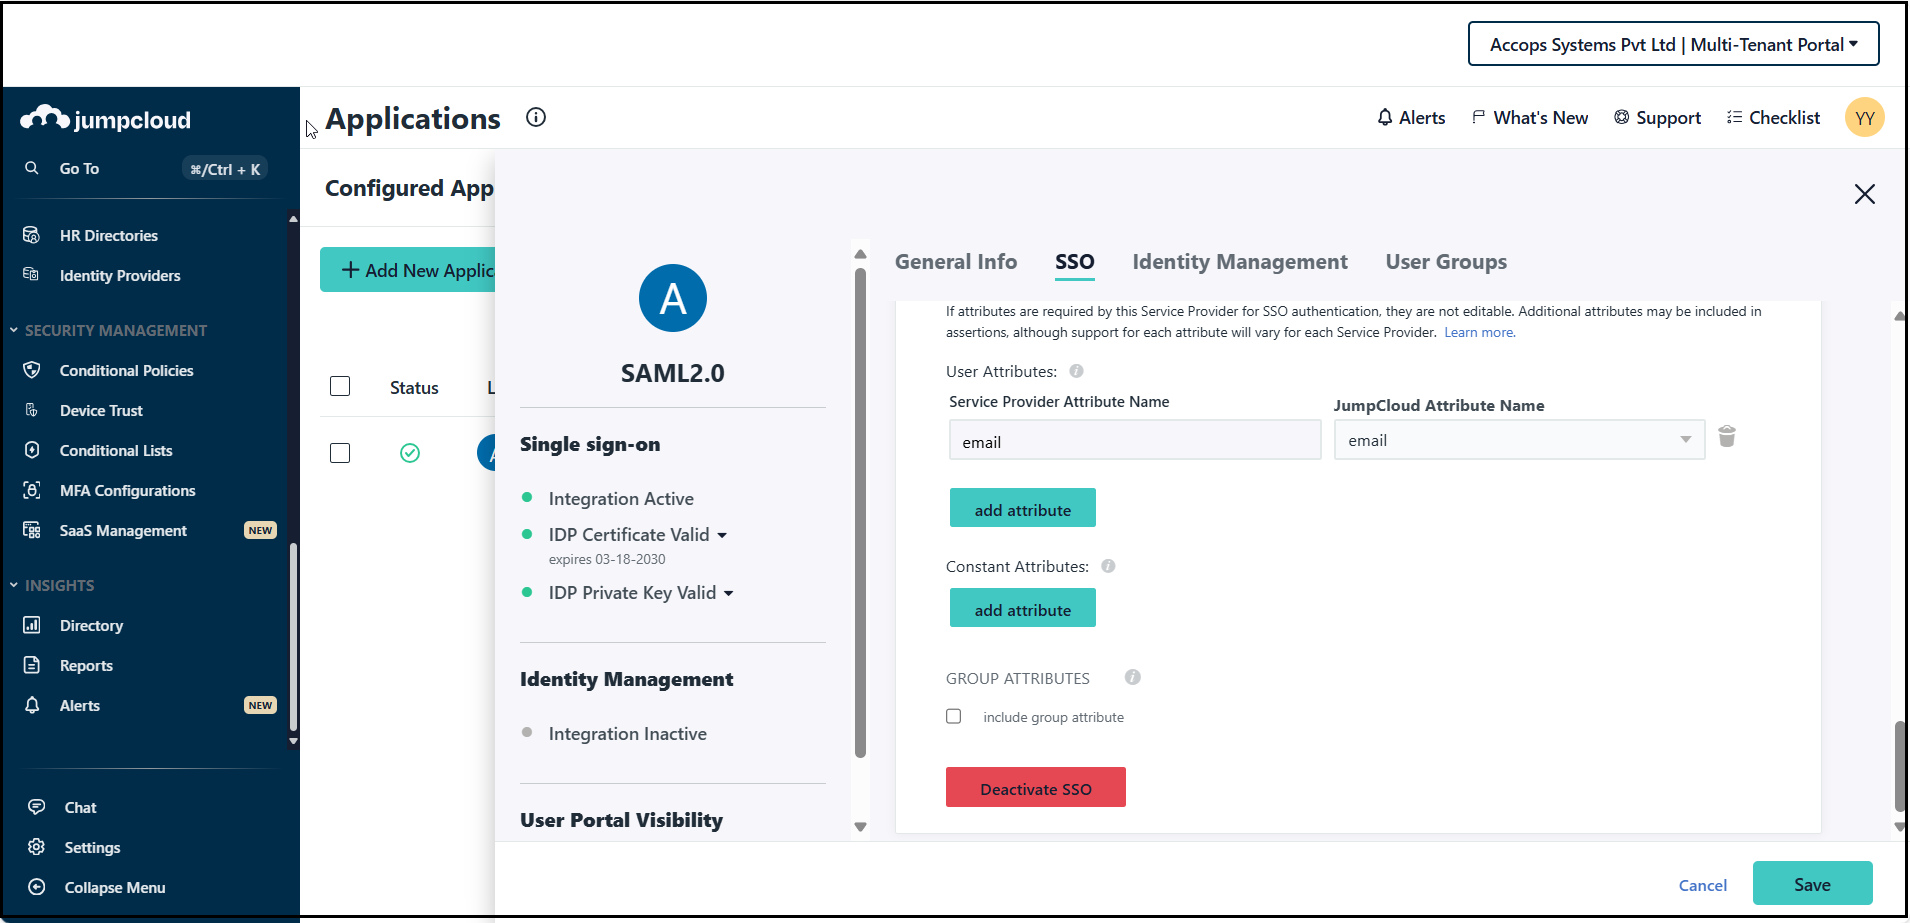
Enter the details, as shown in the table below:
Field Sample Value IdP Entity ID JumpCloud SP Entity ID https://sso.accops.xyz ACS URLs https://sso.accops.xyz/saml-idp/JumpCloud SAMLSubject NameID Email SAMLSubject NameID Format urn:oasis:names:tc:SAML:2.0:nameid-format:unspecified Signature Algorithm RSA-SHA256 Sign Assertion Login URL https://sso.accops.xyz/ IDP URL https://sso.jumpcloud.com/saml2/JumpCloud USER ATTRIBUTE MAPPING SP & JumpCloud Attribute Name – email -
Assign User Groups
- Assign the users or groups that require SSO login access.
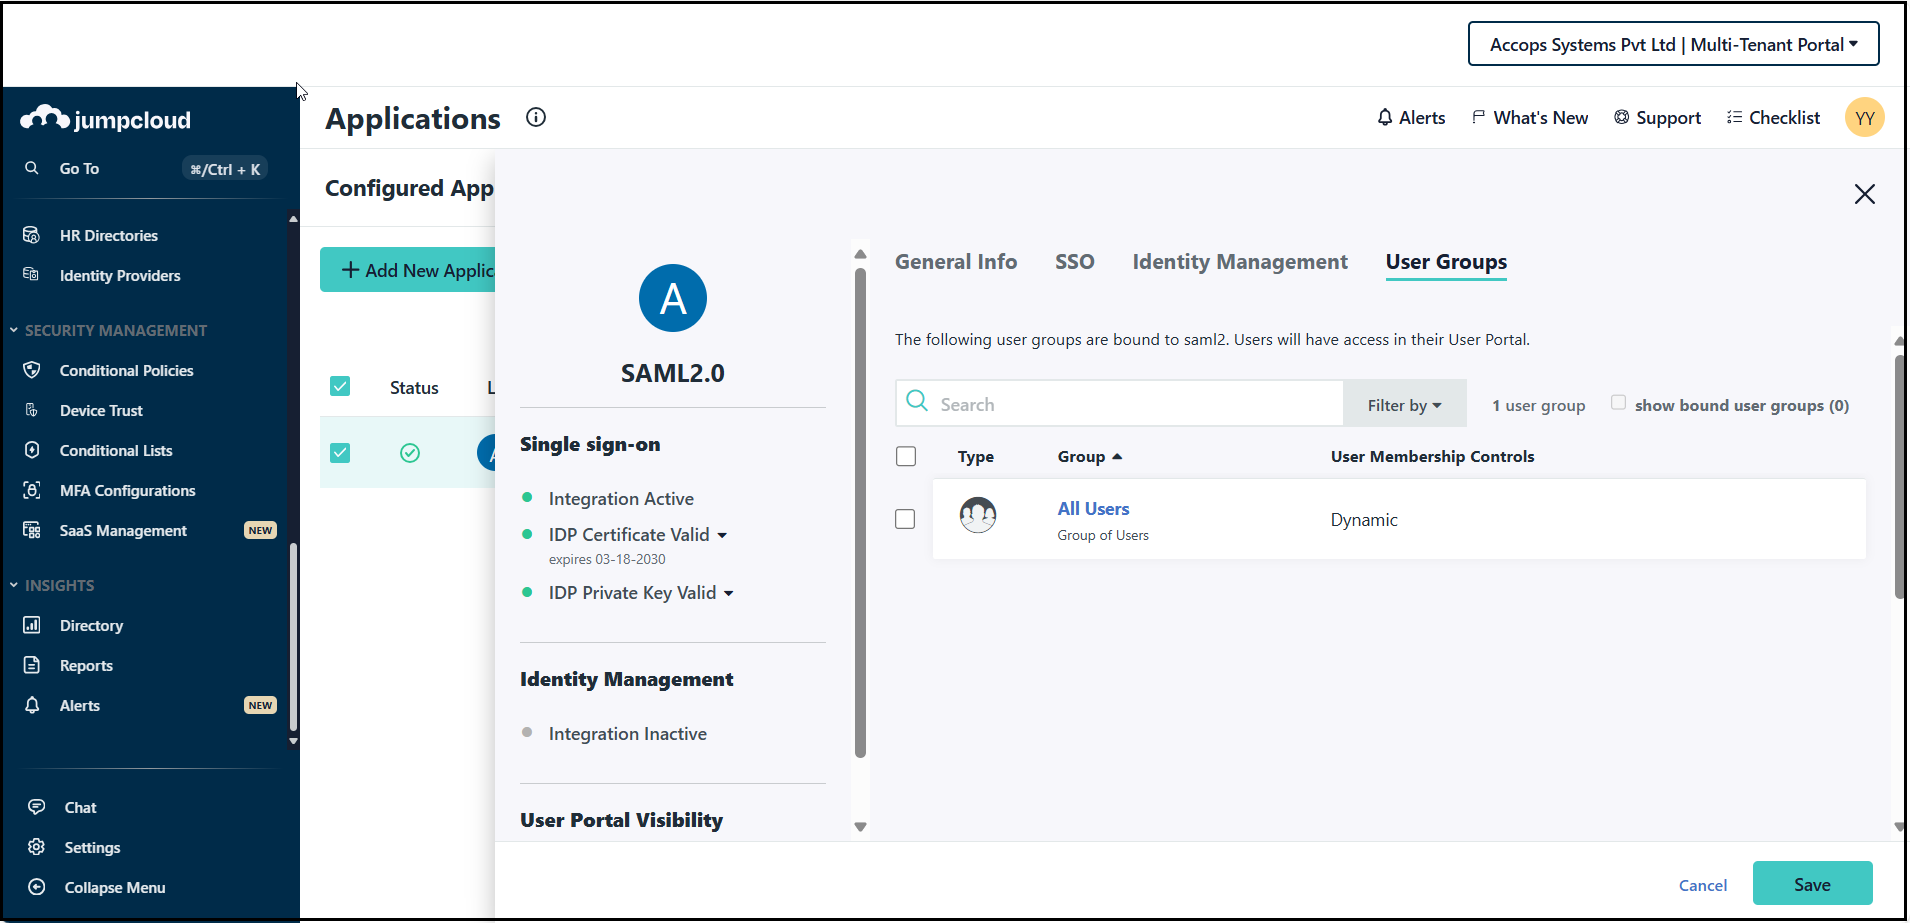
This completes the JumpCloud configuration.
Configure the Authentication Server in HySecure
-
Access the HySecure Management Console
-
Log in to the HySecure Management Console.
-
Navigate to Settings > Authentication Servers to create an authentication server and add the SAML Identity Provider (IdP). For more information, click here.
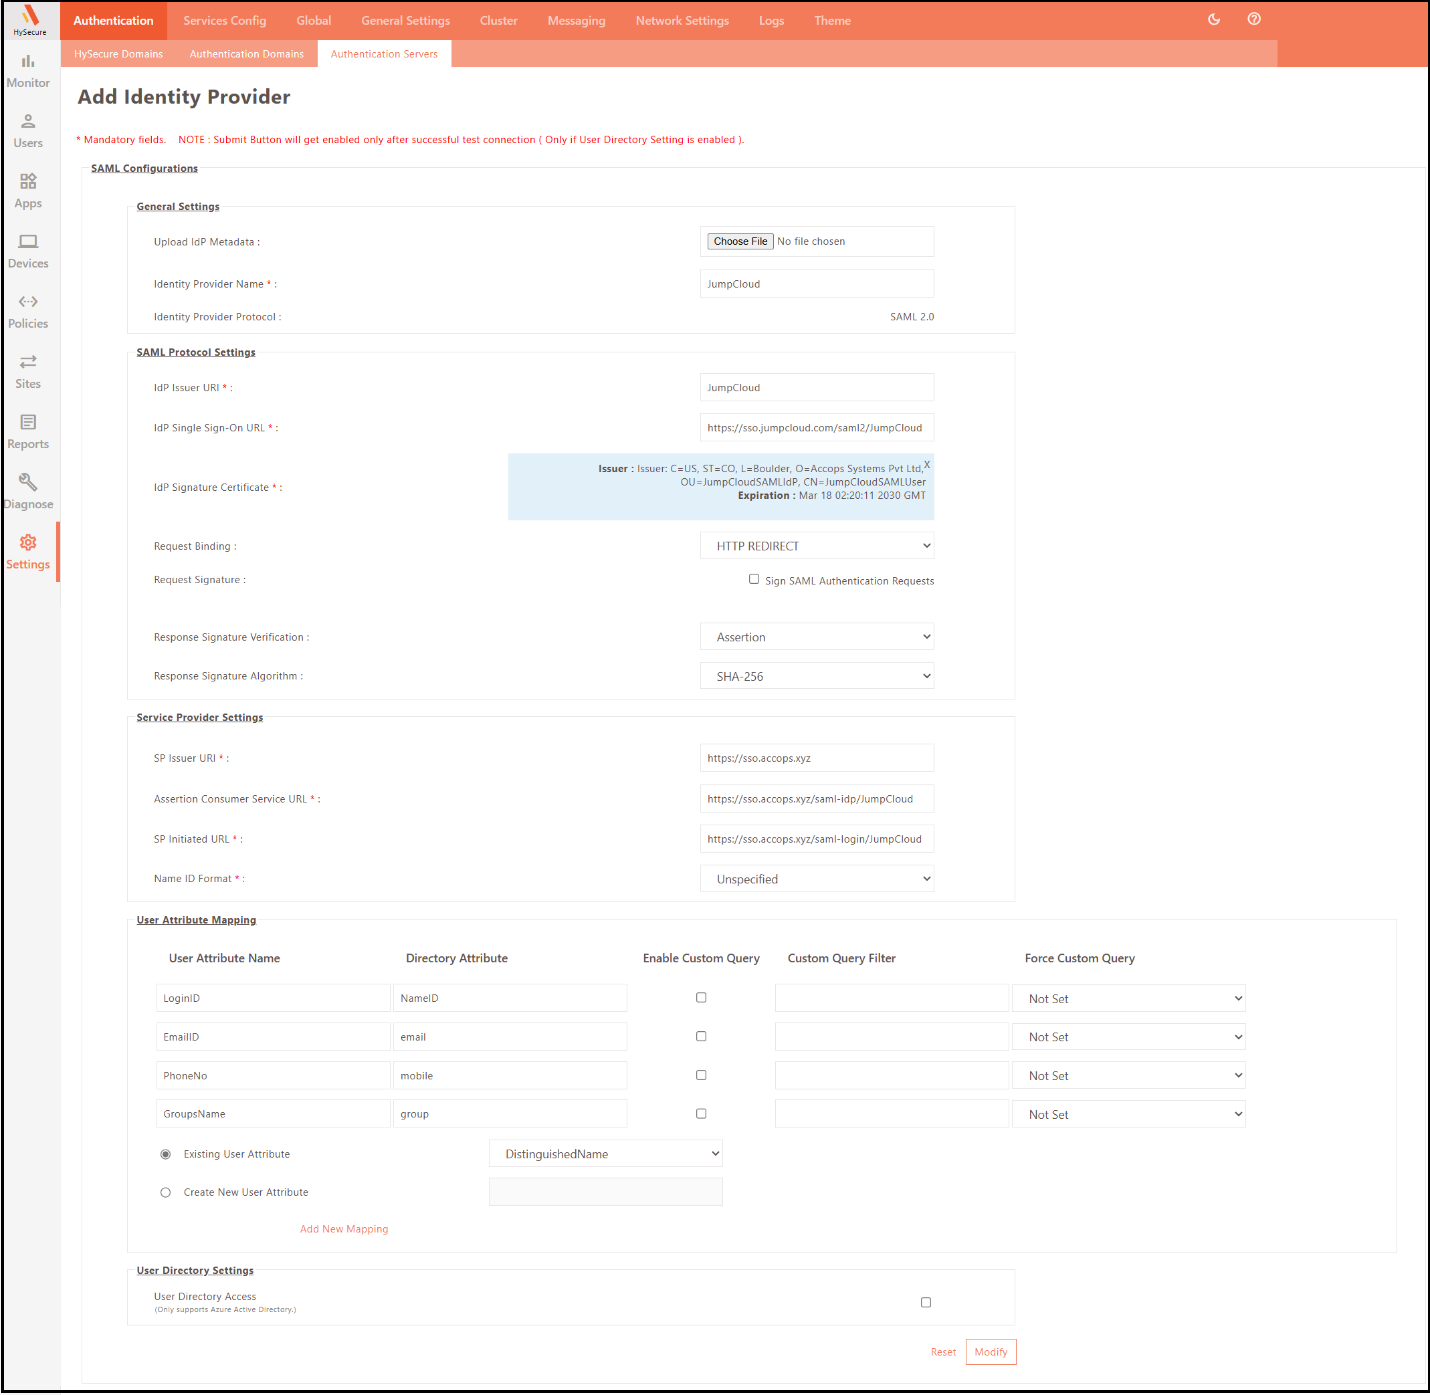
- Enter the details as shown below:
GENERAL SETTINGS:
Field Sample value Identity Provider Name JumpCloud Identity Provider Protocol SAML 2.0 (SAML version) Note
Ensure that the Identity Provider Name matches the one provided in the IdP Entity ID under the JumpCloud Console.
SAML PROTOCOL SETTINGS:
Field Sample value IdP Issuer URI JumpCloud IdP Single Sign-On URL https://sso.jumpcloud.com/saml2/JumpCloud IdP Signature Certificate {Will Autofill, no action required} Request Binding HTTP-REDIRECT Request Signature {Unchecked} Response Signature Verification Response Response Signature Algorithm SHA-256 SERVICE PROVIDER SETTINGS:
Field Sample value SP Issuer URI https://sso.accops.xyz Assertion Consumer Service URL https://sso.accops.xyz/saml-idp/JumpCloud SP Initiated URL https://sso.accops.xyz/saml- login/JumpCloud Name ID Format Unspecified AUTHENTICATION SETTINGS:
Field Sample value IdP Username IdP User Subject Name Id SAML Email Attribute email SAML Mobile No. Attribute mobile -
-
Configure Authentication Domain
-
Navigate to Settings > Authentication Domain in the HySecure Management Console.
-
Select Add. Under the Server at Priority 1 field, select the respective Authentication Server, i.e., JumpCloud. For more information, click here.
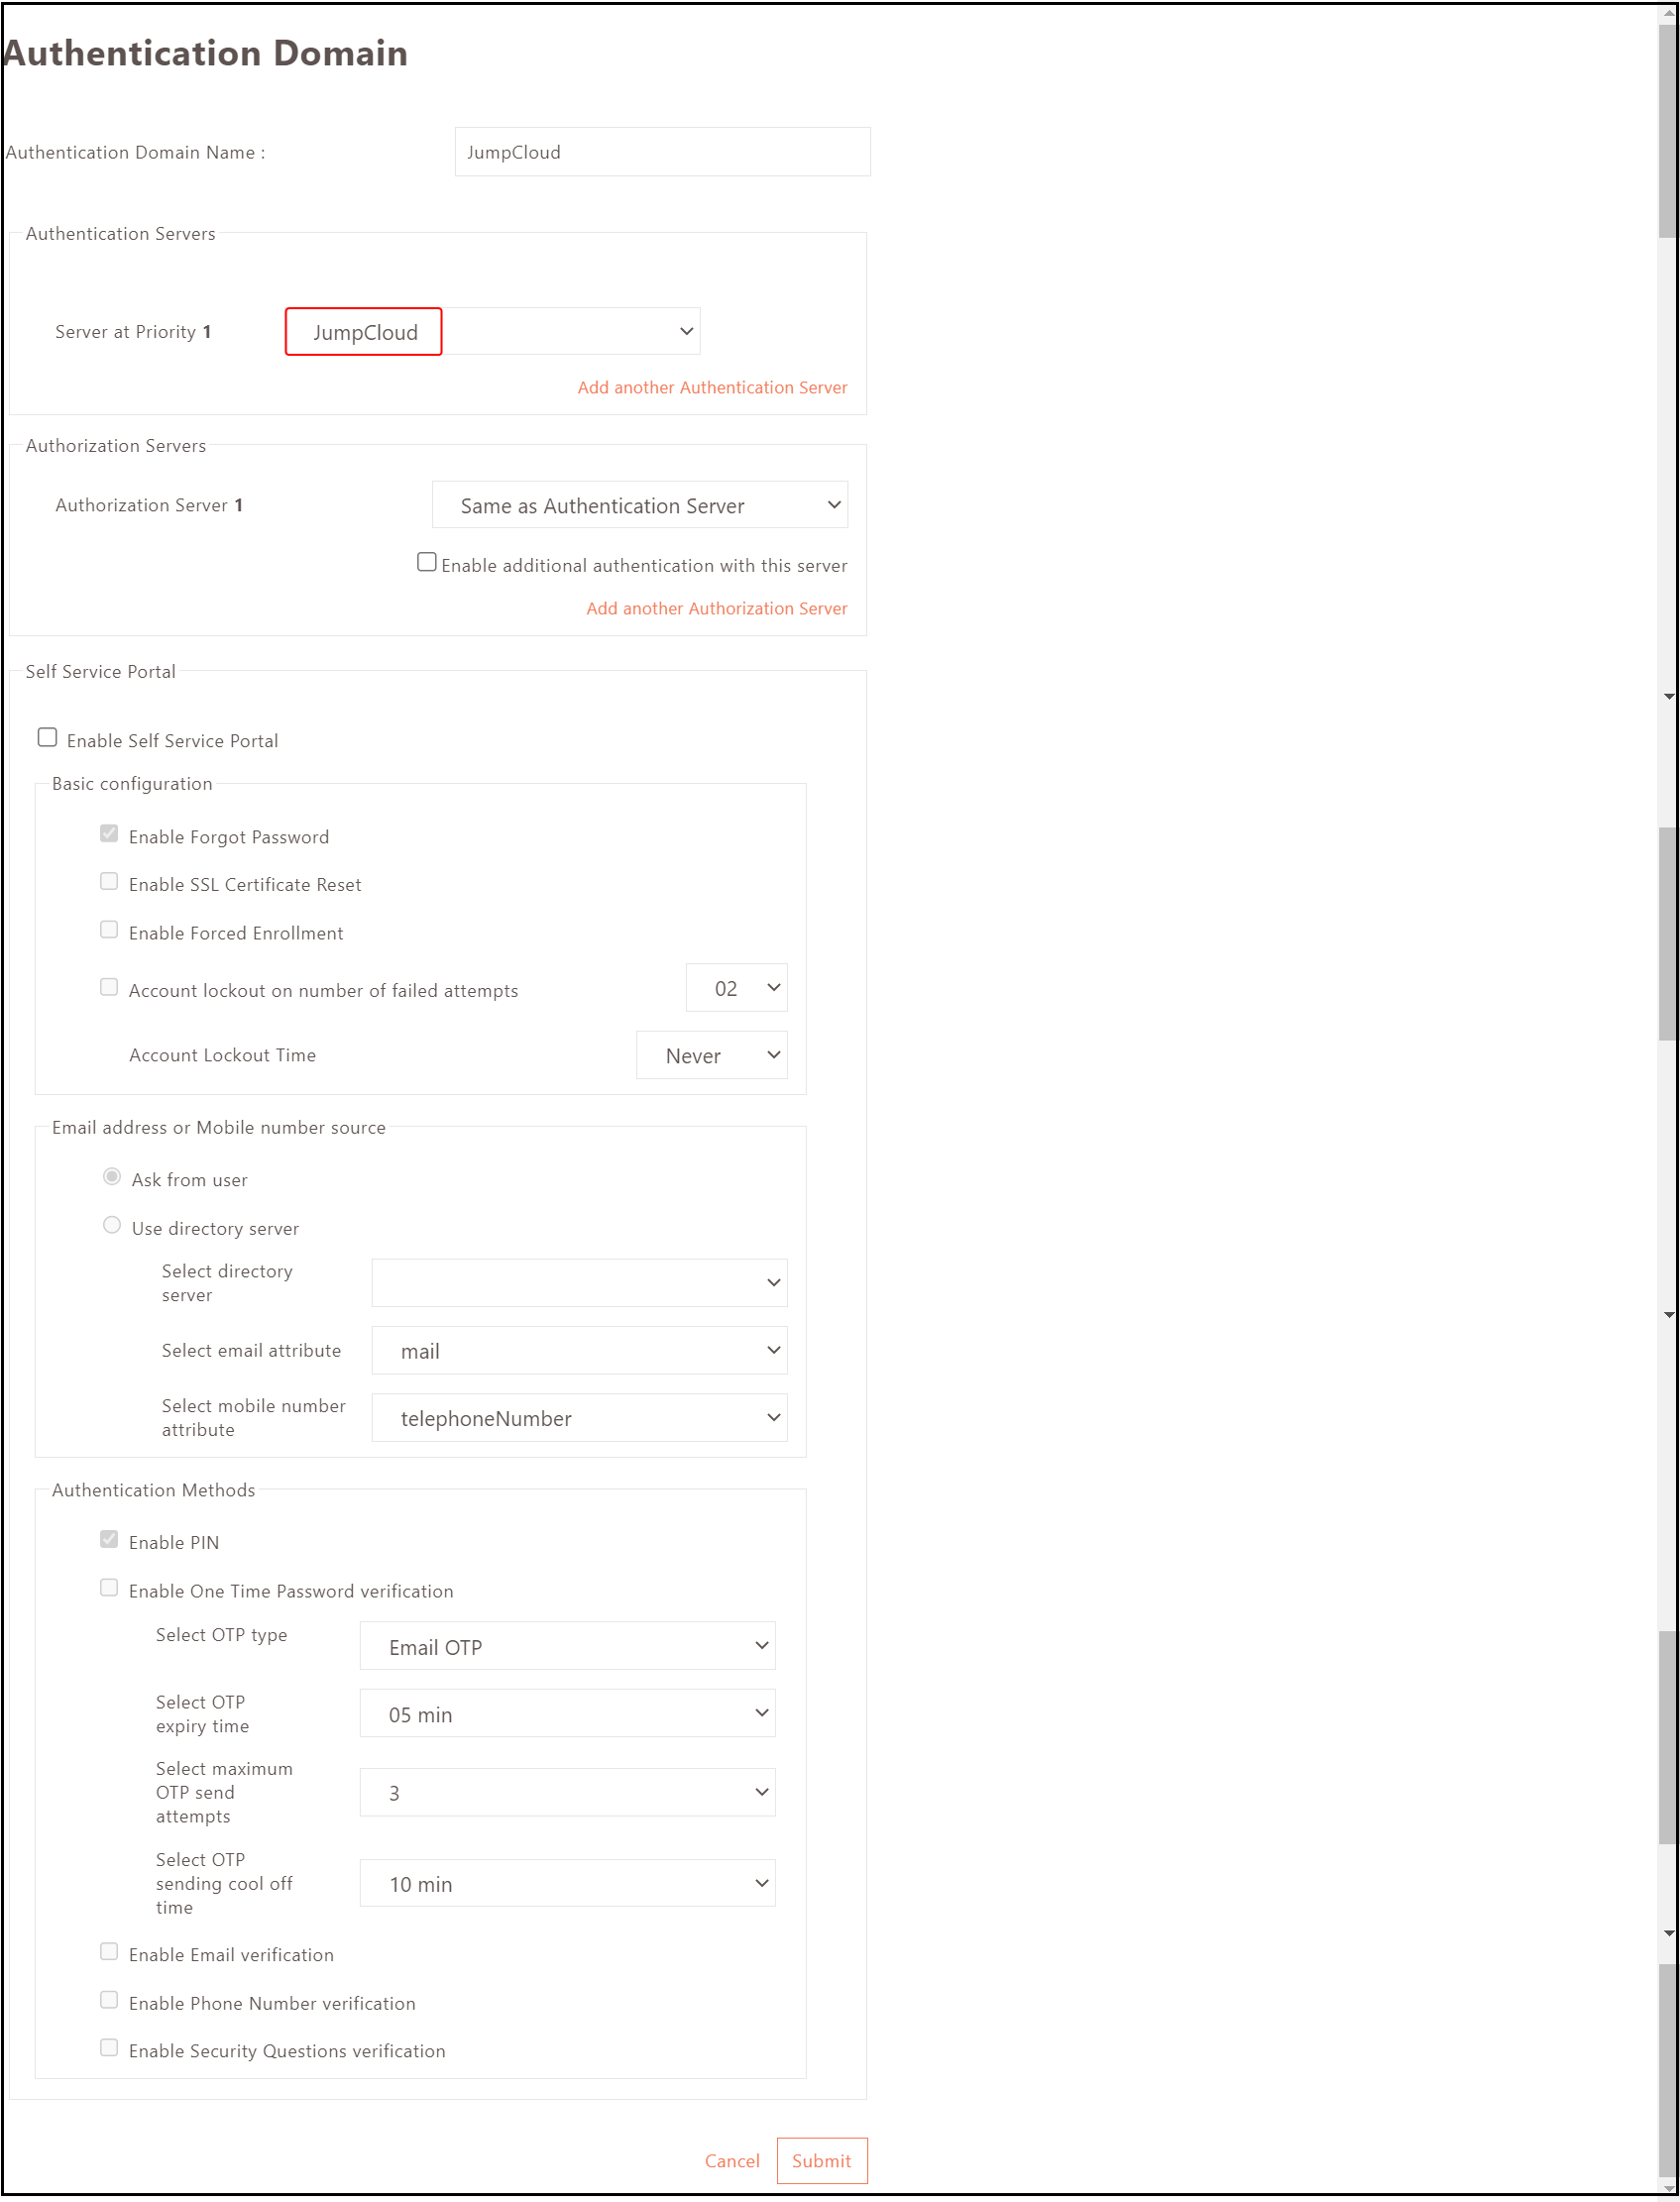
-
-
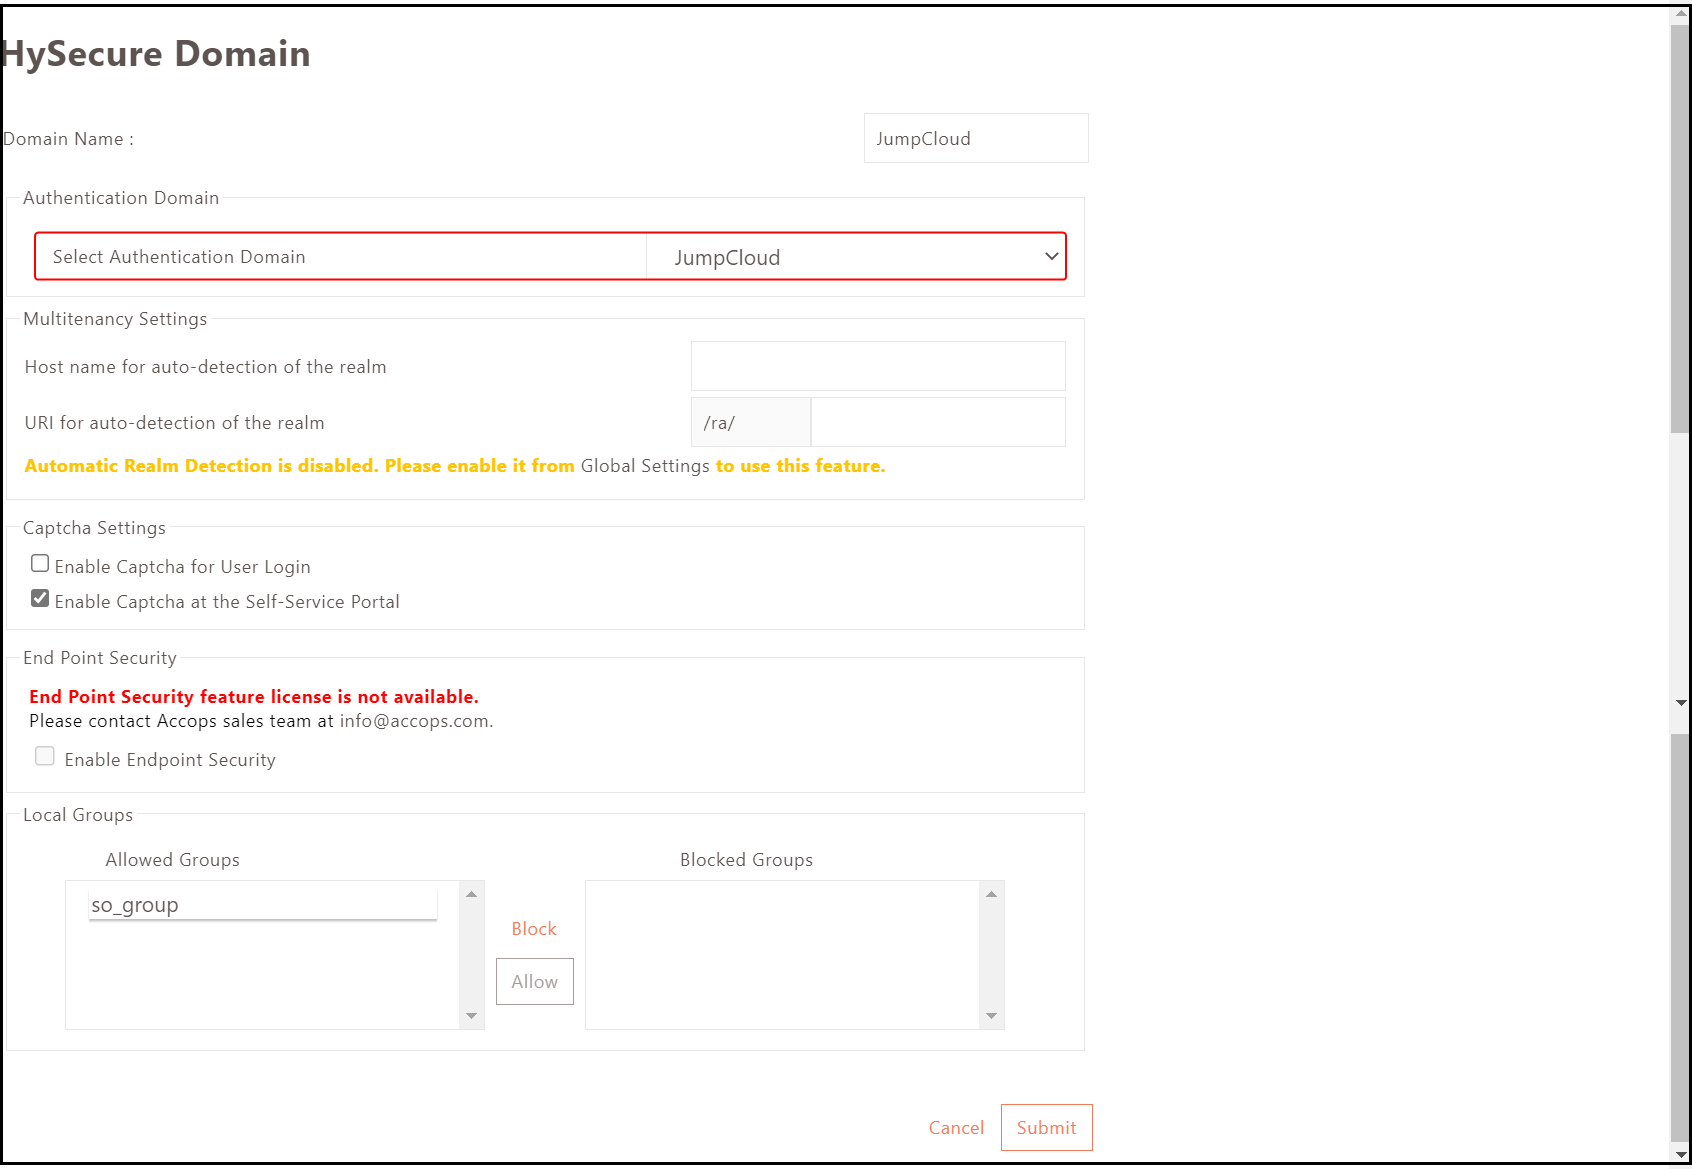
Configure HySecure Domain
-
Navigate to Settings > HySecure Domain in the HySecure Management Console.
-
Select Add. Add the new HySecure Domain and select the respective Authentication Domain, i.e., JumpCloud, under the Select Authentication Domain field. For more information, click here.
-
-
Application and ACL Policy Configuration
-
Navigate to Policies > ACL in the HySecure Management Console.
-
Create an application and assign it to the application group.
-
Create an ACL policy and select the parameters below to configure it with the SAML authentication server of the respective application group.
Field Sample value Select HySecure Domain JumpCloud Select Authentication Domain JumpCloud Selected Group DEFAULT_SAML_IDP_USER_GROUP 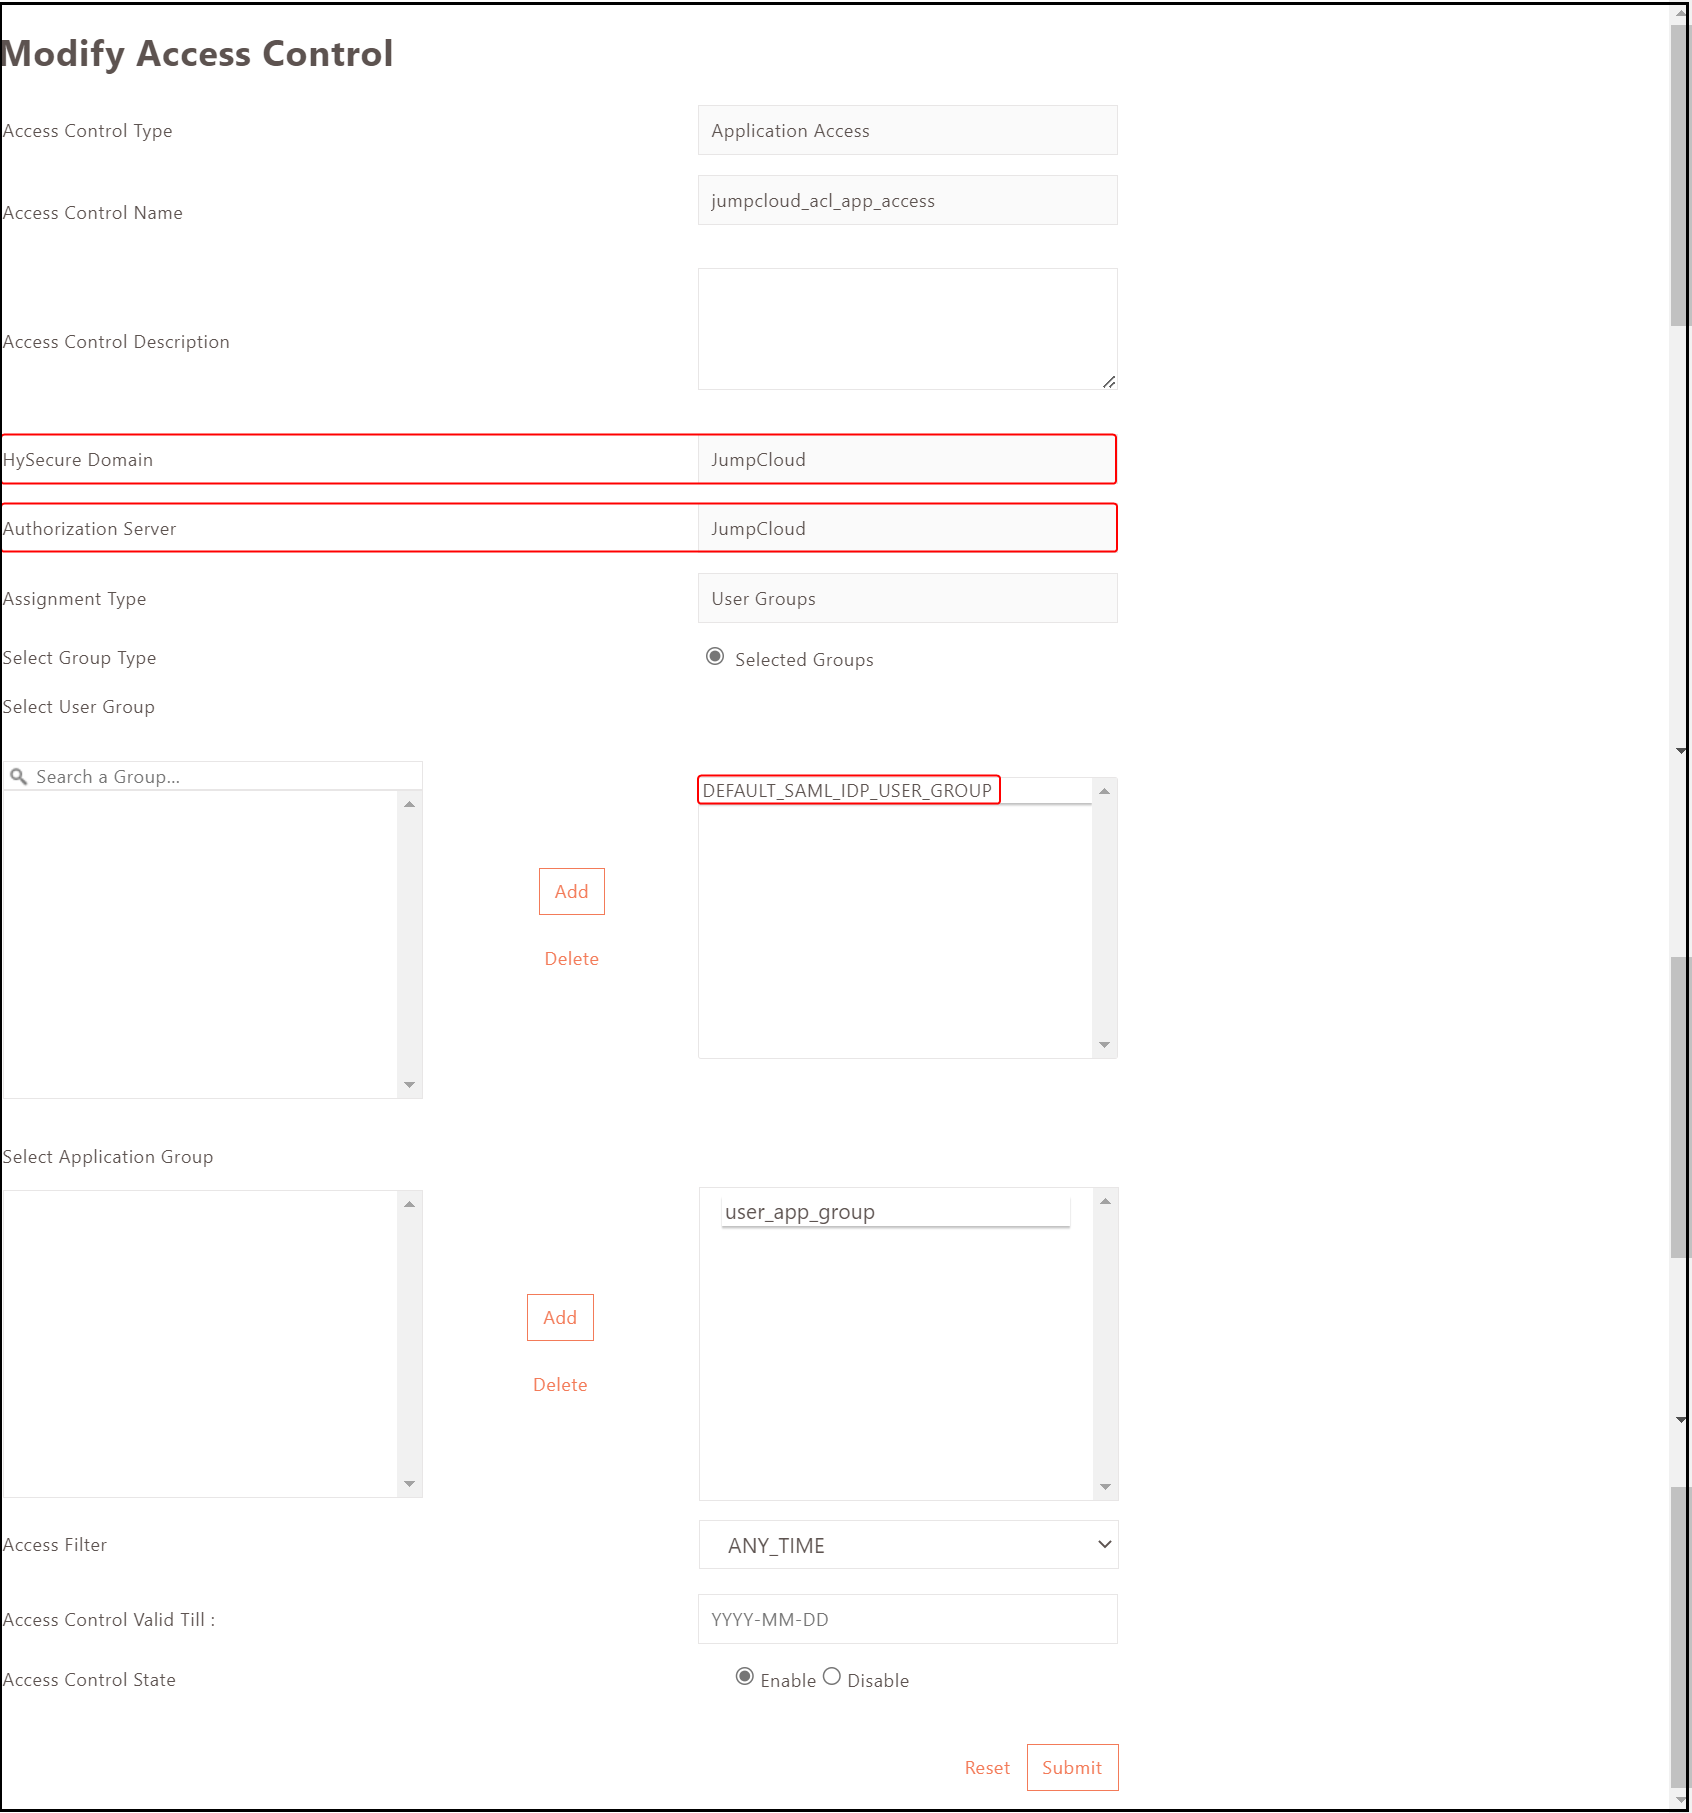
-
This completes the HySecure configuration.
Users should now be able to access web resources using SAML authentication according to the configured settings.