Prepare Oracle
To assist with the smooth integration of your Oracle platform with the HyWorks Controller, use the following references:
Supported Feature Matrix
| Feature | Sub Feature Category | Sub Feature | Oracle |
|---|---|---|---|
| Deploy pool with existing VMs | - | - | Yes |
| Desktop VM Provisioning | Clone Type | Linked Clone | Not Applicable |
| Full Clone | Yes | ||
| Clone from Snapshot | - | No | |
| Disk persistence | Persistent VM Deployment | Yes | |
| Non-persistent VM Deployment | No | ||
| Enable DVM Reset | No | ||
| Deployment Setting | Only resource group, not Location | ||
| Customization | Both (Sysprep and Hyprep) | ||
| IP Address Filter | Yes | ||
| Shared hosted desktop provisioning and automated deployment | Yes | ||
| Automated power management and scaling | Yes | ||
| Desktop Power Operations | - | - | Yes |
| Operating Systems Support on Provider | Windows Desktops | Windows 7 | Yes |
| Windows 8.1 | Yes | ||
| Windows 10 | Yes | ||
| Windows Servers | Windows Server 2008 R2 | Yes | |
| Windows Server 2012 R2 | Yes | ||
| Windows Server 2016 | Yes | ||
| Windows Server 2019 | Yes | ||
| Linux Desktops | CentOS 7 | Yes | |
| Ubuntu 16 | Yes | ||
| Ubuntu 16 | Yes |
Pre-requisites
-
Oracle Account ID: The Oracle Account ID is a unique identifier for your account, granted as an IAM user right.
-
Oracle Secret Key: The Oracle secret is the Fingerprint of the IAM User. It protects your resources by only granting tokens to authorized requestors.
-
Oracle Tenant ID: The Tenant ID is a globally unique identifier that is different from the tenant name or domain.
-
Provider Pem File: Provider Pem File is an RSA key in a PEM format used to sign the API requests.
-
Region: The Region is a physical location where virtual desktops will be stored worldwide.
Configure Oracle IAM User
-
Log in here with your credentials: https://cloud.oracle.com/?tenant=ro***
-
Search for Users and select it once you find it.

-
Click Create Users.

-
Enter the User Name and Password.

-
Select Created User.

-
Click API Keys followed by Add API Key.

-
Download the Private Key and click Add.

-
Save the Configuration File Preview in Notepad for future reference.

Adding Users in Group
-
Search for Groups and select it once you find it.

-
Click Administrator Group.

-
Click Add User to Group.

-
Add the user to the group.

-
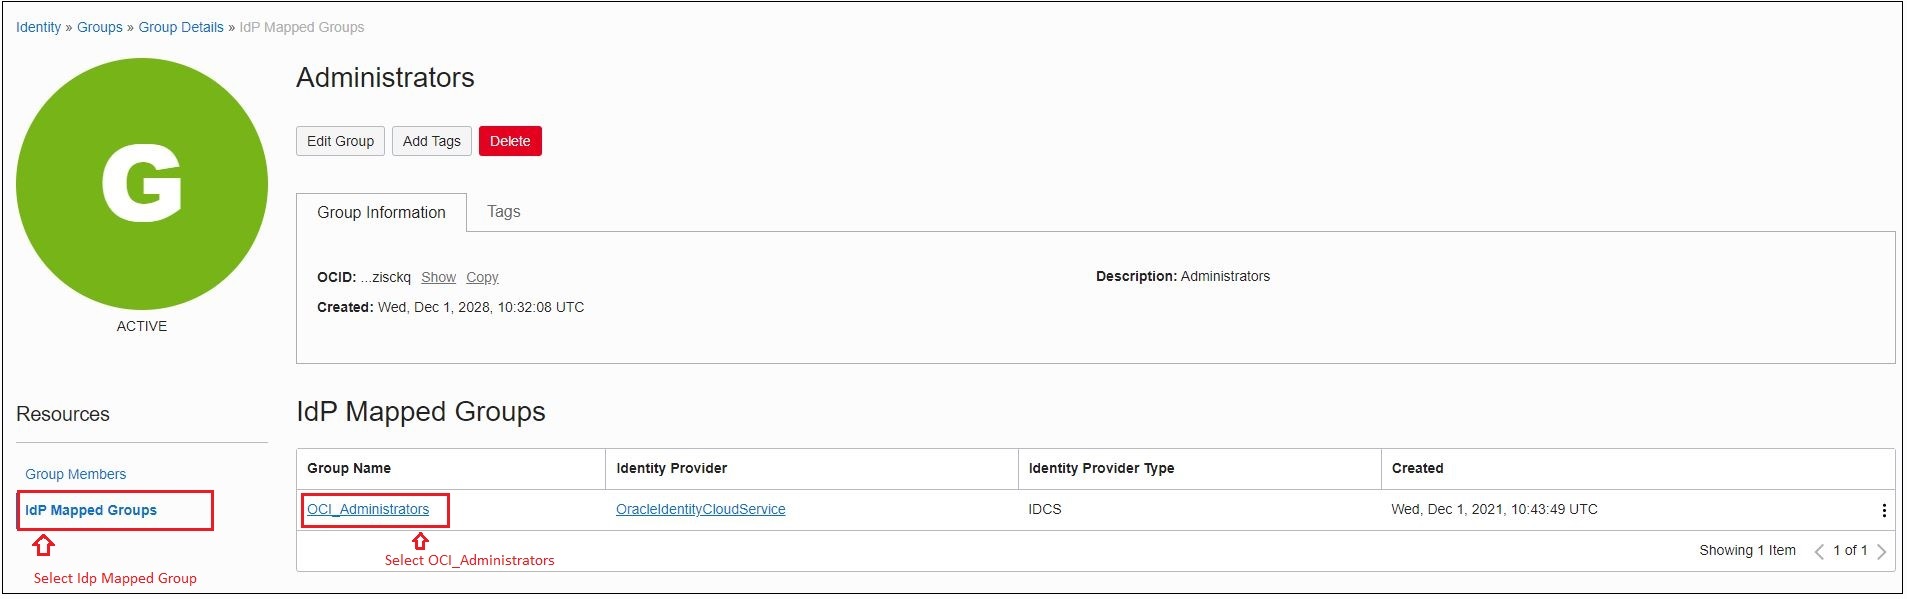
Click on IdP Mapped Groups and OCI_Administrator.
-
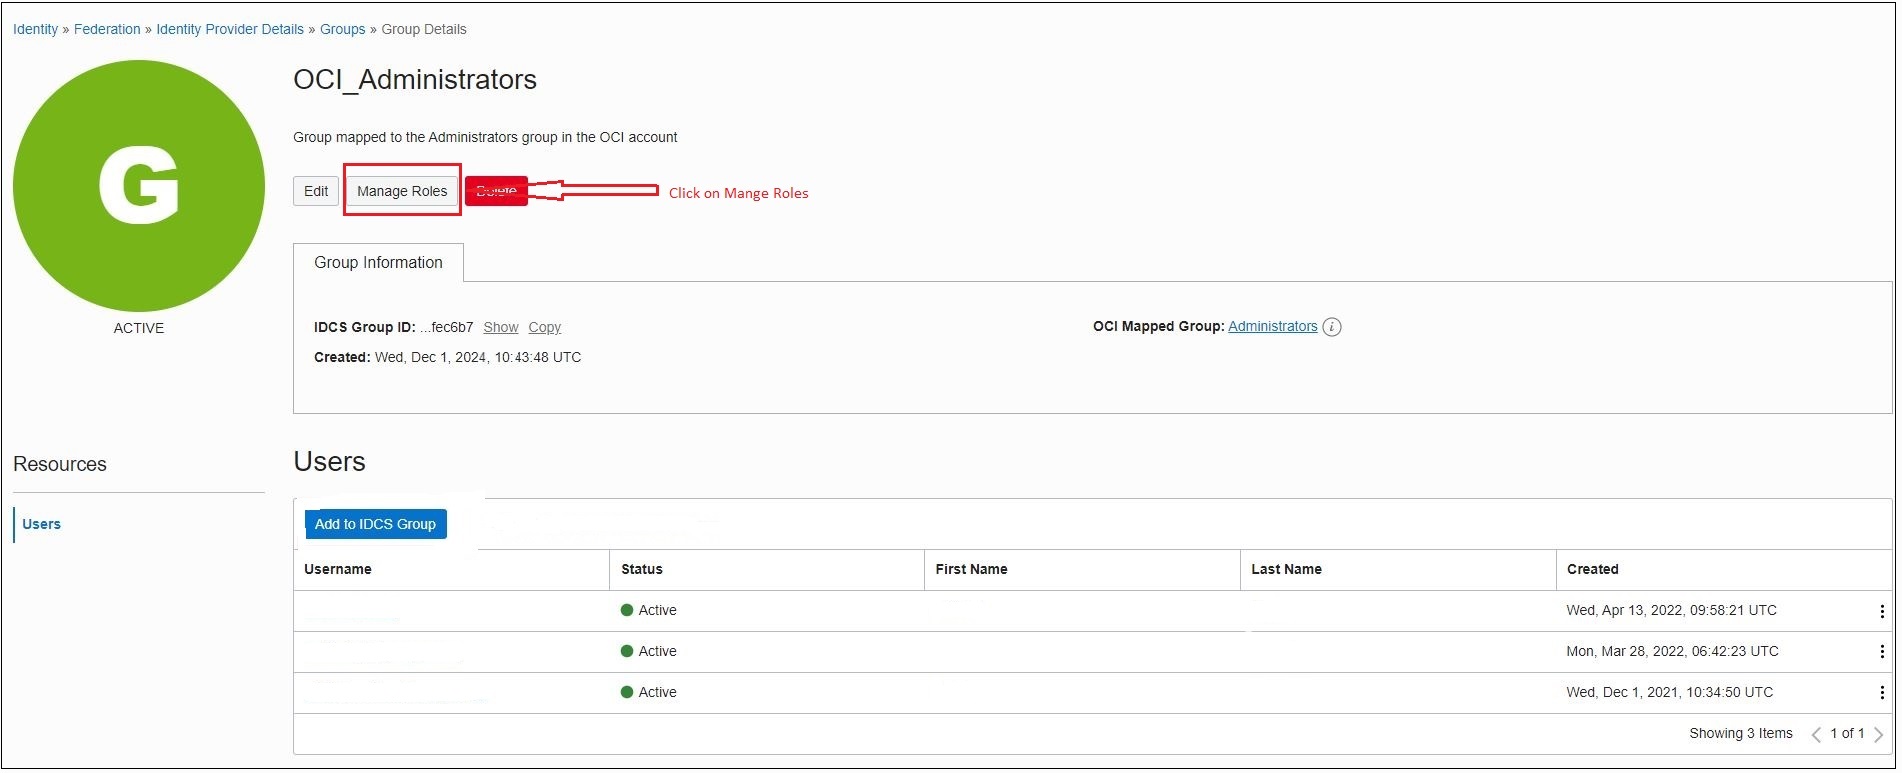
Click IDCS Group.

-
Add the user to the IDCS group.

-
Click Manage Service.
-
Click Manage Service Access.

-
Update the Role Selections and Apply Role Setting.

Reference: https://docs.oracle.com/en-us/iaas/Content/GSG/Tasks/addingusers.htm
Configure Controller for Domain Account Authentication in Proxy server
Make the following configurations in the Controller when you configure the proxy server on the Controller and Oracle-based Desktop Provider is being used:
- Install the controller service using this account (not the local system account)
- The account should be configured as Logon as Service.
- Configuration can be done at the time of installation or later.
- The specified account will be used to authenticate through the proxy server.
- Whitelist URLs are mentioned above.
 Fig: Configuration post-installation
<system.net>
    <defaultProxy>
    <proxy usesystemdefault="true" />
    </defaultProxy>
</system.net>
- Verify the above configuration within the HyWorks controller
x:\Program Files (x86)\Accops\HyWorks\Service\EDC.Service.exe.config
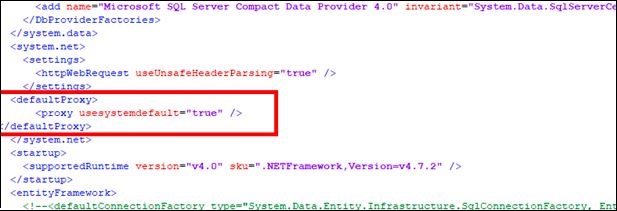
Fig: Configuration file change
Note
- **You need to re-login to apply the changes above. **
Desktop Operation Support
| Operation | Support | Status on Oracle | Status on HyWorks |
|---|---|---|---|
| Power On | Yes | Powered On | Powered On |
| Power Off | Yes | powered Off | powered Off |
| Shutdown | Yes | powered Off | powered Off |
| Restart | Yes | Restart | Restart |
| Reset | No | - | - |
| Refresh (Desktop Information on HyWorks) | Yes | - | Update VM details, call the DVM agent |
| Re-Create (single VM from Desktop VMs page) | Yes | - | - |
Limitation with the Oracle Handler
-
Change the Location (the current VM will be cloned at the source VM location)
-
The latest Gold Master changes require manual intervention. Recompose and cloning uses Snapshot for ExpireSnapshotAfterLastUseInMin.
-
The old Snapshot is deleted when the time interval between the current Time and LastUsedTimeForCloning exceeds Time to Live (ExpireSnapshotAfterLastUseInMin). The old Snapshot deletion occurs with every new clone job.
Oracle Disk Snapshot Time To Live
- In Oracle, a snapshot is used to clone the OS Disk and Data Disk. After cloning is complete, these disks are deleted according to their time to live. This deletion process depends on three Tags—two on the Gold Master Disk and one on Snapshot.
Gold Master Tags : 1. ExpireSnapshotAfterLastUseInMin (In min) (Default 48 hours): Reduce this time interval to reflect the latest Gold master changes applicable on Recompose and fresh cloning. 2. CreateNewSnapshot (Default False): This tag will force a new snapshot to be created with every cloning. It is recommended that you keep this tag set to False.
SnapShot Tags : 1. LastUsedTimeForCloning (In Epoc): This is updated for the Snapshot every time a clone is created from this snapshot.
- The Gold Master and snapshot tags are created at the first call of cloning the VM with the Default value. The Admin can change ExpireSnapshotAfterLastUseInMin and CreateNewSnapshot based on their requirements. The Admin can add the ExpireSnapshotAfterLastUseInMin and CreateNewSnapshot tags before cloning the fresh Gold Master with the desired value.