Registered Users
Overview
Whenever a user logs in to the Management Console, an administrator-managed profile is created for that user.
The list of profiles can be viewed under Registered Users.
As part of the profile management, the administrator can perform the following actions:
-
Add a user profile.
-
Enable the user if the administrator locks them out, or if the user is locked out due to multiple password failure attempts.
-
Disable the user to prevent them from logging in to the HySecure gateway via the Client or the HyLite portal.
-
Delete the selected user profile.
-
View the Profile details and perform various actions such as:
-
Activate / Deactivate the Mobile Token.
-
Assign / Unassign Hardware Token.
-
Reset the user password on their behalf if they are locked out.
-
Generate an Offline OTP on behalf of the user to log in to the HyID Windows Desktop.
-
-
Export all user profiles to a .csv file.
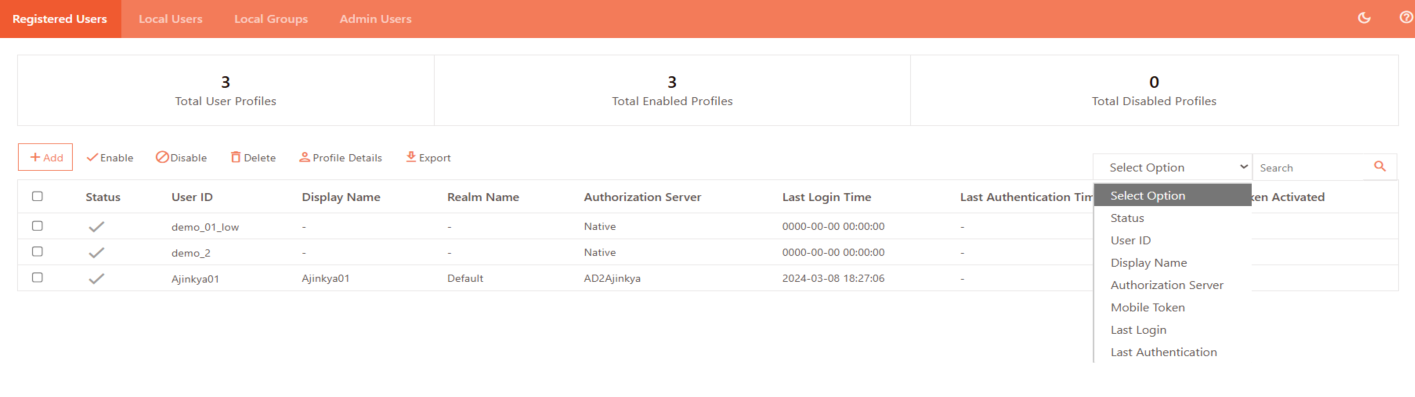
Filter Options
-
Status: Filter users by their account status (Enabled or Disabled).
-
User ID: Search by the unique username or login ID assigned to the user. Upon selecting this filter, the user must also select the associated Realm Name, since User IDs may exist in multiple realms. Choosing the correct realm ensures the search results are accurate and limited to the relevant authentication domain.
-
Display Name: Filter users by their visible name shown in the system.
-
Authorization Server: Search by authentication source (e.g., Native, Active Directory).
-
Mobile Token: Filter users by registered mobile authentication token details.
-
Last Login: Find users based on their most recent login date and time.
-
Last Authentication: Filter by the user's most recent authentication activity.
View Registered Users List
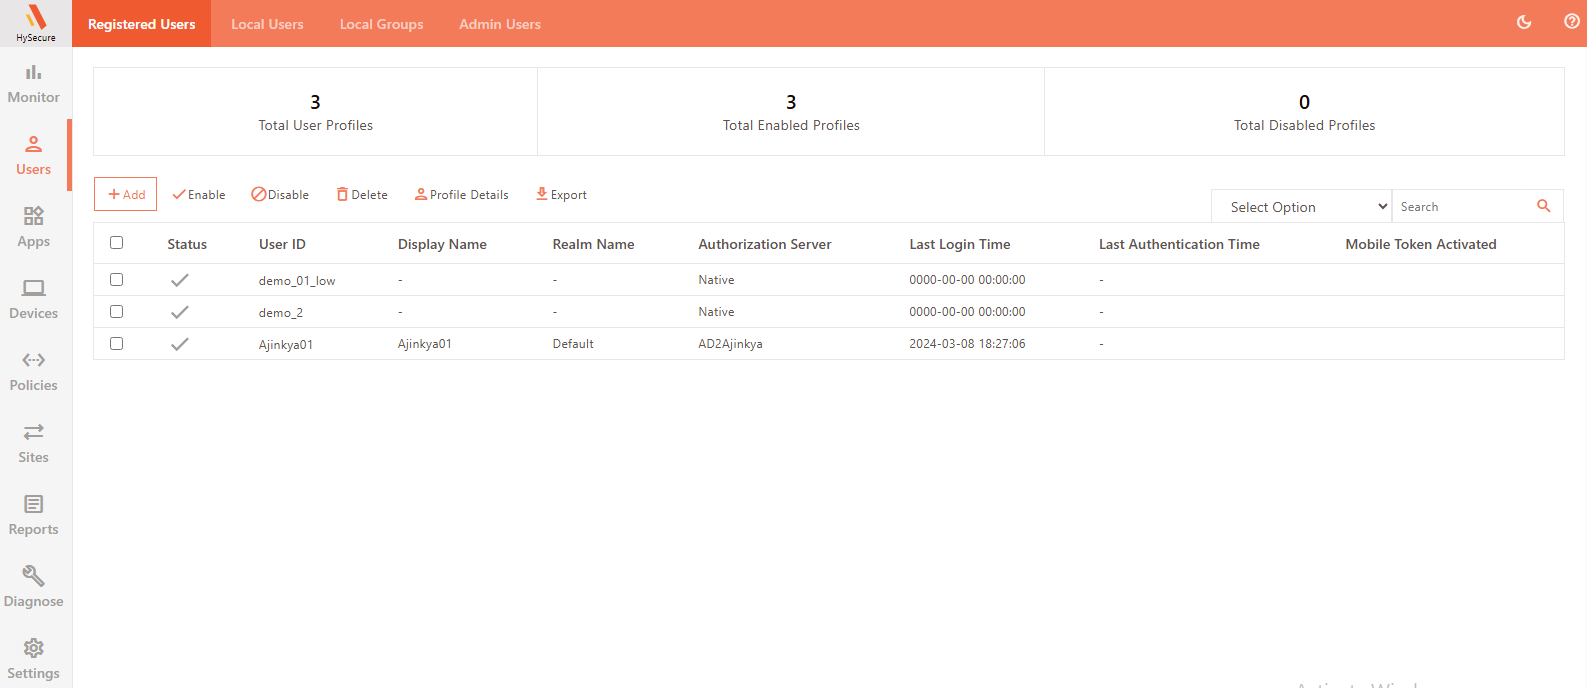
To view the details of the Registered Users:
- Log on to the Management console.
- Navigate to Users > Registered Users.
- The page has the following details:
| Field | Description |
|---|---|
| Status | Displays the profile status as Enabled (ticked) or Disabled (blank). |
| User ID | Displays the user’s ID when they log in to the Gateway. |
| Display Name | Displays the name given to the user. |
| Realm Name | Displays the HySecure domain name the user connects to when logging in to the Gateway. |
| Authorization Server | Displays the authorization Server that authorizes the user. |
| Last Login Time | Displays the timestamp of the user’s last logon to the Gateway. |
| Last Authentication Time | Displays the timestamp of the user’s last authentication to the Gateway. The Administrators or Security Officers can easily disable/delete registered users based on the users’ last login time or last authentication time. |
| Mobile Token Activated | Indicates whether a mobile token is activated for the user. |
| Last Successful Login Location | Displays the location of the last successful login using geolocation login enforcement. |
| Last Unsuccessful Login Location | Displays the location from which the user tried to log in, which is not allowed for the user to log in using geolocation login enforcement. This is helpful for keeping the logs. |
The following details are visible inside the profile:
| Field | Description |
|---|---|
| Hardware Token | Indicates whether a hardware token is assigned to a user. |
| FIDO Security Key | Indicates whether a FIDO Security Key is activated for the user. |
Add Users
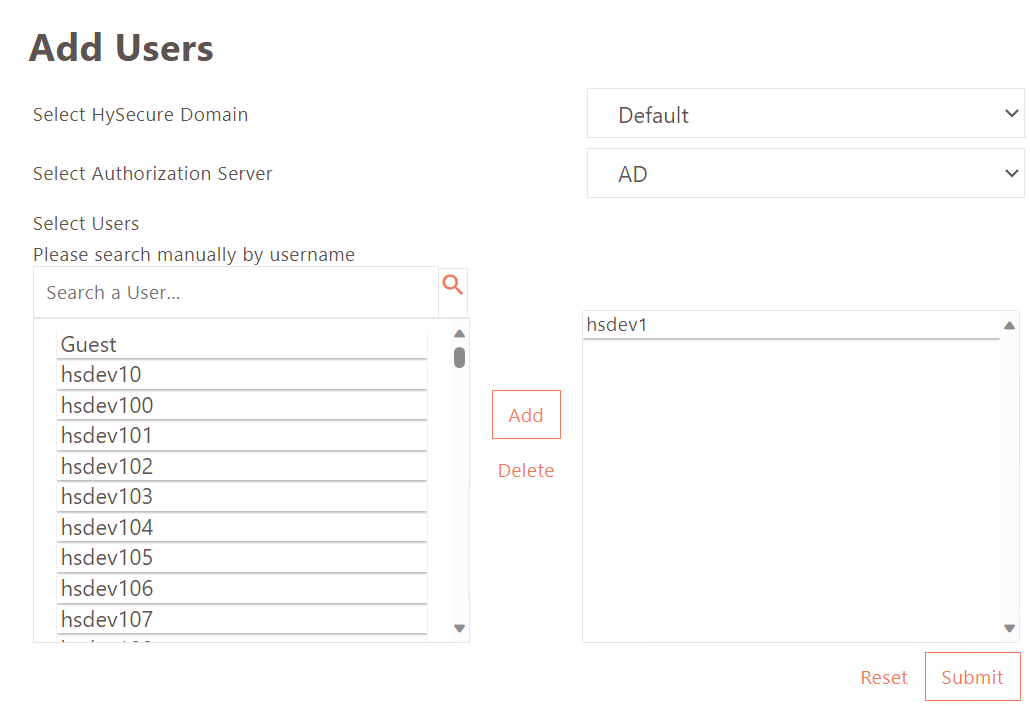
- Navigate to Users > Registered Users and click Add.
- Enter the following details:
- Select HySecure Domain: Select the HySecure Domain for user login.
- Select Authorization Server: Select the HySecure Domain’s authorization server for user authorization.
- Select Users: Select the user from the list or search manually by typing the username.
- Click Add to confirm the user.
- Click Submit to complete the user profile creation.
Enable User
- Navigate to Users > Registered Users.
- Select the user profiles you want to enable.
- Click Enable.
Upon confirmation, the user profiles will be enabled and will be able to log in to the Management Console.
Disable User
- Navigate to Users > Registered Users.
- Select the user profile you want to disable.
- Click Disable.
Upon confirmation, the user profile will be disabled, and the user will no longer be able to log in to the Management Console.
Delete User
- Navigate to Users > Registered Users.
- Select the user profile you want to delete.
- Click Delete.
Upon confirmation, the user profile will be deleted.
View Profile Details
- Navigate to Users > Registered Users.
- Select the user to view their Profile Details.
- Click Profile Details.

Basic Info
| Field | Description |
|---|---|
| User ID | Displays the user ID used to log in to the Management Console. |
| Authentication Domain | Displays the Authentication Domain used to authenticate the user. |
| Authentication Server | Displays the Authentication Server configured in the Domain - responsible for authenticating the user. |
| Authorization Server | Displays the Authorization Server configured in the Domain - responsible for authorizing the user. |
| Authentication Failed Attempts | Displays the number of failed authentication attempts. |
| Alternate Mobile | Displays the user’s mobile number. |
| Alternate Email | Displays the email address of the user. |
| First Login Time | Displays the timestamp of the user’s first login. |
| Last Login Time | Displays the timestamp of the user’s last login. |
| Last Authentication Time | Displays the user’s last authentication time. Administrators/Security Officers can easily disable/delete registered users based on their last authentication time. |
Tokens
| Field | Description |
|---|---|
| Mobile Token | Mobile Token-based authentication can be activated/deactivated by clicking the toggle link Activate/not Activate. |
| Hardware Token | Hardware Token-based authentication can be assigned/de-assigned by clicking the toggle link Assign/ Not Assign. |
| FIDO Security Key | FIDO allows users to sign in to their devices using passkeys, such as biometrics or security keys. Click the toggle link Enable FIDO/Disable FIDO. |
Hardware tokens cannot be registered by the user; they can only be assigned by the administrator from the Management Console. The assigned hardware token for the user can be verified in Profile Details under Registered Users. Navigate to Users > Registered Users and click on any user; details of whether a Hardware Token is assigned can be viewed here.
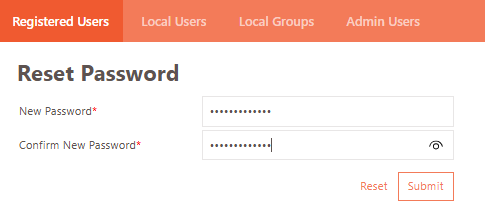
Reset Password
Click the link to reset the user's password.

Offline OTP
Click the link to generate an Offline OTP on the user’s behalf.

Last Login Device Details for Push Notification
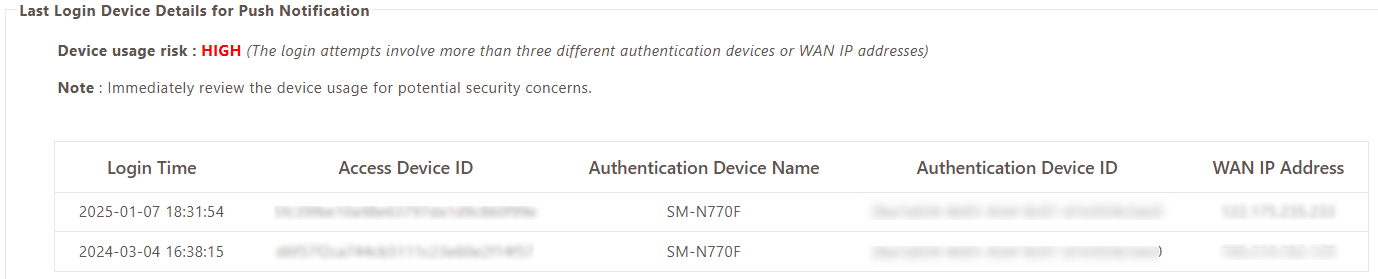
This section displays information on the previous device used to log in and the device usage risk level using the push notification.
Explanations behind each risk level to help administrators better understand the risks and take appropriate actions:
- Normal: This indicates the Authentication Device ID and WAN IP address have remained consistent during recent logins, suggesting a low risk of unauthorized access.
- Medium Risk: This suggests that two or three combinations of the Authentication Device ID and WAN IP address have been used in recent logins. In this case, administrators should closely monitor the device for any potential security concerns.
- High Risk: This indicates that more than three combinations of the Authentication Device ID and WAN IP address have been detected in recent logins. Immediate review and action are necessary to address potential security vulnerabilities and prevent unauthorized access.
Authentication Devices

This section displays a list of all devices used to authenticate the user. The administrator can Enable/Disable devices by toggling the relevant option.
| Field | Description |
|---|---|
| Device ID | Displays the device’s unique ID. |
| Device Name | Displays the Name of the device. |
| OS | Displays the Operating System running on the device. |
| Device Type | Displays the type of the device, e.g., Android or iPhone. |
| Registered On | Displays the date and time when the device was first registered. |
| Updated On | Displays the date on which the device details were last updated. |
| Active | Indicates if the device is currently active (tick mark) or not (blank). |
Authorized Locations
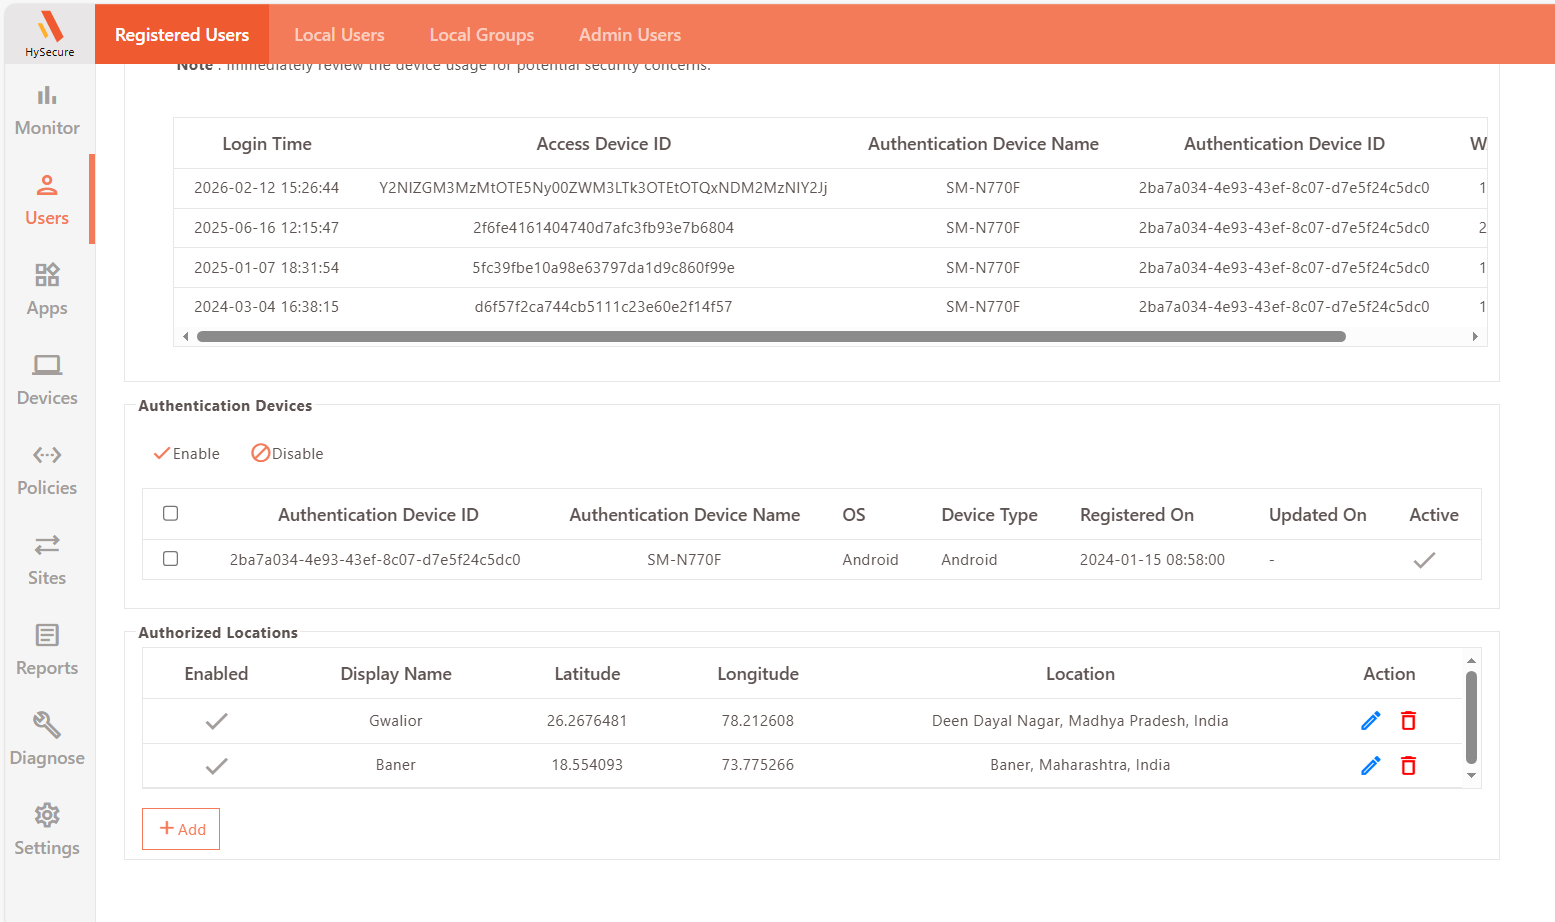
This section displays a list of all authorized locations used to authorize the user. The administrator can Enable/Disable the locations by checking the relevant box.
| Field | Description |
|---|---|
| Enabled | Check the Enabled checkbox to whitelist the location for login. |
| Device Name | Displays a descriptive identifier for the geolocation. |
| Latitude | Enter coordinates manually. |
| Longitude | Enter coordinates manually. |
| Location | Displays more details of the address. |
| Action | Displays the option to Save the changes or Cancel the changes made. |
Add Authorized Locations

Use this option when each user has individual whitelisted locations configured in their profile.
-
Select the required user profile and click Profile Details.
-
Locate Authorized Locations and click Add to configure a new geolocation entry.
-
Provide the following details:
-
Display Name: A descriptive identifier for the geolocation.
-
Latitude and Longitude: Click the Search icon to fetch location details using Google Geolocation API (if reachable). Alternatively, enter coordinates manually.
-
Click the Green Tick icon to save the geolocation entry.
-
Select the Enabled checkbox to whitelist the location for login.
Export Registered Users
-
Navigate to Users > Registered Users.
-
Click Export.
This will download a list of users in .csv format.
Search User Profiles
In case there are a large number of user profiles, the administrator can filter or search a particular profile based on any one of the following fields:
- Status
- User ID
- Display Name
- Authorization Server
- Mobile Token
- Last Login