Fresh Installation
Follow the steps given below to install HyWorks Controller version v4.0 or later.
Note
- Running the HyWorks setup from a UNC path is unsupported and will cause the setup to fail. You must copy the HyWorks setup files to the target servers locally rather than run them directly from the UNC path.
- Running the HyWorks setup may also fail during file extraction if the logged-in user has a roaming profile. In this case, logging in with a local administrator account is required.
Important Options in HyWorks Controller Installation Wizard
The following components of the HyWorks management layer can be installed during the installation:
-
HyWorks Controller Service: Select this option to configure the server as a HyWorks Controller node.
-
HyWorks Controller Management Console: Select this option if the server is to host the Management Console web application. Management Console should not be installed on servers that function in the broker role.
-
Accops HyWorks Reservation Management Service: The option will be enabled only when the management console is installed on the same server. HyLabs or Reservation Management Services should be installed only if deployment includes HyLabs.
Deployment Modes
HyWorks Controller can be installed in the following modes:
-
Two-node Active-Passive Cluster: HyWorks controller nodes can be installed on two identical Windows servers and joined to a cluster, with one HyWorks controller acting as the master or primary node. This deployment mode can support up to 2500 concurrent user sessions. This mode should be used to deploy a standalone HyWorks Controller for quick verification or evaluation.
-
Multi-node Active-Active Cluster: Multiple HyWorks Controller nodes are installed with appropriate roles (node type) to form a multi-node cluster. Two HyWorks nodes serve as management nodes for the complete HyWorks infrastructure, whereas one or more HyWorks nodes can be installed as broker nodes to handle client and session host server requests. A multi-node setup requires an external load balancer to distribute traffic among broker (session) nodes. This deployment mode should be used for larger deployments, having more than 2500 concurrent user sessions.
Database High-availability Configuration
Database high availability can be achieved using the following mechanisms:
-
SQL Server Managed Database High Availability: In this mechanism, HyWorks requires clustered SQL servers behind a single access point. SQL Servers will manage database availability, and HyWorks will access the database at the provided address.
-
HyWorks Managed Database High Availability: In this mechanism, HyWorks manages the database’s high availability. HyWorks initiates database syncing every minute using the Microsoft Sync Framework.
Roles (Node) Types
HyWorks Controllers can have the following roles:
-
Management Node: Responsible for communication with session providers and managing HyWorks deployments. But will not participate in endpoint request handling (Login, connections, etc.) or session updates by session host servers.
-
Broker (Session) Node: Responsible for performing all the brokering tasks, i.e., taking endpoint requests and getting session updates. Broker nodes will not participate in management activities.
SQL Server Authentication Mechanism
HyWorks Controller supports the following authentication mechanisms:
-
SQL Server Authentication: Uses username and password to connect to SQL Server for database creation and management by the HyWorks Controller service.
-
Windows Authentication: Requires the HyWorks Controller service to run with user credentials. The configured user must have rights to log on as a service on the server and access to the SQL server to create and manage databases.
-
If either of the databases (Service database or Log database) is configured to use Windows authentication, the HyWorks Controller service must be configured to run under the user account that has the logon as a service right on the server.
-
When installing the broker node, if HyWorks Controller management nodes are configured with Windows authentication, the broker node will also use Windows authentication. It must run under a user account with Log On as a Service rights on the server.
-
High-level Workflow for Cluster Deployments (Combinations)
Using the HyWorks Controller installation wizard, the administrator can configure the Windows server to perform a specific role in HyWorks management. This section provides steps to deploy HyWorks Controller in a specific role.
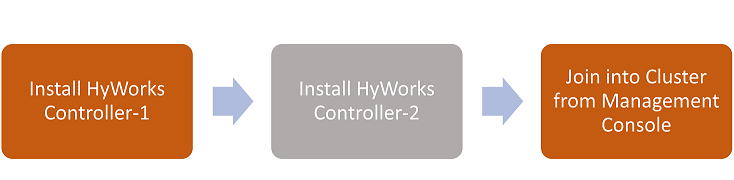
Two-node Active-Passive Cluster
Note
- A two-node active-passive cluster requires MS Sync Framework v2.1 to be installed on HyWorks Controller servers.
- MS Sync Framework - English is already included in HyWorks Controller Setup.
- MS Sync Framework - Japanese requires installation separately. It can be downloaded from here.
High-Level Steps:
-
Install HyWorks Controller# 1: Using the instructions given below:
-
Welcome screen: Proceed with the default option.
-
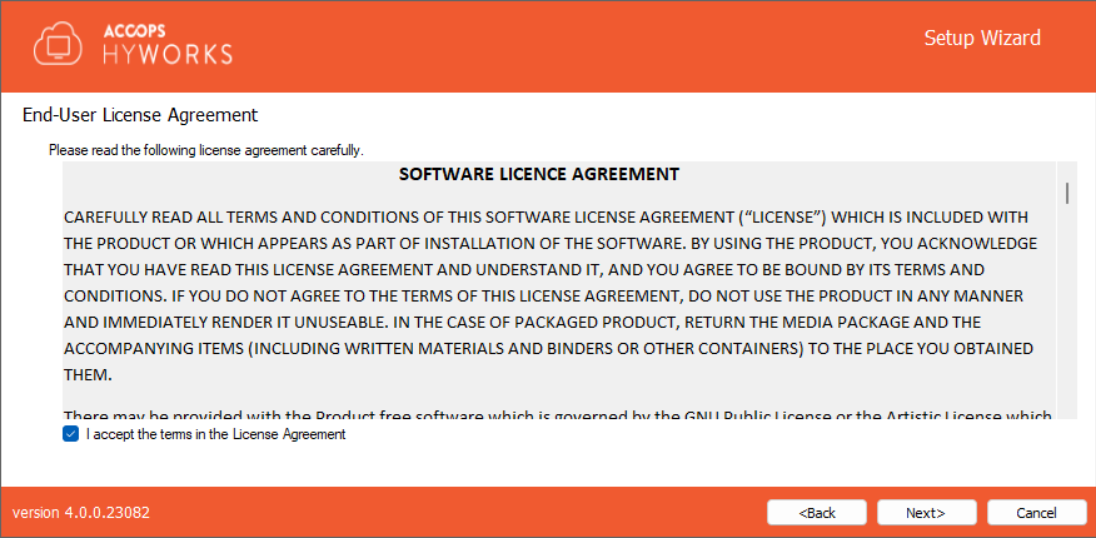
License and Agreement screen: Proceed by agreeing to the terms and conditions.
-
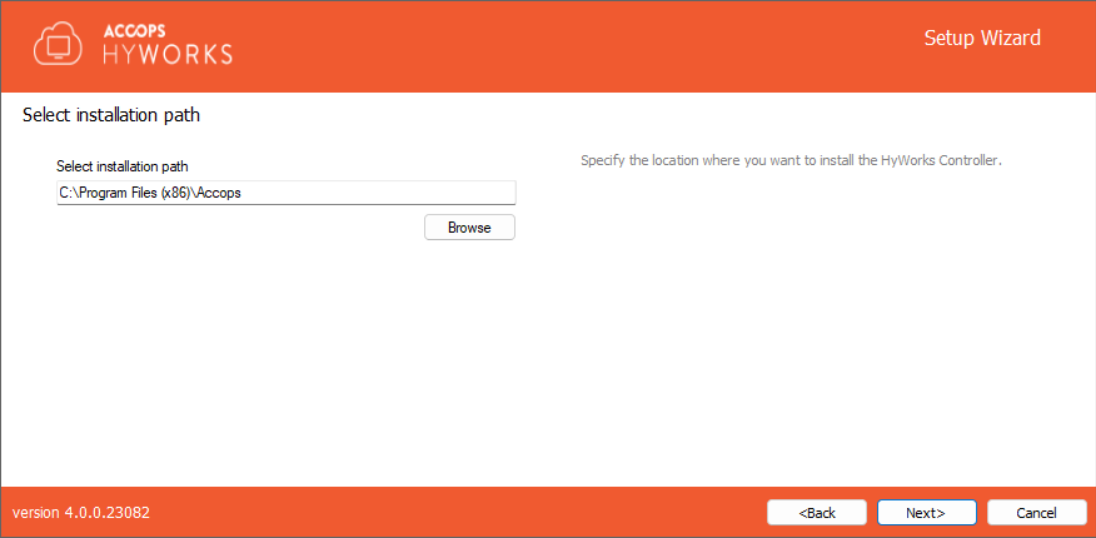
Installation Path screen: Configure as per requirements.
-
Component Selection Screen: Select the following components:
-
HyWorks Controller Service
-
HyWorks Controller Management Console
-
-
Deployment Type: Select Two-node Active-Passive Cluster.
-
Service Database Configuration Screen: SQL Server address with the instance name, database, and authentication configuration (Windows authentication or SQL Server Authentication), as per requirement.
-
Log Database Configuration Screen: SQL Server address with the instance name, database, and authentication configuration (Windows authentication or SQL Server Authentication), as per requirement. We recommend using a different SQL Server instance for the log database than the one used for the HyWorks service database.
-
Restore Database: Don't select anything and proceed.
-
HyWorks Controller Administrators: As required and per setup.
-
Service Login Credentials: As per requirement and setup.
-
Port Settings: Use the default (38866 for Controller service and 443 for management console) or use other ports as required.
-
Finish the setup, and one management node of the HyWorks controller will be ready for a two-node active-passive cluster deployment.
-
-
Install HyWorks Controller# 2: Follow the same steps as used for HyWorks Controller# 1 installation:
-
A different Windows Server with an identical configuration should be used.
-
Service Database Configuration and Log Database Configuration should use a different SQL Server instance from HyWorks Controller #1, and the authentication mechanism should be the same.
-
The installation will be completed, and the second node of the HyWorks controller will be ready for deployment in a two-node active-passive cluster.
-
-
Joining the Cluster: The two HyWorks controllers can be joined to the Cluster from either controller’s Management Console to form a two-node active-passive cluster.
Multi-node Active-Active Cluster with HyWorks Managed Database High Availability
Note
- A Two-node active-passive cluster requires MS Sync Framework v2.1 to be installed on HyWorks Controller Management nodes.
- MS Sync Framework - English is already included in HyWorks Controller Setup.
- MS Sync Framework - Japanese requires installation separately. It can be downloaded from here.
High-Level Steps:

-
Install HyWorks Controller Management Node# 1: Using the instructions given below:
-
Welcome screen: Proceed with the default option.
-
License and Agreement screen: Proceed by agreeing to the terms and conditions.
-
Installation Path screen: Configure as per requirements.
-
Component Selection Screen: Select the following components:
-
HyWorks Controller Service
-
HyWorks Controller Management Console
-
-
Deployment Type: Select Multi-node Active-Active Cluster.
-
Cluster Configuration:
-
Roles to install: Set as Management Node
-
Database High Availability: Select HyWorks Managed Database High Availability
-
-
Service Database Configuration Screen: SQL Server address with the instance name, database, and authentication configuration (Windows authentication or SQL Server Authentication), as per requirement.
-
Log Database Configuration Screen: SQL Server address with the instance name, database, and authentication configuration (Windows authentication or SQL Server Authentication), as per requirement. We recommend using a separate SQL Server instance for the log database, rather than the same instance used for the HyWorks service database.
-
Restore Database: Keep default selections and proceed.
-
HyWorks Controller Administrators: As required and per setup.
-
Service Login Credentials: As per requirement and setup.
-
Port Settings: Use the default (38866 for Controller service and 443 for management console) or use other ports as required.
-
Finish the setup, and one node of the HyWorks controller will be ready for a two-node active-passive cluster deployment.
-
-
Install HyWorks Controller Management Node# 2: Follow the same steps as used for installing the HyWorks Controller Management Node# 1.
-
A different Windows Server with an identical configuration should be used.
-
Service Database Configuration and Log Database Configuration should use a different SQL Server instance than HyWorks Controller#1, and the authentication mechanism should be the same across both.
-
The installation will be completed, and the second node of the HyWorks controller will be ready for deployment in a two-node active-passive cluster.
-
-
Joining the Cluster: The two HyWorks controllers can be joined into the Cluster from the Management Console of either controller server. Broker nodes will be added to the cluster later.
-
Install HyWorks Controller Broker Nodes: Follow the steps below to install one or more broker nodes and configure them into this multi-node active-active HyWorks managed database high availability cluster:
-
Welcome screen: Proceed with the default option.
-
License and Agreement screen: Proceed by agreeing to the terms and conditions.
-
Installation Path screen: Configure as per requirements.
-
Component Selection Screen: Select only HyWorks Controller Service. Do not install the management console on the broker node.
-
Deployment Type: Select Multi-node Active-Active Cluster.
-
Cluster Configuration:
-
Roles to install: Set as Broker Node.
-
Broker Node Configuration: Set as HyWorks Controller Management Node# 1 and HyWorks Controller Management Node# 2 as installed and configured in steps 1 & 2.
-
-
Log Database Configuration Screen: SQL Server address with the instance name, database, and authentication configuration, same as used for the log-database configuration of Management node# 1 log-database. The broker node will push logs to the current primary management node.
-
Service Login Credentials: Same as management nodes.
-
Port Settings: Use the default (38866 for the Controller service) or use a different port as required.
-
Finish the setup. One node of the HyWorks controller broker node will be installed and become a member of a multi-node cluster deployment with the HyWorks managed database availability.
-
Repeat these steps to add more broker nodes to the deployment.
-
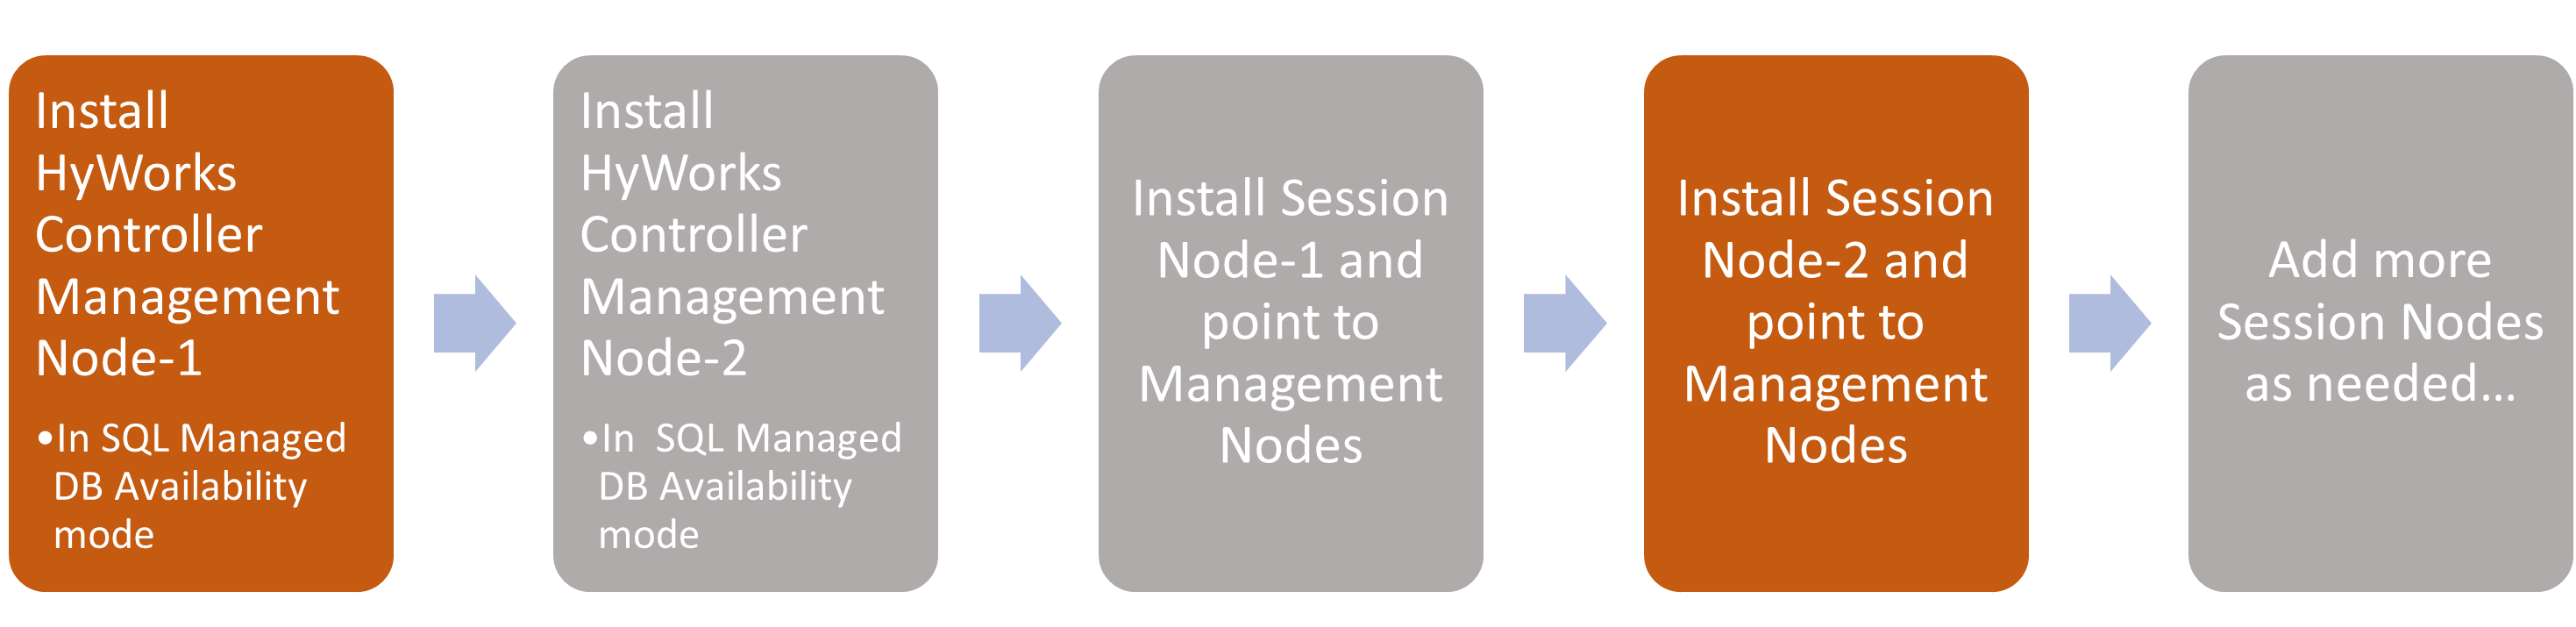
Multi-node Active-Active Cluster with SQL Managed Database High Availability
High-Level Steps:
-
Install HyWorks Controller Management Node# 1: Follow the steps given below:
-
Welcome screen: Proceed with the default option.
-
License and Agreement screen: Proceed by agreeing to the terms and conditions.
-
Installation Path screen: Configure as per requirements.
-
Component Selection Screen: Select the following components:
-
HyWorks Controller Service
-
HyWorks Controller Management Console
-
-
Deployment Type: Select Multi-node Active-Active Cluster.
-
Cluster Configuration:
-
Roles to install: Set as Management Node.
-
Database High Availability: Select SQL Server Managed Database High Availability.
-
-
Service Database Configuration Screen: SQL Server cluster address with instance name, database, and authentication configuration (Windows authentication or SQL Server Authentication), as per the requirement.
-
Log Database Configuration Screen: SQL Server address with instance name, database, and authentication configuration (Windows authentication or SQL Server Authentication), as per the requirement. We recommend using a different SQL Server instance for the log database than the one used for the HyWorks service database.
-
Restore Database: Keep the default selection and proceed.
-
HyWorks Controller Administrators: As required and per setup.
-
Service Login Credentials: As per requirement and setup.
-
Port Settings: Use the default (38866 for the Controller service and 443 for the management console), or use other ports as required.
-
Finish the setup. One management node of the HyWorks controller will be ready for a two-node active-passive cluster deployment.
-
-
Install HyWorks Controller Management Node# 2: Follow the same steps as used for HyWorks Controller Management Node# 1 installation:
-
A different Windows Server with an identical configuration should be used.
-
Service Database Configuration: This should match the configuration on the first management node. Both controllers will point to the same database instance, and the SQL server will manage the database’s high availability.
-
During the installation of the second management node, you will be prompted to confirm the database reconfiguration; select No to proceed without reconfiguring the database.
-
Log Database Configuration should use a different instance than HyWorks Controller# 1. However, the authentication mechanism should be the same.
-
The installation will be completed, and the second management node of the HyWorks controller will be ready for deployment in a two-node active-passive cluster.
-
-
Install HyWorks Controller Broker Nodes: Follow the steps given below to install one or more broker nodes and configure them into this multi-node active-active HyWorks managed database high availability cluster.
-
Welcome screen: Proceed with the default selection.
-
License and Agreement screen: Proceed by agreeing to the terms and conditions.
-
Installation Path screen: Configure as per requirements.
-
Component Selection Screen: Select only HyWorks Controller Service. Do not install the management console on the broker node.
-
Deployment Type: Select Multi-node Active-Active Cluster.
-
Cluster Configuration:
-
Roles to install: Set as Broker Node.
-
Broker Node Configuration: Set as HyWorks Controller Management Node# 1 and HyWorks Controller Management Node# 2 as installed and configured in steps 1 & 2.
-
-
Log Database Configuration Screen: SQL Server address with the instance name, database, and authentication configuration, same as used for the log-database configuration of Management node#1 log-database. Currently, the broker node will push logs to the primary management node.
-
Service Login Credentials: Same as management nodes.
-
Port Settings: Use the default (38866 for the Controller service), or use other ports as required.
-
Finish the setup. One node of the HyWorks controller broker will be installed and will become a member of a multi-node cluster with HyWorks-managed database availability.
-
Repeat the steps above to add more broker nodes to the deployment.
-
HyWorks Controller Installation Wizard Flow
This section provides details on HyWorks Controller installation for different deployment types.
-
Log in to Windows Server as a local administrator.
-
Copy the Accops HyWorks Controller installer to the Windows Server with all prerequisites configured. Refer to the Software Requirements for the Accops HyWorks Controller.
Important
- HyWorks Controller v3.3-R3 or later already includes the Microsoft Sync framework, so it doesn't need to be installed separately.
-
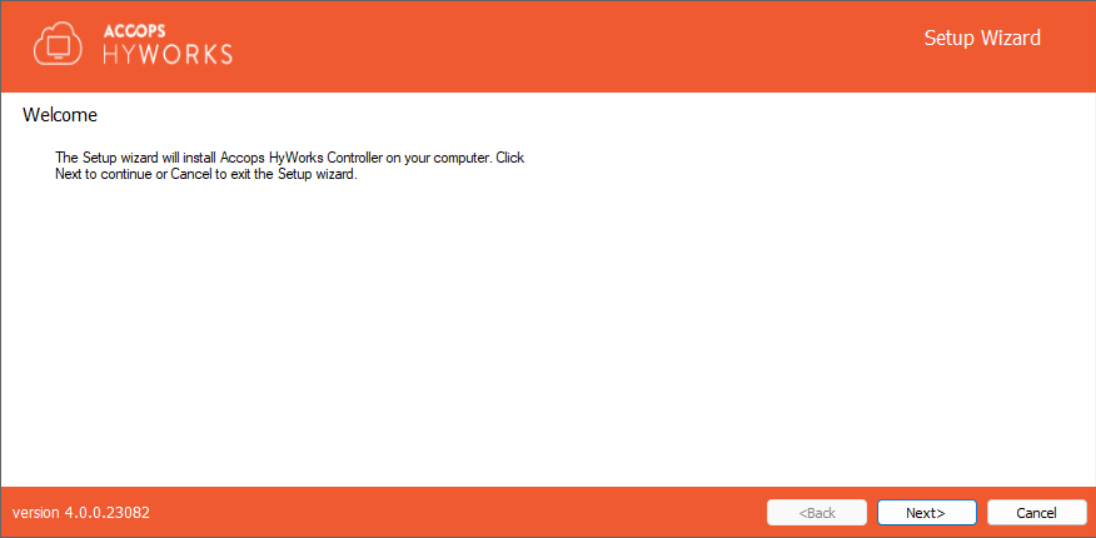
Right-click the installer, then select the Run as Administrator option to launch the Installation wizard.**
-
Click Next on the welcome Screen to proceed with the installation.
-
Accept the license agreement and click Next to proceed.
-
If required, change the installation directory and click Next to proceed. The default installation folder is "C:\Program Files (x86)\Accops".
-
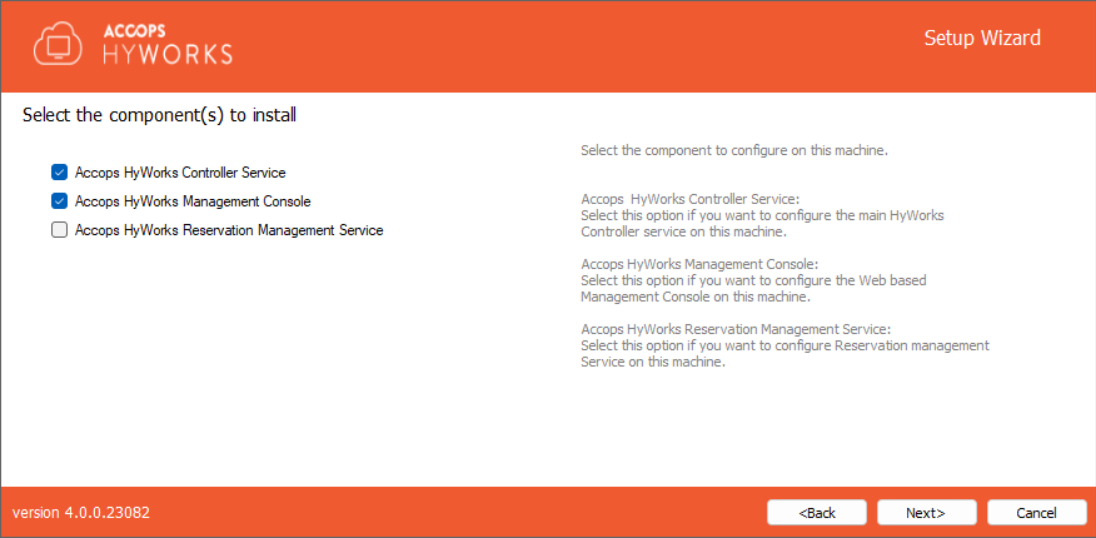
Select the following HyWorks Components to be installed.
-
Accops HyWorks Controller Service: This must be selected.
-
Accops HyWorks Management Console: Should be selected. Usually, in two-node deployments, the management console is installed with the HyWorks controller service.
-
Accops HyWorks Reservation Management Service: Not to be selected. It should be selected only if the same HyWorks server is to be used for HyLabs deployment and usage.
-
Accops Hypervisor Manager Service: Integrated in HyWorks v4.1, Accops Hypervisor Manager service manages multiple Hyper-V hosts and clusters together. For other connectors, the service will not be needed.
-
Accops HyWorks API Service: Integrated in HyWorks v4.1, Accops HyWorks API Service enables HyWorks integration with external applications. The external applications once configured correctly, can call HyWorks and HyLabs APIs to use HyWorks and HyLabs based deliveries.
-
-
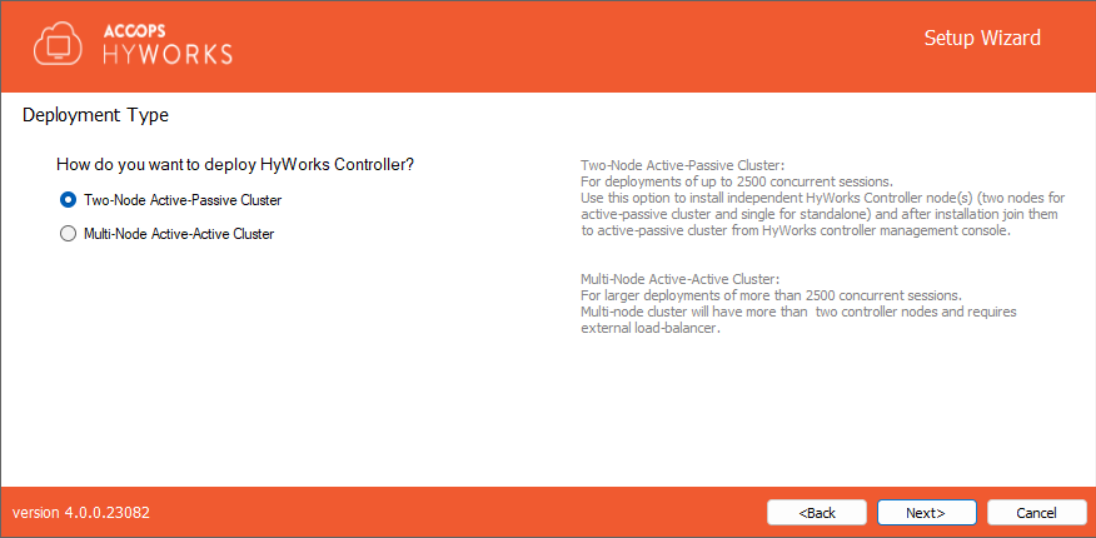
Deployment Type: Select the deployment type that best meets your requirements, then click Next. The installer wizard flow will be determined by the deployment type selected at this step.
-
Two-node Active-Passive Cluster: Select this to deploy a two-node cluster with one node working as active at a time. Choosing this option will not require the cluster configuration screen; jump to step# 10 for two-node deployment.
-
Multi-node Active-Active Cluster: Select this mode to deploy multiple HyWorks Controllers and assign them appropriate roles (management/Broker node). Choosing this option will require the administrator to set cluster configuration options.
-
-
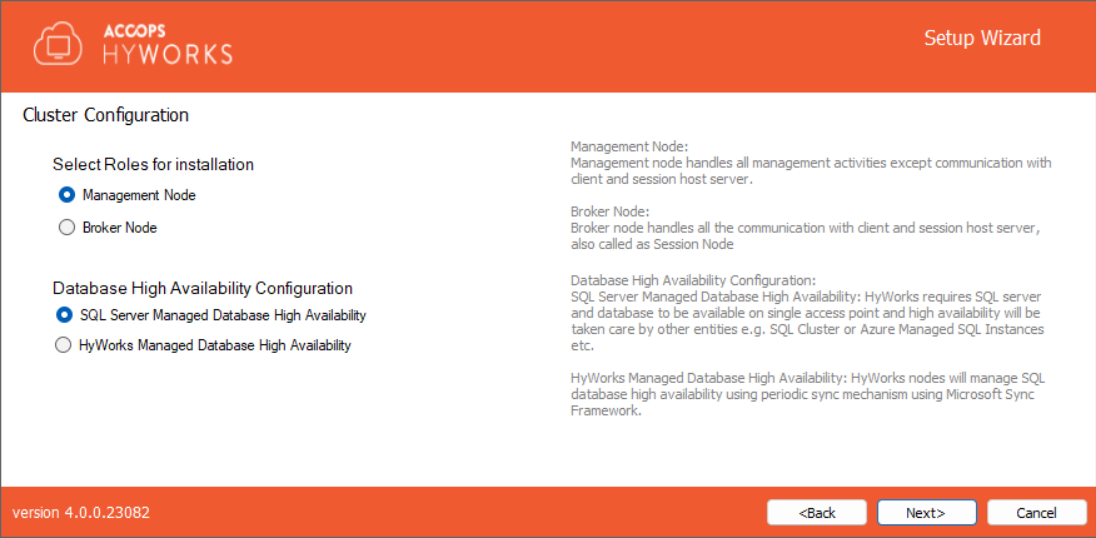
Cluster Configuration: Choosing Deployment Type as Multi-node Active-Active Cluster Deployment will require the administrator to select Roles to install. In a multi-node deployment, HyWorks Controller will be installed to function as a management node or broker node and will perform role-specific tasks.
-
Management Node: Select Roles to install as Management Node to configure the server as a HyWorks Controller Management node for multi-node deployment. Management node installation will require configuring database high availability. HyWorks supports the following two mechanisms:
-
SQL Server Managed Database High Availability: HyWorks will be configured with a SQL cluster, available on a single access point. The SQL cluster will handle database high availability. Both HyWorks Management nodes will be pointing to the same database.
-
HyWorks Managed Database High Availability: HyWorks will manage database availability by synchronizing databases between the primary and secondary HyWorks management nodes. Both management nodes will have their own databases.
-
-
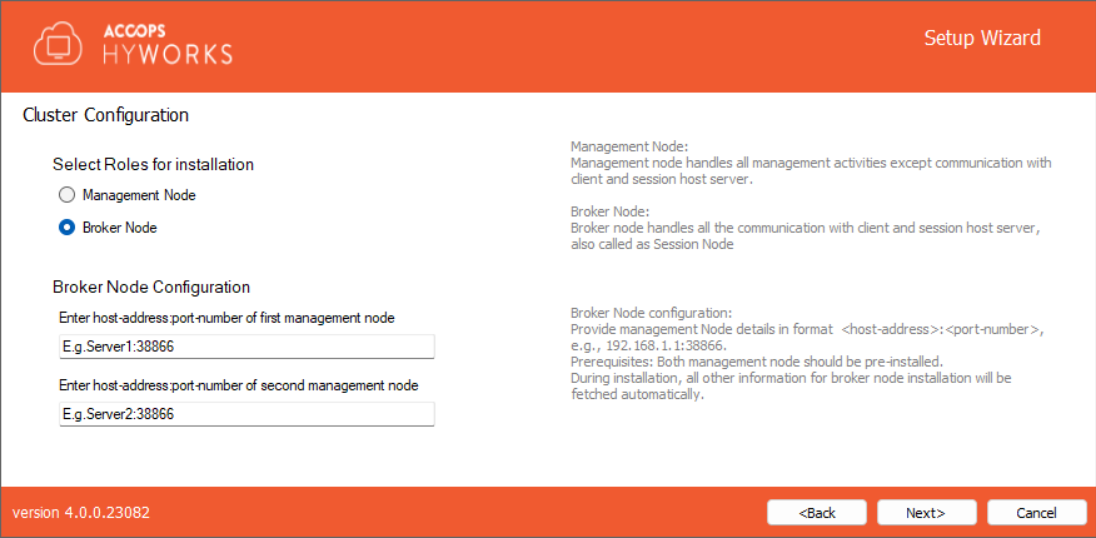
Broker Node: If this server should be installed as a HyWorks Controller broker node. While configuring this server as a broker node, the administrator will need to provide the host addresses of both management nodes.
- Broker Node Configuration: Provide the host address and port number for both management nodes, e.g., mgmtsrv1:38866 or 192.168.1.1:38866. Upon providing the management node address, the broker node will automatically obtain the database configurations and will not require them. Jump to step# 11 for broker node installation.
-
-
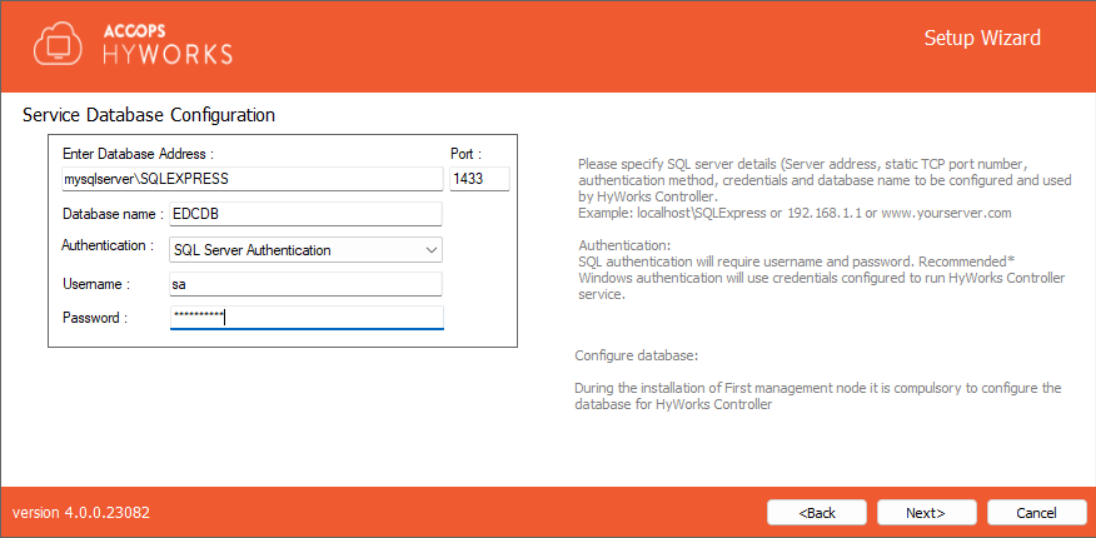
Click Next to proceed and configure the Service database. (Not applicable for broker nodes, jump to step# 11 for broker node installation). Configure the service database appropriately using the following configurations and click on the next button to proceed:
-
Database Information: Database Server address, static TCP port to connect to SQL Server, and database name.
-
Database Address in the format - <Server IP or FQDN>\\<SQL Instance Name>. e.g., if SQL Express is installed on the same instance, then the database address could be localhost\SQLExpress for Microsoft SQL Server standard and Enterprise: localhost\MSSQLSERVER (for named instance).
-
Port: Provide the static port of Microsoft SQL Server, e.g., 1433 (Default TCP Port for SQL Server)
-
Database Name: Provide the name of the database to be created. The default name is EDCDB.
-
-
Authentication mechanism: HyWorks supports the following two authentication mechanisms:
-
SQL Server Authentication. It will require SQL Server credentials.
-
Windows Authentication. Use user credentials to connect to SQL Server. User credentials or gMSA details will be entered on the next screen and used to run the HyWorks Controller service.
-
Service Database Configurations as per Deployment and Node Type: Here we will try to list out database configurations to be followed for different types of deployments and node types:
-
Management Nodes for Two-node cluster or Multi-node cluster with HyWorks Managed Database High Availability
- Both management nodes should point to different SQL servers to configure the database.
-
Management Nodes for a Multi-node cluster with SQL Server Managed Database High Availability
-
Both management nodes must use the same SQL Server cluster address, port number, and database name.
-
-
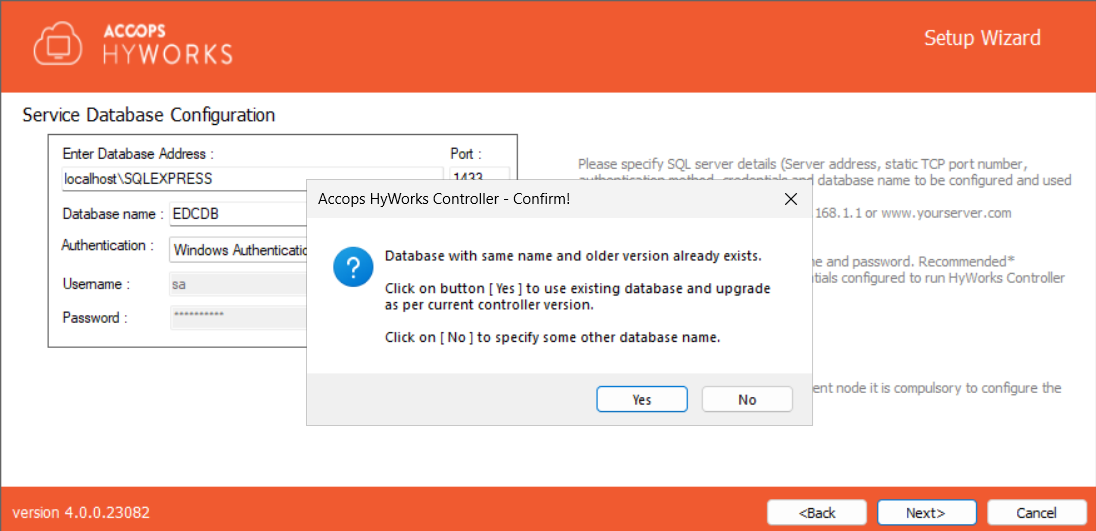
Important
During the installation of the second management node for a multi-node deployment with a SQL Server-managed database, when entering the same service database information as the first management node, a prompt will appear to confirm the action.
-
It is recommended to click the No button to avoid reconfiguring the database, since it is already set up during the installation of the first management node, and the second management node points to the same database.
-
Reconfigure Existing Database: Click the Yes button to reconfigure the database, which was already set up during the first management node's installation. This step is not recommended when installing the second management node in SQL Server-managed database high-availability setups.
-
-
When a lower version of the database exists, and a change prompt appears, or if the administrator is unsure whether the database configurations were done previously, the administrator can click on the Yes button to reconfigure the database.
-
-
Click Next to proceed with configuring the Log server. Log database configuration should be done as specified below:
-
Database Information: Database Server address, static TCP port to connect to SQL Server, and database name.
-
Database Address in the format - <Server IP or FQDN>\\<SQL Instance Name>. e.g., if SQL Express is installed on the same instance, then the database address could be localhost\SQLExpress for Microsoft SQL Server standard and Enterprise: localhost\MSSQLSERVER (for named instance).
-
Port: Provide the static port of Microsoft SQL Server, e.g., 1433 (Default TCP Port for SQL Server)
-
Log Database Name: Provide the name of the database to be created. The default name is HyLog.
-
-
Select an appropriate Authentication mechanism:
-
SQL Server Authentication. It will require SQL Server credentials.
-
Windows Authentication. Use user credentials to connect to SQL Server. User credentials will be entered on the next screen and used to run the HyWorks Controller service.

-
-
Log Database Configurations as per Deployment and Node Type:
-
Management Nodes for Two-node cluster or Multi-node cluster with HyWorks or SQL Managed Database High Availability
- Both management nodes should point to a different SQL Server instance configured as the log database.
-
Broker Nodes
-
Broker nodes should use the same log-database configurations as the primary management node. This allows the administrator to monitor any failures on broker nodes from the primary management node's console.
-
Broker nodes also fetch the log database information from the secondary management node, and when switching between management nodes, they also switch the log database.
-
During the broker node log-database configuration, when pointing to the log-database of the primary management node, a prompt will appear stating 'Database already exists'. Click the Yes button to proceed.
-
-
-
-
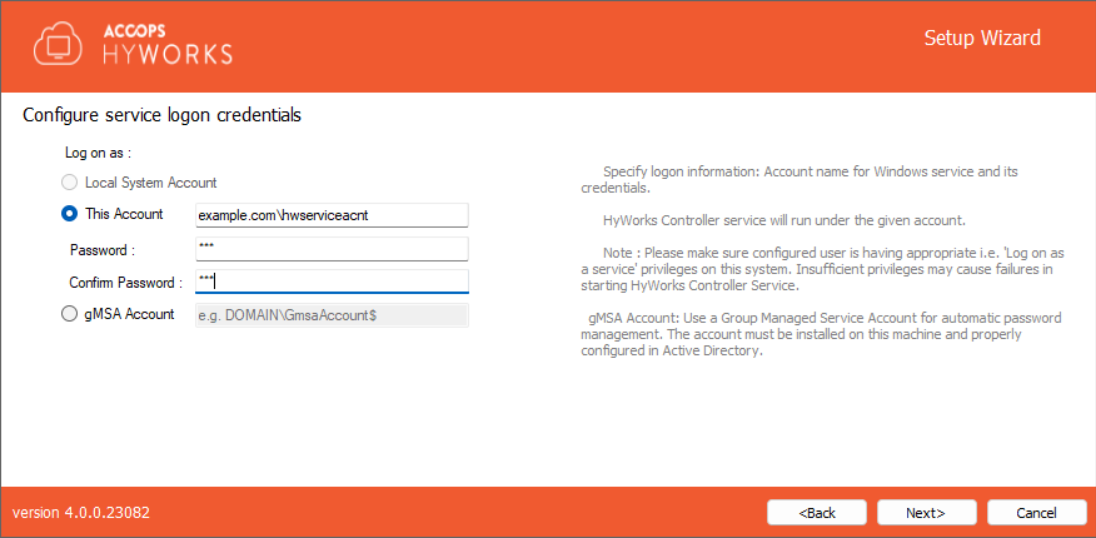
Click Next to configure the Service Logon Credentials for the HyWorks Controller Service. You can either log on as the Local System Account or use the current account.
-
Local System Account: HyWorks controller service will run using Local System Account as service logon credentials. The option will be used when HyWorks Controller service database configuration uses SQL Server Authentication.
-
This Account: Configuring SQL Server with Windows Credentials requires logon credentials to run the HyWorks Controller service. When the HyWorks Controller database connection is configured with Windows Authentication, the option to run the service with specific user credentials is available. When service runs with specific user credentials, the same user is used to connect to SQL server.
-
Refer to the section Logon as a service for detailed instructions on granting Logon as a service rights to a user.
-
-
gMSA Account: Provide gMSA (Group Managed Service Account) details in the format
domain\gMSAccount. Important: Use$as a suffix to the account.- Important: To use gMSA, both the domain controller and HyWorks servers must be configured correctly. The detailed explanation and configurations are provided in the dedicated section for installation with gMSA.
-
-
Click Next to move to the Restore database screen. For a first-time installation, click the Next button to move to the next screen.
-
Select the Restore database option only when the HyWorks node should be restored from the backed-up database to use existing data.

-
Refer to the HyWorks Backup and Restore for detailed instructions on database backup and restoration.
-
-
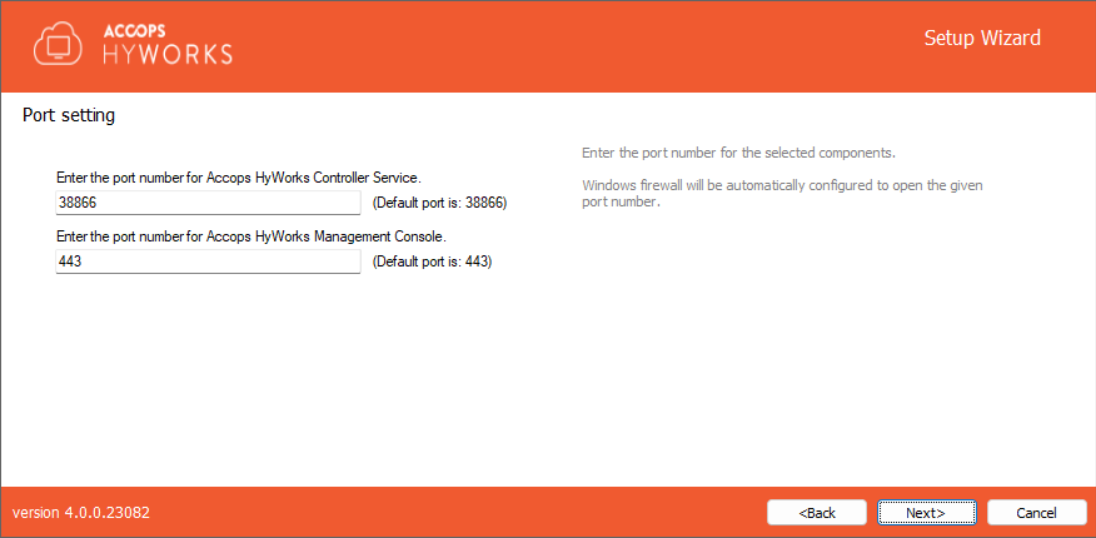
Click Next to configure communication ports.
-
The default port for Accops HyWorks Controller Service is 38866. Change if required.
-
The default port for Accops HyWorks Management Console is 443. Change if required.
-
-
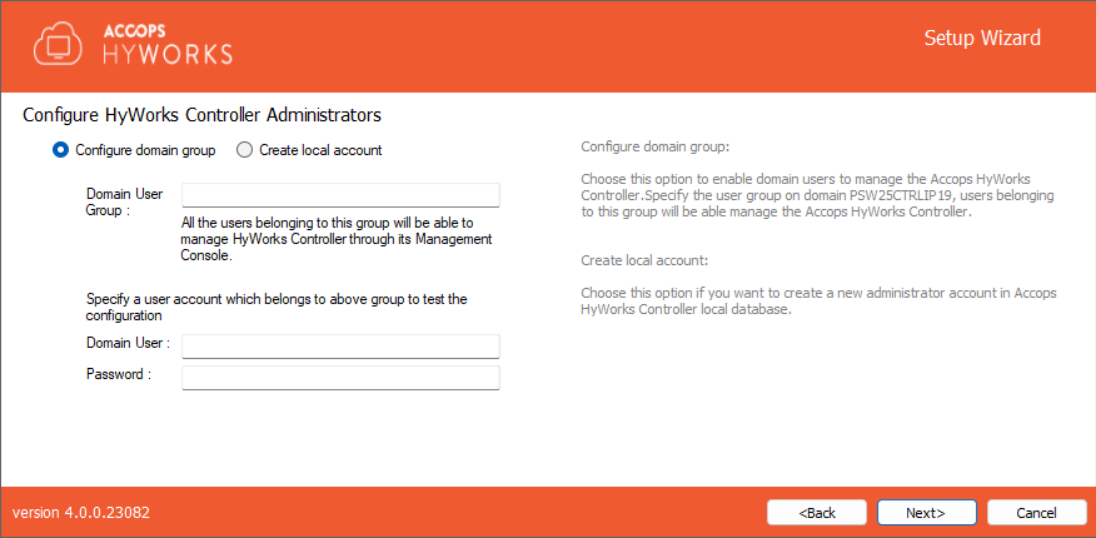
Click Next to configure the HyWorks Controller administrators. You can either set Domain User Group or Local User as administrator:
-
Domain Group Configuration: Domain User Group configured as super-administrator. To configure the Domain User group, make sure:
-
The system is in the domain.
-
User is logged in with domain credentials and has administrative privileges on the server.
-
-
Local User Configuration: Local HyWorks user created and designated as Super-administrator. To create a local user administrator, provide the username (default is HyWorksAdmin) and password.
-
-
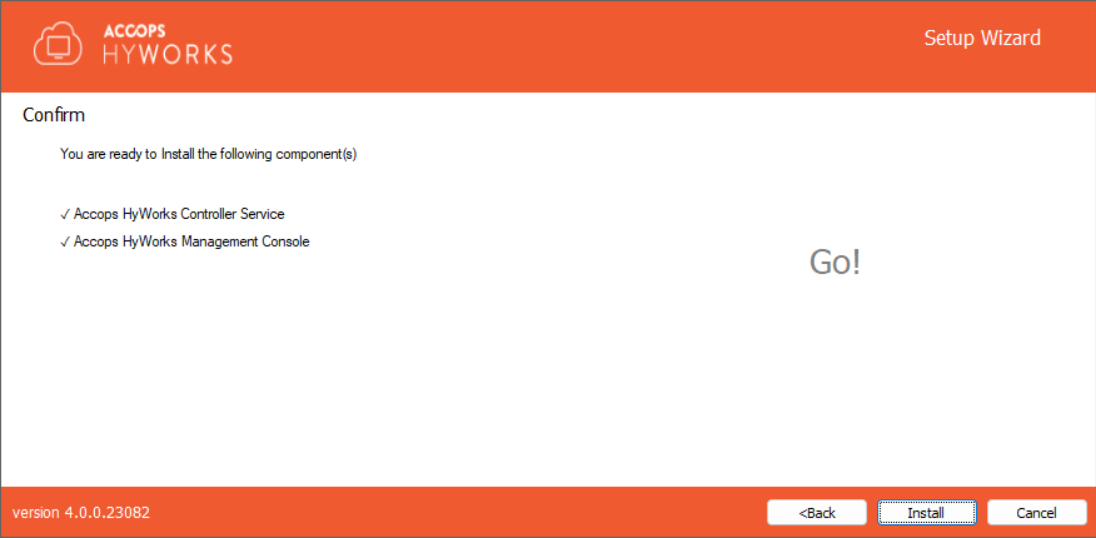
Click Next. Verify the information displayed on the Confirmation screen and click Install to start the installation.
-
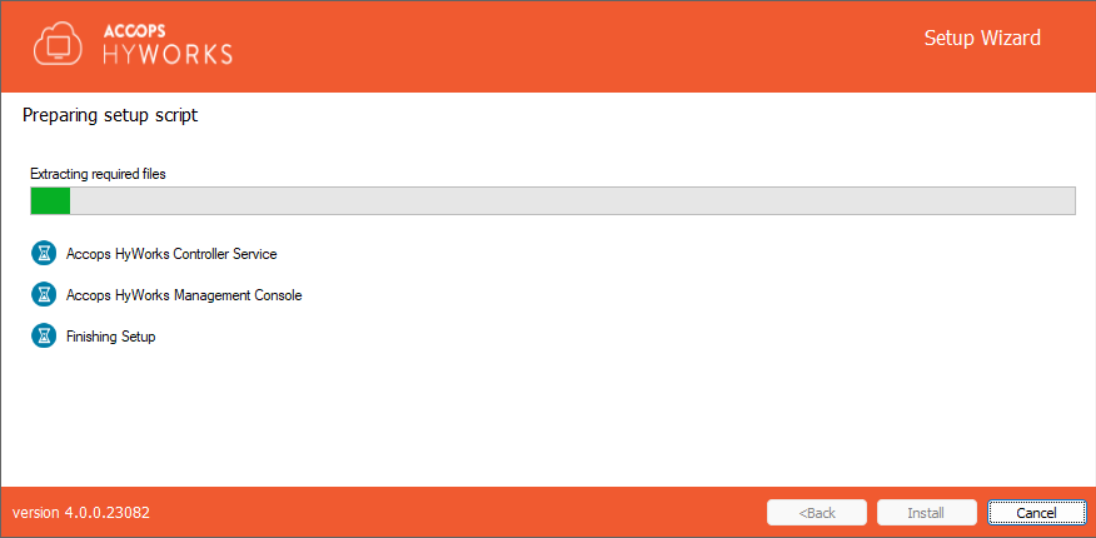
This will start installing the appropriate roles and features. The screen will display status and updates of installation progress as:
-
Component being installed
-
Installation status of the component
-
Progress bar and related information of the changes being made to the system
-
-
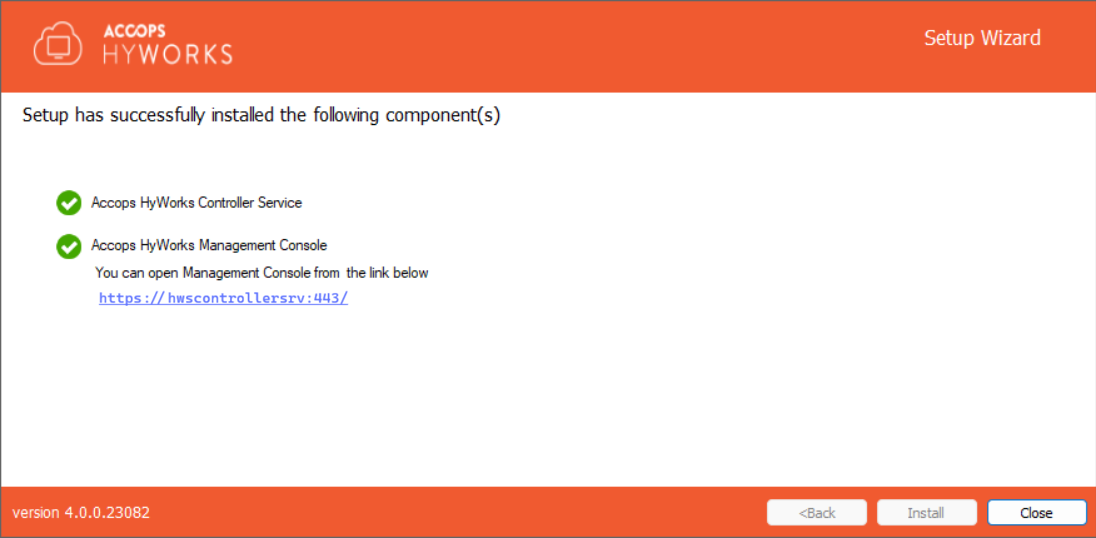
Once the installation is complete, the screen displays:
-
Installation status of individual components
-
URL of Accops HyWorks Management Console (if Installed)
-
Installation Verification
The administrator can verify the successful installation by checking the installation logs and services running as follows:
-
Setup Status Prompt: Setup Status is displayed on the last screen of installation. It displays details about all the installed components and their respective status.
-
Access and log in to Accops HyWorks Management Console
-
After the successful installation, open the supported browser (Edge, Firefox, or Google Chrome) and type the URL: https://\<IP of HyWorks Controller>:\<port number> e.g.,
-
Provide appropriate credentials to log in.
-
Installation Logs
For troubleshooting or verification purposes, HyWorks installation logs can be used. Installation logs are created at the following location:
%appdata%\HyWorksController\Logs
Special Installation Case: Installation with gMSA
This section of the document provides detailed instructions for configuring and installing using gMSA.
About gMSA
-
A special type of service account in Active Directory
-
Automatically managed by the system - no password to set or remember
-
Used by services, applications, and scheduled tasks securely
-
Supports multiple servers (unlike standard MSA)
Where We Can Use It
-
Windows Server 2012 and above
-
Any domain-joined server running services, scheduled tasks, or app pools
-
Load-balanced, clustered, or multi-server environments
Why We Should Use It
-
Automatic password rotation
-
Strong, random passwords never exposed to humans
-
Centralized management via Active Directory
-
Reduced risk of password leaks
-
Supports Kerberos authentication
-
Works across multiple hosts
Common Use Cases
| Use Case | Description |
|---|---|
| Windows Services | IIS, SQL Server, custom services |
| Scheduled Tasks | Secure tasks without hardcoded passwords |
| IIS App Pools | Run app pools under gMSA |
| Clustered Apps | Server farms, clusters (e.g., SharePoint) |
| Kerberos Auth | Applications using SPNs |
Comparison with Other Options
| Feature | gMSA | MSA | User Account |
|---|---|---|---|
| Password Rotation | Automatic | Automatic | Manual |
| Multi-Server Support | Yes | No | Yes |
| Kerberos Support | Yes | Yes | Yes |
| Human-Readable Password | No | No | Yes |
| Setup Complexity | Moderate | Simple | Simple |
Prerequisites / Dependencies
-
Active Directory Domain (2012 or later)
-
Key Distribution Service (KDS)
-
KDS Root Key created (one-time)
-
Security group for allowed servers
-
RSAT / PowerShell tools
-
Domain-joined Windows Server 2012+ target machines
Security Advantages
-
240+ character random passwords
-
Automatic rotation
-
No human access to passwords
-
Restricted to allowed computers
-
Fully auditable in AD
Limitations
-
Domain-only usage
-
Some third-party apps may not support gMSA
-
Requires proper SPN setup for Kerberos
-
Requires Windows Server 2012+ AD environment
What is KDS?: Key Distribution Service (KDS) is an AD component that:
-
Generates and distributes cryptographic keys
-
Securely manages and rotates gMSA passwords
You never:
-
See the password
-
Store it
-
Rotate it manually
KDS enables AD to securely handle all of this automatically.
Detailed Steps to Configure gMSA (Environment Preparation)
Example Environment Overview
| Role | Example | Description |
|---|---|---|
| Domain Controller | WIN-19MyDC | AD + PowerShell |
| Member Server | WIN19-HWSCTRL | Uses gMSA |
| Domain | example.com | AD Domain |
| gMSA Name | WebAppGmsa | Managed account |
| Security Group | GMSAServers | Allowed servers |
Part 1 - Domain Controller Configuration
Step 1 - Create KDS Root Key (One-Time)
Check if the KDS root key exists:
Get-KdsRootKey
If it does not exist, run (one-time):
Add-KdsRootKey -EffectiveImmediately
If the domain is new and replication has not completed:
Add-KdsRootKey -EffectiveTime ((Get-Date).AddHours(-10))
Step 2 - Create a Security Group for gMSA Access
This group defines which machines are allowed to use the gMSA.
New-ADGroup -Name "GMSAServers" -GroupScope Global -GroupCategory Security
Step 3 - Add Member Servers to the Group
Add the computer accounts of all servers that will use the gMSA.
Add-ADGroupMember -Identity "GMSAServers" -Members "WIN19-HWSCTRL$"
You can add more later as needed:
Add-ADGroupMember -Identity "GMSAServers" -Members "SERVER02$$ ","SERVER03 $$"
Step 4 - Create the gMSA
Create the actual Group Managed Service Account and associate it with the group.
New-ADServiceAccount -Name "WebAppGmsa" -DNSHostName "user.local" -PrincipalsAllowedToRetrieveManagedPassword "GMSAServers"
Step 5 - Verify the gMSA Configuration
Check that the gMSA is created and linked to the group:
Get-ADServiceAccount WebAppGmsa -Properties PrincipalsAllowedToRetrieveManagedPassword
Part 2 - Configuration on the Member Server
These steps are performed on the domain-joined server (e.g., WIN19-HWSCTRL).
Step 1 - Install AD PowerShell Module
Install-WindowsFeature RSAT-AD-PowerShell
Step 2 - Refresh Group Policy and Reboot
Make sure the machine has the latest AD membership info:
gpupdate /force
Restart-Computer -Force
Step 3 - Install the gMSA
After reboot, install the gMSA locally:
Install-ADServiceAccount -Identity WebAppGmsa
Step 4 - Verify Installation
Check that the gMSA can be used:
Test-ADServiceAccount WebAppGmsa
Expected result:
True
Part 3 - Database Permissions Requirement
The HyWorks controller installer creates/updates the databases (Service Database and Log Database) required for the HyWorks controller to function and for logging.
If the gMSA account has to be used, ensure that the gMSA has access to the following databases:
-
Service Database: Default name -
EDCDB -
Log Database: Default name -
HyLog
If the required permissions are not granted, the service will fail to start, and users will encounter runtime errors.
There are two ways to grant SQL Server access to a gMSA account:
-
Grant sysadmin permission to the gMSA account.
-
Map the gMSA as a database user and grant required permissions.
Option 1: Grant sysadmin Permission to the gMSA (Quick & Full Access)
Use this only if full administrative access is acceptable in the deployment.
Steps:
-
Open SQL Server Management Studio (SSMS)
-
Connect to the SQL Server instance
-
In Object Explorer, expand:
Security > Logins -
Right-click Logins > New Login
-
Click Search..
-
Select Object Types > check Service Accounts
-
Select Locations > choose your domain
-
Enter the gMSA name (for example:
DOMAIN\gmsaAccount$) > click OK -
Go to Server Roles page > check sysadmin
-
Click OK to save
The gMSA now has full access to all databases.
Option 2: Database User Mapping with Required Permissions (Recommended / Least Privilege)
-
Step 1: Create Login for gMSA
-
Open SSMS and connect to SQL Server
-
Expand:
Security > Logins -
Right-click Logins > New Login
-
Click Search
-
Select Service Accounts and your domain
-
Enter the gMSA name (e.g.,
DOMAIN\gmsaAccount$) -
Click OK
-
-
Step 2: Map gMSA to EDCDB
-
In Login Properties, go to User Mapping
-
Check database EDCDB
-
Under Database role membership, select required roles:
-
db_owner -
public
-
-
Click OK
-
-
Step 3: Map gMSA to HyLog
-
Right-click the gMSA login > Properties
-
Go to User Mapping
-
Check database HyLog
-
Assign required roles (same as above)
-
db_owner -
public
-
-
Click OK
-
Changes in Installers for gMSA Support
The following installers are updated:
-
Controller
-
Scheduler
-
SRMS
-
VM Scale Booster
Important: Use Hostname for SQL Server Windows Authentication
During implementation, Windows Authentication to SQL Server failed when the database server was configured using an IP address.
Errors Observed
-
SSPI Handshake failed (0x8009030c) -
The target principal name is incorrect. Cannot generate SSPI context.
Root Cause
Kerberos authentication is hostname-based, not IP-based.
SQL Server SPNs are registered as:
MSSQLSvc/<hostname>:<port>
MSSQLSvc/<FQDN>:<port>
-
When an IP Address is Used
-
SPN cannot be resolved
-
Kerberos authentication fails
-
Windows Authentication does not work
-
-
When Hostname/FQDN is Used
-
SPN resolves correctly
-
Kerberos authentication succeeds
-
Connection works
-
Recommendations
Always configure the SQL Server address using Hostname or FQDN when using Windows Authentication. Do not use IP address.
-
Key Point
- Windows Authentication to SQL Server requires a hostname/FQDN for Kerberos SPN resolution.
gMSA Validation Steps in Installers
The following gMSA (Group Managed Service Account) validations are implemented in every installer.
-
Format Validation
- The installer first validates the format of the gMSA account:
DOMAIN\GmsaAccount$
- The installer first validates the format of the gMSA account:
-
Domain and Machine Validation: It checks whether:
-
The provided domain matches the domain the machine is joined to
-
Both belong to the same domain
-
-
Active Directory Lookup: The installer performs an LDAP / Directory Services search to verify that:
- The gMSA account exists in Active Directory
-
PowerShell Validation - Machine Authorization for gMSA
- The installer runs an internal PowerShell workflow to verify that the machine is allowed to use the gMSA and retrieve its managed password.
PowerShell Script - Internal Workflow
-
Step 1: Check if AD PowerShell Module is Available: If the Active Directory module is not available, the installer:
-
Installs the AD module -
-
Imports the module
-
-
Step 2: Install the gMSA on the Local Machine: This allows the machine to retrieve the managed password automatically.
Install-ADServiceAccount -Identity <GmsaAccountName> -
Step 3: Test Whether the Machine Can Use the gMSA: The installer verifies whether the machine can retrieve the gMSA password:
Test-ADServiceAccount -Identity <GmsaAccountName>
Result Interpretation
-
Success > Machine is authorized to use the gMSA
-
Failure > Possible causes:
-
Machine is not added to
PrincipalsAllowedToRetrieveManagedPassword -
gMSA is not installed correctly
-
Optimization Done in HyWorks Modules
Controller
-
Service Logon Option: A new Logon option has been added when Windows Authentication is selected during database configuration. The user can now choose either:
-
This Account (AD user)
-
gMSA account
Note
If you select a gMSA account and click Next, the installer validates the gMSA against Active Directory:
-
Checks whether the gMSA account exists in AD
-
Verifies whether the current machine is allowed to use that gMSA
-
-
Registry Entry: A new registry section named SERVICELOGON has been added under:
HKEY_LOCAL_MACHINE\SOFTWARE\Accops\Controller\EDC.-
This section stores the logon details for all HyWorks-related services.
-
HyWorks Service
-
RMSService
-
Monitor Service
-
-
Each service entry includes: These entries are automatically updated based on the service configuration performed during installation or upgrade.
-
<SERVICE>_LOGON_ACCOUNT- Specifies the configured AD user or gMSA account -
<SERVICE>_LOGON_TYPE- Indicates the logon type (e.g., GMSA)
-
-
Scheduler
-
Configuration Changes
-
Removed dependency on EncryptDecryptAppConfigFile completely
-
Added Database Configuration and Service Configuration pages to the Scheduler installer
-
-
Permissions
-
Folder Permission: The installer grants the configured gMSA account:
- Modify permissions on the service installation folder
-
-
gMSA Validation: When a gMSA account is selected, and you click Next, the installer validates:
-
gMSA exists in Active Directory
-
Current machine is authorized to use it
-
SRMS
SRMS retrieves the database connection string from the Controller database.
Users can now configure the SRMS service to run under a different logon account:
-
Local System
-
User Account
-
gMSA
-
Service Logon Page: A new Service Logon page has been added during installation, where all three logon options are available. An additional button, Fetch from Controller, has also been added.
-
Fetch from Controller Behavior: When clicked:
-
Detects the logon account used by the Controller service
-
Automatically selects the same account in the SRMS installer UI
-
-
SRMS gMSA TLS Certificate Private Key Access Issue
When running Session Recording Management Services (SRMS) under a Group Managed Service Account (gMSA), the following error may appear in the Windows System Event Viewer:
-
A fatal error occurred when attempting to access the TLS server credential private key.
-
Error code:
0x8009030D -
Internal error state:
10001 -
SSPI client process:
SessionRecordingManager.Management
This indicates that SRMS was unable to access the private key of the certificate configured for TLS communication.
Meaning of the Error: The error does not indicate an issue with the certificate itself. Instead, it means:
-
The certificate’s private key is present.
-
The SRMS service account (gMSA) does not have permission to read the private key.
-
Kestrel cannot initialize the HTTPS endpoint
This is a permissions issue in the Windows Certificate Store, not a certificate validity issue.
Root Cause - Why This Happens with gMSA: gMSA accounts do not automatically receive access to a certificate’s private key. By default:
-
The private key ACL does not include the gMSA
-
SRMS (running under gMSA) attempts to load the certificate for HTTPS
-
Private key access is denied > Windows throws error
0x8009030D
VM Scale Booster
The following changes are in VM Scale Booster:
Service Logon Configuration
A similar configuration enhancement has been added for selecting the service logon account. The user can now choose which logon type to use based on the controller service’s logon settings. A new “Fetch from Controller” button retrieves the controller’s logon details using the Registry service. (Refer to the SRMS section for detailed updates.)
File Permissions
The installer now grants the configured gMSA account Modify permissions on the service installation directory to ensure that SRMS can access and update required files without permission issues.