Automated Email Reporting
This document outlines the necessary steps to configure and integrate an existing ARS server for automated email reporting of saved searches and dashboards.
Important
- Before proceeding, ensure that an ARS instance is already installed and fully configured, including the necessary integrations with HySecure/HyWorks.
- A list of custom dashboards and saved searches (report templates) that need to be sent via email has been prepared and identified.
- SMTP email details, including the sender and recipient email addresses, should be available, and network connectivity to the customer’s SMTP port from the ARS server must be confirmed.
Configuring Automated Email Reporting
-
Email Reporting is installed by default. To configure email reporting, open the config.json file located at cd reporting/distribution/utilities

-
Open the config.json file with vi config.json
-
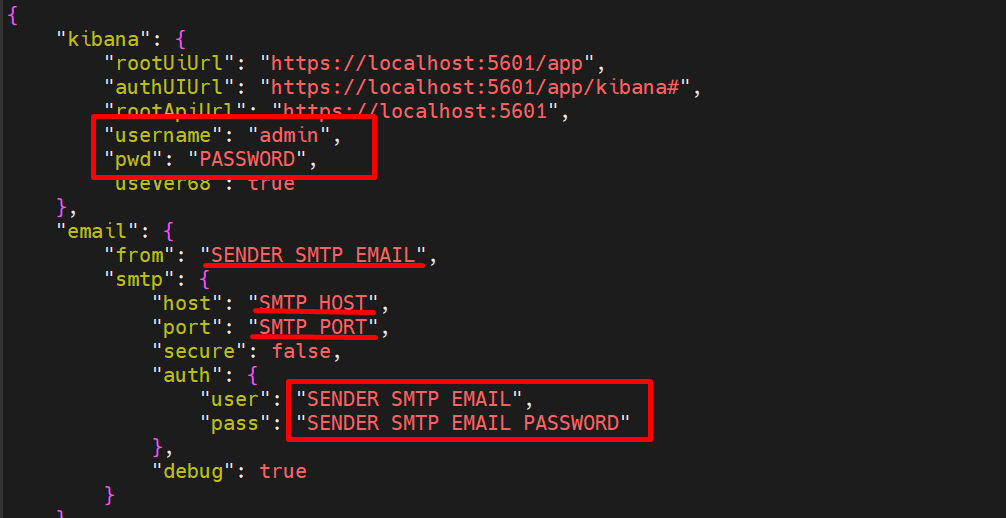
Populate the details using the following guidelines:
-
ARS_USERNAME: Username used to access the ARS web UI.
-
ARS_PASSWORD: Password for the Username used to access the ARS web UI.
-
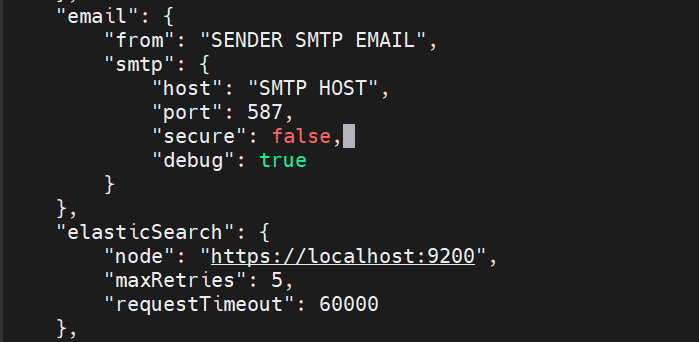
FROM_EMAIL_ADDRESS: The email address from which emails shall be sent to recipients.
-
SMTP_HOST_IP: URL/IP address of SMTP server/host.
-
SMTP_PORT: Port Number used by the SMTP server.
-
Secure: If authentication is over secure SSL, change the value to true; else keep it as false.
-
SMTP_USERNAME: SMTP Username.
-
SMTP_PASSWORD: Password for the above SMTP User.
-
Once the above configuration is done, scroll down to set the static schedules for reports. The default configuration file provides templates for the following two types of schedules:
-
Saved Search (Report Templates accessed from Discover > Open)
-
Dashboard
-
-
The Saved Search reports are sent to recipients in CSV format, while Dashboard reports are sent in PDF format.
The reports are scheduled using the cron expressions. Cron expressions are a method to specify when you want the report schedule to run.
Configuring Schedule
For simplicity, 2 template schedules, each representing saved searches and dashboards, have been provided by default. Modify these schedules as needed. More details about the different sections of each schedule type are listed below:
-
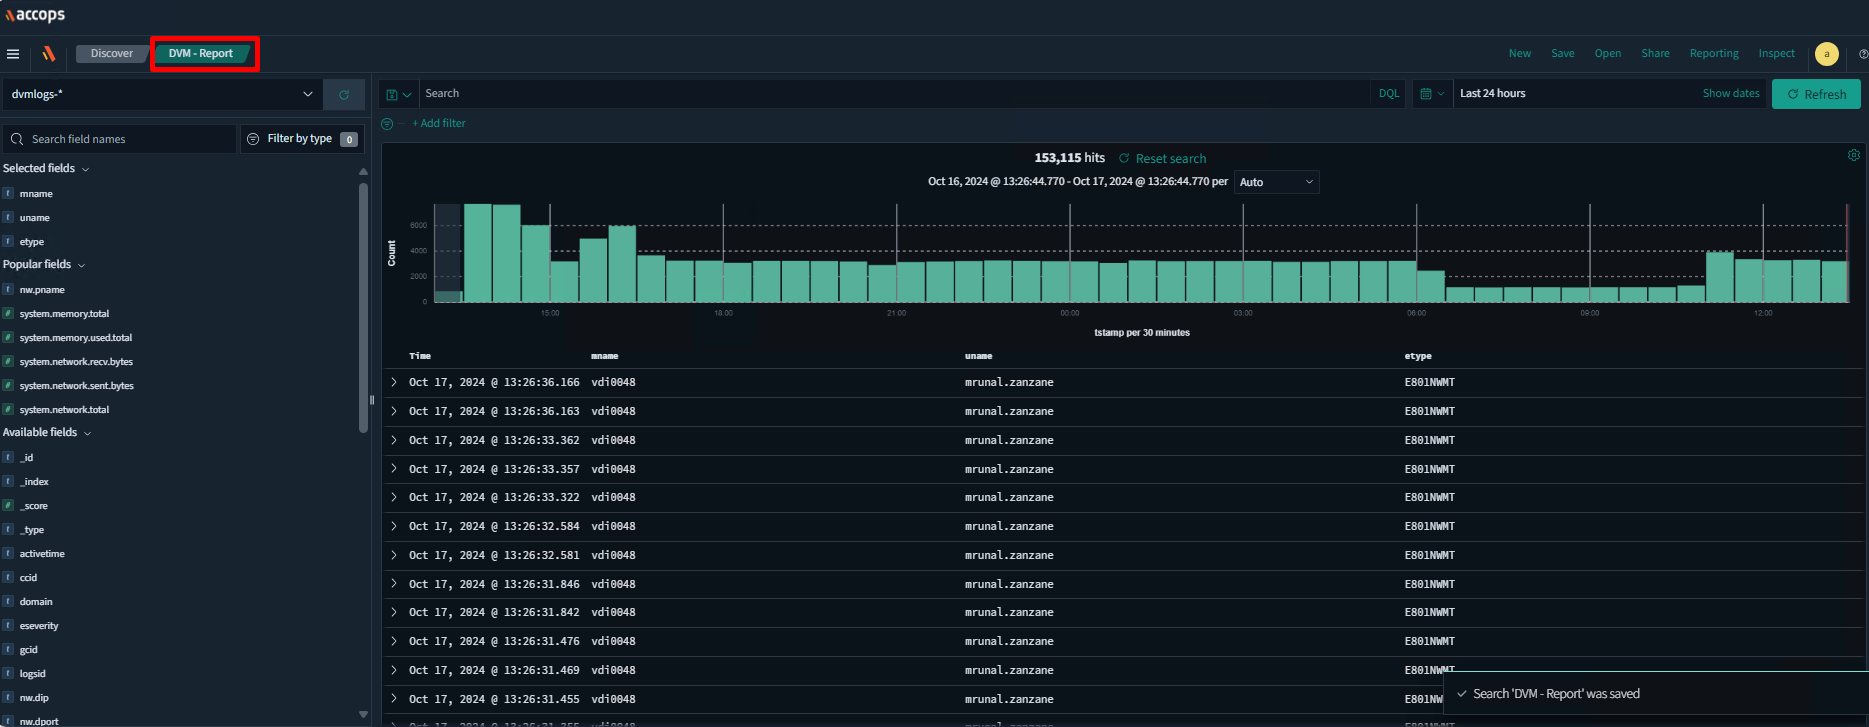
savedSearchCSV: Saved searches are report templates that are accessed from Discover > Open in the ARS web UI.
An example of a saved search is HySecure – Successful Login Report or HySecure – Usage Summary. All saved searches have a default time period of ‘Last 24 Hours’. Hence, any schedule provided here will execute with the same period.
If you wish to change this, please change the time picker in the saved search and save the template before setting it up here.

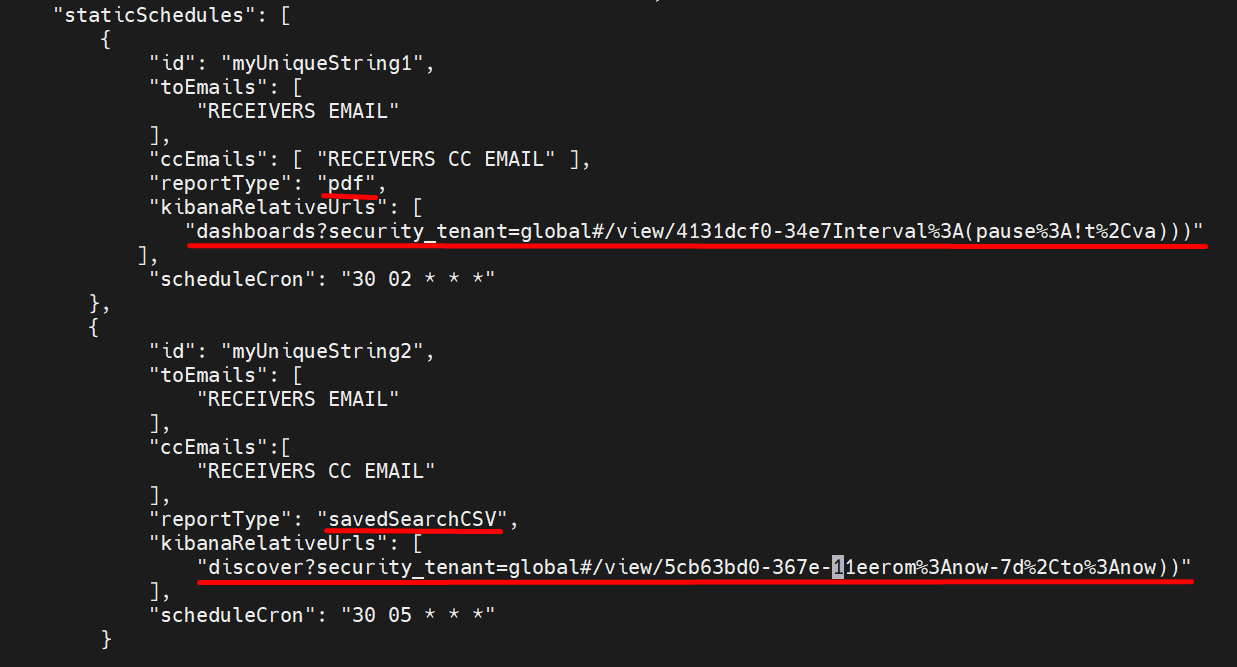
Refer to the sample screenshot of a saved search schedule provided in the config file. Replace the following placeholders with actual values:
-
RECEIVERS EMAIL: Email address to which the CSV report should be emailed to.
-
RECEIVERS CC EMAIL: Email address in carbon copy that will also receive a copy of the report.
-
reportType: This should be set to savedSearchCSV for Saved Searches.
-
kibanaRelativeUrls: Relative URL is the unique link of the saved search, which is generated and displayed on the browser.
To determine the relative URL for the report that needs to be scheduled, follow the steps below:
-
Open ARS UI.

-
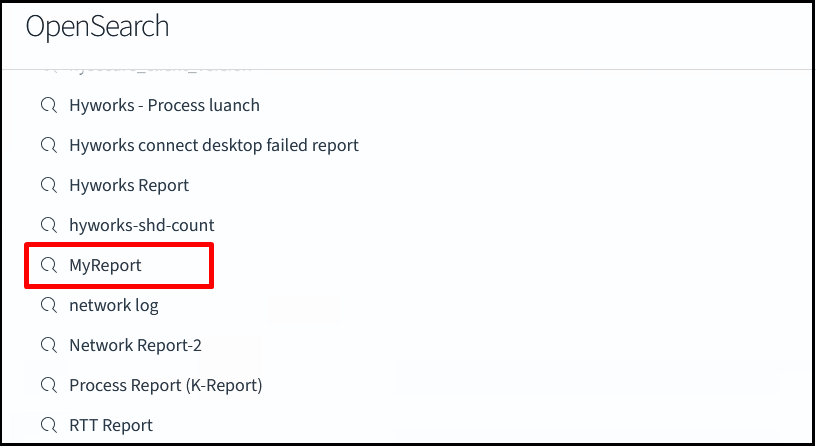
Open the Report that needs to be sent.
-
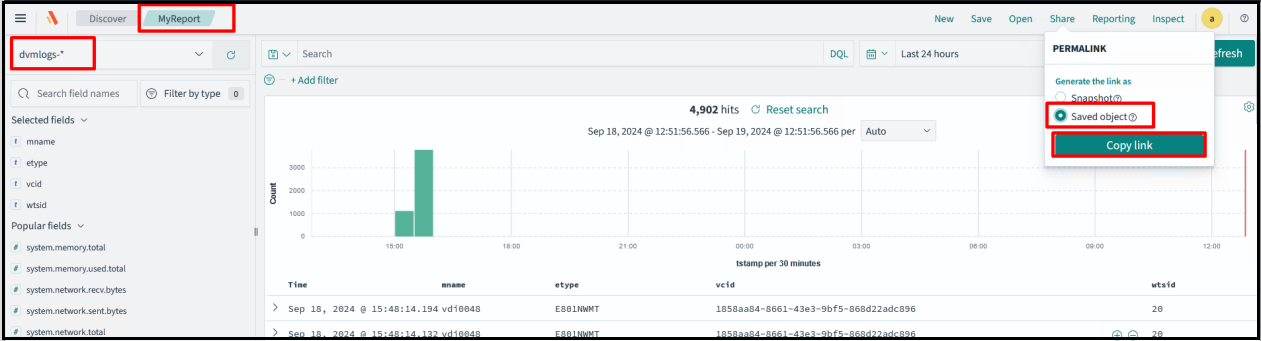
Navigate to Share > Saved object > Copy link.
-
Paste this copied link in kibanaRelativeUrls. Eg.: discover?security_tenant=global#/view/5cb63bd0-367e-11eerom%3Anow-7d%2Cto%3Anow)).
-
-
Dashboards: Dashboards are a combination of visualizations and are used to represent multiple types of data together on a single page. E.g. HySecure Dashboard/HyWorks Dashboard. The dashboards can be sent over email in PDF format in fixed intervals. The schedule for dashboards is given below:

-
reportType: For dashboards, the field should be set to PDF.
-
Relative URL: The relative URL for dashboards can be obtained by following the steps listed below:
-
Log in to ARS Web UI.
-
Navigate to Dashboards.
-
Click on the Dashboard you wish to schedule emails for.
-
Note and copy the section of the URL in the browser beginning with dashboard and paste it in the above section. E.g. dashboards?security_tenant=global#/view/4131dcf0-34e7-11ed-942861c20ffcf0e2?_g=(filters%3A!()%2CrefreshInterval%3A(pause%3A!t%2Cva))).
-
-
Combination of both Schedules: You can add both types of reports in one config.json file by adding the configuration. Add Receivers’ emails, report type and kibanaRelativeUrl in both the blocks. The configuration is the same as we see in the above two schedules.
-
scheduleCron: The scheduleCron section allows specifying the cron expression for triggering these reports and follows the standard cron format.
Note
All cron expressions entered here follow the Universal Time Coordinate (UTC) time zone. Please keep this in mind when scheduling/identifying cron expressions. For India, we are 5 hours and 30 minutes ahead of UTC. Hence, please set the cron expressions appropriately.
For example, if you want to trigger the report at 7 AM daily, perform the following steps:
-
Determine the time zone of the email recipients (IST in our example)
-
Determine the time difference/offset between UTC and the recipient’s time zone (UTC +5:30 in our example)
-
Determine the UTC for the schedule trigger event (we want the email to be triggered at 7 AM, so 7 AM IST = 1.30 AM UTC)
-
Determine the cron expression for 01:30 AM

-
Every cron expression has 5 elements.
-
Minute
-
Hour
-
Day
-
Month
-
Week
Note
This follows a 24-hour time period.
-
For more information on creating your cron expression, go to https://crontab.guru
-
-
After all settings are done in the config.json file, follow the steps below to start the Reporting Service.
cd /root/
sh Email_Reporting_start.sh
To stop reporting service :
sh Email_Reporting_stop.sh
Passwordless SMTP
If you prefer not to authenticate using SMTP, remove the auth block from the email configuration section in the config.json file. All other steps will remain the same as above.
Manual Reports Download from opensearch-dashboards
-
Create a report/dashboard/visualization as per the requirements and save it.
-
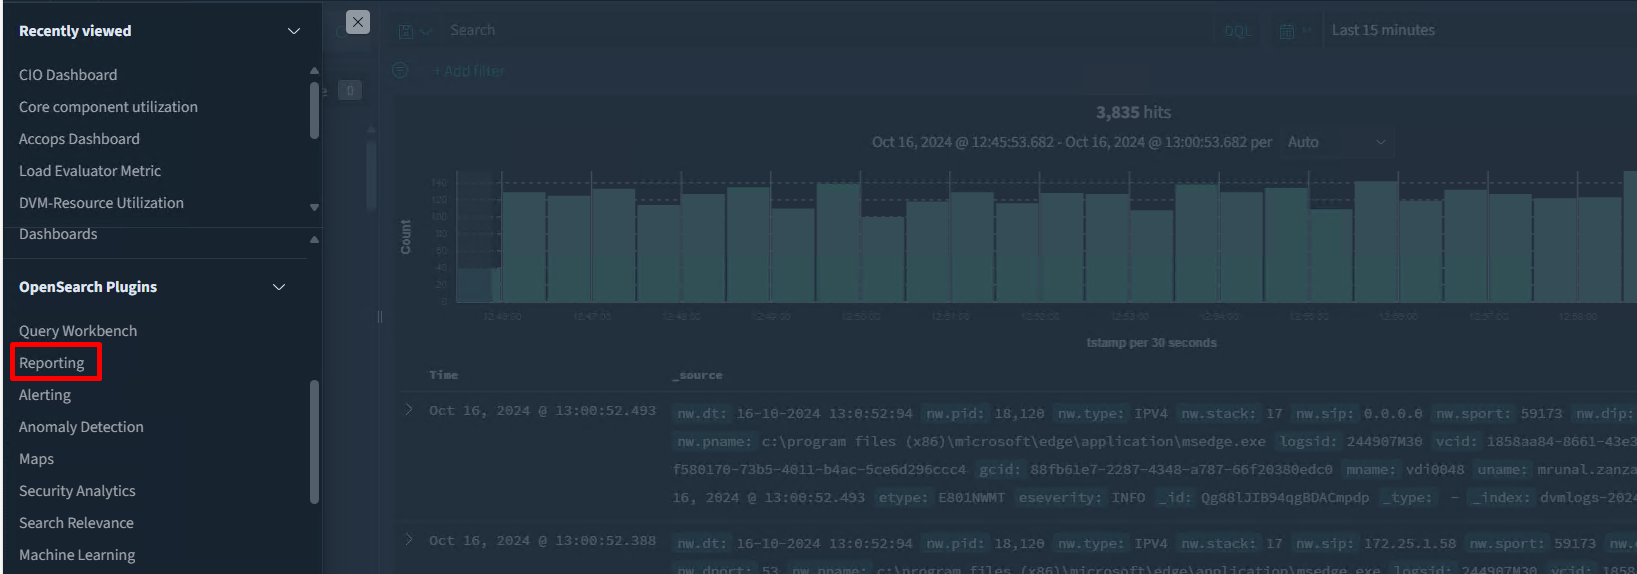
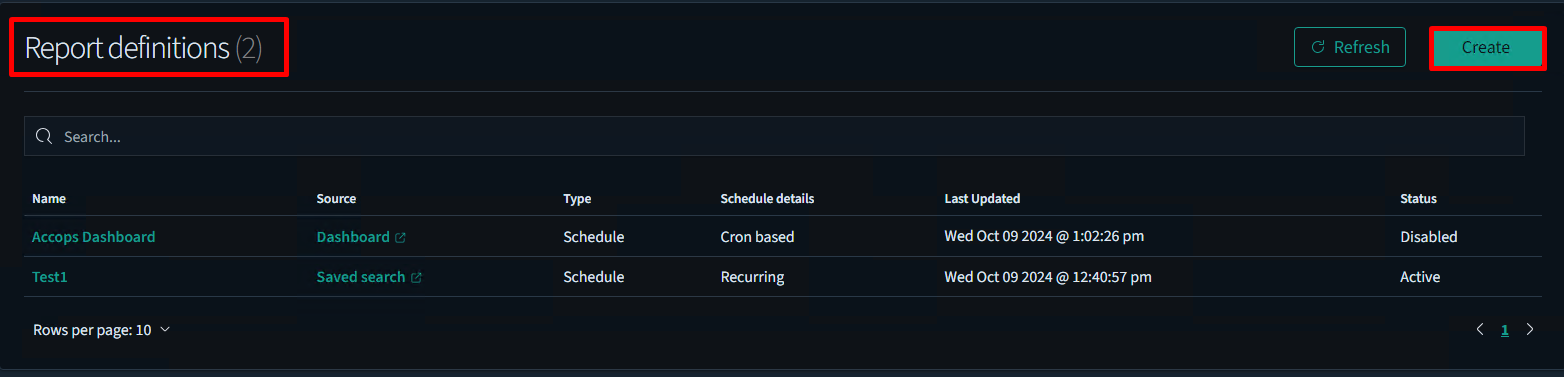
Go to the Reporting tab.
-
Under the Report definitions, click Create.
-
Add name for report and description. Select the report type as per the requirement. Here we are generating for the Saved search.
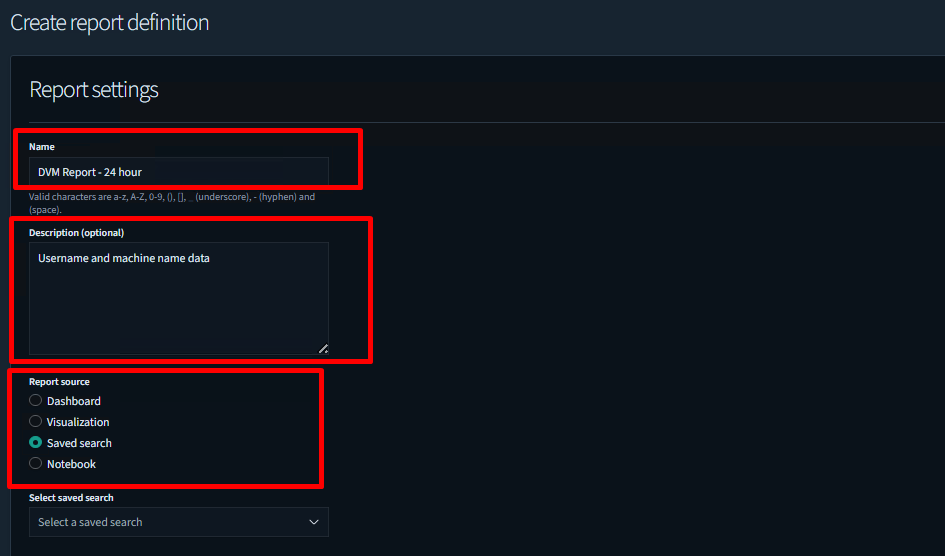
-
Select the option: Saved search. Select the Time range as required. Here we are setting it for 24 hours.
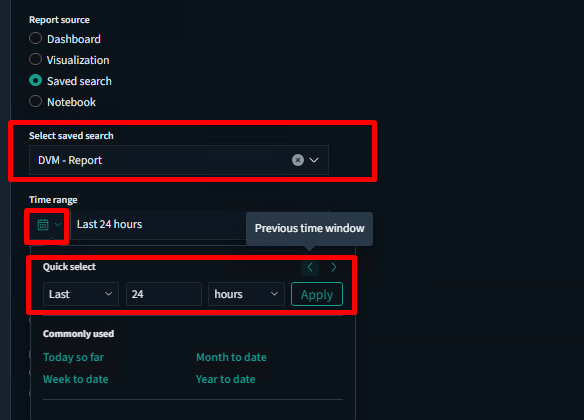
-
Select the File format.

-
For the Report Trigger, we have 2 options.
-
On demand: On-demand reports can be downloaded as needed. They will not generate daily or at any regular interval. We can download them when required, and the data will be fetched according to the time specified in step 5.

-
Schedule: Reports can be scheduled by selecting a specific time. We have two options for scheduling request times.
-
Recurring: By selecting the recurring option, we can schedule reports using frequency: daily or by interval, by setting up the request time. Here, I have set the report time to daily at 13:36.
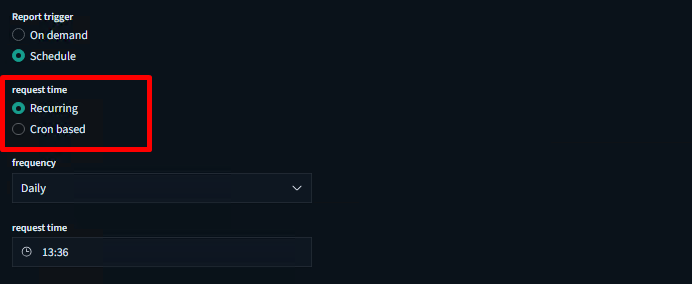
-
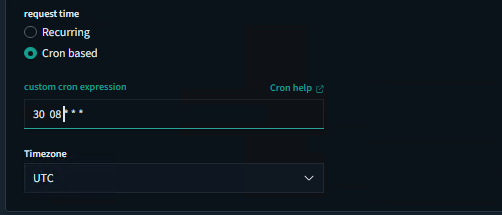
Cron based: We can schedule report generation using a cron job, which operates in the UTC zone.
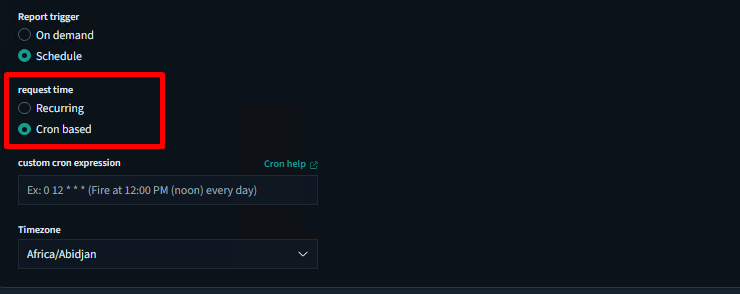
Here we have scheduled the report generation to occur daily at 2 PM.
-
-
-
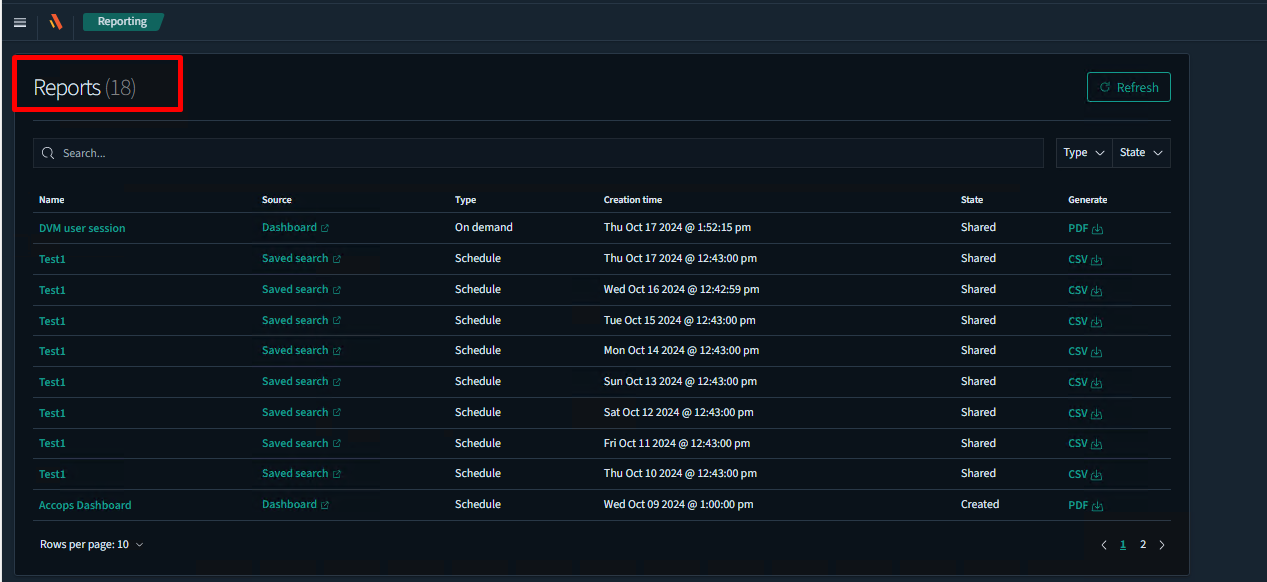
In the Reporting tab, under Reports, we can view the generated reports. Here, we can download reports by selecting the Generate option. On-demand reports are created when we download them, while scheduled reports are generated according to the set time and can also be downloaded from this section. To select a specific report, use the custom date feature.