Local Users
Overview
A user needs to log in to HySecure to either access the applications securely over the network OR to manage the HySecure Gateway through the Management Console.
Organizations integrate HySecure with AD/LDAP/SAML - third-party authentication methods for user authentication. However, there are situations where organizations do not have third-party authentication methods or do not wish to use them for internal reasons. In such cases, HySecure supports creating users in its local database. These are called Local Users.
This page provides details on Local Users management.
Note
Avoid creating local user accounts for integrated authentication server users (e.g. AD, LDAP, RADIUS, SAML IdP).
User Roles
Local Users can have the following roles:
| User Role | Privileges |
|---|---|
| Low Security User | Low Security Users log in with basic authentication using the username and password. See configuring Authentication Servers for more information. |
| High Security User | High Security Users use certificate-based authentication to log in. Security Officers, Administrators, and Monitoring Users are High Security Users by default. |
| Administrator (Admin) | The Administrator can manage other Administrators, High and Low Security users, Applications, and Access Control Lists (ACLs) for various users and application groups. However, they cannot Add, Modify, or Delete a Security Officer. They do not have the right to apply licenses, updates, or upload certificates. |
| Security Officer (SO) | The Security Officer (SO) has the highest level of access in HySecure. The SO can Create, Modify, and Delete users, including other Security Officers, Administrators, and High/Low Security Users. An SO can manage ACLs for User Groups and applications. Only an SO has the right to change the Server State, Database Password, and Basic Authentication Method, and Enable or Disable SSH. |
| Monitoring User | This role enables users to manage registered devices and monitor the Dashboard. They can also monitor and export Active users, Registered users, Turbo active users, and Remote meeting users. In addition, they can download reports, logs, and archived logs. |
| L1 Support User | The L1-level Support user have the right to: 1. Monitor the dashboard. 2. Monitor and export active users, turbo active users, and remote meeting users. 3. Monitor and export registered users. 4. Monitor, export, and manage registered devices. 5. Monitor and download reports and logs. 6. Download archived logs. 7. Modify host scan policies. |
Important
Use certificate-based authentication for Security Officers, Administrators, L1 Support Users, and Monitor Users. Username and password login restricts access to Low Security User privileges.
View Local Users
- Log on to the Management Console.
- Navigate to Users > Local Users.
All the users created so far will be visible on this page in a tabular form with the following information: 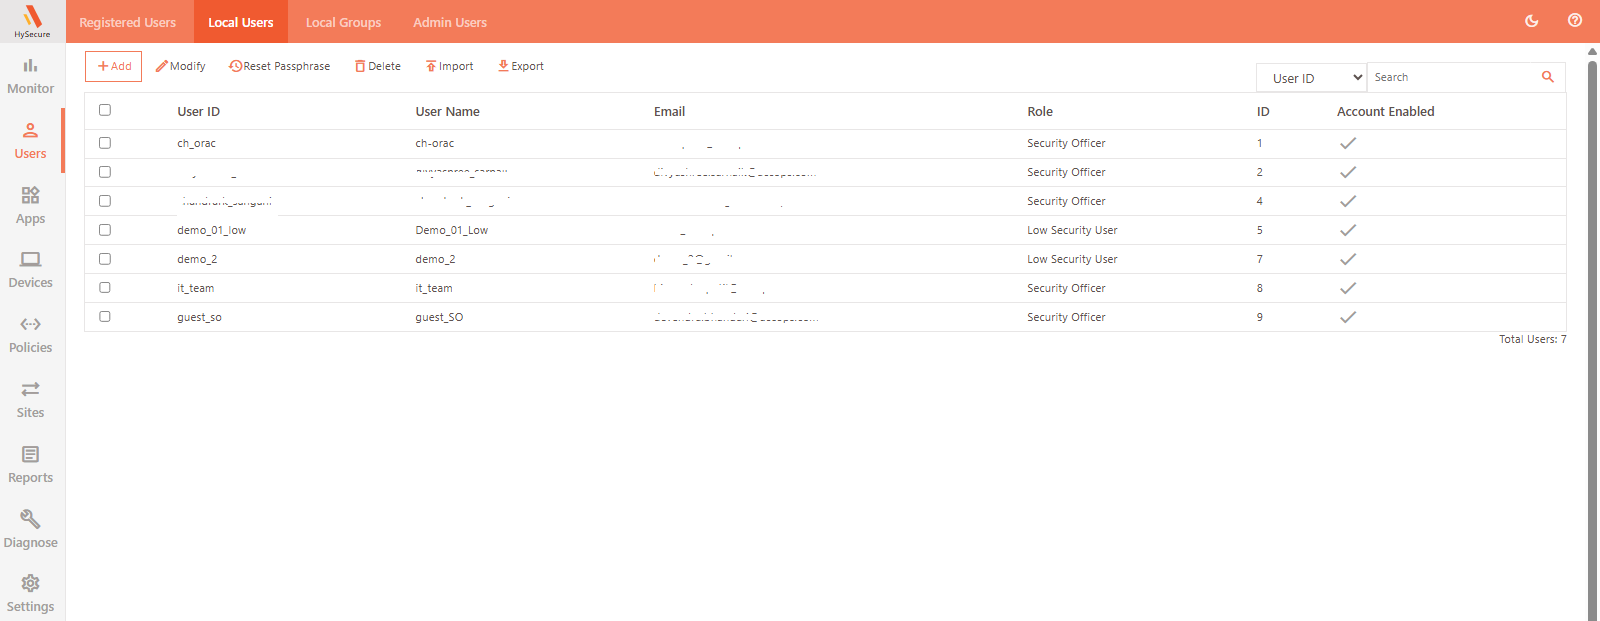
| Field | Description |
|---|---|
| User ID | Displays the user ID used to log in to HySecure. |
| User Name | Displays the user name entered while adding the user. |
| Displays the Email ID entered for the user while adding. | |
| Role | Displays the role assigned to the user, such as Security Officer, Low/High Security User, Administrator, or Monitoring User. For more information on each role, check the User Roles section. |
| ID | Displays the user number generated by the system. |
| Account Enabled | Displays the status of the account, whether enabled (ticked) or disabled (blank). |
Search for a Local User
In case there is a large number of local users, the administrator can filter or search for a particular user based on any one of the following fields:
- User ID
- User Name
- Role
- User Status
Filter the search for a user based on any of the above-mentioned parameters except the system-generated ID.
Add/Create a User
- Log on to the Management Console.
- Navigate to Users > Local Users and click Add.
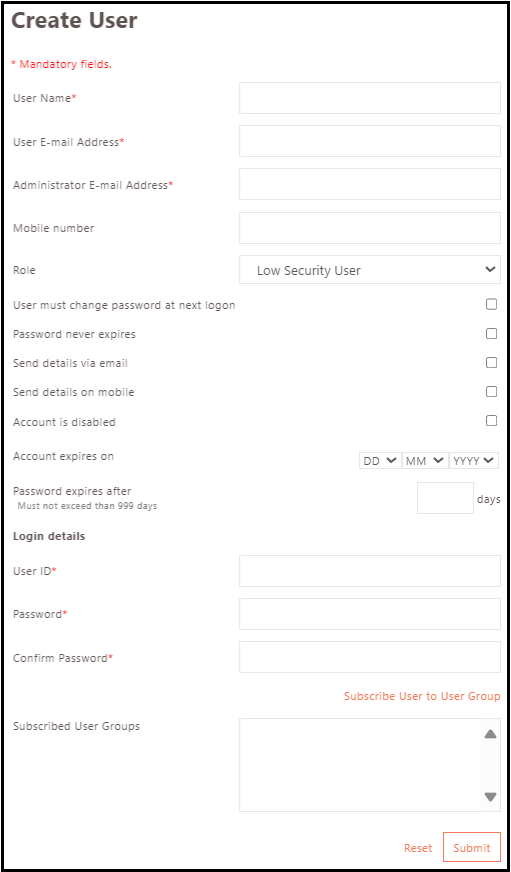
| Field | Description |
|---|---|
| User Name | Enter the given name of the user. |
| User E-mail Address | Enter the complete Email address associated with the user. |
| Administrator E-mail Address | Enter the complete Email address associated with the administrator. |
| Mobile number | Enter the complete mobile number to which the messages will be sent. |
| Role | Select the role, that is to be assigned to the user from the drop-down list. Note that High Security User and Low Security User are created to provide application access, whereas the primary function of the Administrator, Security Officer, and Monitoring User is to manage the system. |
| User must change password at next logon | Check this box to force the user to change the password at the next login. |
| Password never expires | Check this box to set a non-expiring password for the user. |
| Send details via email | Check this box to email the authentication details, except the password, to the user’s email address. |
| Send details on mobile | Check this box to send authentication details via SMS to the user’s mobile number. |
| Account is disabled | Check this box to temporarily disable a new user account. |
| Allow administration access from internet | Check this box to control internet access to the HySecure Management Console. When creating native certificate-based users (like SO, Administrator, L1 Support, or Monitor), admins can now allow or block their access from the internet. This improves security by restricting console access to users within the local network if needed. |
| Account expires on | The Administrator can set an expiration date for when the account will automatically expire. After the given date, the user account will be disabled. This option is applicable only for the basic authentication and certificate users. Note that this option does not apply to Security Officers and Administrators. |
| Password expires after | Enter the number of days to set the timeline for user password expiration. The password will expire after the number of days specified here. The days entered must not be more than 999 days. By default, it is set to 75 days. Note that this option will not be available if the Password never expires check box is selected. |
Login details
| Field | Description |
|---|---|
| User ID | Enter the user ID, which the user will use to log in to the HySecure Gateway. This does not apply to Machine-Class users. |
| Password | This field is only applicable for the Low Security User role. Enter the password used to log into the HySecure Gateway. |
| Confirm Password | Re-enter the password to confirm. |
| Subscribed User Groups | Click Subscribe User to User Group to assign the user to local groups. A dialogue box will appear with all the available groups to add. |
Click Submit to create the user successfully.
Note
All High Security Users must enrol to access the Gateway.
Modify User Details
To modify a user's details, select the user from Local Users, then click Modify. Make the necessary changes and click Submit.
The changes will be effective once the user logs in next time.
Note
The Username, User ID, and Role cannot be changed.
Reset Passphrase
Steps to reset a certificate user's passphrase:
- Navigate to the Local Users.
- Select the user whose passphrase needs to be reset.
- Click on the Reset Passphrase.
- The new passphrase will be sent to the user's email address.
Note
To reset the passphrase, the user should be enrolled for the passphrase.`
Delete a User
Select the user from the Local Users list, and click Delete. Upon confirmation, the user would be deleted.
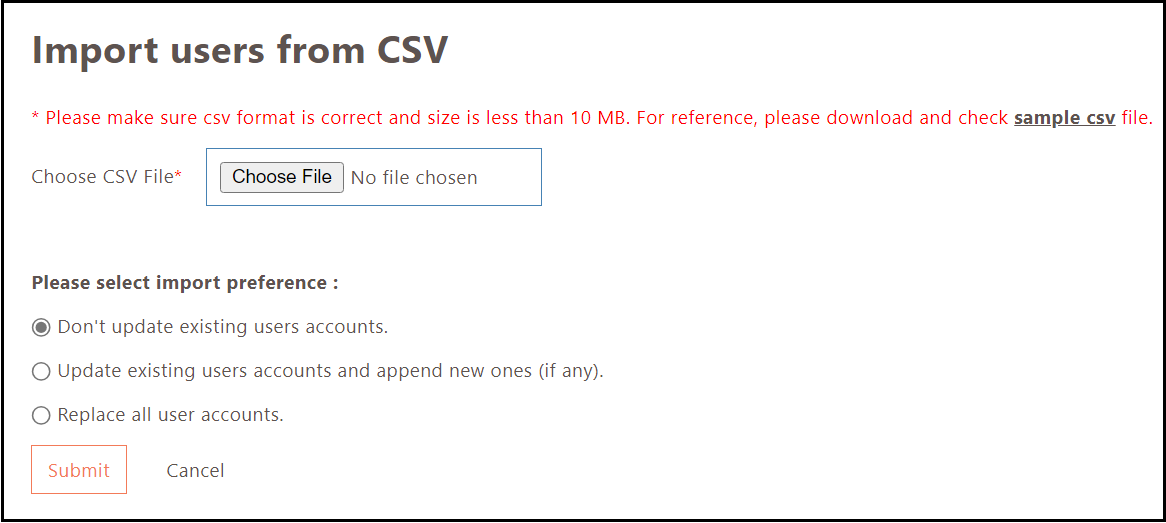
Import Users
Note
Import Users only works with Low Security users who log in using usernames and passwords.
- Log on to the Management Console.
- Navigate to Users > Local Users and click Import.
- Choose the .csv file by clicking Choose File.
-
Select one of the following import preferences:
-
Don't update existing users accounts: Select this option if the existing user accounts are not to be updated.
-
Update existing users accounts and append new ones (if any): Select this option if the existing user accounts are to be updated and new accounts are to be added.
-
Replace all user accounts: Select this option if all the existing low security users are to be replaced by the users uploaded from the .csv file.
-
Export Users List
- Log on to the Management Console.
- Navigate to Users > Local Users and click Export. The list of users will be exported and downloaded in a CSV file format.