Office 365 Apps
Microsoft 365 Single Sign-On (SSO) allows users to log in to their Microsoft 365 account with a single set of credentials. This eliminates the need for users to manage multiple passwords while reducing the risk of phishing attacks. By leveraging an existing on-premises Active Directory (AD) infrastructure, Microsoft 365 SSO ensures seamless authentication across cloud and on-premises applications.
Prerequisites
Before configuring Microsoft 365 SSO, ensure that your environment meets the following requirements:
-
Verified Domain: Your on-premises User Principal Name (UPN) domain must be verified in your Azure AD/Microsoft 365 Tenant.
-
Azure AD Connect Configuration: Install and configure Azure AD Connect to link and synchronize on-premises Active Directory user accounts with Microsoft 365.
-
Directory Synchronization: Ensure that your on-premises Active Directory is continuously synchronized with Azure Active Directory.
-
Administrative Permissions: A Global Administrator account for the Microsoft 365 Tenant is required to establish a secure PowerShell connection.
-
HySecure Gateway Configuration: The Accops HySecure Gateway must be set up with a public DNS name and a valid SSL certificate.
-
Access to Management Console: The HySecure Gateway Management Console must be accessible with Security Officer-level privileges.
Configurations
Set up HySecure Identity Provider (IdP) for Microsoft 365
Note
This configuration applies to HySecure 5427 with Hotfix 0006 and above, as well as HySecure 7.
Steps to use HySecure as an Identity Provider (IdP) for a SAML-based Microsoft 365 application:
-
Configure the HySecure Gateway as an SAML identity provider.
- Log in to the HySecure management console using Security Officer level privileges.
- Navigate to Settings > Services Config > SAML Identity Provider.
- Create a new SAML Identity Provider.
-
Enter the following details:
- Identity Provider Name: Provide the unique name of the Identity Provider.
- Domain Name: Select the configured HySecure domain that is used to authenticate the user from the authentication server.
- Entity ID: Enter the unique shared data between IdP and SP in the format https://hysecure_gateway_address
- Single Sign-On Service Endpoint: Enter the IdP URL (HySecure) that the SP will use to connect for SAML SSO.
- Single Logout Service Endpoint: Enter the IdP Logout URL that the SP will use to initiate SAML Logout.
- NameId Format: Select the name identifier used by providers to communicate with each other about the user.
- Certificate Signing Options: Select the available SAML Signing Options (The default value is Sign SAML Assertion).
- CA Certificate for Signing: Select the CA Certificate used to sign the SAML assertion (Use the certificate that is configured in SP if the HySecure certificate is used in SAML SP; leave this with the default value).
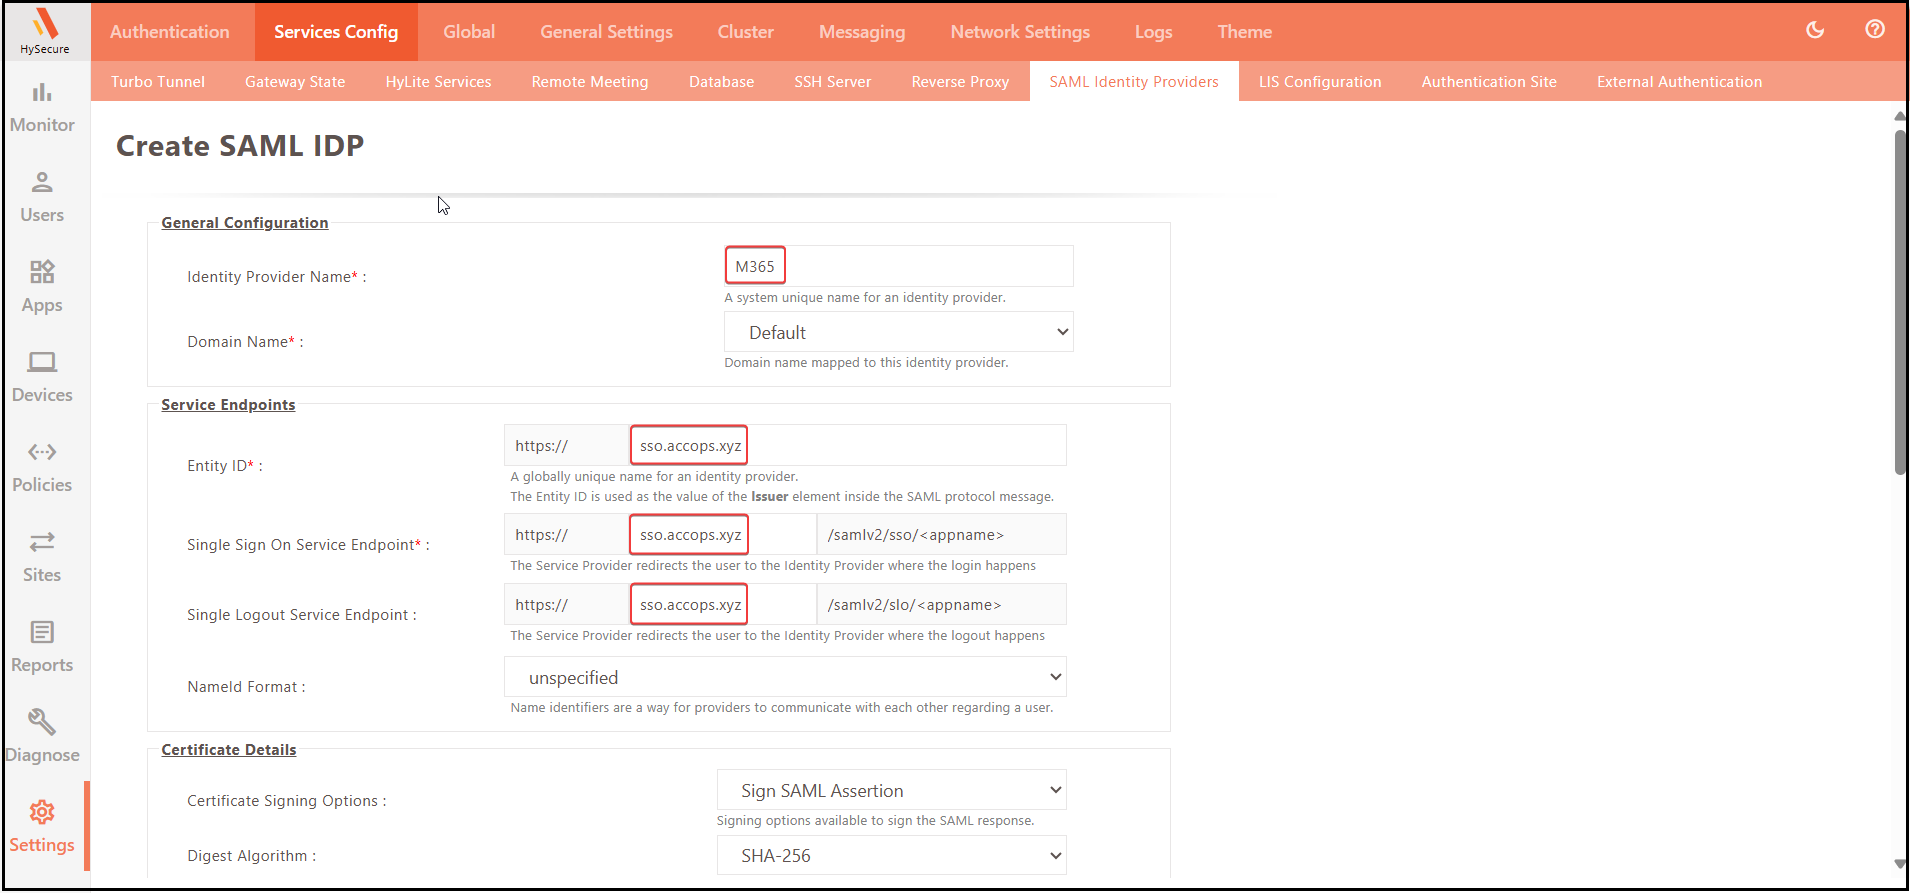
General Configuration:
Field Example Description Identity Provider Name M365 Unique Name can be used Domain Name Default Select the configured HySecure domain that is used to authenticate the user from the authentication server. Service Endpoints:
Field Example Entity ID https://sso.accops.xyz Single Sign-On Service Endpoint https://sso.accops.xyz/samlv2/sso/appname Single Logout Service Endpoint https://sso.accops.xyz/samlv2/slo/appname NameId Format unspecified Certificate Details:
Field Example Certificate Signing Options Sign SAML Assertion Digest Algorithm SHA-256
-
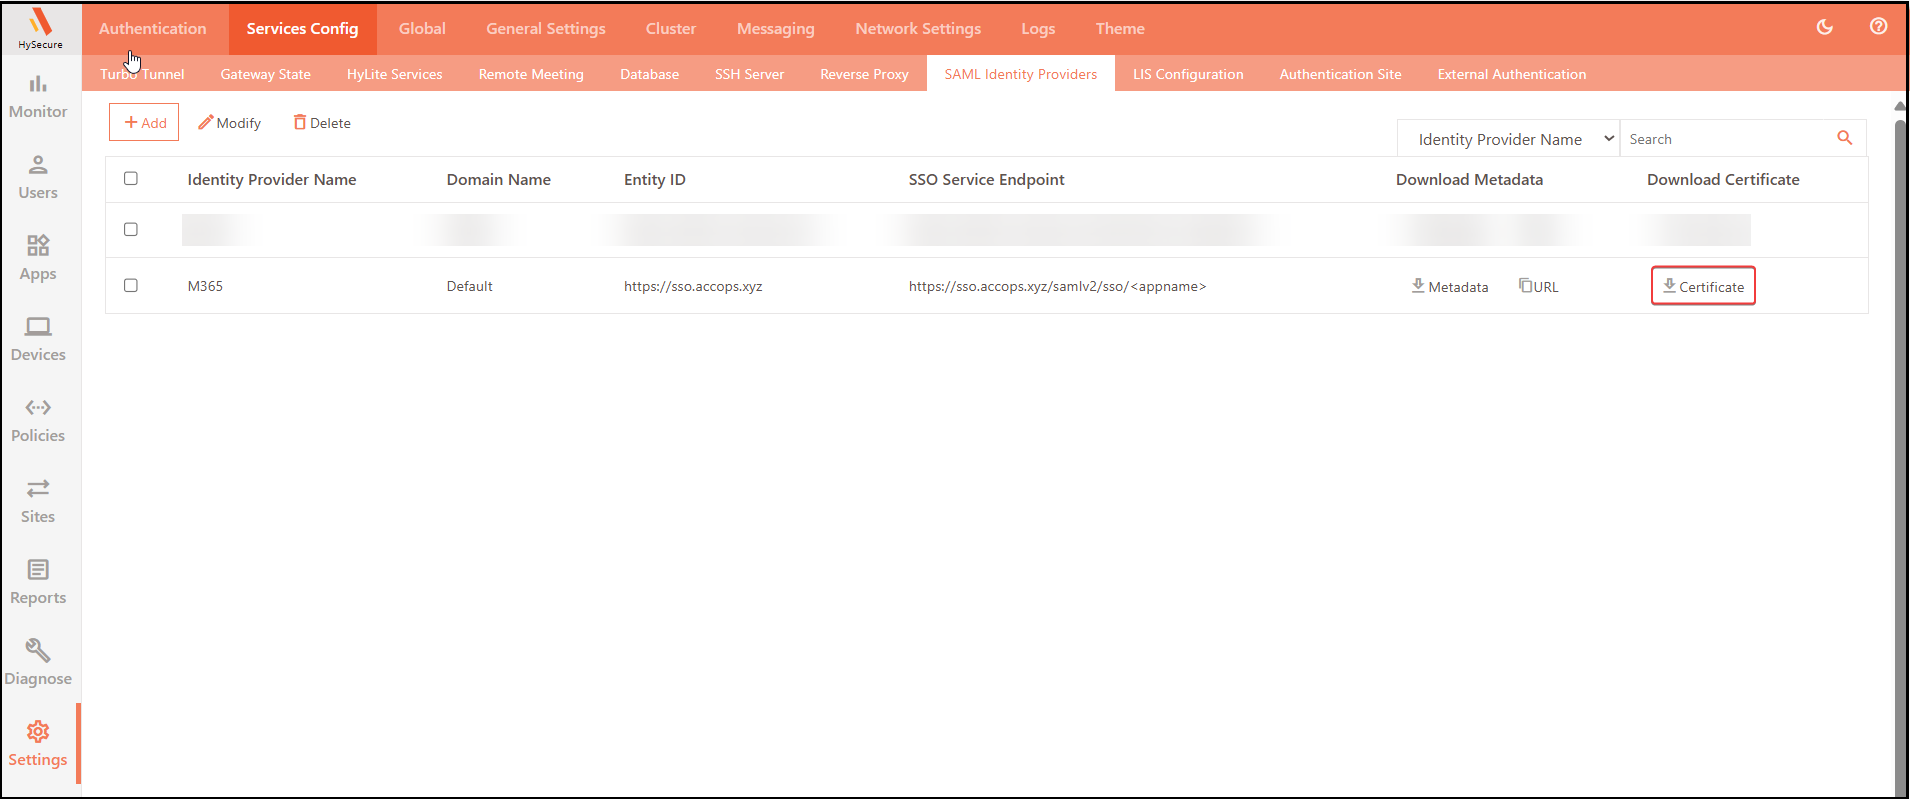
Download the SAML SSO Certificate. In the SAML Identity Providers section, download the certificate for the identity provider attached to the M365 Application.
-
Open the Certificate in Notepad and copy the SAML SSO Certificate content.
Example:

Note
This certificate is required when federating the M365 domain with the Accops HySecure Gateway; therefore, ensure that no new lines are added when copying the content in the SAML SSO Certificate.
-
In the Apps section, select Apps to create an HTTPS Type App.
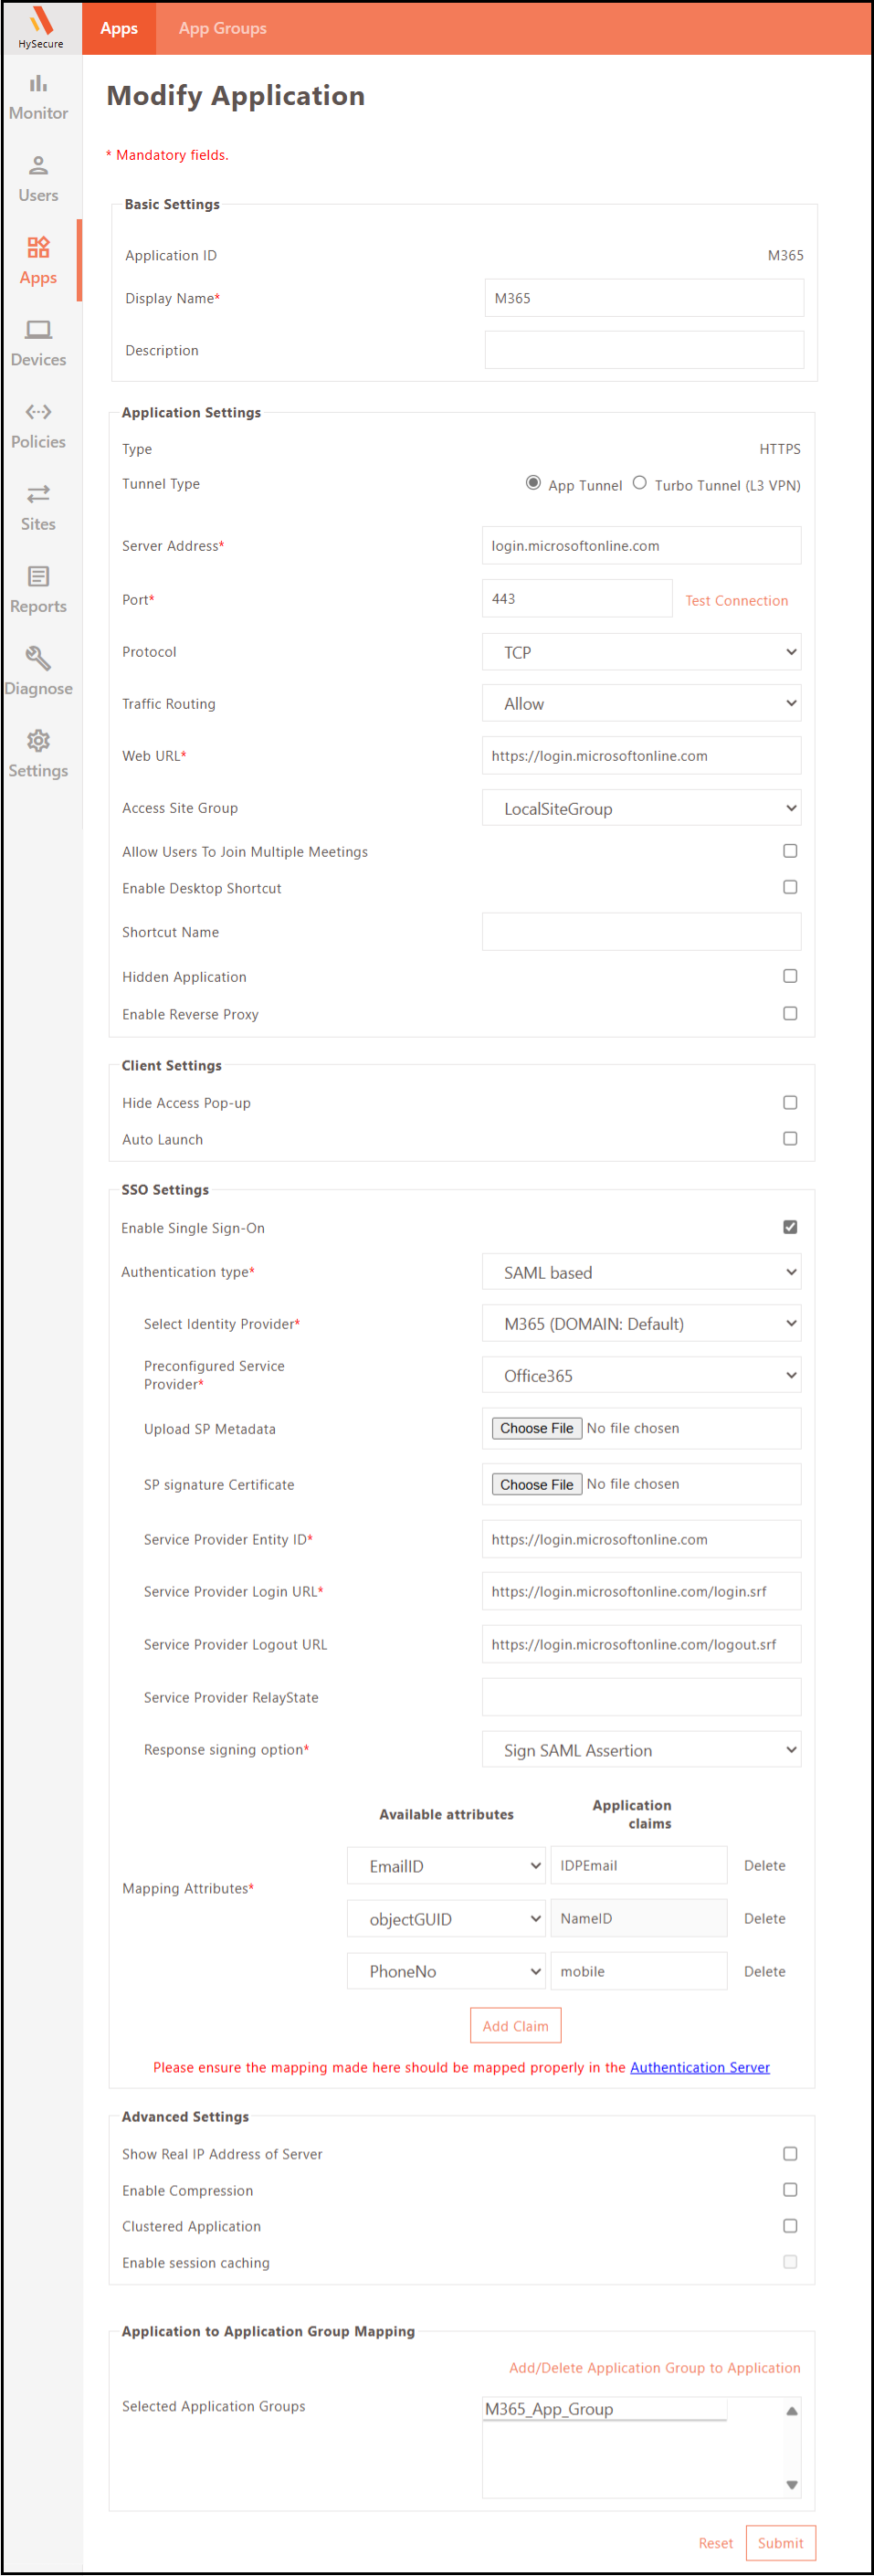
Basic Settings:
Field Example Application ID M365 Display Name M365 Application Settings:
Field Example Type HTTPS Tunnel Type App Tunnel Application Server Address Login Application Port 443 Protocol TCP Traffic Routing Allow Web URL https://login.microsoftonline.com Access Site Group LocalSiteGroup SSO Settings:
Field Example Enable Single Sign-On Checked Authentication type SAML based Select Identity Provider M365 (DOMAIN:Default) Preconfigured Service Provider Office365 Service Provider Entity ID https://login.microsoftonline.com Service Provider Login URL https://login.microsoftonline.com/login.srf?sso_reload=true Service Provider Logout URL https://login.microsoftonline.com/logout.srf Response signing option Sign SAML Assertion Mapping Attributes:
Available attributes Application claims EmailID IDPEmail objectGUID NameID PhoneNo mobile -
Add the on-premises Active Directory (synchronized with Azure AD) as an authentication server.
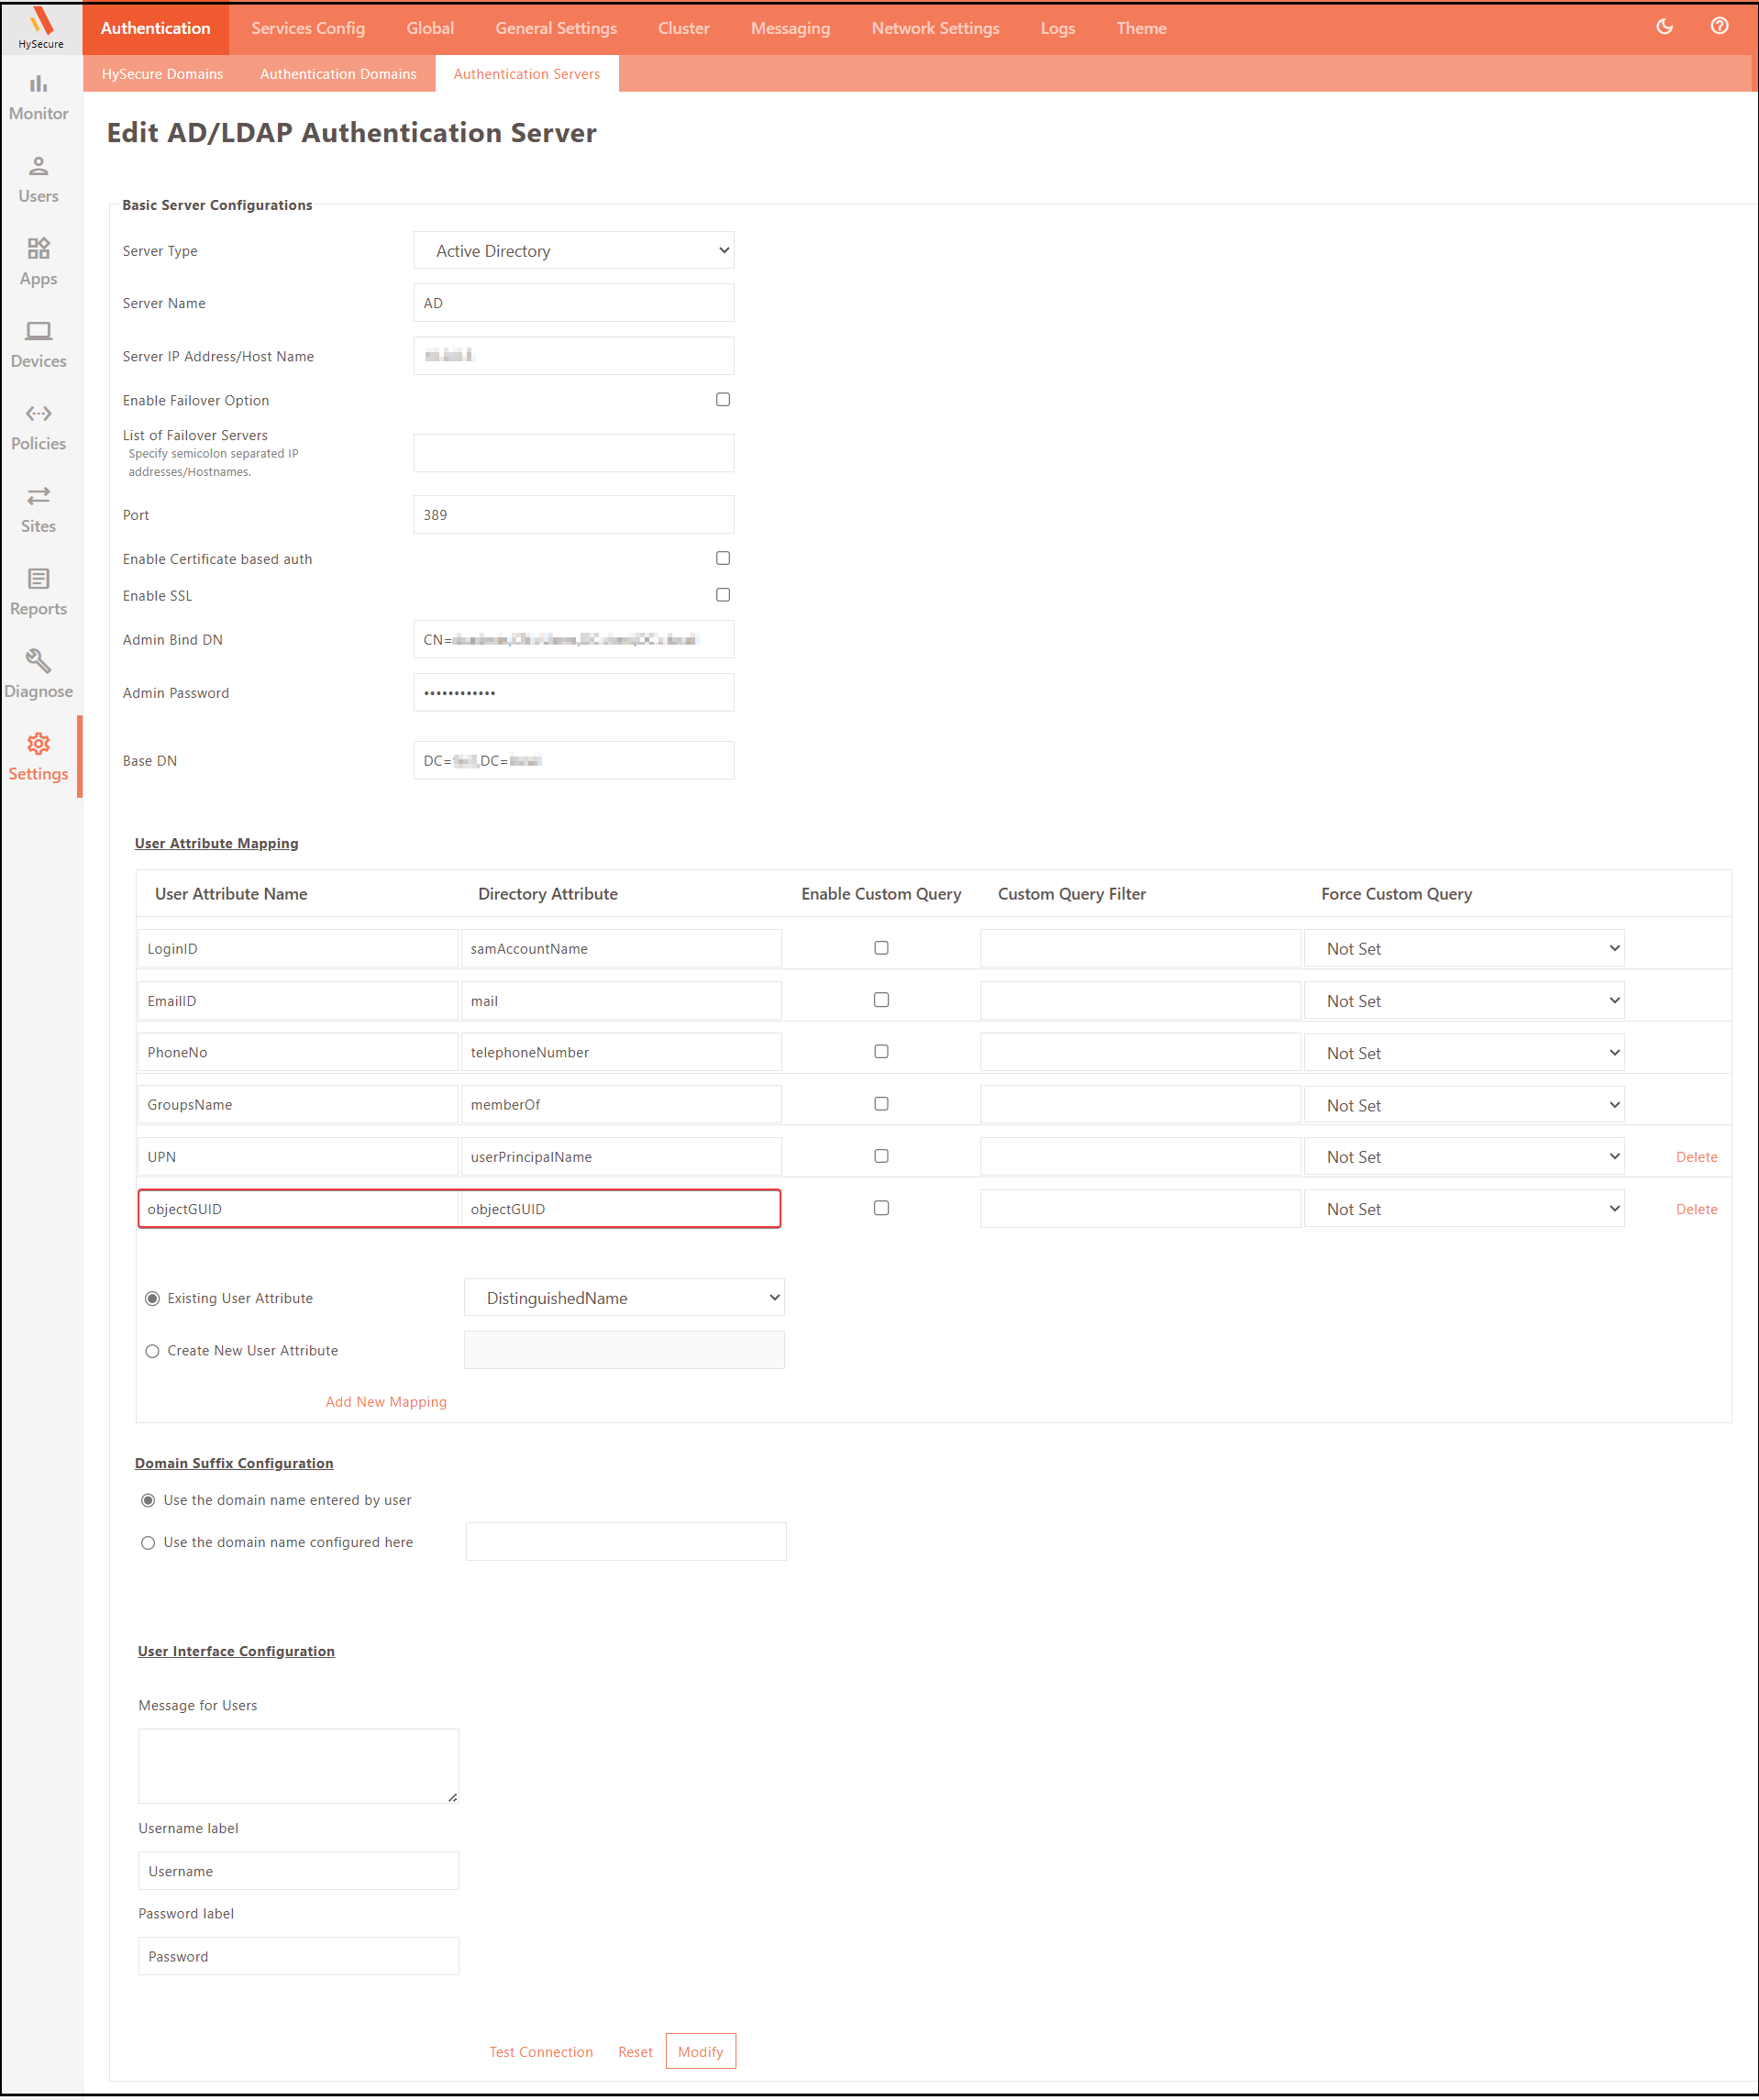
The following user attribute is mandatory:
User Mapping Attributes Available attributes Application claims objectGUID objectGUID -
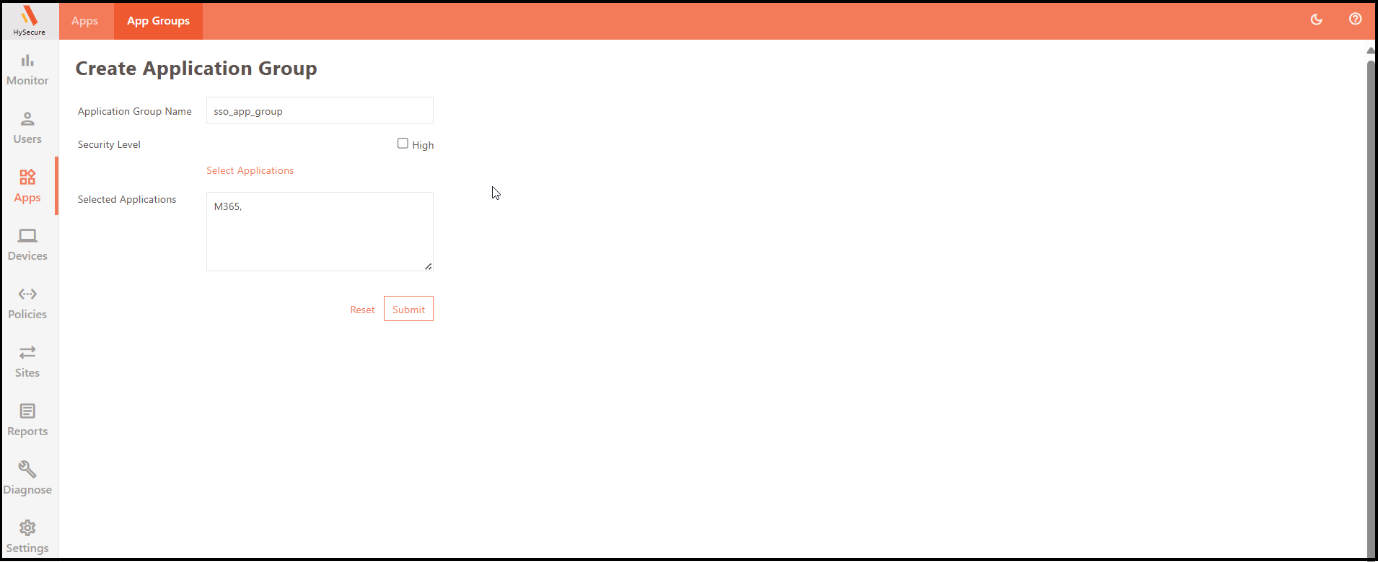
Add all respective M365 accounts to a New/Existing Application Group.
-
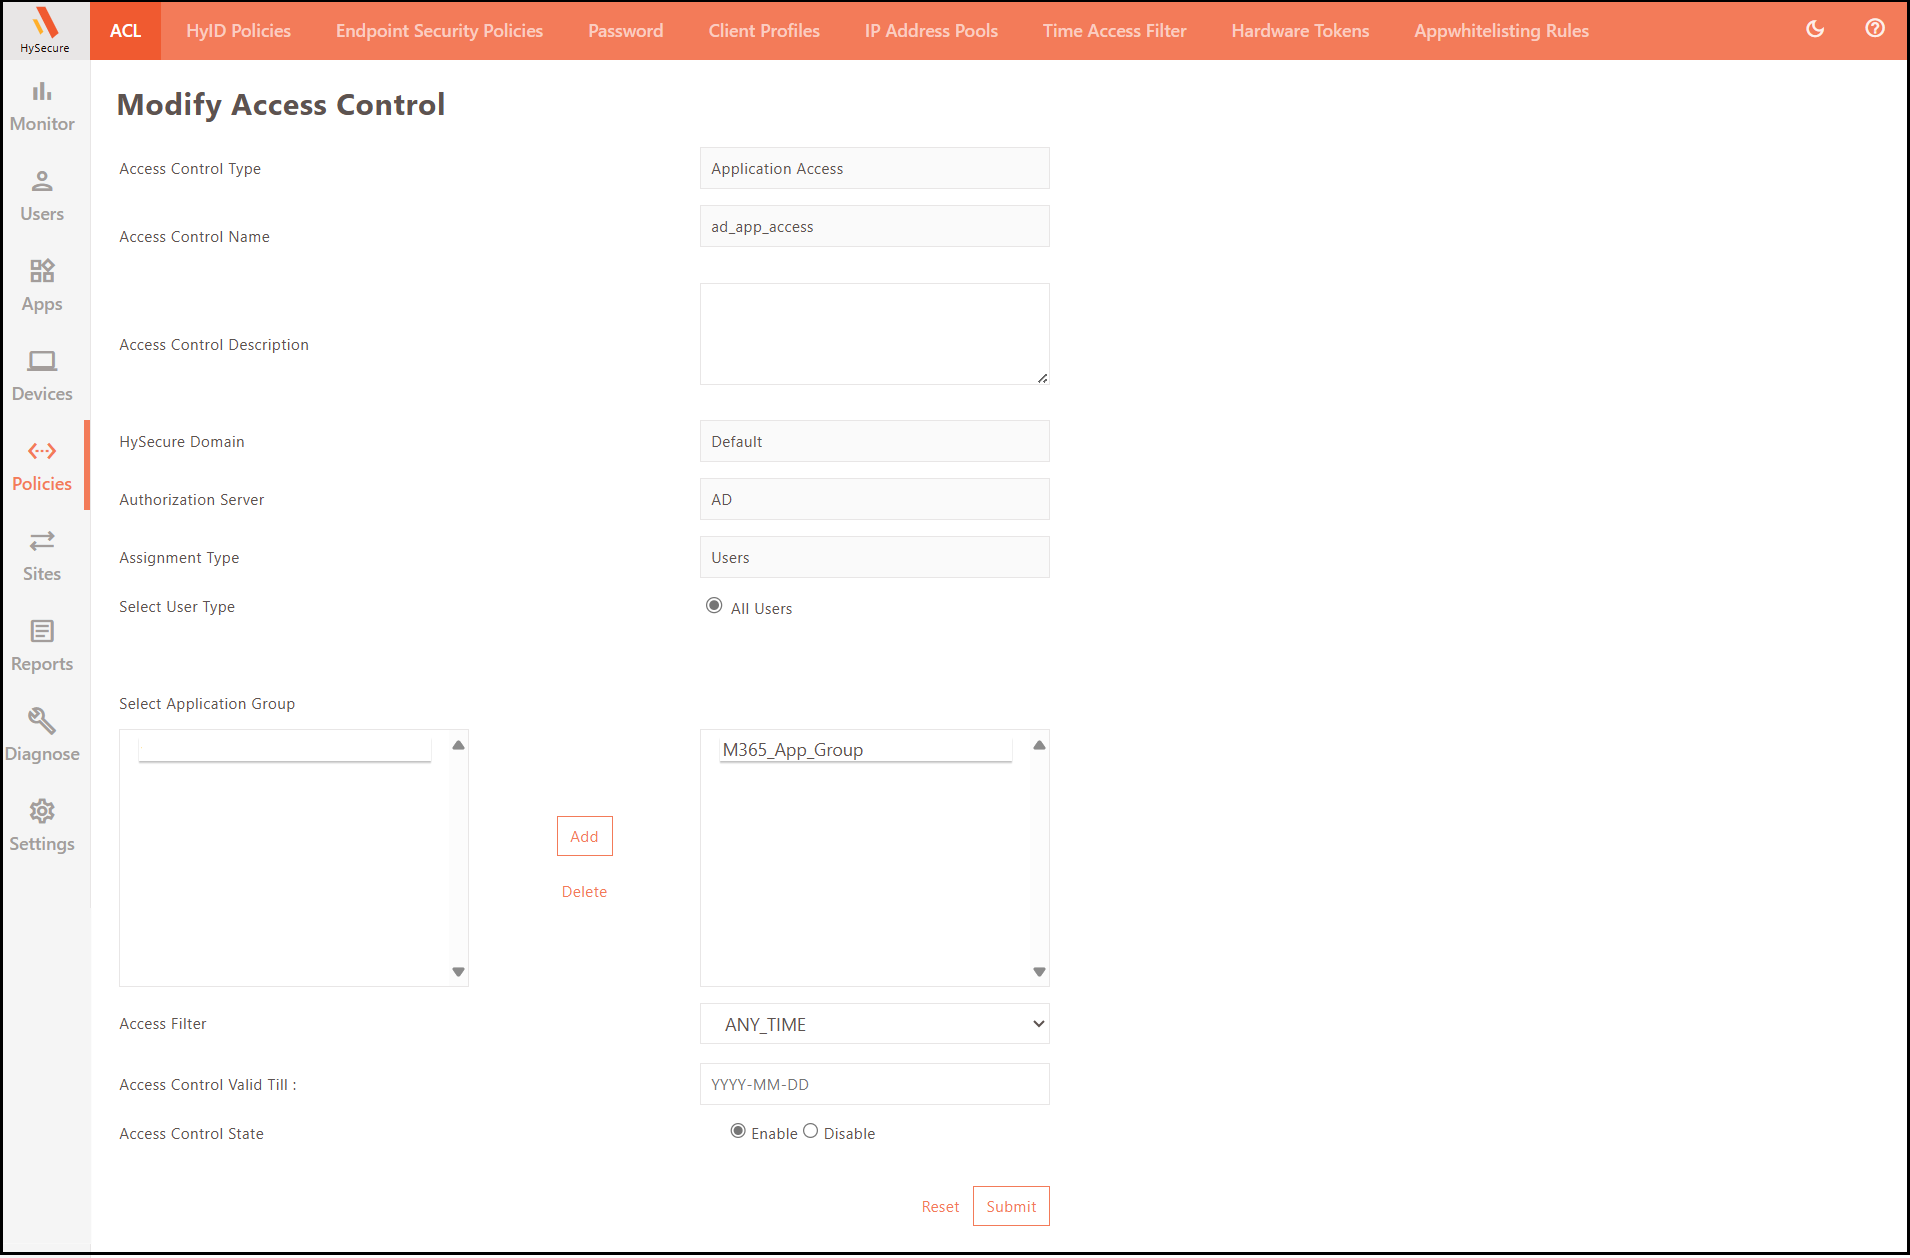
Create/Update Application Access control type in the New/Existing Access Controls.
Set up HySecure in Microsoft 365 (Service Provider)
-
Open PowerShell as Administrator and install the Microsoft Graph module. If the Microsoft Graph module is already installed, skip this step.
Install-Module Microsoft.Graph
Reference URL: https://learn.microsoft.com/en-us/powershell/microsoftgraph/installation?view=graph-powershell-1.0
-
Connect to Microsoft Graph using the following command in PowerShell:
Connect-MgGraph -Scopes "Domain.ReadWrite.All","Directory.AccessAsUser.All"
-
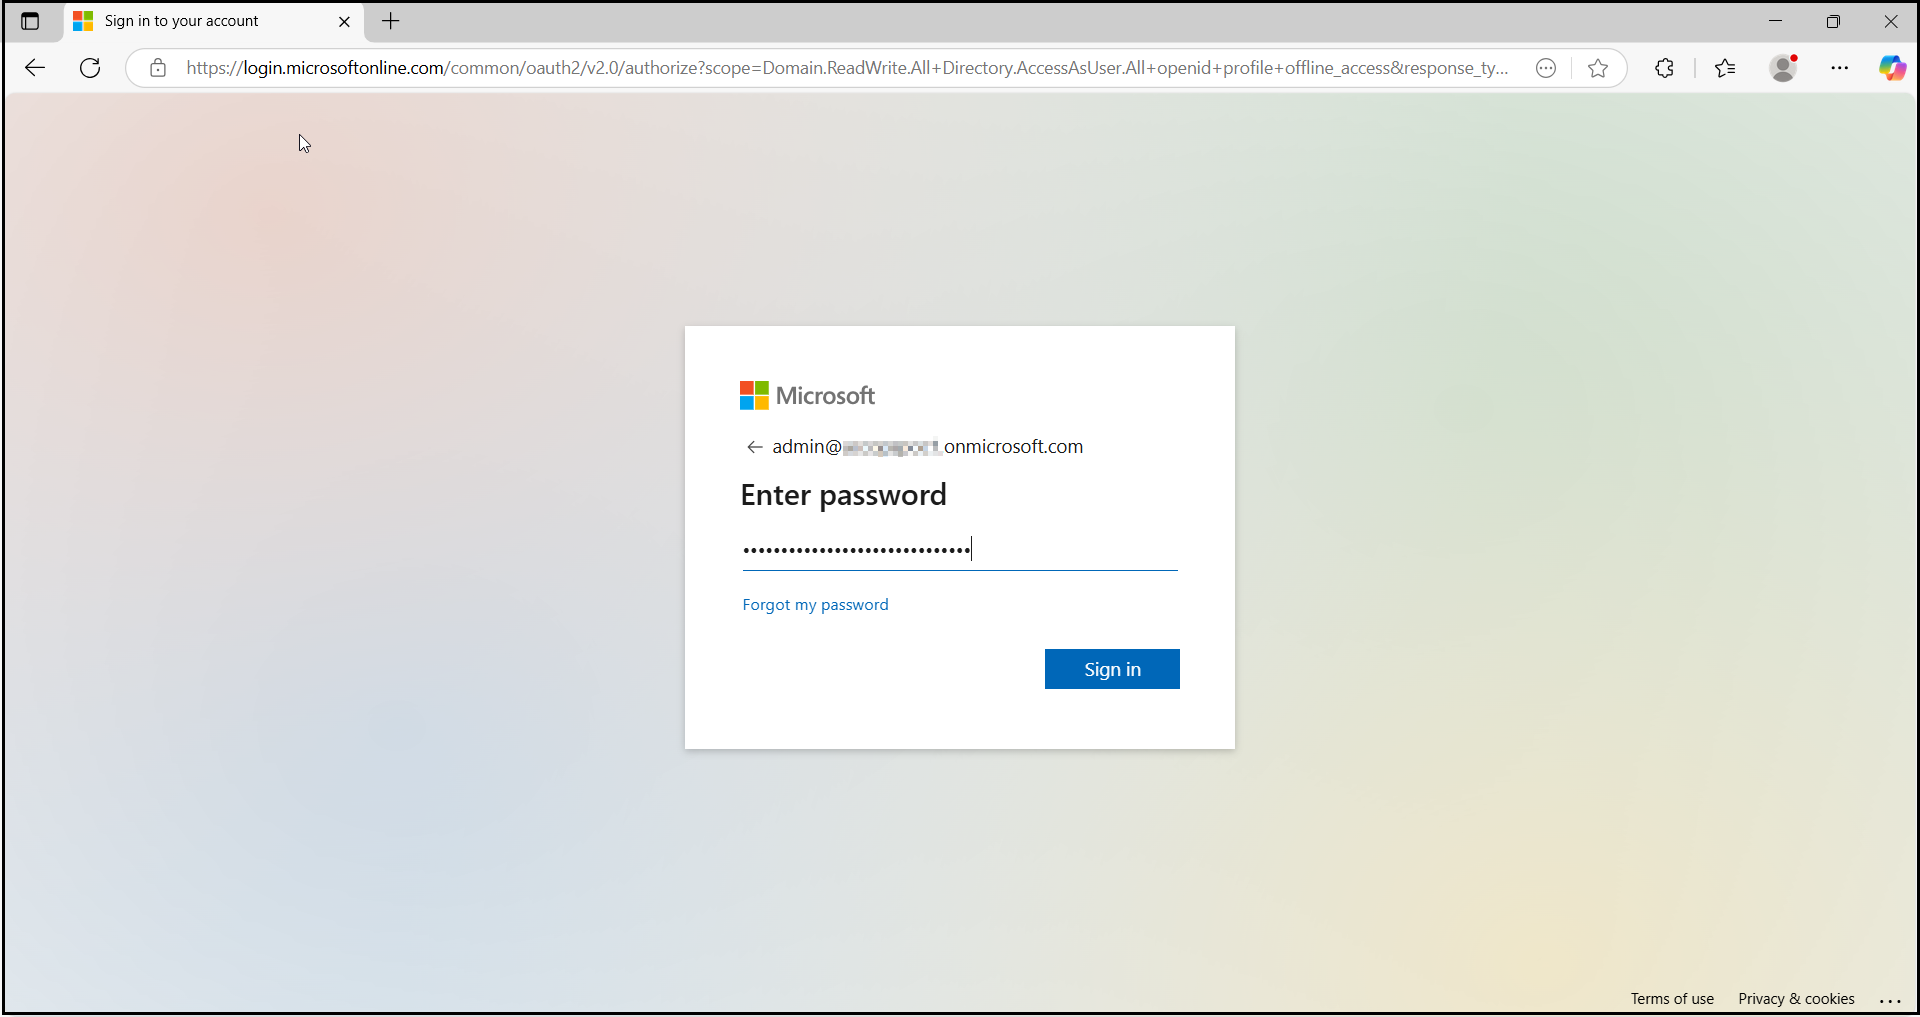
Log in to the Microsoft 365 Tenant with a Global Administrator Account.
-
Upon authentication completion. Close the browser.

-
-
Retrieve the list of domains in your Microsoft 365 tenant using the command:
Get-MgDomain

Note
- Microsoft 365 SSO can only be enabled for verified domains in Microsoft Entra ID (formerly Azure AD).
- SSO cannot be enabled for "onmicrosoft.com" domains, as Microsoft manages them.
- SSO cannot be configured for the default domain (i.e., the primary domain where users are created); it is only supported for custom domains.
- Microsoft 365 restricts SSO on default domains by default to ensure administrators can always log in, even if there are issues with the Identity Provider (IdP).
- Organizations without a custom Microsoft 365 domain must purchase one to enable SSO.
- Federated domains (domains with SSO enabled) cannot be configured for password synchronization.
-
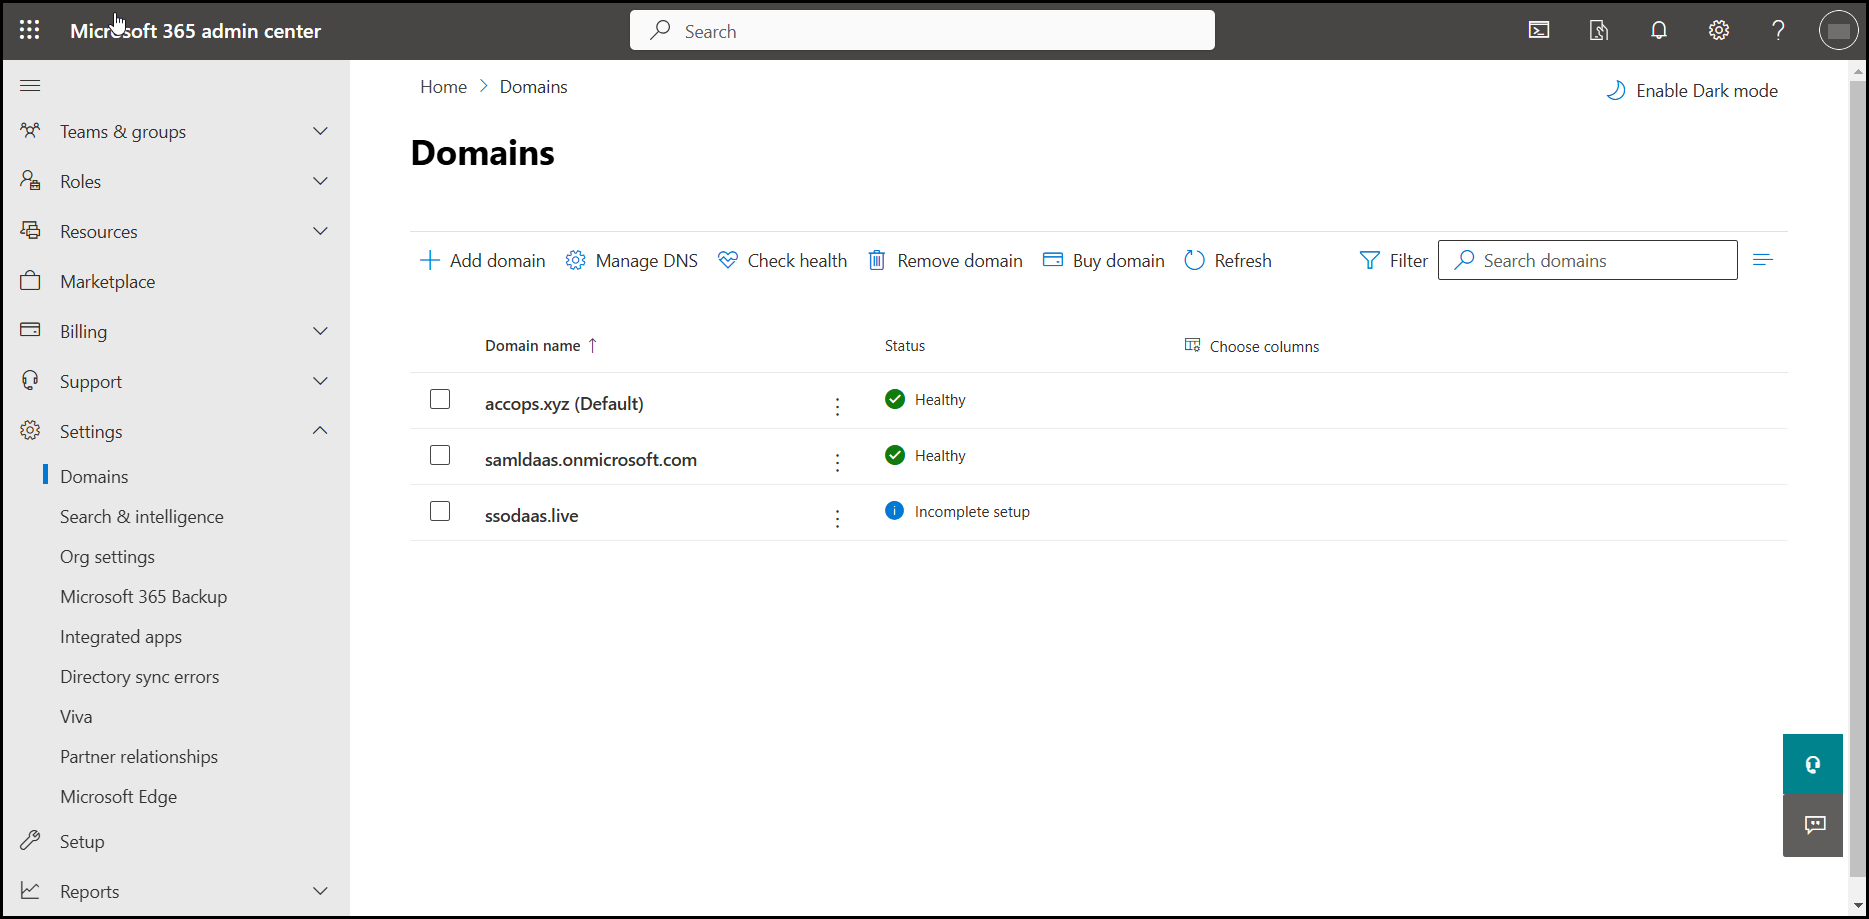
Update the Default Domain in Microsoft 365.
-
Sign in to the Microsoft 365 portal as a Global Administrator. To update the default domain in your Microsoft 365 tenant, navigate to the Microsoft 365 Admin Center and manage domain settings under the Domains section.
Note
If a custom domain is set as the default, change the default domain to onmicrosoft.com. This step is mandatory before configuring the custom domain as a federated domain.
-
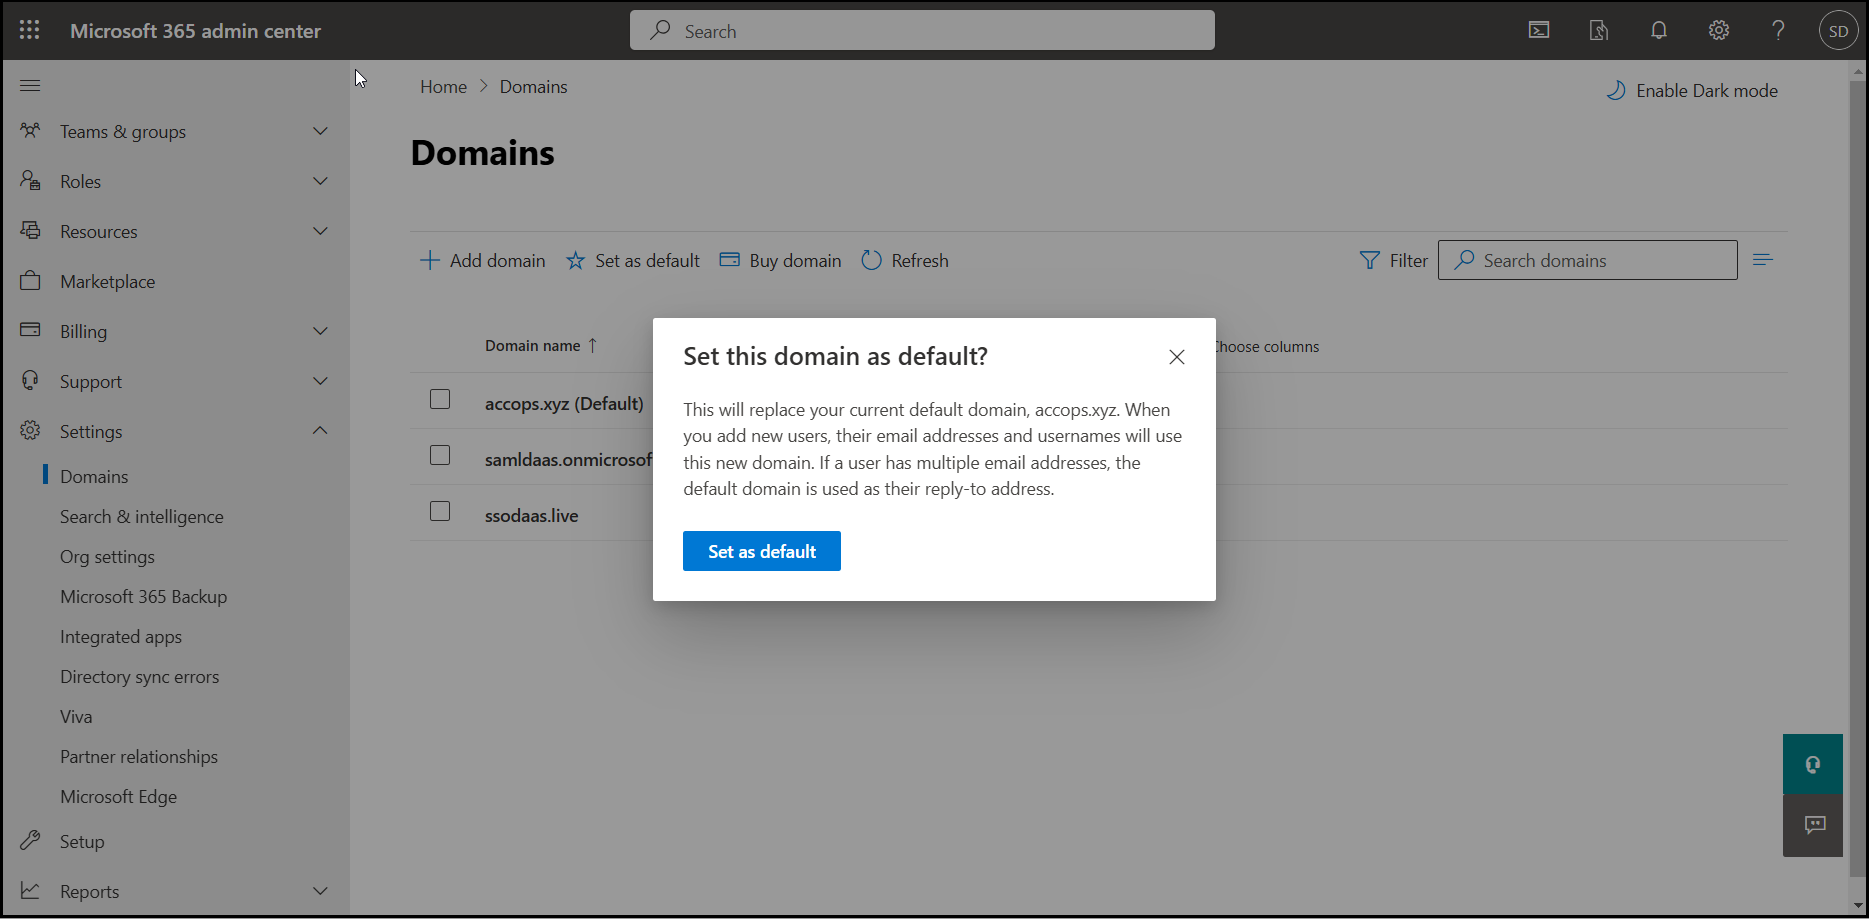
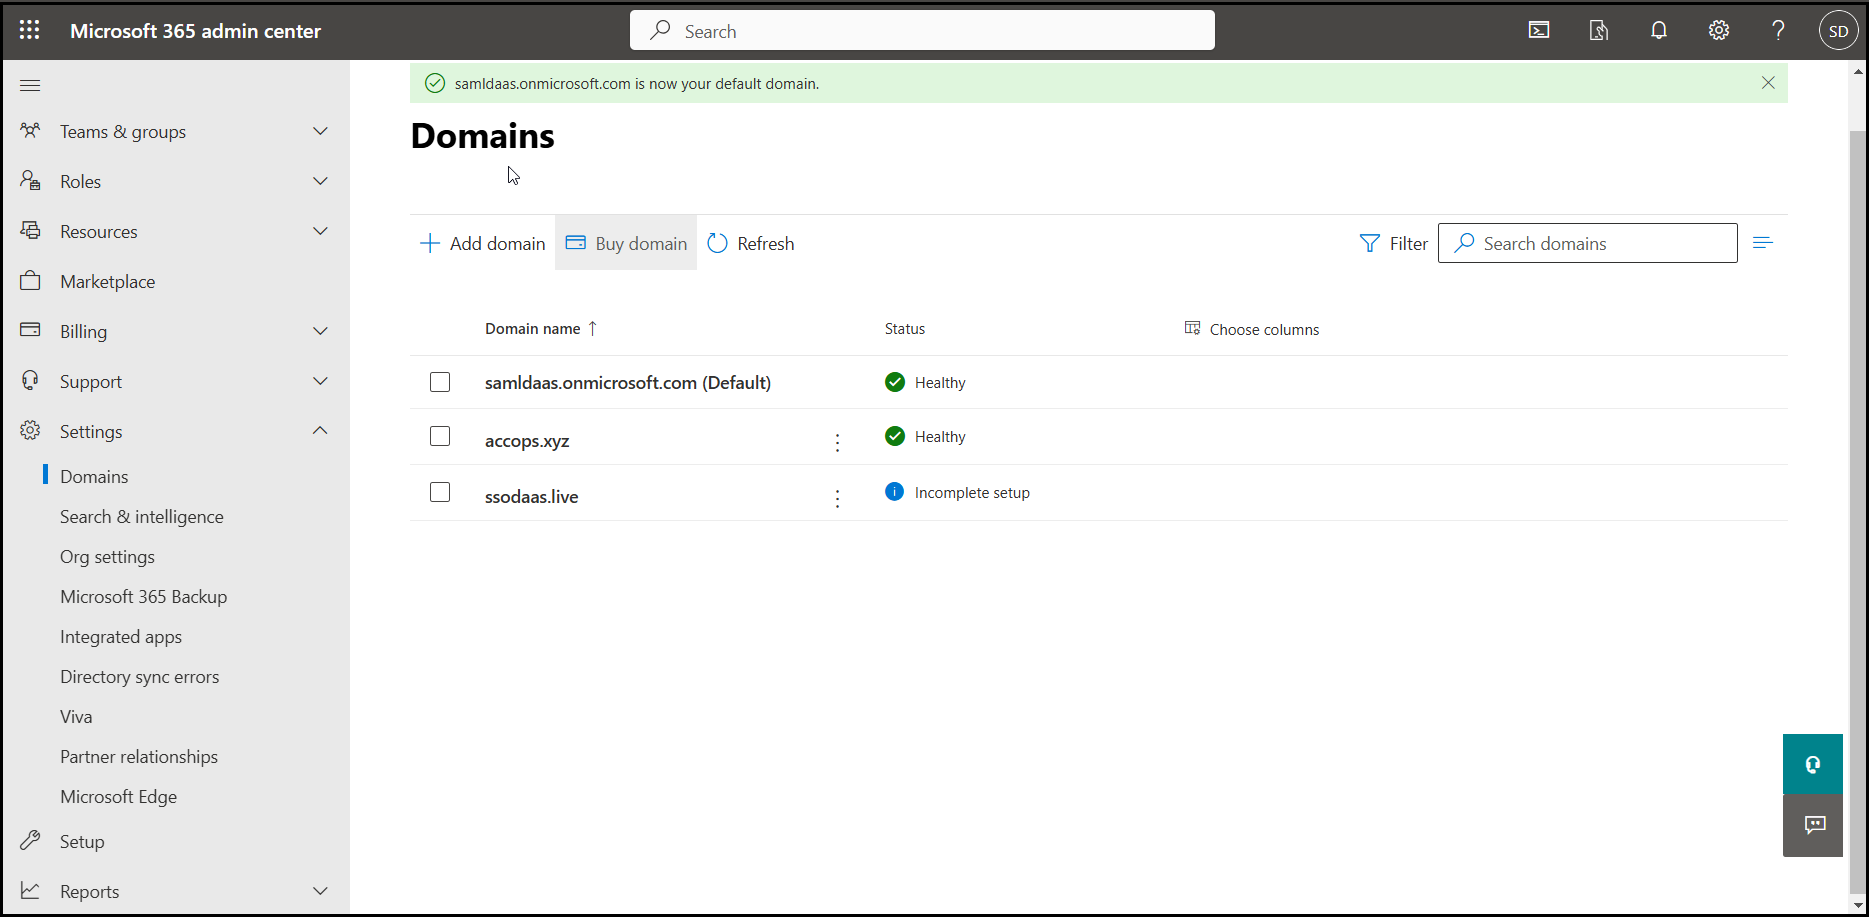
Click the burger menu next to the onmicrosoft.com domain, then select Set as default.
-
-
The following prerequisites must be met to configure accops.xyz as a Federated Domain :
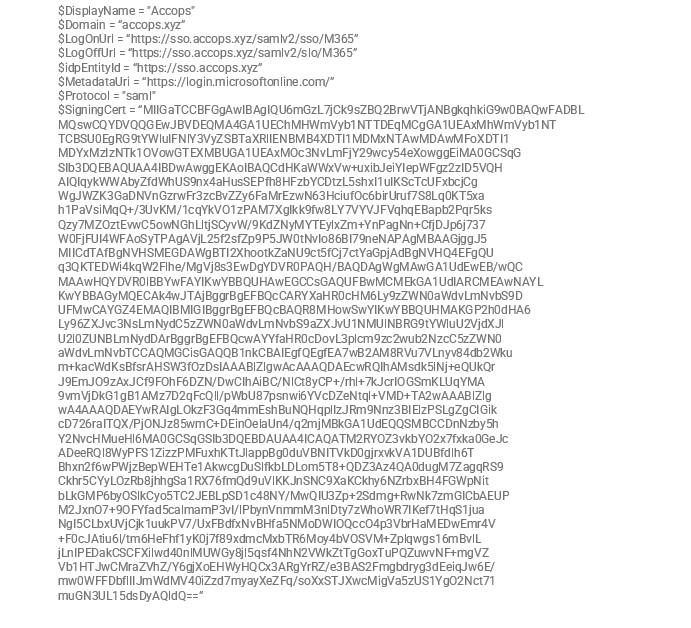
- Before proceeding, update the following parameters according to your environment:
Variable Description $DisplayName = "Accops" # Replace with your brand name $Domain = “accops.xyz” # Replace with your custom domain $LogOnUrl = https://sso.accops.xyz/samlv2/sso/M365 # Replace sso.accops.xyz with your Accops HySecure Gateway FQDN $LogOffUrl = https://sso.accops.xyz/samlv2/slo/M365 # Replace sso.accops.xyz with your Accops HySecure Gateway FQDN $idpEntityId = https://sso.accops.xyz # Replace with your Entity ID $MetadataUri = https://login.microsoftonline.com/ # No changes required $Protocol = "saml" # No Changes required $SigningCert = "SAML SSO Certificate" # Replace with the content of the SAML SSO certificate -
Example:
-
To configure accops.xyz as a Federated Domain, run the command given below in PowerShell.
New-MgDomainFederationConfiguration -DomainId $Domain -ActiveSignInUri $LogOnUrl -PassiveSignInUri $LogOnUrl -DisplayName $DisplayName -IssuerUri $idpEntityId -MetadataExchangeUri $MetadataUri -SignOutUri $LogOffUrl -SigningCertificate $SigningCert -PreferredAuthenticationProtocol $Protocol -FederatedIdpMfaBehavior "rejectMfaByFederatedIdp" -
Verify the Domain Authentication Status using the command:
Get-MgDomain

-
Check the output to verify the domain status:
-
If Authentication is set to Federated, the domain is successfully configured for SSO.
-
If Authentication is set to Managed, the domain is still using Microsoft’s default authentication.
-
-
Ensure your custom domain (example: accops.xyz) is listed as Federated before proceeding with SSO testing.
-
-
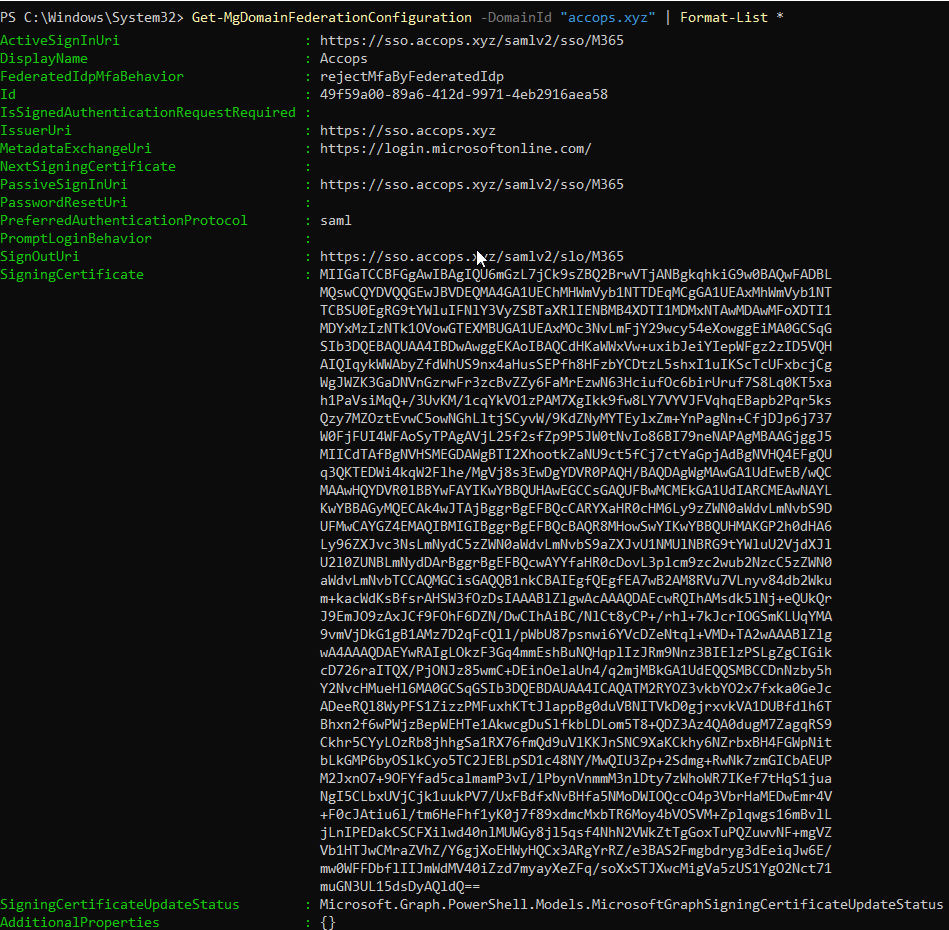
Verify Federation Configuration using the following Command:
Get-MgDomainFederationConfiguration -DomainId "accops.xyz" | Format-List *
-
Review the output to verify the following details:
-
Federation Brand Name
-
Active and Passive SignIn URIs
-
Issuer URI
-
SignOut URI
-
Signing Certificate
-
-
Ensure all values match your configured Accops HySecure SAML settings.
-
-
Reconfigure or update SSO settings.
Warning
- If you are already using SSO for Office 365 from another identity provider or want to update Accops as a Identity Provider for SSO settings, then you must first disable SSO in Office 365, and then follow the steps in this guide from Step 6 to Step 7.
-
If you ever need to revert a custom domain from Federated to Managed, use the following command:
Update-MgDomain -DomainId "accops.xyz" -BodyParameter @{AuthenticationType="Managed"}
Note
Replace the DomainId with your actual domain name.
Sign in to your Office 365
Using IdP initiated login
-
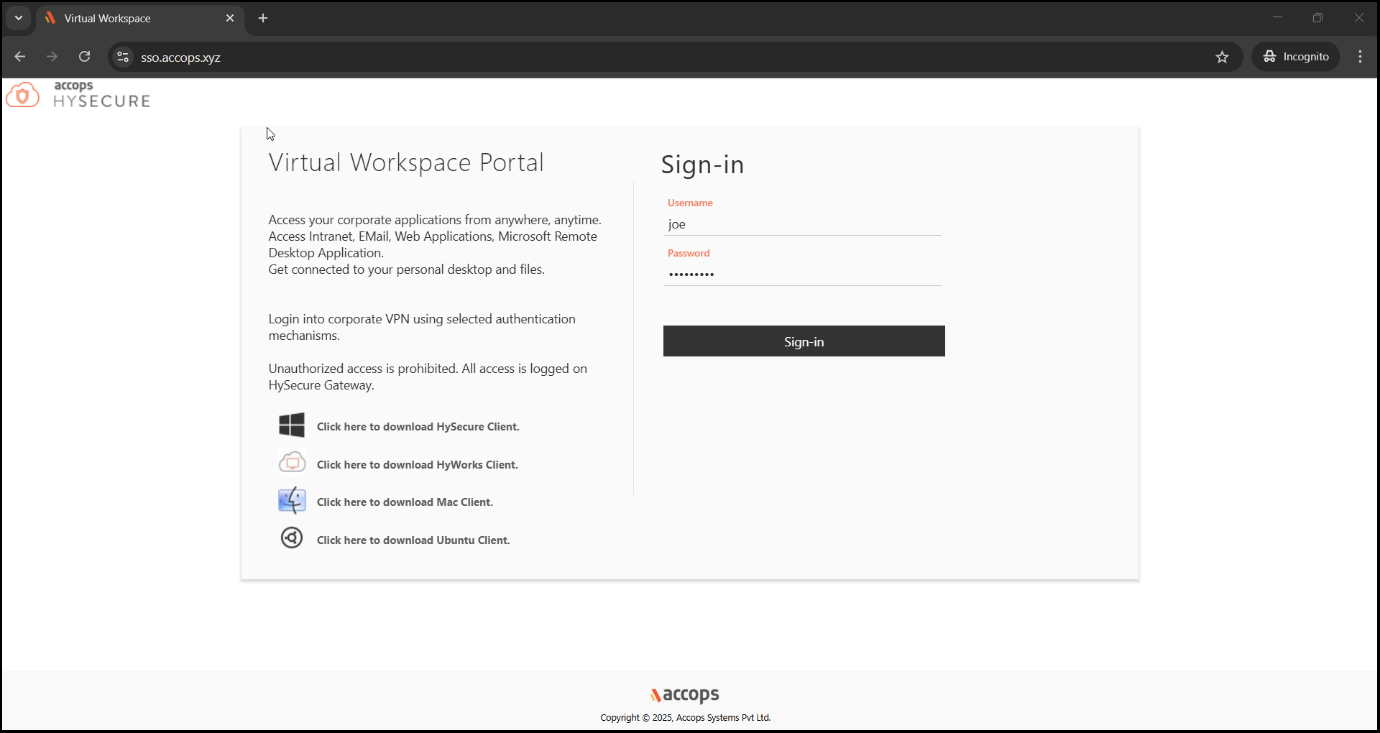
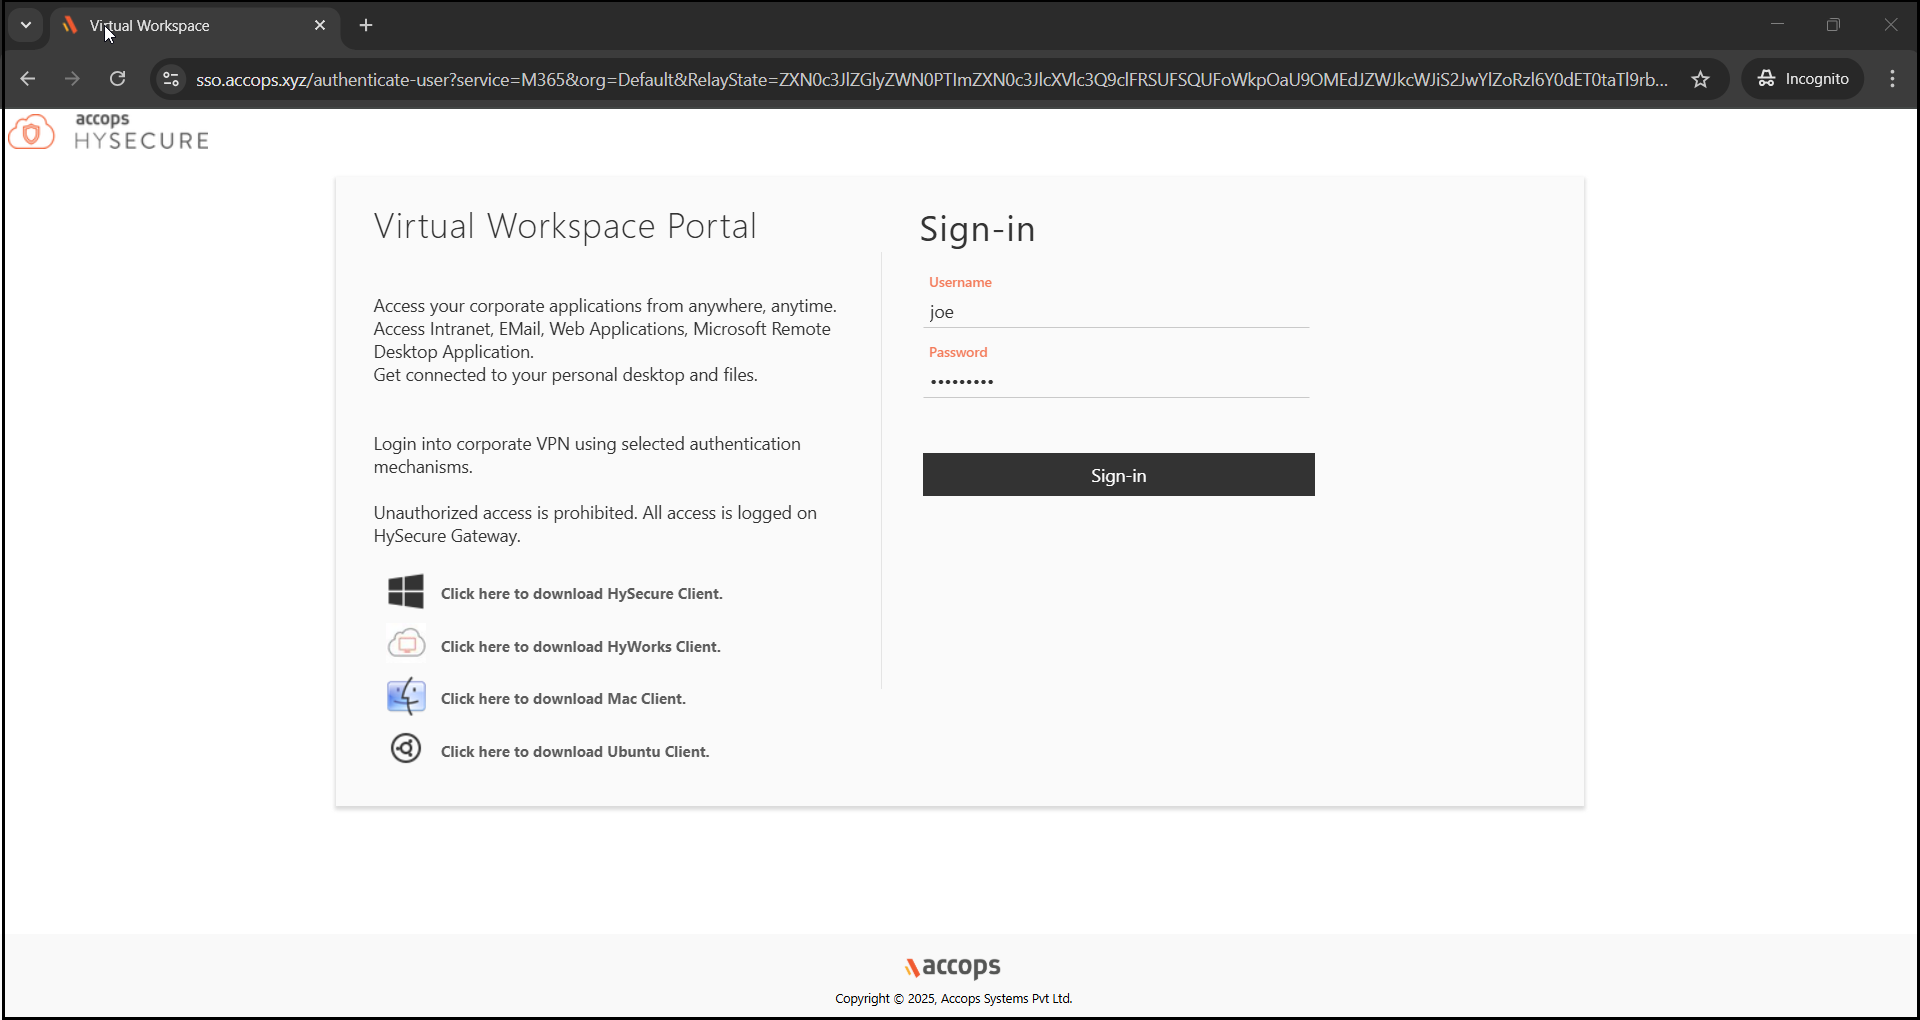
Go to the Accops Workspace Portal (https://sso.accops.xyz)
- Enter the sAMAccountName of the user.
-
Enter the login credentials and click Sign In.
-
For Example:
-
Username: joe
-
Password: xxxxxx
-
-
-
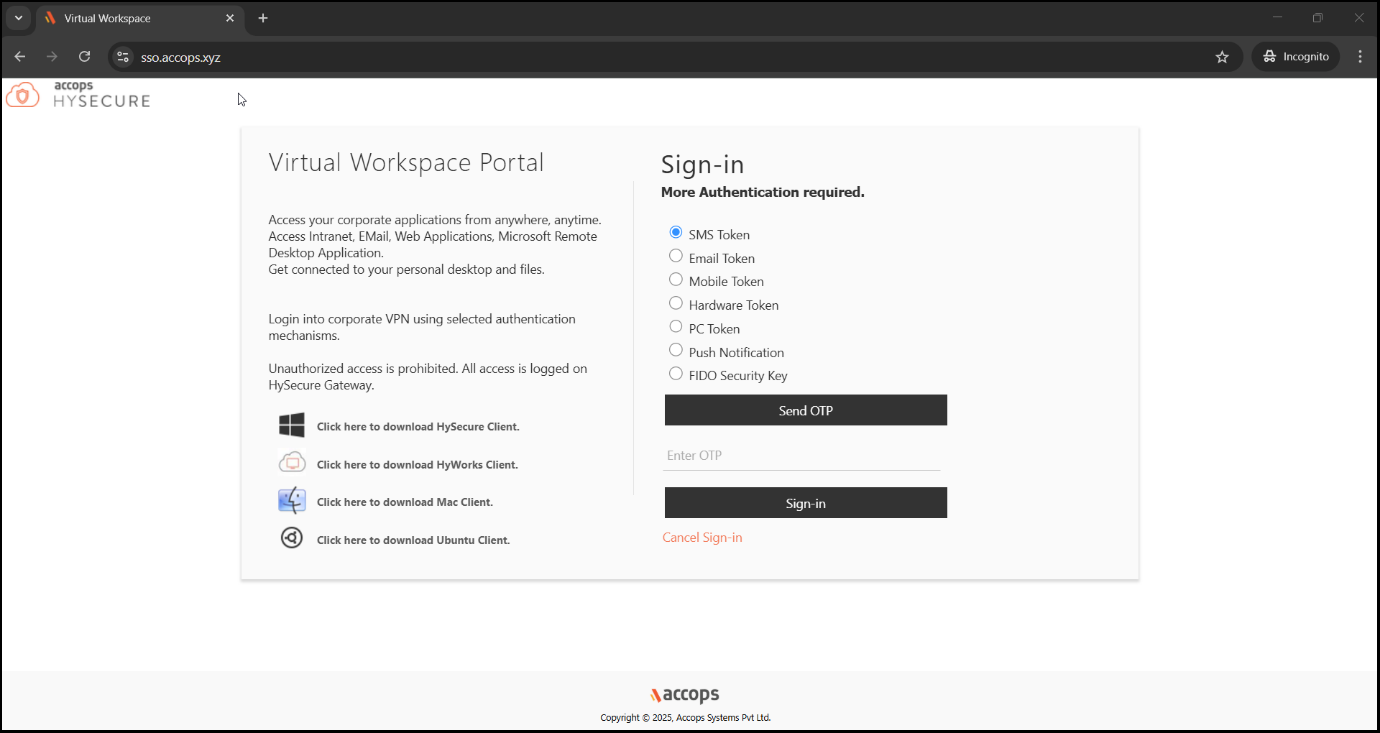
Verify using Multi-Factor Authentication via the MFA options available in the dropdown.
-
Upon successful Authentication and Authorization, the user will will be redirected to the Accops Workspace Portal.

-
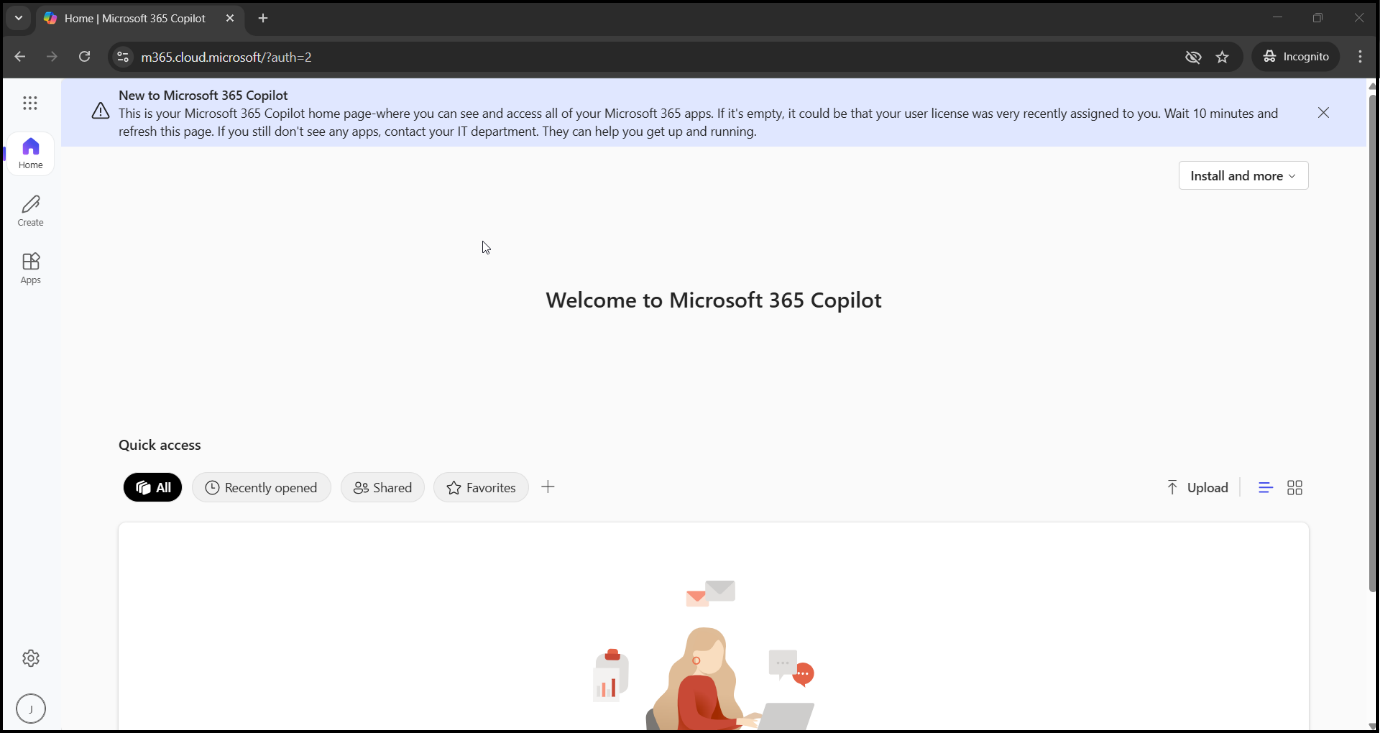
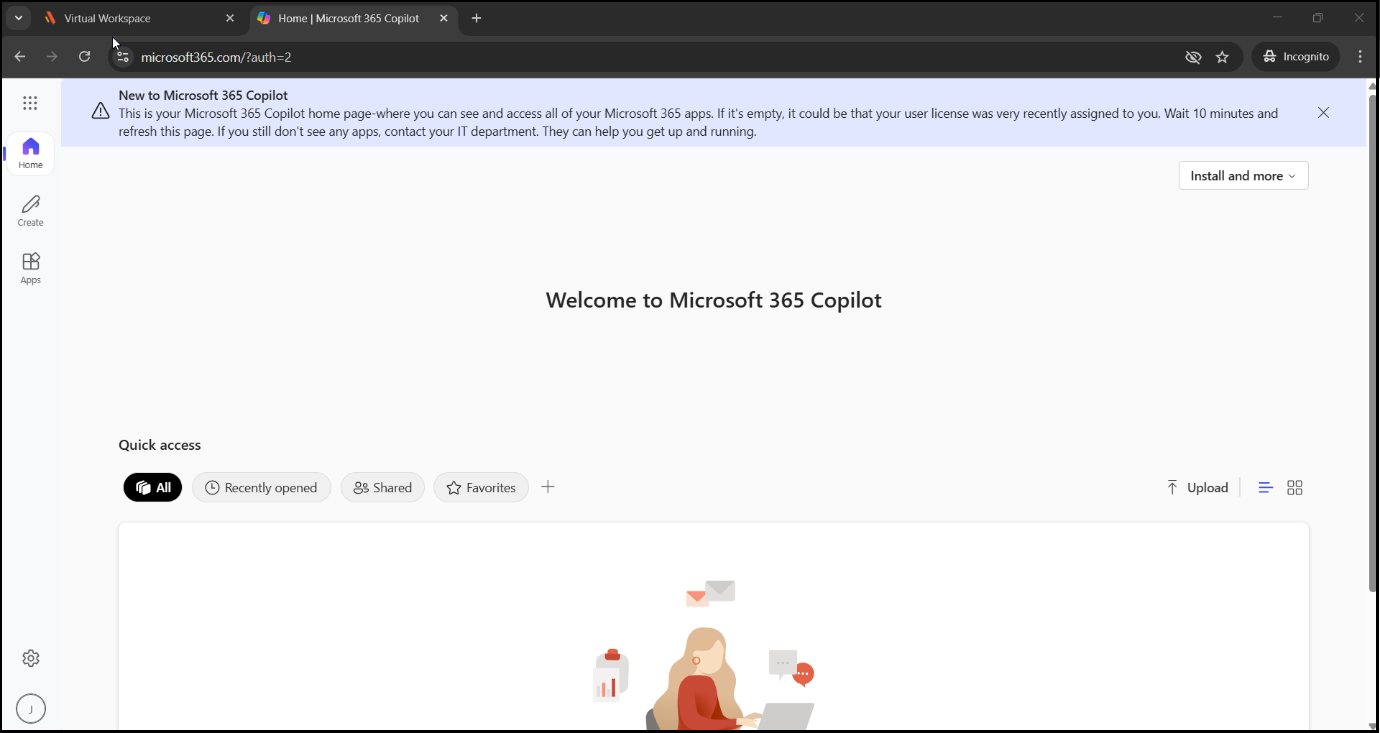
Click the M365 icon to launch Single Sign-On (SSO) access to Microsoft 365.
Using SP initiated login
-
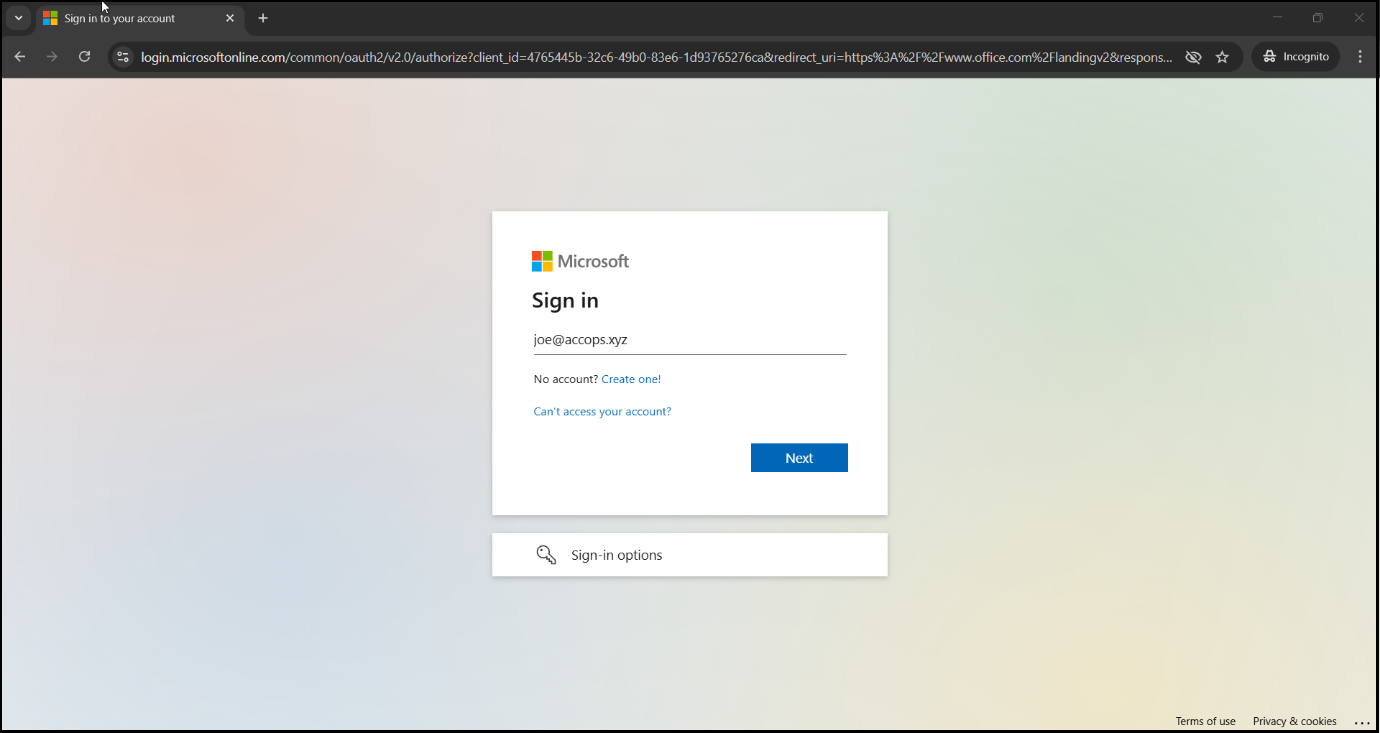
Go to the Office 365 portal (https://www.office.com) and sign in with your email address.
-
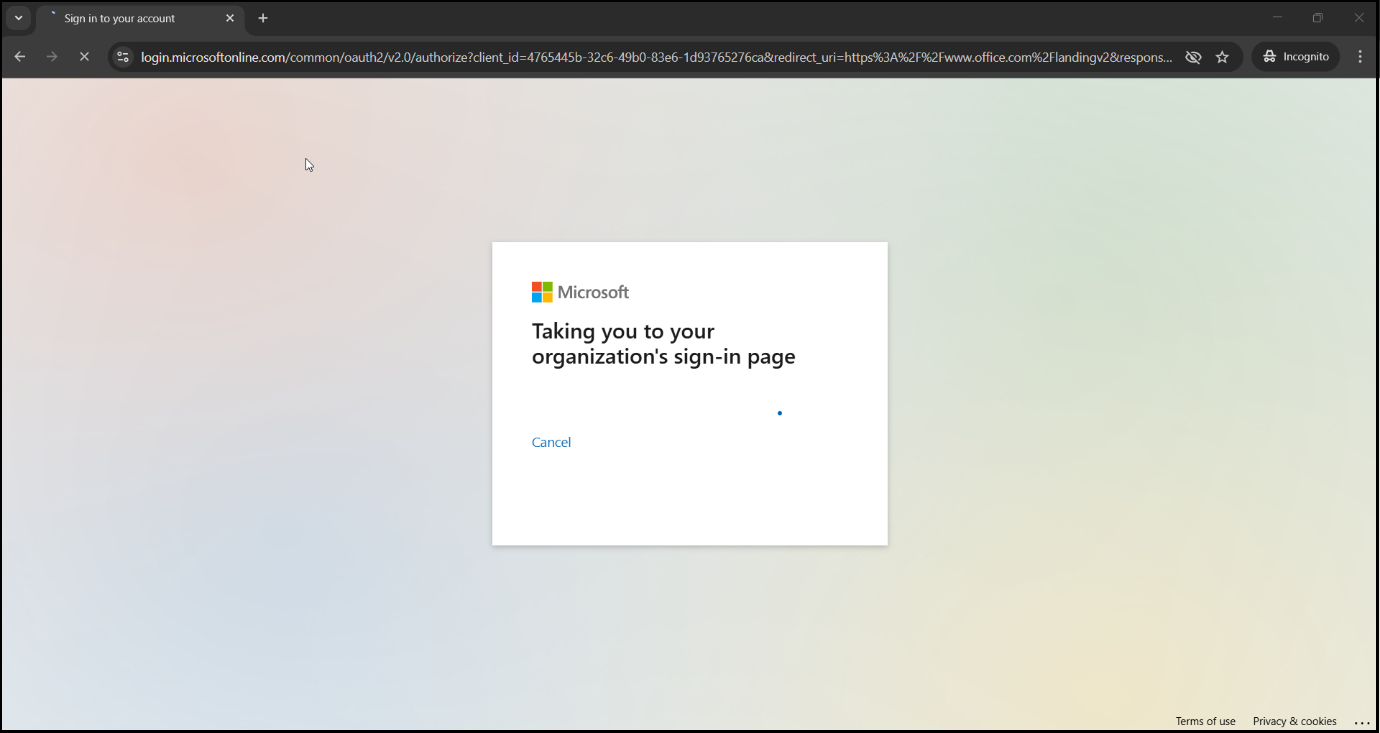
The Authentication request will be redirected to the organization's Sign-In page (Accops IDP Login Portal).
-
Enter the user's sAMAccountName and login credentials, then click Sign In.
-
Verify using Multi-Factor Authentication via the MFA options available in the dropdown. Click Sign-in.

-
Access to the Office 365 Portal should now be successfully established.