Session Delivery Software
Accops Session Delivery Software needs to install in each Gold VM.
Prerequisites
- Gold VM Readiness.
- Accops Support Portal Access
- New User, Signup Now.
- Accops HyWorks Session Host Module
- Download it from Accops Support Portal.
- Accops DVM Tools
- Download it from Accops Support Portal.
Getting Started with Software Installations
- Install Session Delivery software in Shared Virtual Machine
- Install Session Delivery software in dedicated Virtual Machine
- Microsoft Office 365 Installation
- Microsoft Teams Installation for VDI
- Install End User Basic Software
Install Session Delivery software in Shared Virtual Machine
Environment
- Windows Server 2012 R2, 2016 & 2019 for Shared Session Delivery
- Windows 10 for Multi-Session Delivery
- Windows 11 for Multi-Session Delivery
Steps to Install Accops HyWorks Session Host Module.
Steps to Install HyWorks Session Host
Install Session Delivery software in a dedicated Virtual Machine
Environment
- Windows 7
- Windows 10
- Windows 11
Steps to Install Accops DVM Tools
Steps to Install Accops DVM Tools
Installing Microsoft 365 Apps on a Shared Computing or Dedicated VDI
-
Supported Operating System: Windows 10, Windows 11, Windows 8.1, Windows Server 2019, Windows Server 2016
-
Install Instructions: Download and then run the self-extracting executable file containing the Office Deployment Tool executable (setup.exe) and a sample configuration file (configuration.xml).
-
Ensure Microsoft Teams is installed using Script on SHD2k16/2k19/2k22, Multisession VDI Win 10/11, and Dedicated VDI Win10/11.
-
Make you install the latest version of VC++ on the client system.
Step 1: Download the Office Deployment Tool
Download the Office Deployment Tool from the Microsoft Download Center.


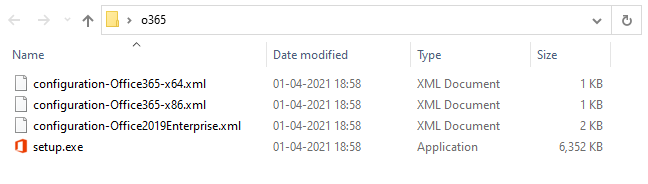
Step 2: Once the Download of "officedeploymenttool_xxxxxxxxxxx.exe" is completed, then run the self-extracting executable file, which contains the Office Deployment Tool executable (setup.exe) and a sample configuration files (configuration-Office365-x64.xml, configuration-Office365-x86.xml & configuration-Office2019Enterprise.xml).
Step 3: Update the Sample configuration as per the below config to Install Microsoft Office 365 for Shared Computing OS.
!!! Note: "Default Configuration File"
<Configuration>
  <Add OfficeClientEdition="64" Channel="Monthly">
    <Product ID="O365ProPlusRetail">
      <Language ID="en-us" />
    </Product>
    <Product ID="VisioProRetail">
      <Language ID="en-us" />
    </Product>
  </Add>

  <!--  <Updates Enabled="TRUE" Channel="Monthly" /> -->

  <!--  <Display Level="None" AcceptEULA="TRUE" />  -->

  <!--  <Property Name="AUTOACTIVATE" Value="1" />  -->

</Configuration>
Update Configuration files as below.
<Configuration>
  <Add OfficeClientEdition="64" Channel="Monthly">
    <Product ID="O365ProPlusRetail">
      <Language ID="en-us" />
      <ExcludeApp ID="Teams" />
    </Product>
  </Add>
  <Property Name="SharedComputerLicensing" Value="1" />
  <Property Name="SCLCacheOverride" Value="0" />
  <Property Name="AUTOACTIVATE" Value="0" />
  <Property Name="FORCEAPPSHUTDOWN" Value="TRUE" />
  <Property Name="DeviceBasedLicensing" Value="0" />
  <Updates Enabled="TRUE" />
  <Display Level="Full" AcceptEULA="TRUE" />
</Configuration>
Step 4: Open Command Prompt and Change the Directory to setup.exe and a sample configuration files.
- Configure mode is used to install the downloaded Microsoft 365 Apps products and languages on a client computer. You also use configure mode to remove and update Office products and languages. Example: setup.exe /configure installconfig.xml
   Directory: C:\Users\PK\Desktop\o365

Mode                LastWriteTime         Length Name
----                -------------         ------ ----
-a----       01-04-2021     18:58           1164 configuration-Office2019Enterprise.xml
-a----       29-04-2021     13:29           1088 configuration-Office365-x64.xml
-a----       01-04-2021     18:58           1014 configuration-Office365-x86.xml
-a----       01-04-2021     18:58        6503744 setup.exe

PS C:\Users\PK\Desktop\o365> .\setup.exe /configure .\configuration-Office365-x64.xml
Tip
The configuration file can be also created using Office Customization Tool
Step 5: Verify if the installation is successful.
After running the command, you should see the Office installation start (unless you set the display level to none). After installation, the command prompt will display "Products configured successfully." If you run into problems, ensure that you have the newest version of the ODT. You can also troubleshoot issues by reviewing the log files in the %temp% folder.
More About Office 365 Apps Installation for Shared Computing
Installing Microsoft Teams Shared Computing or Dedicated VDI.
Step 1: Run PowerShell with Admin Rights.
Step 2: Copy and paste the PowerShell script in PowerShell windows and wait for completion.
                                #Add registry Key
    New-Item -Path "HKLM:\SOFTWARE\Microsoft\Teams" -Force
    New-ItemProperty -Path "HKLM:\SOFTWARE\Microsoft\Teams" -Name IsWVDEnvironment -PropertyType DWORD -Value 1 -Force
#Download C++ Runtime
    invoke-WebRequest -Uri https://aka.ms/vs/17/release/vc_redist.x64.exe -OutFile "C:\Windows\Temp\vc_redist.x64.exe"
    Start-Sleep -s 5
#Download RDCWEBRTCSvc
    invoke-WebRequest -Uri https://query.prod.cms.rt.microsoft.com/cms/api/am/binary/RWWDIg -OutFile "C:\Windows\Temp\MsRdcWebRTCSvc_HostSetup_1.33.2302.07001_x64.msi"
    Start-Sleep -s 5
#Download Teams
    invoke-WebRequest -Uri https://statics.teams.cdn.office.net/production-windows-x64/1.6.00.6754/Teams_windows_x64.msi -OutFile "C:\Windows\Temp\Teams_windows_x64.msi"
    Start-Sleep -s 5
#Install C++ runtime
    Start-Process -FilePath C:\Windows\Temp\vc_redist.x64.exe -ArgumentList '/q', '/norestart'
    Start-Sleep -s 10
#Install MSRDCWEBTRCSVC
    msiexec /i C:\Windows\Temp\MsRdcWebRTCSvc_HostSetup_1.33.2302.07001_x64.msi /q /n
    Start-Sleep -s 10
#Install Teams
    msiexec /i "C:\Windows\Temp\Teams_windows_x64.msi" /l*v teamsinstall.txt OPTIONS="noAutoStart=true" ALLUSER=1 ALLUSERS=1 /q
    Start-Sleep -s 10
Step 3: Post Installation, verify the installed component in the Control Panel as below.

On the End user system, ensure the latest msrdc client is installed. Download the msrdc integrated with Accops HyWorks and HySecure with Turbo client from the link here.
!!! Important: The versions may or may be greater than shown in the screenshot here.

More About Teams for Virtualized Desktop Infrastructure
Click on the link for the latest Microsoft Remote Desktop MSRDC client.
Install End User Basic Software.
Basic Software can be installed as per the requirement.
Info
If the software is required by multiple users, then while installing software in Gold RDS/VDI, Please make sure to choose the installation directory as "C:\Program Files (x86)\xxxxx" or "C:\Program Files\xxxx" as per the software vendor.
Important
If any software is installed in the user appdata directory, that software will only be visible to that user. To avoid this issue, Please choose "Install for all Users" while Installing the Software.
Caution
Please also check with the software vendor and Verify that the software that must be used for Multi Users can be deployed on a Multisession based Virtual Machine.
Here Multi Session Based Virtual Machine are: Windows Server 2012 R2, Windows Server 2019, Windows Server 2016 & Windows 10, 11 Enterprise with Multi-session
What’s Next
Help/Support
Please send a mail to support@accops.com for further Help/Support.