Hyworks Deployment
Environment
- HyWorks Standalone Deployment in Azure Cloud
- OS : Windows Server 2012 R2, 2016 & 2019 Datacenter Edition.
- To Use Windows Server Standard Edition Please Prepare a Windows VHD
Pre-Requisite
-
An Azure account with an active subscription. Create one for free.
- Azure Resource Group
- Azure Virtual Network for HyWorks
- Azure Network Security Group for HyWorks
- Azure Storage Account
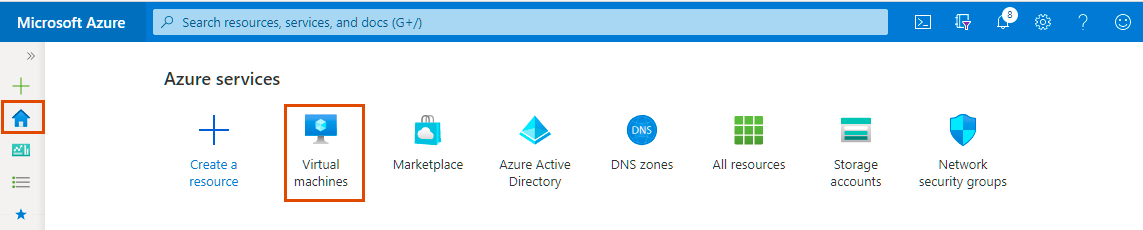
Create HyWorks Virtual Machine
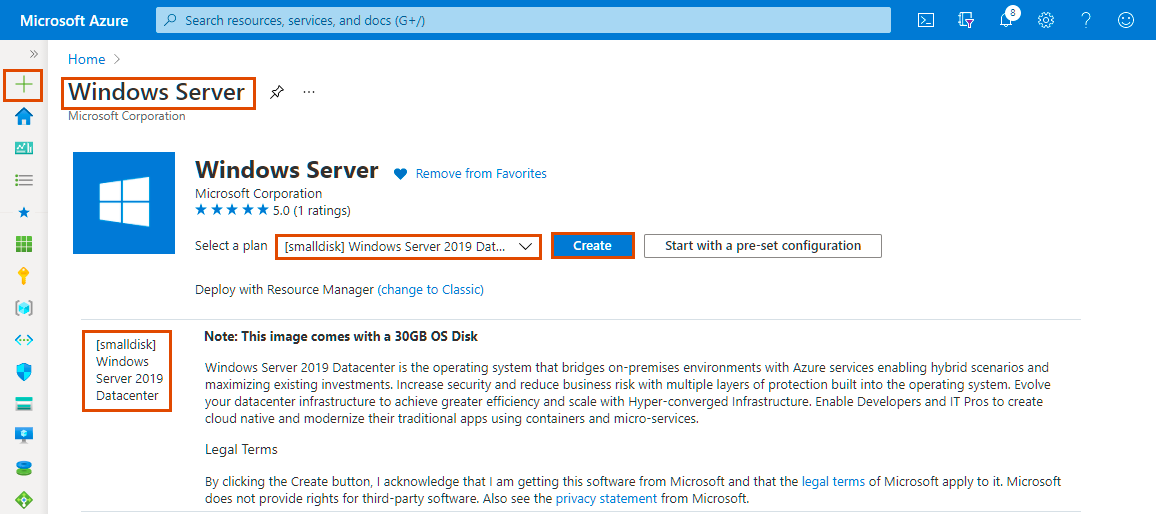
Go to Azure Market place and deploy Microsoft Windows Server 2019.
Note
To Prepare Small Disk OS For Session Host
To Preapare Default Disk OS For Session Host
Small Disk OS size is 30 GB and Default Disk OS size is 128 GB.
Step 1: Prepare New Virtual Machines using above link or Go to Dashboard >> Click on Virtual machine >> Click on + Add >> Click on + Virtual Machine)
Note
If you are using above link to deploy vm, please select the plan of Virtual machine and Click on Create.
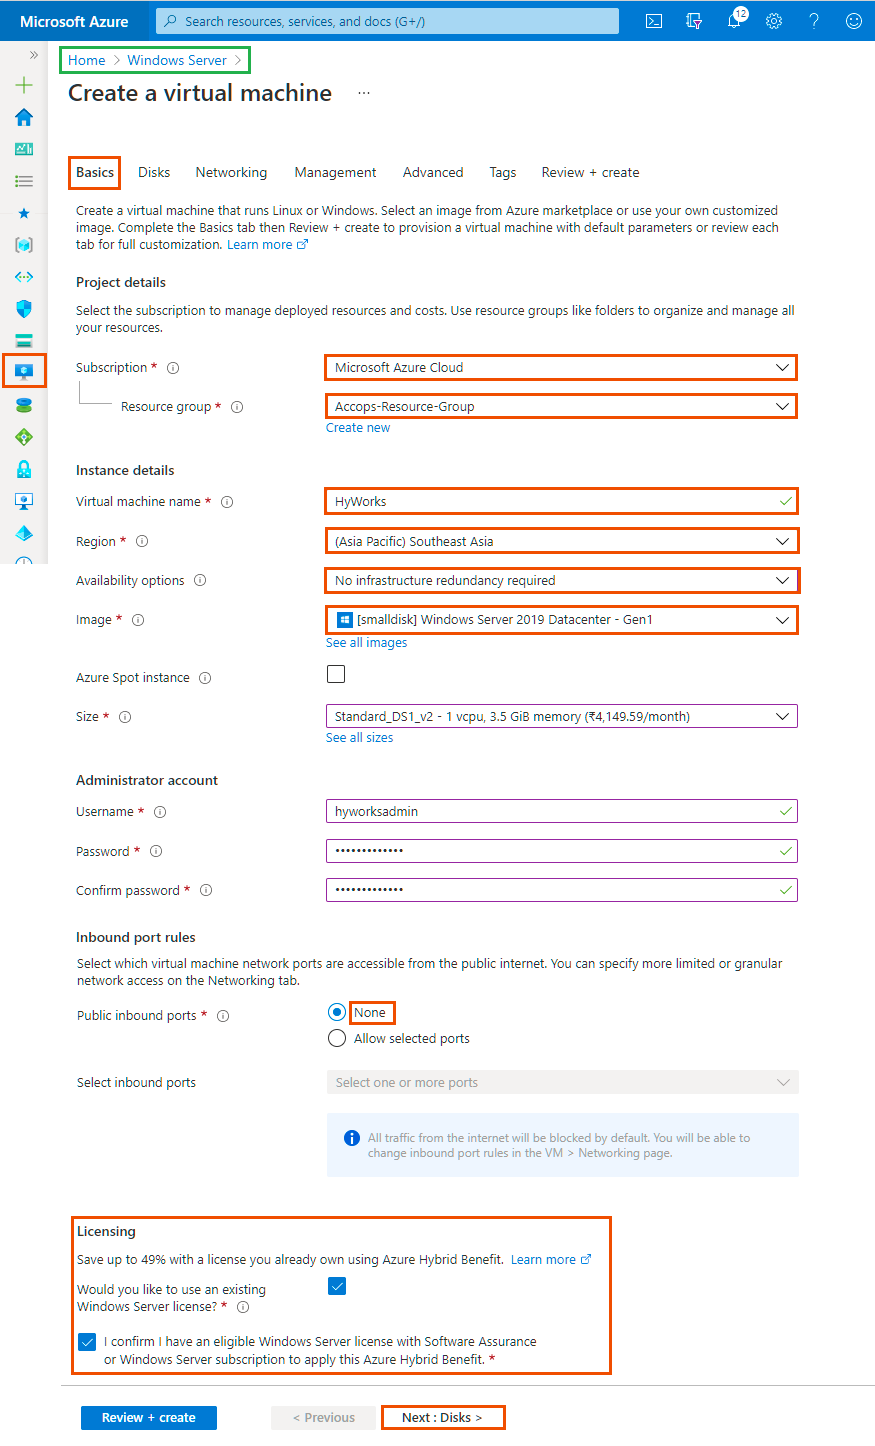
Step 2: Add Project details, Instance Details and then Click on "Next : Disks".
| Basic | Sample Value |
|---|---|
| Project Details | |
| Subscription | Select your Subscription. |
| Resource Group | Select Accops-Resource-Group . |
| Instance Details | |
| Virtual Machine Name | HyWorks |
| Region | Select (Asia Pacific) Southeast Asia. |
| Availability Options | No Infrastrucure redundancy required |
| Image | [smalldisk] Windows Server 2019 Datacenter - Gen1 |
| Azure Spot Instance | No |
| Size | Choose As per your Requirement |
| Administrator Account | |
| Username | Add Username As per your Requirement |
| Password | Set Password |
| Confirm Password | Confirm Password |
| Inbound Port Rules | |
| Public inbound ports | None |
| Licensing | |
| Would you like to use an existing Windows Server license? | Yes |
Review Azure hybrid benefit compliance
Step 3: Add Disk Details and click on Next : Networking Tab.
| Disks | Sample Value |
|---|---|
| Disk Options | |
| OS Disk Type | Choose as per your requirement. |
| Encryption Type | Select Default. |
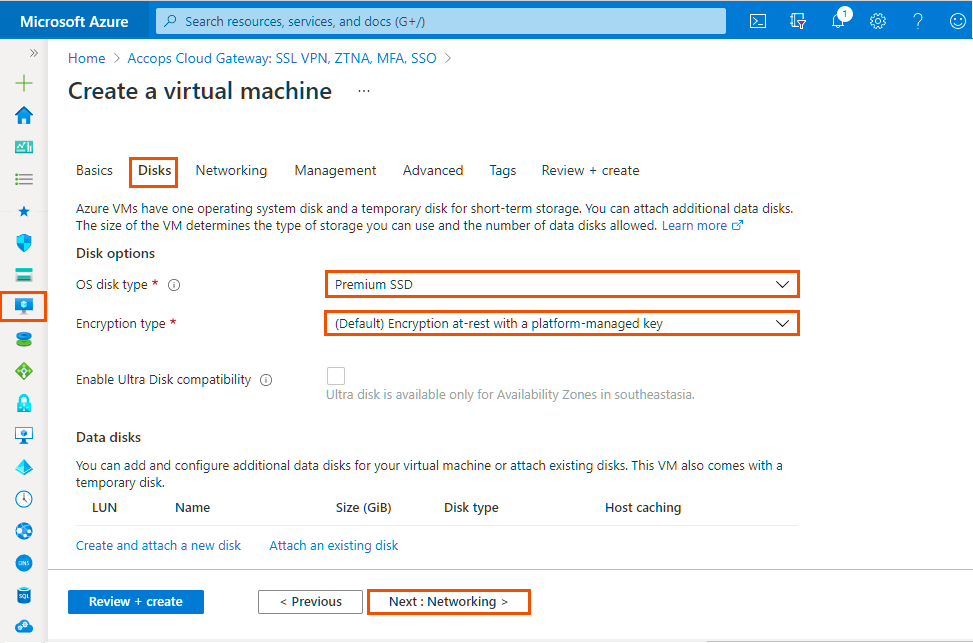
Step 4: Add Networking Details and click on Next : Management Tab.
| Networking | Sample Value |
|---|---|
| Network Interface | |
| Virtual Network | Select Accops-Virtual-Network. |
| Subnet | Select HyWorks-Virtual-Subnet |
| Public IP | Select Create New, Assign Name: HyWorks-Public-IP, select SKU: Basic, Select Assignment: Dynamic, Press OK. |
| NIC network security group | Select Advanced |
| Configure Network Secuorty Group | Choose Advance and Select HyWorks-Network-Security-Group |
| Accelerated Networking | Only Supported with |
| Encryption Type | Select Default. |

Step 5: Add Management Details and click on * Next : Advanced *.
| Management | Sample Value |
|---|---|
| Monitoring | |
| Boot diagnostics | Enable with custom storage account, Choose |
| Enable OS guest diagnostics | Yes |
| Diagnostics storage account | Select azvdifiles |
| Identity | |
| System assigned managed identity | |
| Azure Active Directory | |
| Login with AAD credentials (Preview) | |
| Auto-shutdown | |
| Enable auto-shutdown | No |
| Site Recovery | |
| Enable Disaster Recovery | |
| Guest OS updates | |
| Enable hotpatch (Preview) | |
| Patch orchestration options | Choose Automatic or Manual |
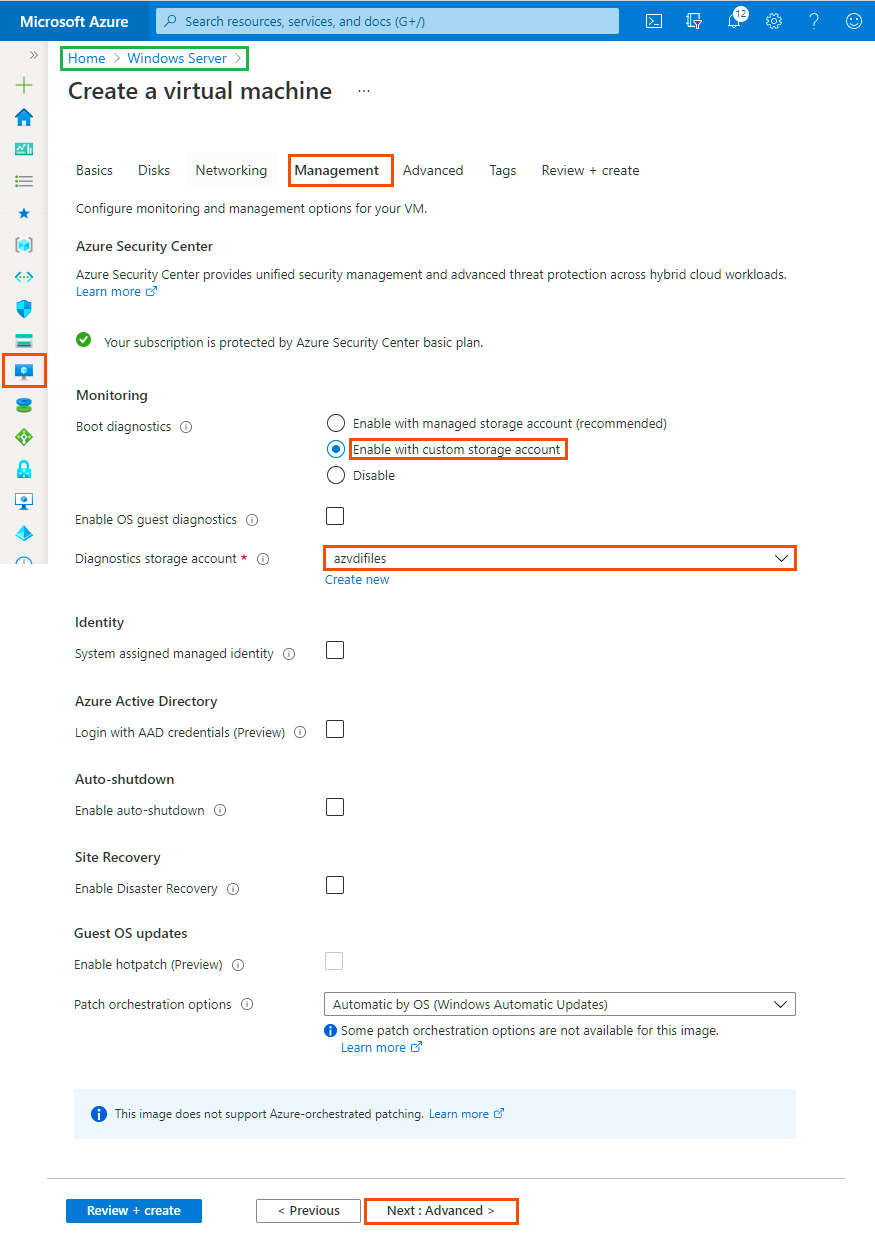
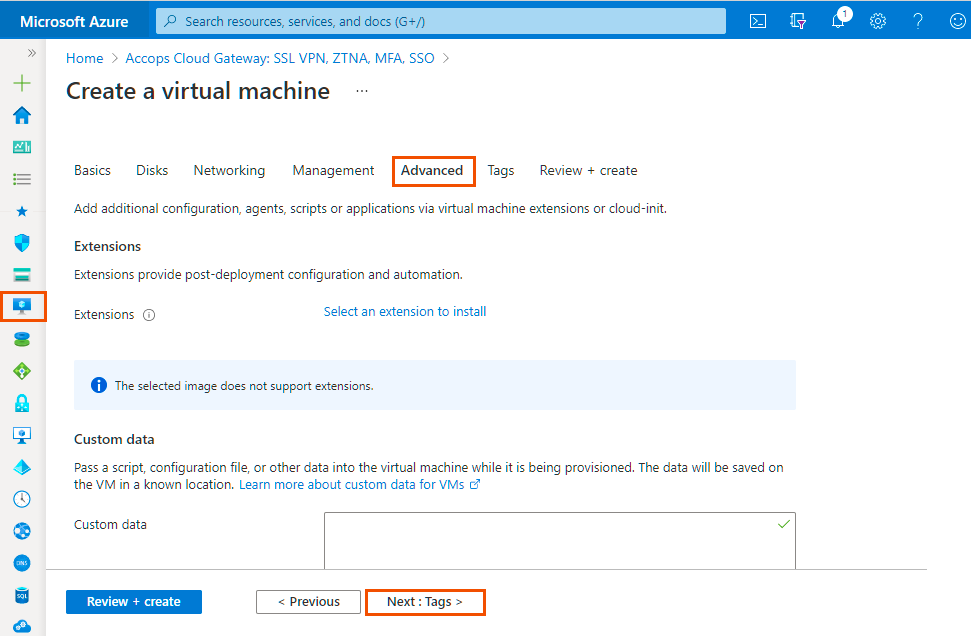
Step 6: Add Advanced Details and Click on Next Tab * Tags*.
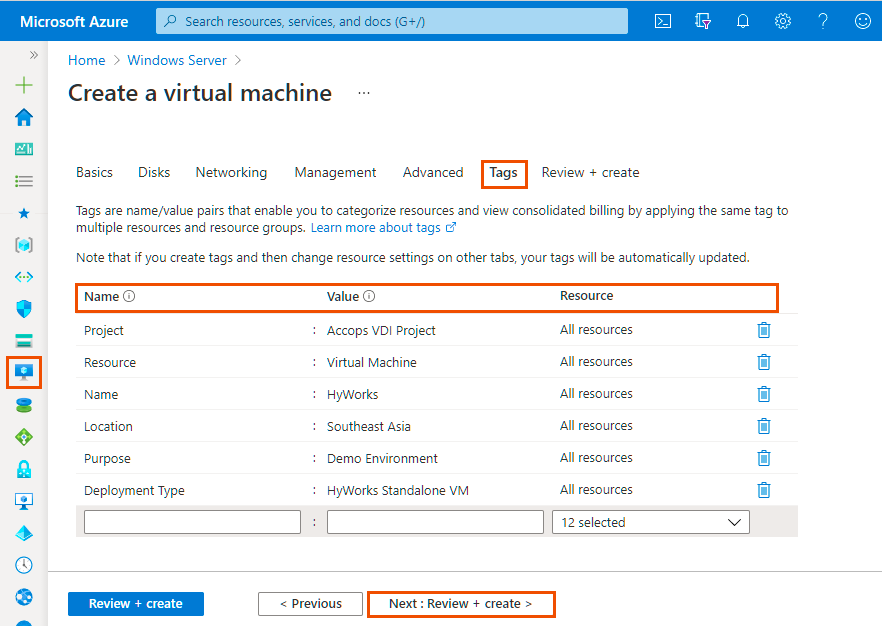
Step 7: Add Project Tags and Click on Next Tab Review + Create.
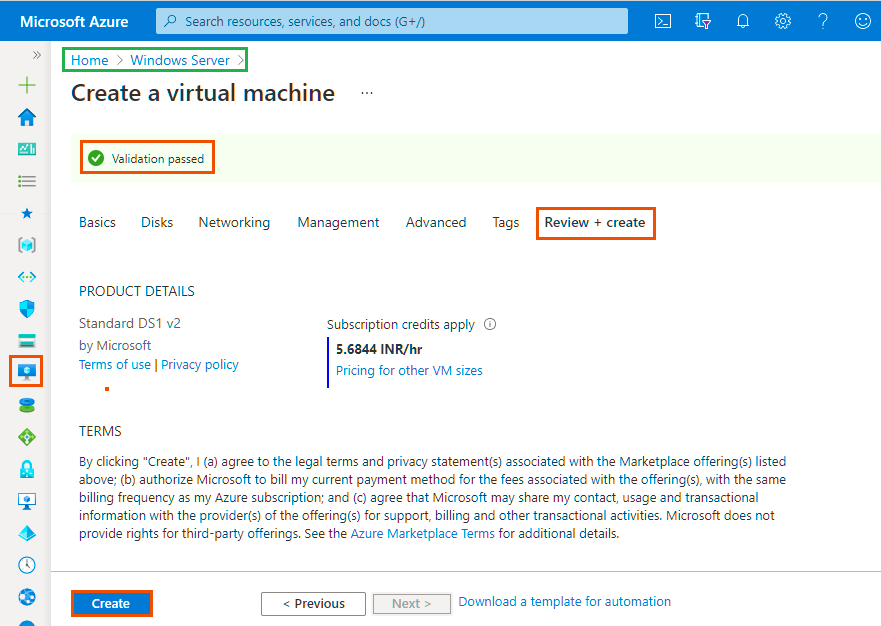
Step 8: Once VM validation is passed then click on * Create *.
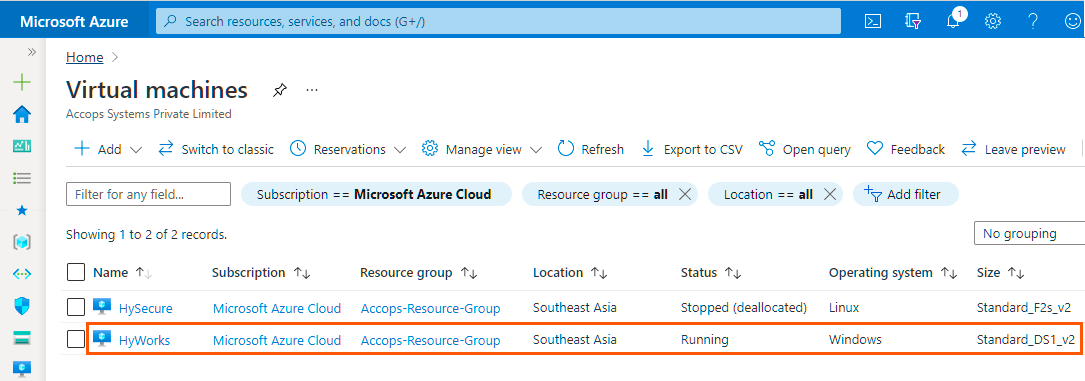
Step 9: List Created VM in Azure Dashboard >> Virtual Machines.
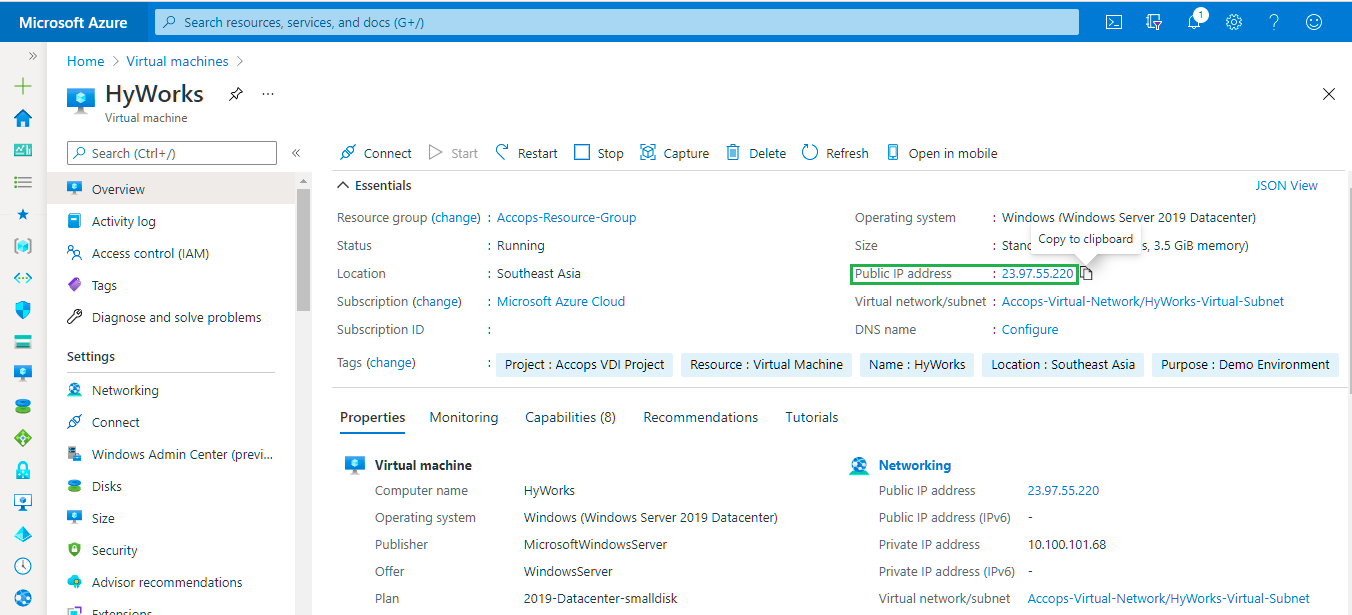
Step 10: Connect newely created Virtual Machine using Public IP Address.
Tip
If Public IP is not attached to Virtual machine then use Private IP to connect the VM, Please make sure you have Site-2-Site Connectivity to your Azure Network from the location you want to access the VM, It may required Port opening in Firewall, Please Check with Your Azure Network/Security Team.
Tip
Another way to connect the Hyworks VM is using HySecure Server.
Step 1: Publish HyWorks Virtual Machine in HySecure Server
Step 2: Create Access Control List in HySecure gateway for Securty Office Account.
Step 3: Login to HySecure Client with Security Officer Account and connect Gold VM from RDP Application Tabs.
About Hyworks Controller
How to Install HyWorks Controller
How to Configure HyWorks Controller
More Info About Accops HyWorks
What's Next
Help/Support
Please send a mail to support@accops.com for further Help/Support.