HySecure HA Deployment
Environment
- Hysecure Gateway Active Node Deployment in Azure Cloud
- Gateway Version: v5299
Pre-Requisite
-
An Azure account with an active subscription. Create one for free.
- Azure Resource Group
- Azure Virtual Network for HySecure
- Azure Network Security Group for HySecure
- Azure Storage Account
- Internal TCP Load Balancer
Create HySecure Active Node
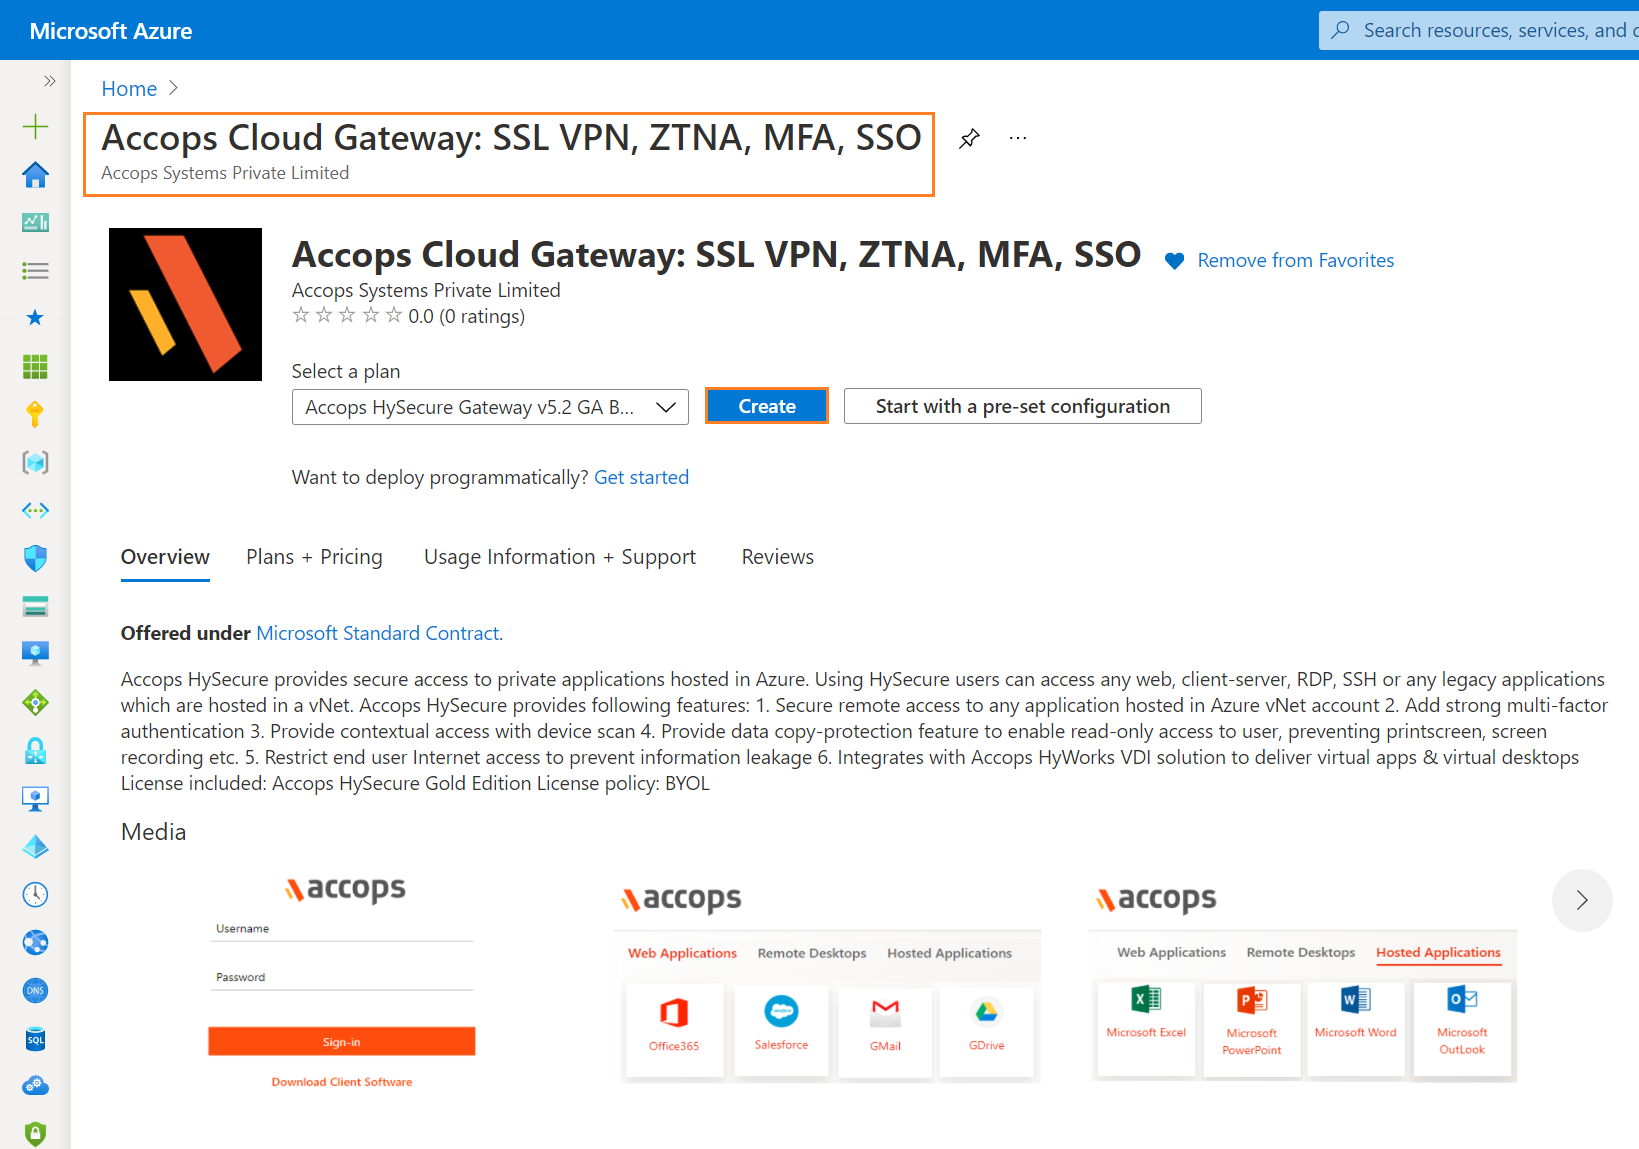
Step 1: Create HySecure Virtual Machine using below link form Azure Marketplace.
Info
Deploy Accops HySecure Gateway v5299 [Recommended]
Deploy Accops HySecure Gateway v5353 [For Turbo]
or click on Create a Resource >> Azure Marketplace and Search for Accops to Deploy it.

Select the version to depoly it from dropdown menu of plan options.
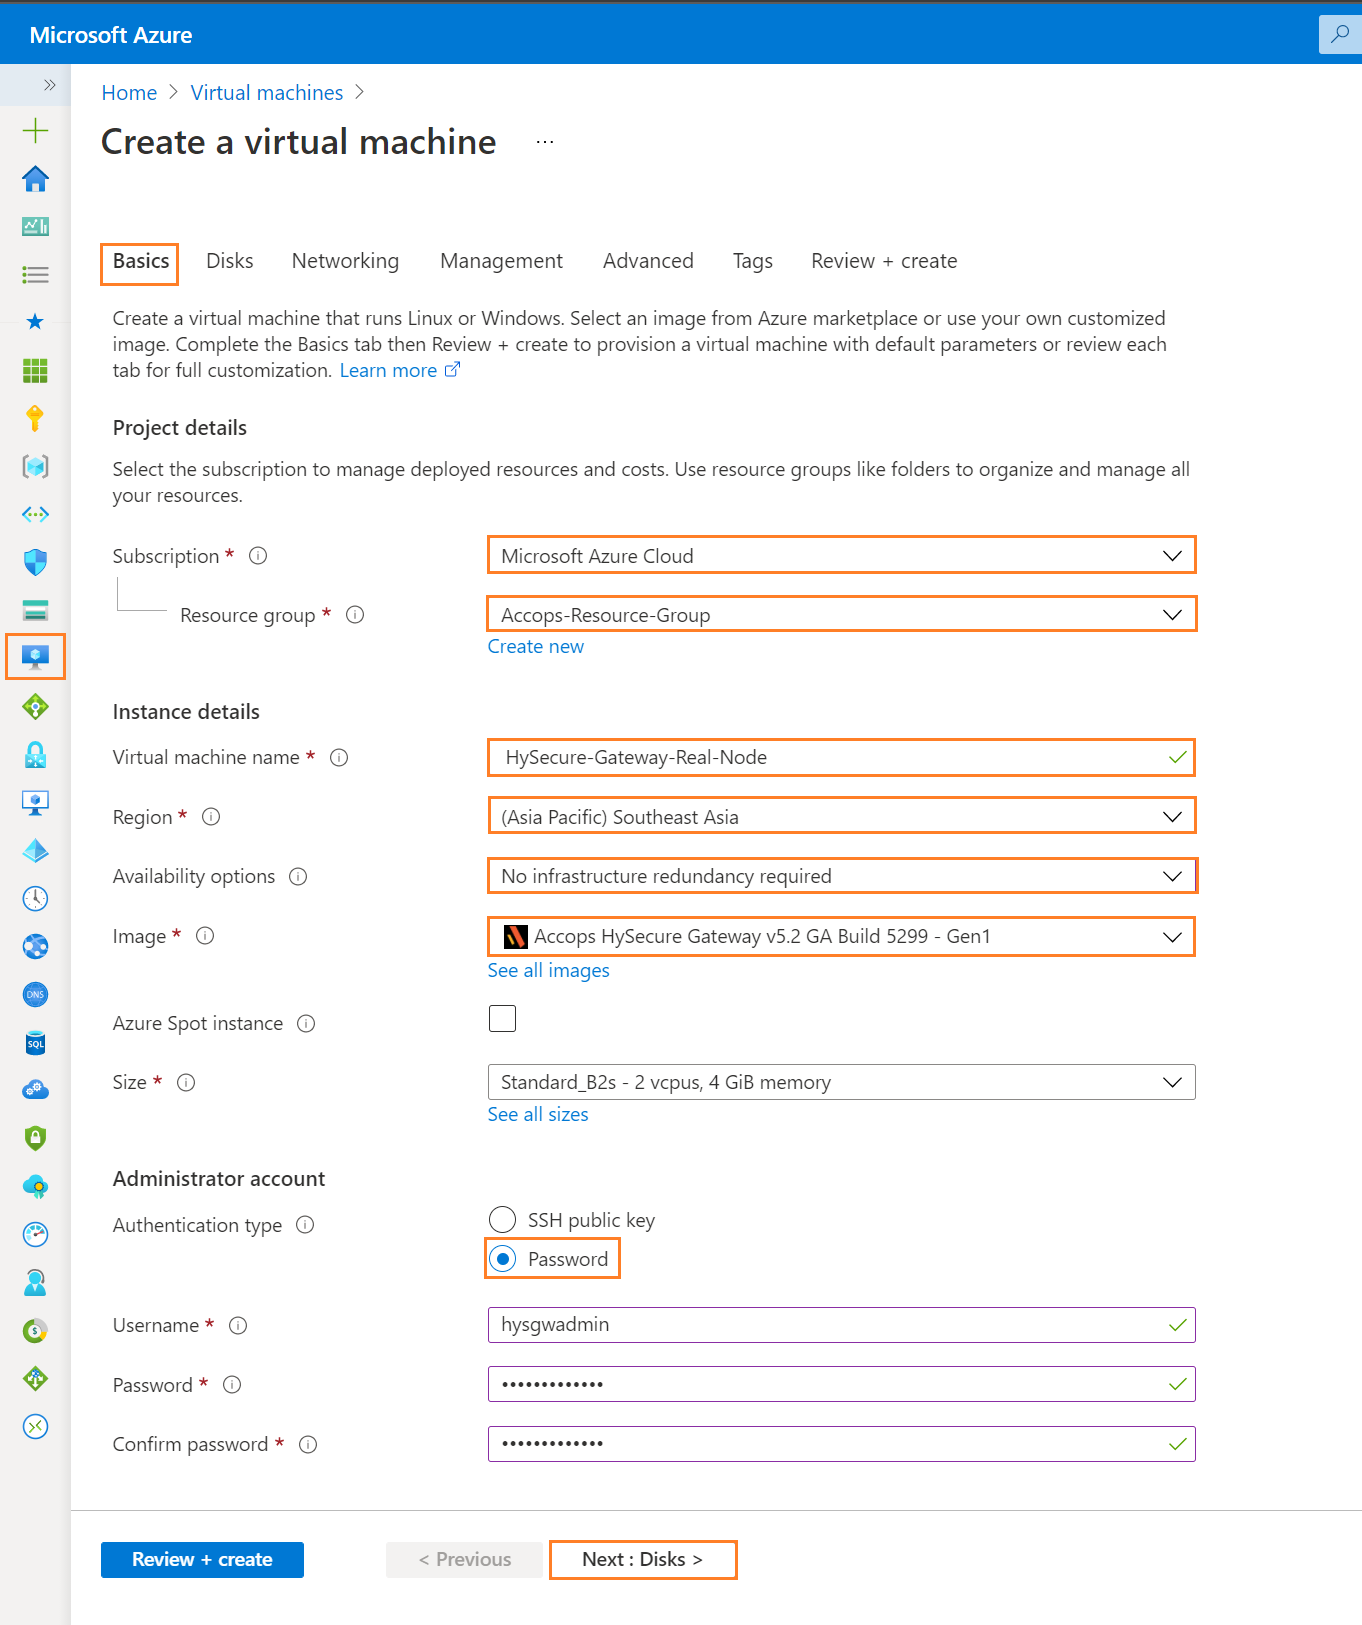
Step 2: Add Project details, Instance Details and then Click on "Next : Disks".

Step 3: Add Disk Details and click on Next : Networking Tab.

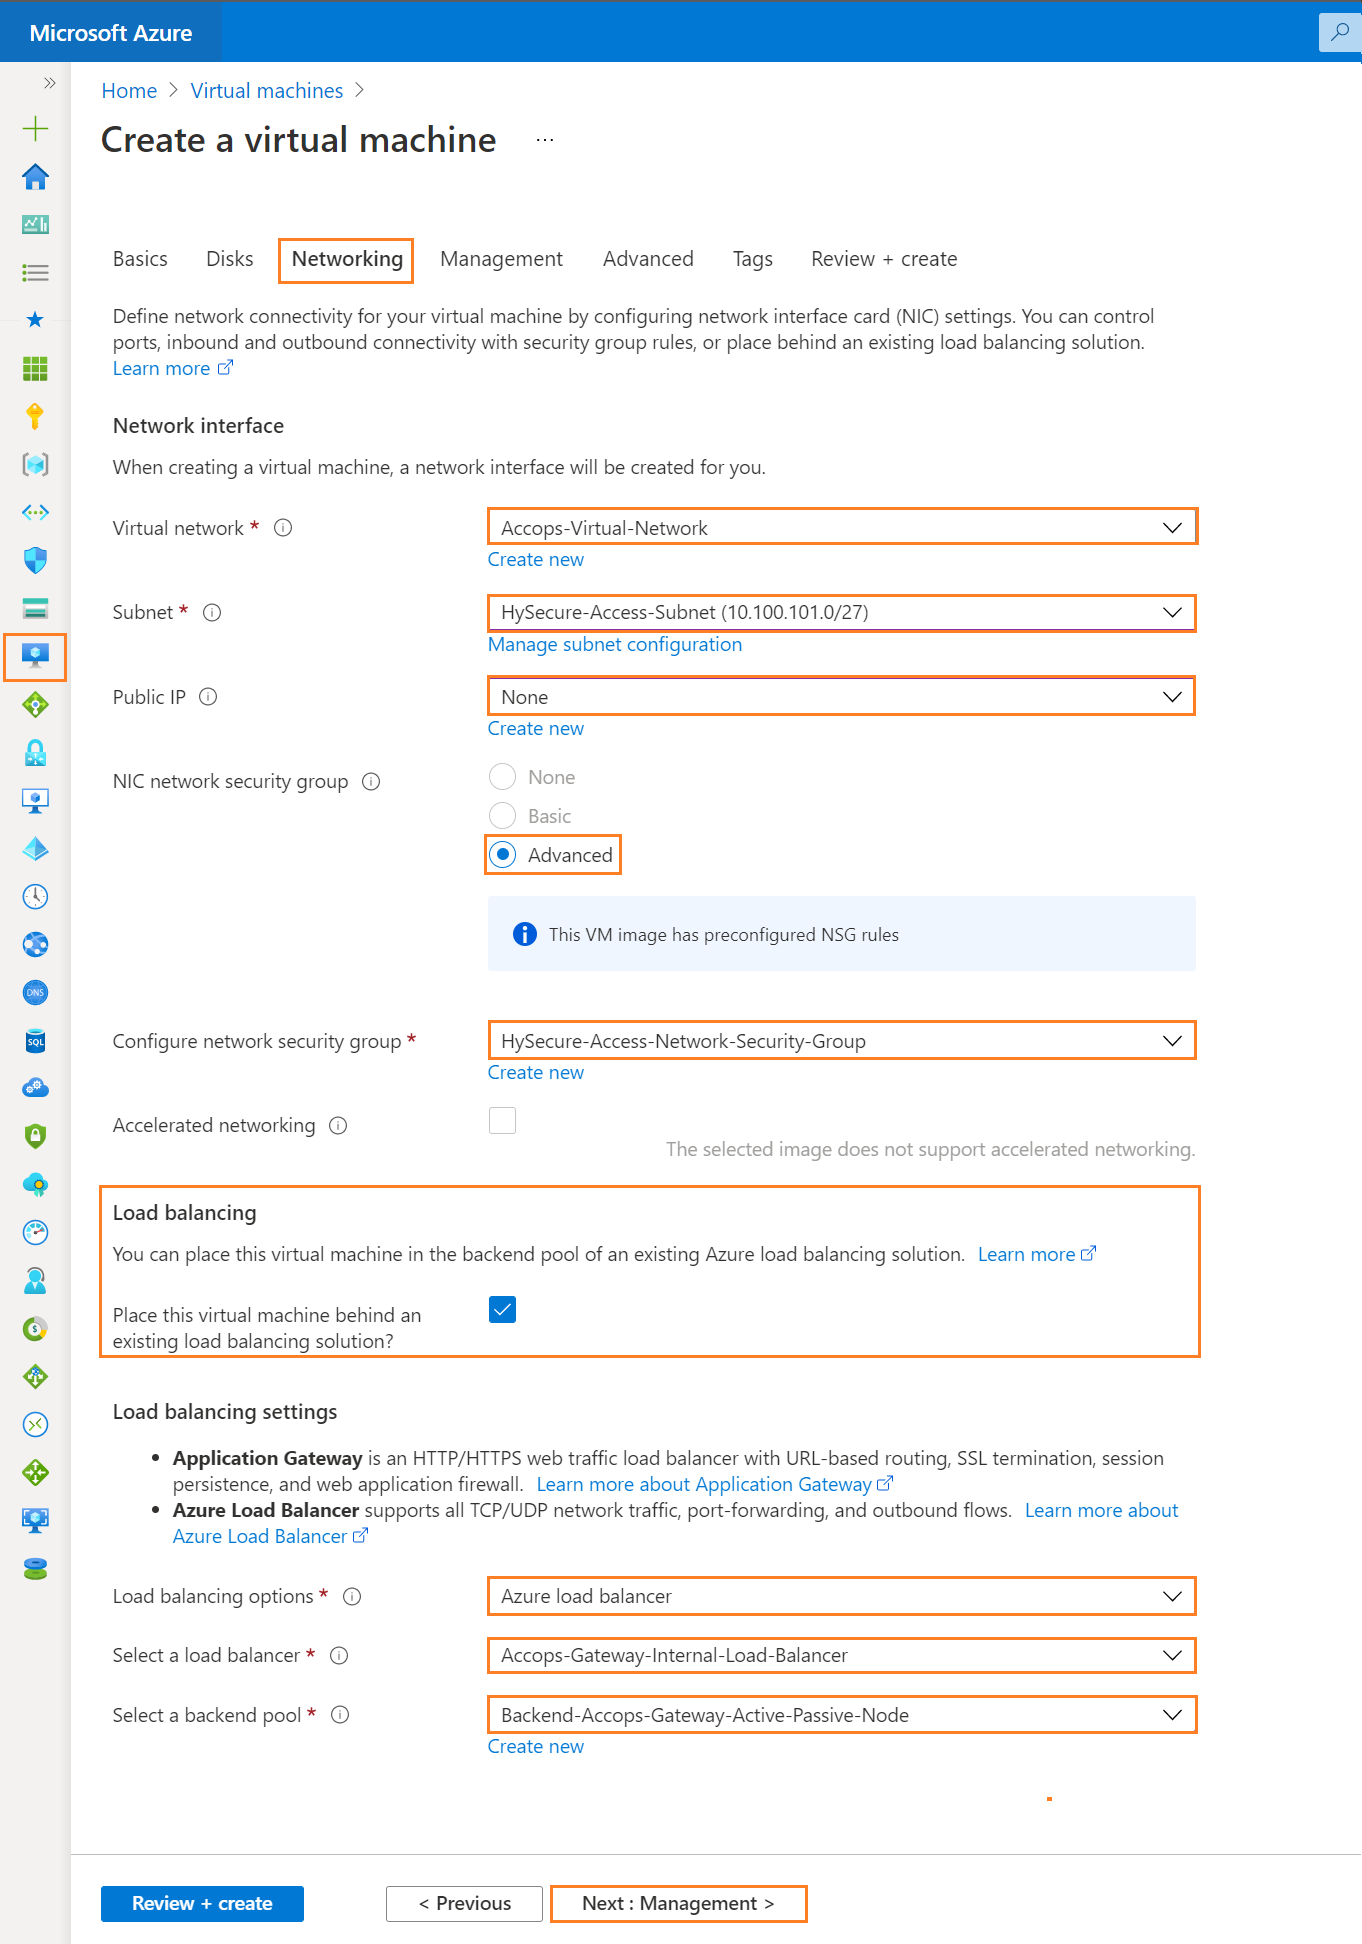
Step 4: Add Networking Details and click on Next : Management Tab.
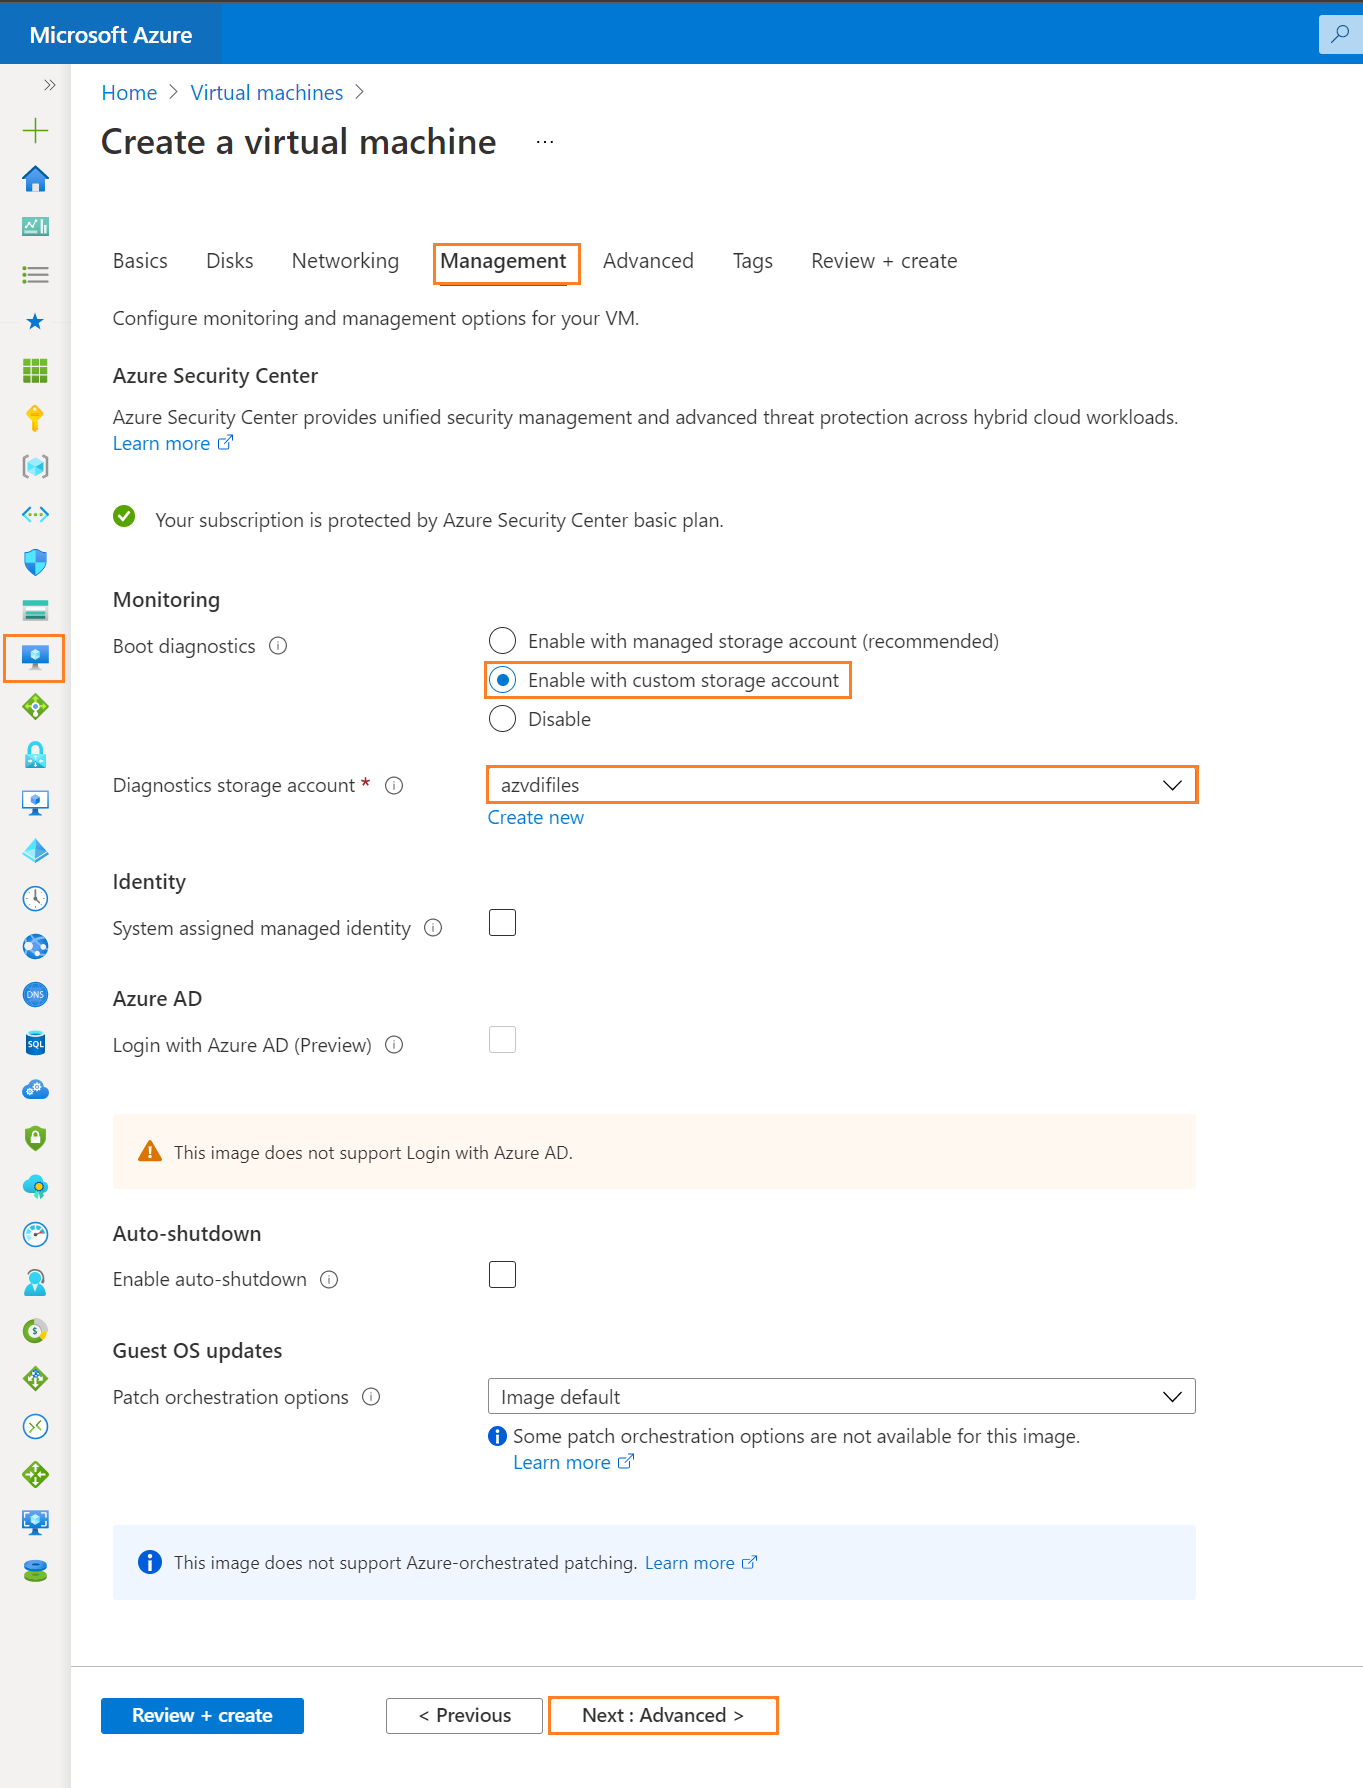
Step 5: Add Management Details and click on * Next : Advanced *.
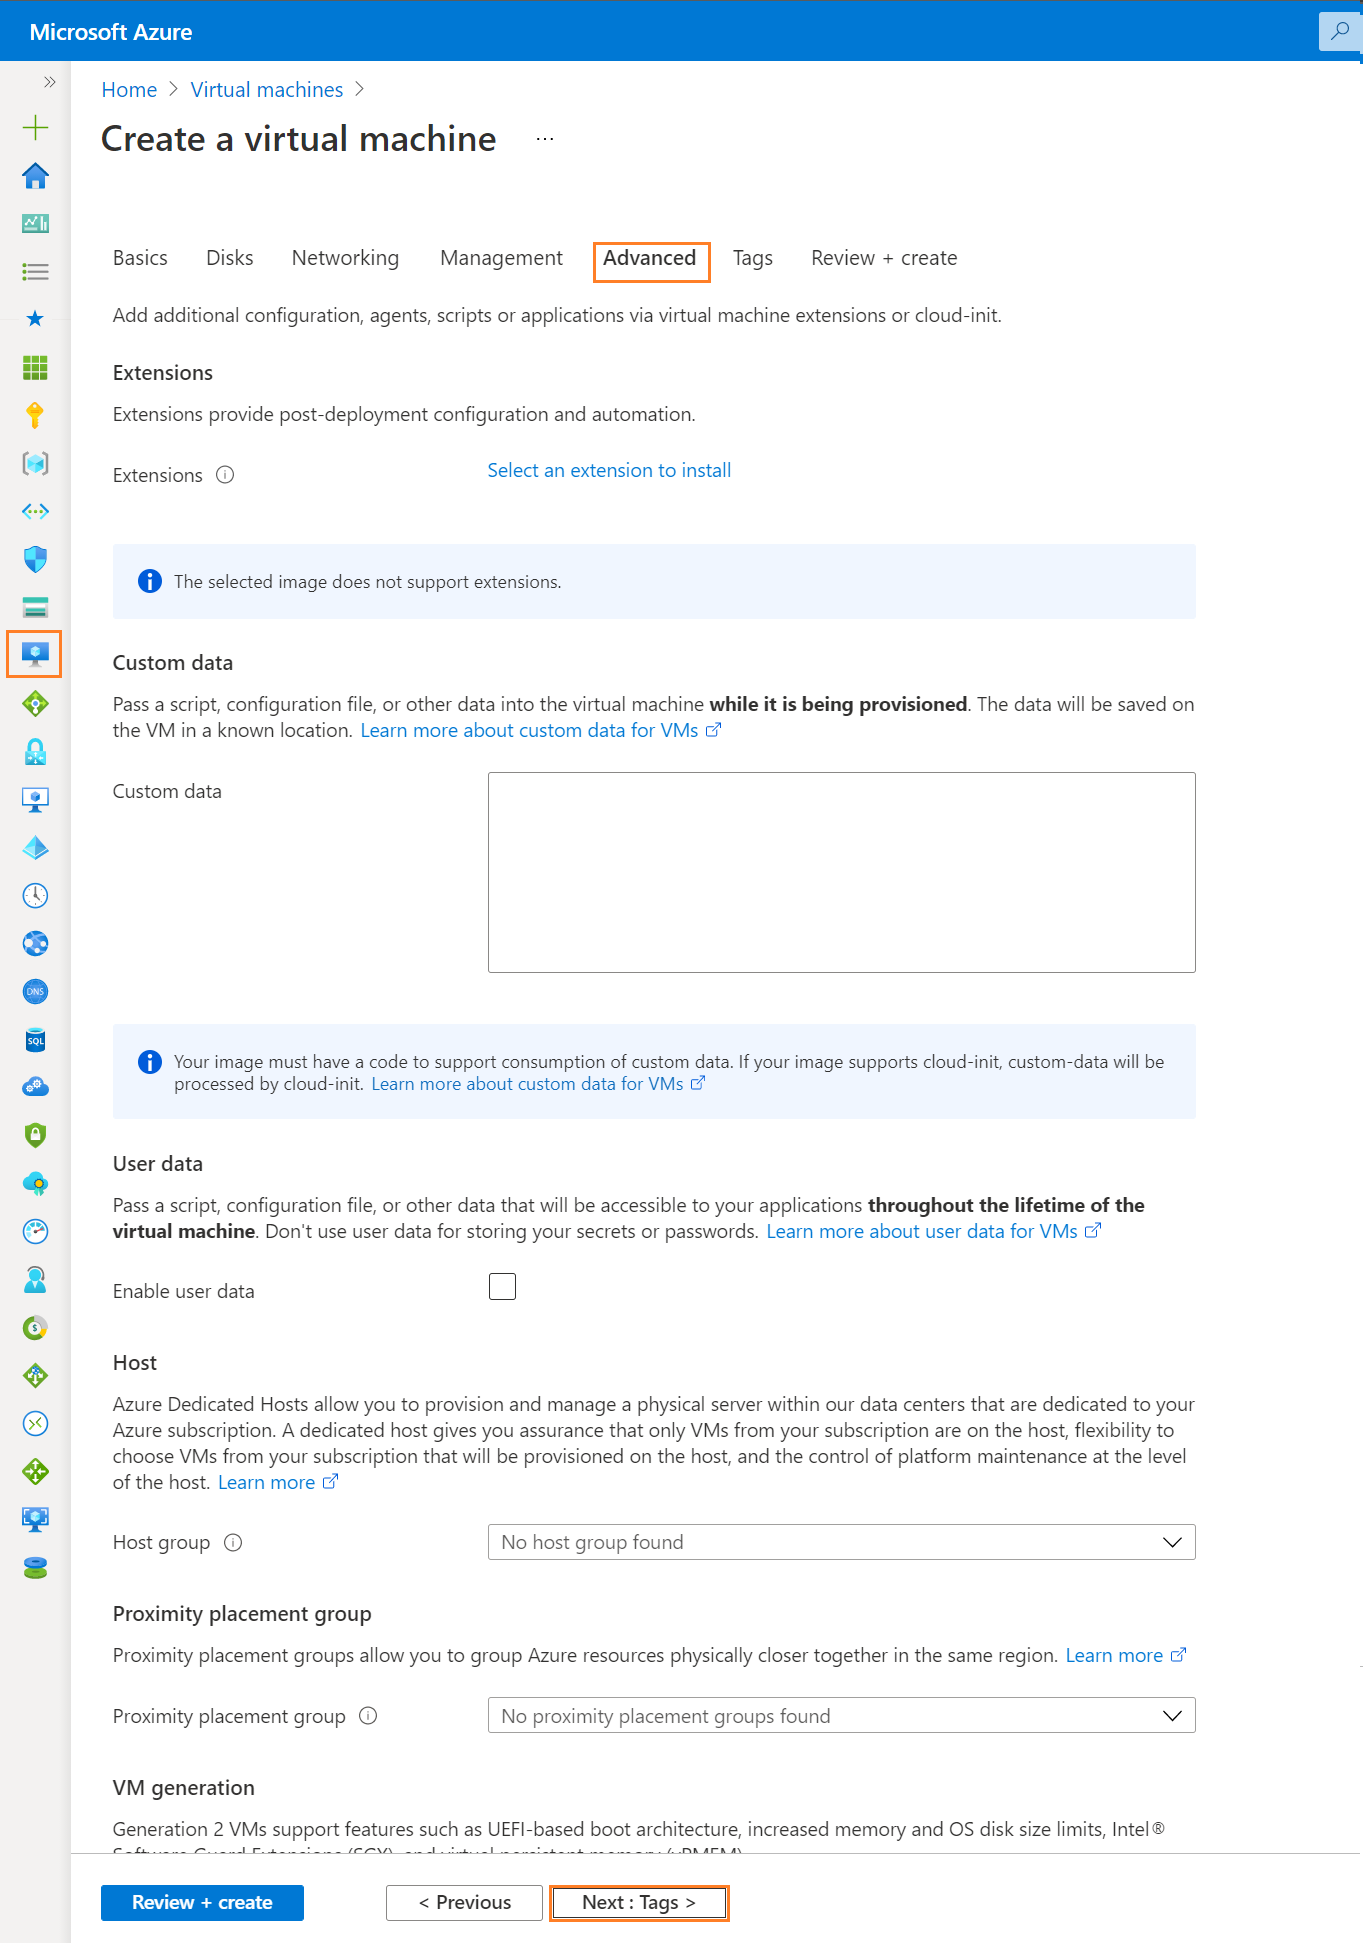
Step 6: Add Advanced Details and Click on Next Tab * Tags*.
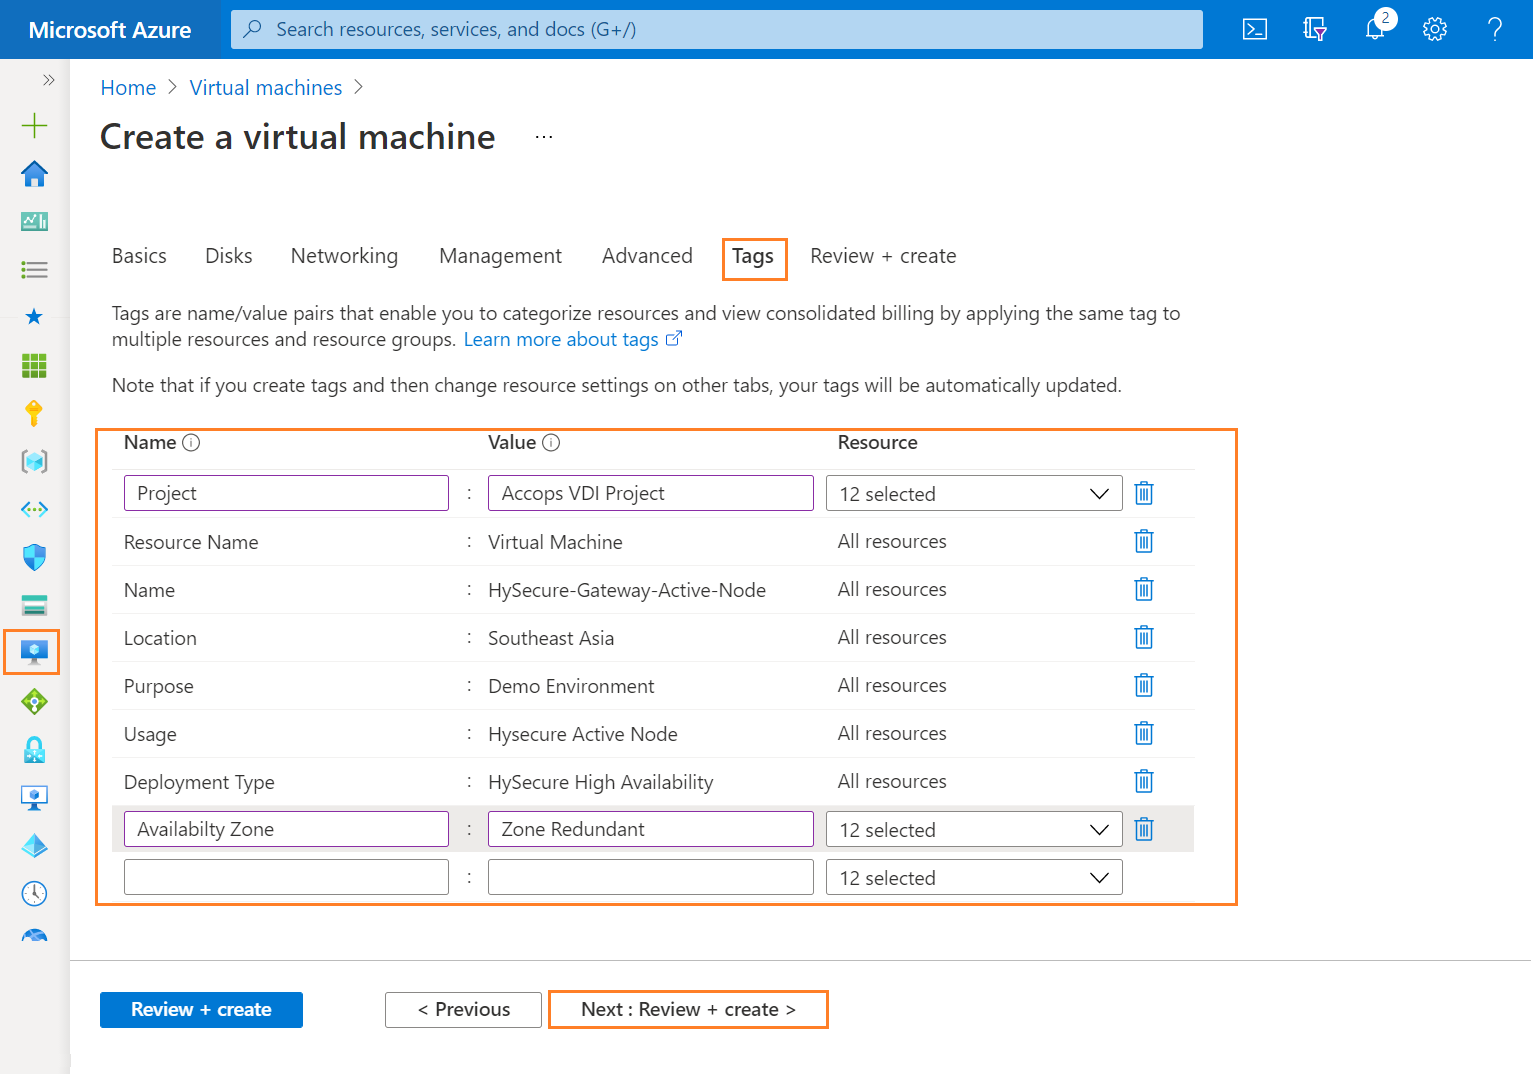
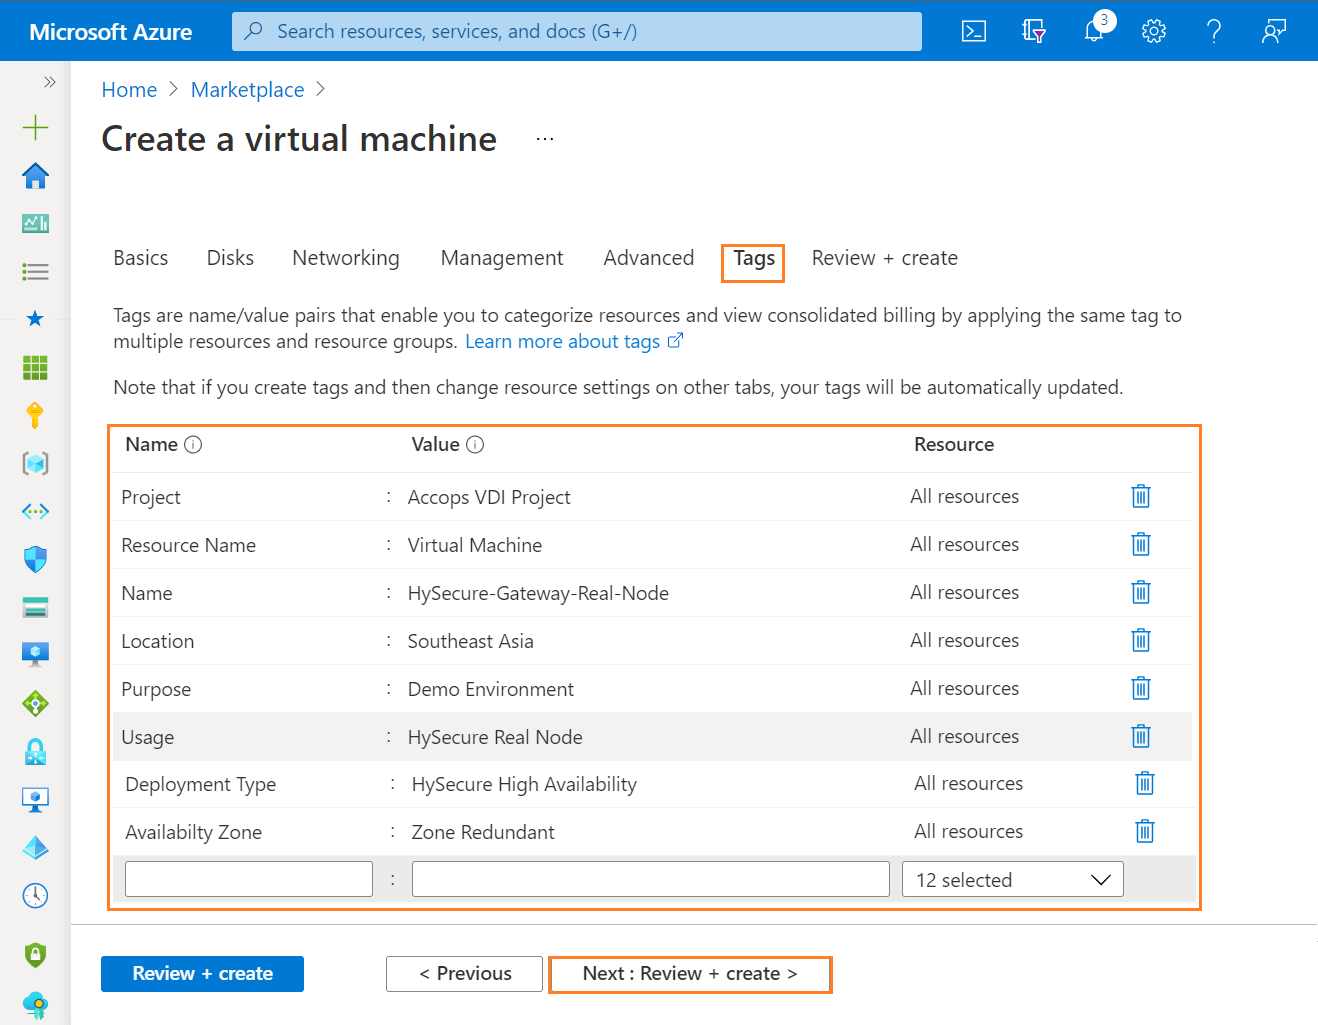
Step 7: Add Project Tags and Click on Next Tab Review + Create.
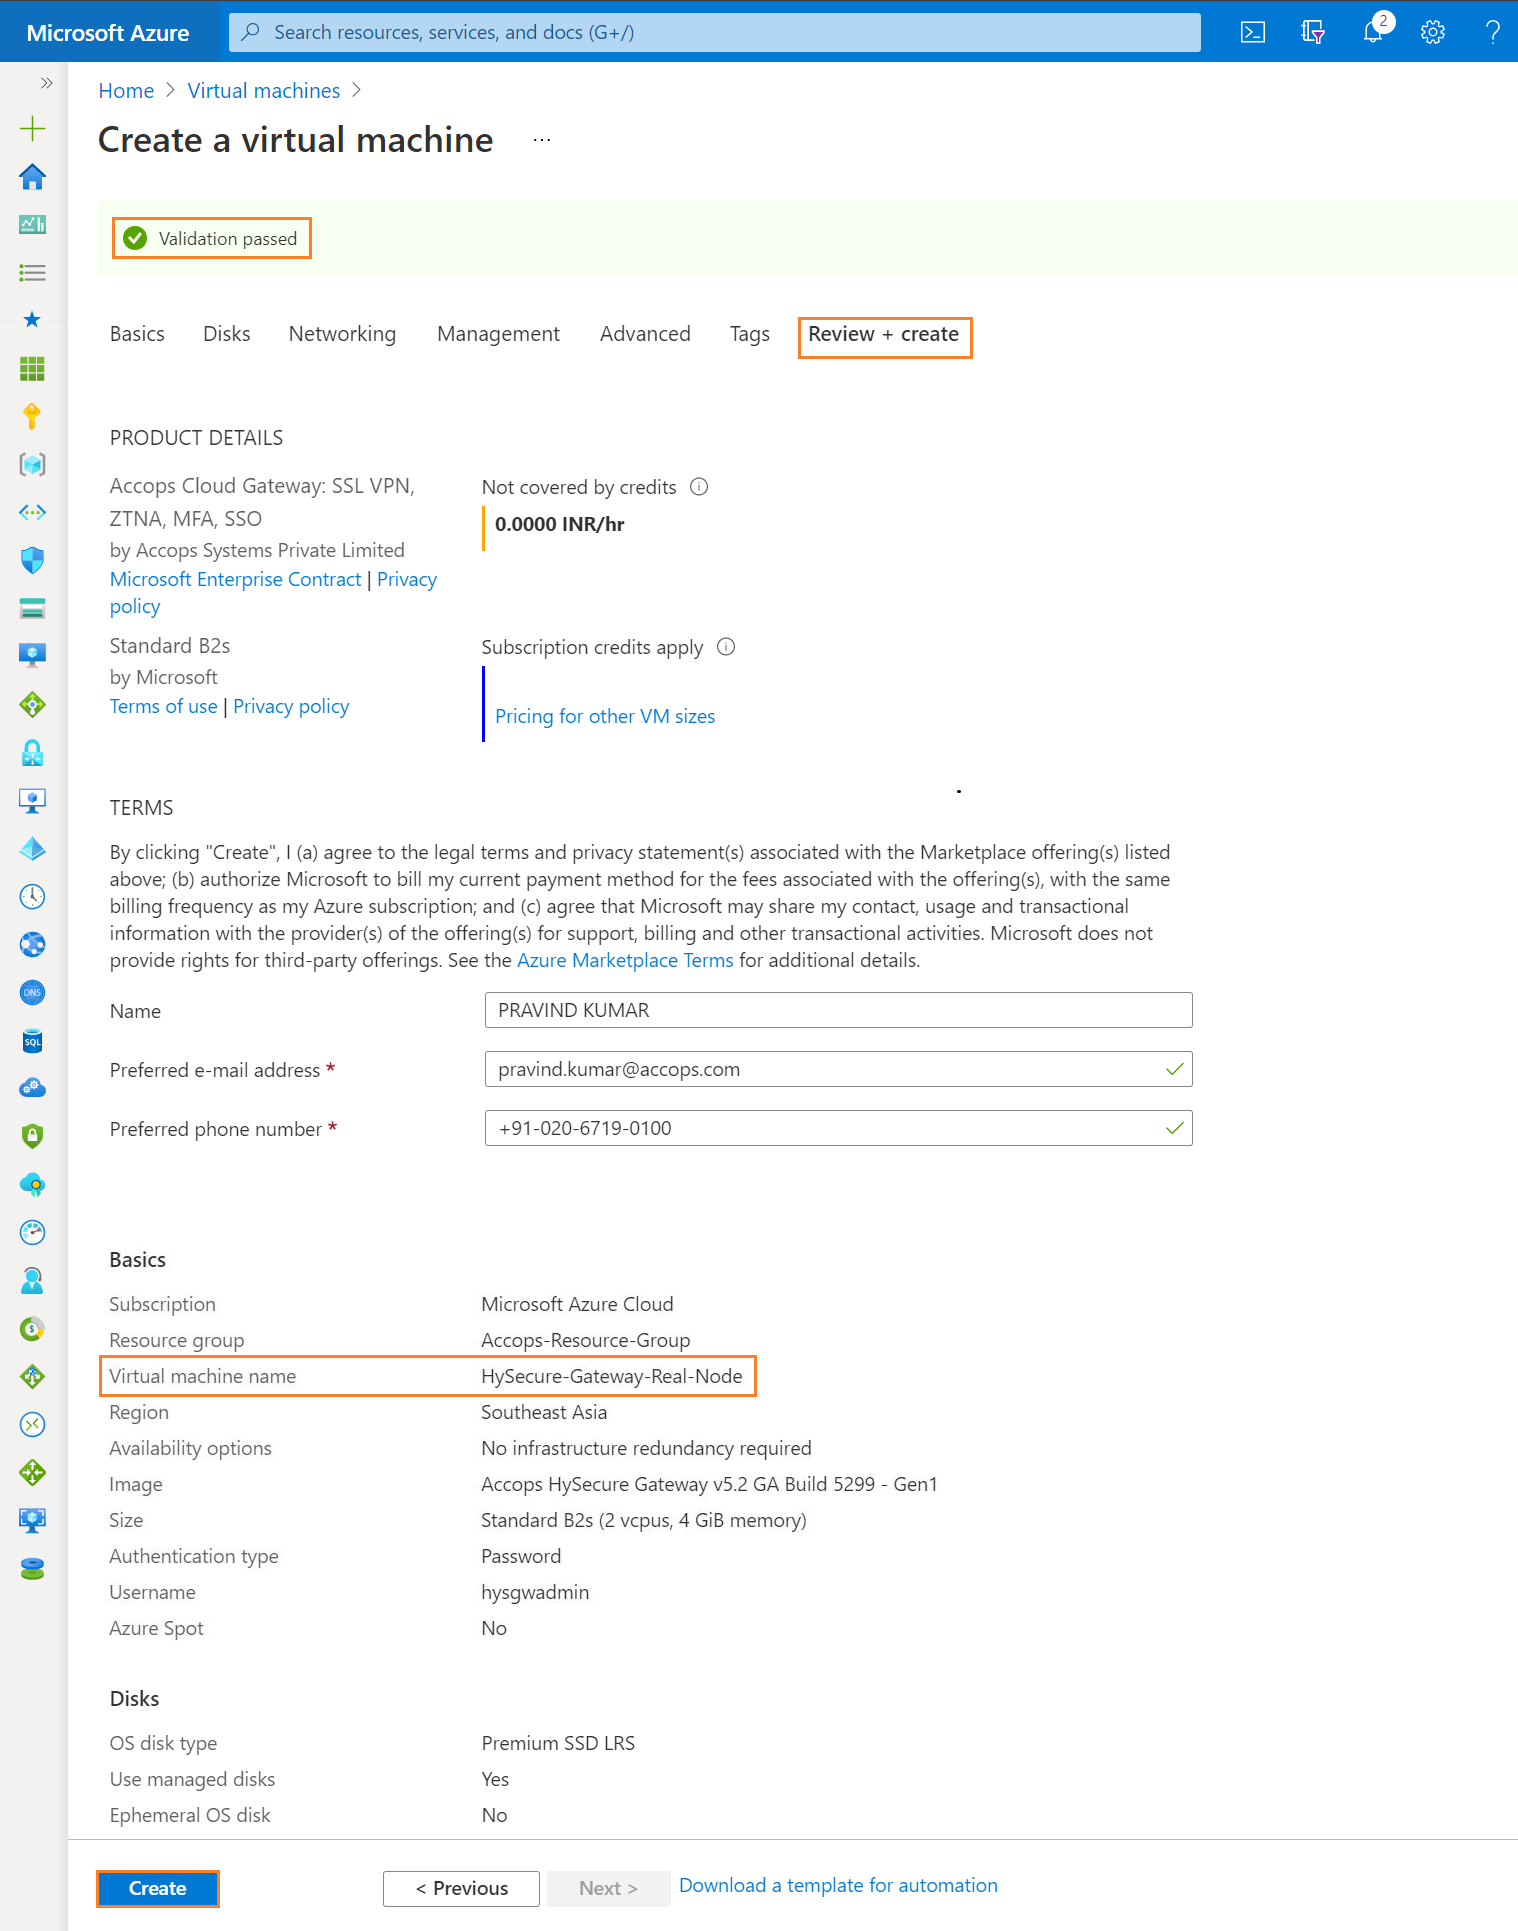
Step 8: Once VM validation is passed then click on * Create *.

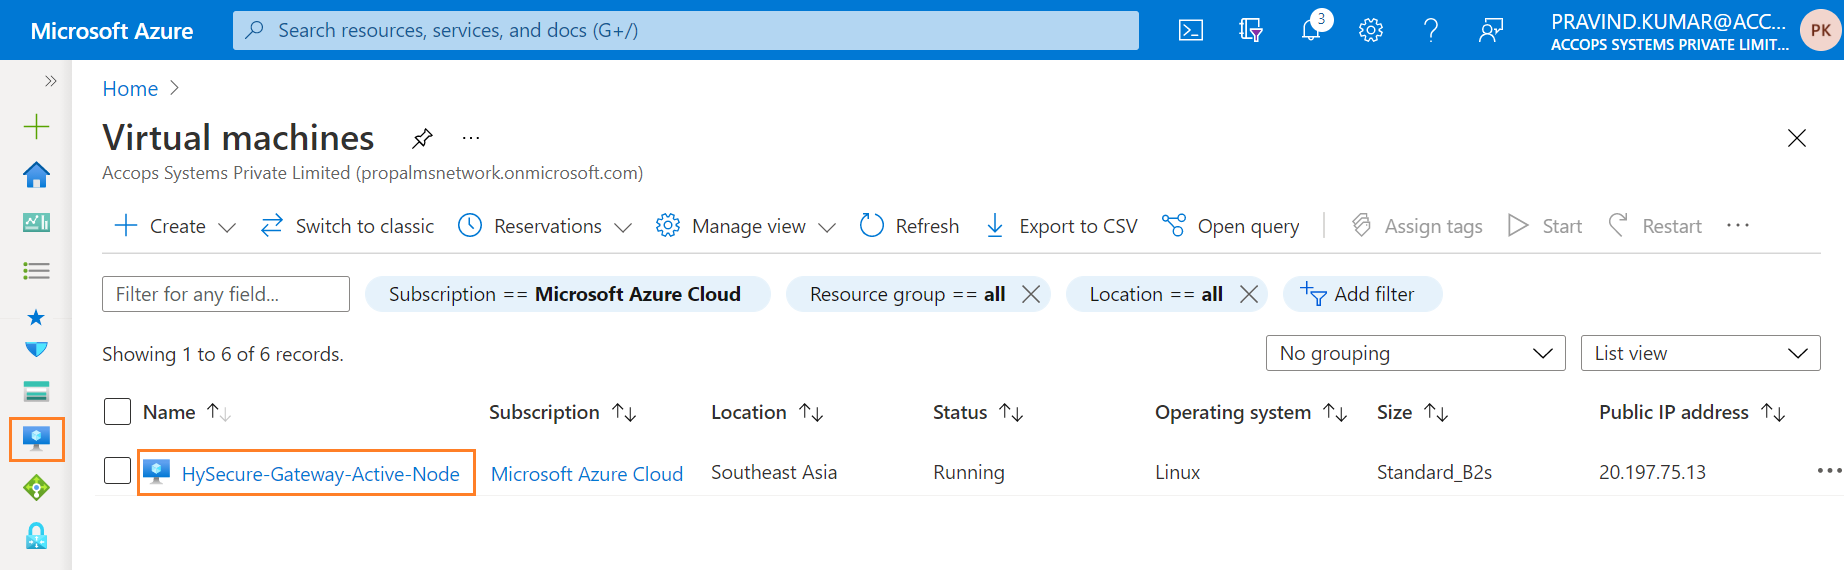
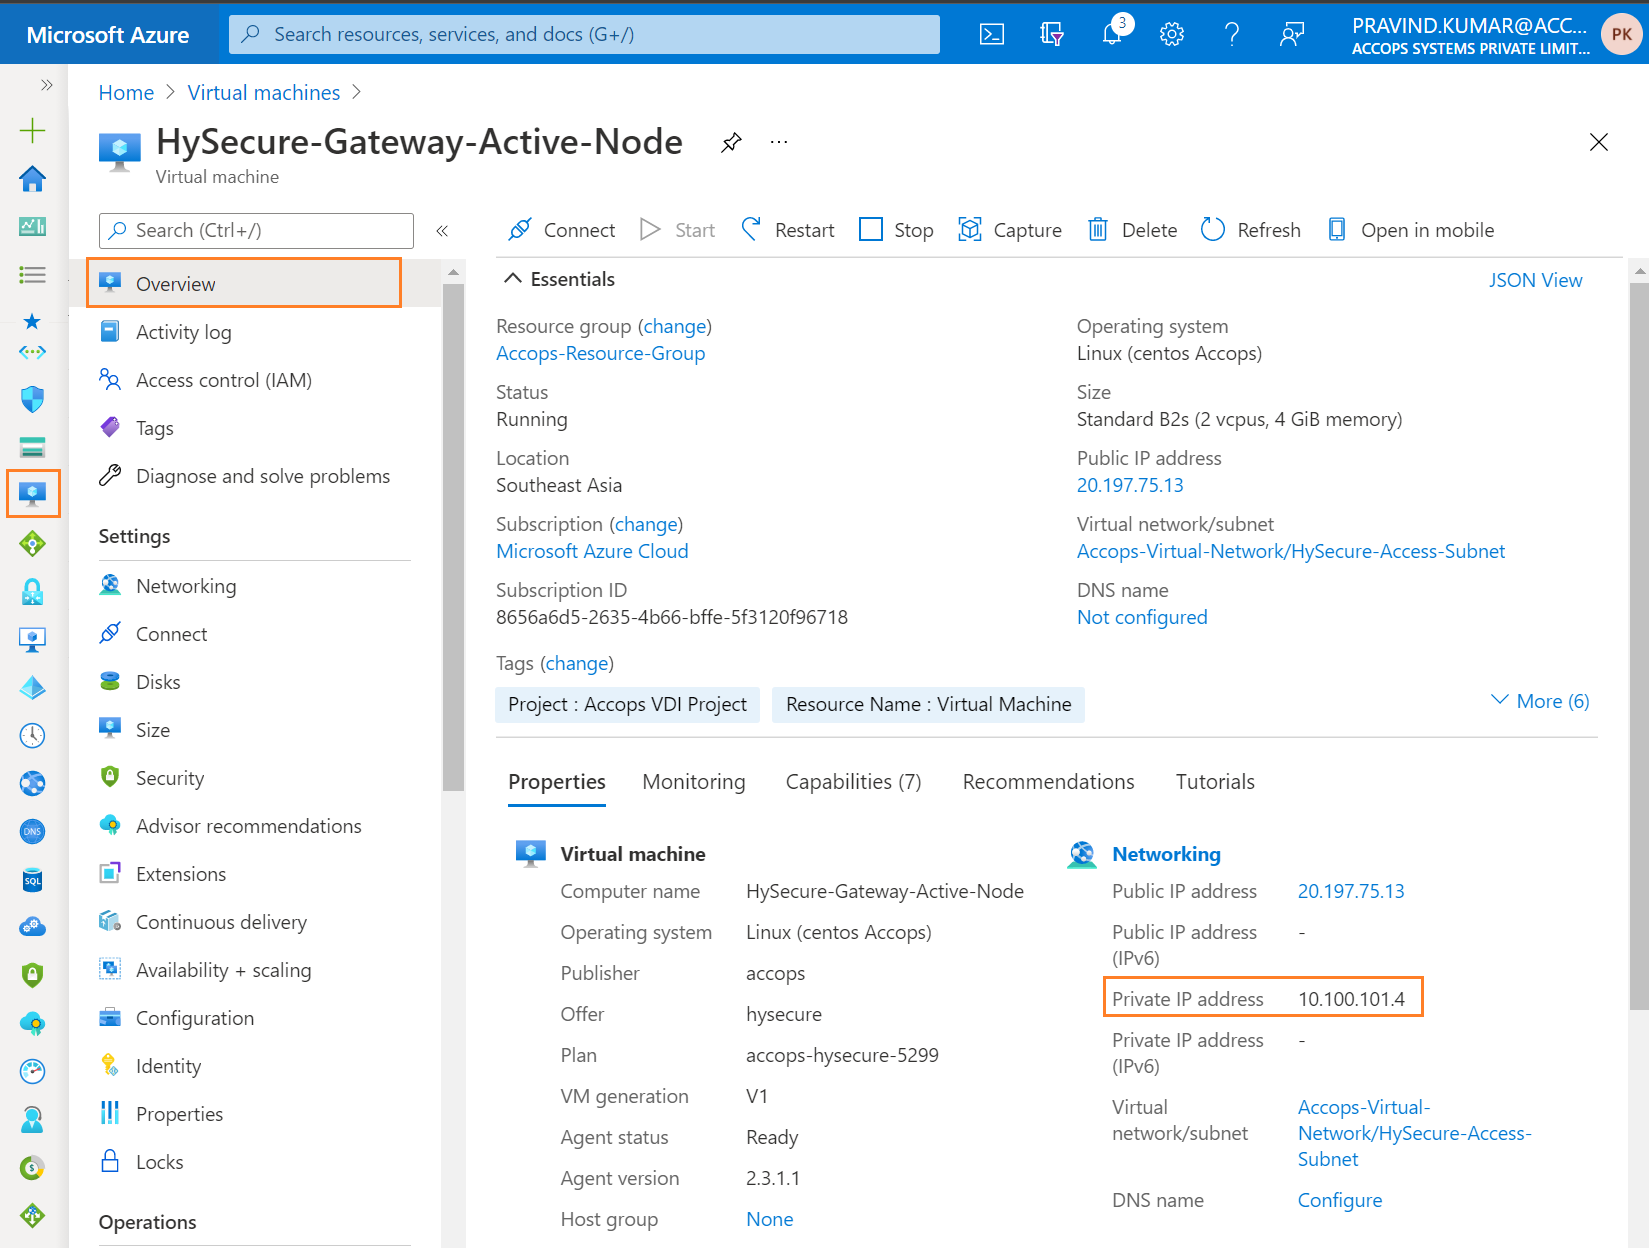
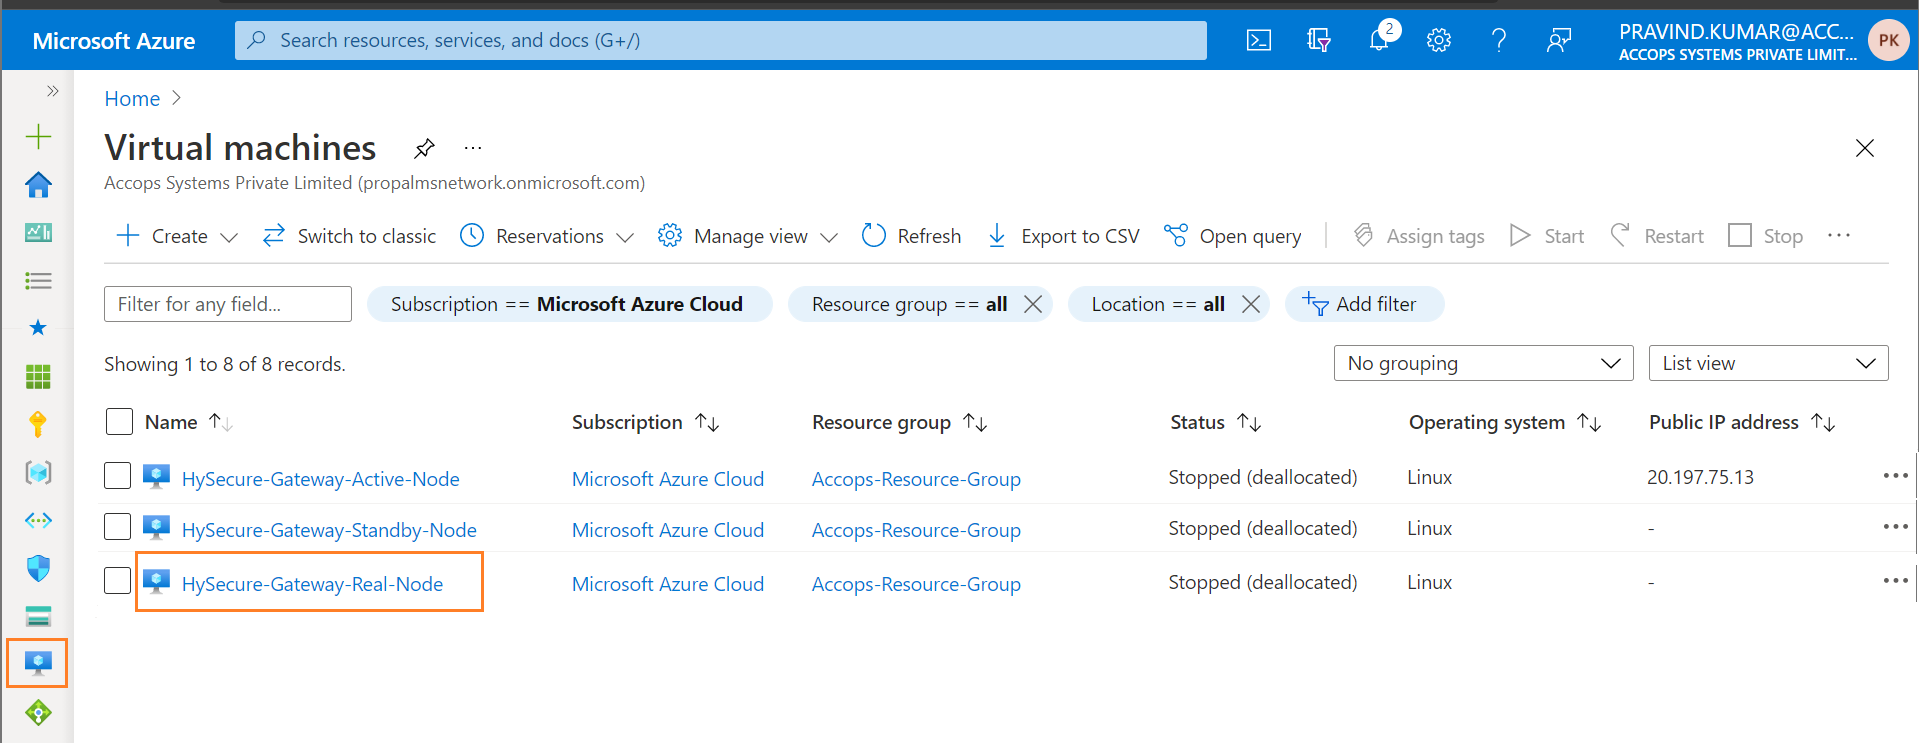
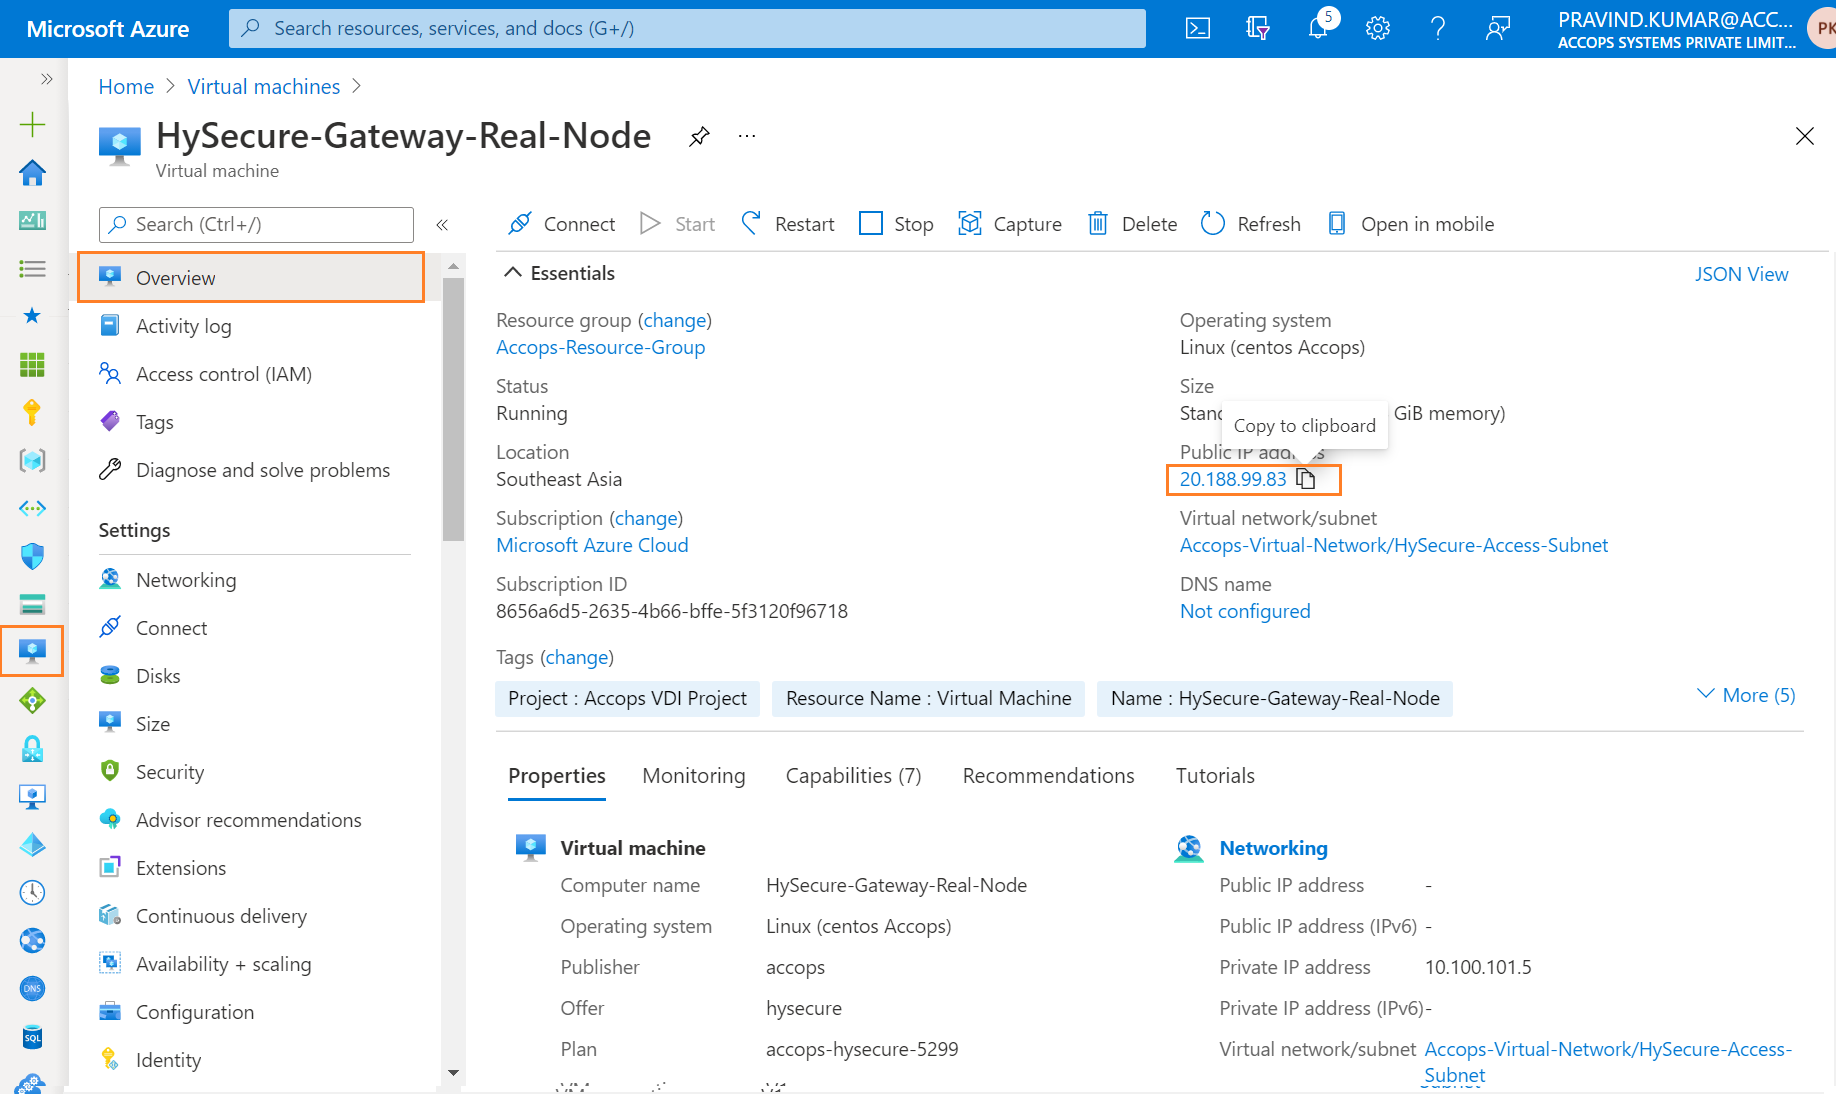
Step 9: List Created VM in Azure Dashboard >> Virtual Machines.
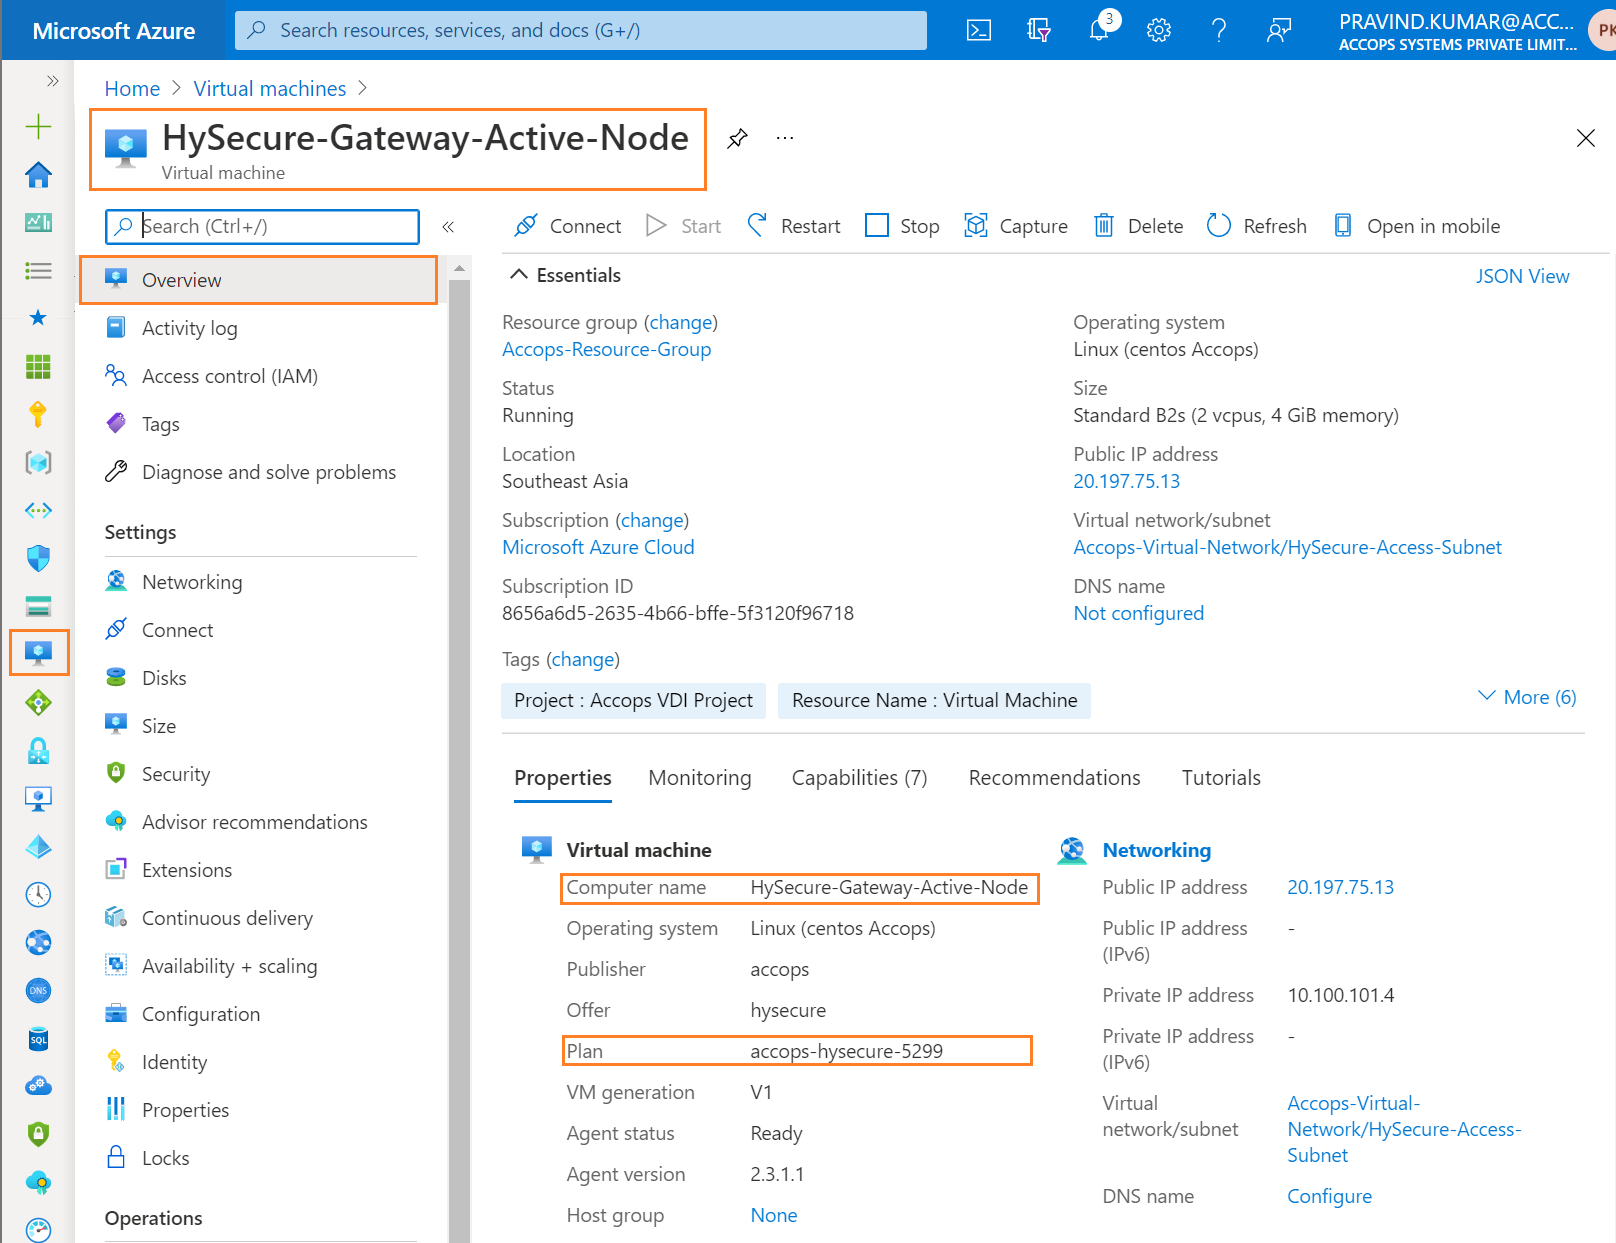
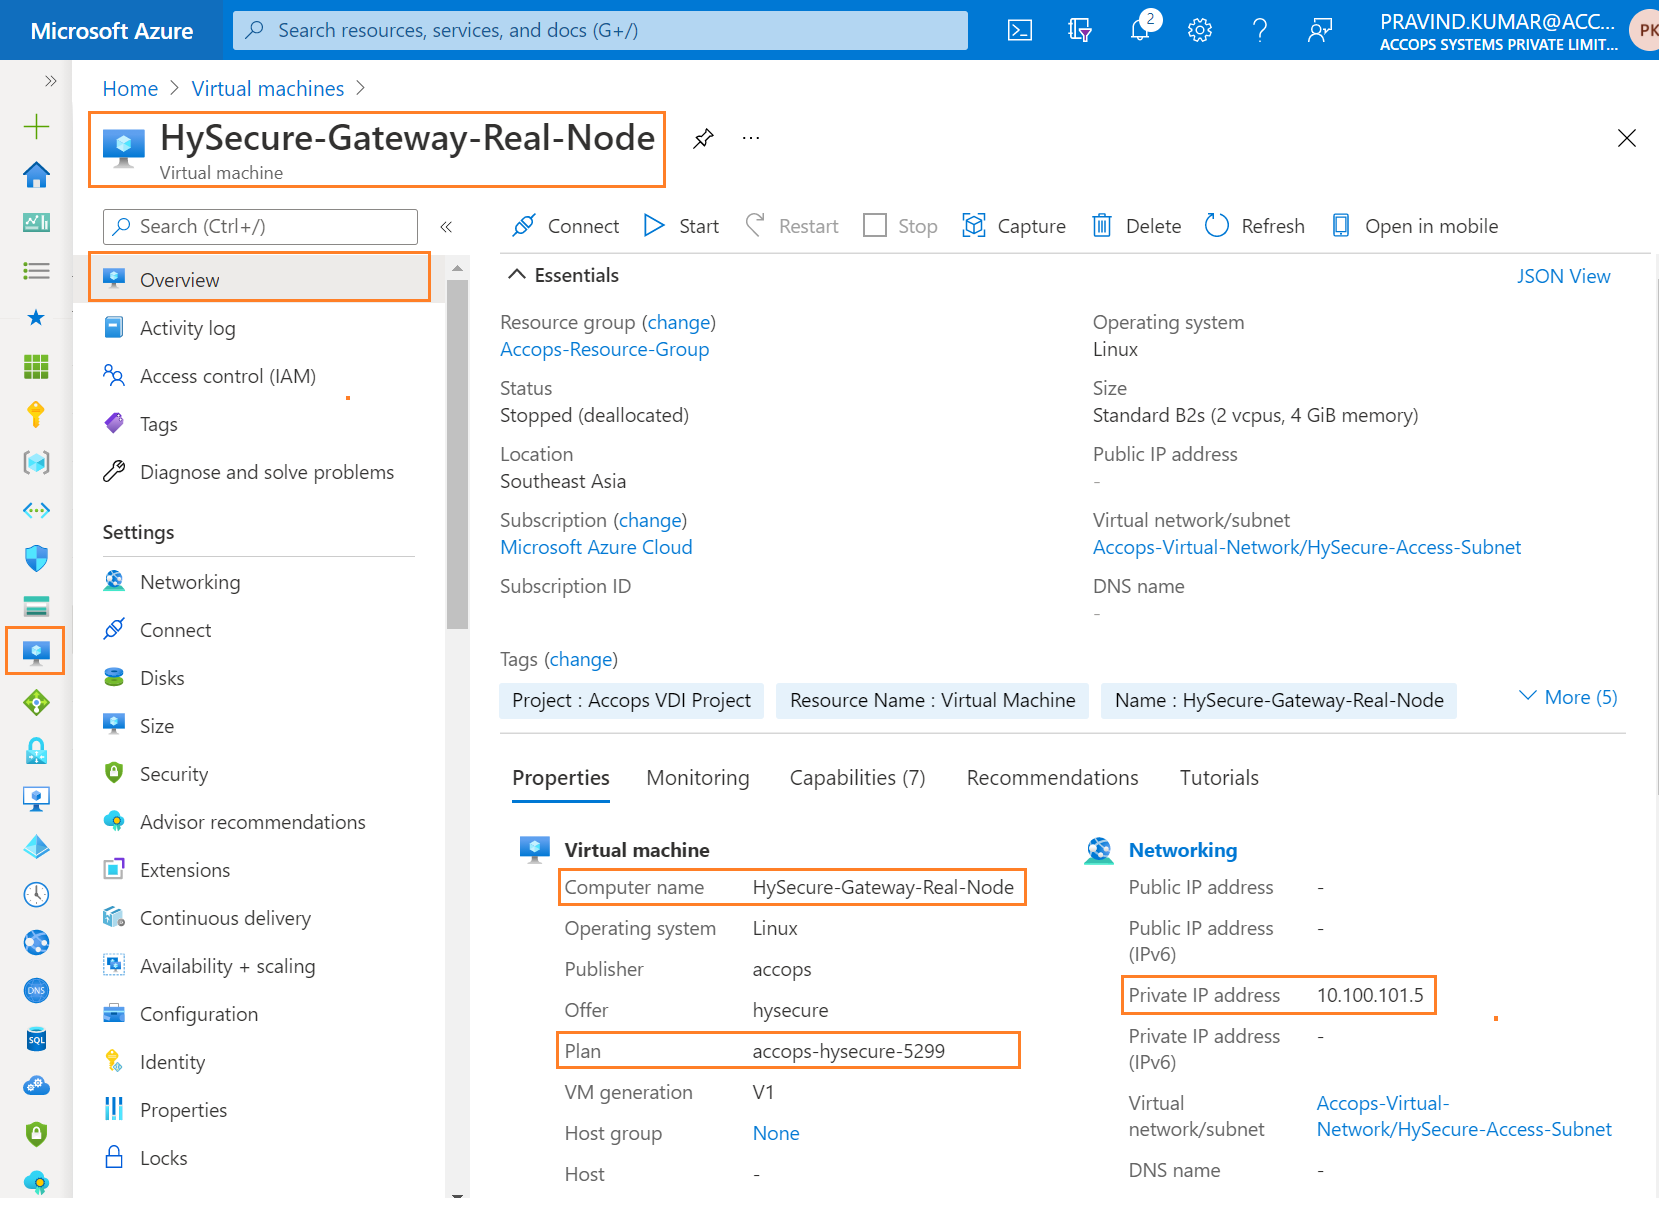
Step 10: Connect newely created Virtual Machine using Private IP Address.
Tip
If Public Load Balancer is attached to Virtual machine then use Private IP to connect the VM, Please make sure you have Site-2-Site Connectivity to your Azure Network from the location you want to access the Accops Gateway. Another method to Access the Gateway is use Any Windows Virtual Machine toAccess the VM from Same Subnet or DIfferent Subnet, It may required Port opening in Firewall, Please Check with Your Azure Network/Security Team
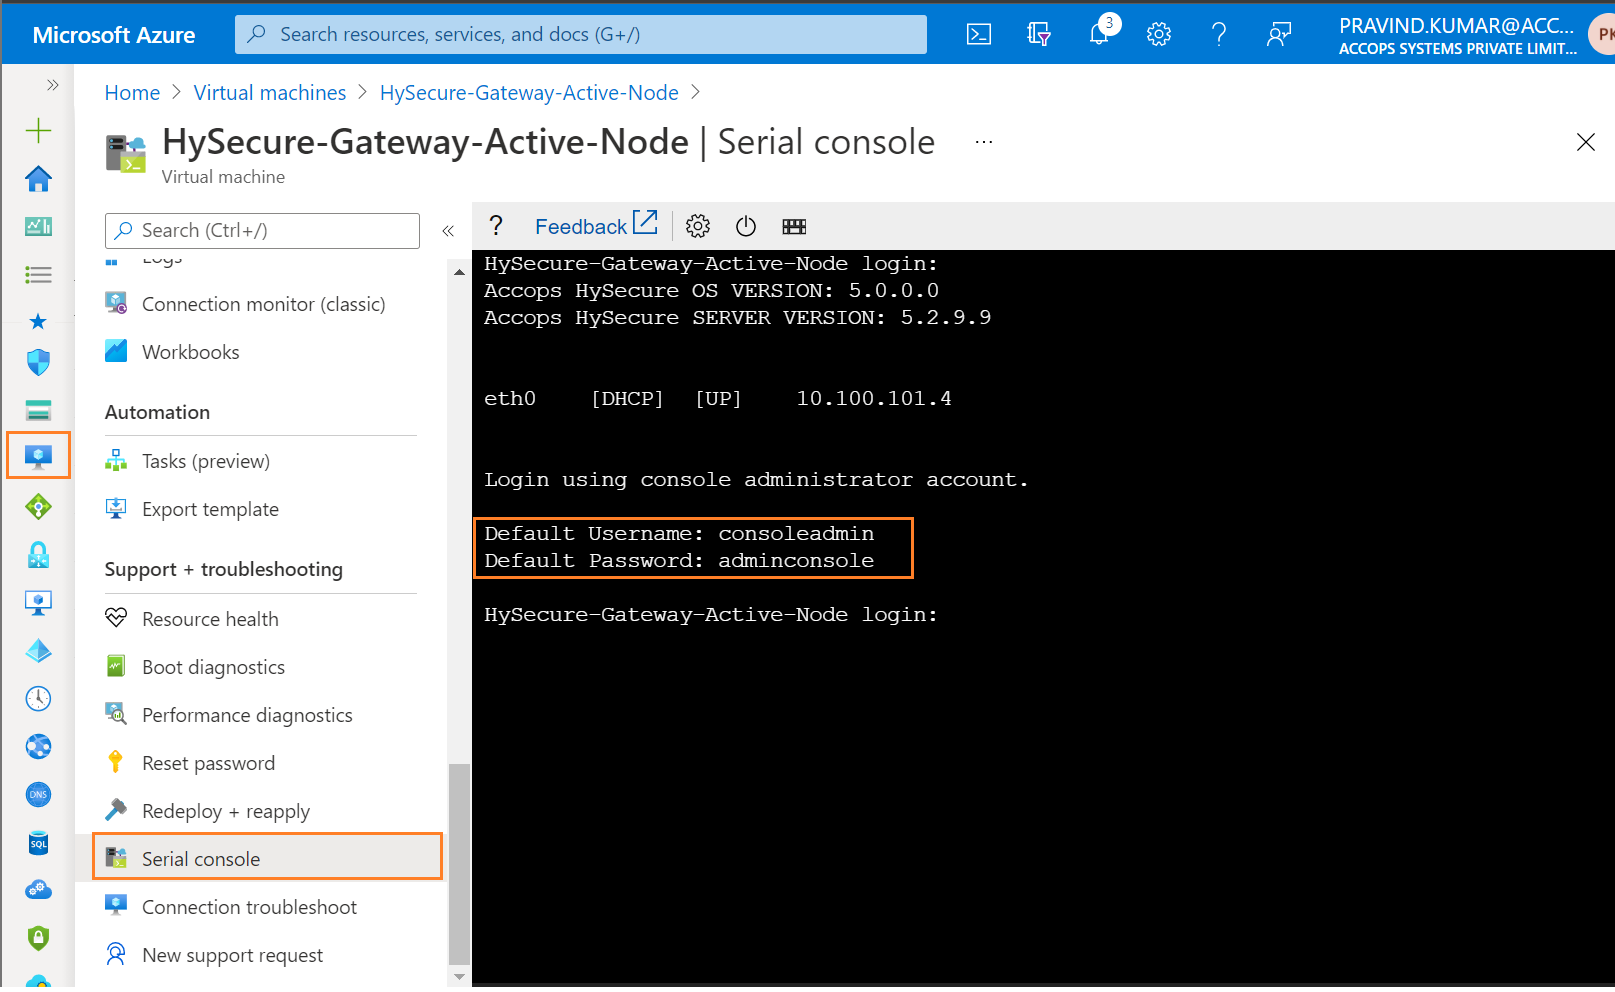
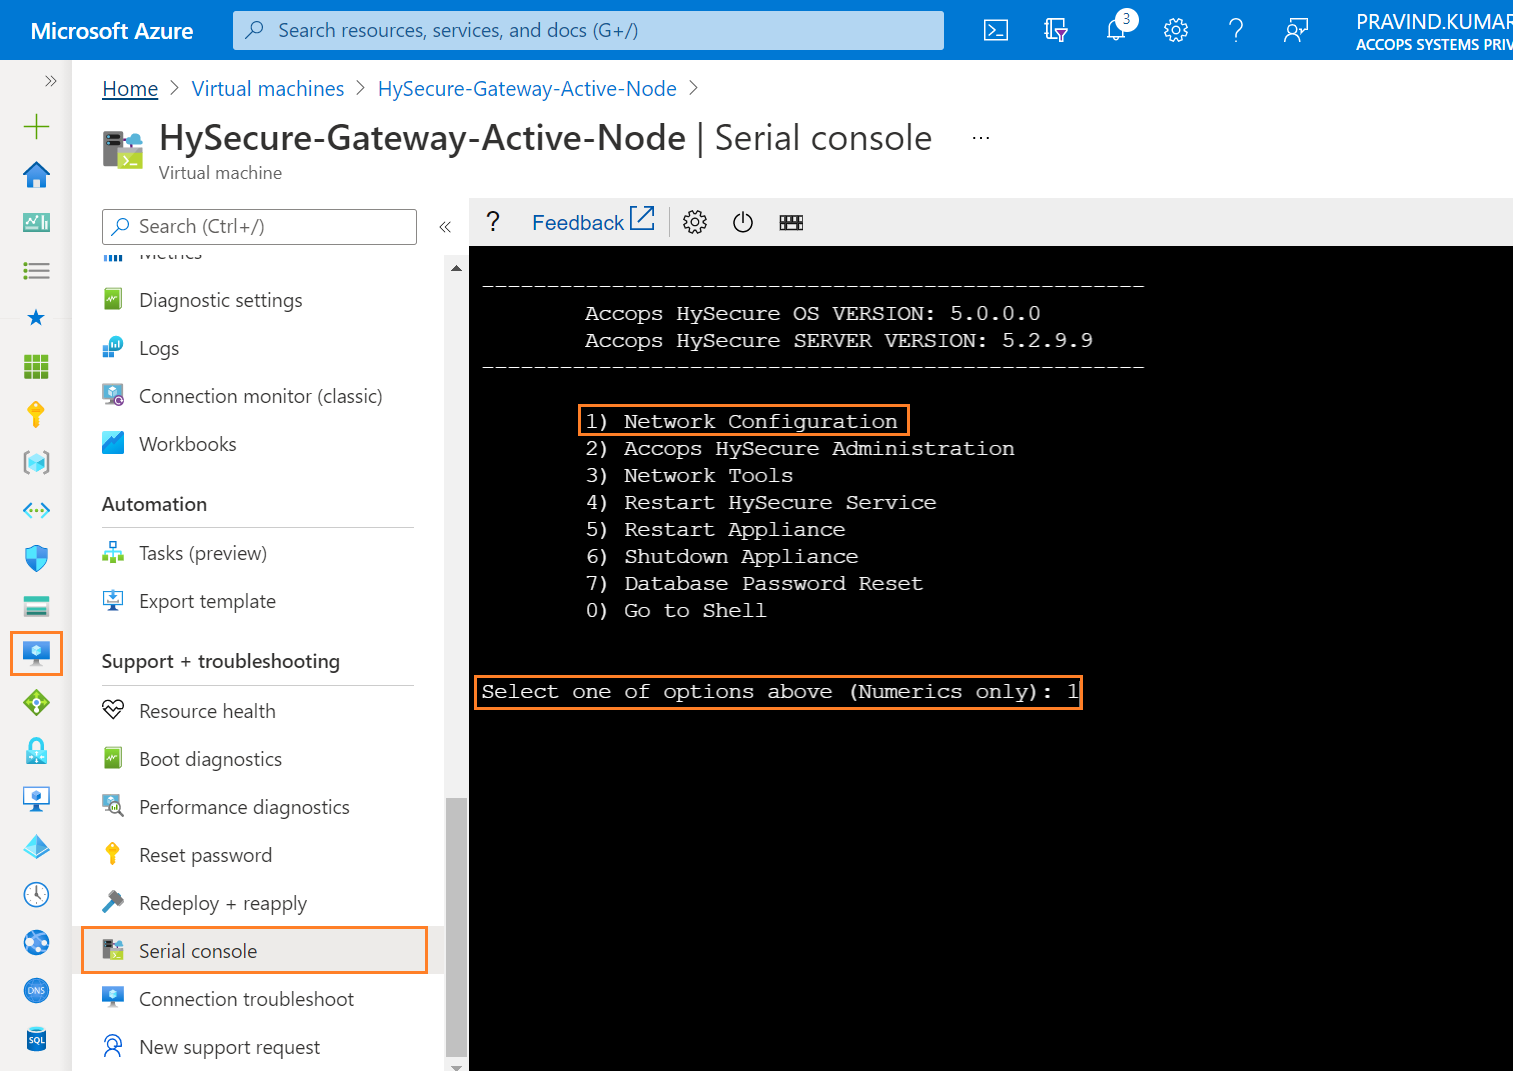
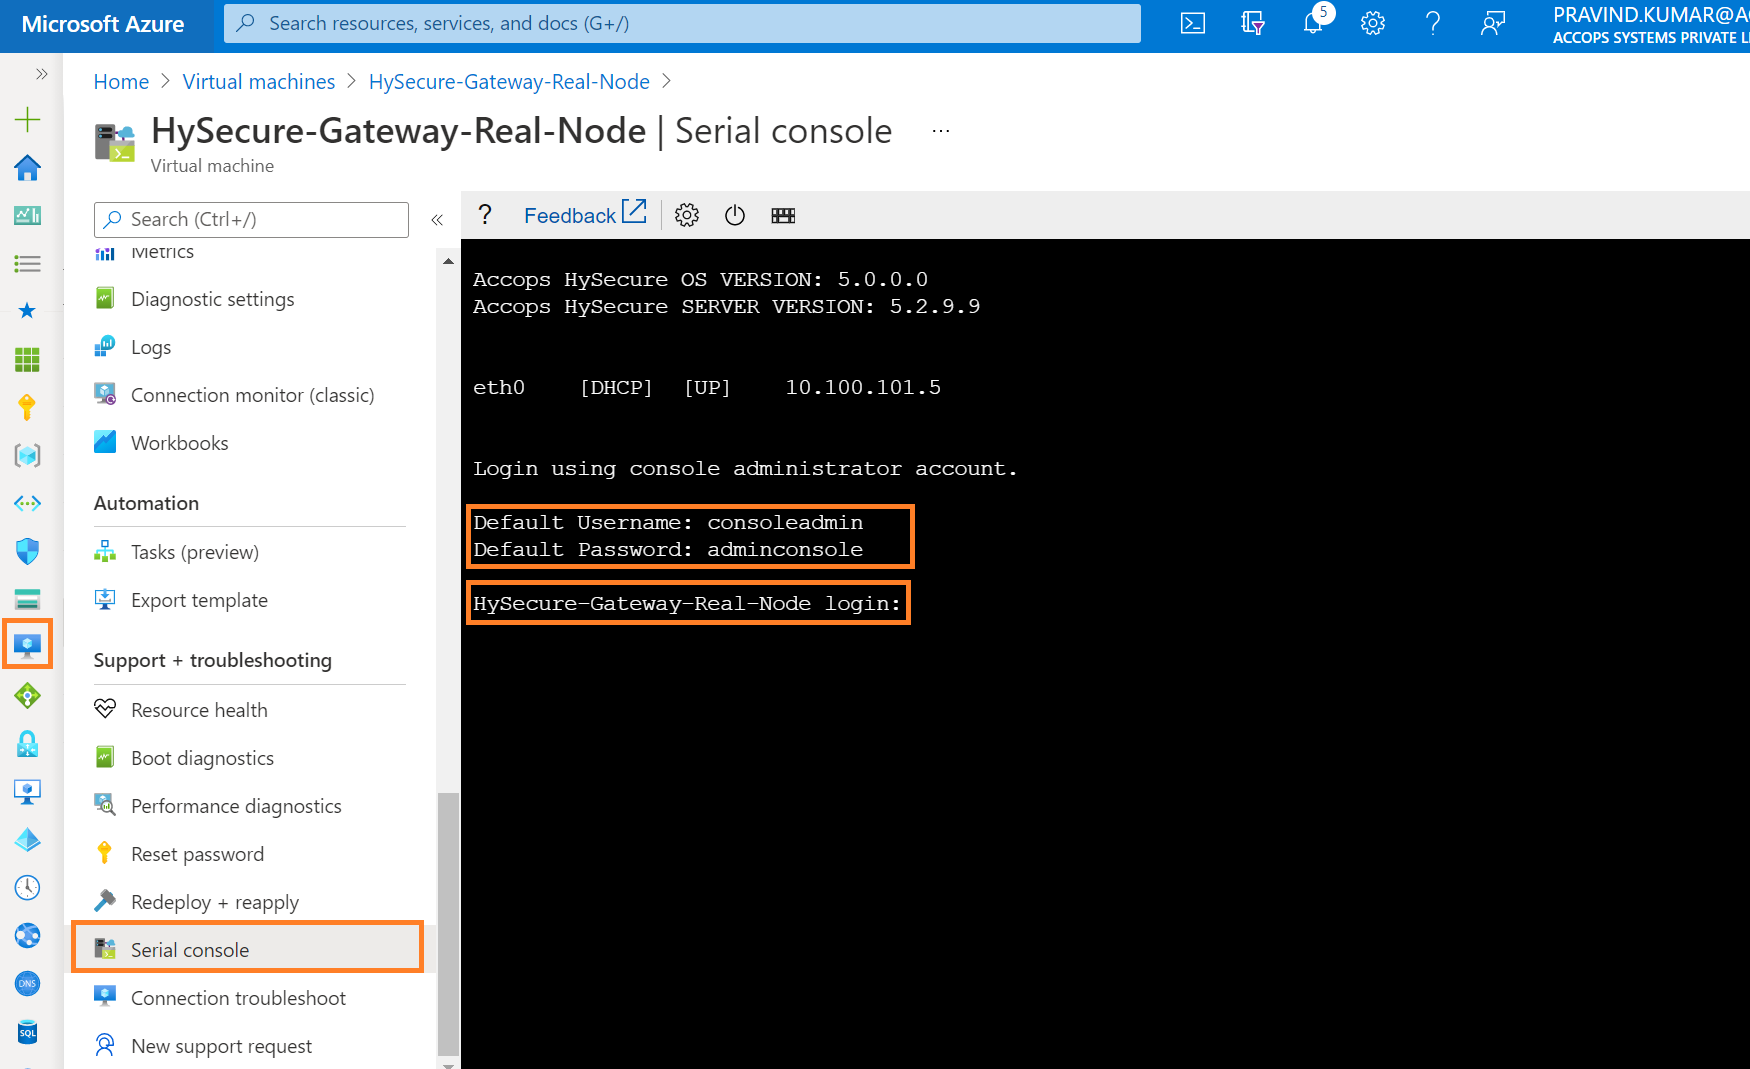
Step 11: Connect to Serial Console of HySecure Active Node & Login with Default Credentials.
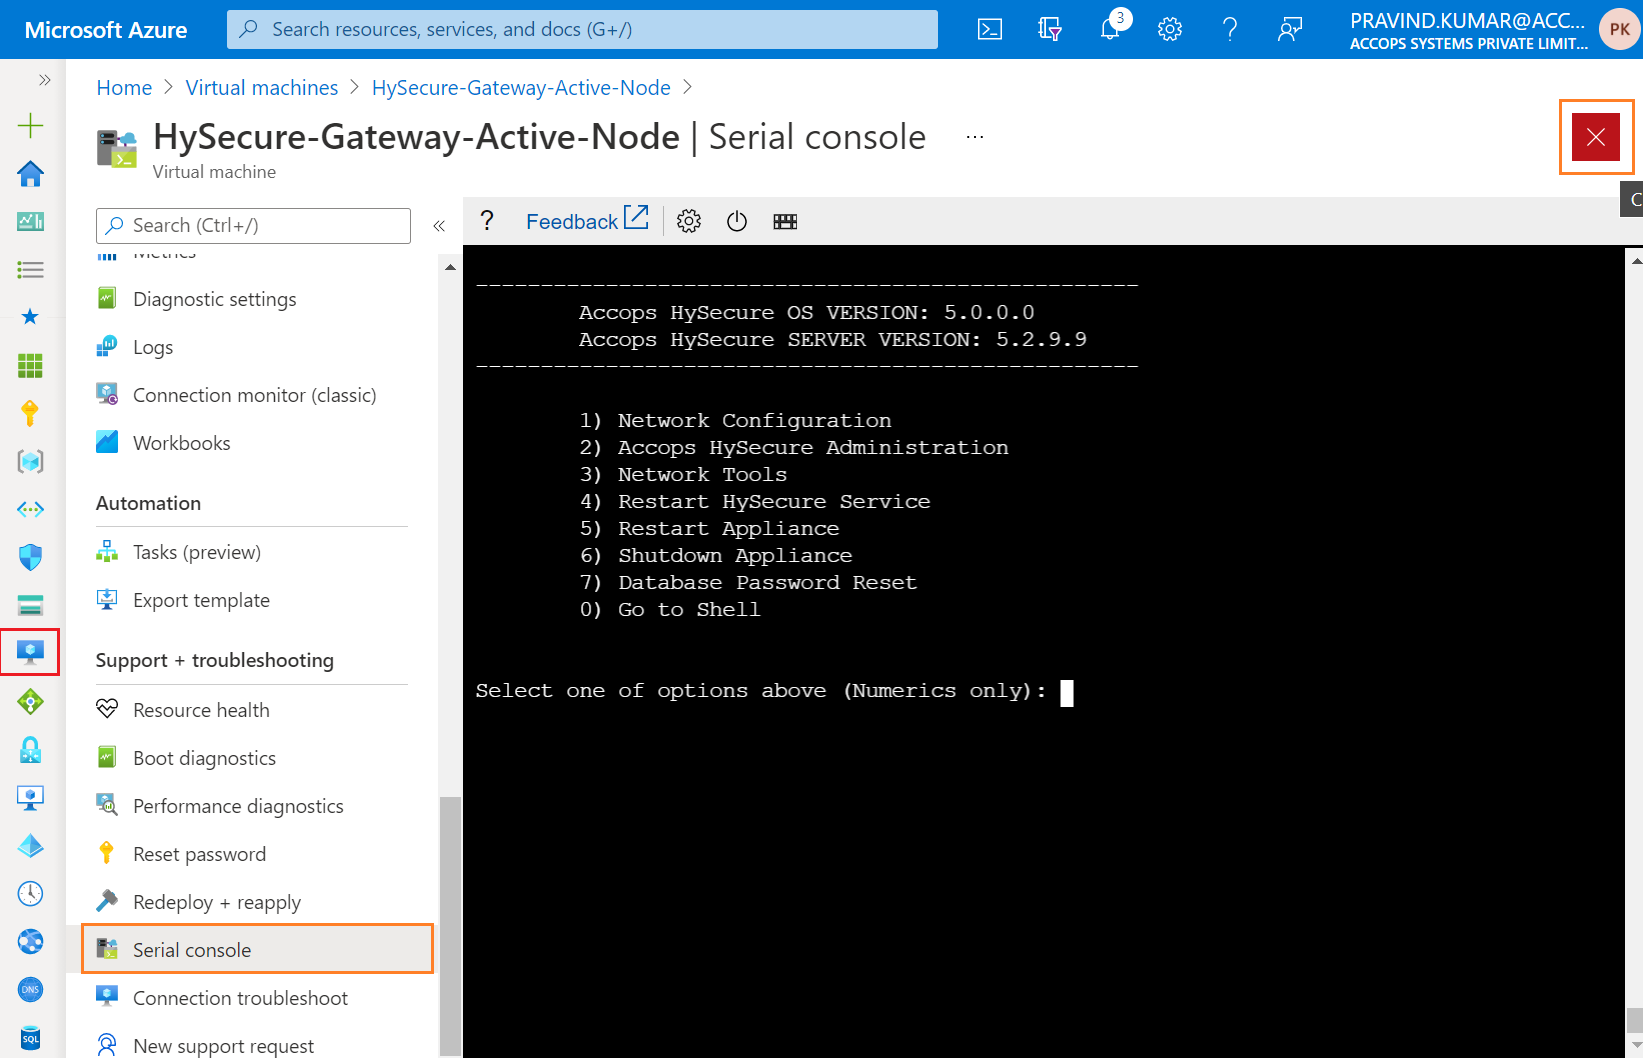
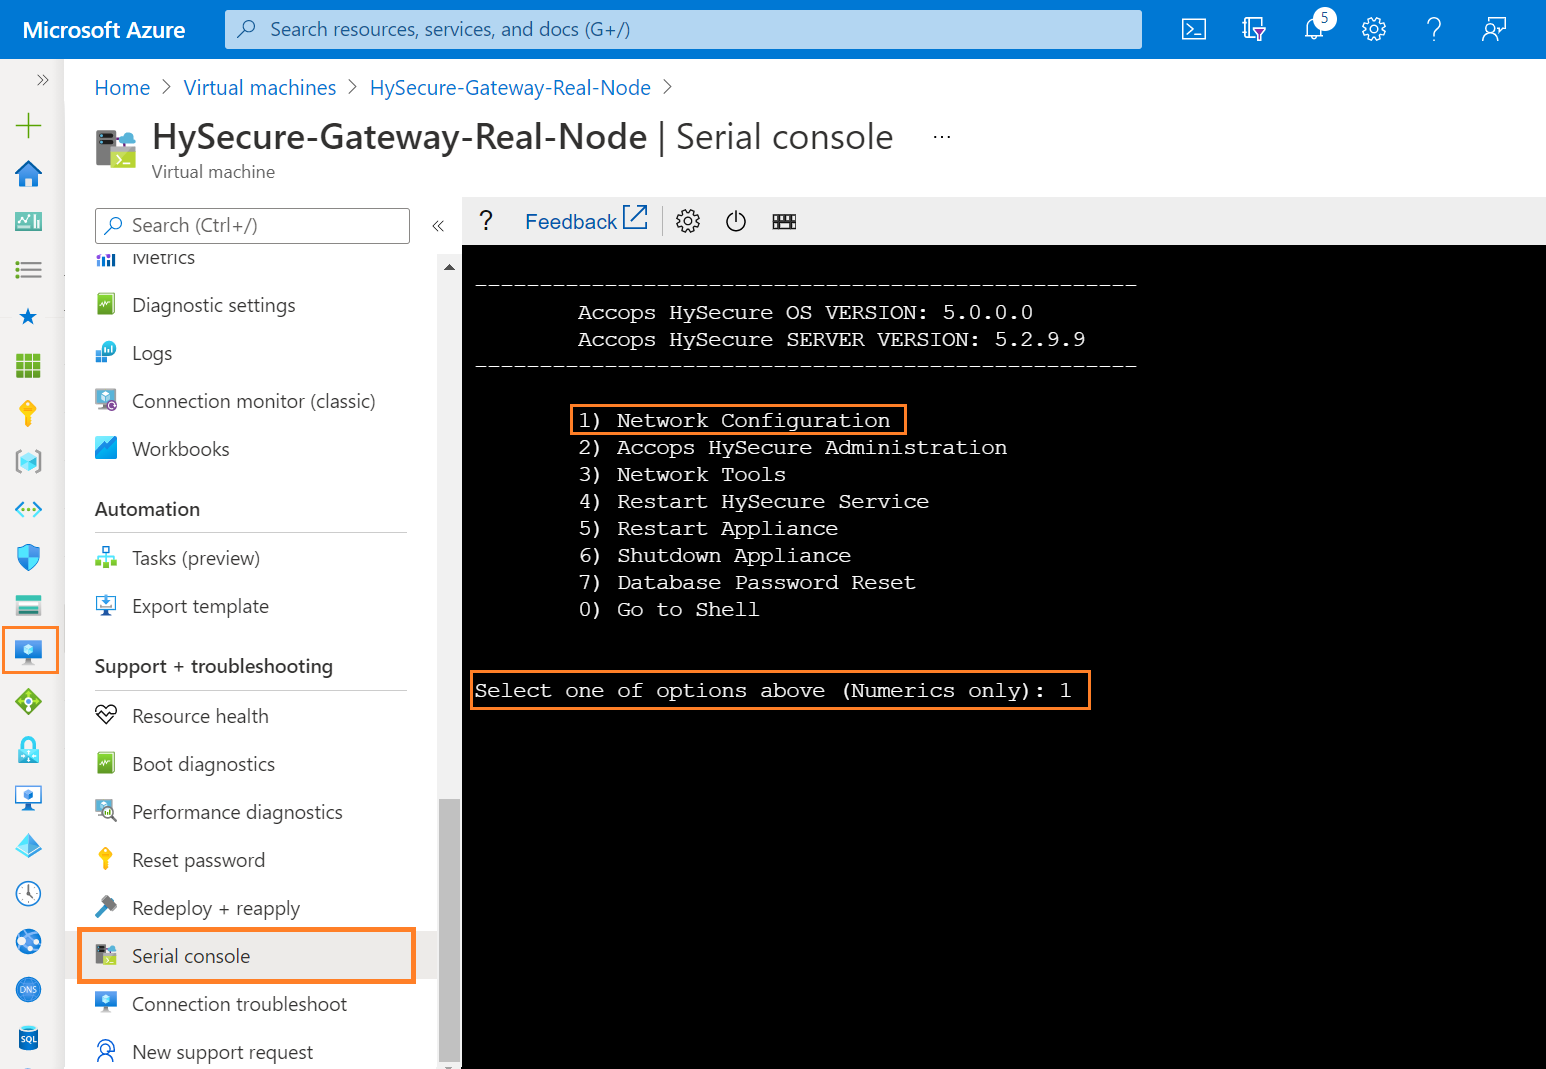
Step 12: For Network Configuration, Enter 1 .
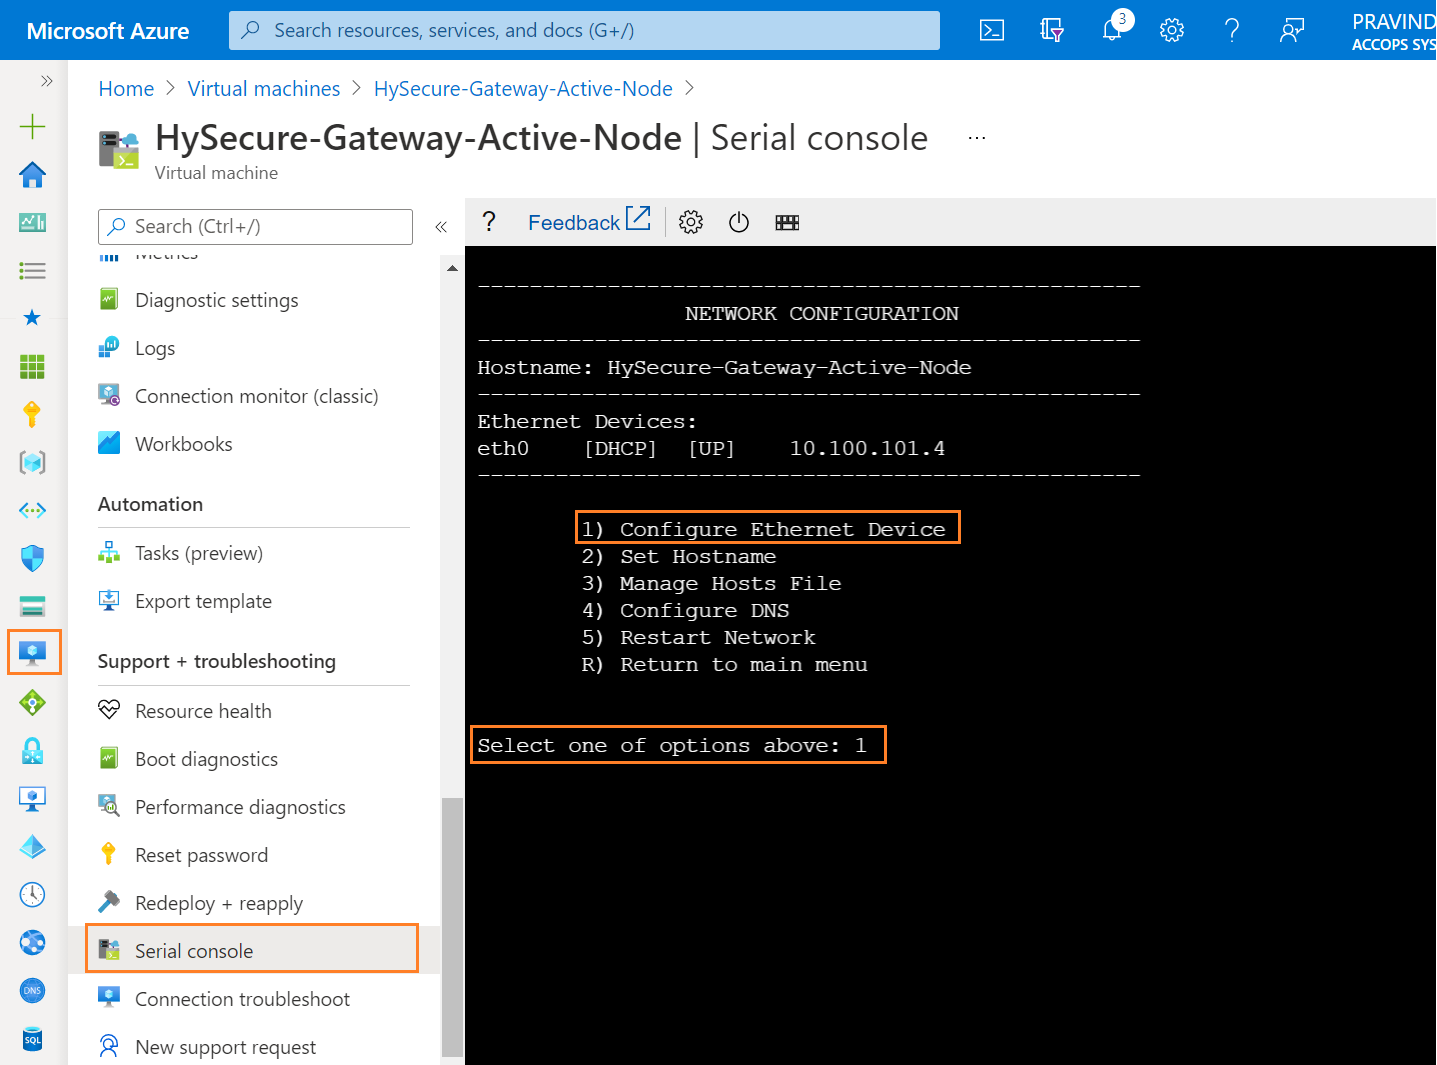
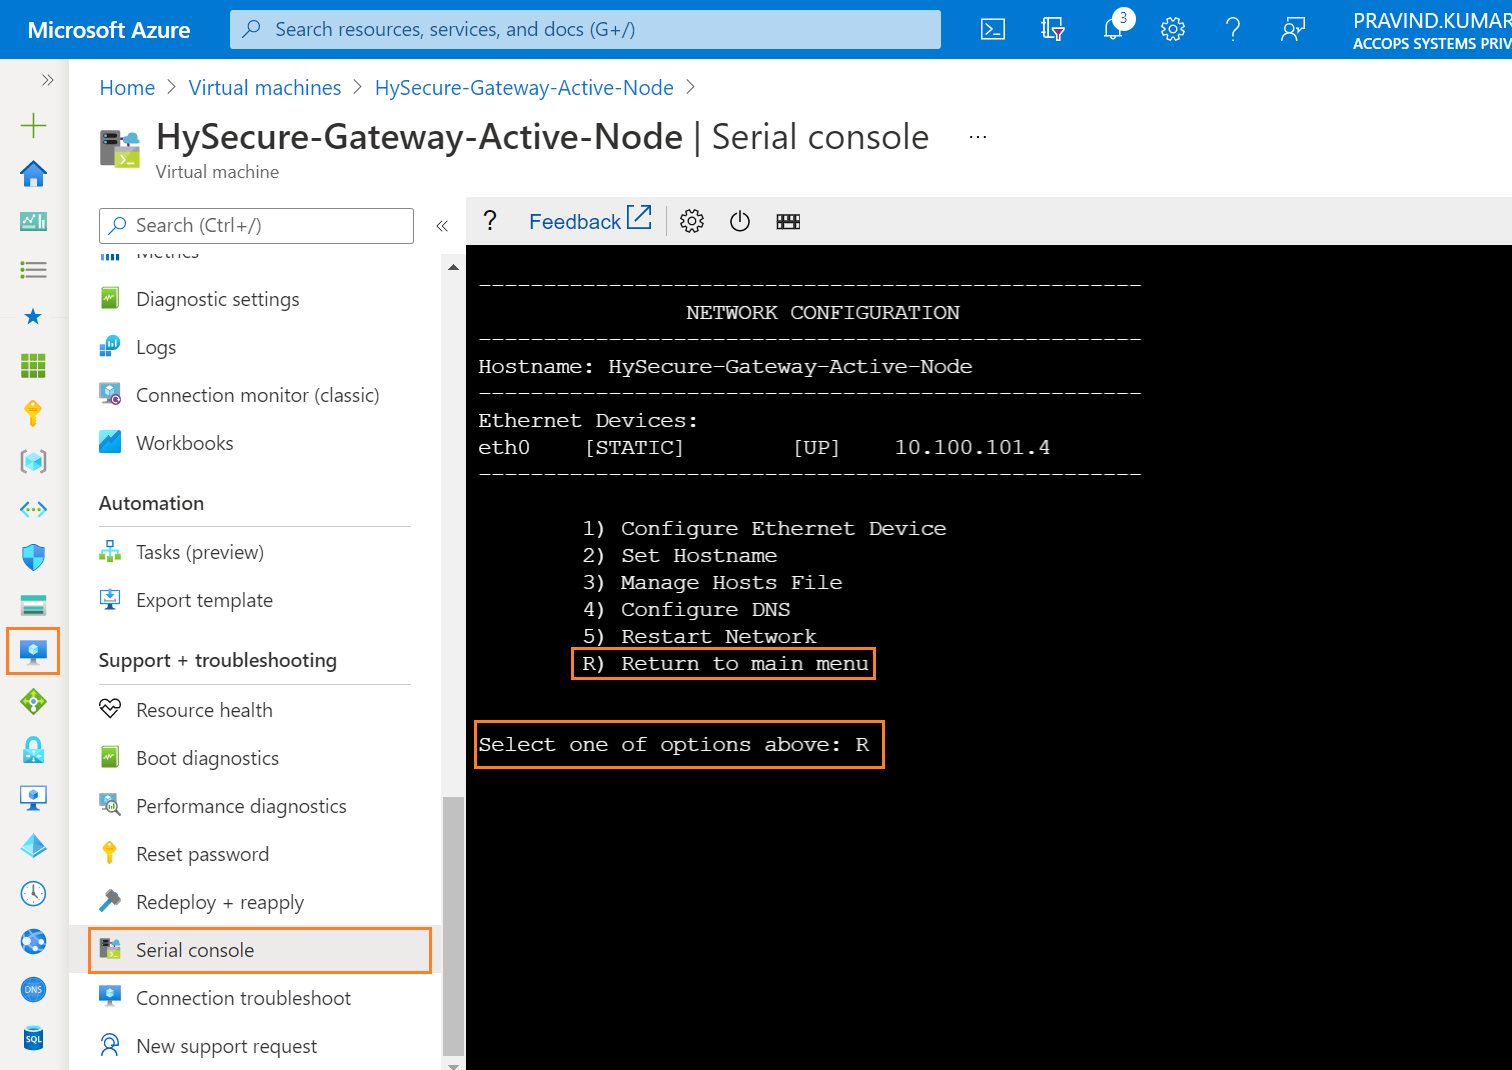
Step 13: To Configure Ethernet Device, Enter 1.
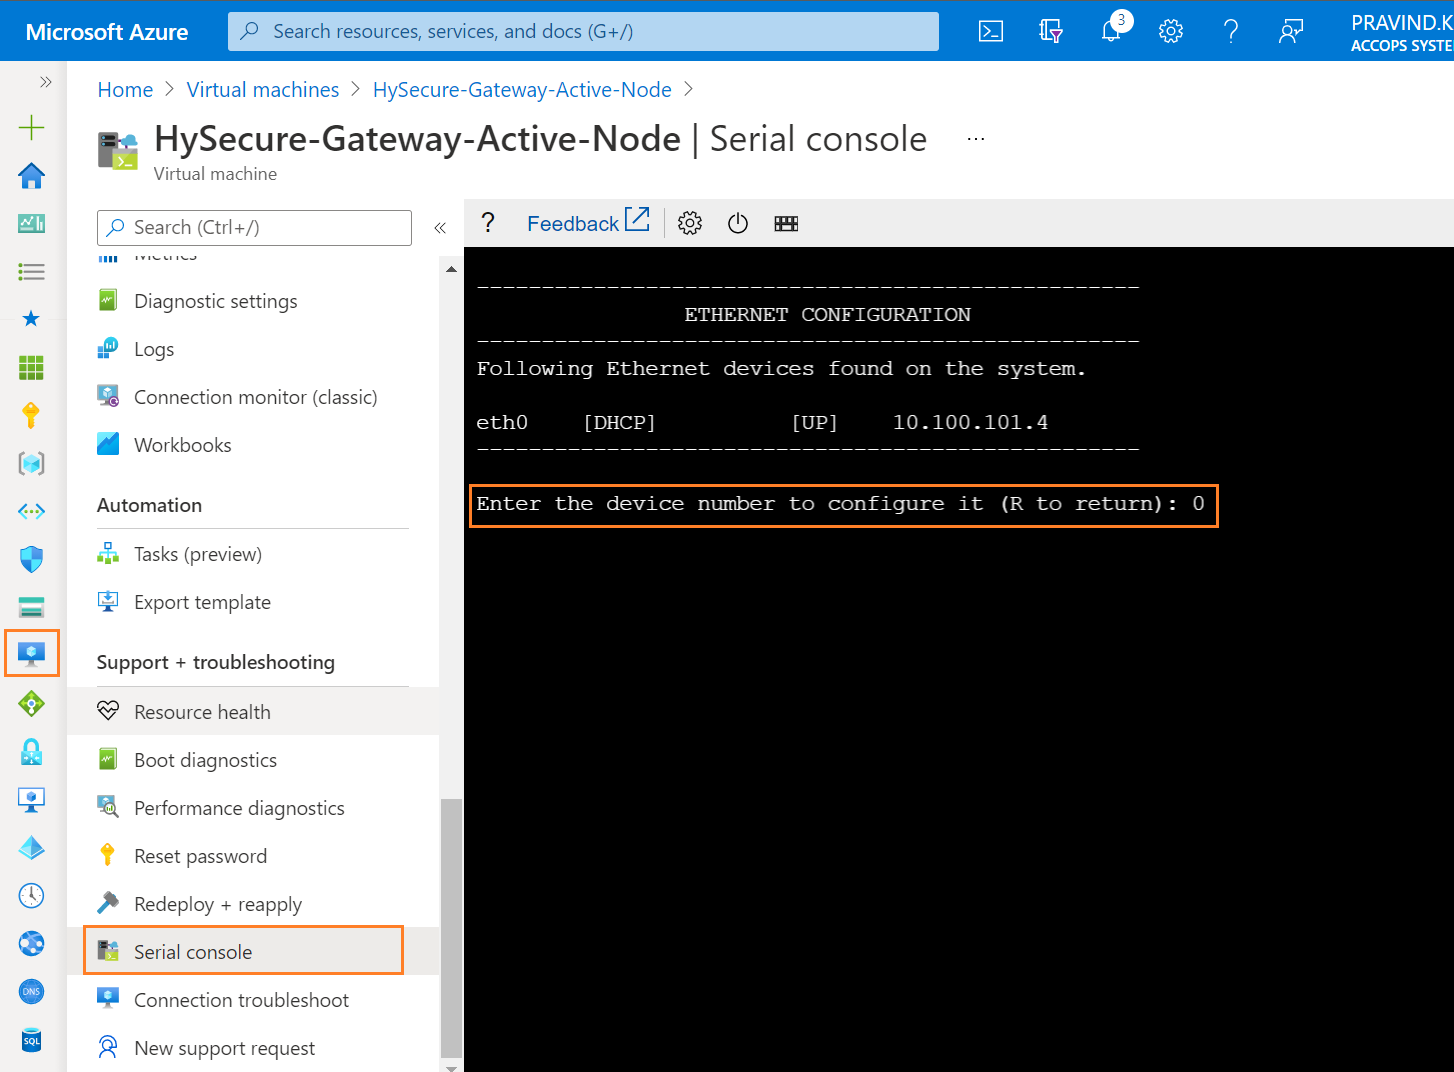
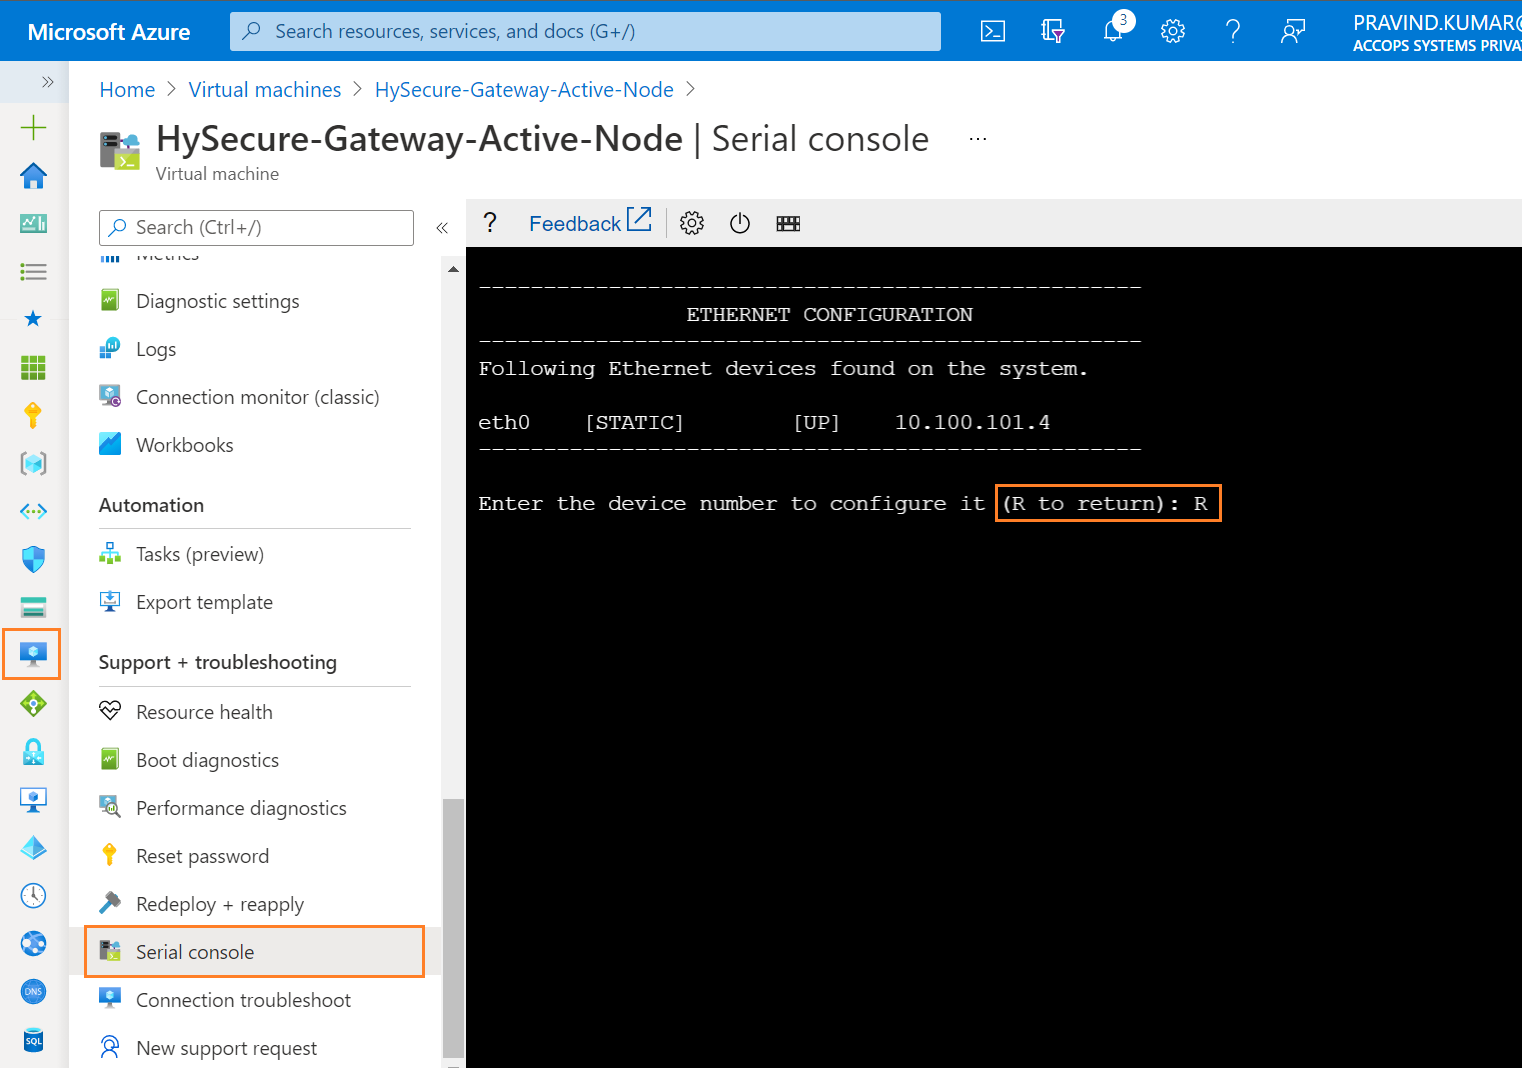
Step 14: Enter the Device Number of Ethernet to configure it, Enter 0 for eth0 interface.
Example
for eth0, Enter 0. for eth1, Enter 1.
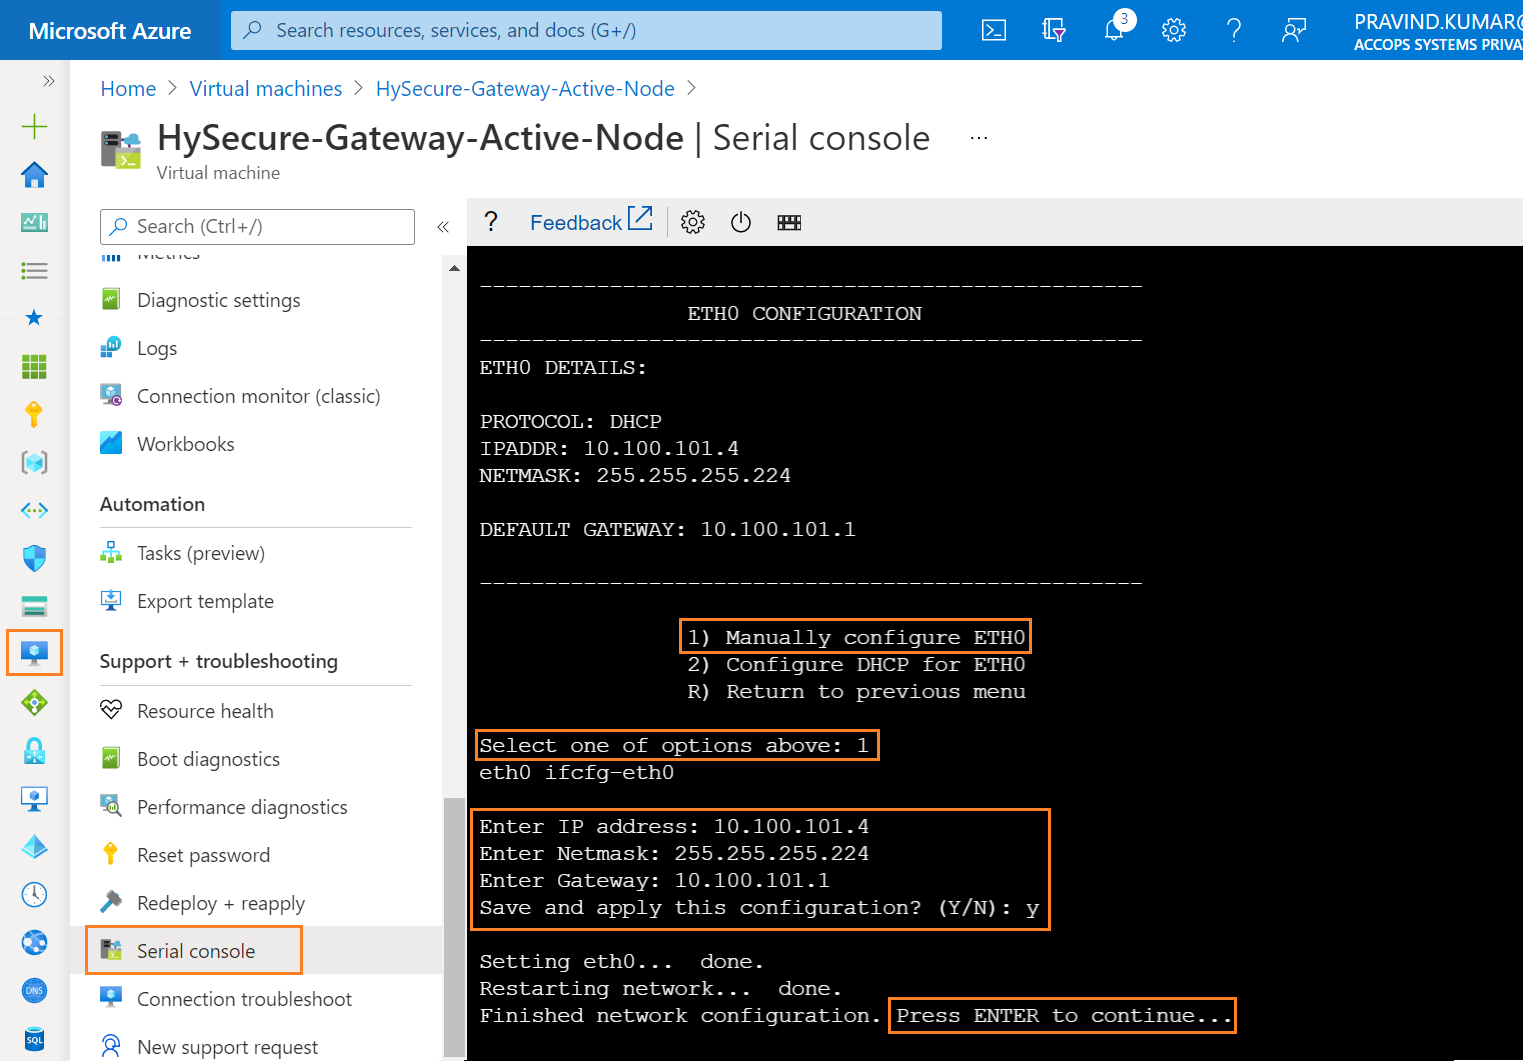
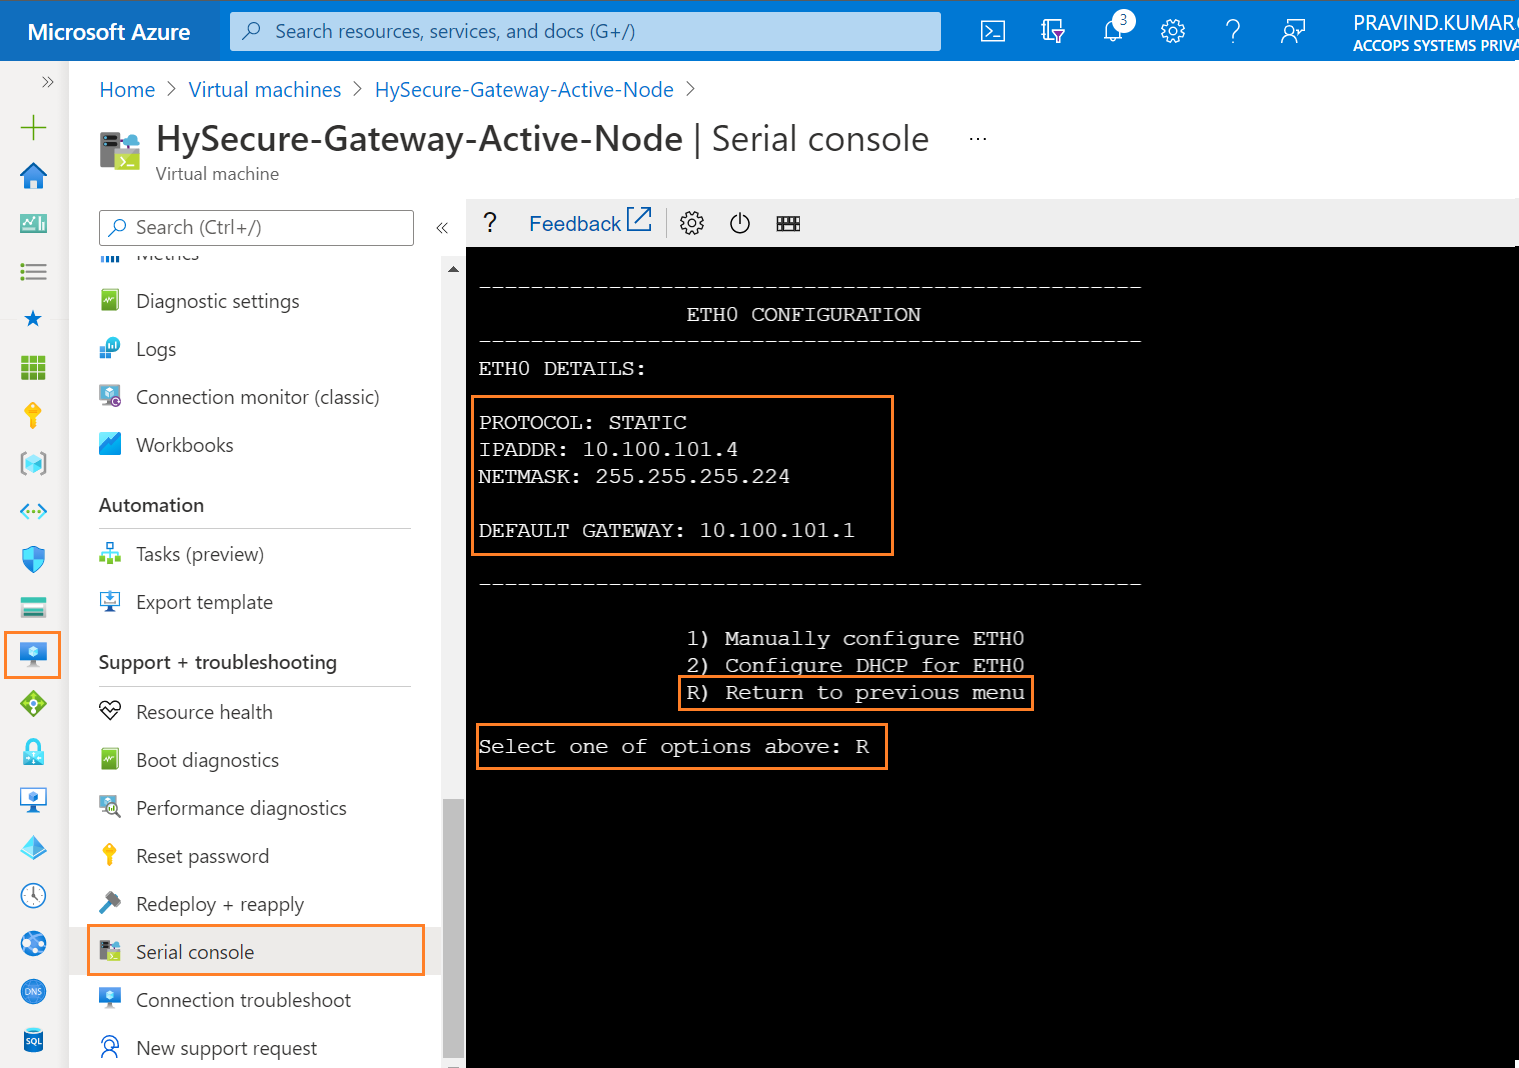
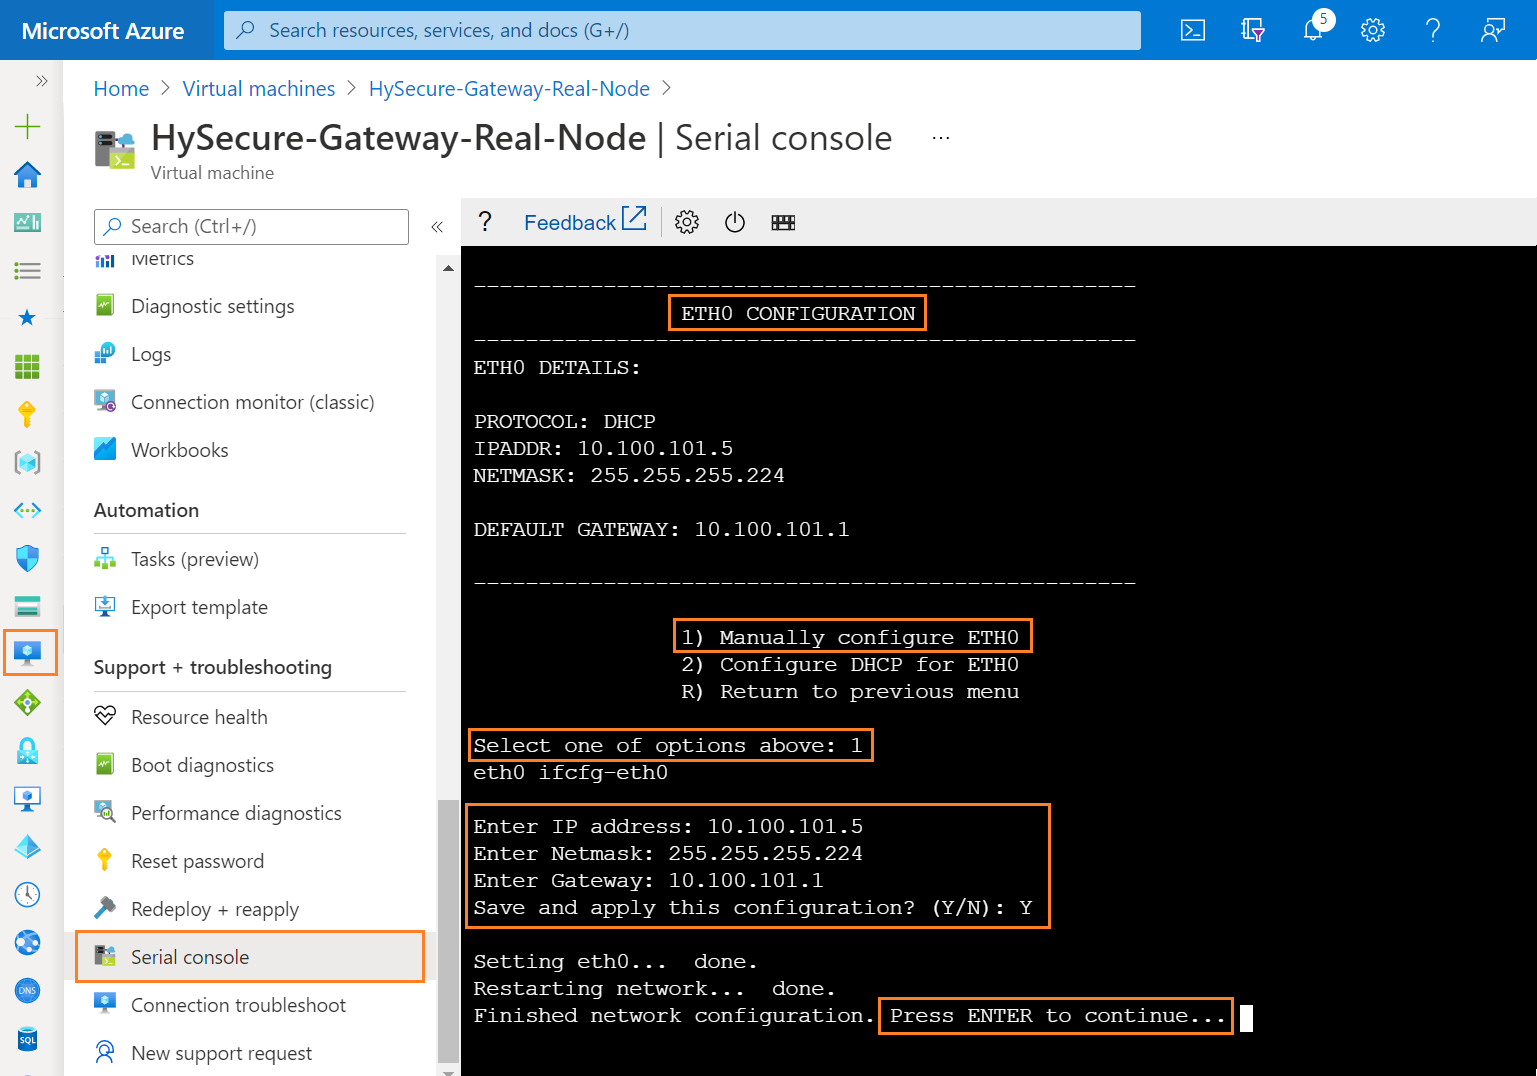
Step 15: Select Manually Configure ETH0, Select one of the option above : 1 and assign Same IP address which is shown in HySecure Serial Console as Static IP Address.
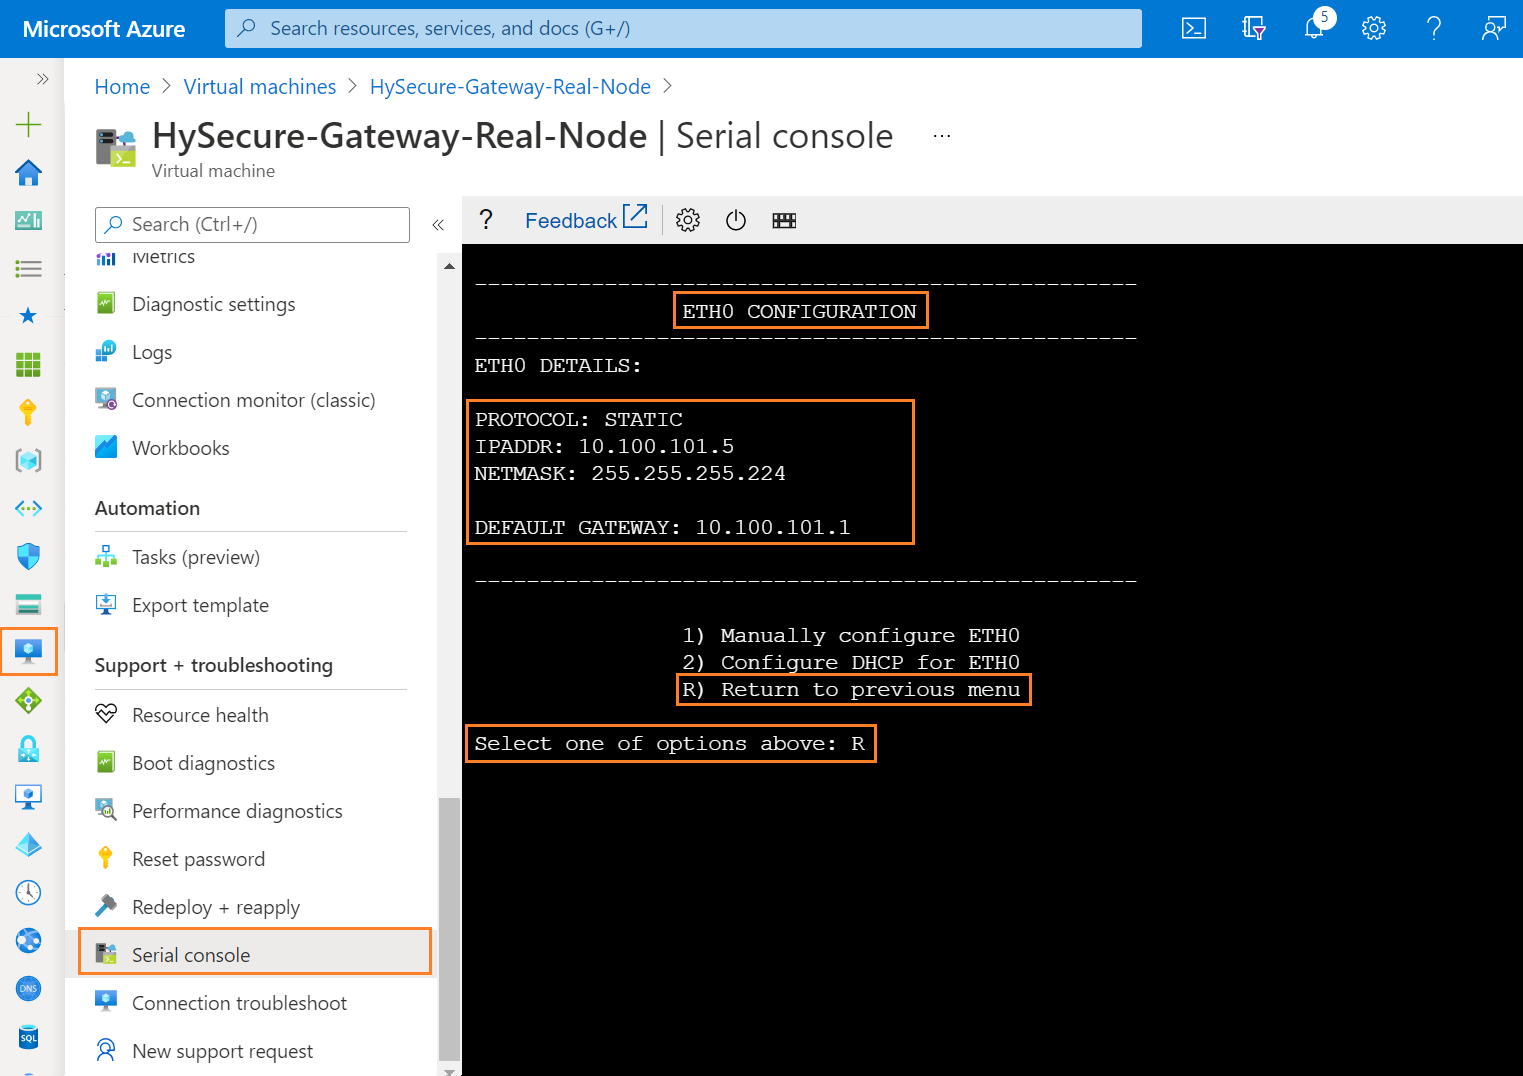
Step 16: Enter R to exit from IP configuration Menu.
Step 17: Enter R to exit from Ethernet Configuration Menu.
Step 18: Enter R to exit from Network Configuration Menu.
Step 19: Enter R to exit from HySecure Console Menu.
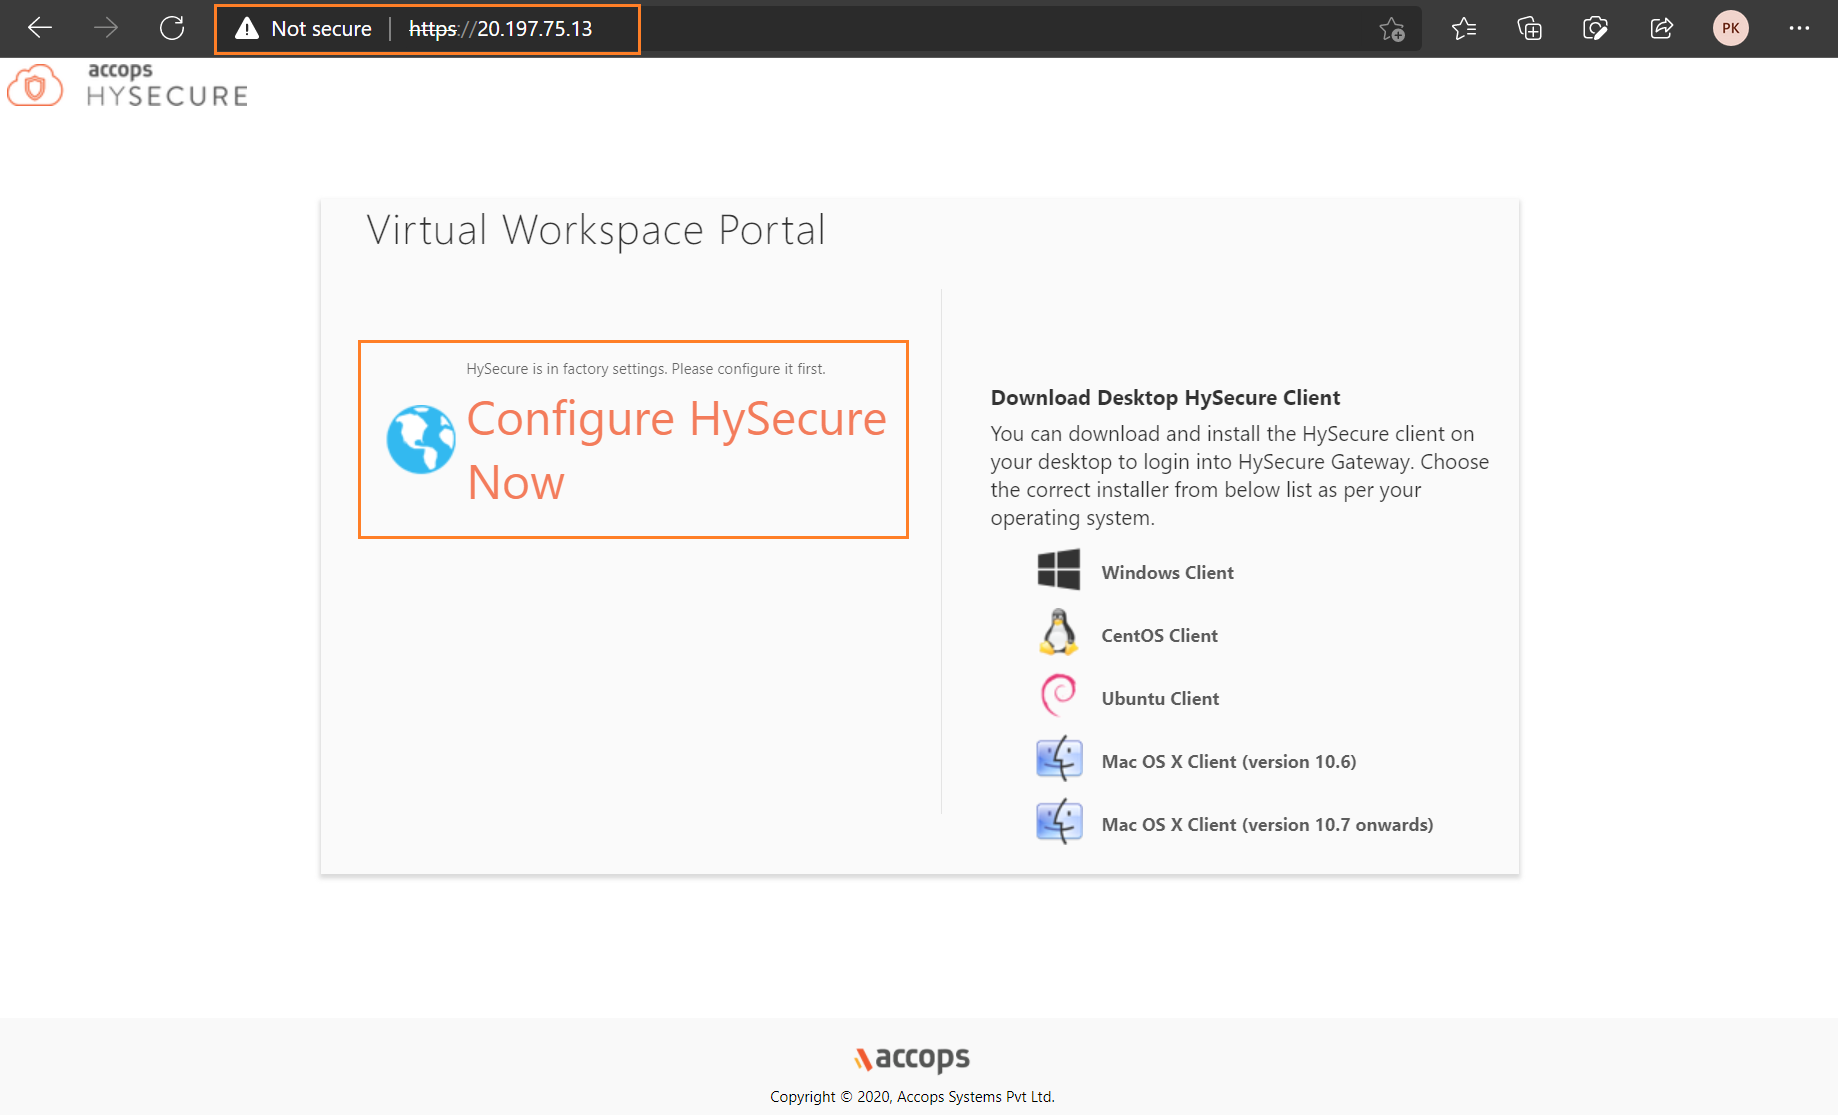
Step 20: Connect HySecure gateway using Public or Private IP from Browser.
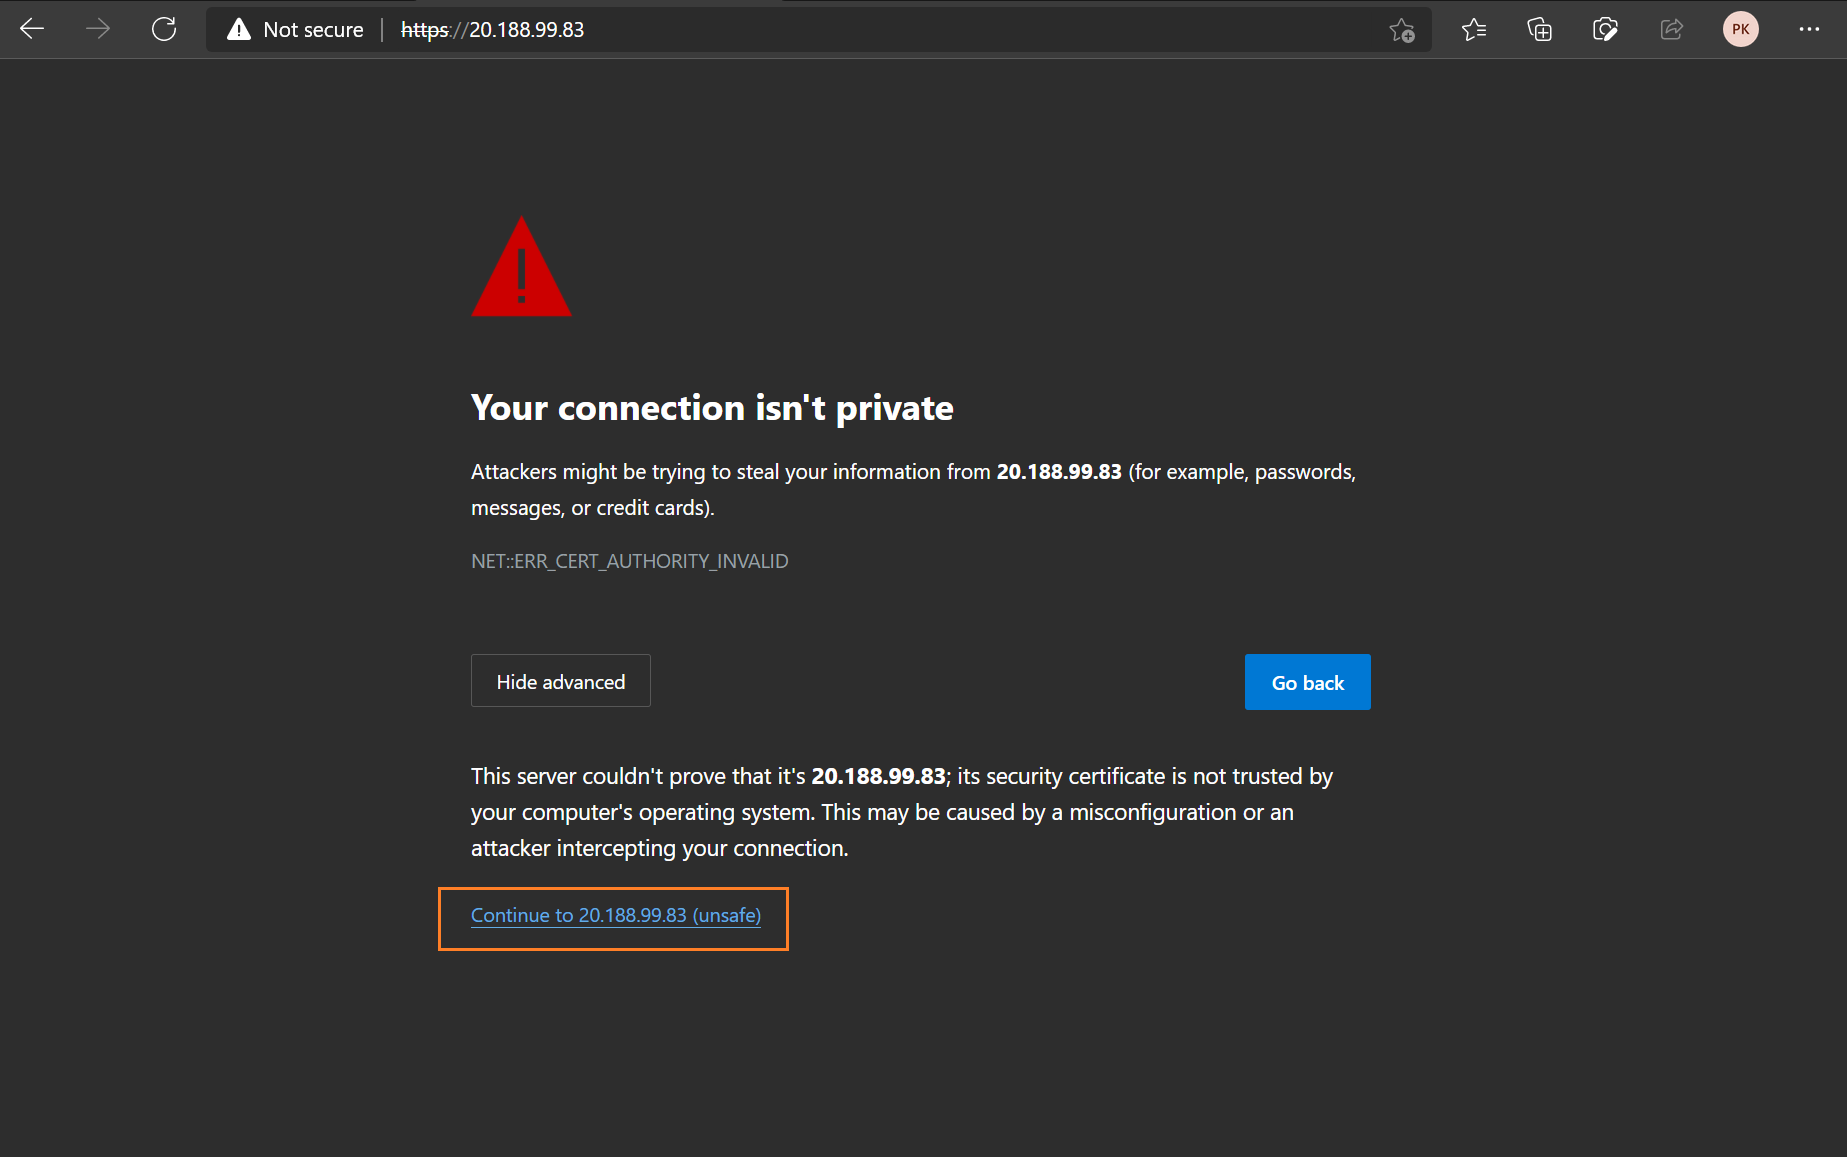
Step 21: Ignore Certificate error and Click on Continue to ....
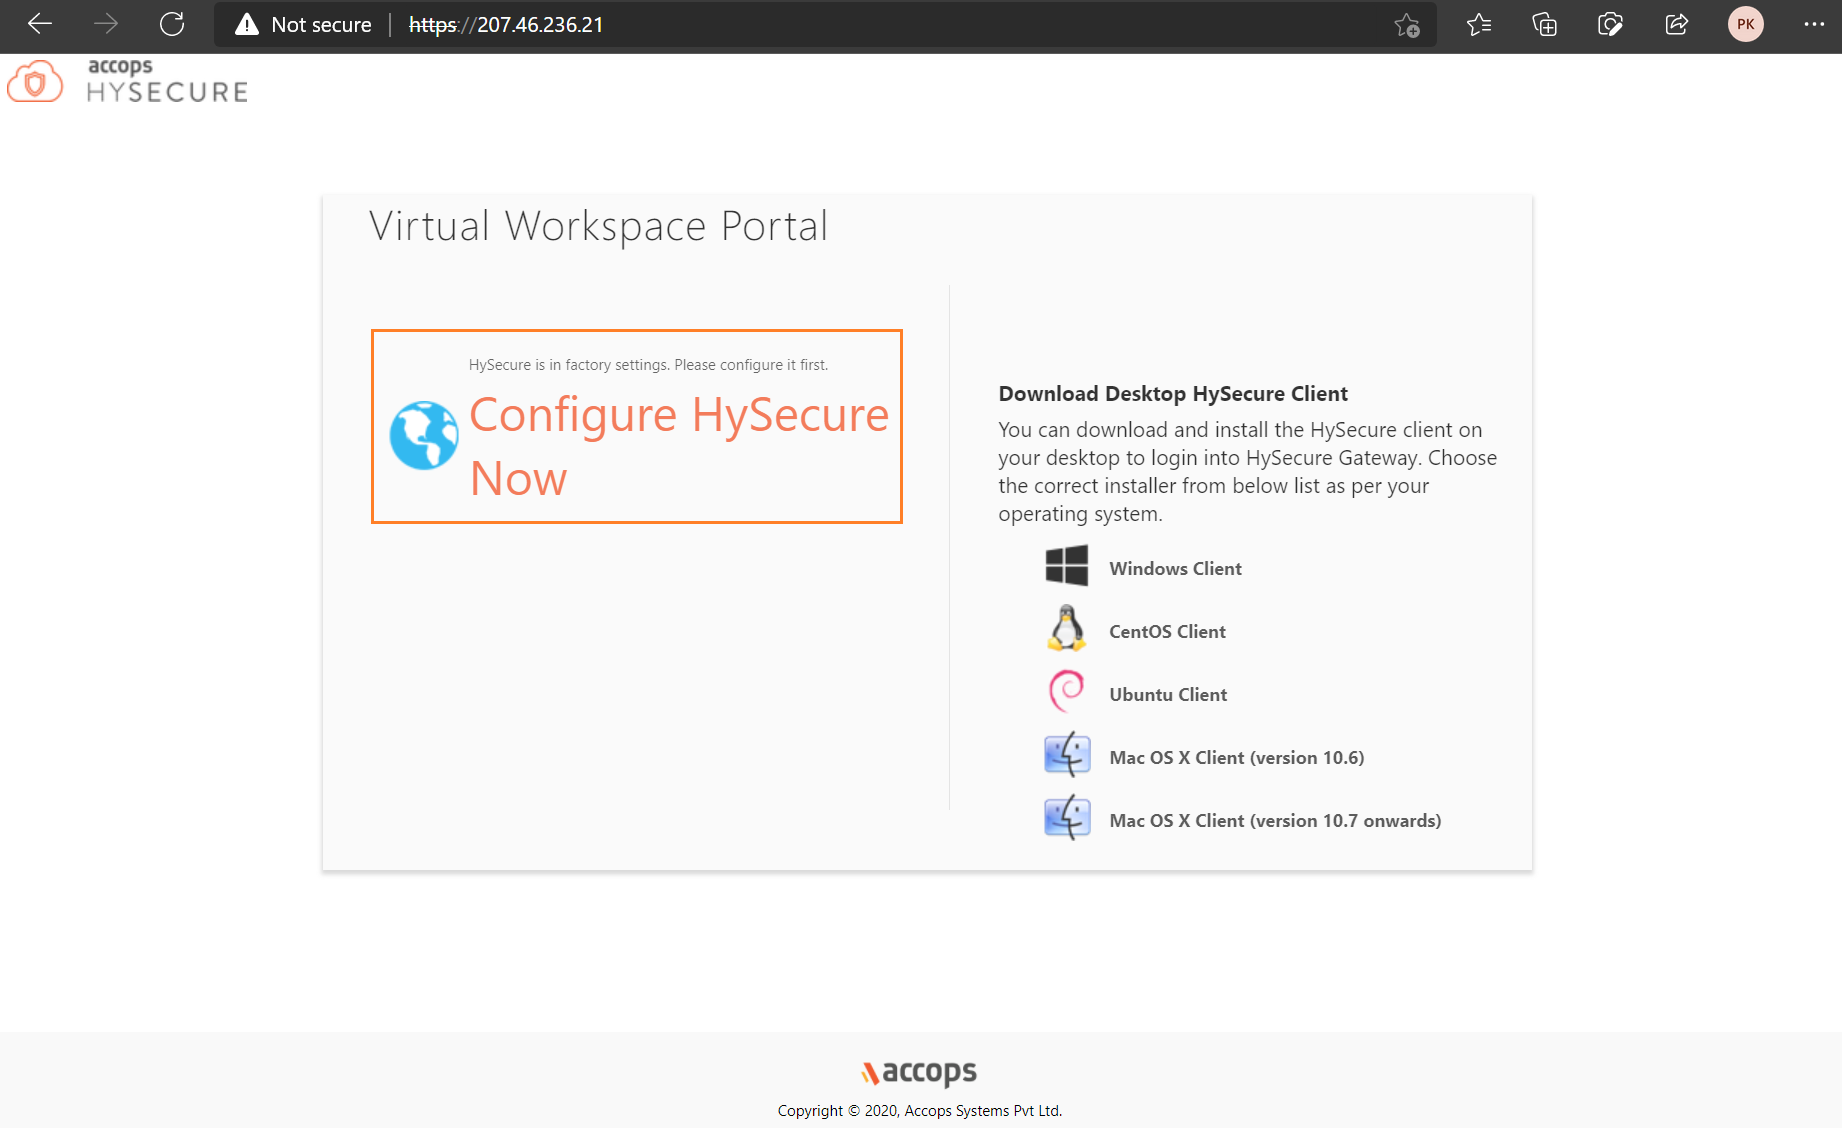
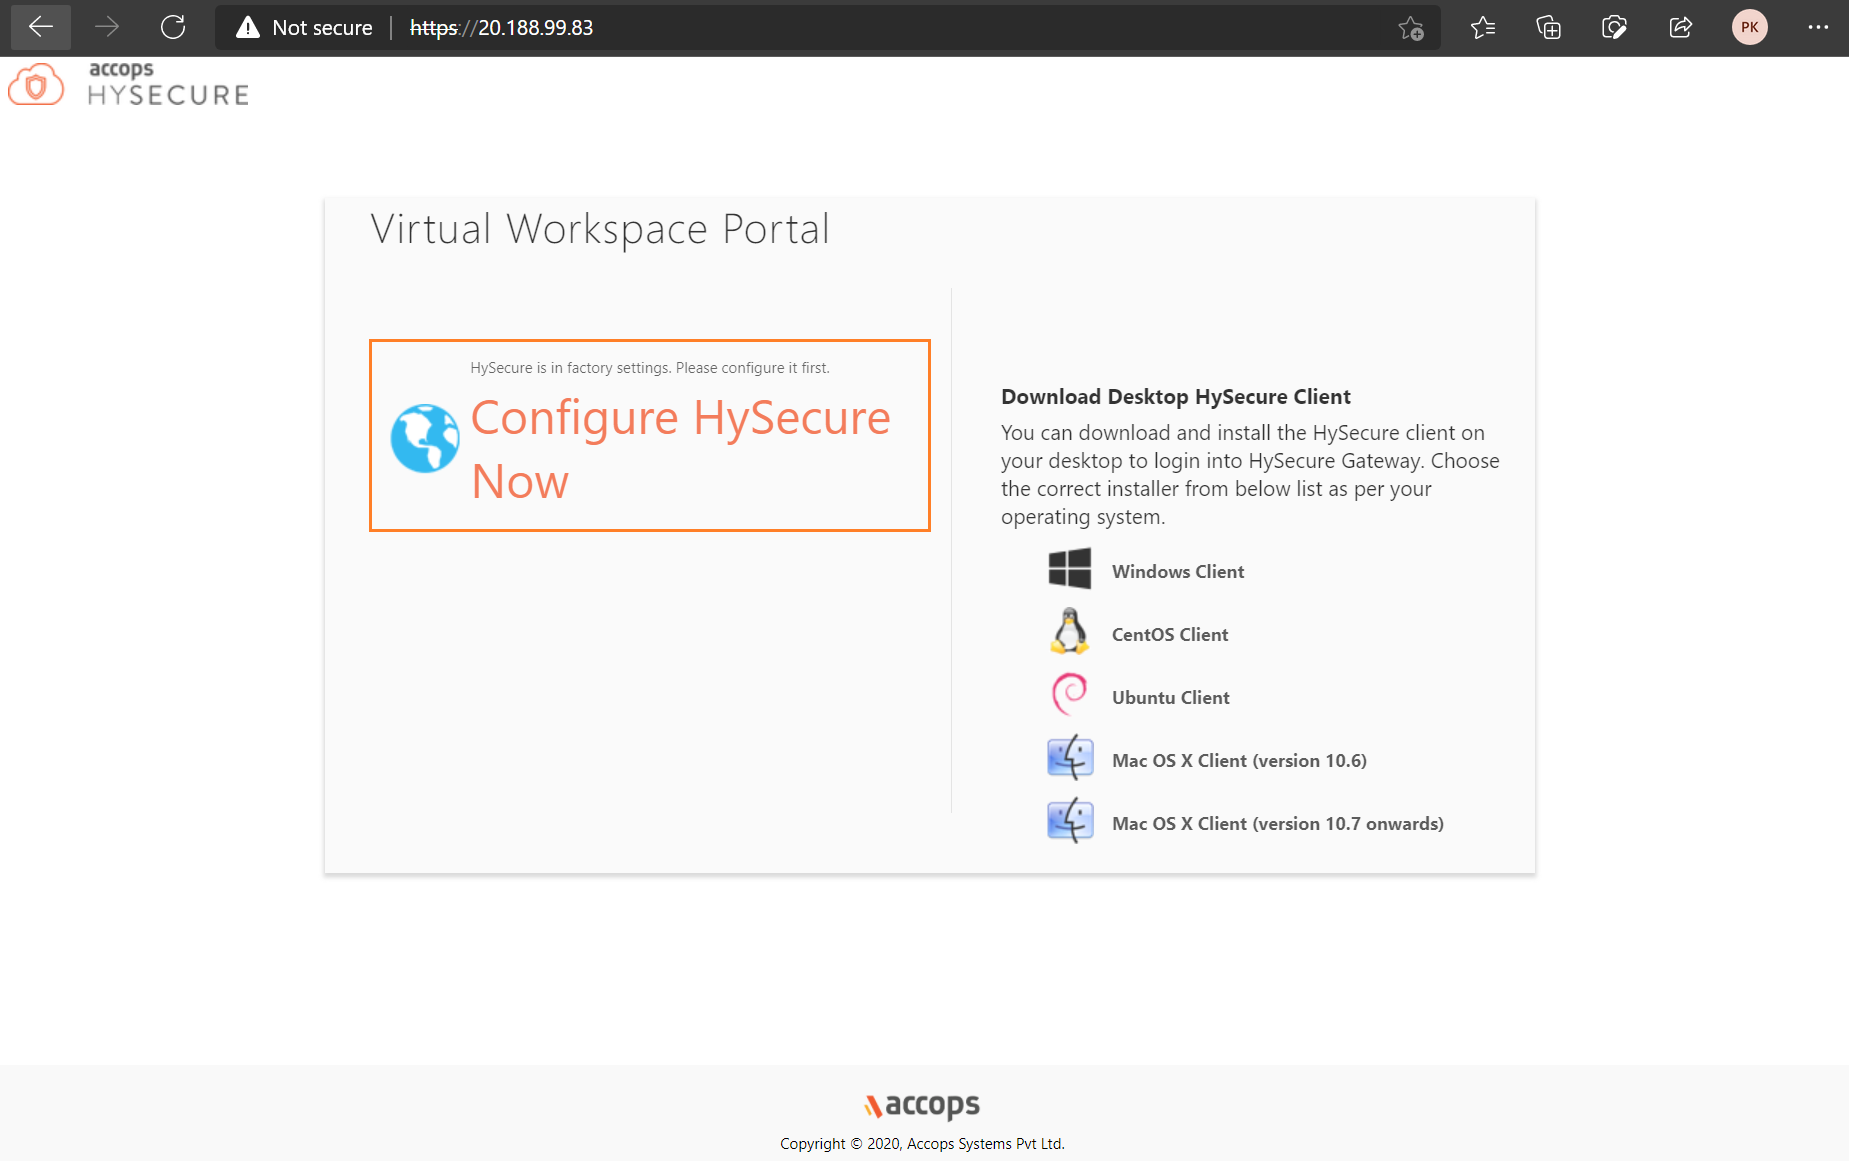
Step 22: Select Configure HySecure Now.
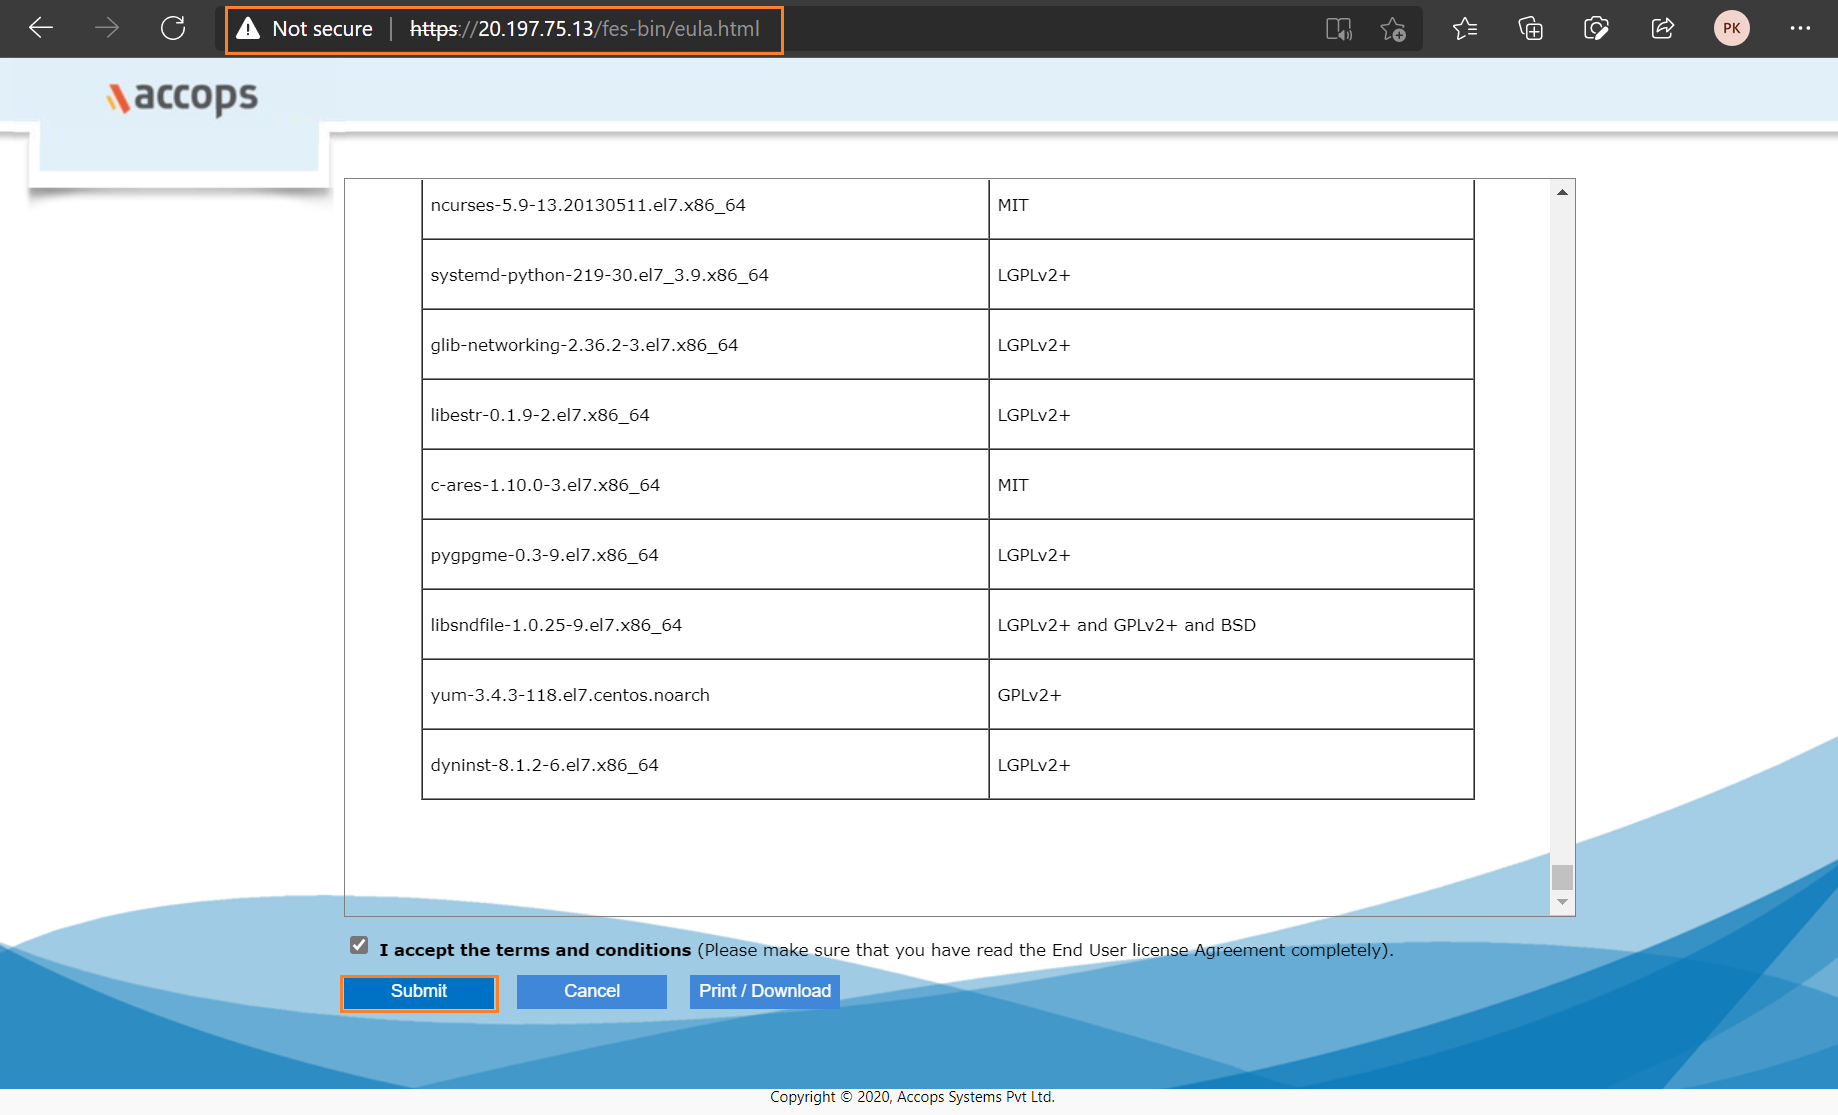
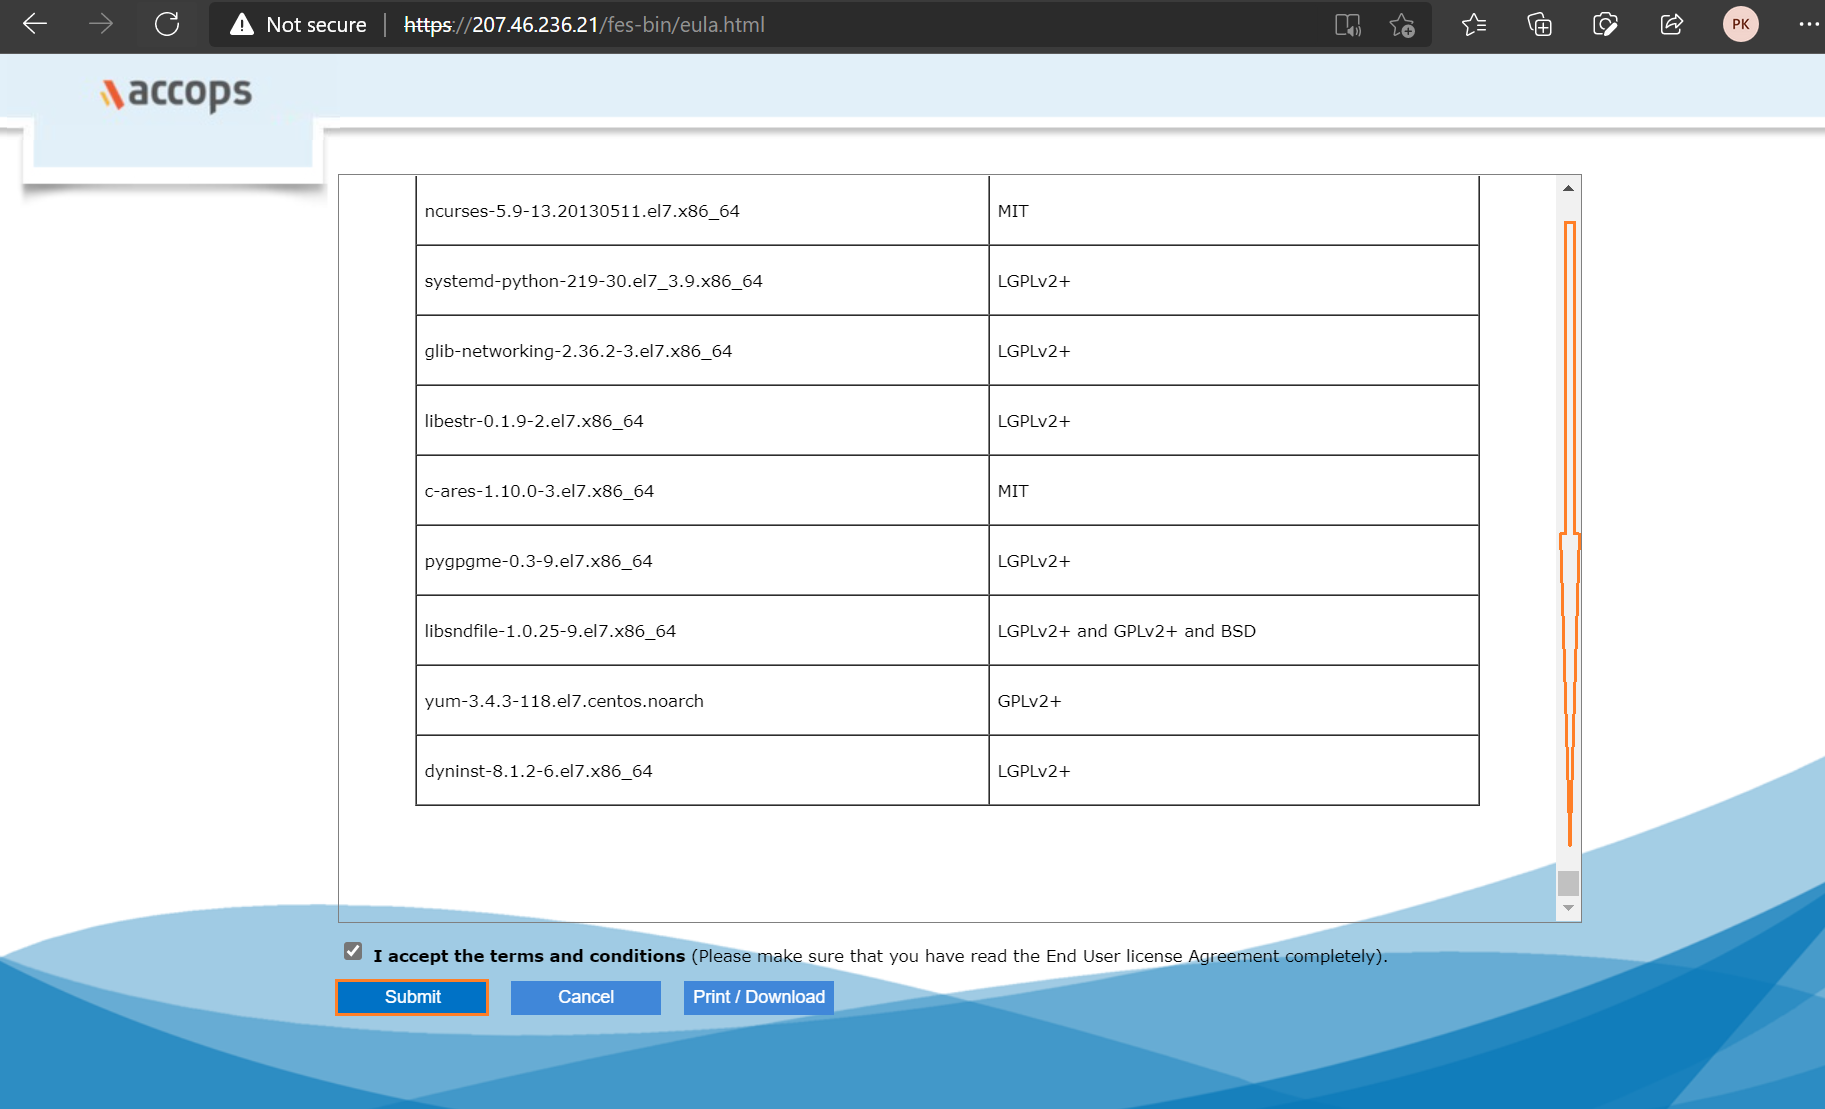
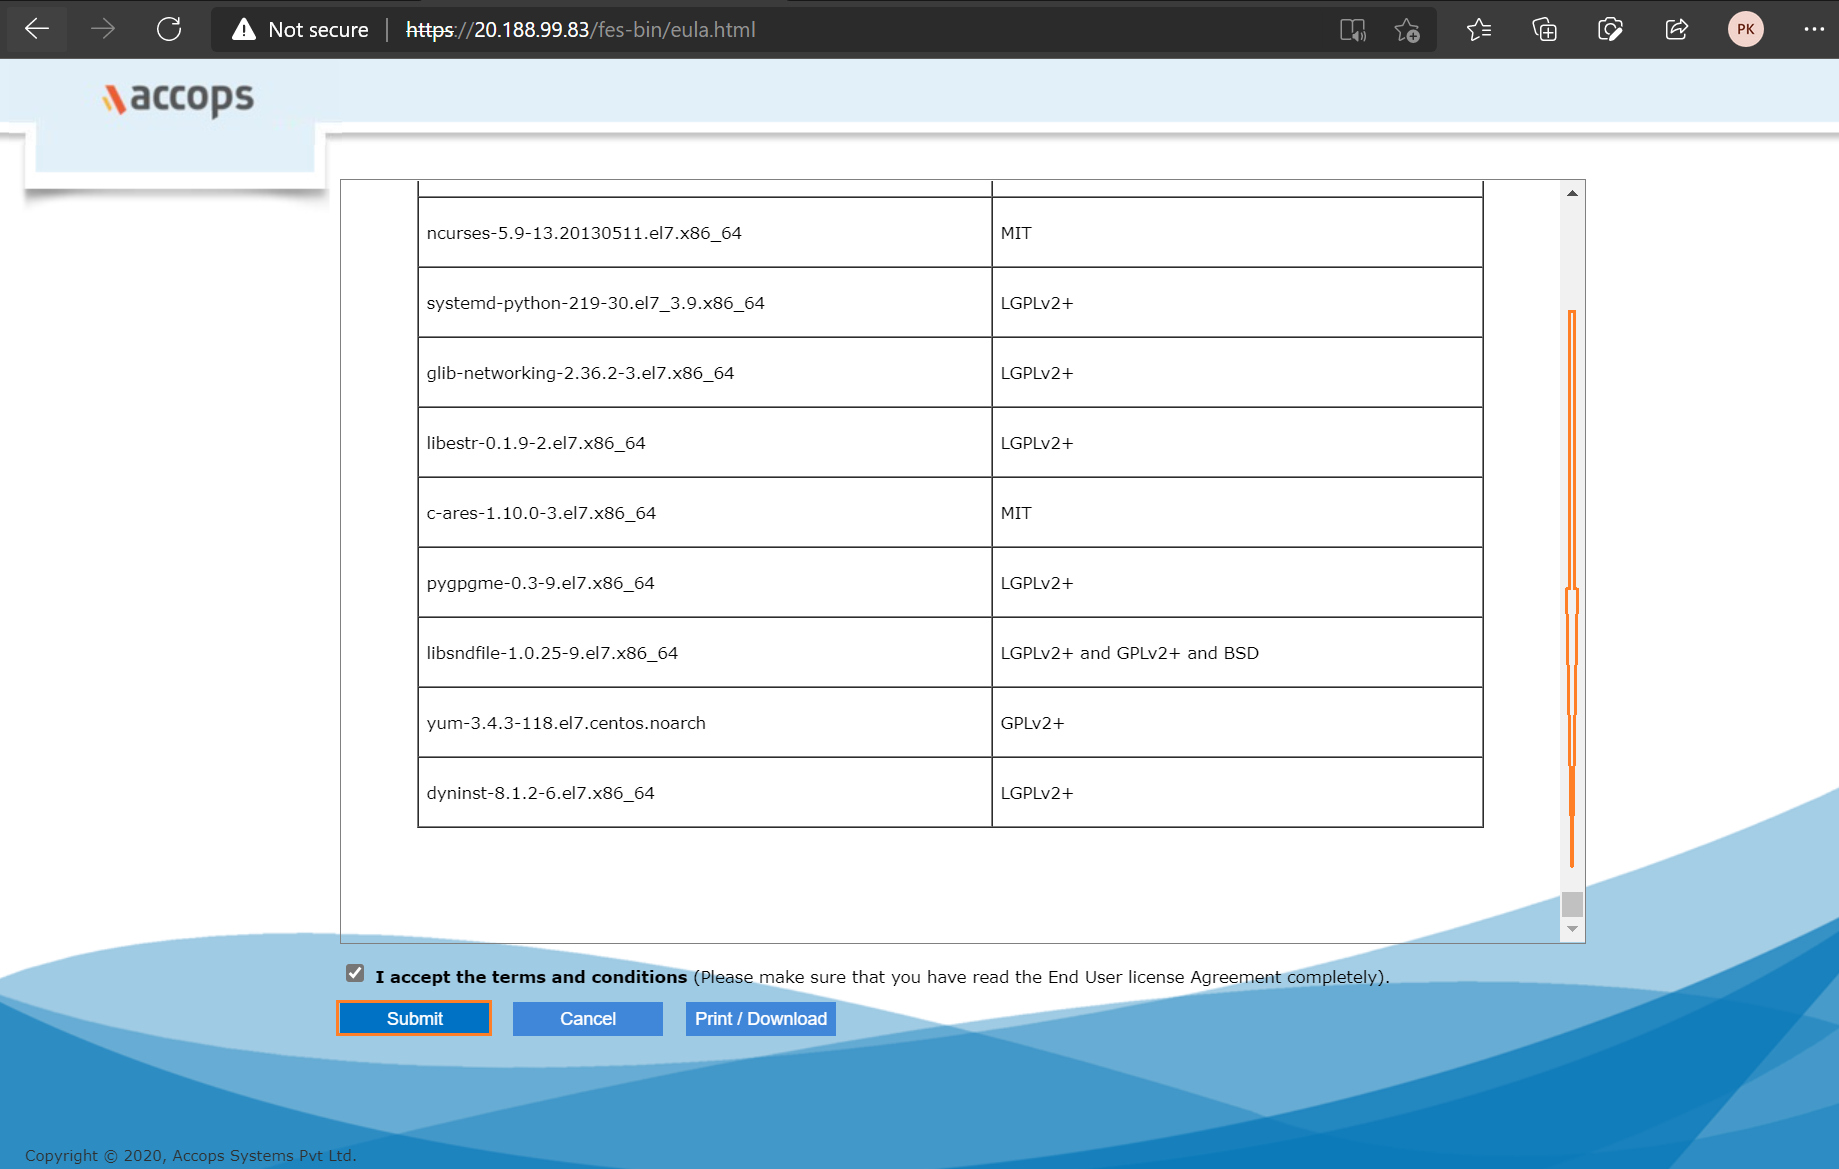
Step 23: Scroll down End User License Agreement and Select I Accept Tnc then Click on Submit.
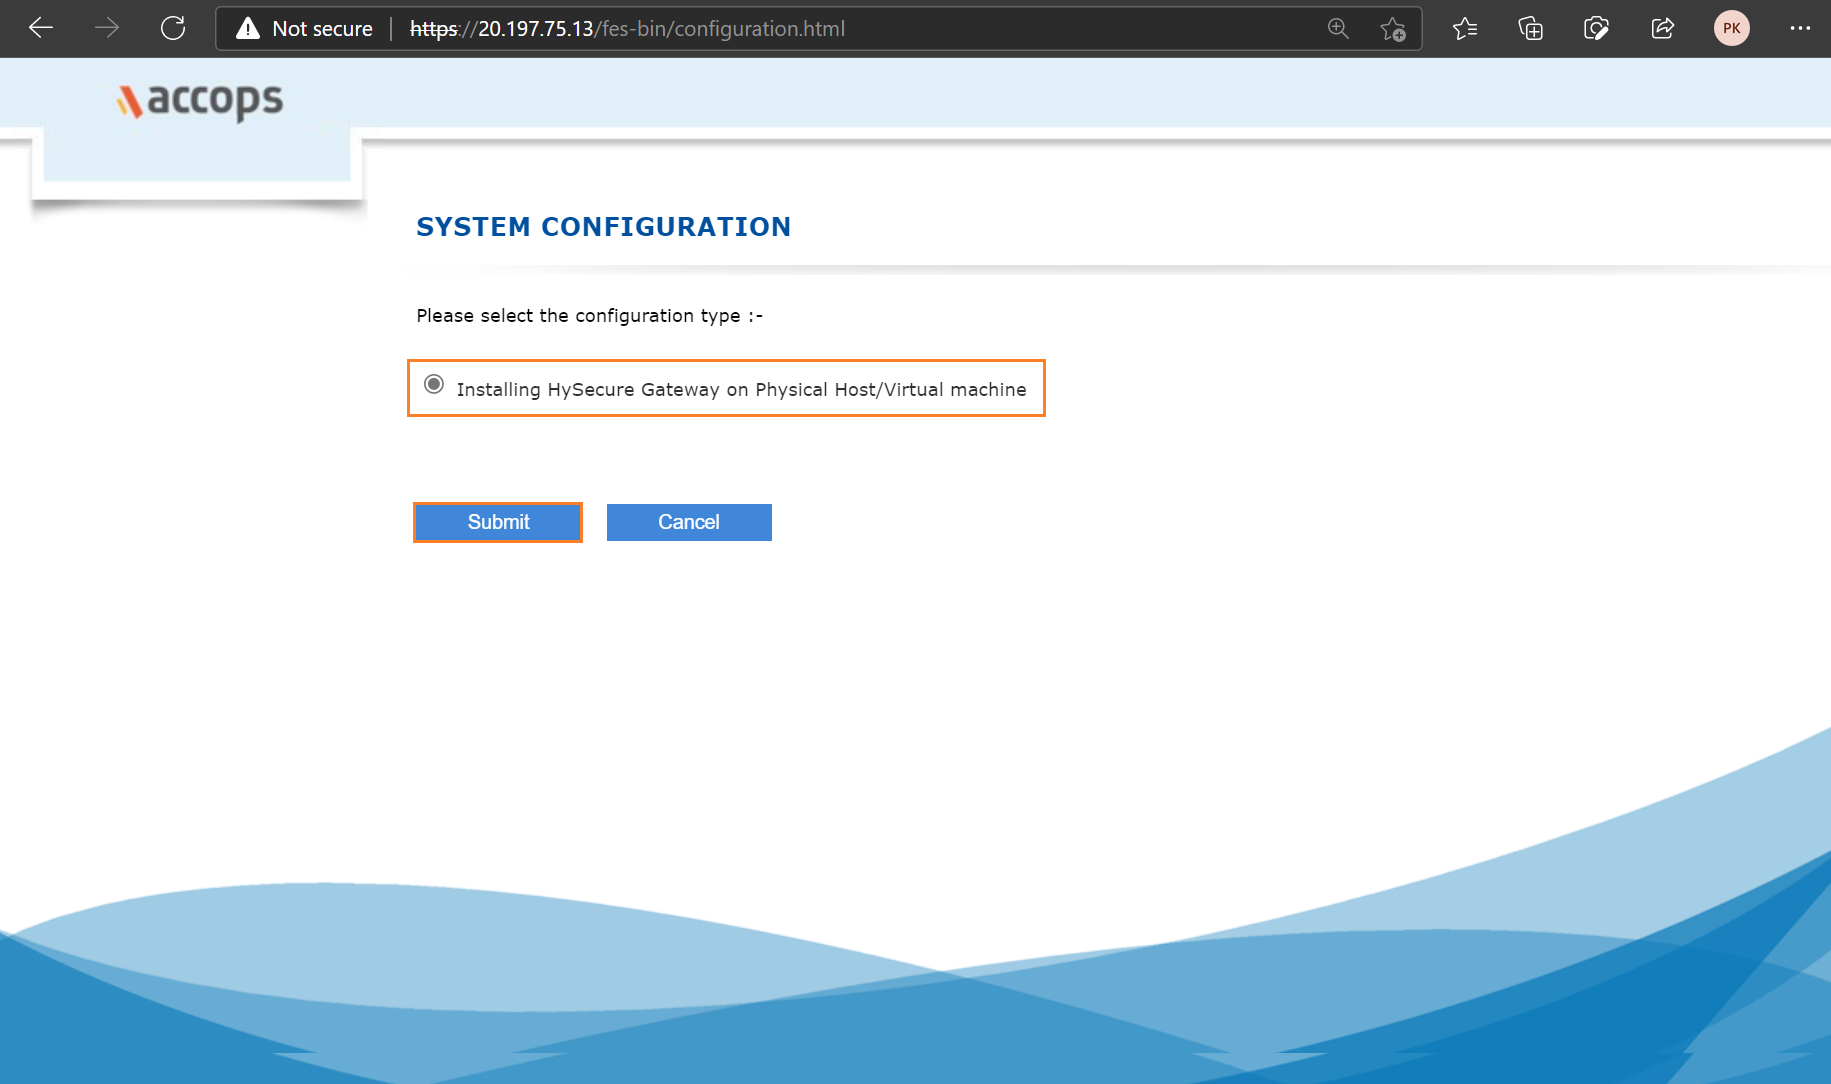
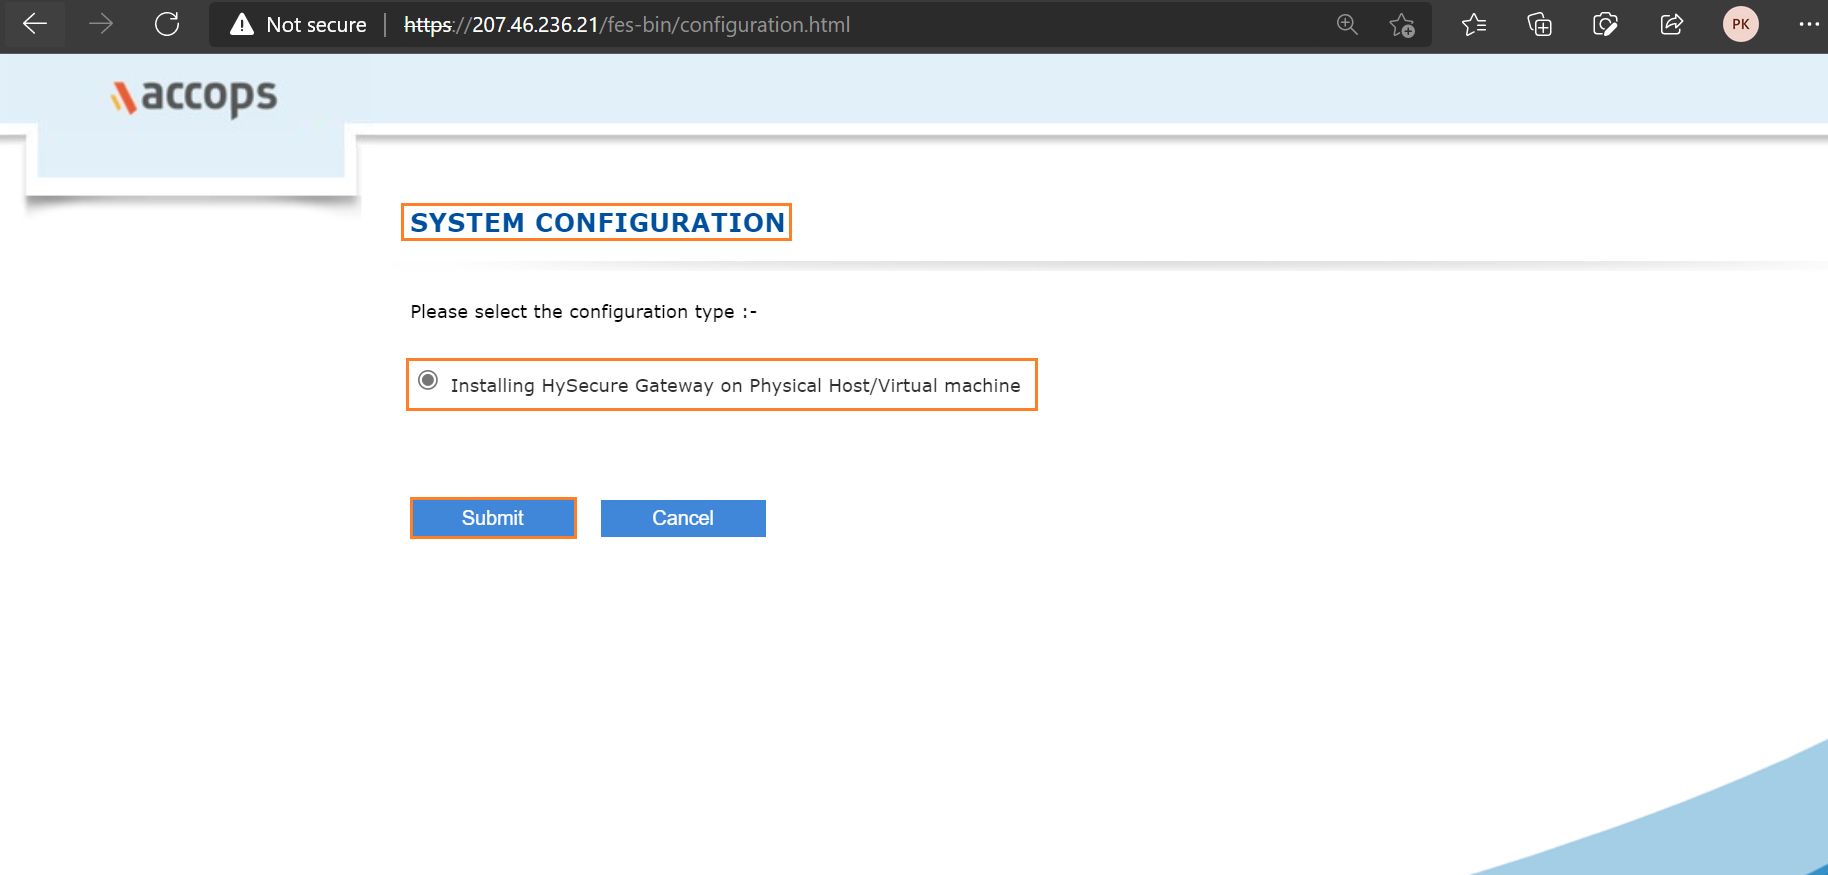
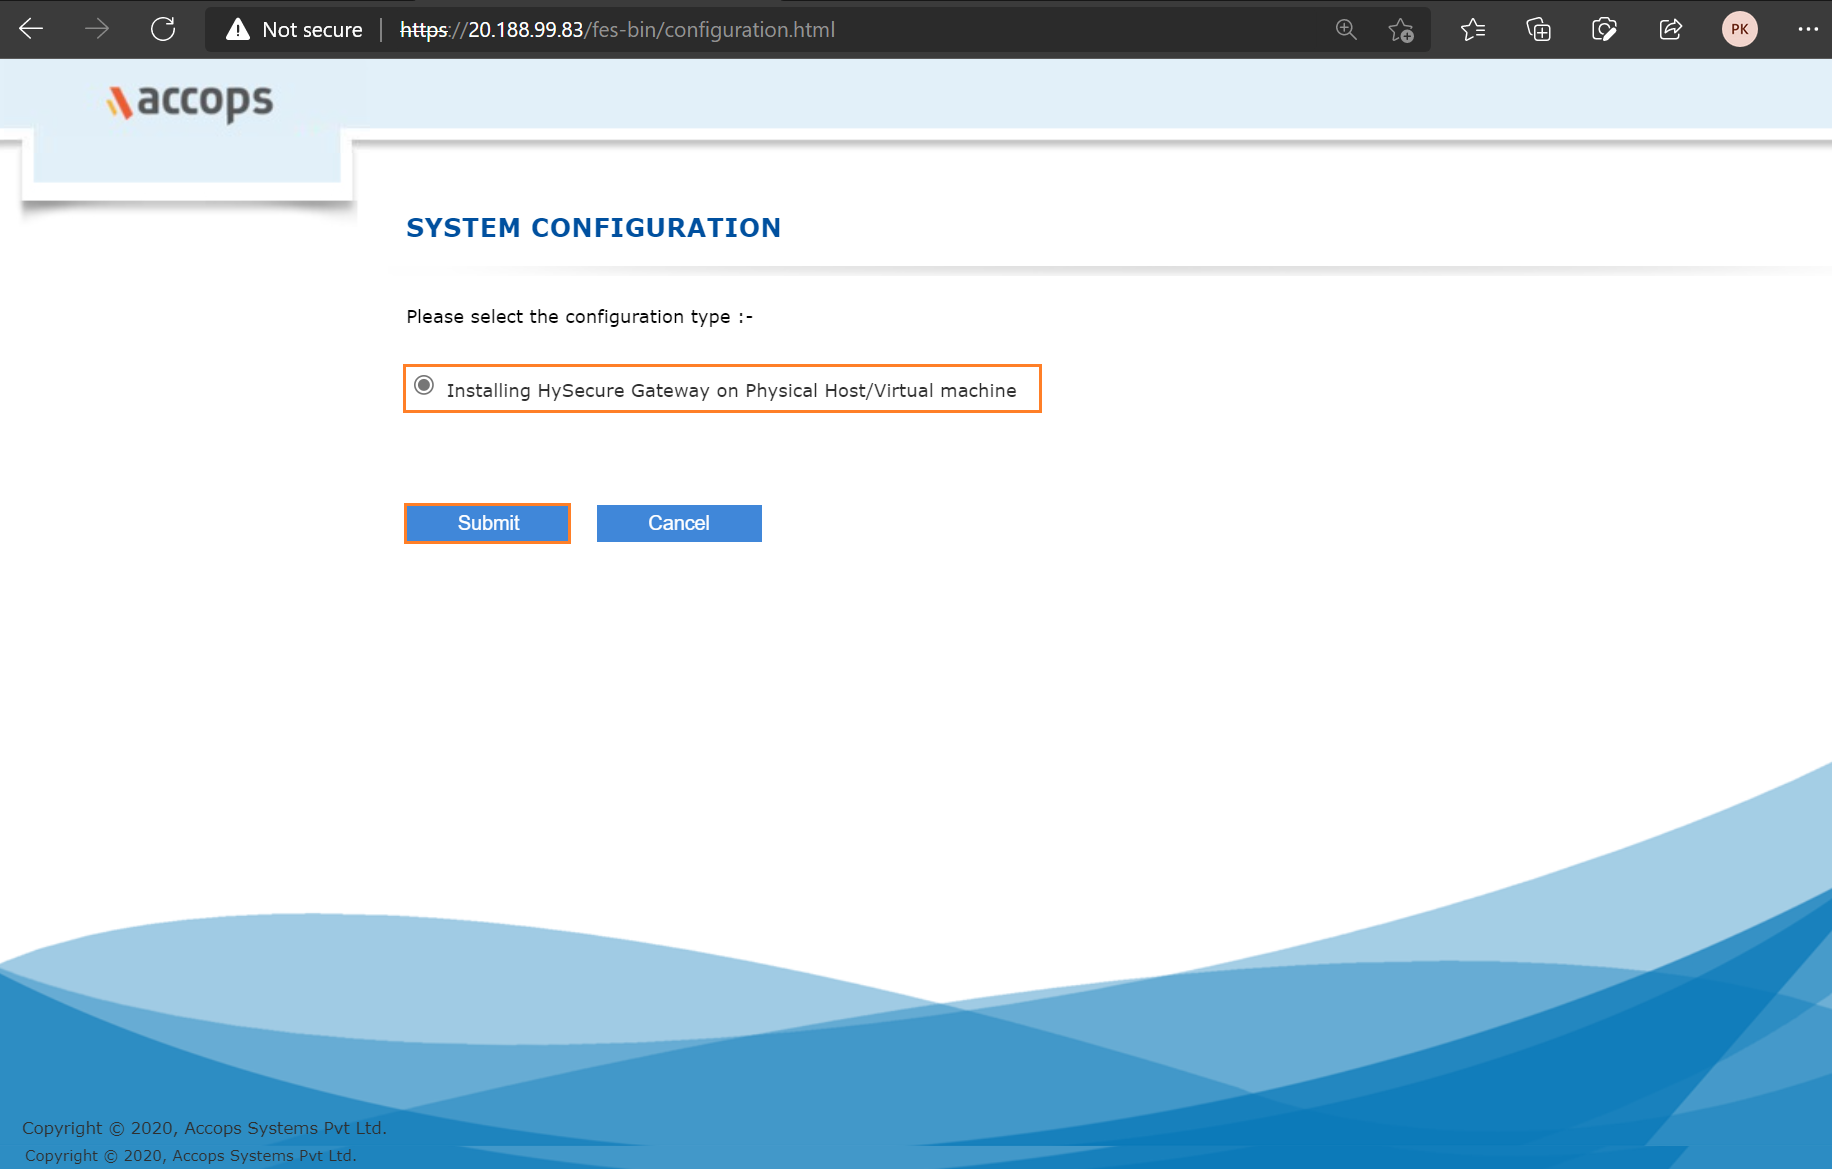
Step 24: Select Preboot Type and then click on Submit.
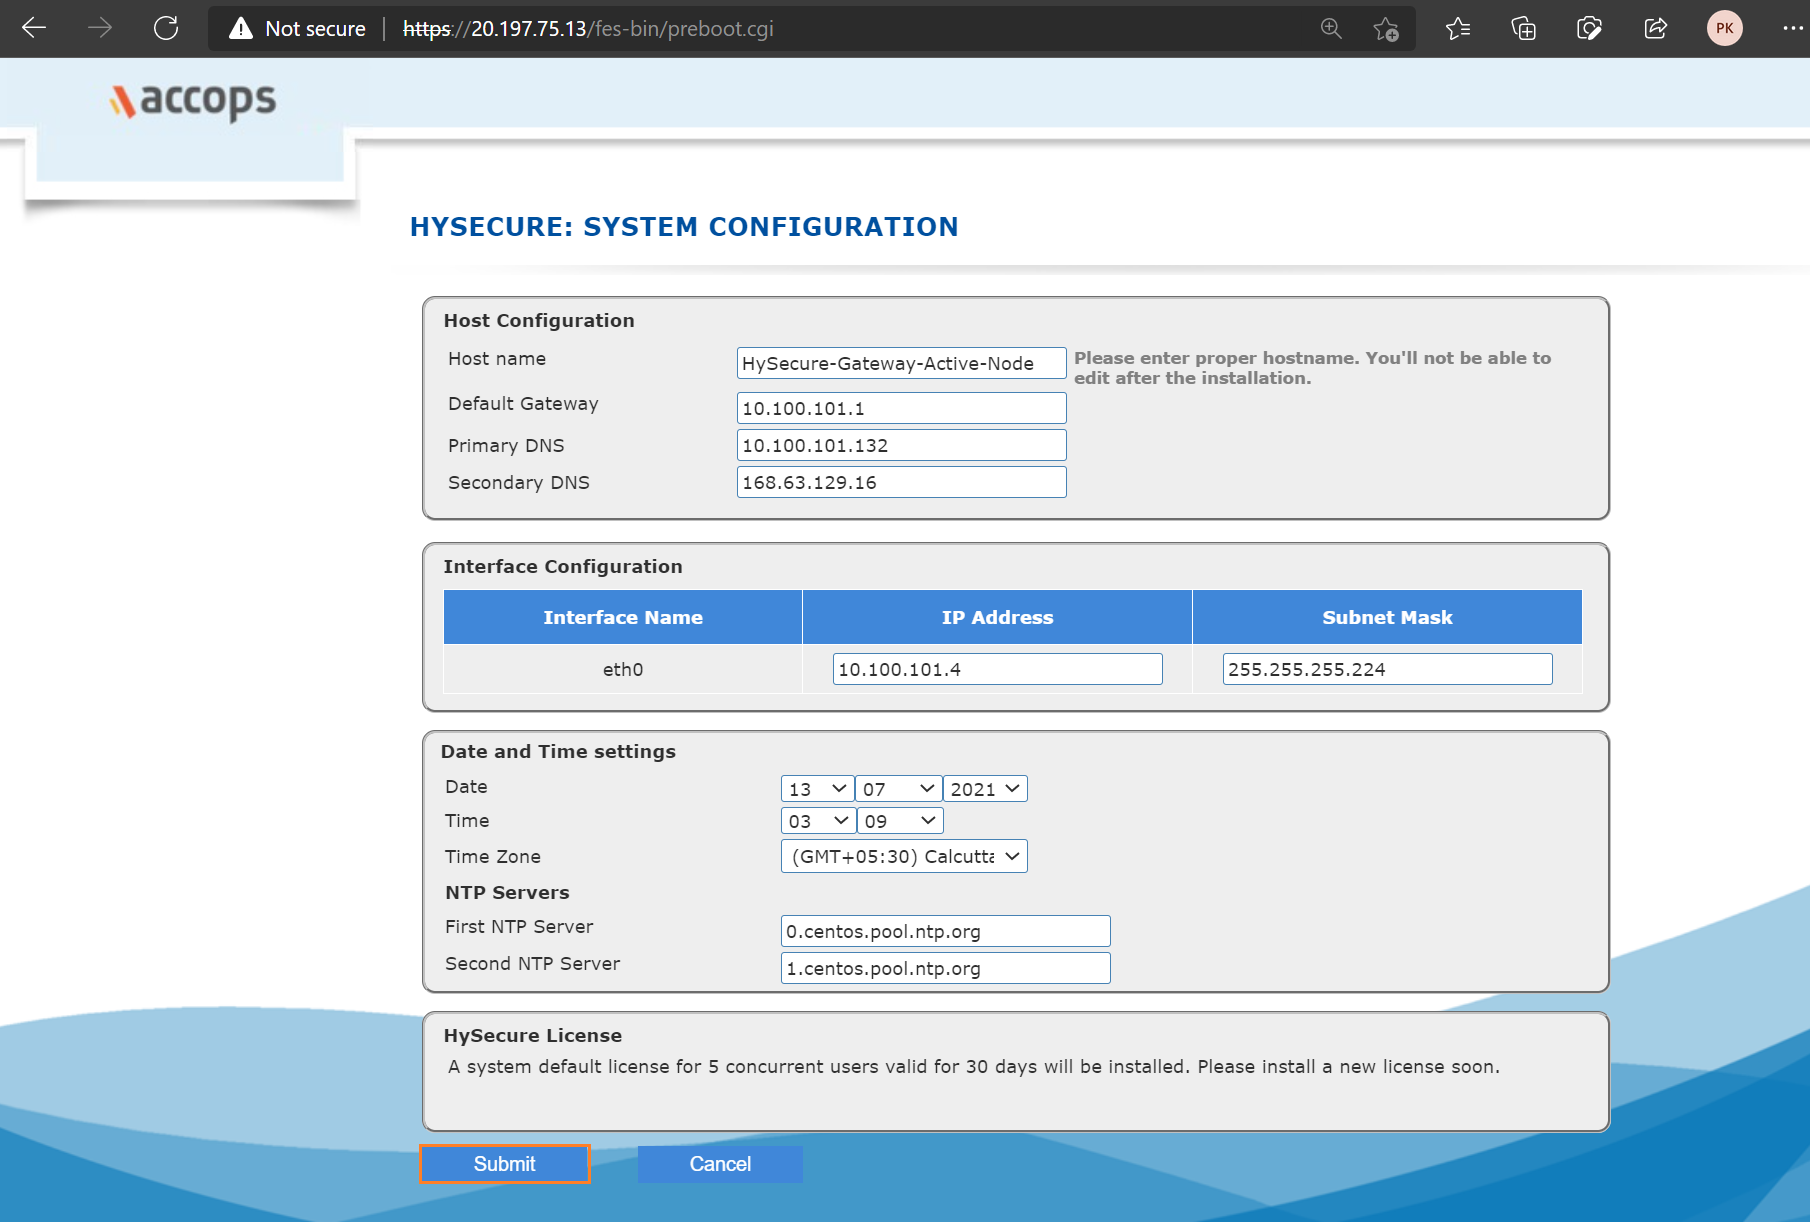
Step 25: Change Hostname, Keep IP address Default, Update Date and Time select Timezone, and then click on Submit.
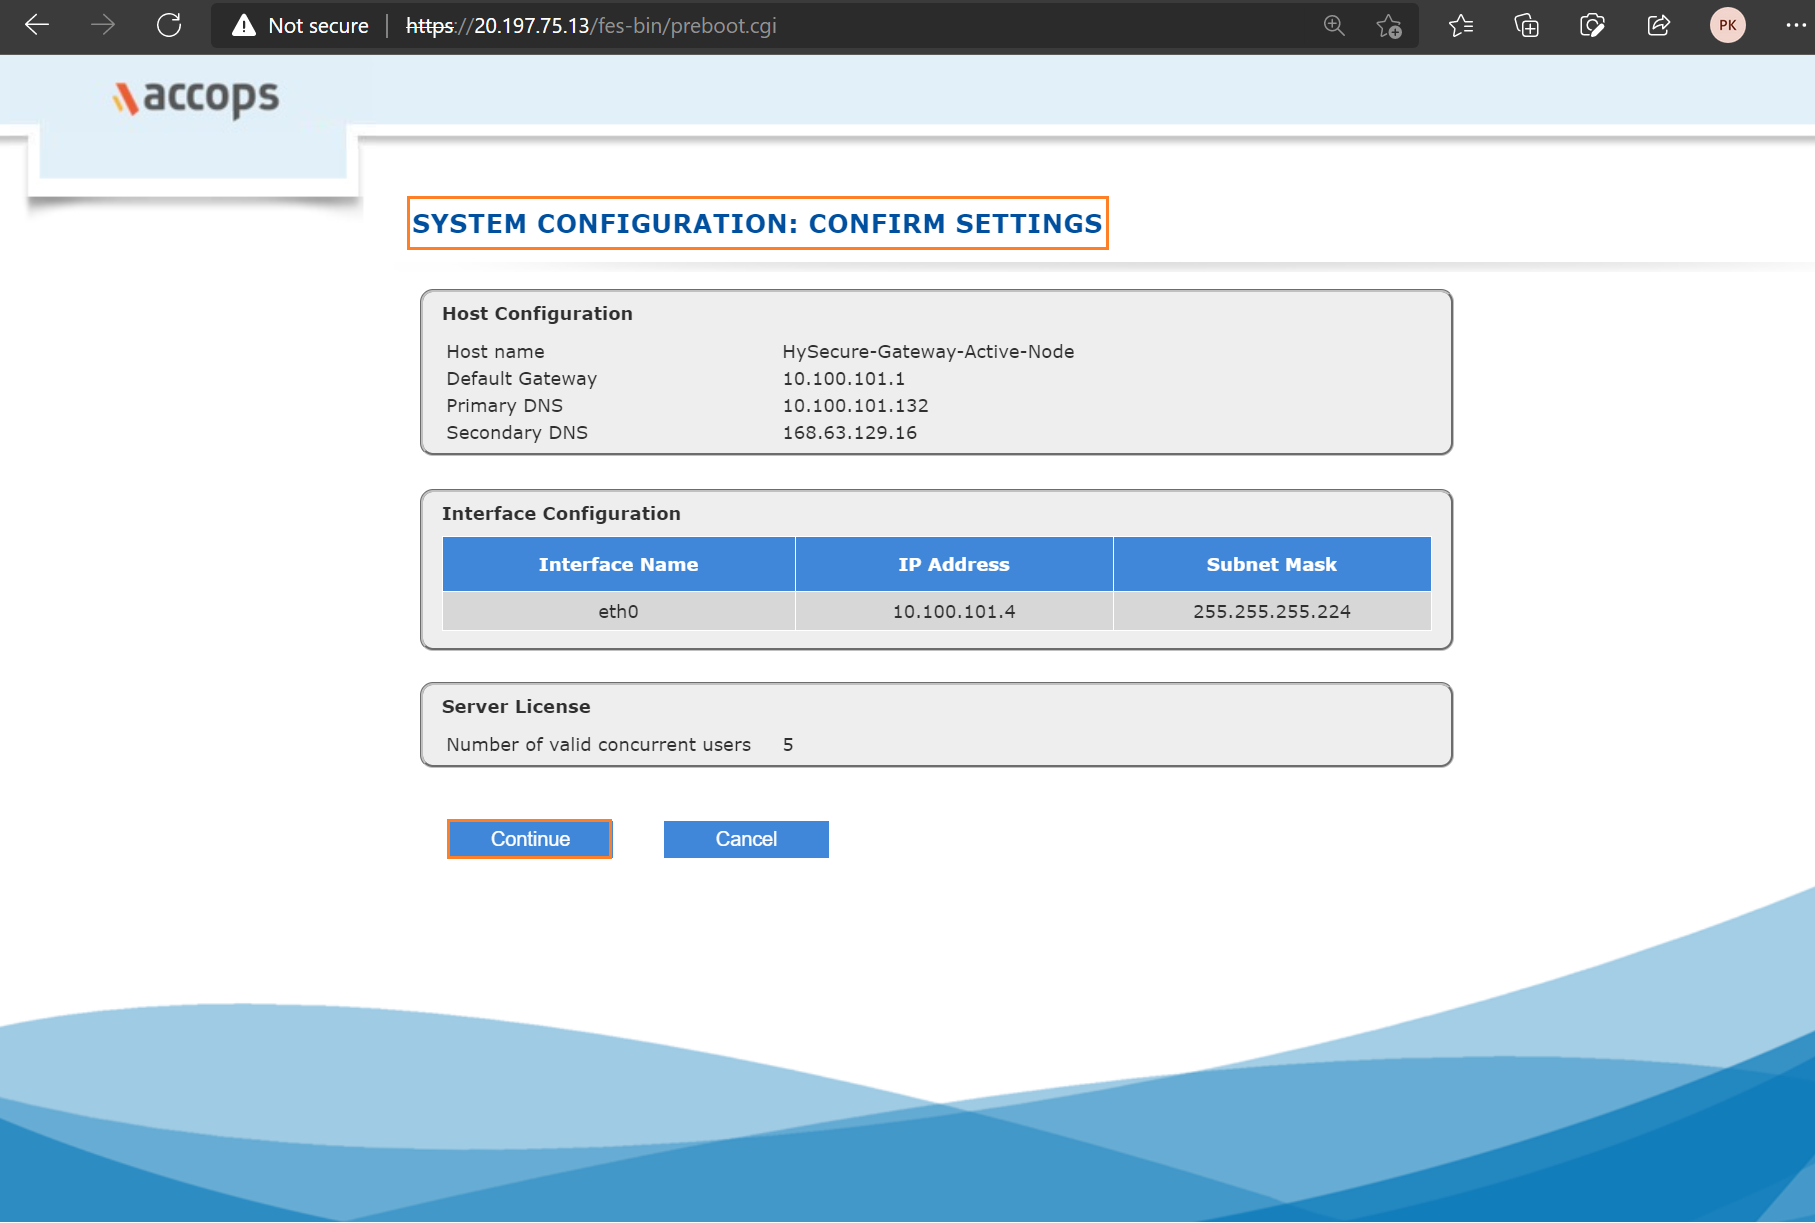
Step 26: Review Hostname, IP address and Interface Configuration and then click on Submit.
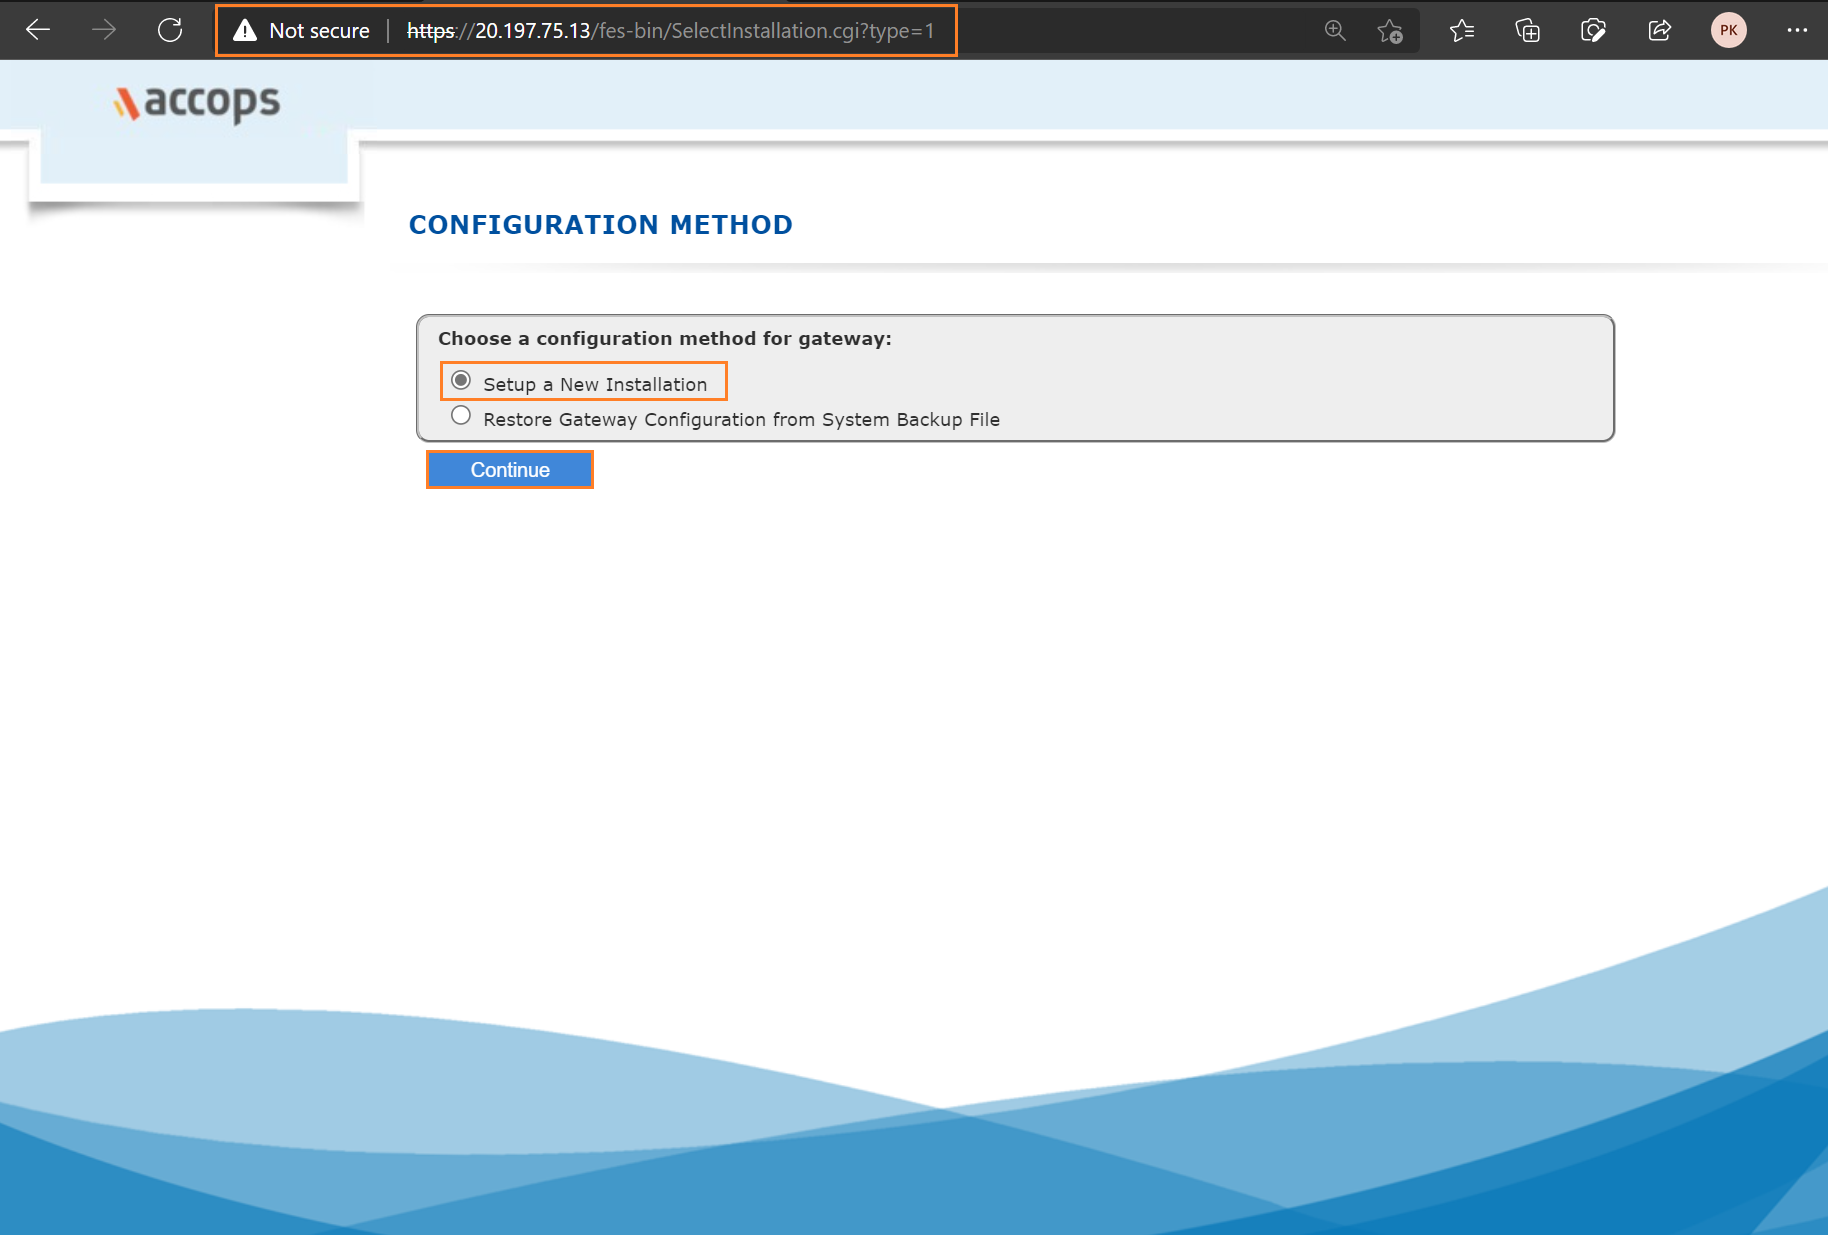
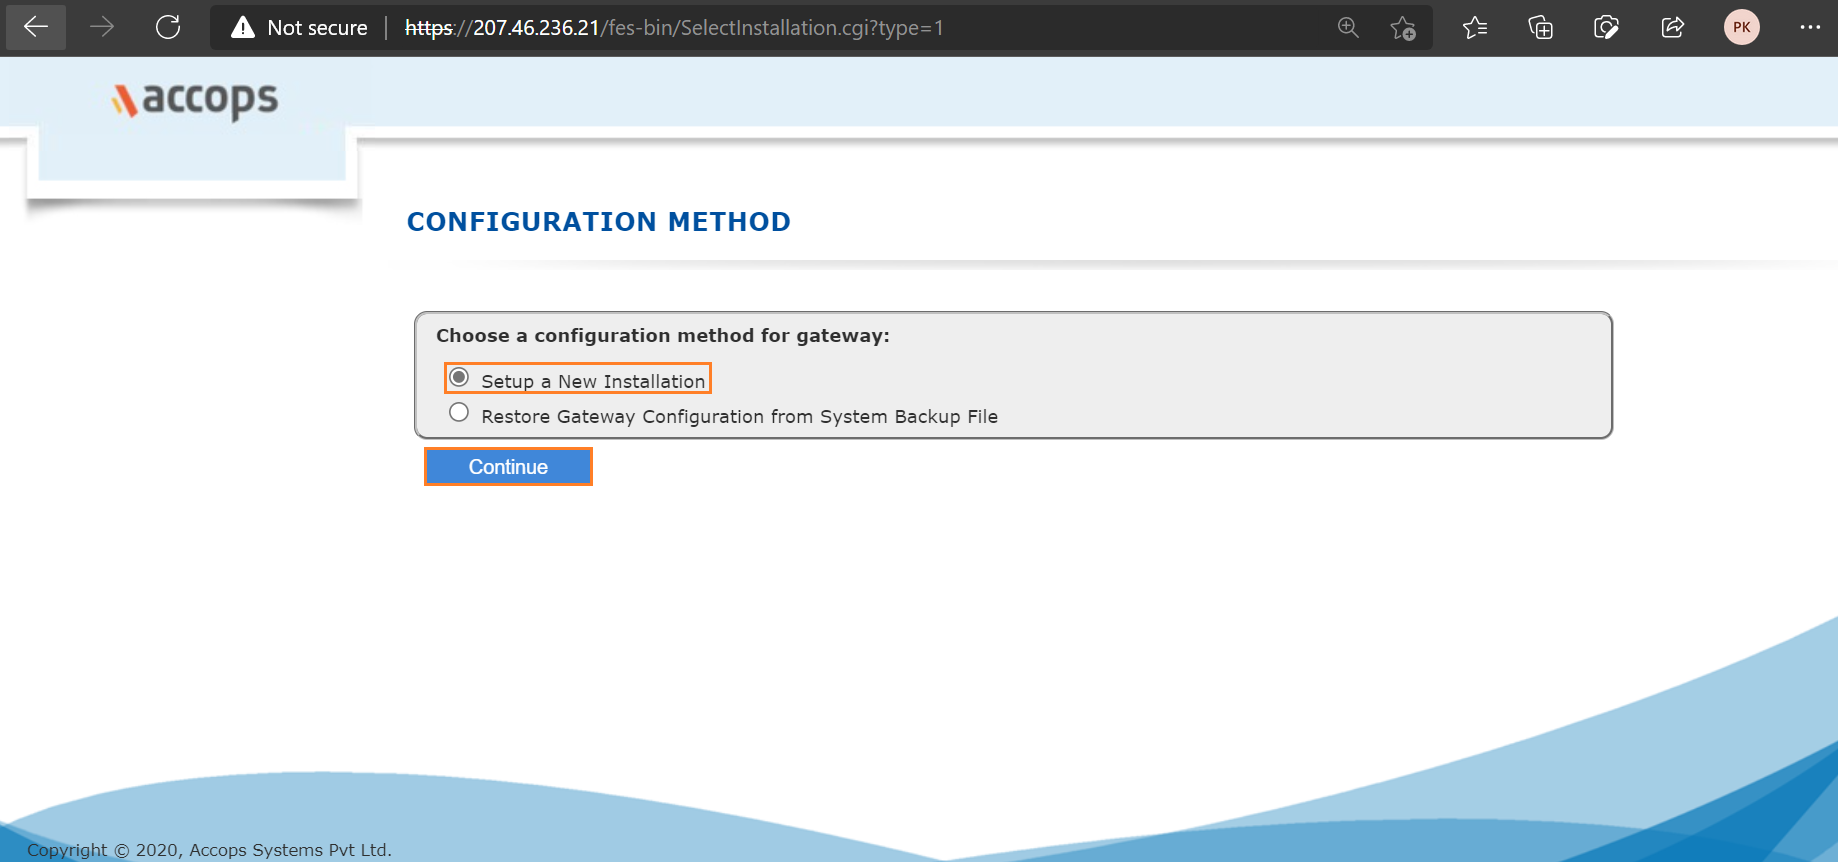
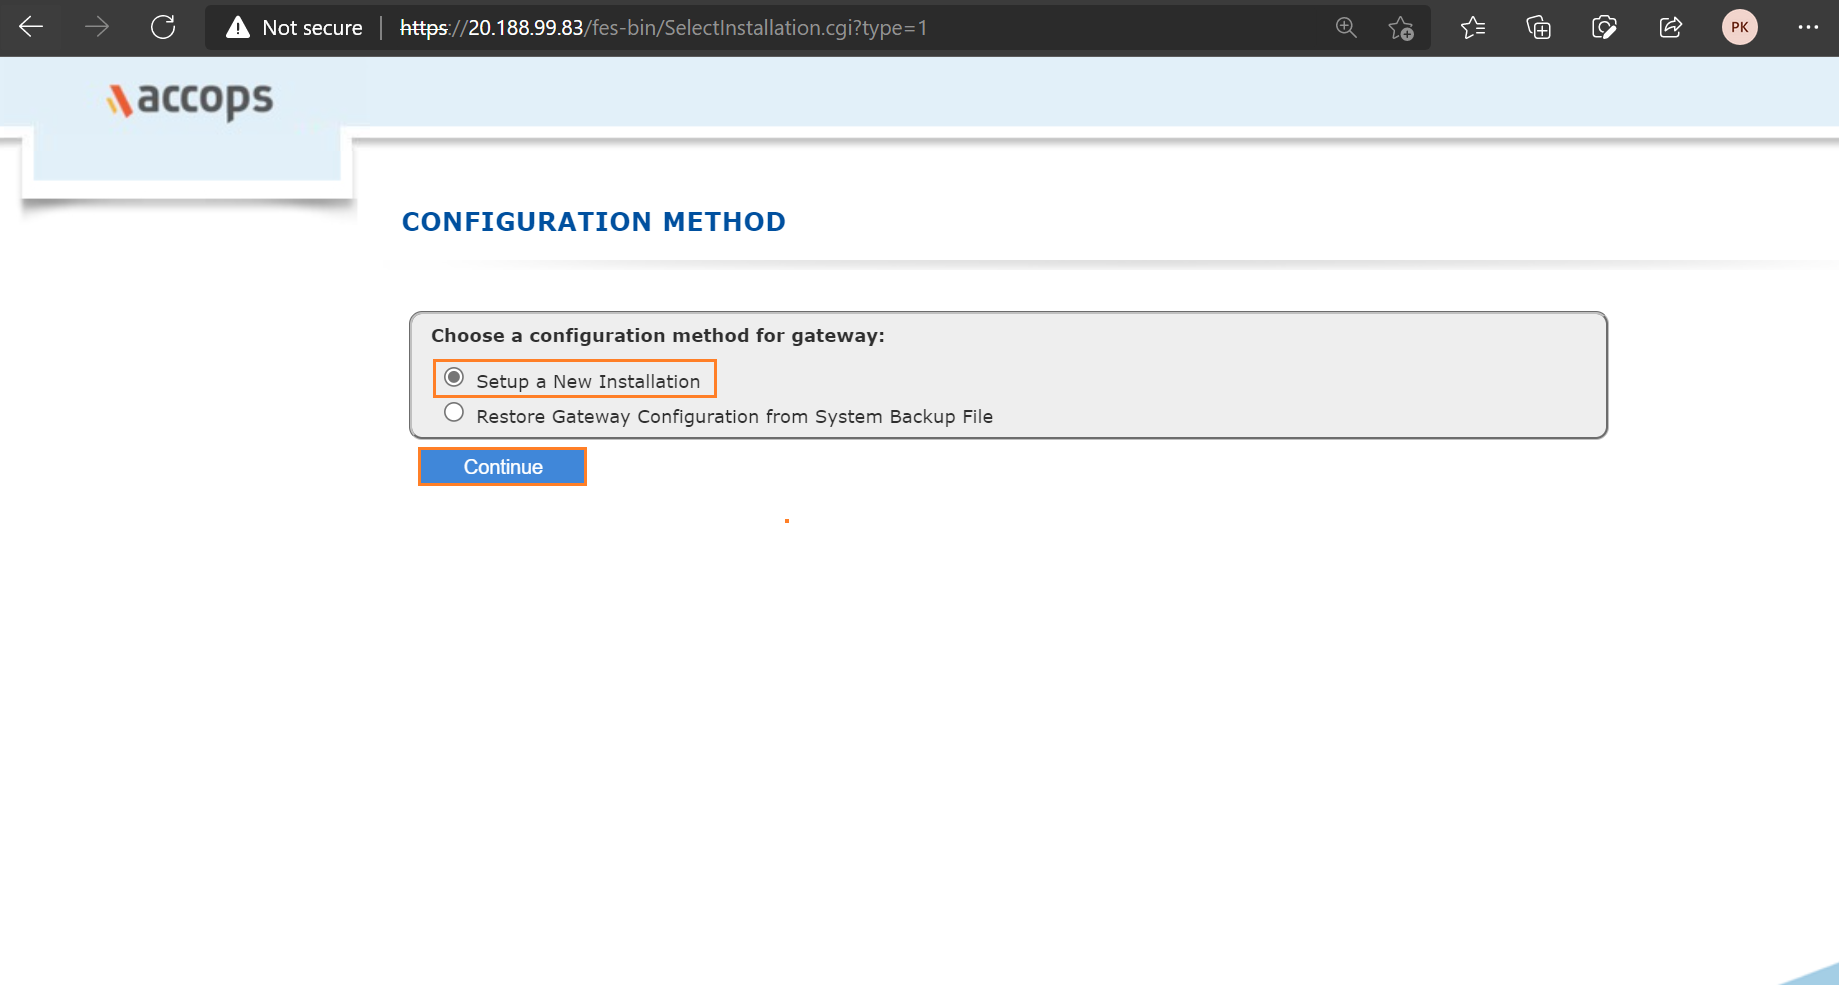
Step 27: Select Setup a New Installation Type and then click on Submit.
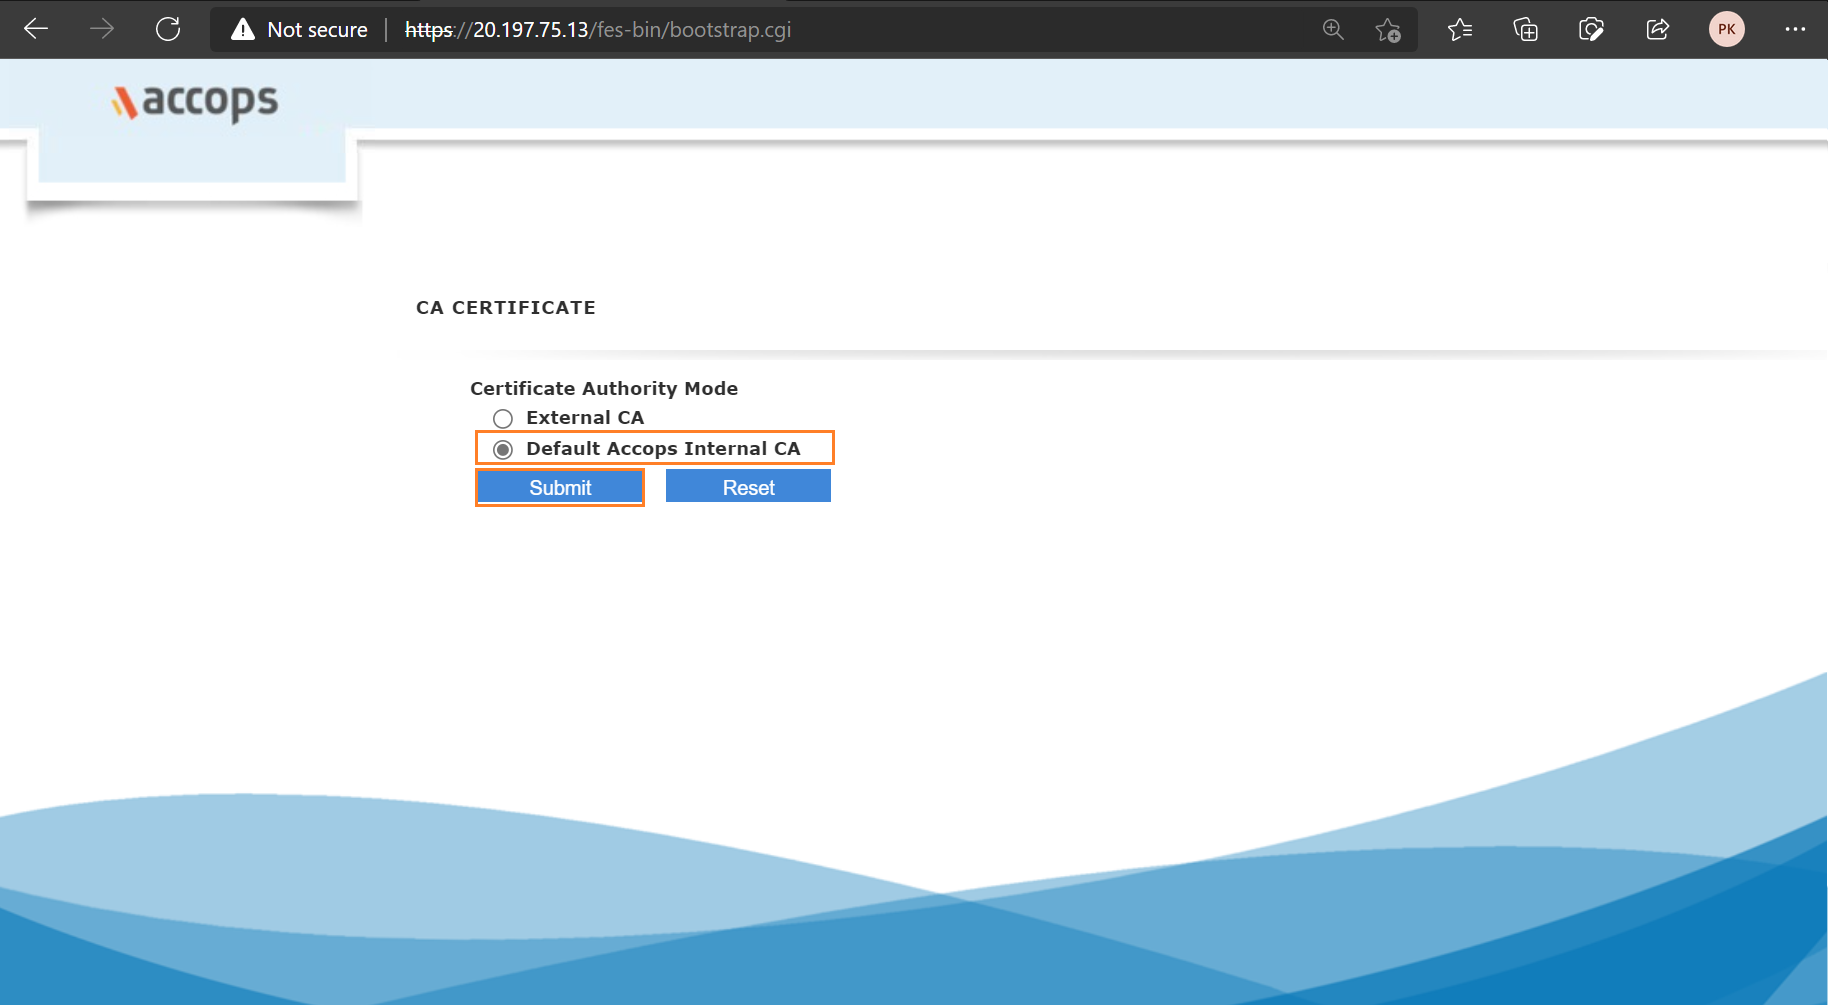
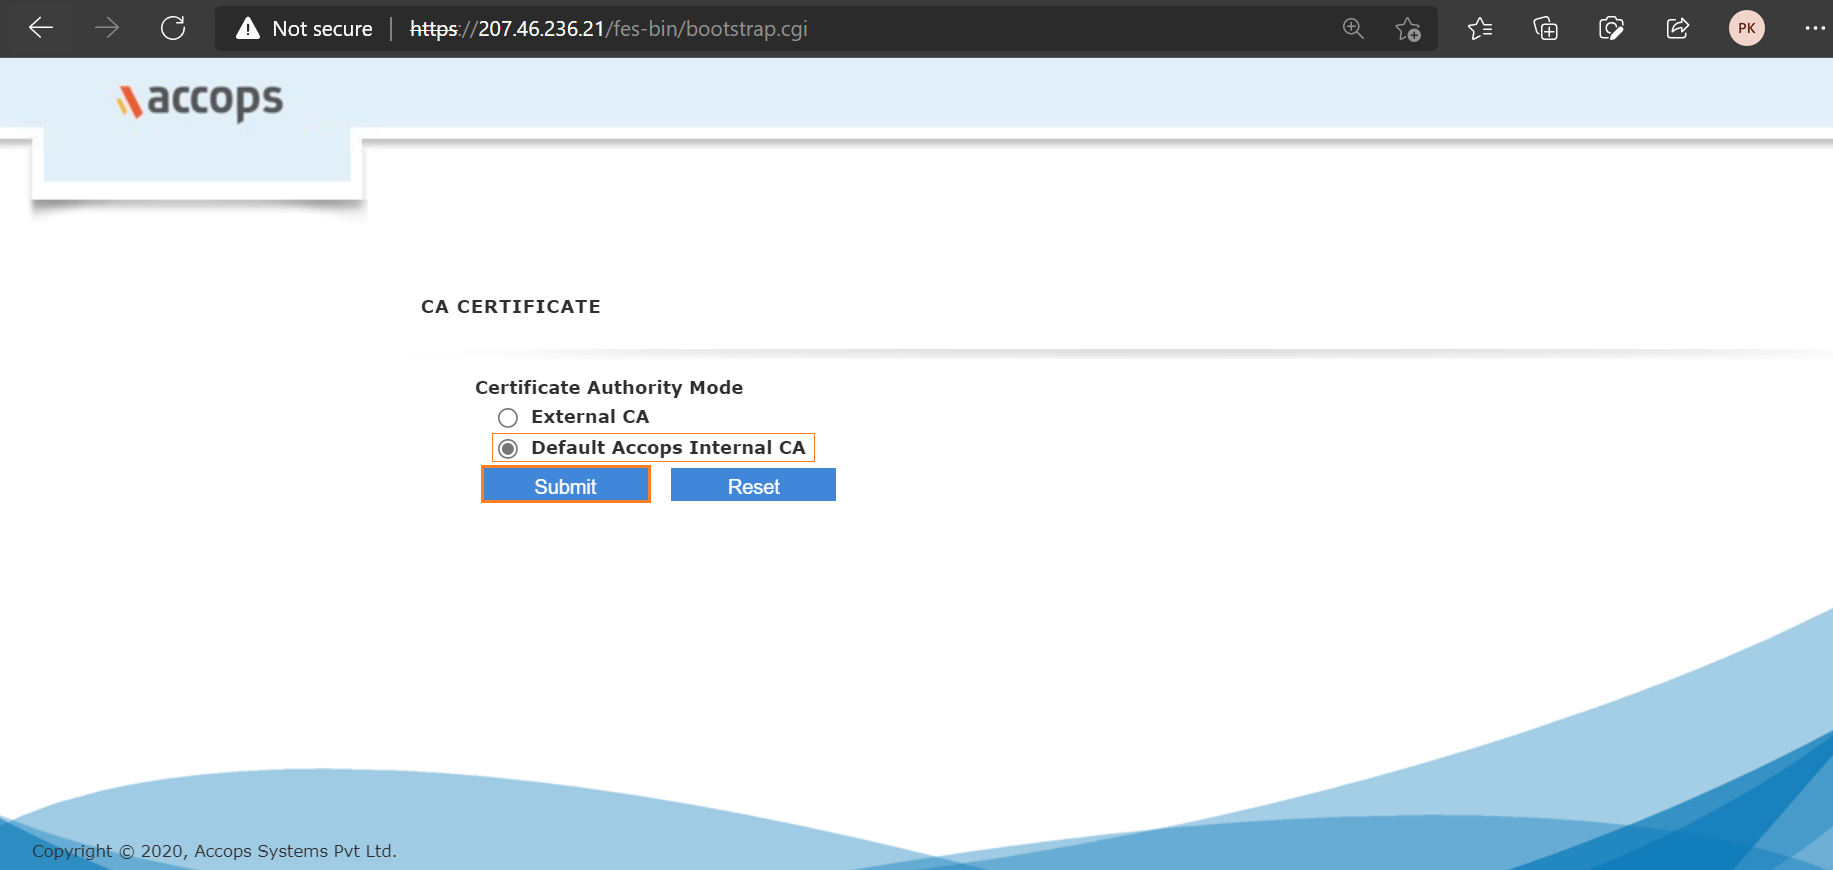
Step 28: Select Default Accops Internal CA and then click on Submit.
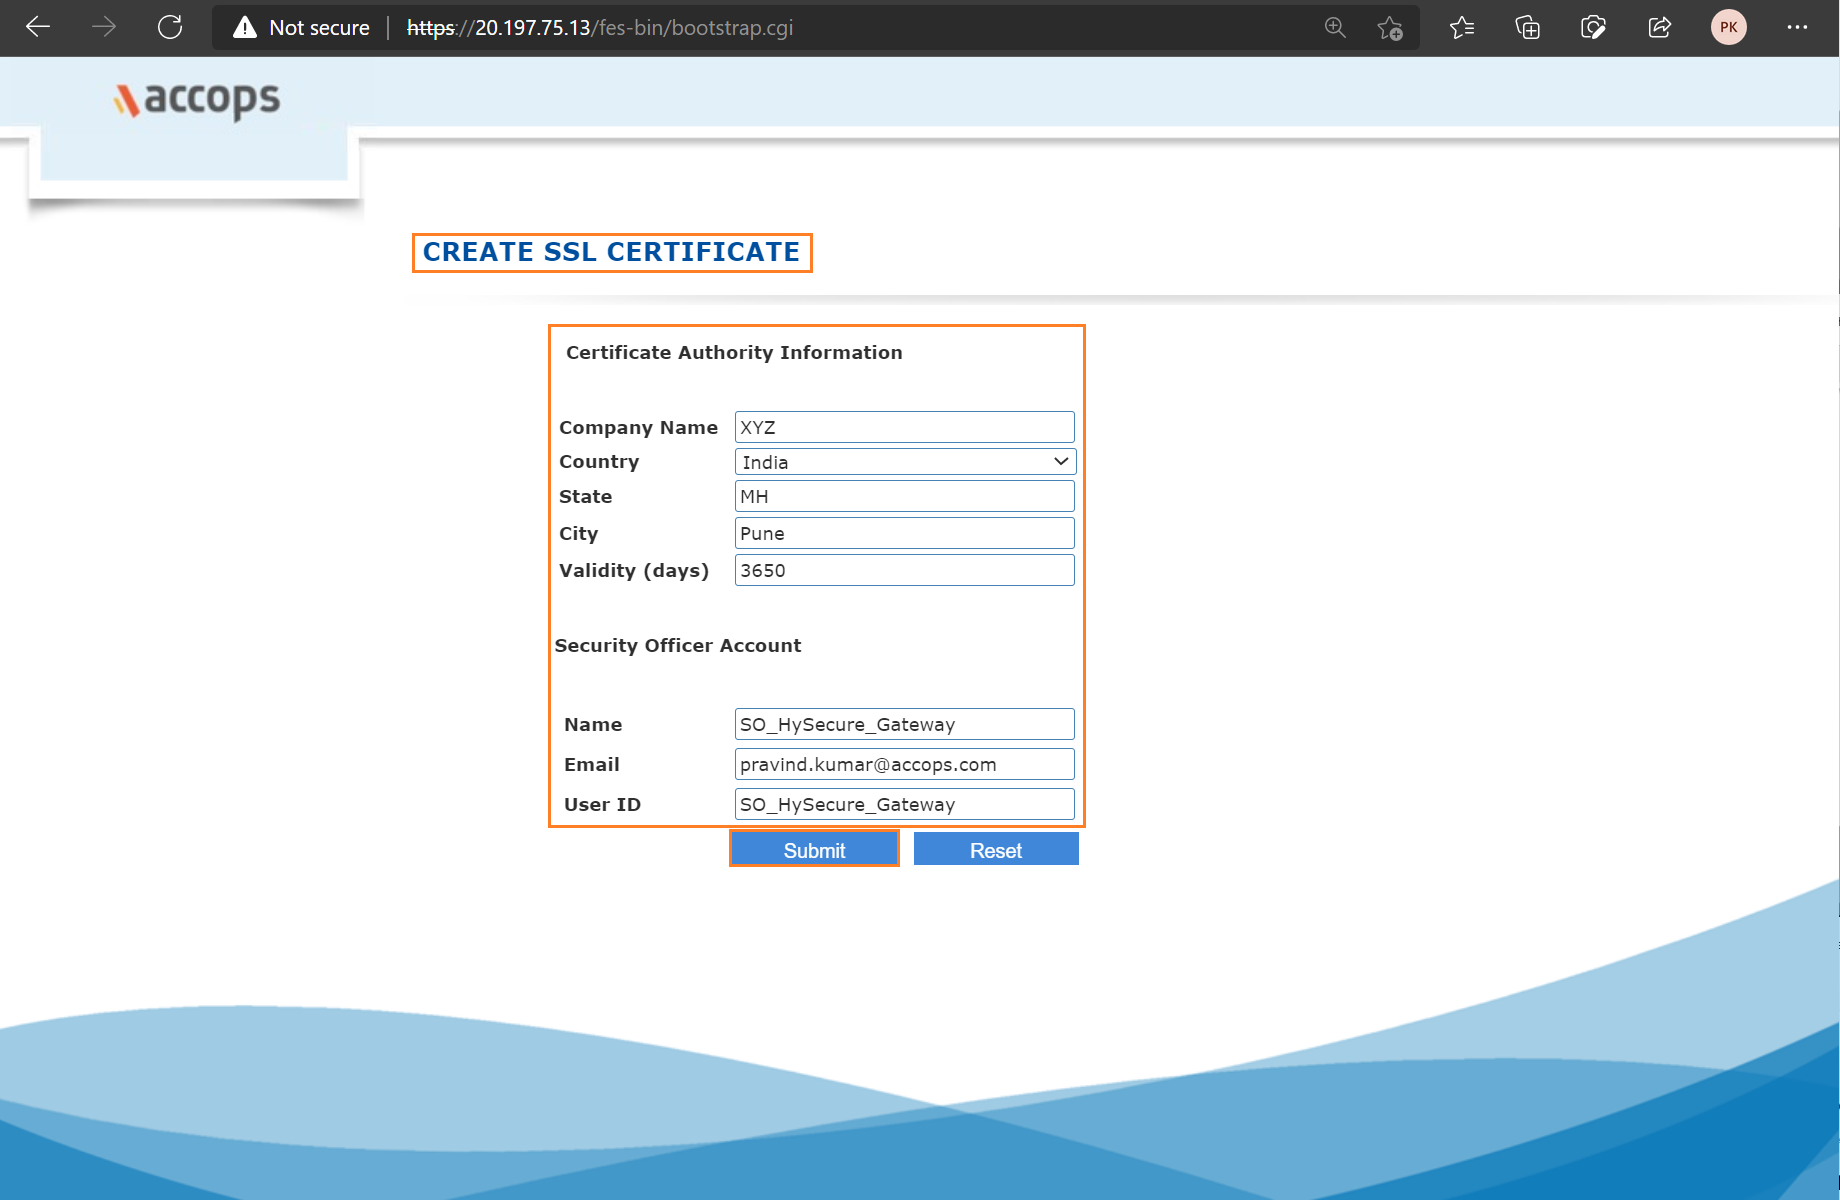
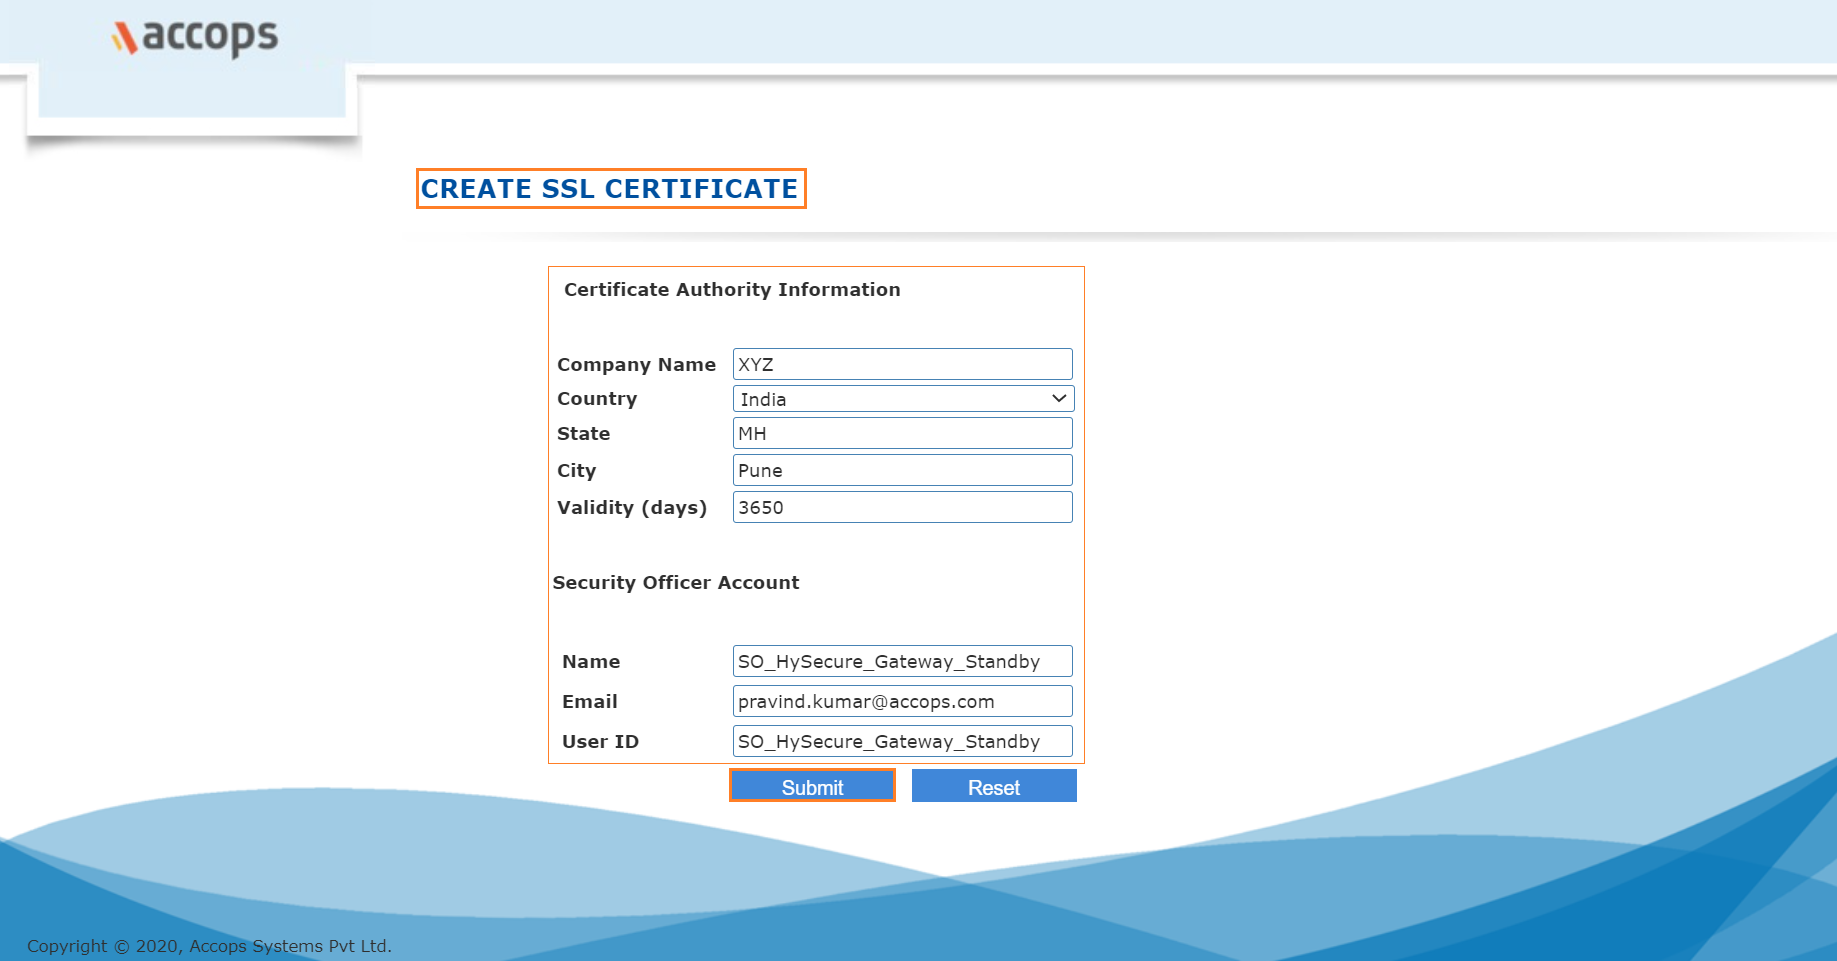
Step 29: Add CA Authority Details, and First Security Office Account Details and then click on Submit.
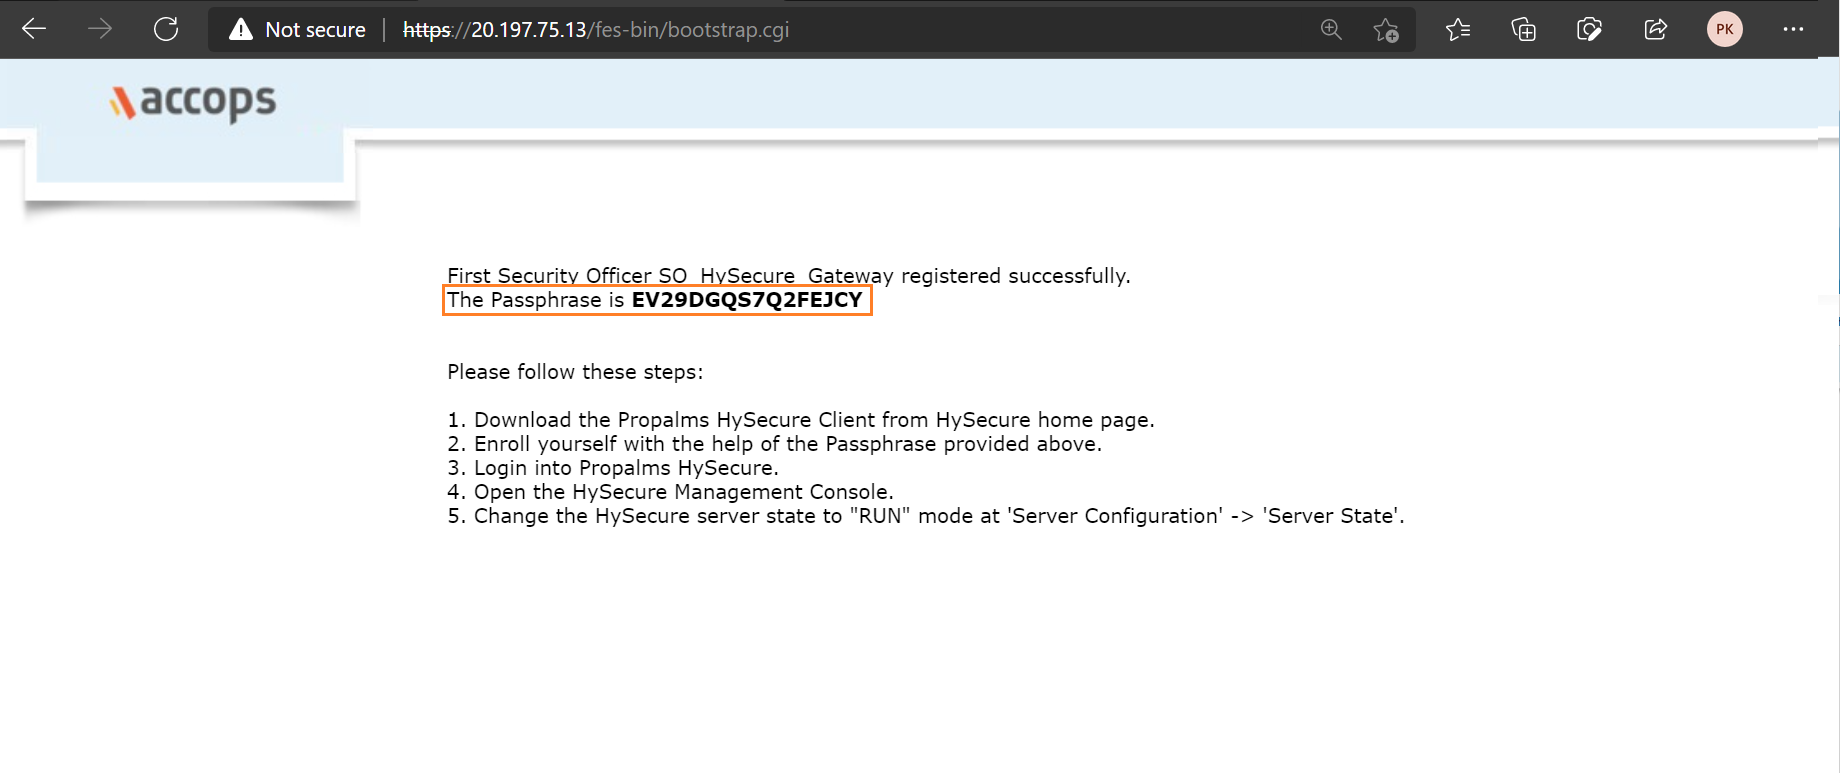
Step 30: Wait for Processing and then First Security Officer Account Passphrase will be shown.
Active Node Passphrase
Info
First Security Officer: SO_HySecure_Gateway
HySecure Active Node Passphrase: EV29DGQS7Q2FEJCY
Create HySecure Standby Node
Step 1: Create HySecure Virtual Machine using below link form Azure Marketplace.
Info
Deploy Accops HySecure Gateway v5299 [Recommended]
Deploy Accops HySecure Gateway v5353 [For Turbo]
or click on Create a Resource >> Azure Marketplace and Search for Accops to Deploy it.
Select the version to depoly it from dropdown menu of plan options.
Step 2: Add Project details, Instance Details and then Click on "Next : Disks".

Step 3: Add Disk Details and click on Next : Networking Tab.
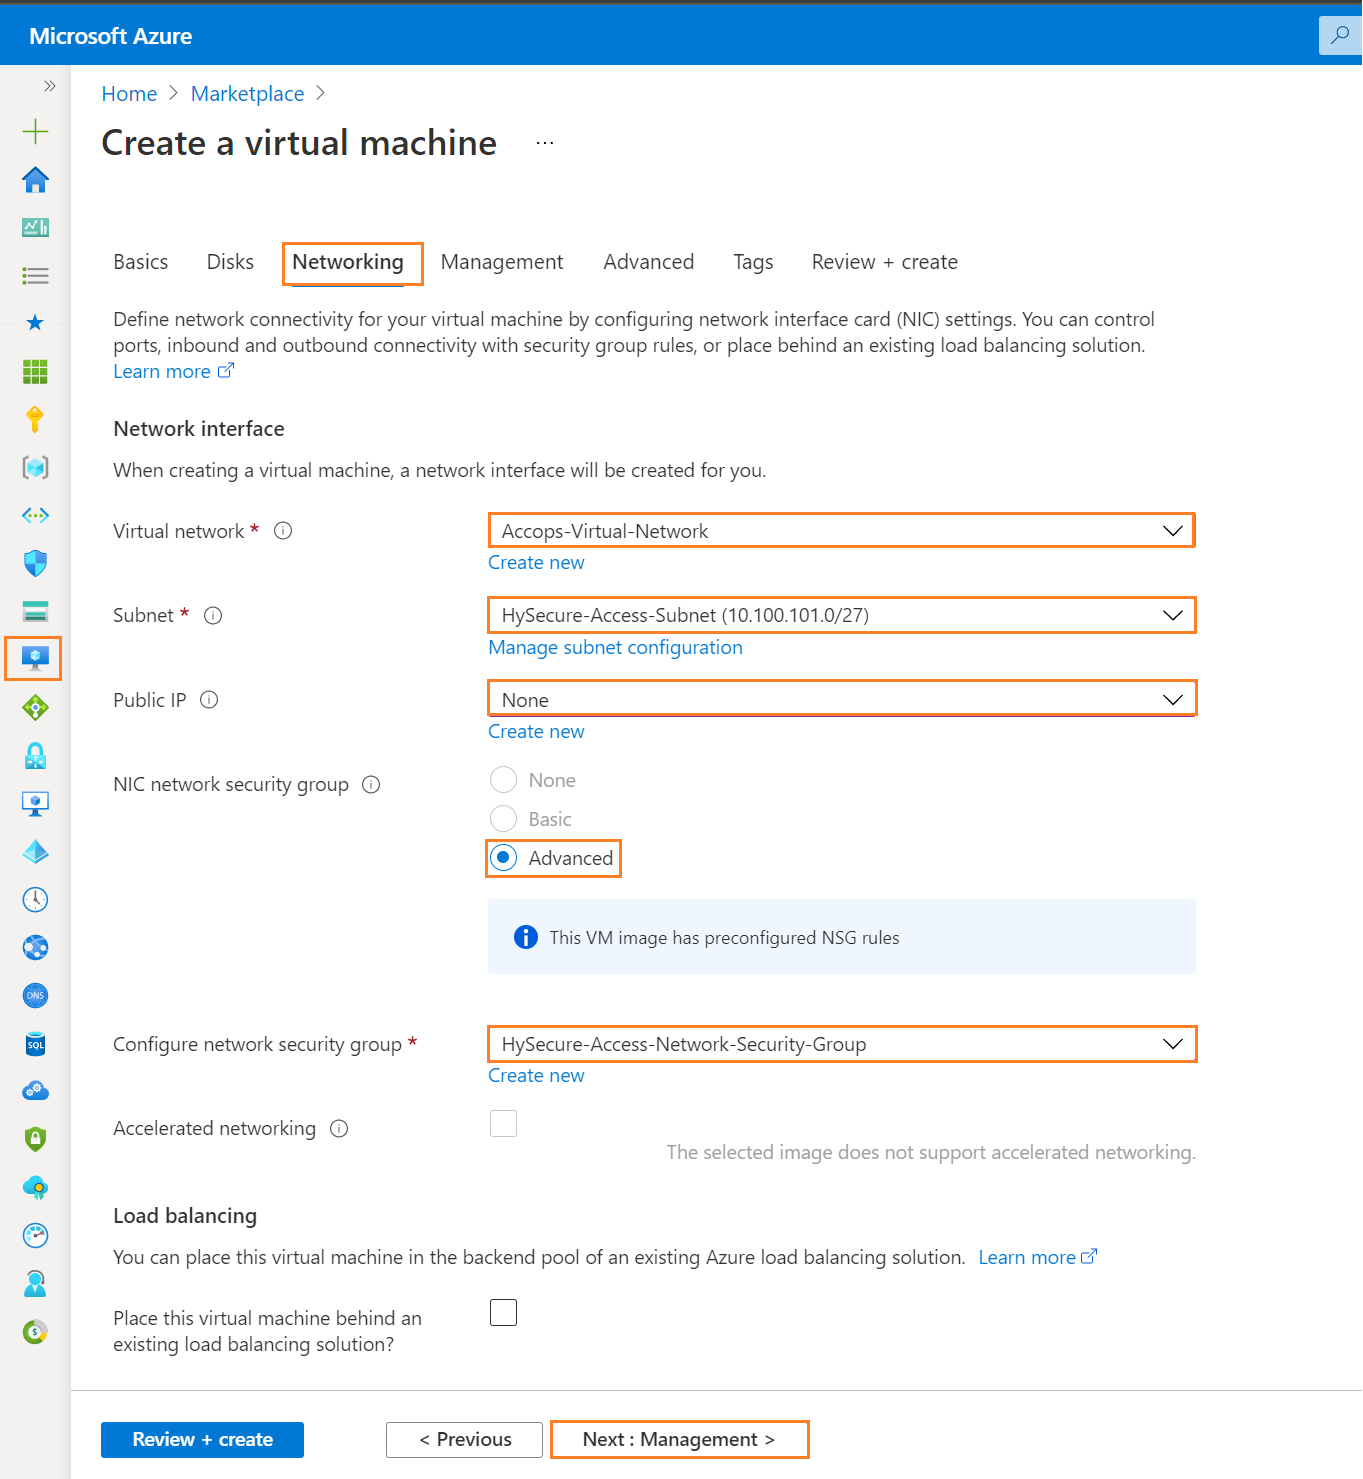
Step 4: Add Networking Details and click on Next : Management Tab.
Info
While Creating Standby Node, keep the Load Balancing option blank/unchecked. Standby Node will participate in Load balancing once the Active Node Setup is completed and Active Cluster is ready to accept the request from Standby Node for High Availability.
Step 5: Add Management Details and click on * Next : Advanced *.
Step 6: Add Advanced Details and Click on Next Tab * Tags*.
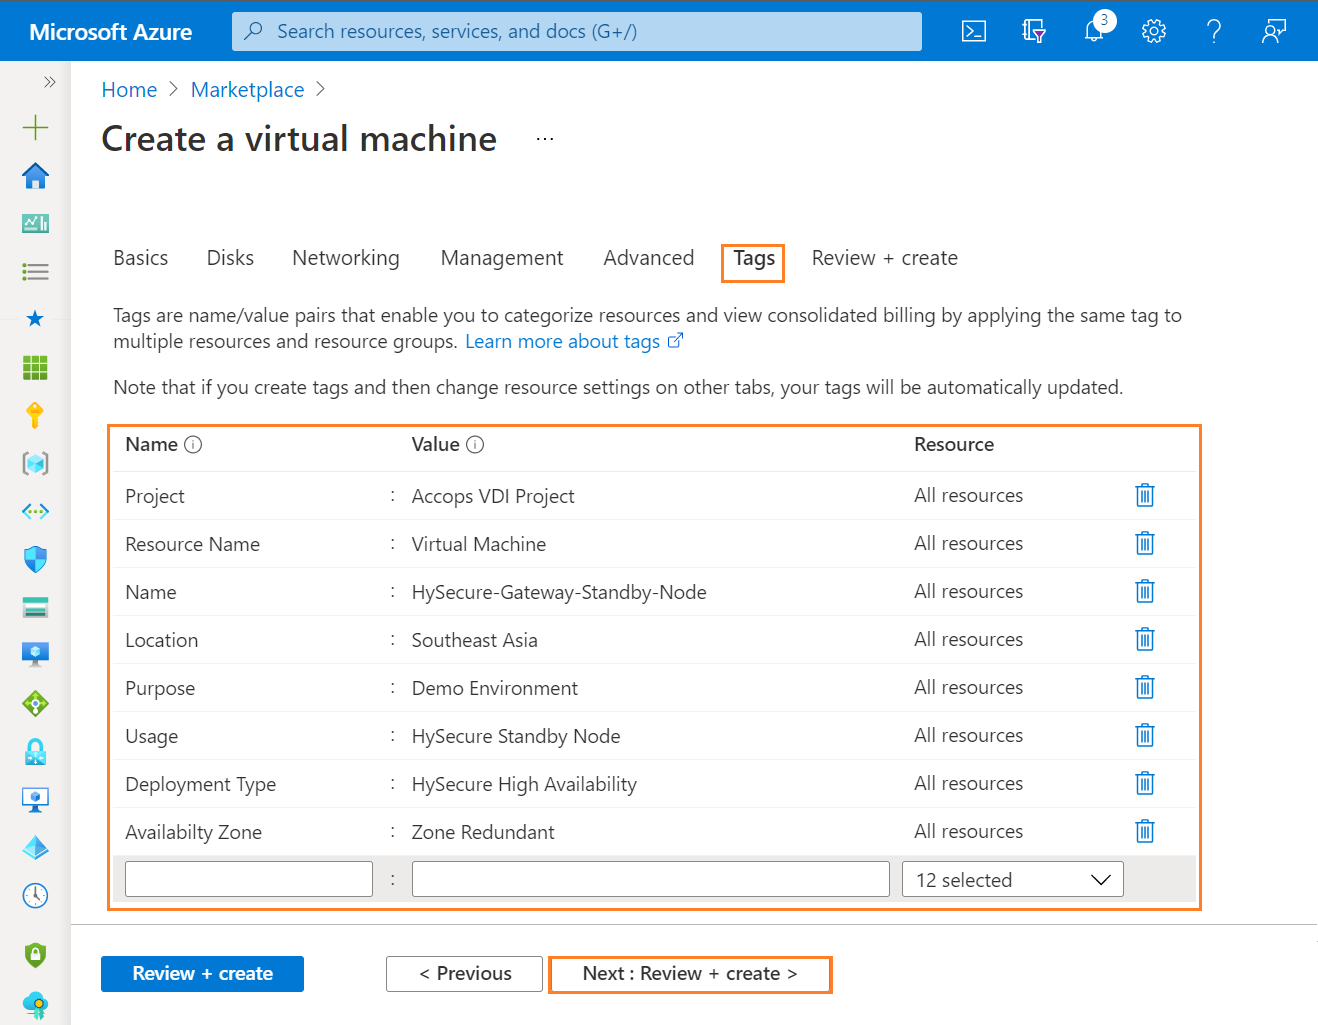
Step 7: Add Project Tags and Click on Next Tab Review + Create.
Step 8: Once VM validation is passed then click on * Create *.

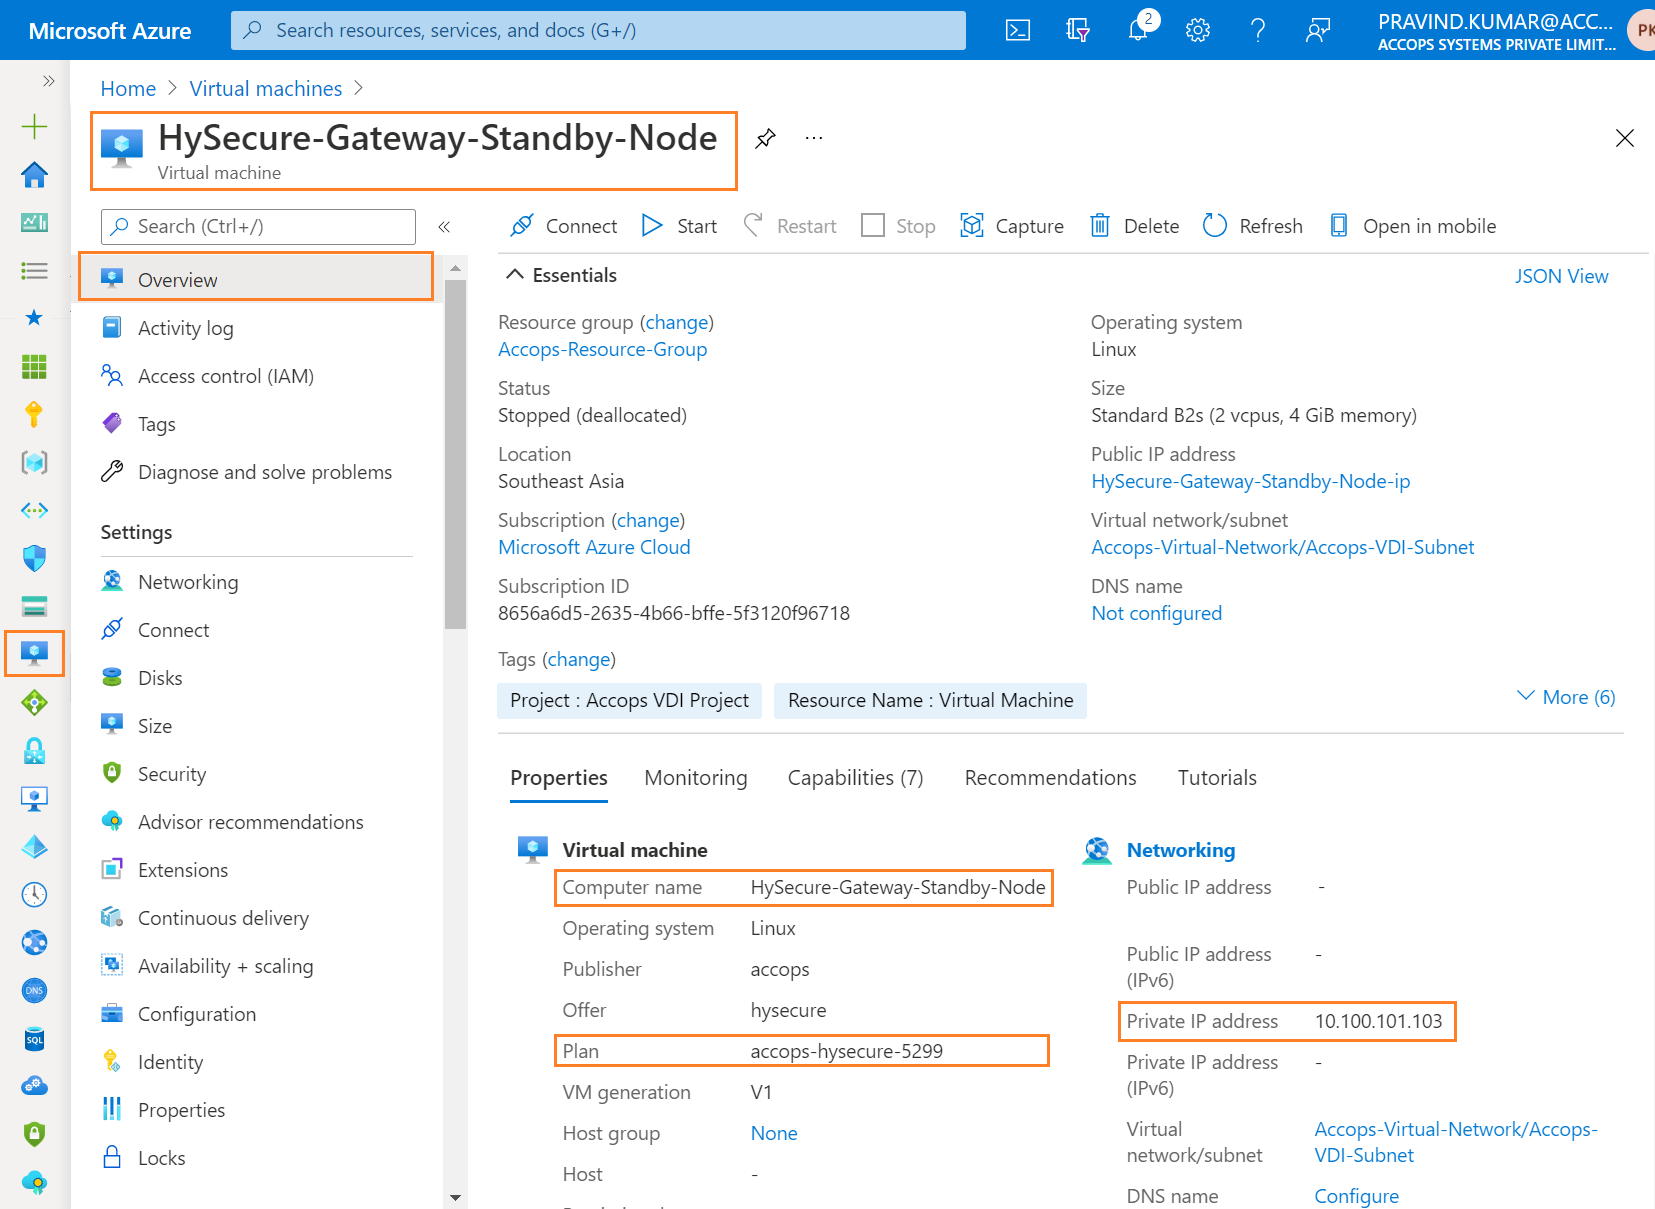
Step 9: List Created VM in Azure Dashboard >> Virtual Machines.
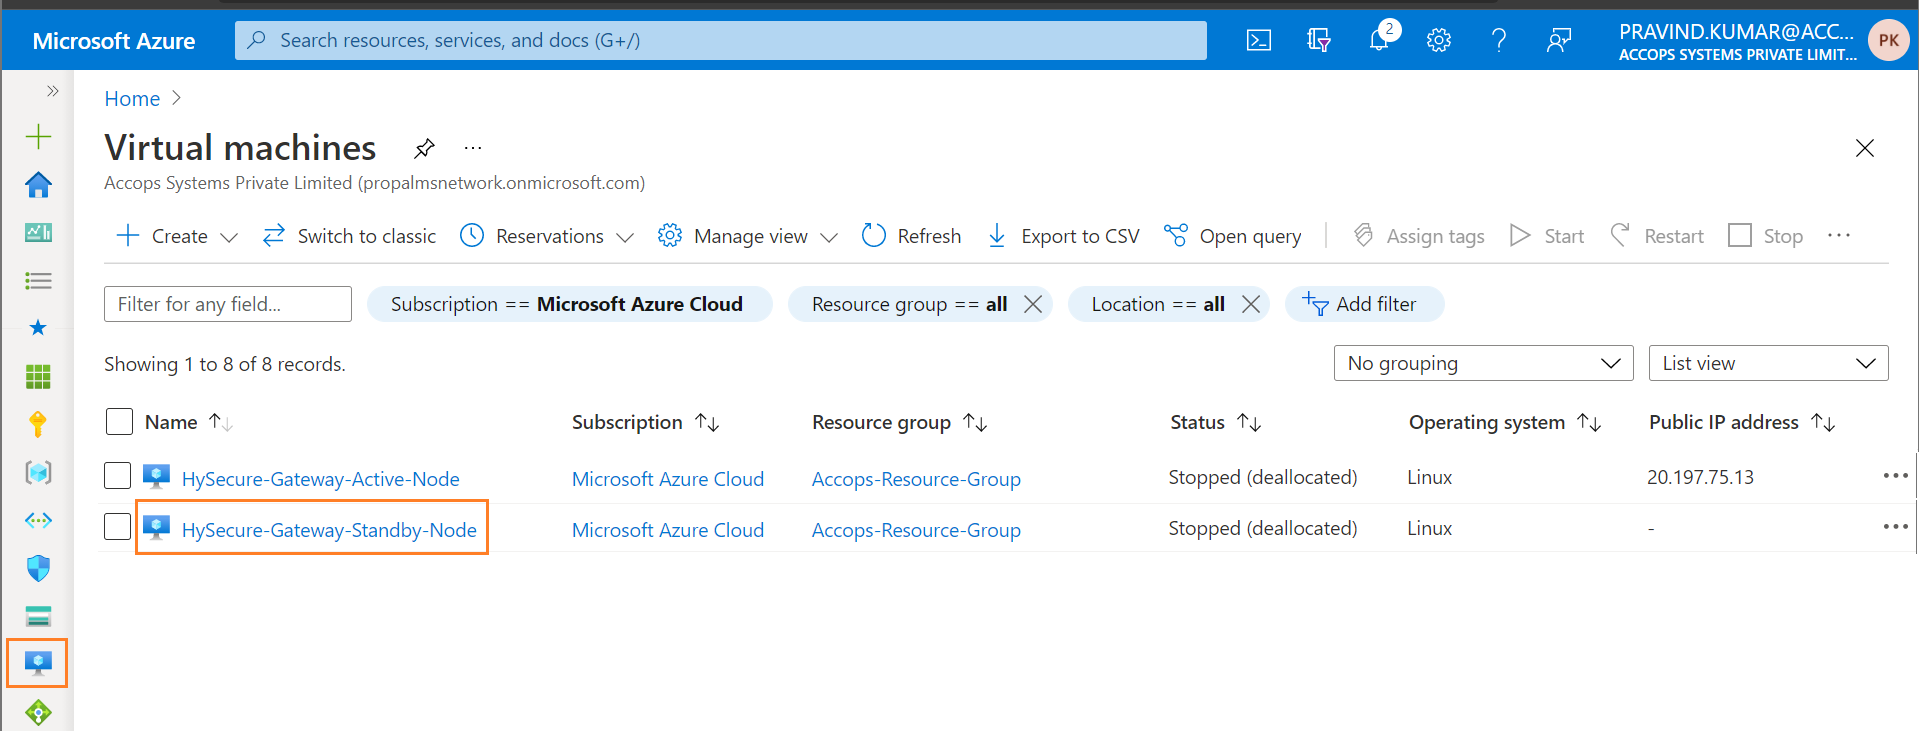
Step 10: Connect newely created Virtual Machine using Private IP Address.
Tip
If Public Load Balancer is attached to Virtual machine then use Private IP to connect the VM, Please make sure you have Site-2-Site Connectivity to your Azure Network from the location you want to access the Accops Gateway. Another method to Access the Gateway using any Windows Virtual Machine from Same Subnet or Different Subnet, It may required Port opening in Firewall, Please Check with Your Azure Network/Security/Firewall Team.
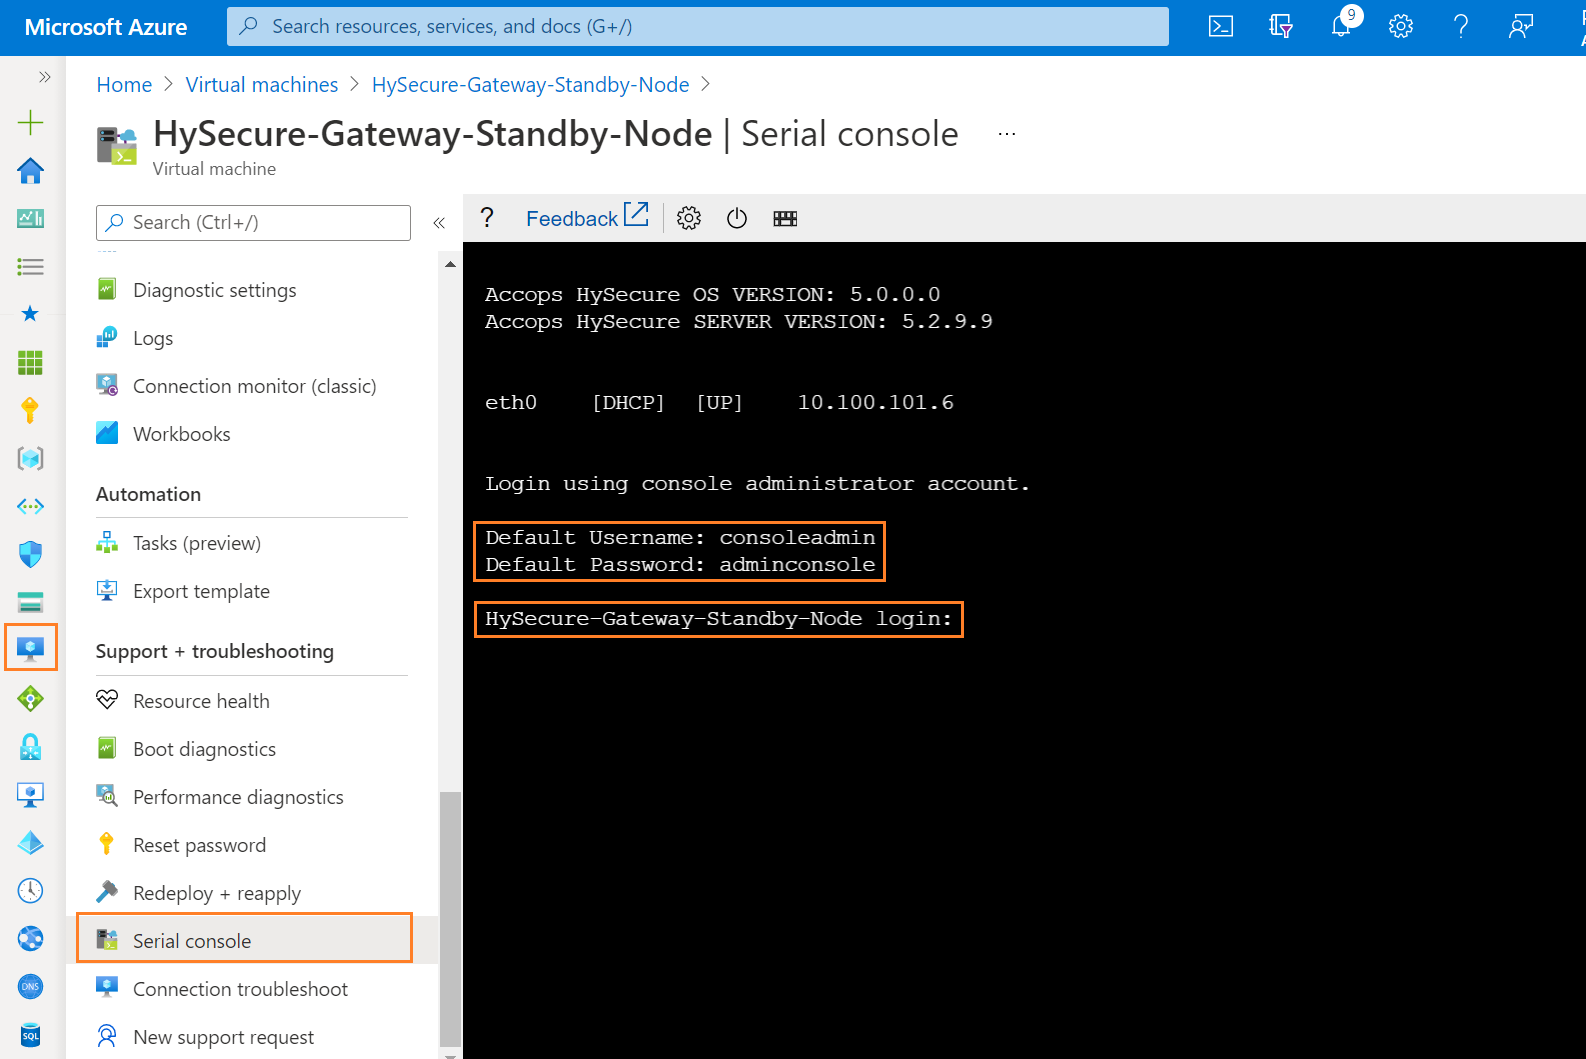
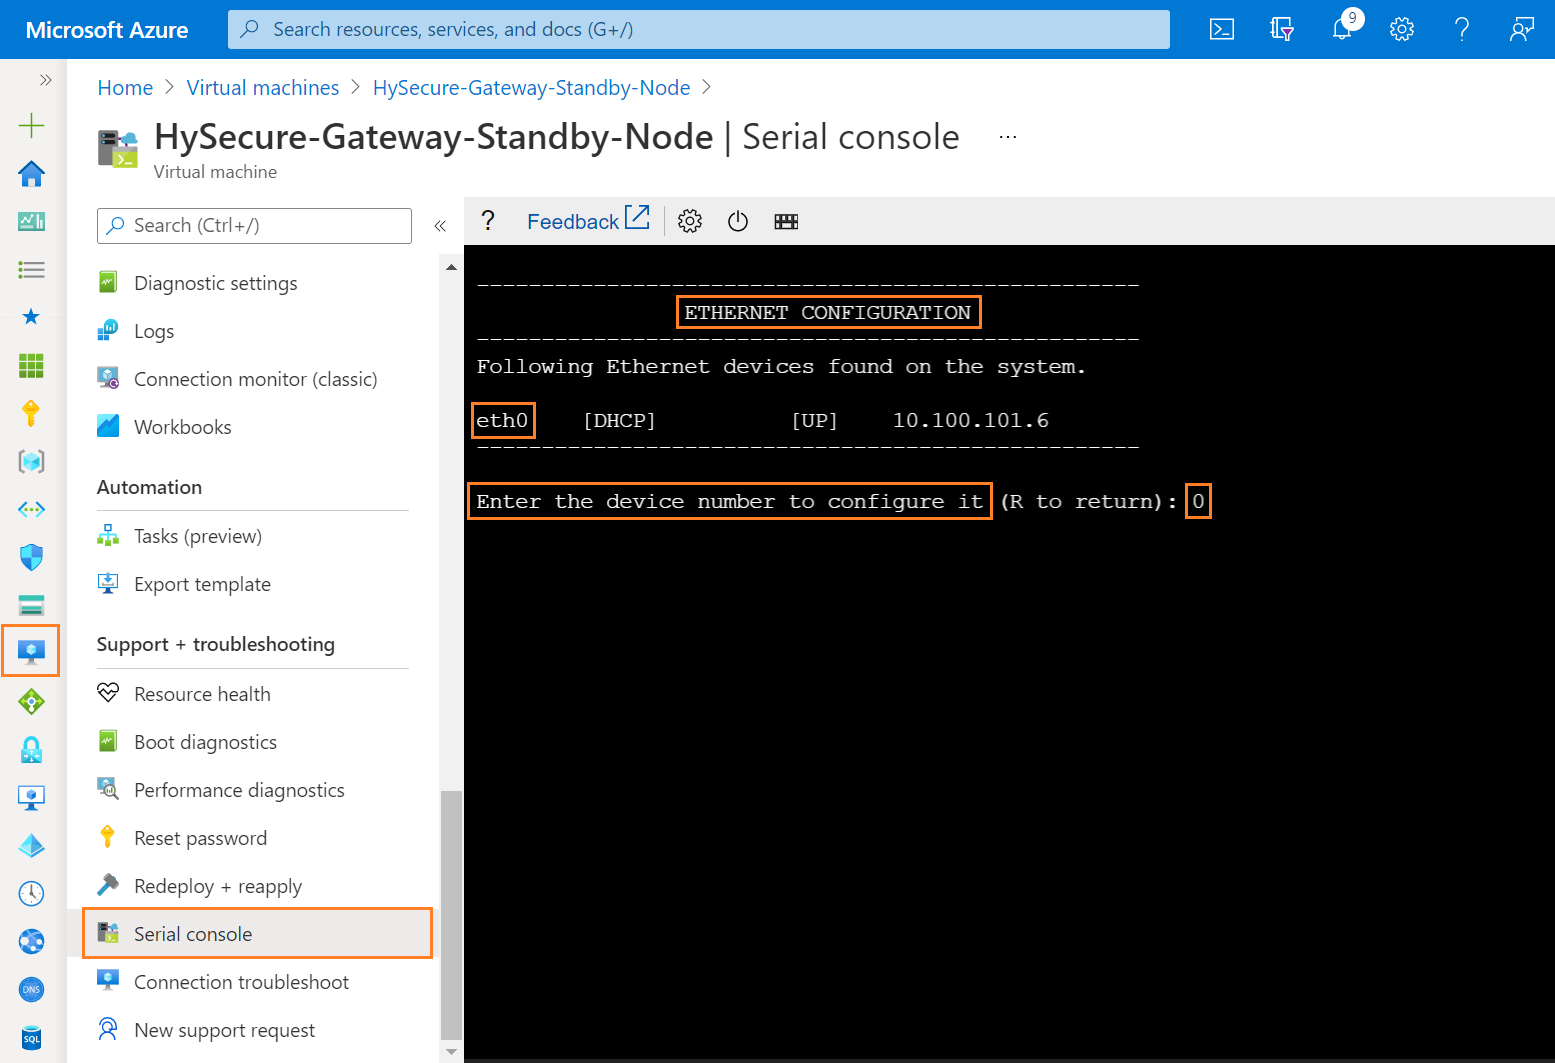
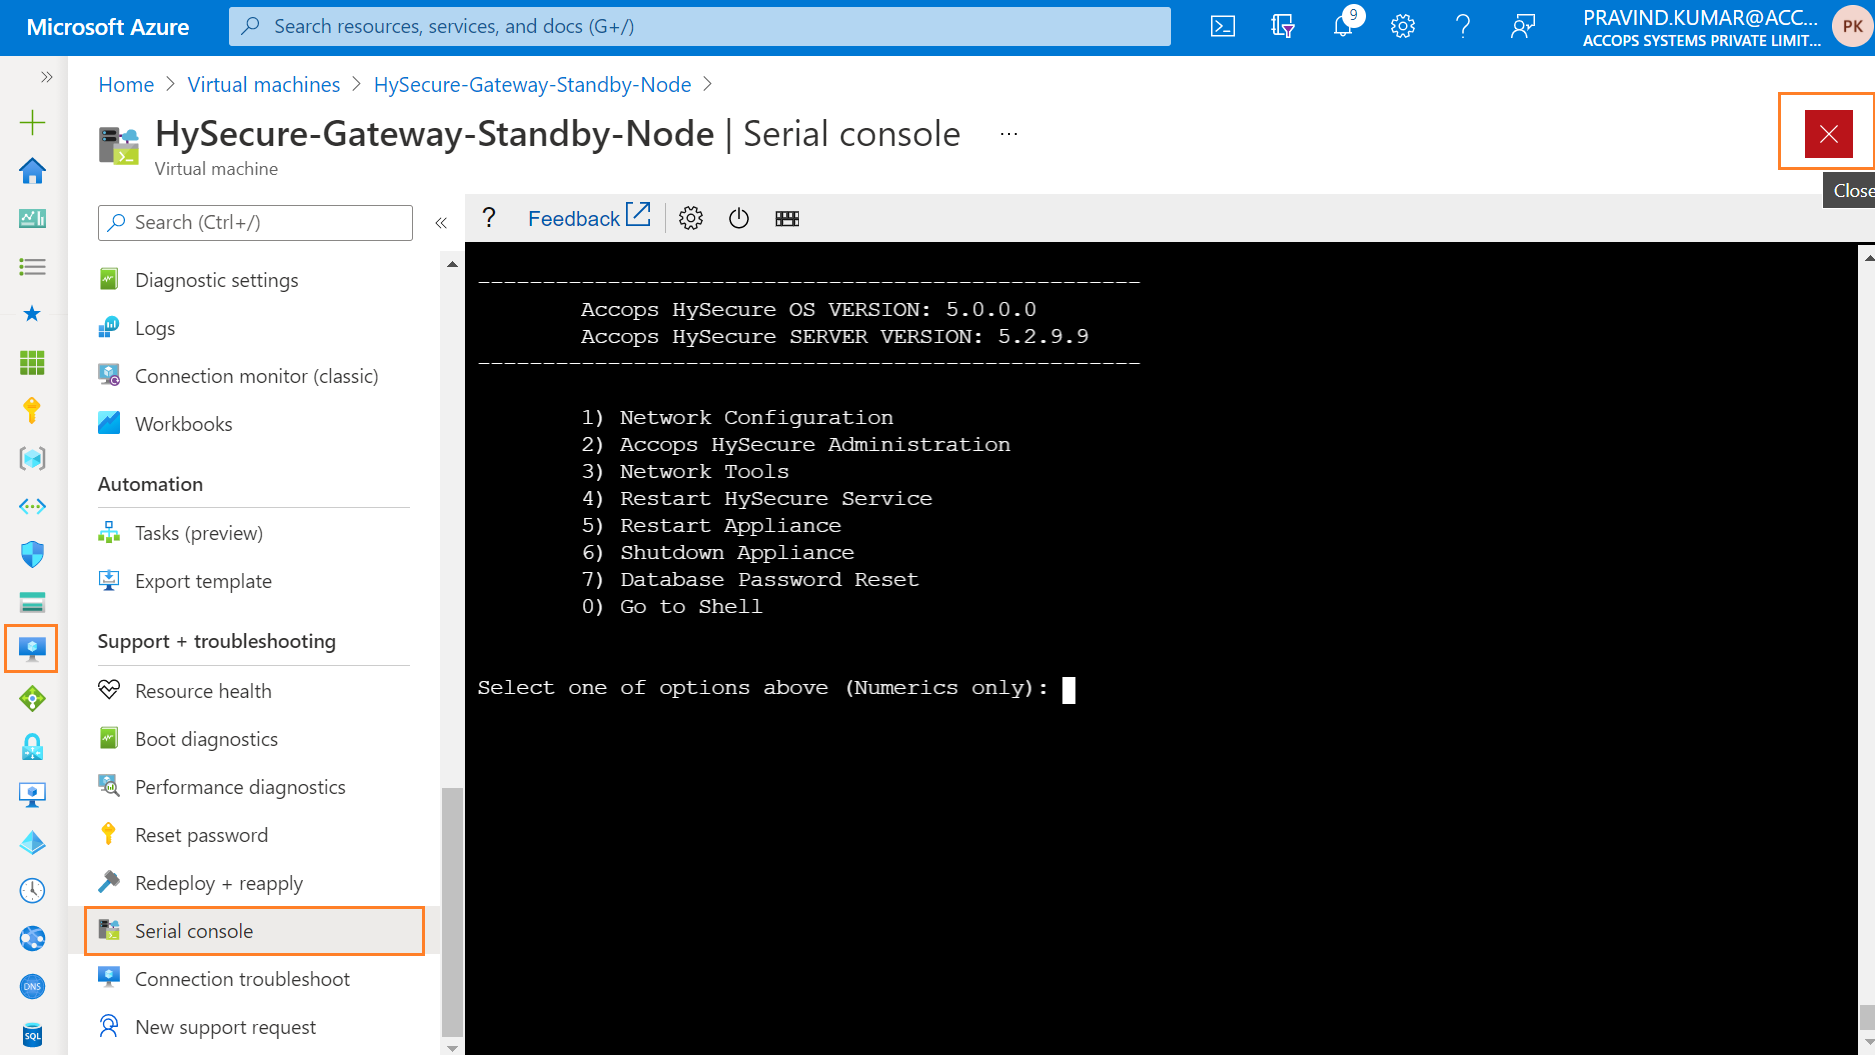
Step 11: Connect to Serial Console of HySecure Active Node & Login with Default Credentials.
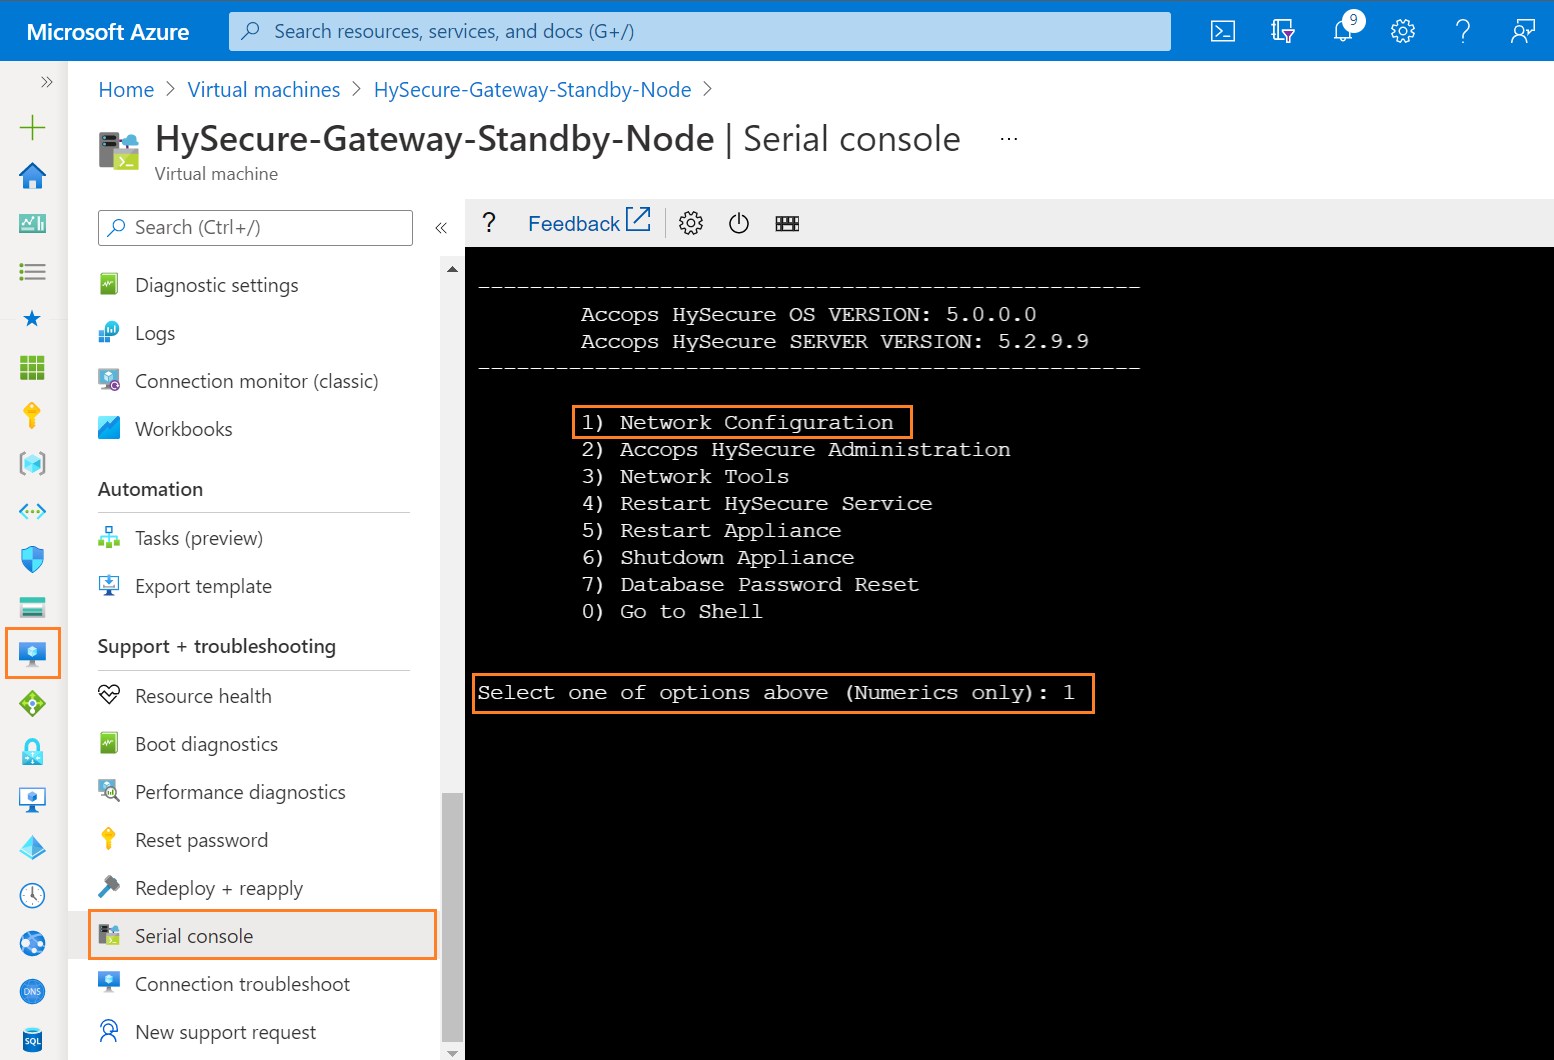
Step 12: For Network Configuration, Enter 1.
Step 13: To Configure Ethernet Device, Enter 1.

Step 14: Enter the Device Number of Ethernet to configure it, Enter 0 for eth0 interface.
Example
for eth0, Enter 0. for eth1, Enter 1.
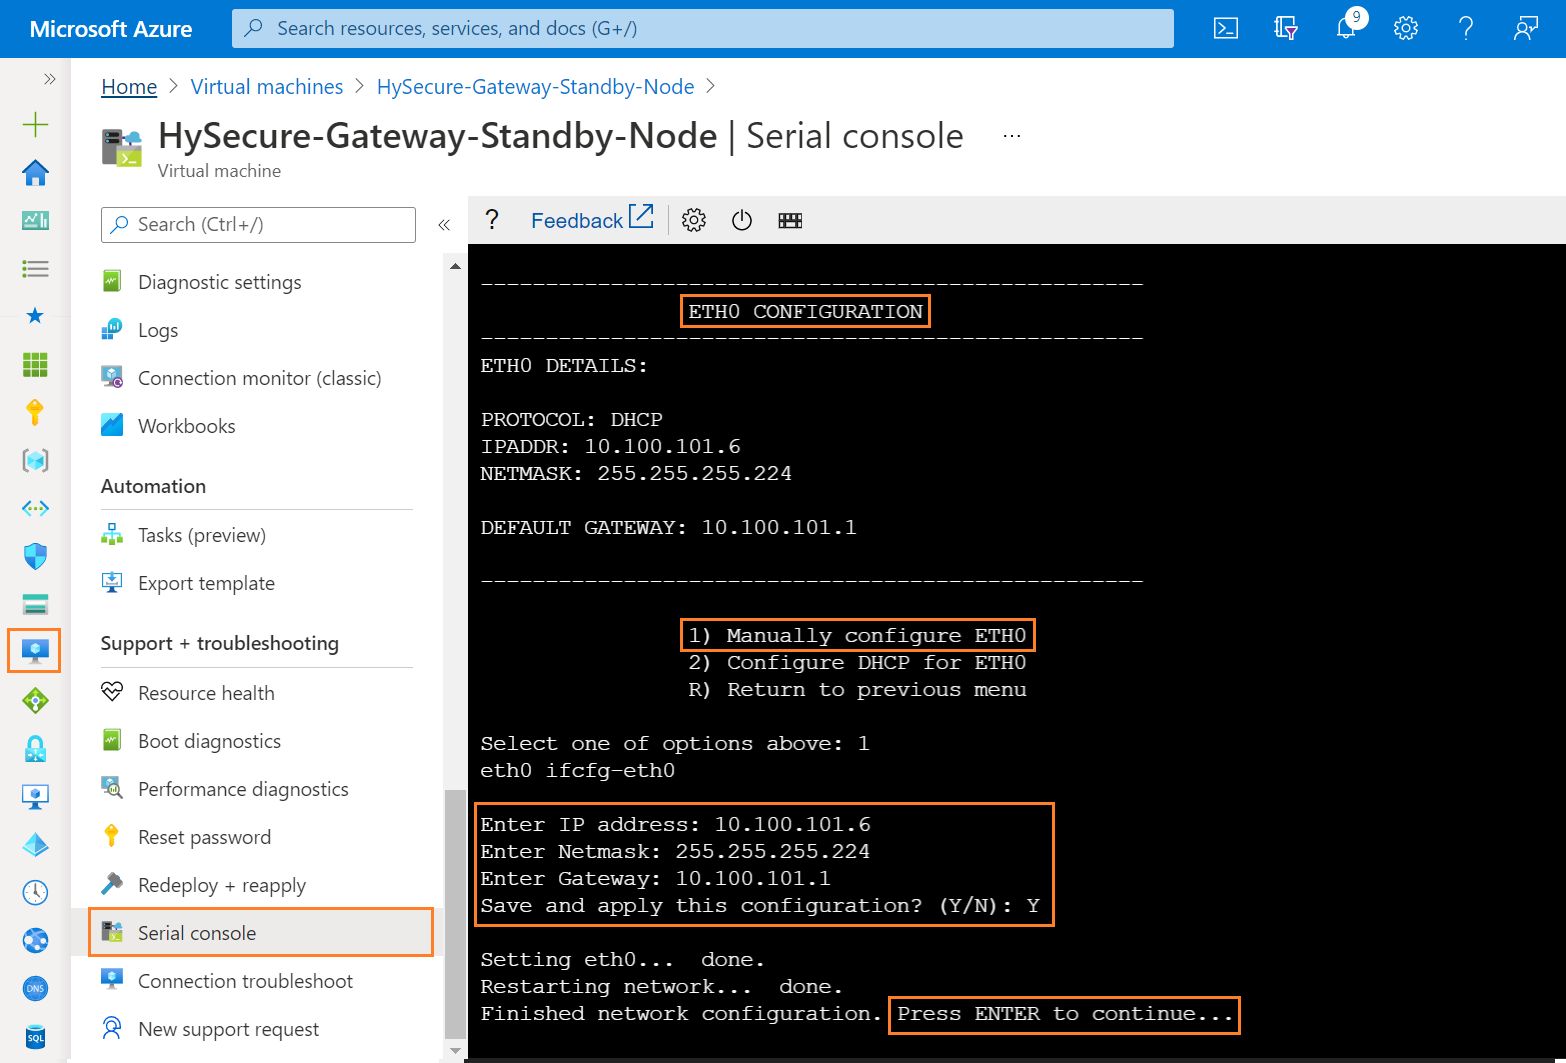
Step 15: Select Manually Configure ETH0, Select one of the option above : 1 and assign Same IP address which is shown in HySecure Serial Console as Static IP Address.
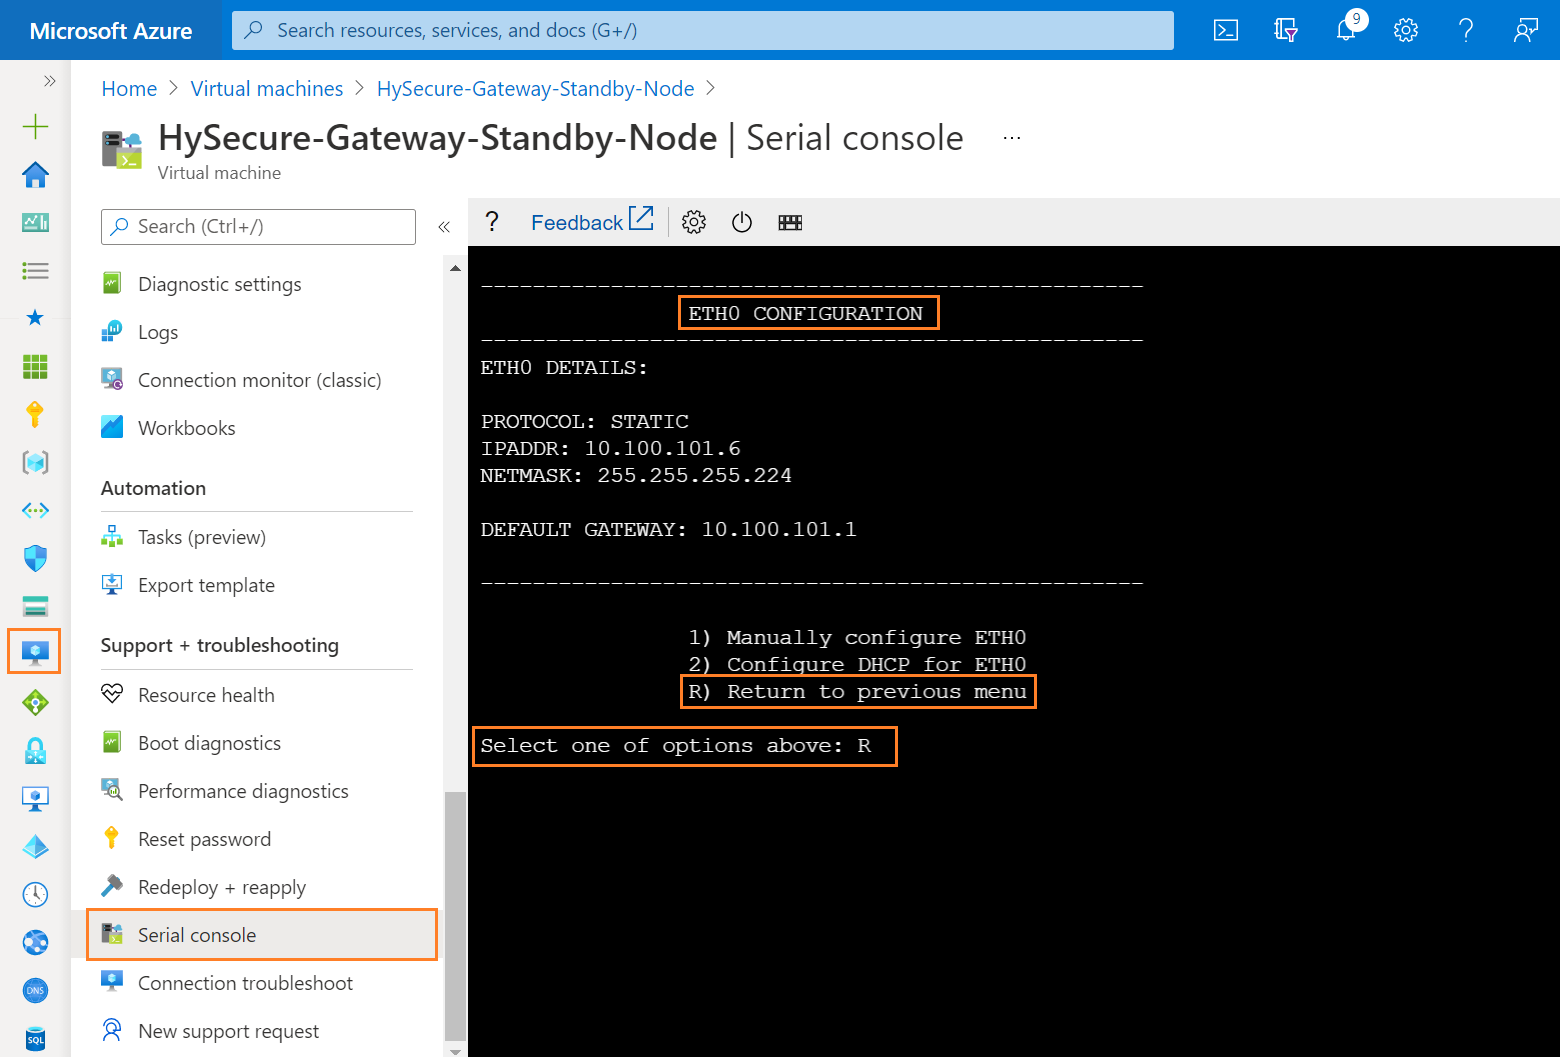
Step 16: Enter R to exit from IP configuration Menu.
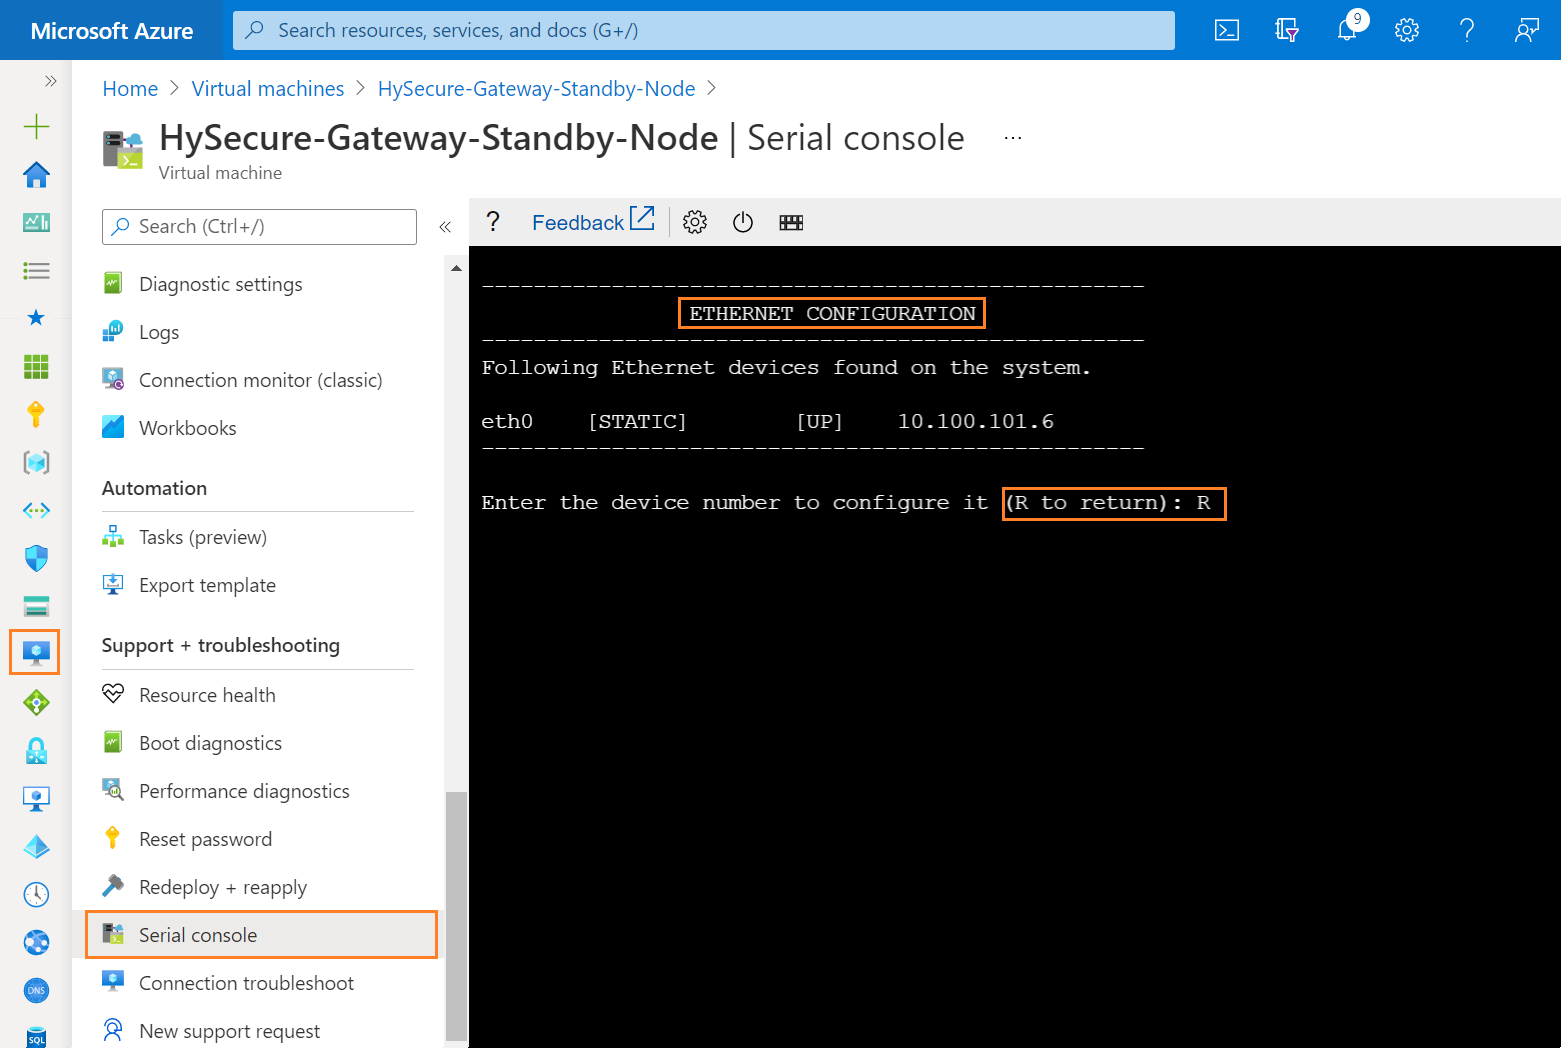
Step 17: Enter R to exit from Ethernet Configuration Menu.
Step 18: Enter R to exit from Network Configuration Menu.
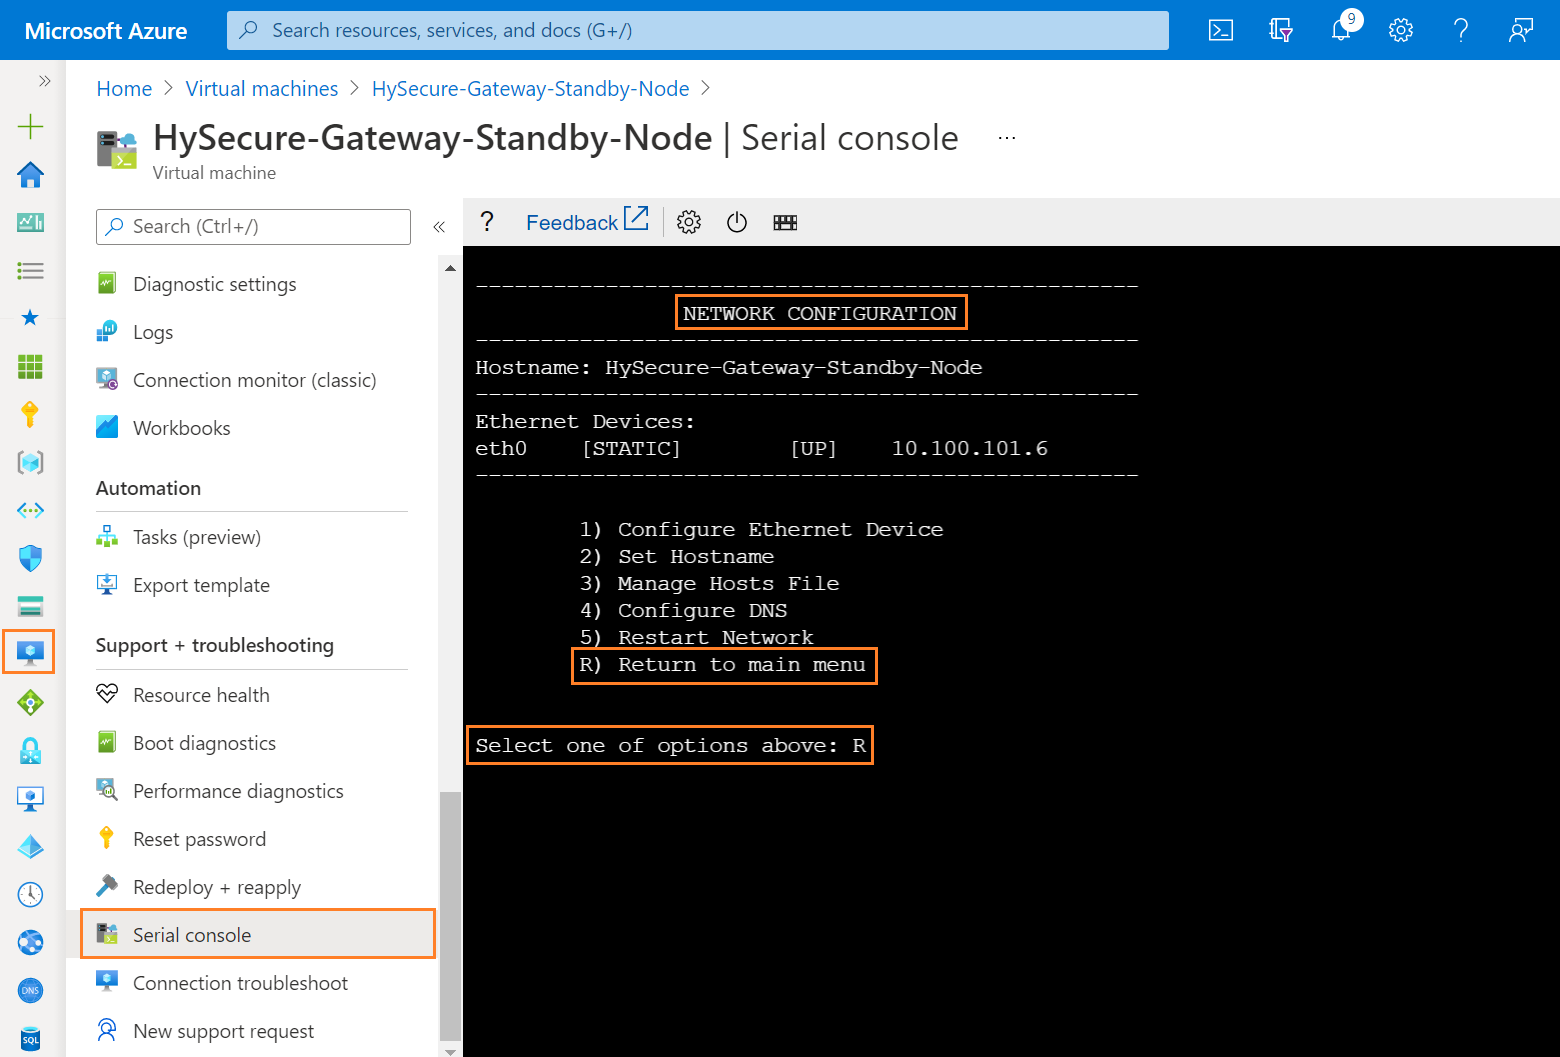
Step 19: Select cross to exit from HySecure Console Menu.
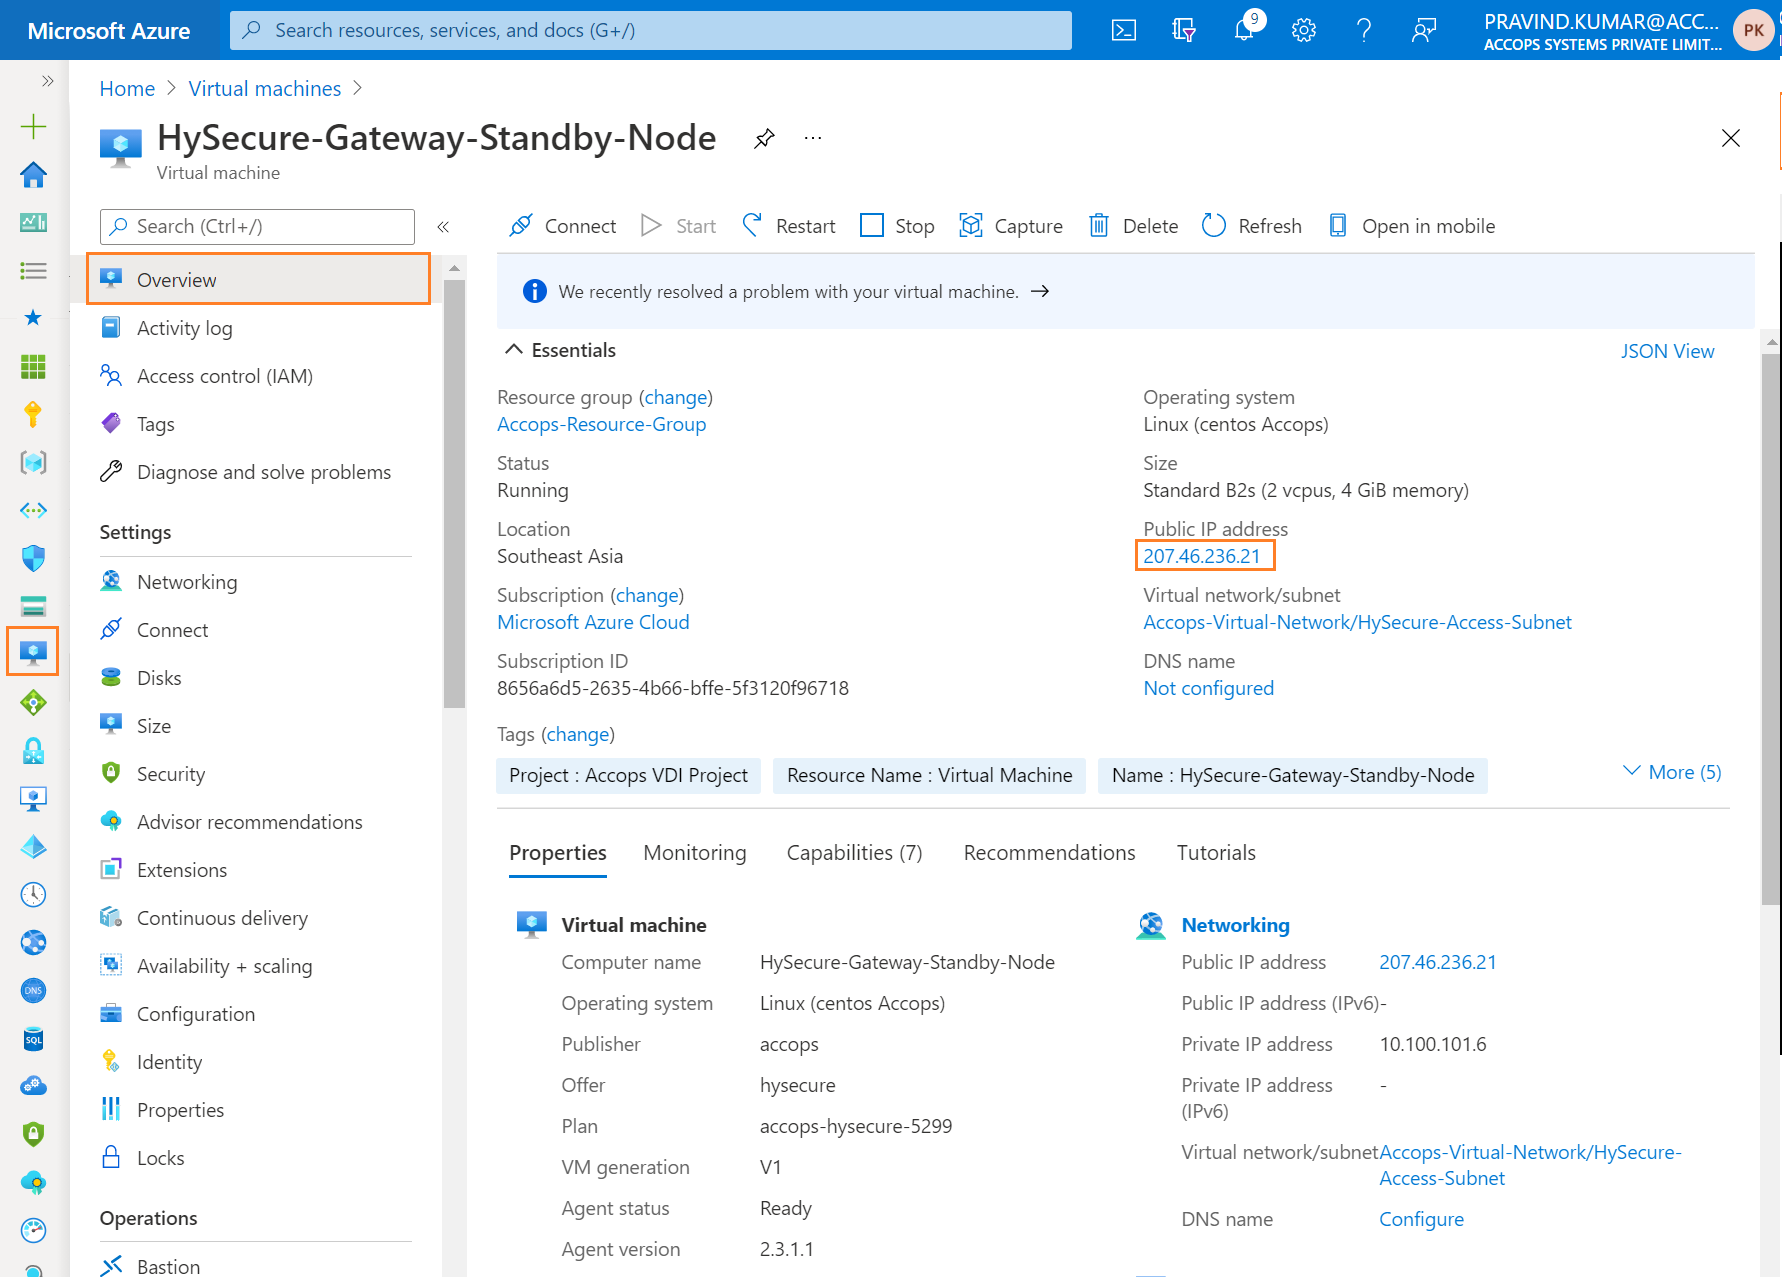
Step 20: Connect HySecure Standby Node using Private IP Address from Browser.
Tip
Below option can be used to Preboot Standby Node using Public/Private IP Address.
1: Temporarily Assign a Public IP address to Standby Node Server and Complete Preboot, post that You can remove the Public IP address from Standby Node. (Using 1st Method to Preboot Real Node)
2: Publish Standby Node in Active Cluster as an Application on port 443 then Create an Application and Assign it to Security Officer User and Preboot the Standby node Server.
3: Create a Windows VM (For Example: Jump Server/Existing Server ) in Azure Cloud within Same Subnet or Different Subnet and allow ports 443,3636 and 22 from Windows VM to Complete Preboot on Standby Node Server.
4: Create Site-2-Site Connectivity to Azure Cloud from the Network You want to Access the Standby Node.
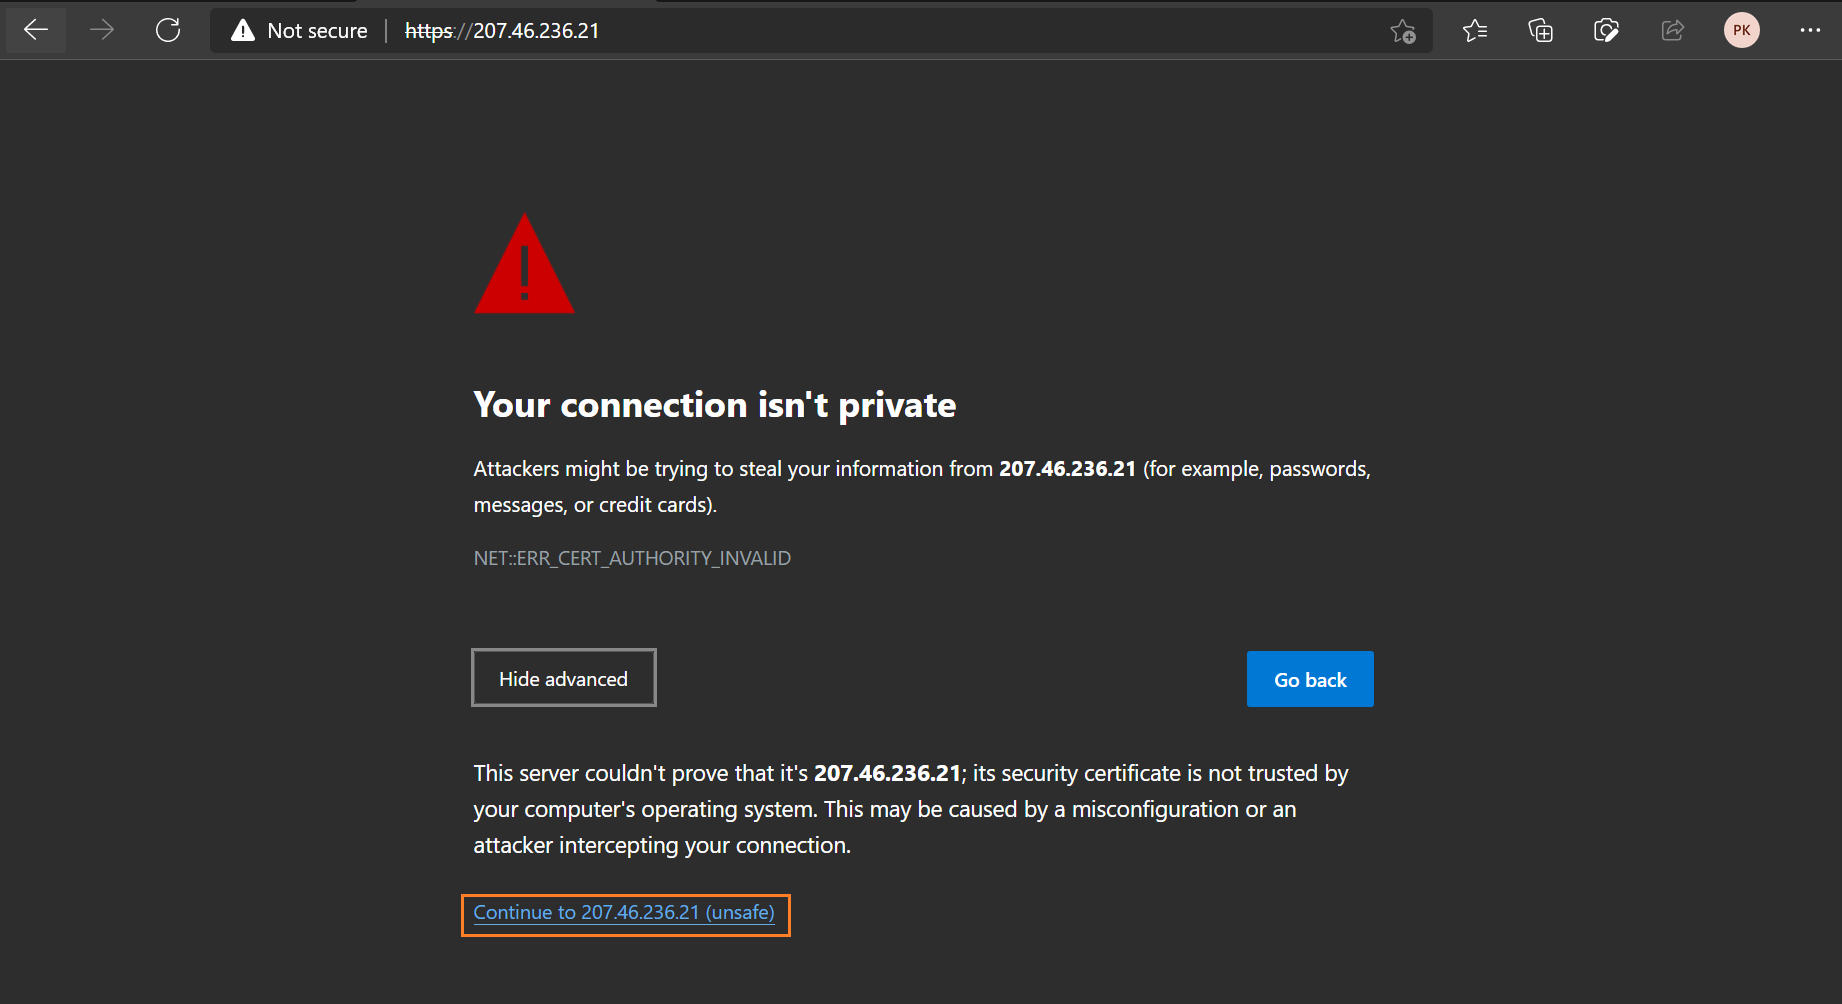
Step 21: Ignore Certificate error and Click on Continue to ....
Step 22: Select Configure HySecure Now.
Step 23: Scroll down End User License Agreement and Select I Accept Tnc then Click on Submit.
Step 24: Select Preboot Type and then click on Submit.
Step 25: Change Hostname, Keep IP address Default, Update Date and Time select Timezone, and then click on Submit.
Step 26: Review Hostname, IP address and Interface Configuration and then click on Submit.

Step 27: Select Setup a New Installation Type and then click on Submit.
Step 28: Select Default Accops Internal CA and then click on Submit.
Step 29: Add CA Authority Details, and First Security Office Account Details and then click on Submit.
Step 30: Wait for Processing and then First Security Officer Account Passphrase will be shown.

Standby Node Passphrase
Info
First Security Officer: SO_HySecure_Gateway_Standby
HySecure Active Node Passphrase: 25TTFB88NV50RNI8
Create HySecure Real Node
Step 1: Create HySecure Virtual Machine using below link form Azure Marketplace.
Info
Deploy Accops HySecure Gateway v5299 [Recommended]
Deploy Accops HySecure Gateway v5353 [For Turbo]
or click on Create a Resource >> Azure Marketplace and Search for Accops to Deploy it.
Select the version to depoly it from dropdown menu of plan options.
Step 2: Add Project details, Instance Details and then Click on "Next : Disks".
Step 3: Add Disk Details and click on Next : Networking Tab.
Step 4: Add Networking Details and click on Next : Management Tab.
Info
While Creating Real Node, we can choose Load Balancing option if we have already Created a Public Load Balancer. Real Node will participate in Public Load balancing on External Port 443. We can add as many Real Nodes as we want as per the user loads.
Step 5: Add Management Details and click on * Next : Advanced *.
Step 6: Add Advanced Details and Click on Next Tab * Tags*.
Step 7: Add Project Tags and Click on Next Tab Review + Create.
Step 8: Once VM validation is passed then click on * Create *.
Step 9: List Created VM in Azure Dashboard >> Virtual Machines.
Step 10: Connect newely created Virtual Machine using Private IP Address.
Tip
If Public Load Balancer is attached to Virtual machine then use Private IP to connect the VM, Please make sure you have Site-2-Site Connectivity to your Azure Network from the location you want to access the Accops Gateway. Another method to Access the Gateway using any Windows Virtual Machine from Same Subnet or Different Subnet, It may required Port opening in Firewall, Please Check with Your Azure Network/Security/Firewall Team.
Step 11: Connect to Serial Console of HySecure Active Node & Login with Default Credentials.
Step 12: For Network Configuration, Enter 1 .
Step 13: To Configure Ethernet Device, Enter 1.

Step 14: Enter the Device Number of Ethernet to configure it, Enter 0 for eth0 interface.
Example
for eth0, Enter 0. for eth1, Enter 1.

Step 15: Select Manually Configure ETH0, Select one of the option above : 1 and assign Same IP address which is shown in HySecure Serial Console as Static IP Address.
Step 16: Enter R to exit from IP configuration Menu.
Step 17: Enter R to exit from Ethernet Configuration Menu.

Step 18: Enter R to exit from Network Configuration Menu.

Step 19: Select cross to exit from HySecure Console Menu.

Step 20: Connect HySecure Real Node using Private IP Address from Browser.
Tip
Below option can be used to Preboot Real Node using Private IP Address.
1: Temporarily Assign a Public IP address to Real Node Server and Complete Preboot, post that You can remove the Public IP address from Real Node. (Using 1st Method to Preboot Real Node)
2: Publish Real Node in Active Cluster as an Application on port 443 then Create an Application and Assign it to Security Officer User and Preboot the Real node Server.
3: Create a Windows VM (For Example: Jump Server/Existing Server ) in Azure Cloud within Same Subnet or Different Subnet and allow ports 443,3636 and 22 from Windows VM to Complete Preboot on Real Node Server.
4: Create Site-2-Site Connectivity to Azure Cloud from the Network You want to Access the Real Node.
Step 21: Ignore Certificate error and Click on Continue to ....
Step 22: Select Configure HySecure Now.
Step 23: Scroll down End User License Agreement and Select I Accept TnC then Click on Submit.
Step 24: Select Preboot Type and then click on Submit.
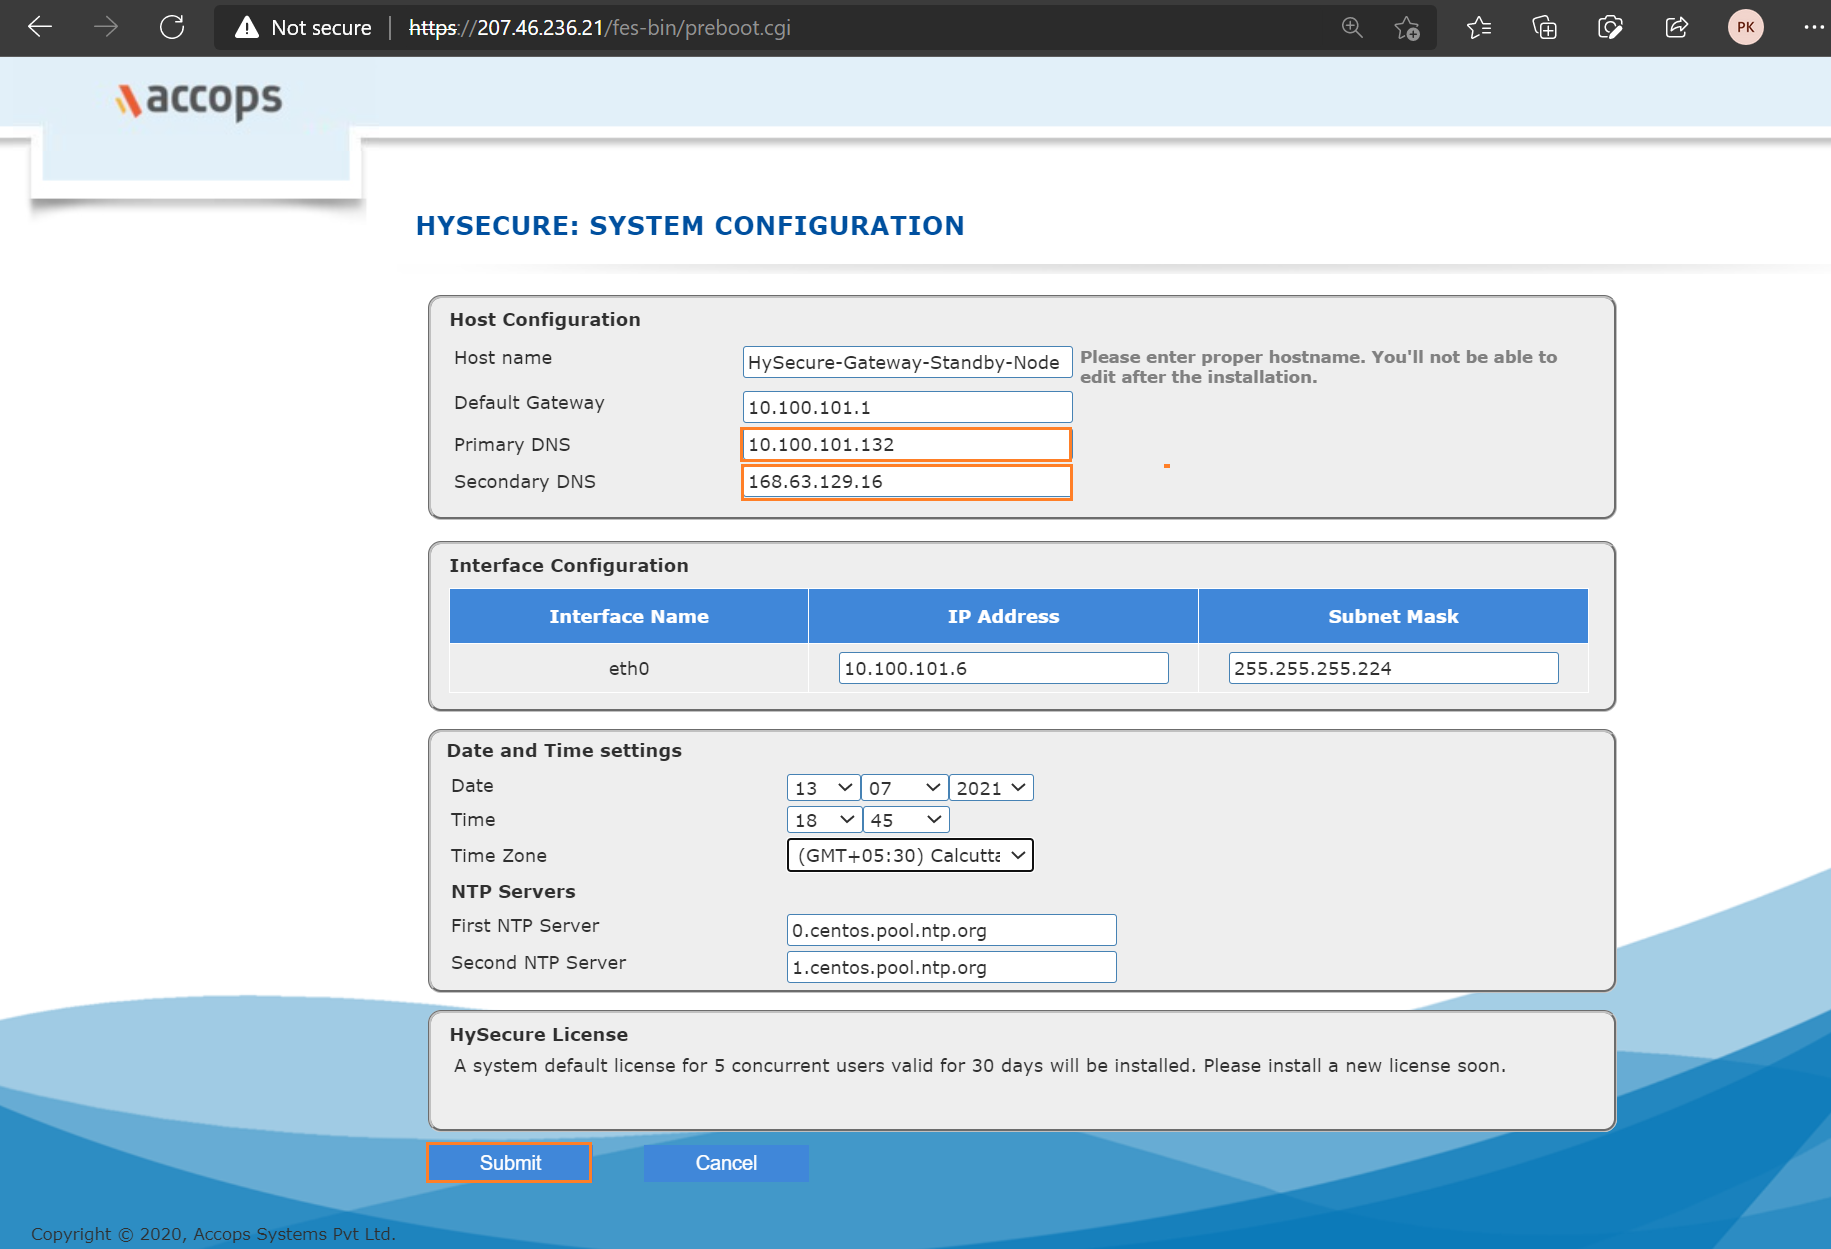
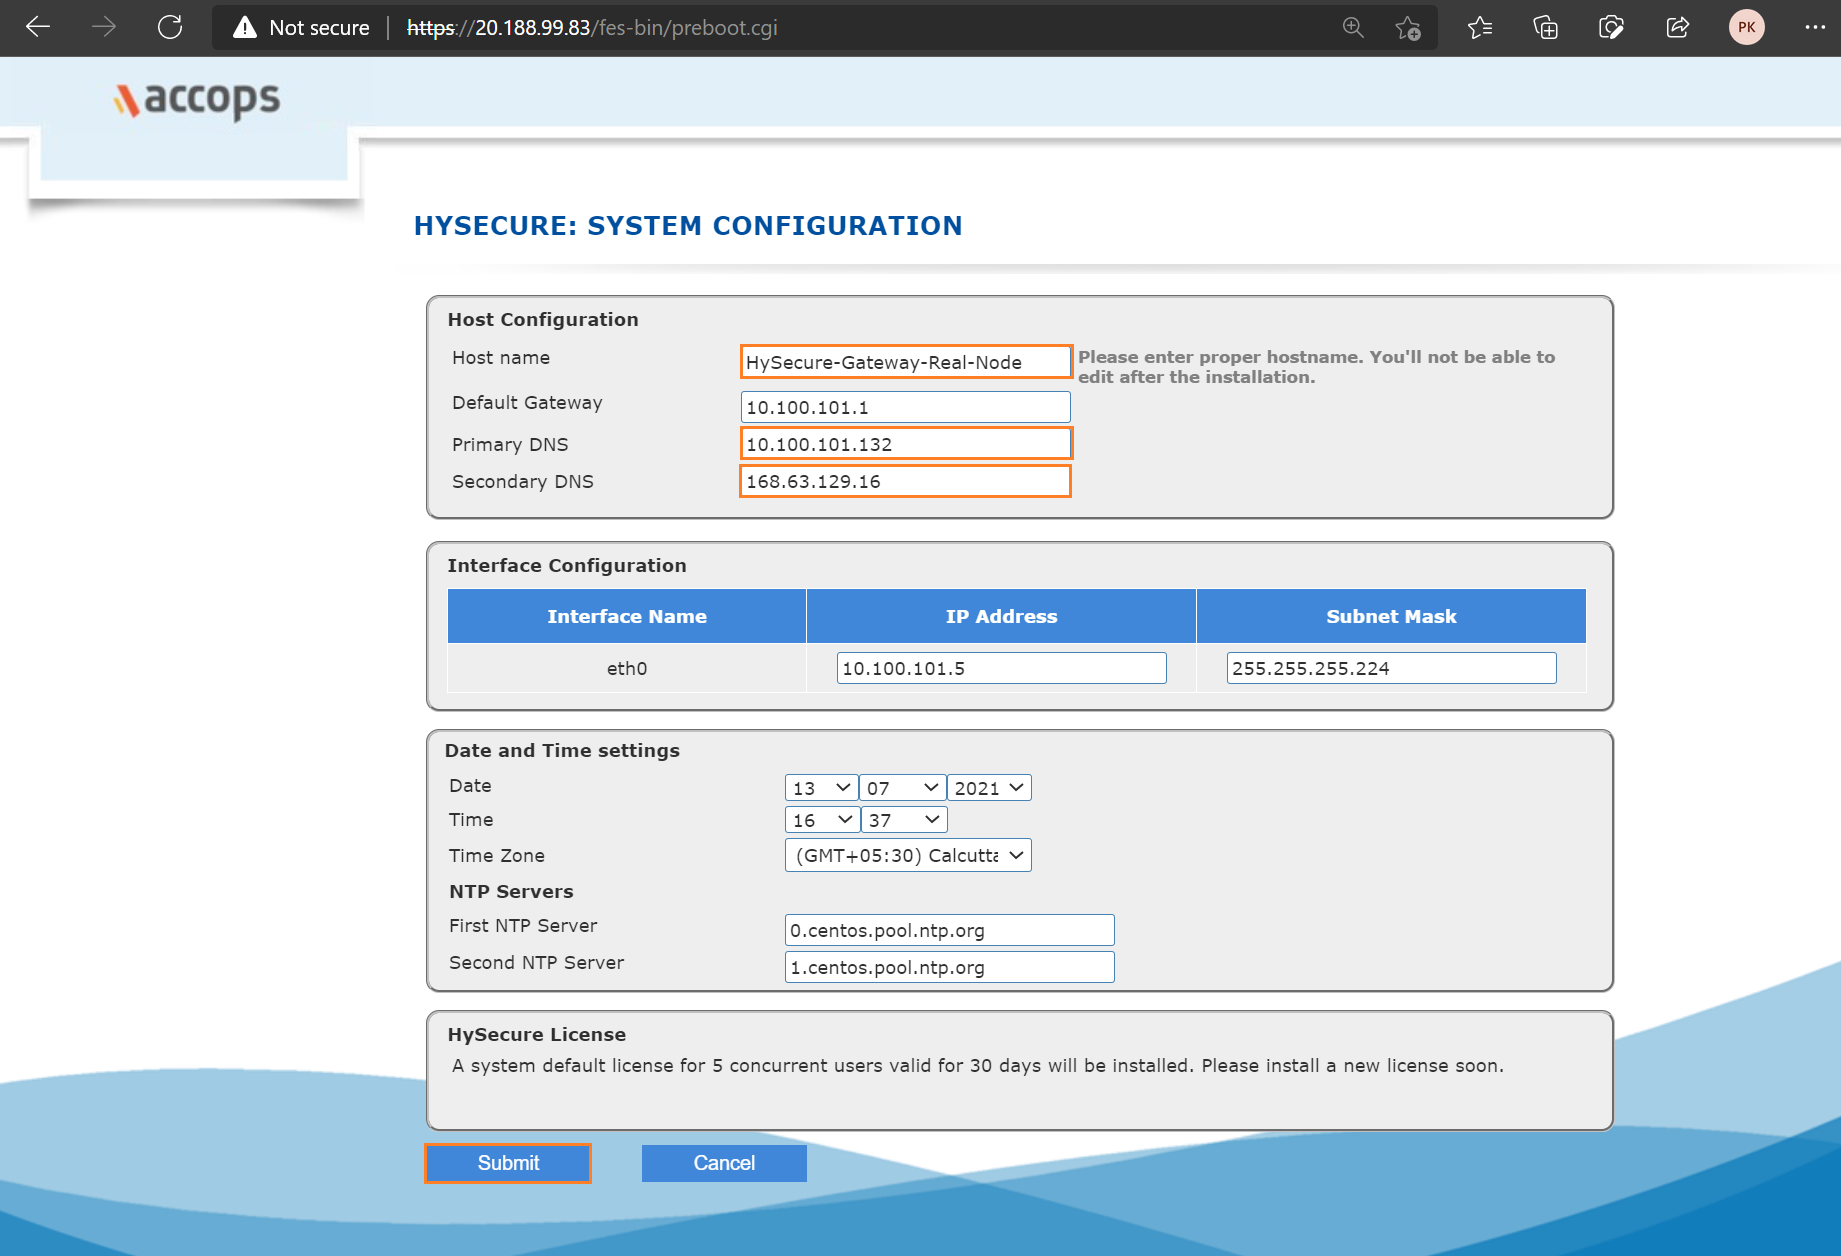
Step 25: Change Hostname, Keep Default Gateway as it is, Set Primary & Secondary DNS, Keep IP Interface Configuration Default, Update Date & Time, select Time Zone, Update NTP Server as per Your Requirement or Keep it Default then click on Submit.
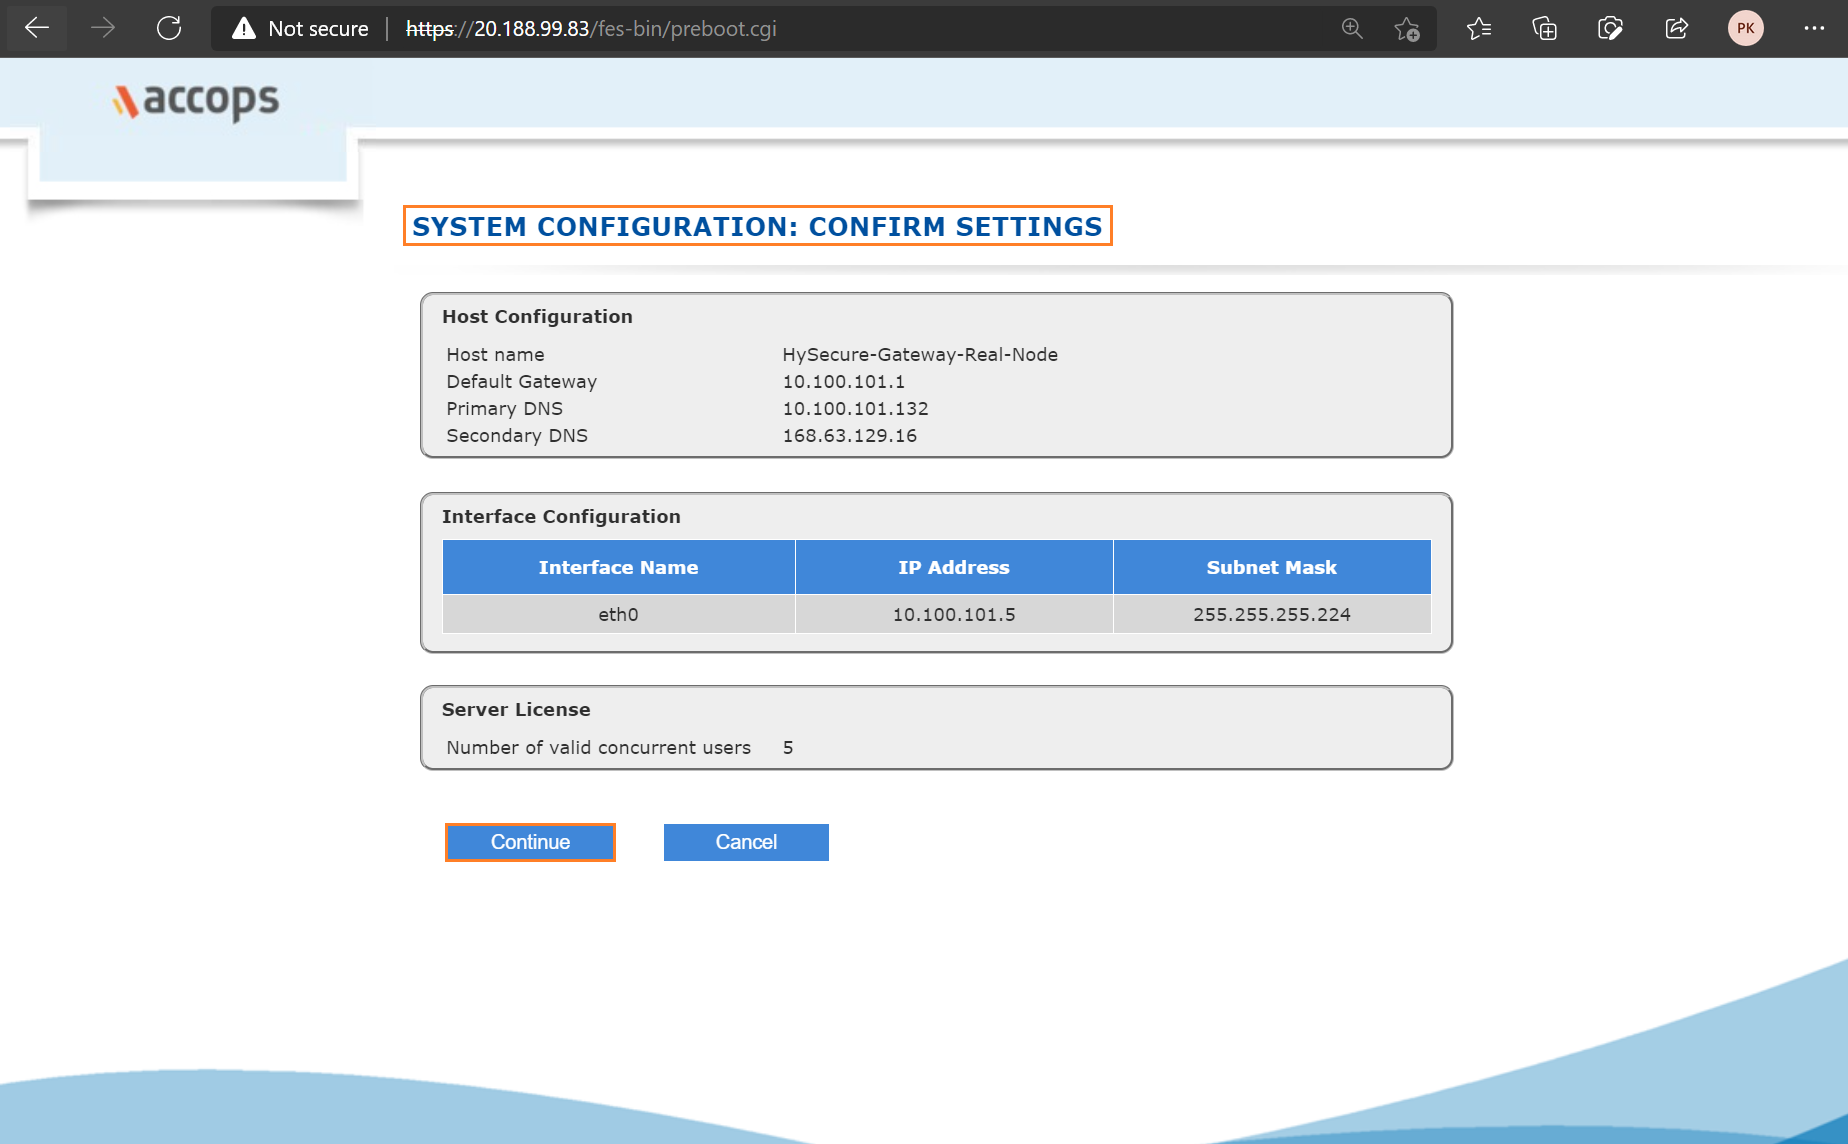
Step 26: Review Hostname, IP address and Interface Configuration and then click on Submit.
Step 27: Select Setup a New Installation Type and then click on Submit.
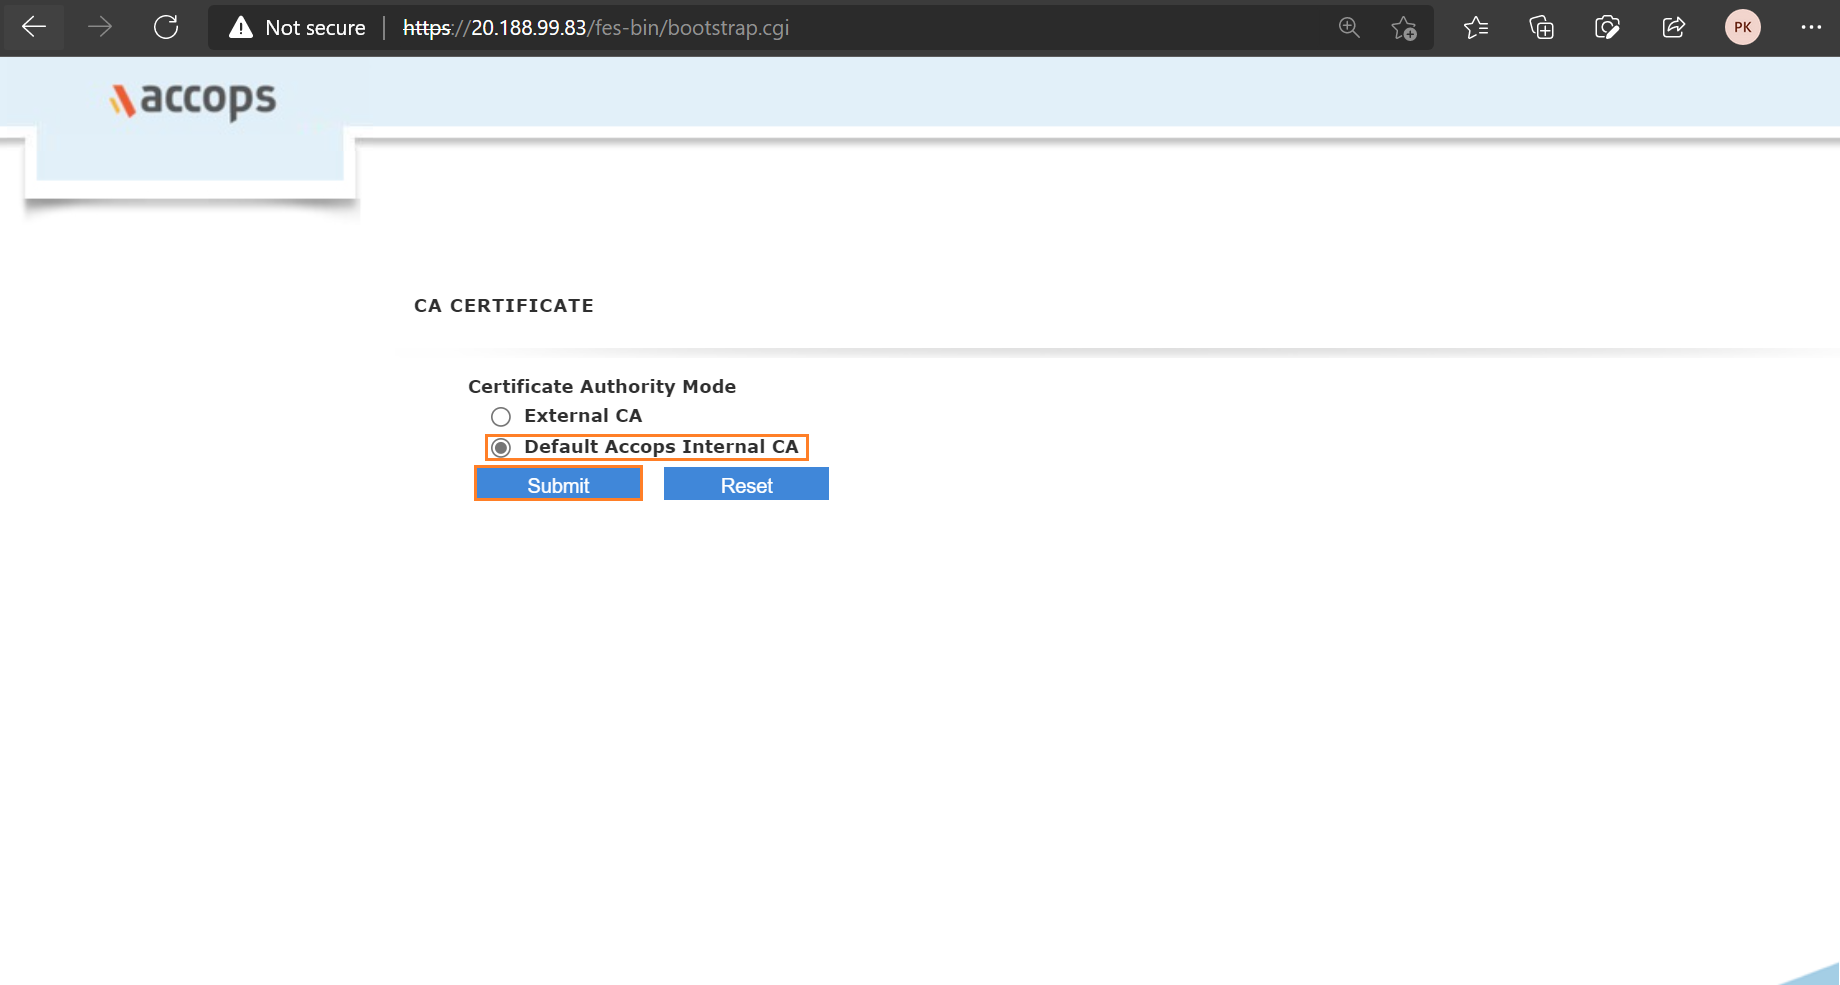
Step 28: Select Default Accops Internal CA and then click on Submit.
Step 29: Add CA Authority Details, and First Security Office Account Details and then click on Submit.

Step 30: Wait for Processing and then First Security Officer Account Passphrase will be shown.
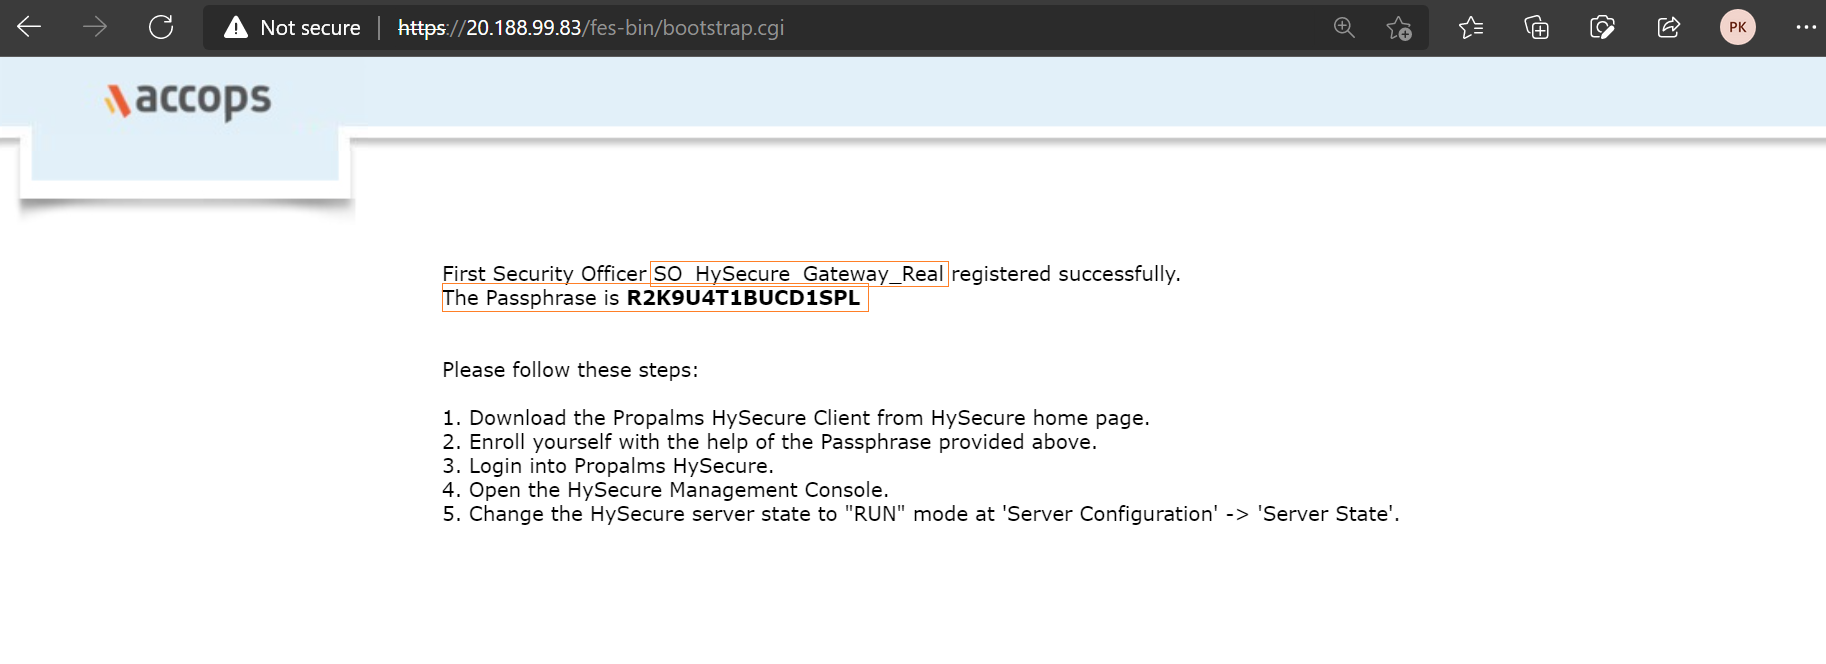
Real Node Passphrase
Info
First Security Officer: SO_HySecure_Gateway_Real
HySecure Active Node Passphrase: R2K9U4T1BUCD1SPL
What's Next
Info
-
Enroll First Security Officer Account
-
Create New Cluster
-
Add Standby Nodes to New Cluster
-
Add Real Node to New Cluster
How to Enroll First Security Officer Account
How to Logging in as an SO
How to Configure HySecure Gateway For User Access
More Info About Accops HySecure
Help/Support
Please send a mail to support@accops.com for further Help/Support.