HySecure HA Configuration
Environment
- Hysecure Gateway Active Node Deployment in Azure Cloud
- Gateway Version: v5299
Pre-Requisites
In this Article we will be completing below steps.
Info
- Enroll First Security Officer Account
- Create New Cluster
- Add Standby Nodes to New Cluster
- Add Real Node to New Cluster
Install Desktop Client
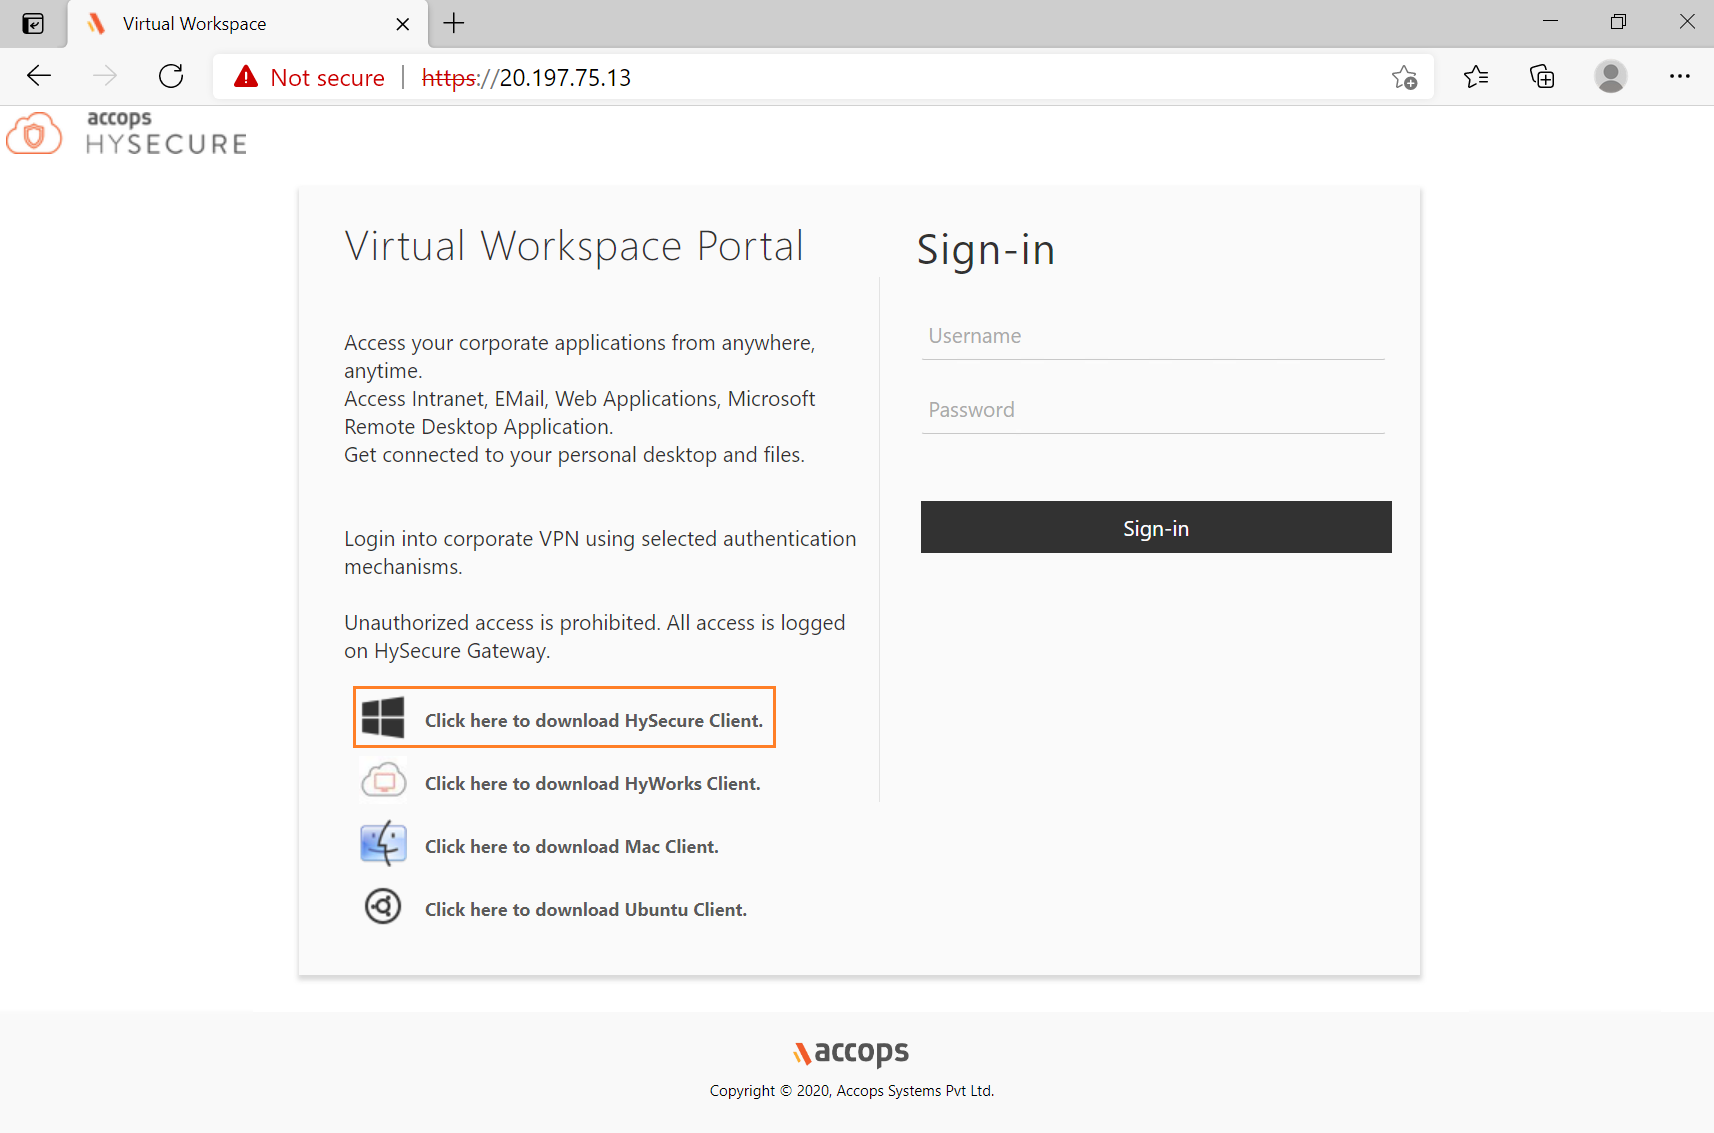
Step 1: To Enroll First Security Officer Account, Download Desktop Client , Launch the Web Browser and go to https://IP_Address_of_Active_Node
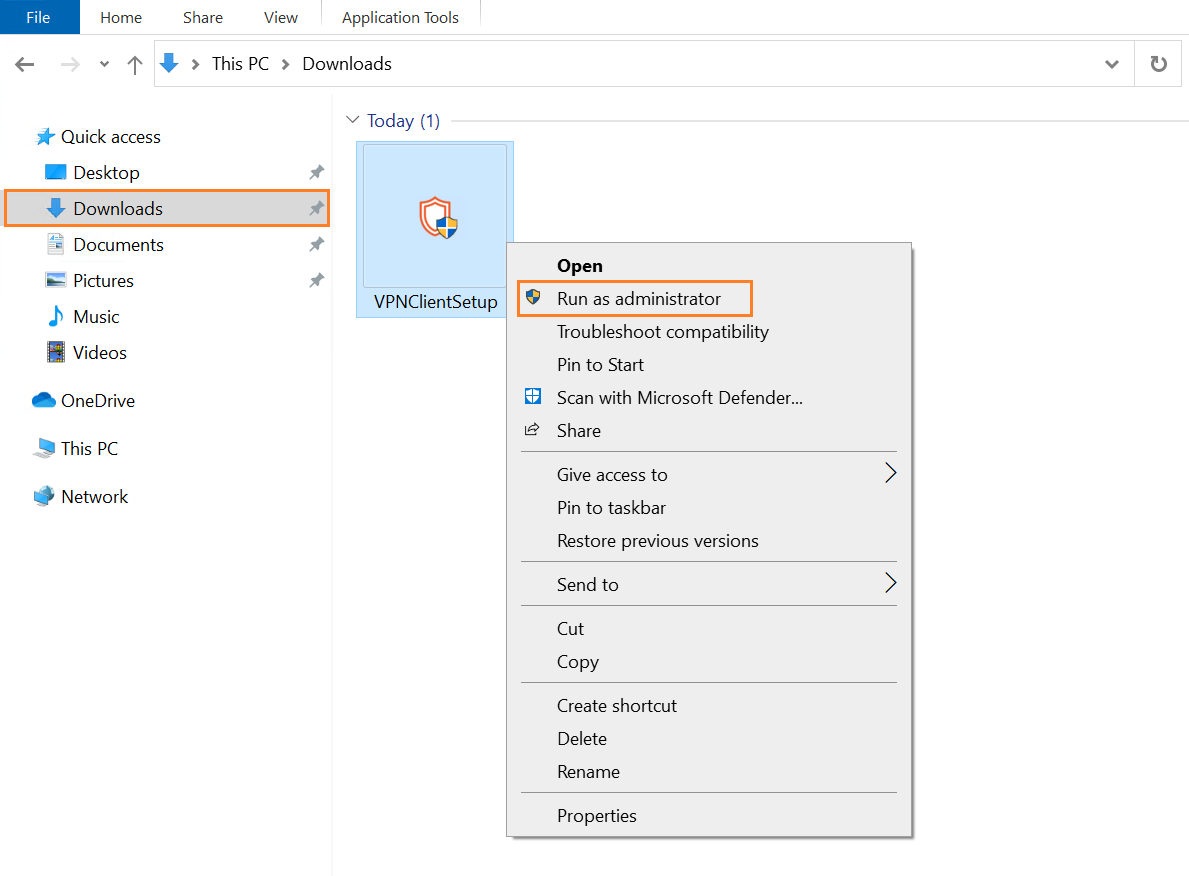
Step 2: Open download folder and install VPNClientSetup.exe.

Step 3: Right click on VPNClientSetup & Select Run as administrator.
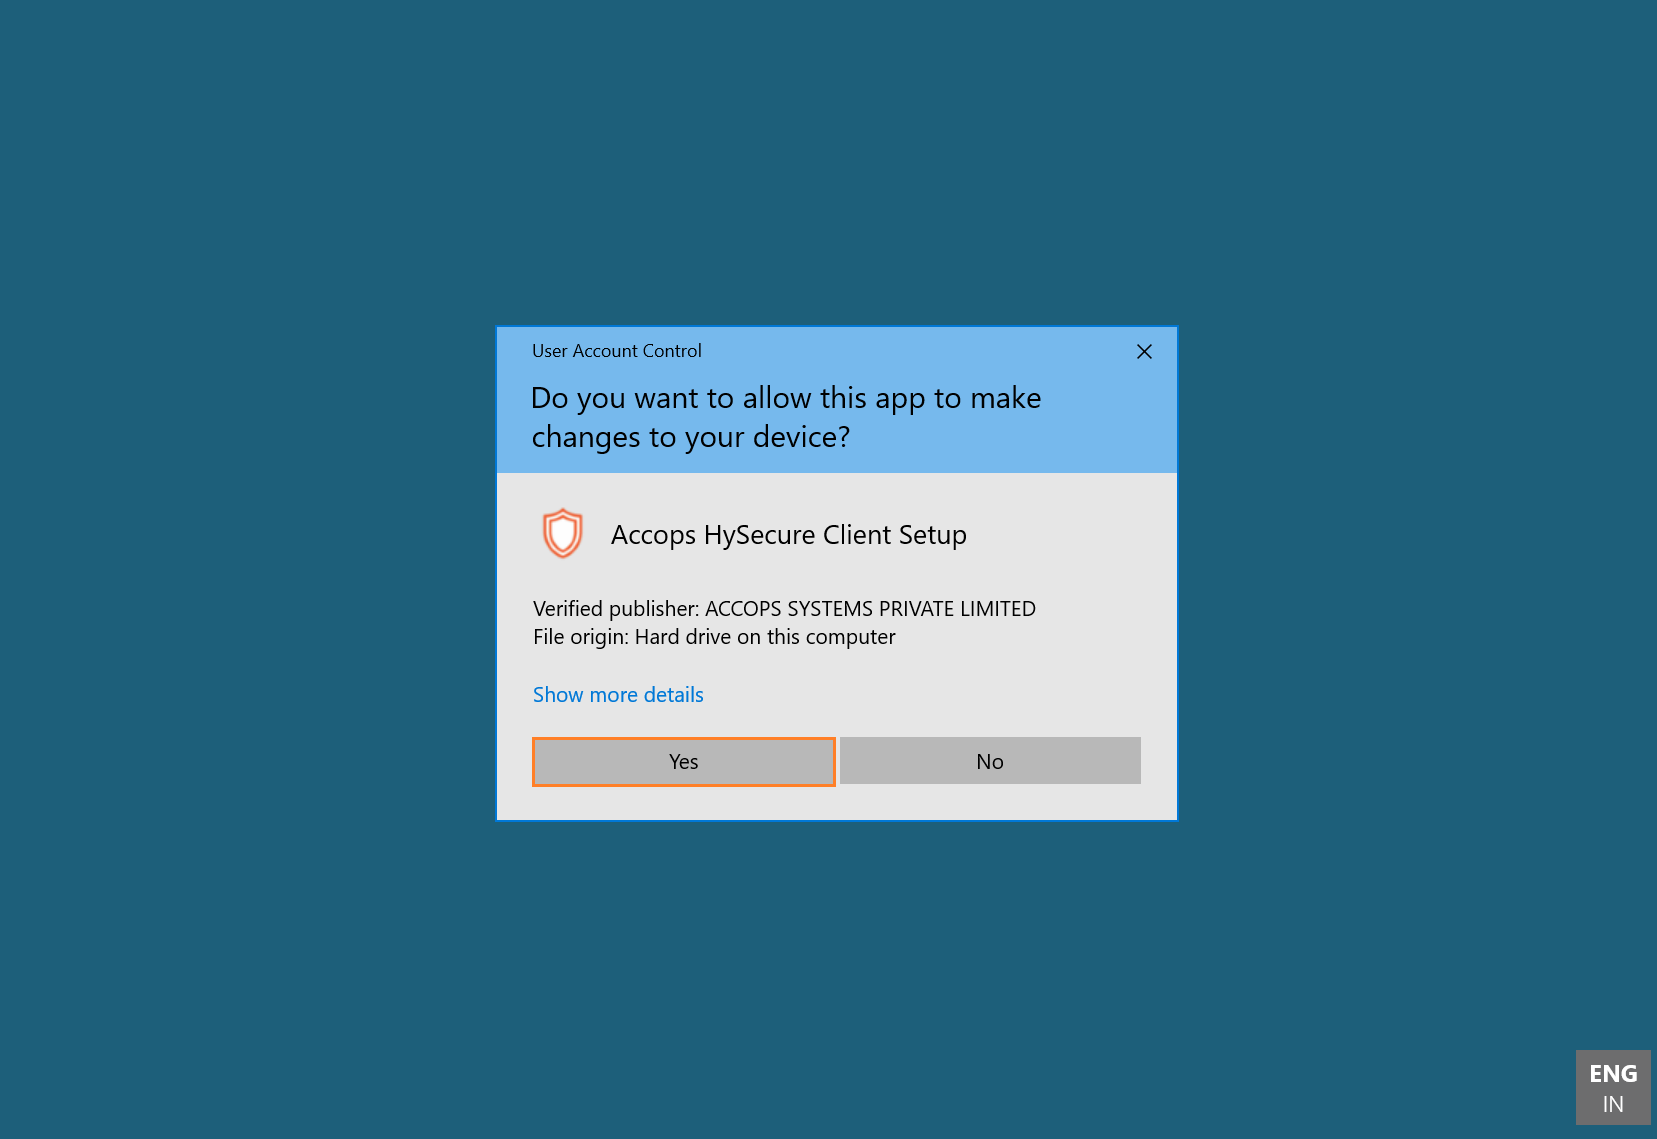
Step 4: Select UAC Prompt.
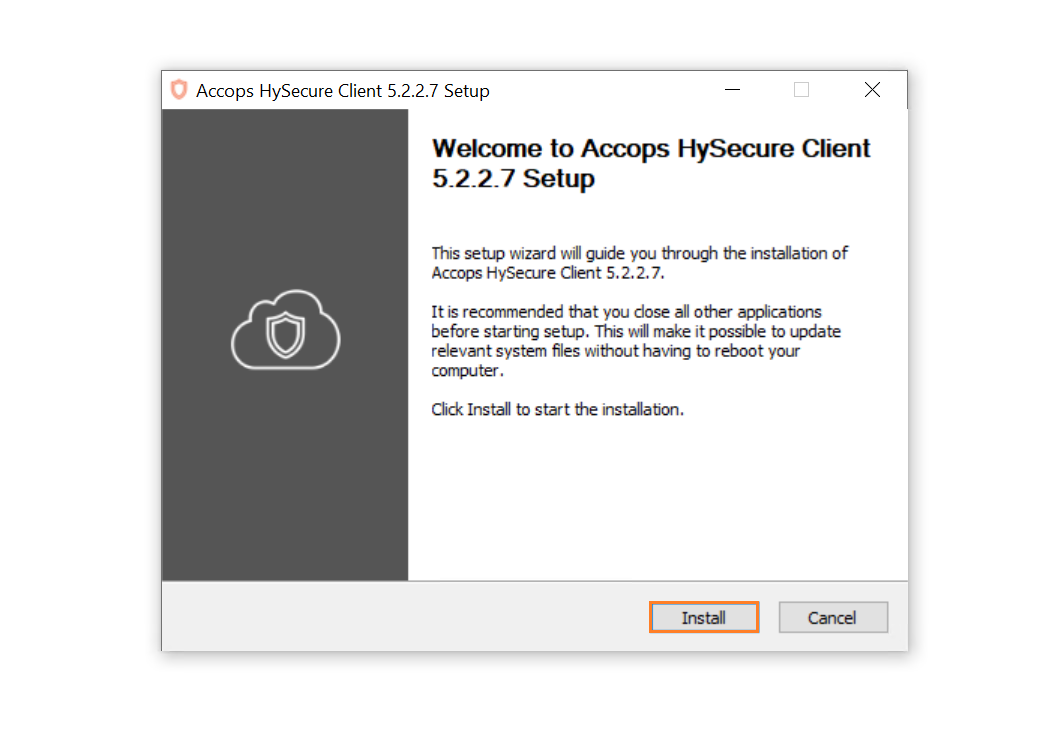
Step 5: Select Install.
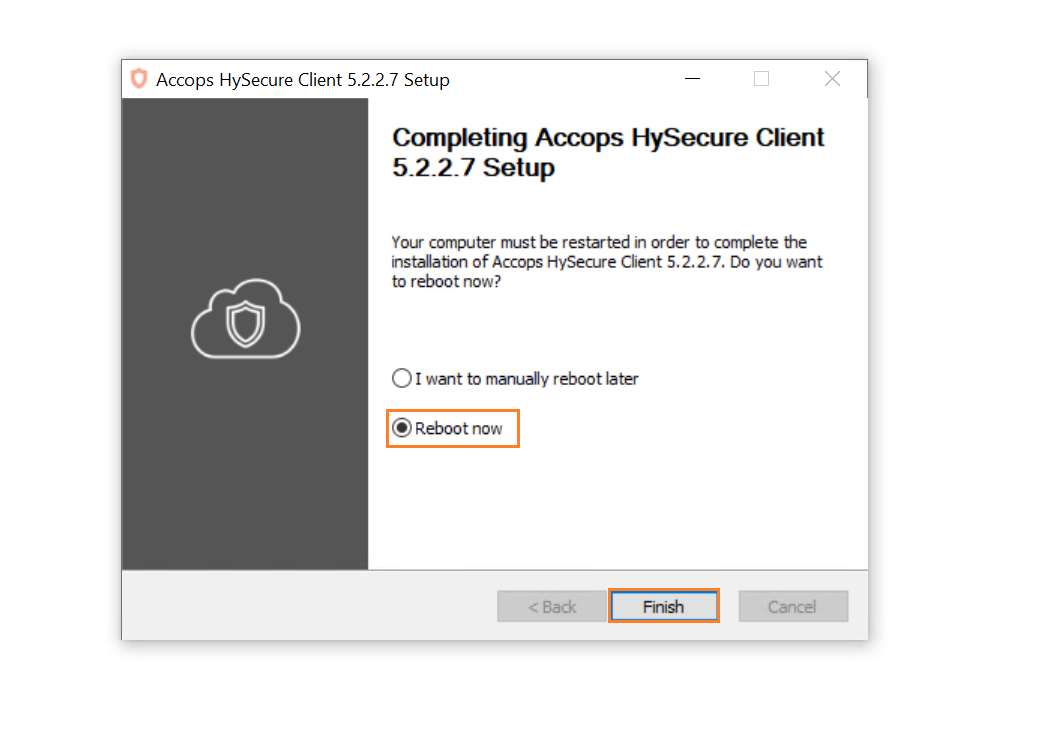
Step 6: Select Reboot Now & click on Finish.
Enroll Passphrase using Desktop Client
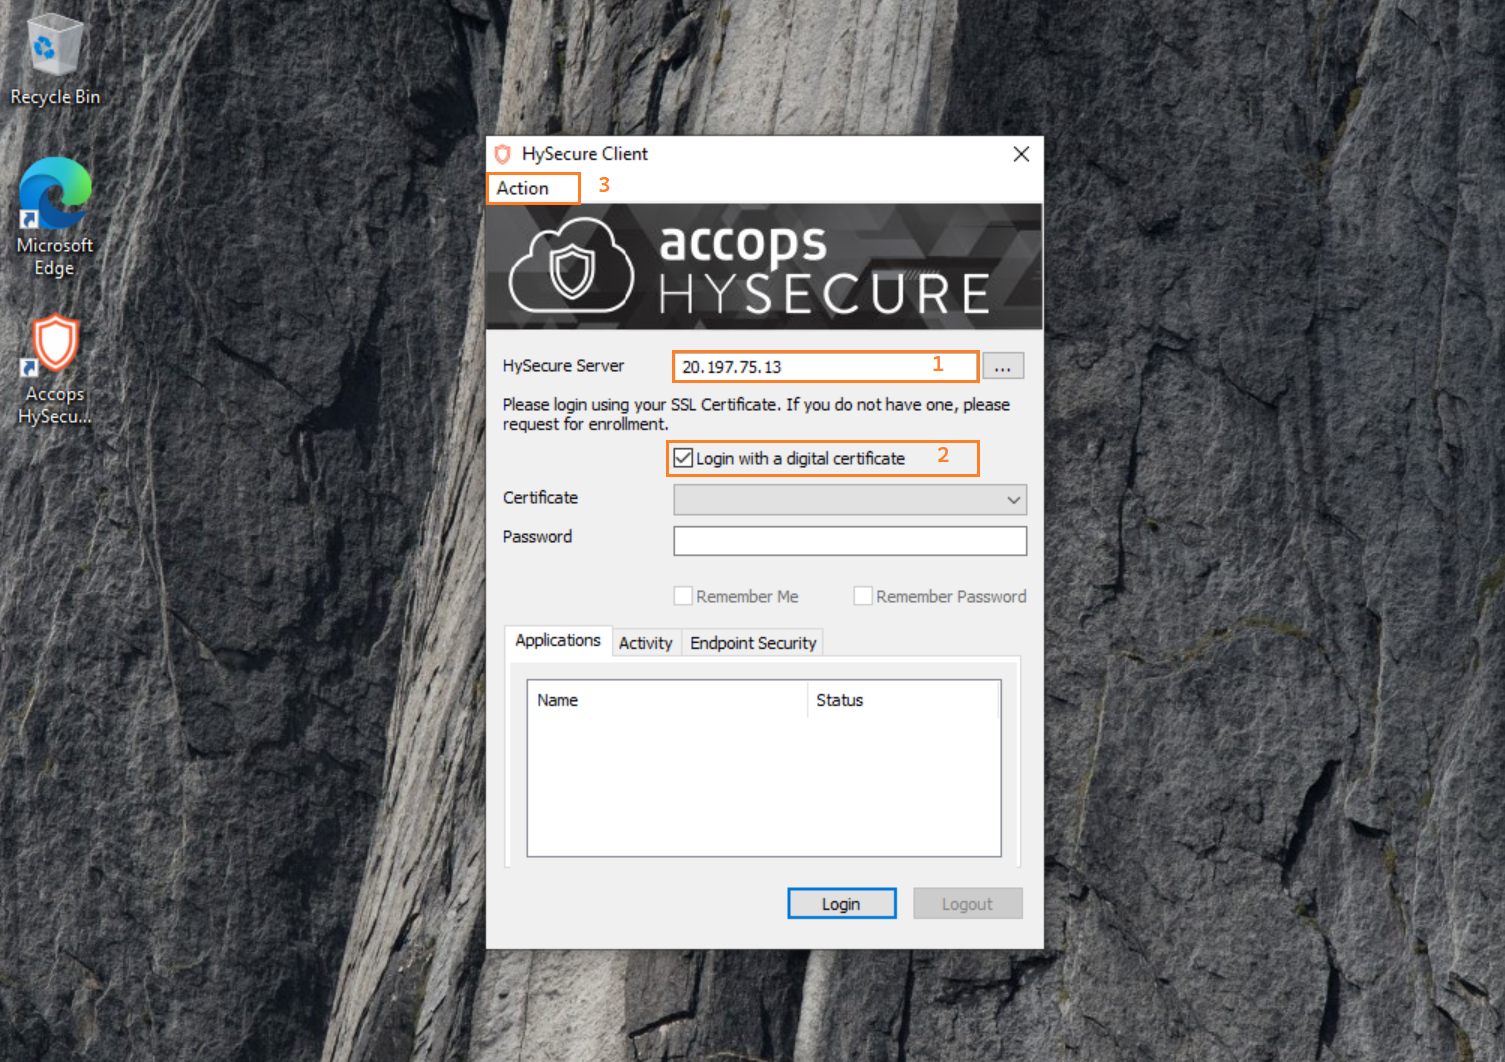
Step 1: Launch Accops HySecure Client from Desktop.

Step 2: Enter HySecure Server Address , Select Checkbox * Login with a digital certificate then Click on Action Menu.
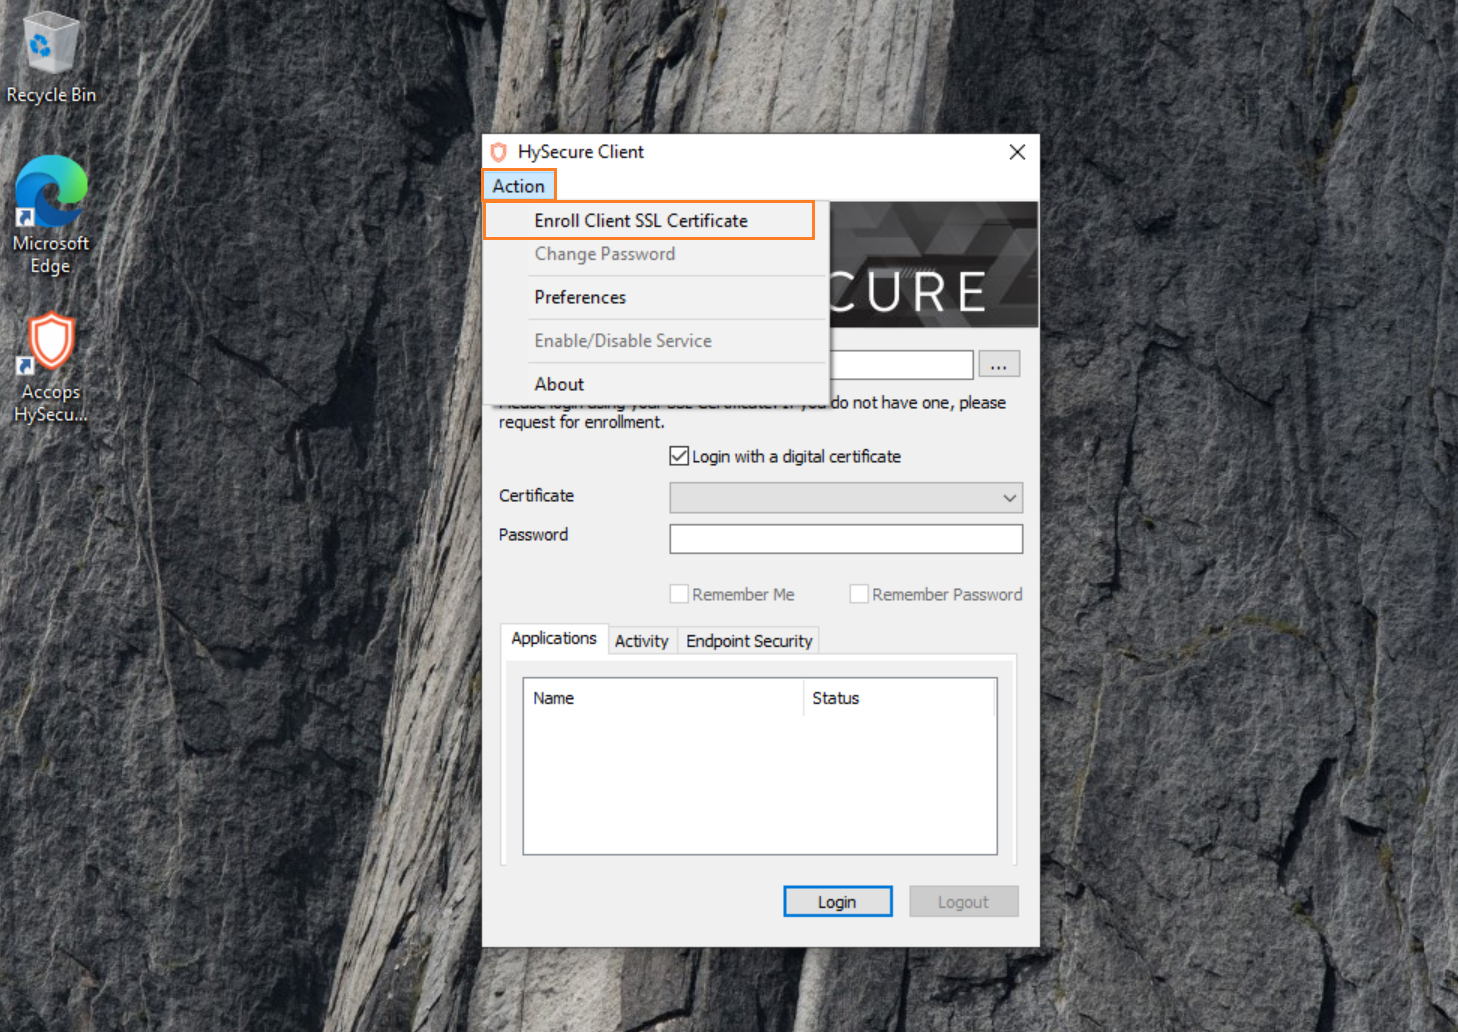
Step 3: Go to Action and select Enroll Client SSL Certificate from Dropdown Menu.
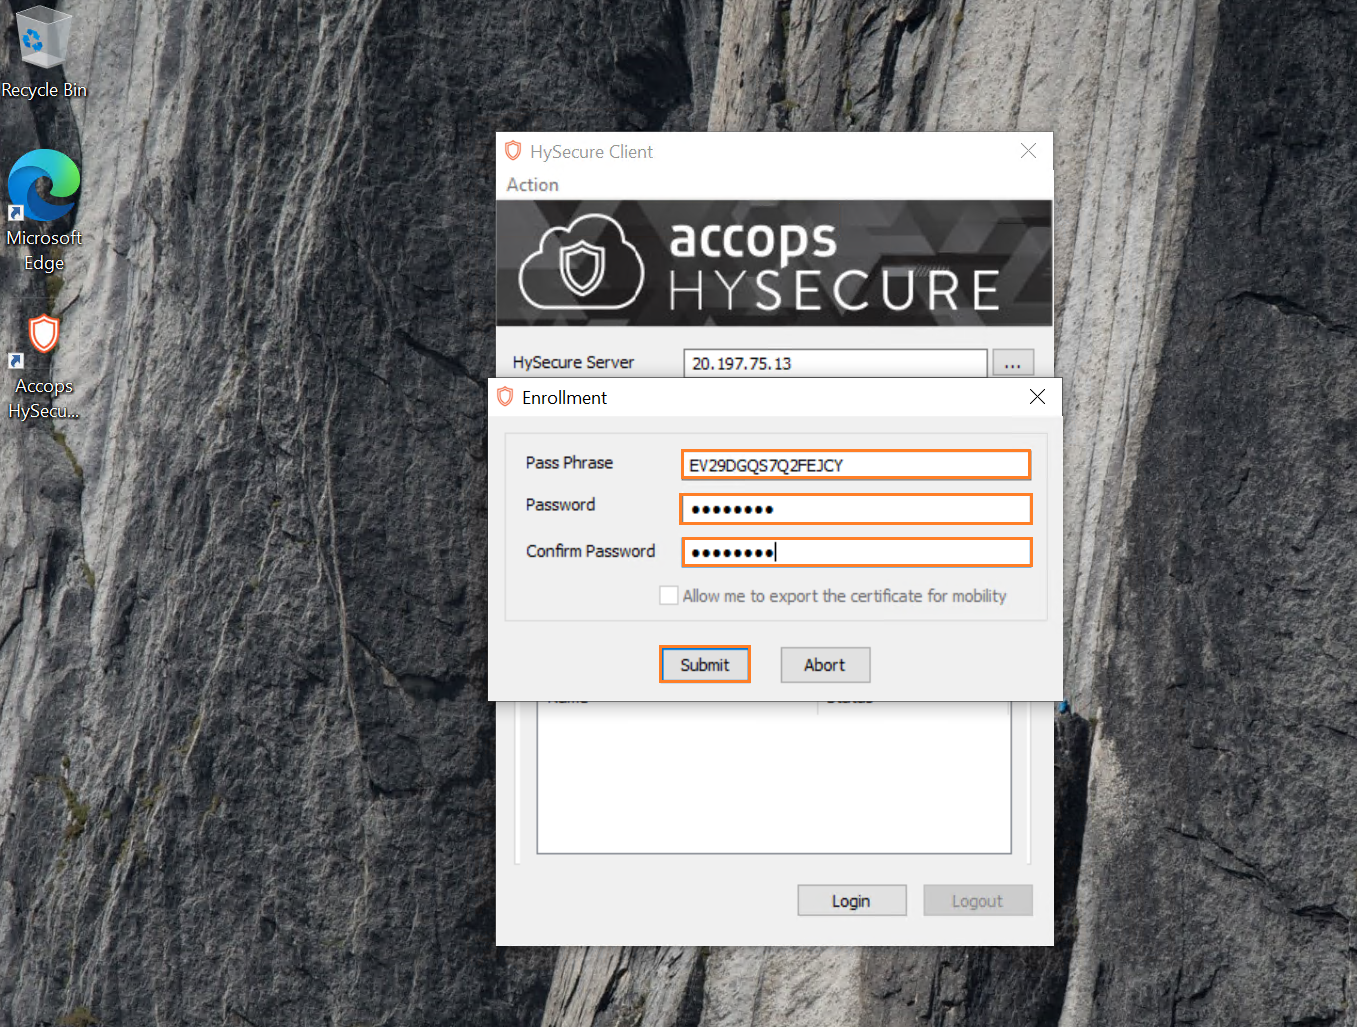
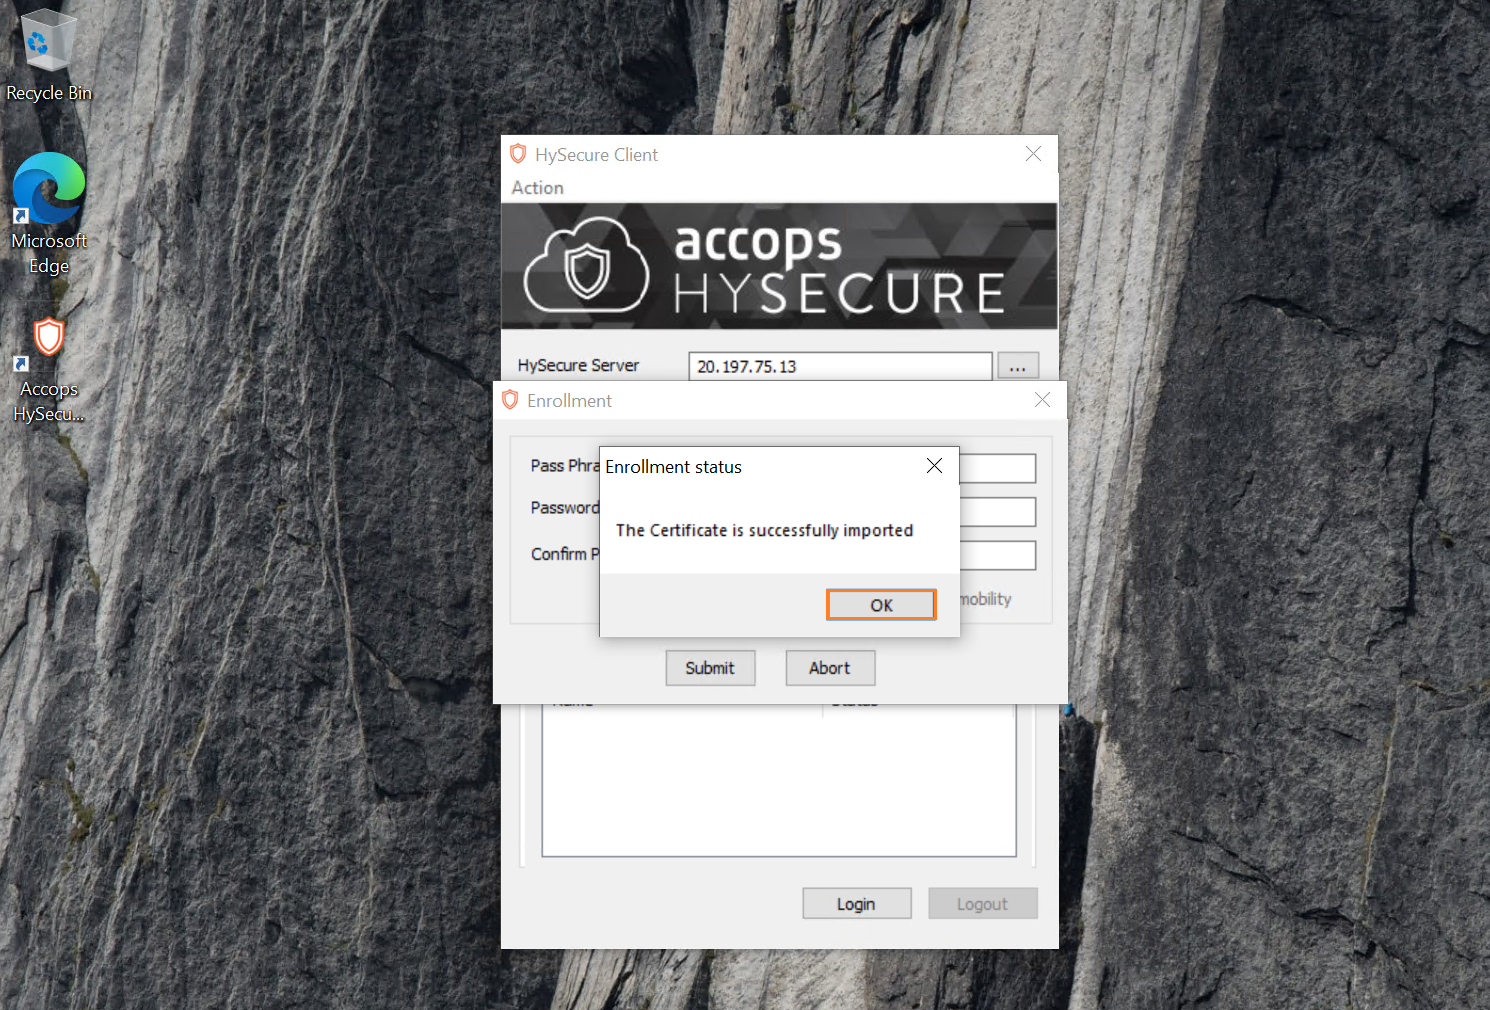
Step 4: Enter Passphrase, Set New Passowrd and Confirm New Password then click on Submit.
Example
PassPhrase: XXXXXXXXXXXXX
Password: xxxxxxxxxxxxxxxx
Confirm Password: xxxxxxxxxxxxxxxx
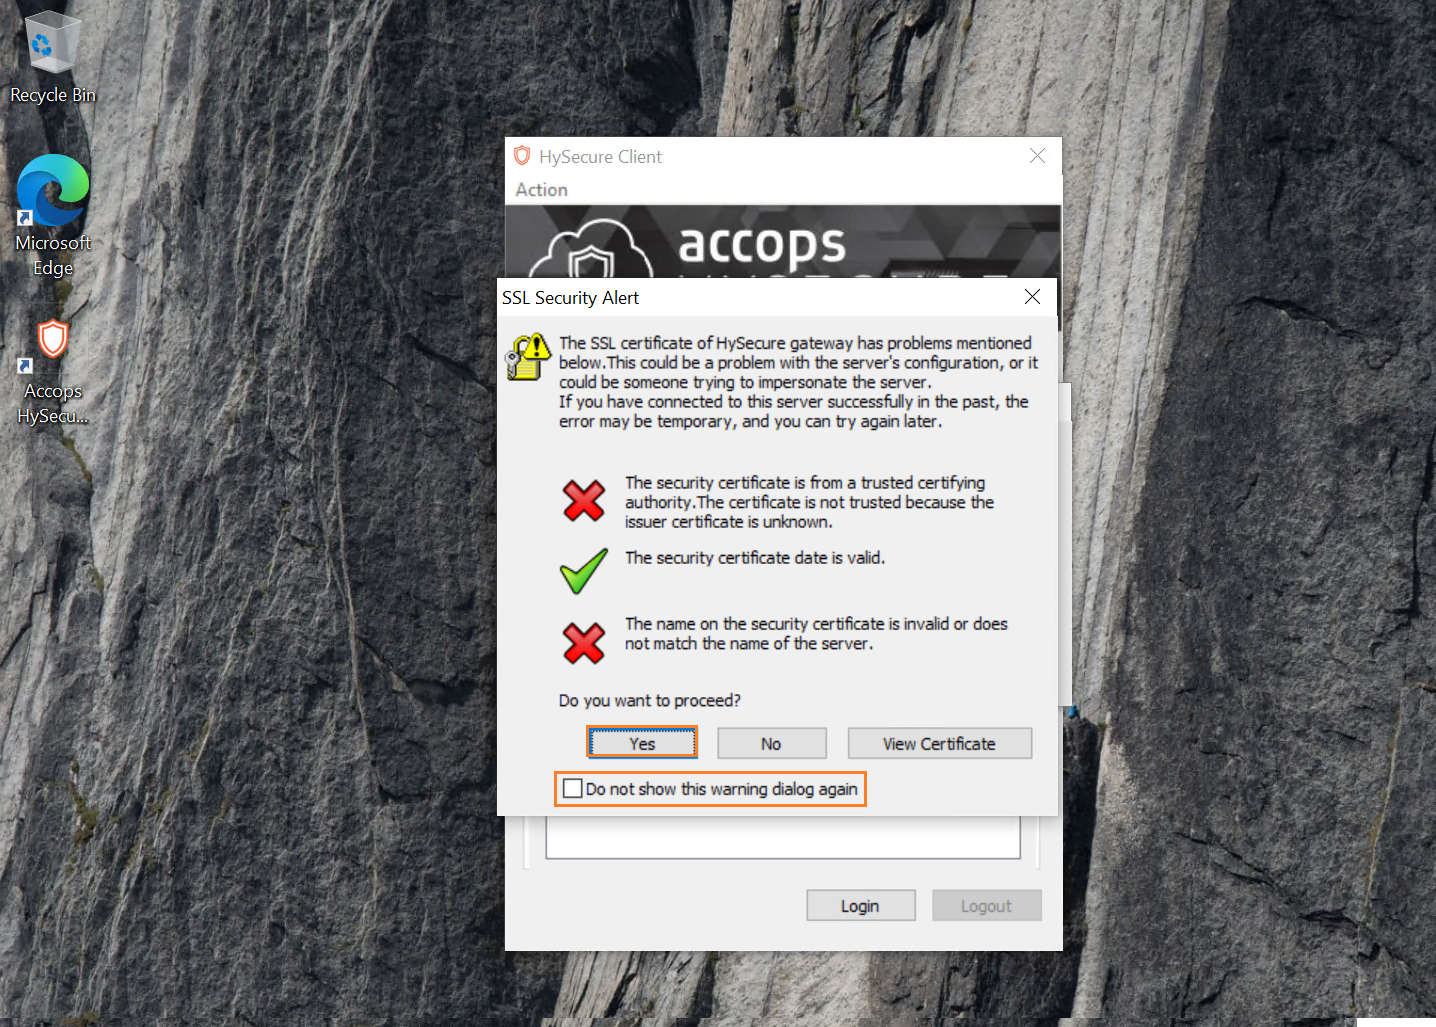
Step 5: Accept SSL Warning and select check box Donot show this warning dailog again.
Step 6: Enrollment of First Security Officer Account using Desktop Client is completed.
Create HA Active Cluster
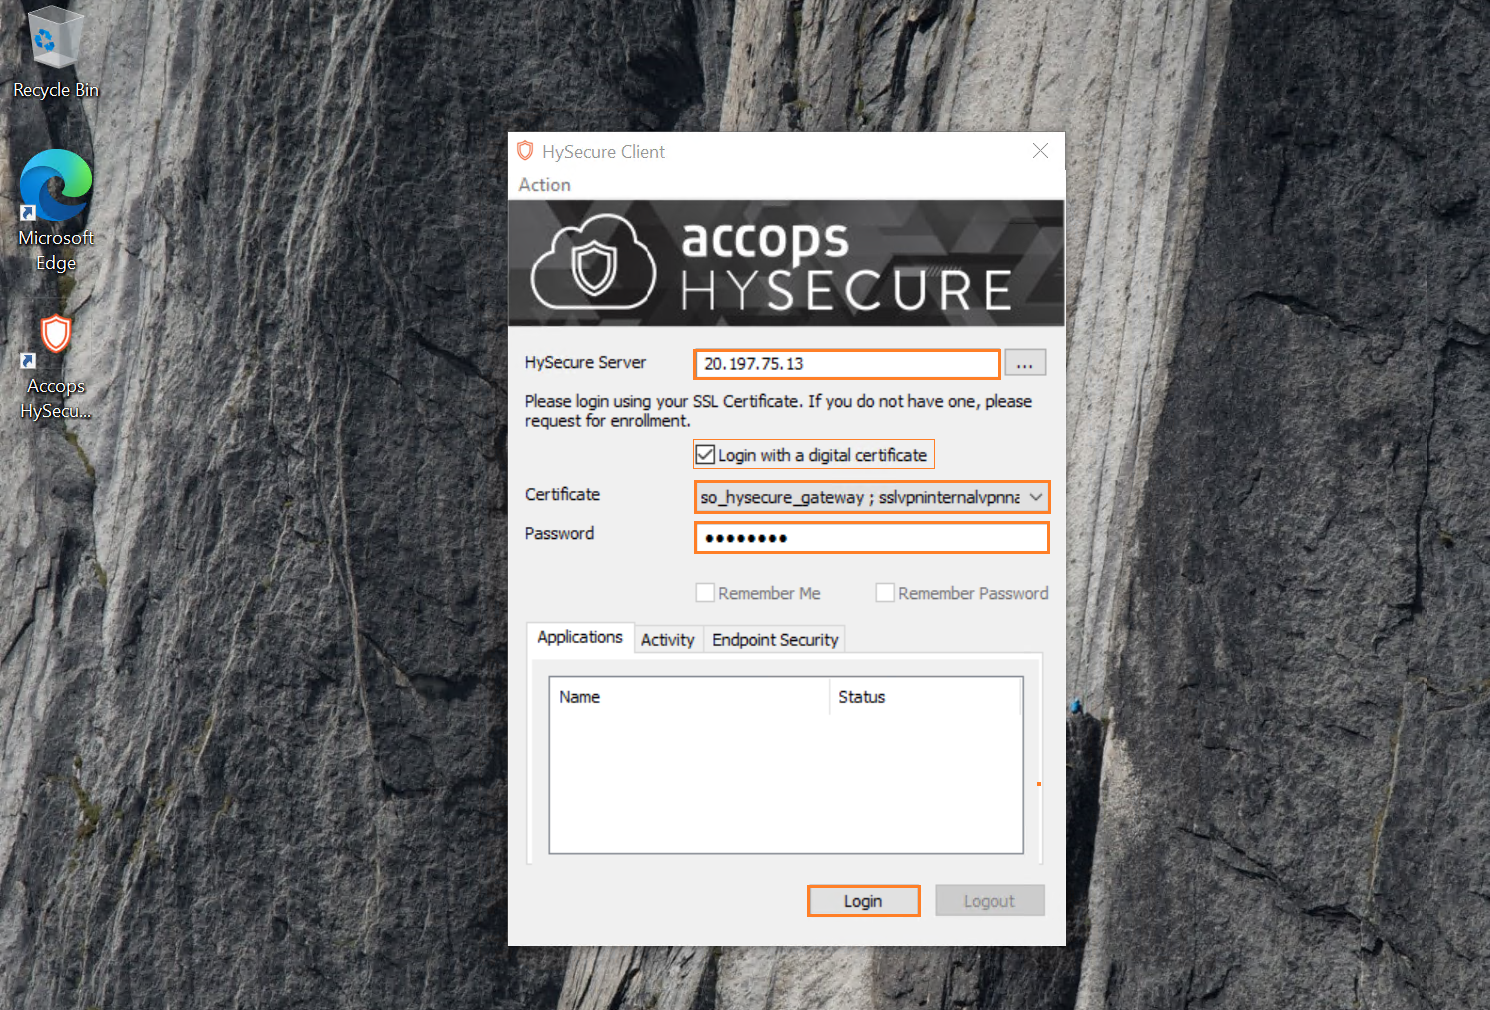
Step 1: Open HySecure client, Enter Server Address, Select Certificate from Dropdown Menu, Enter Password and click on Login.
Example
Hysecure Server: 20.197.75.13
Select Checkbox Login with a digital certificate
Certificate: so_hysecure_gateway_standby
Password: XXXXXXXX
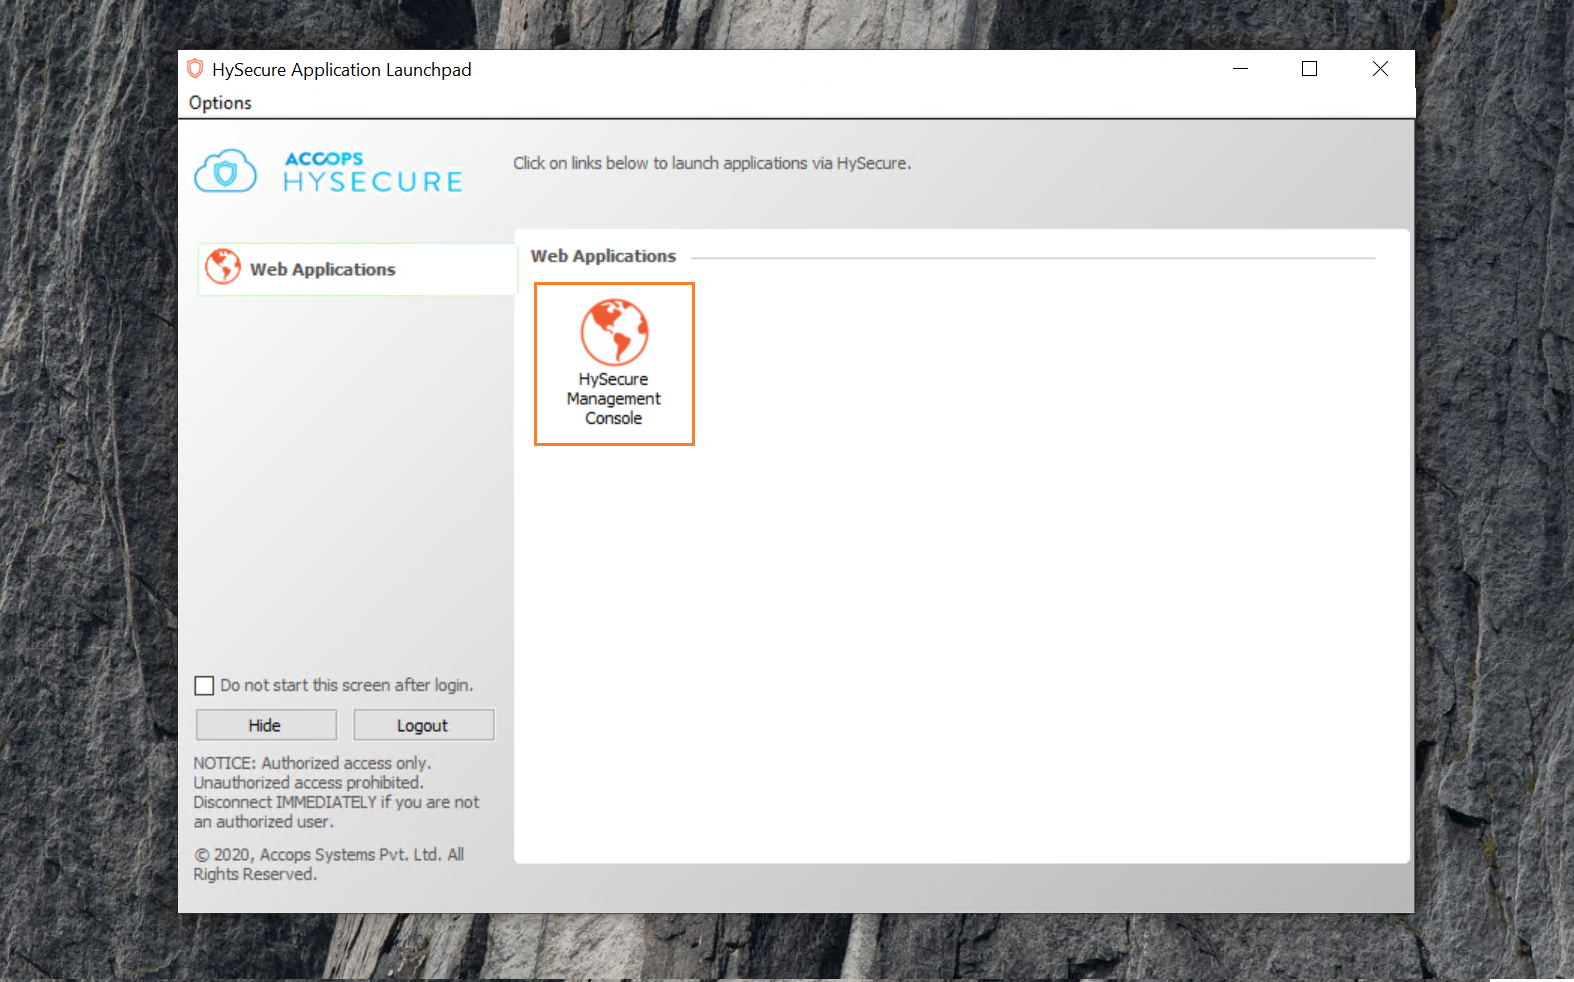
Step 2: Launch HySecure Management console.
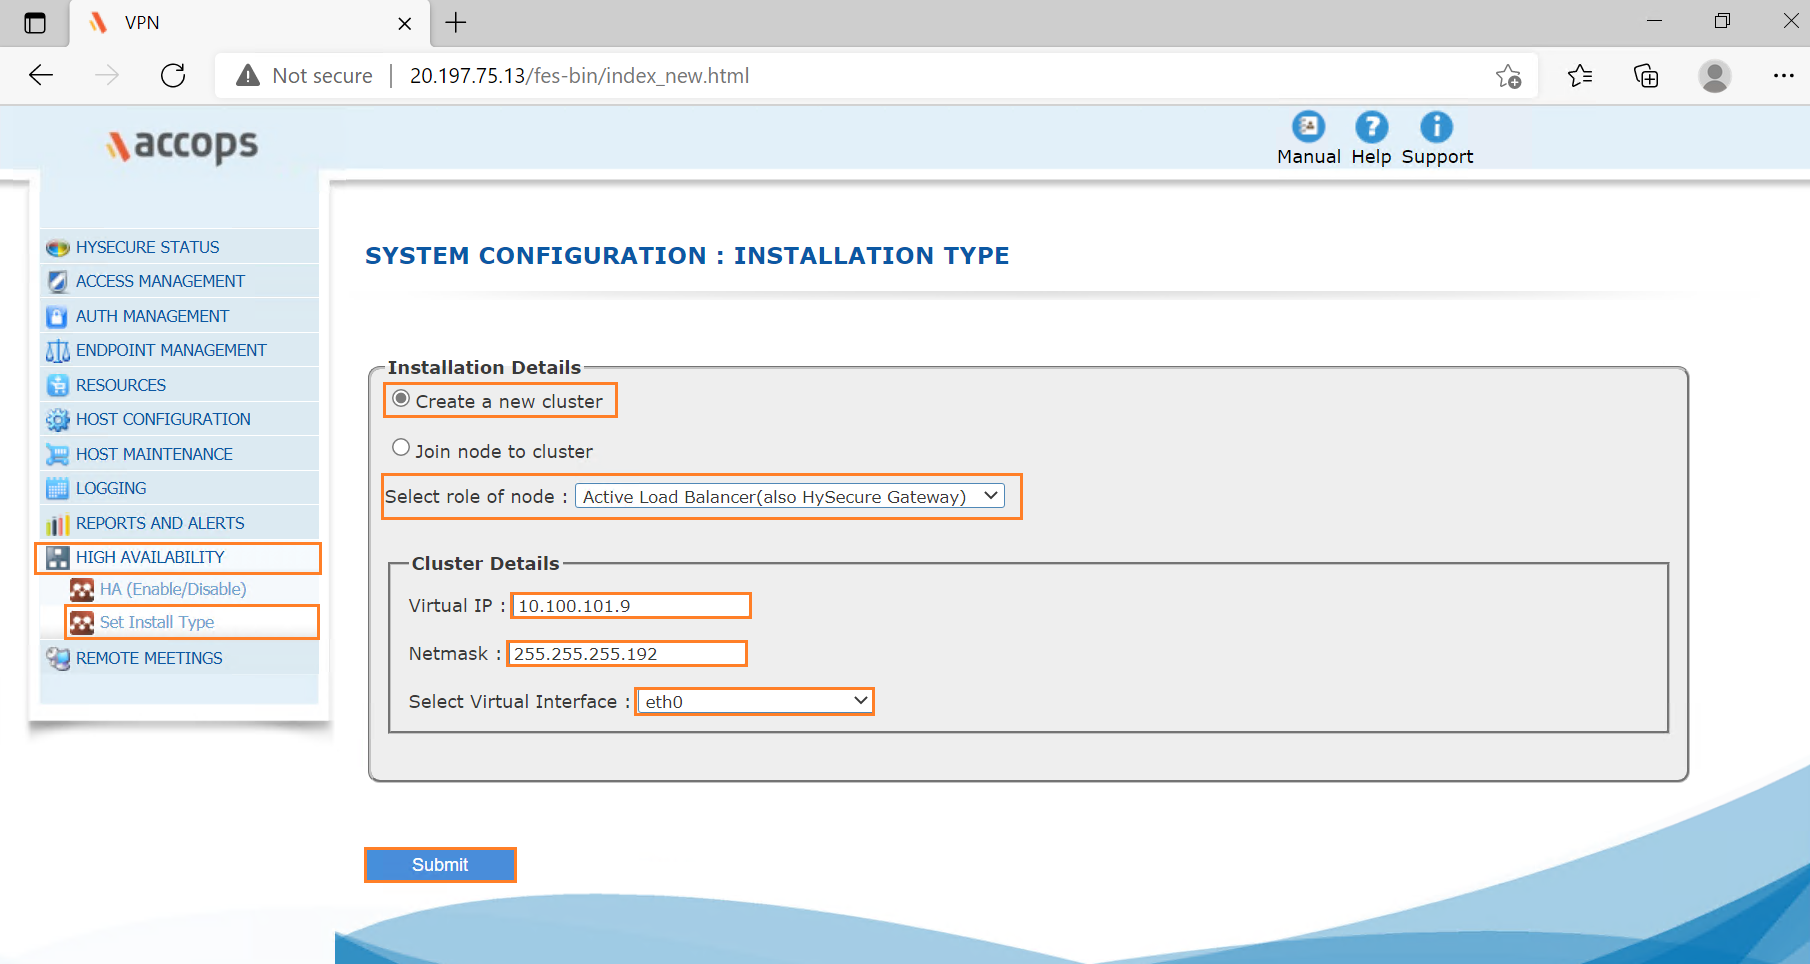
Step 3: Go to High Availability and Set Install Type , Create a New Cluster, Select Node Type as Active Load Balacer(also HySecure gateway), Enter VIP(Internal Load Balancer IP Address), Subnet Mask, select Virtual Interface and then click on Submit.
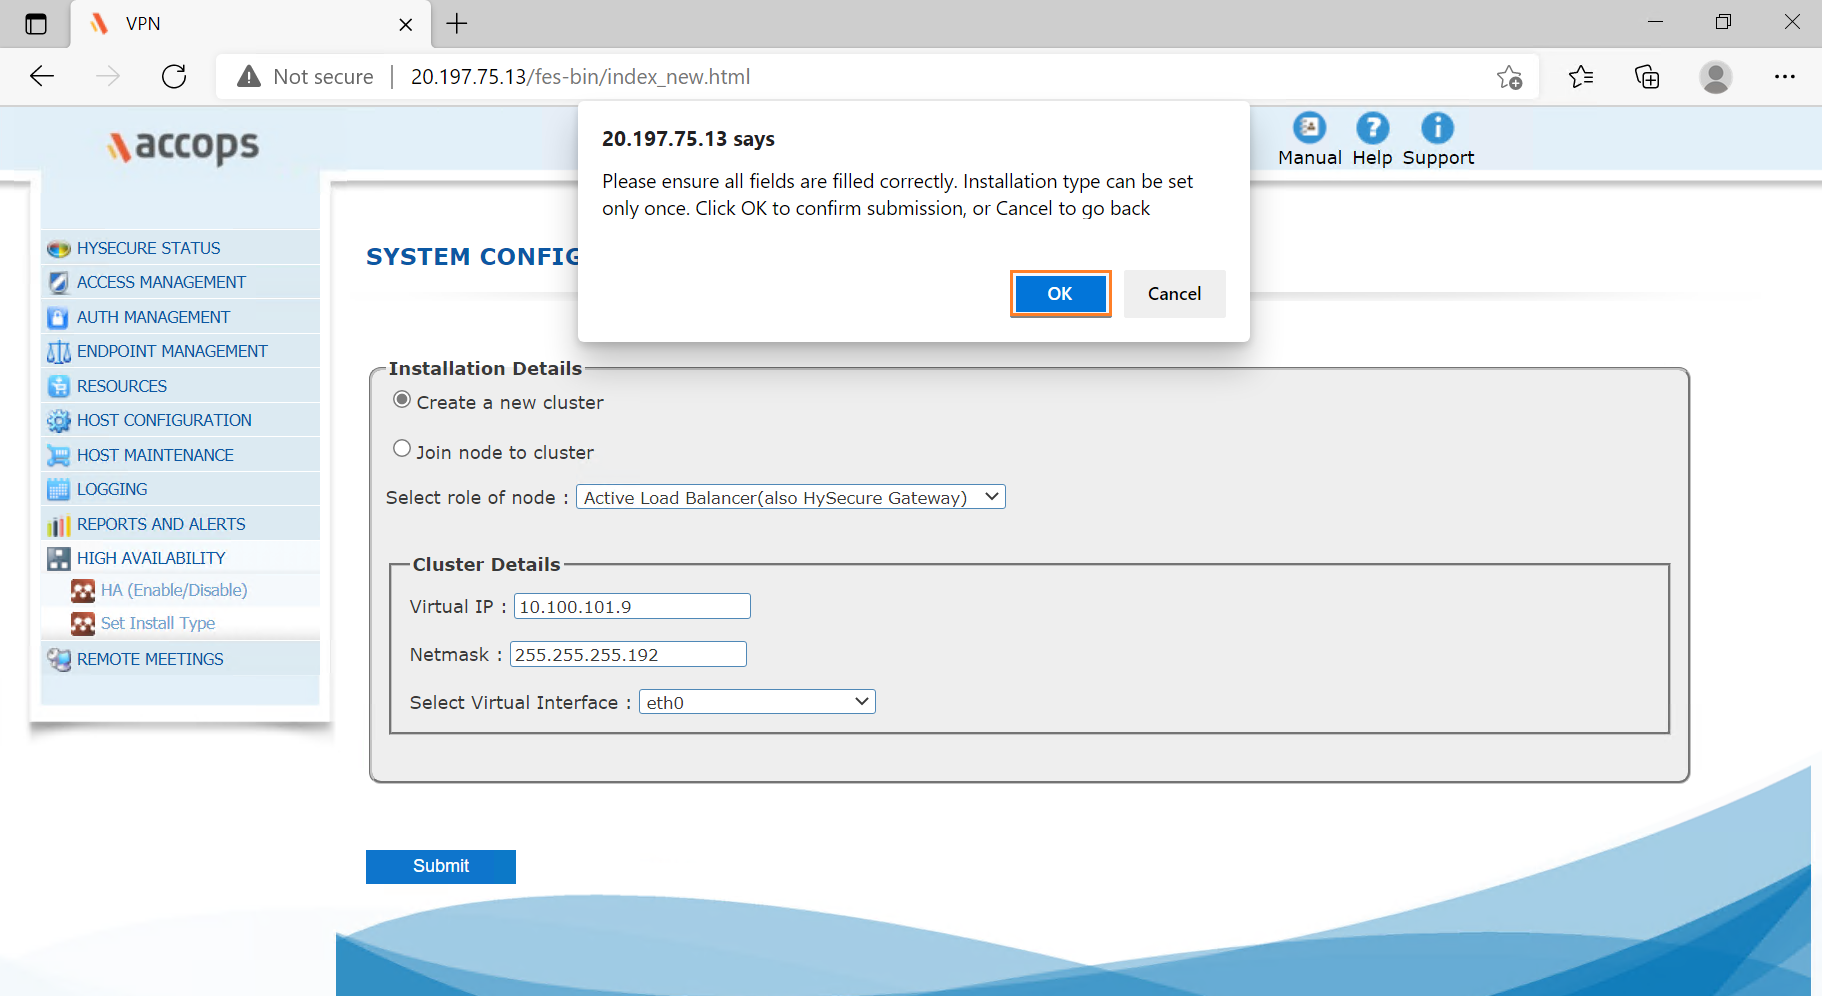
Step 4: Confirm added details and click on OK.
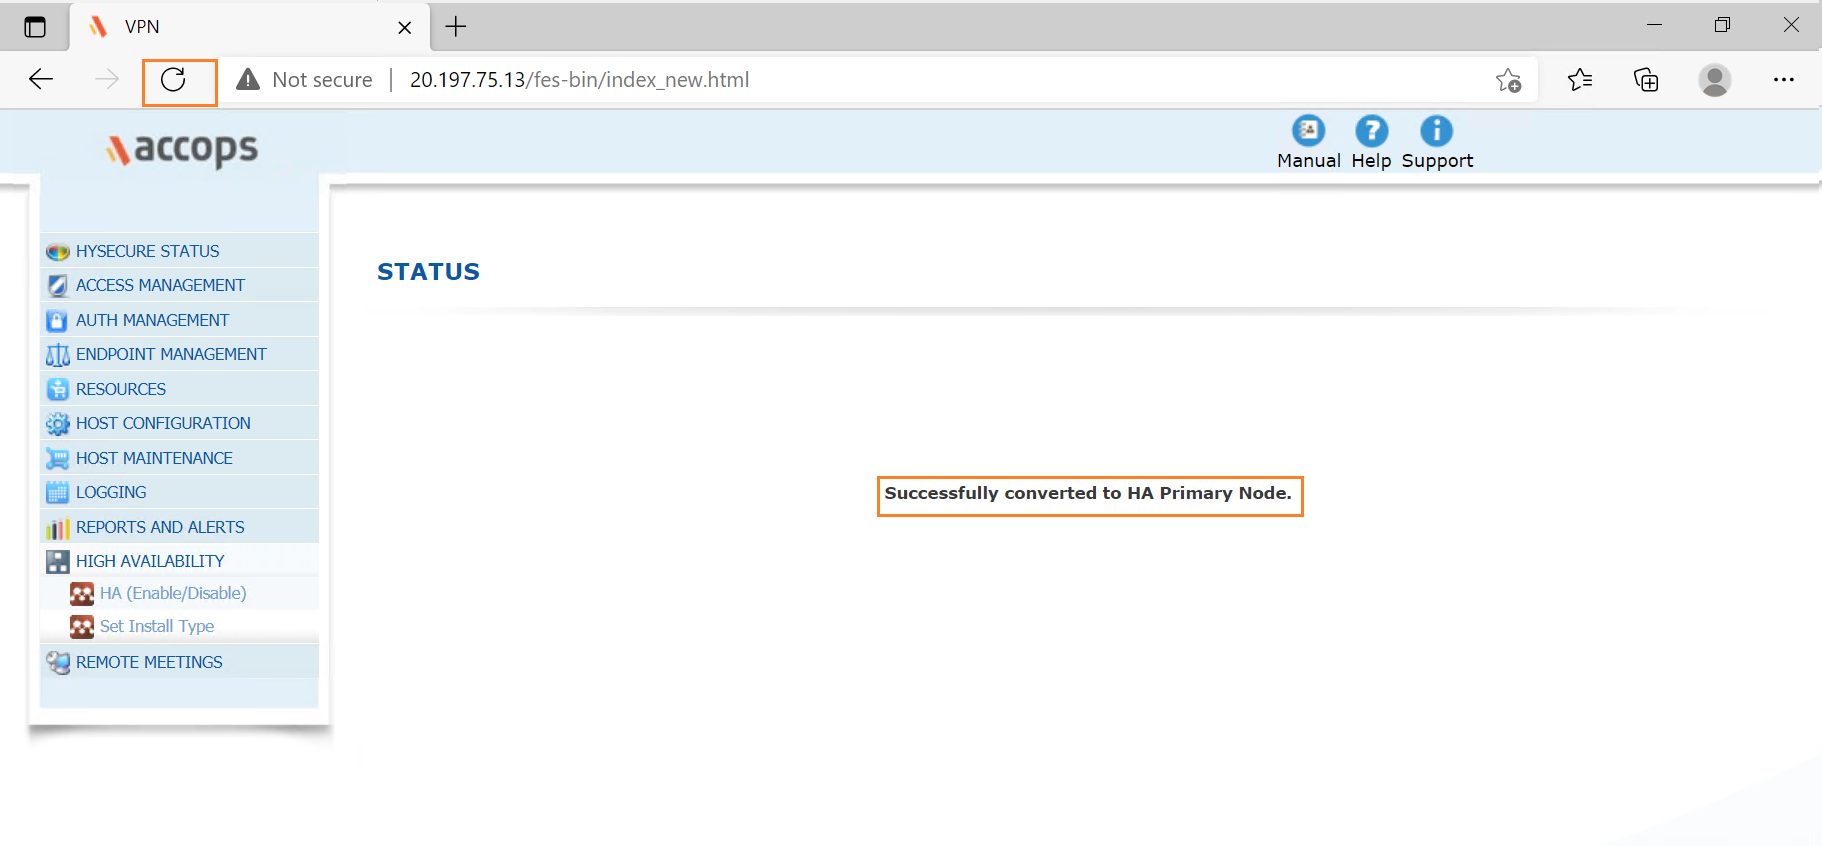
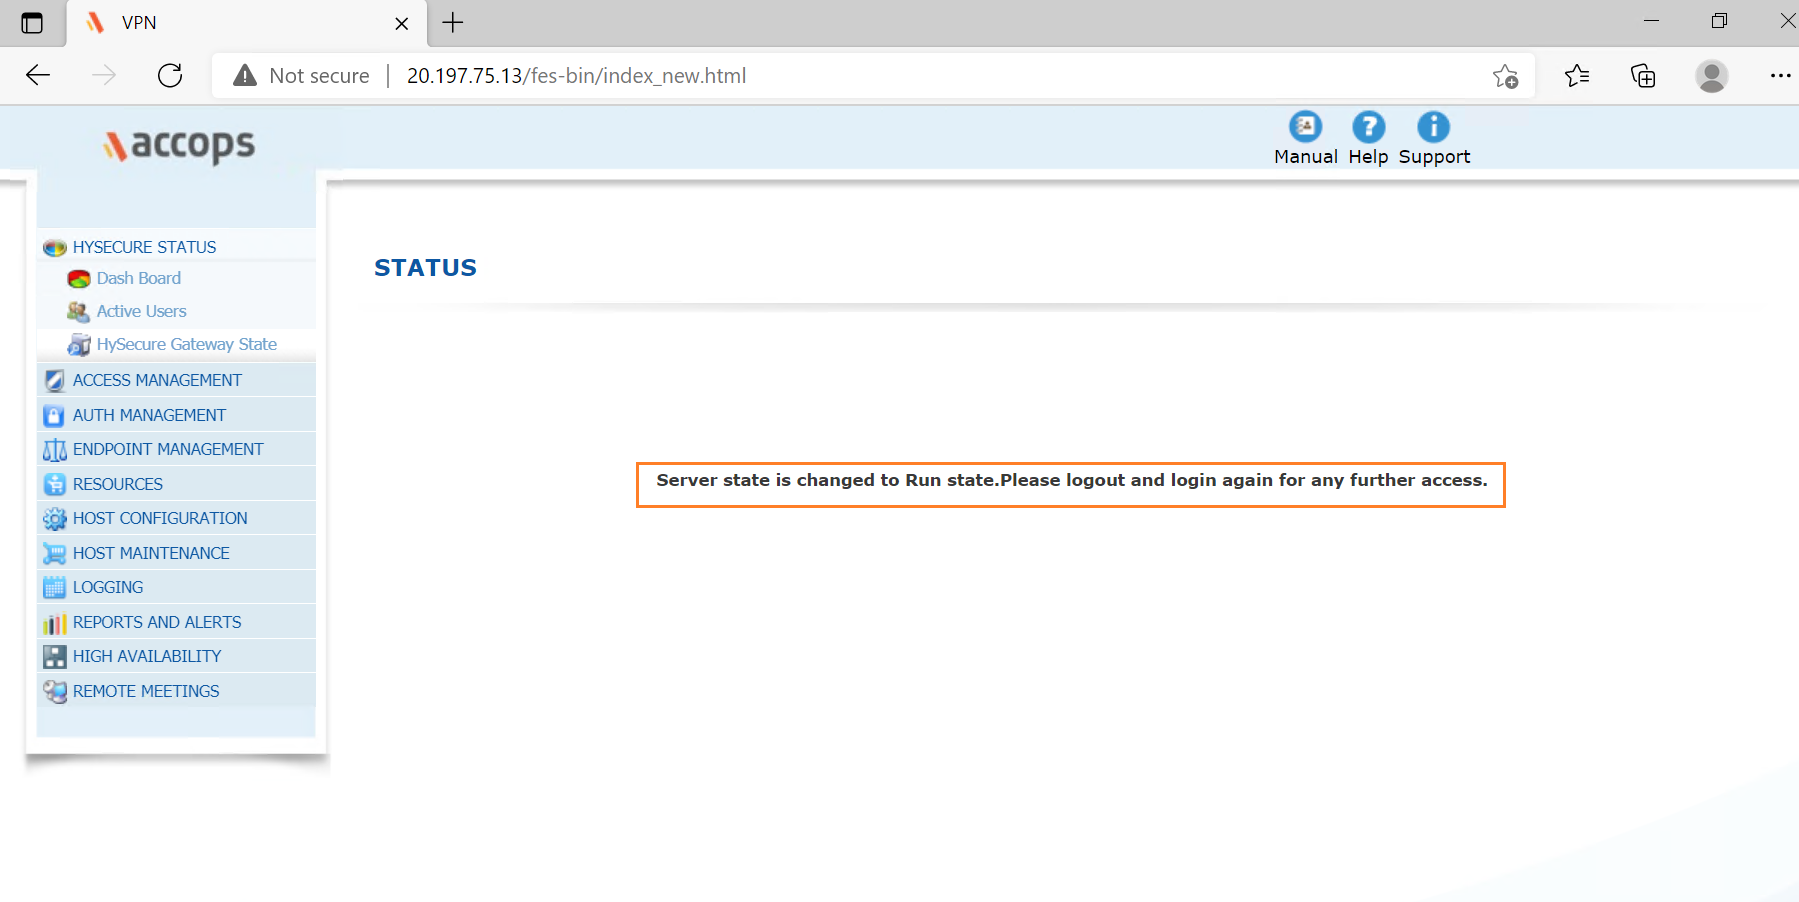
Step 5: Gateway Successfully Converted to HA Primary Node.
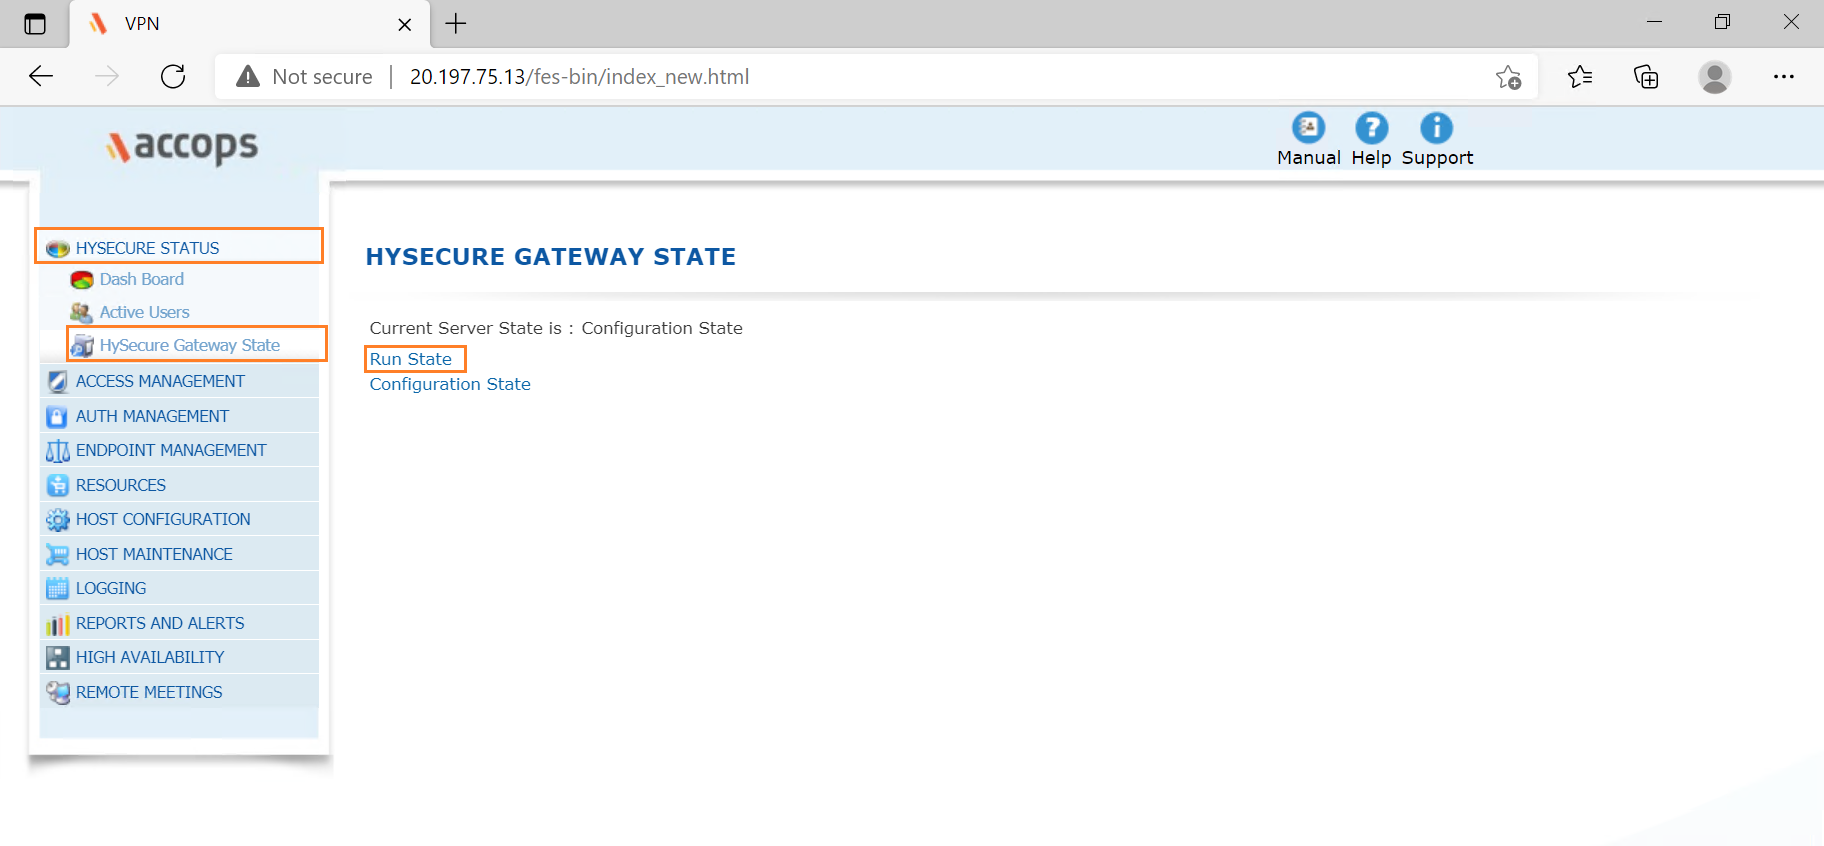
Step 6: Change Gateway state to Run State from Configuration state.
Step 7: Close Browser and Log Out from HySecure client and relogin again for further configuration.
Step 8: Update HA Configuration as below and click on SAVE and then select RELOAD SERVICE.
Example
Virtual IP Address: 10.100.101.9
Virtual IP Network Mask Address: 255.255.255.224
Primary Load Balacer Server IP Address: 10.100.101.4
Backup Load Balacer Server IP Address :10.100.101.6
Load Balanced Port Number:80,443
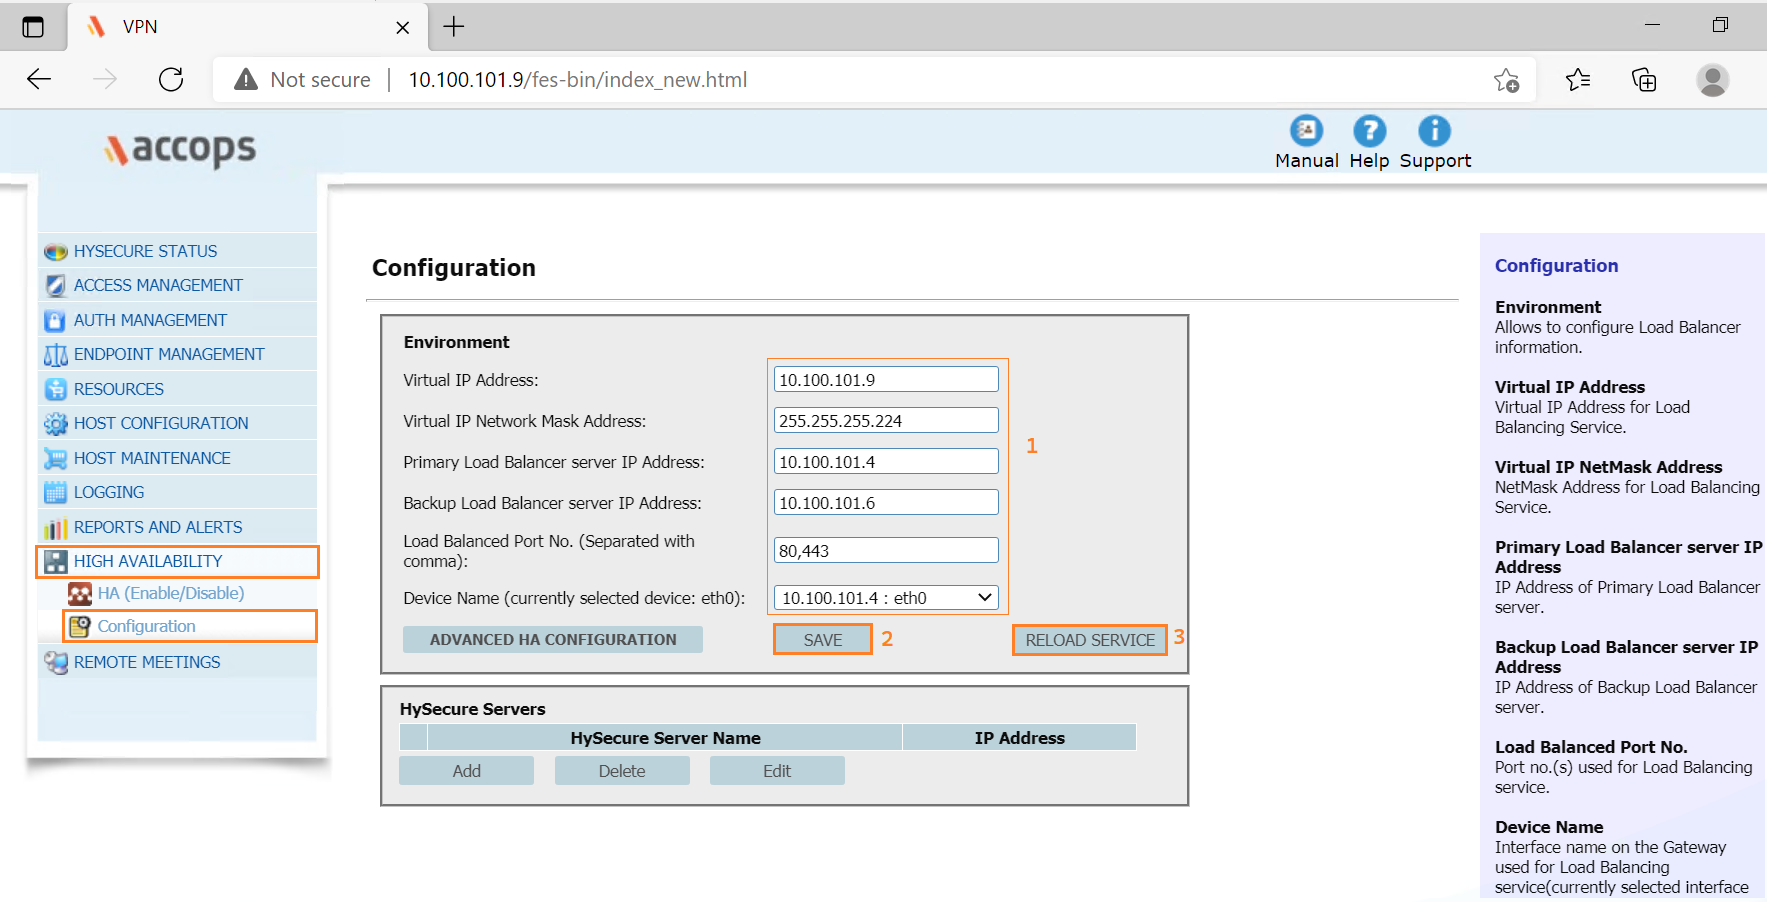
Step 9: Click on Add HySecure Servers.
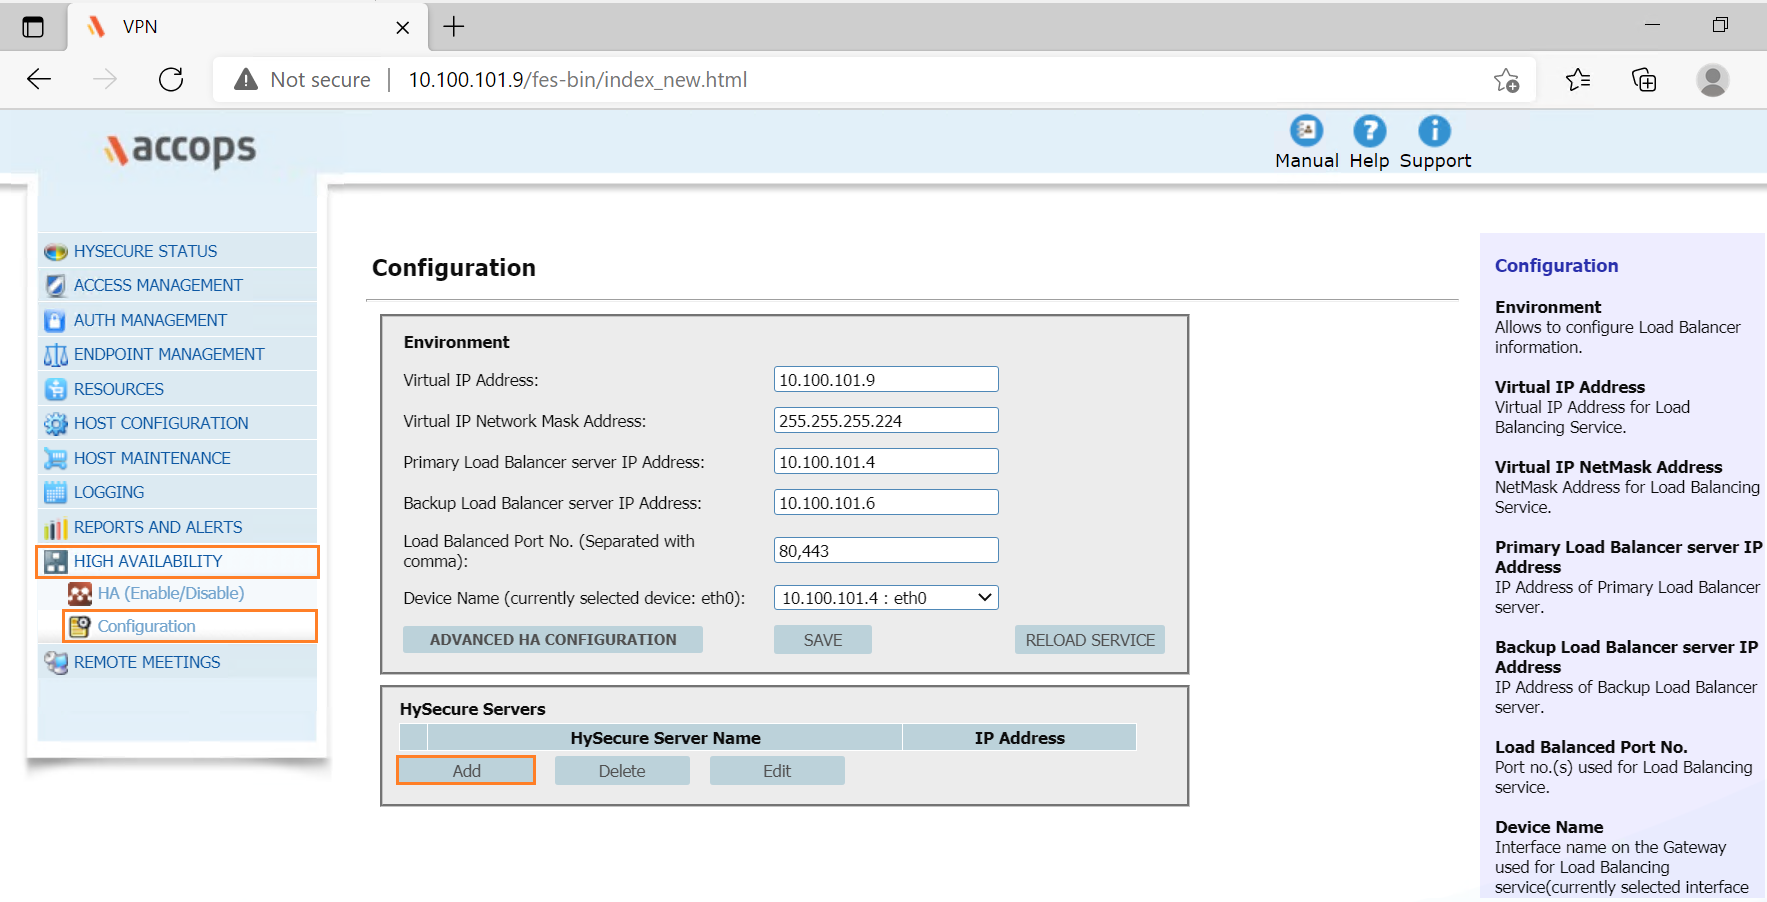
Step 10: Add VPN SERVER Details and click on SAVE.

Step 11: Add Standby and Real Node in HySecure Server Lists.
Important
Before adding Standby Node and Real Node to Active Cluster Hysecure Servers should be listed in HA Configurations as below.
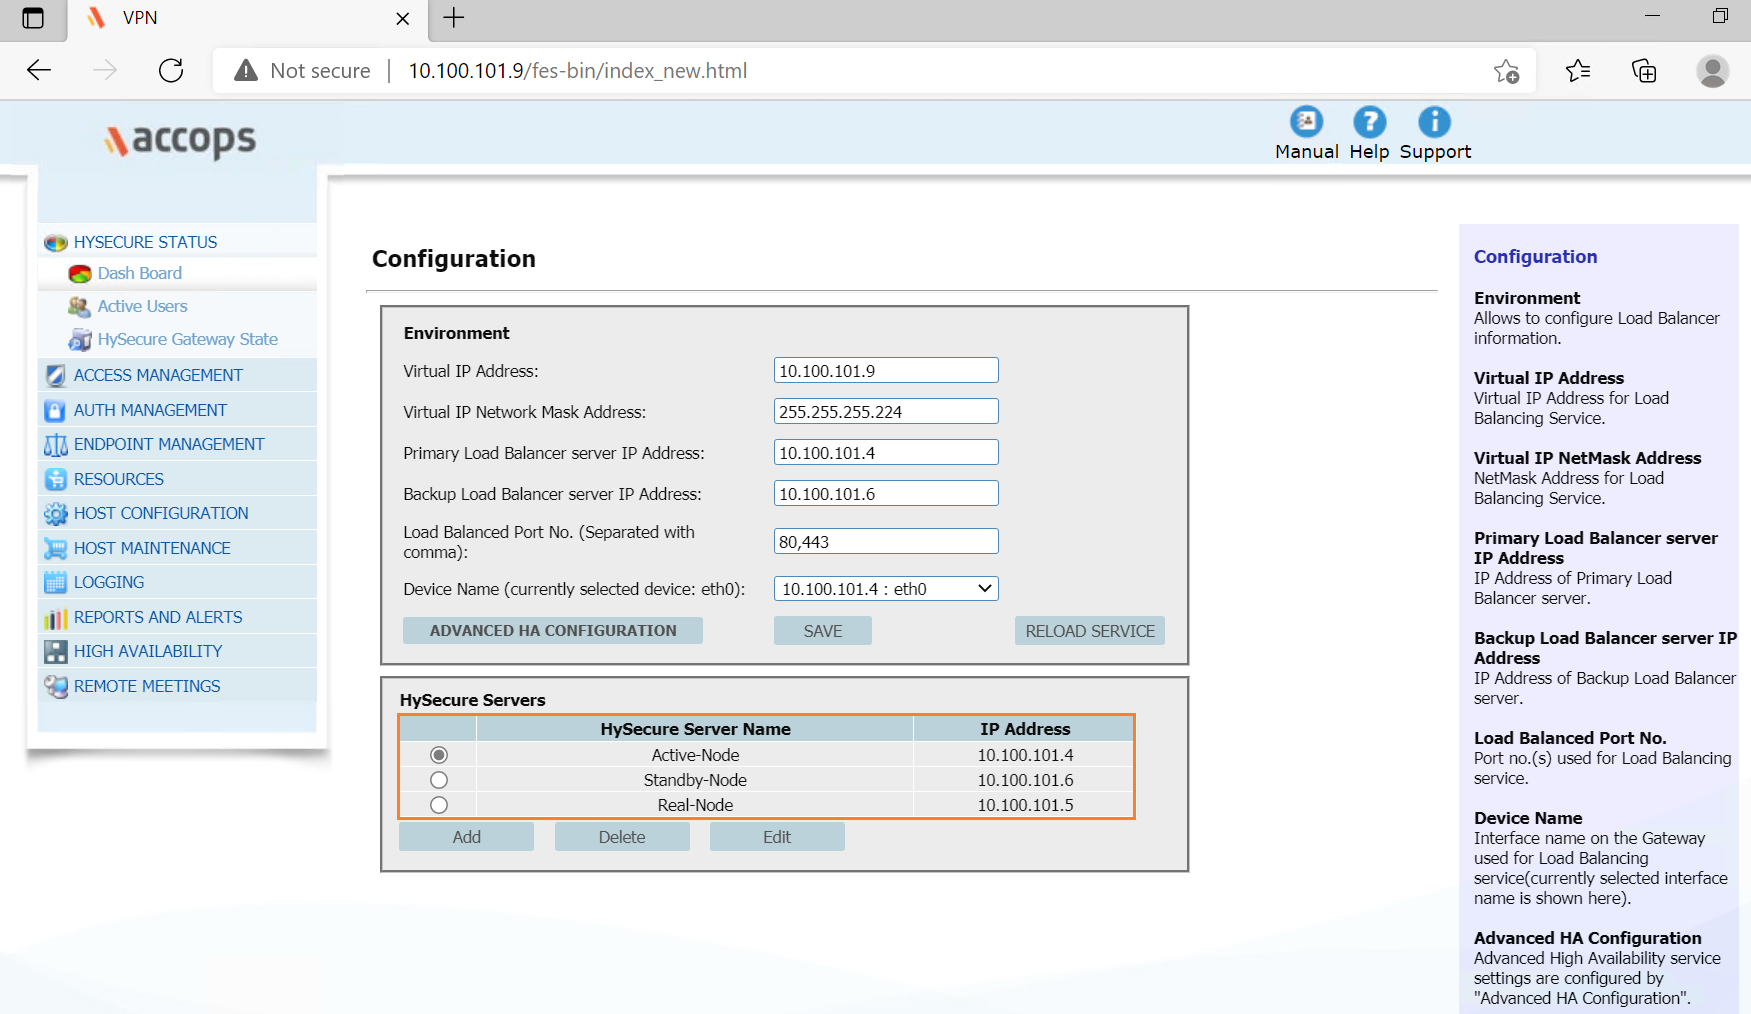
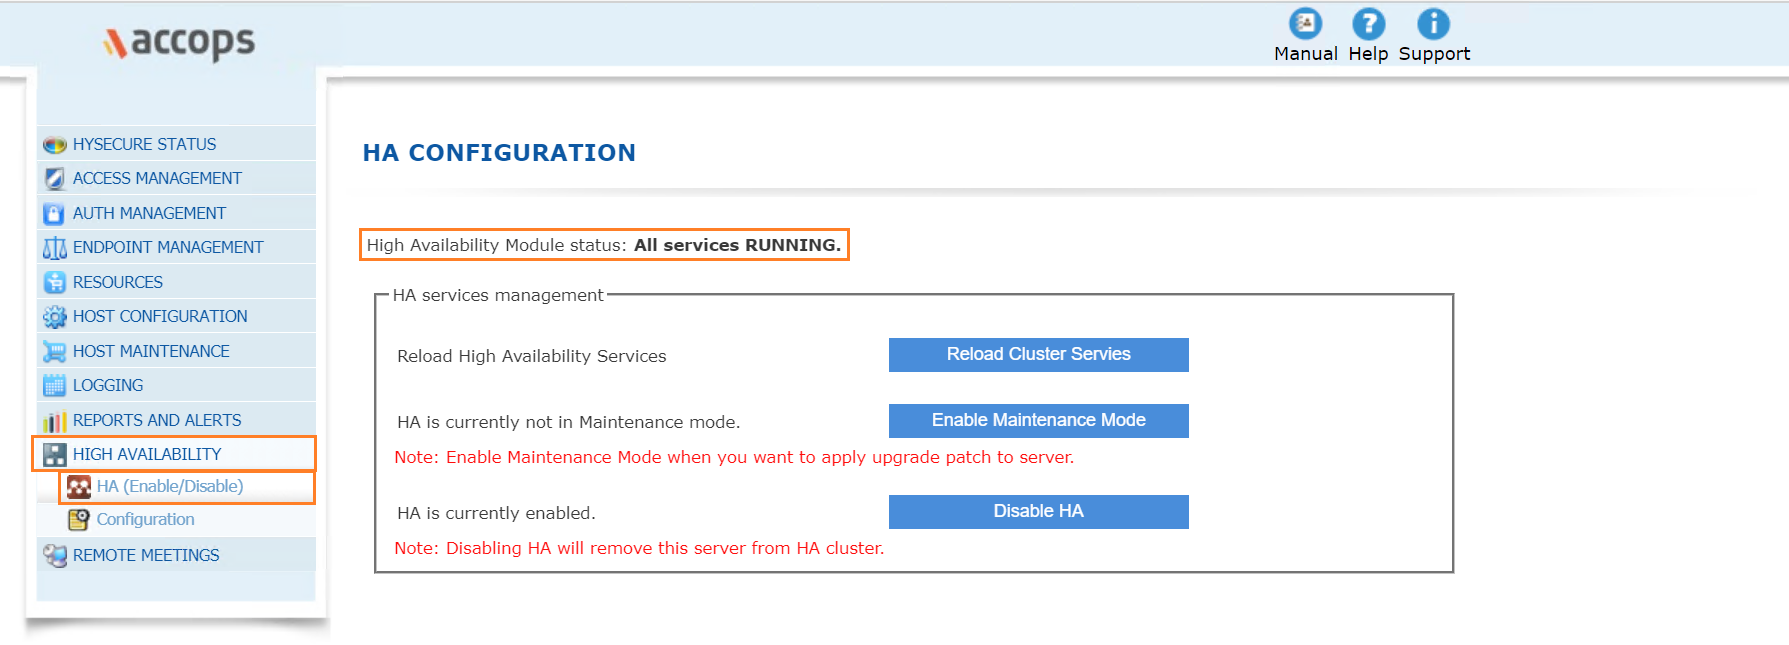
Step 12: Verify High Availability Module Status as below.
Add Standby Node to Cluster
Step 1: Follow steps for Enrolling Standby Node Passphrase.
Step 2: Open HySecure client, Enter Server Address, Select Certificate from Dropdown Menu, Enter Password and click on Login.
Example
Hysecure Server: 20.205.229.191
Select Checkbox Login with a digital certificate
Certificate: so_hysecure_gateway_standby
Password: XXXXXXXX

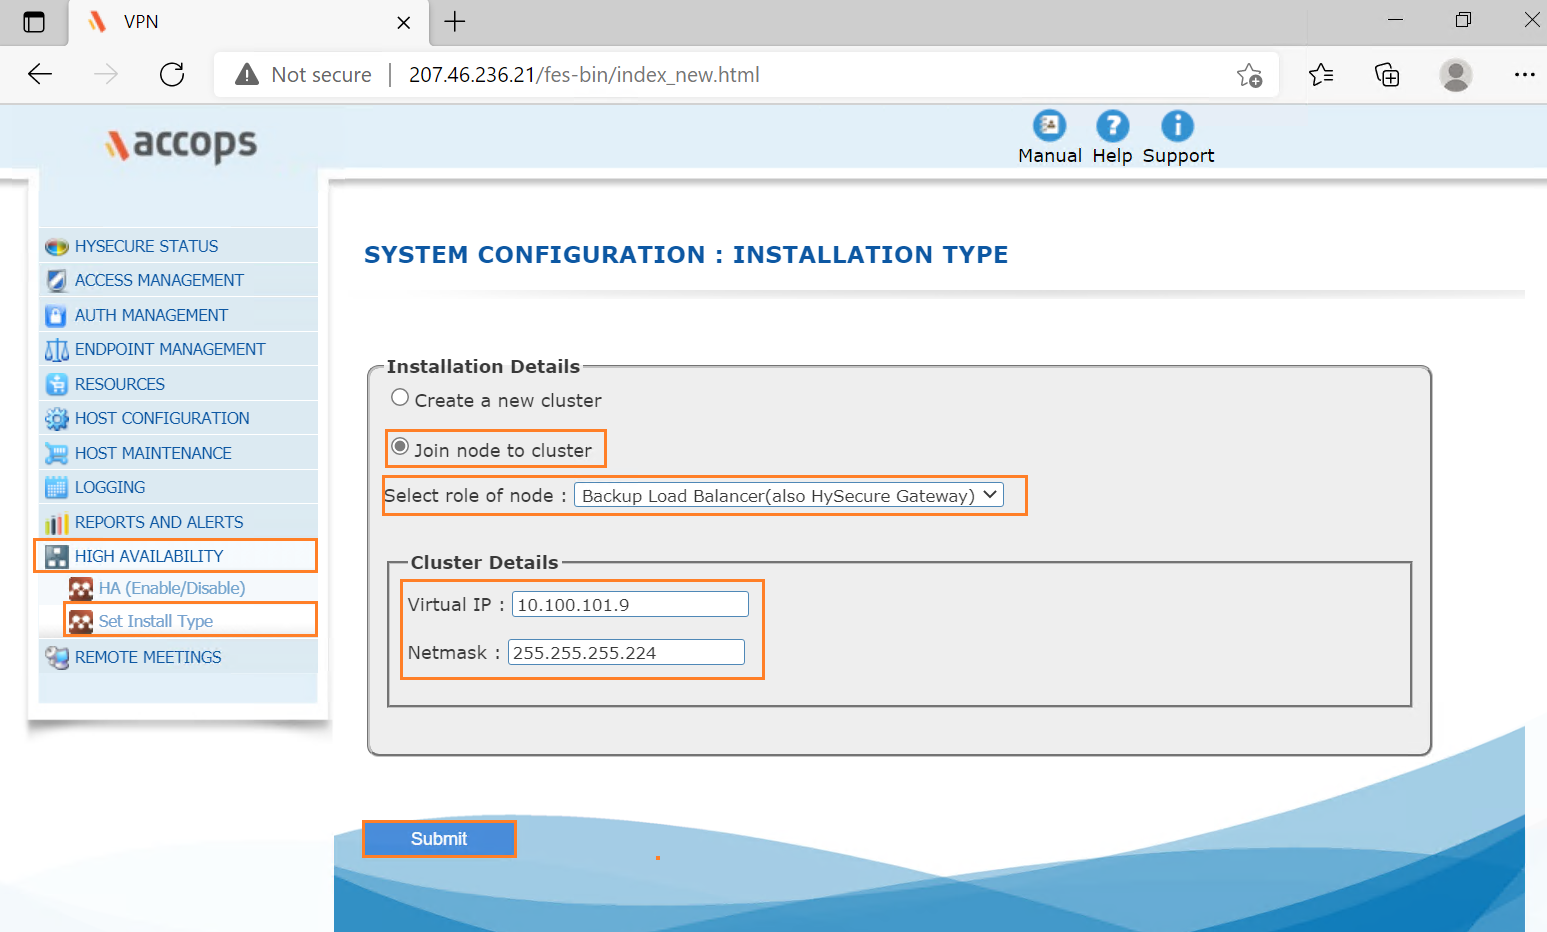
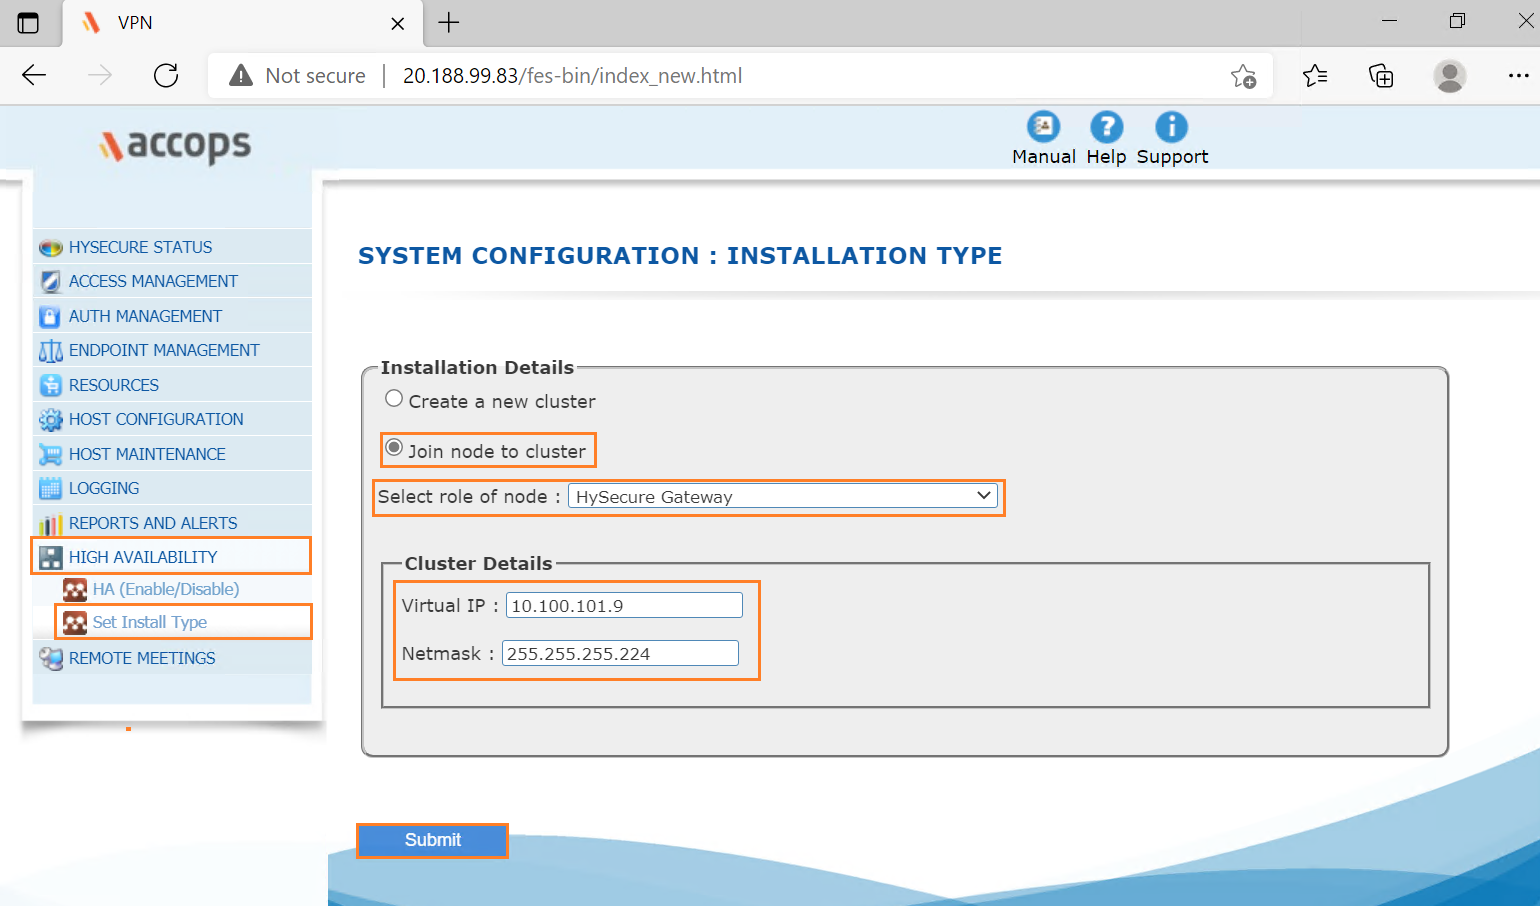
Step 3: Go to High Availability and Set Install Type, Join node to Cluster, Select role of node as Backup Load Balacer(also HySecure Gateway), Enter VIP(Internal Load Balancer IP Address) & Subnet Mask then click on Submit.
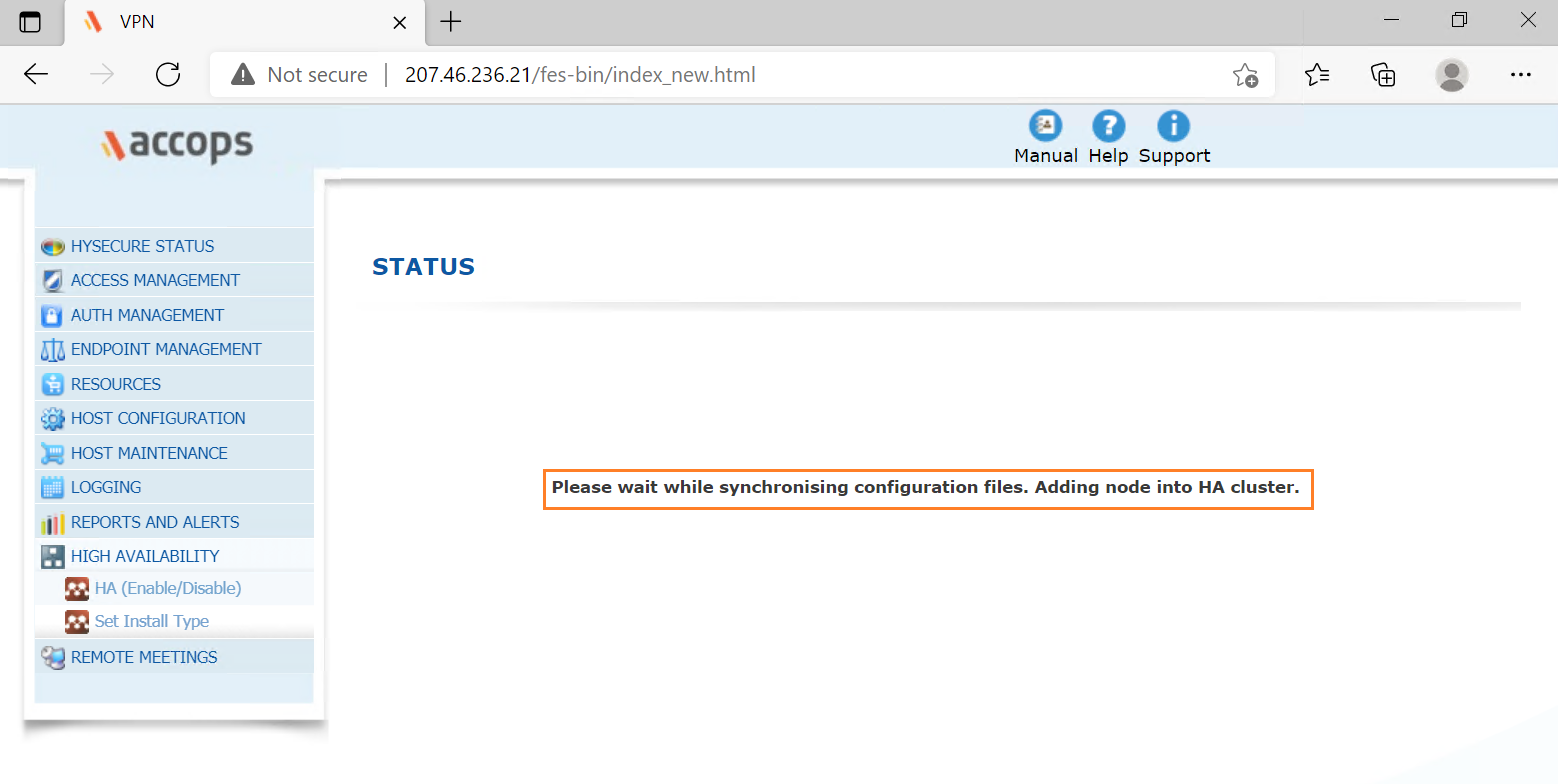
Step 4: Please wait for synchronising configuration files.
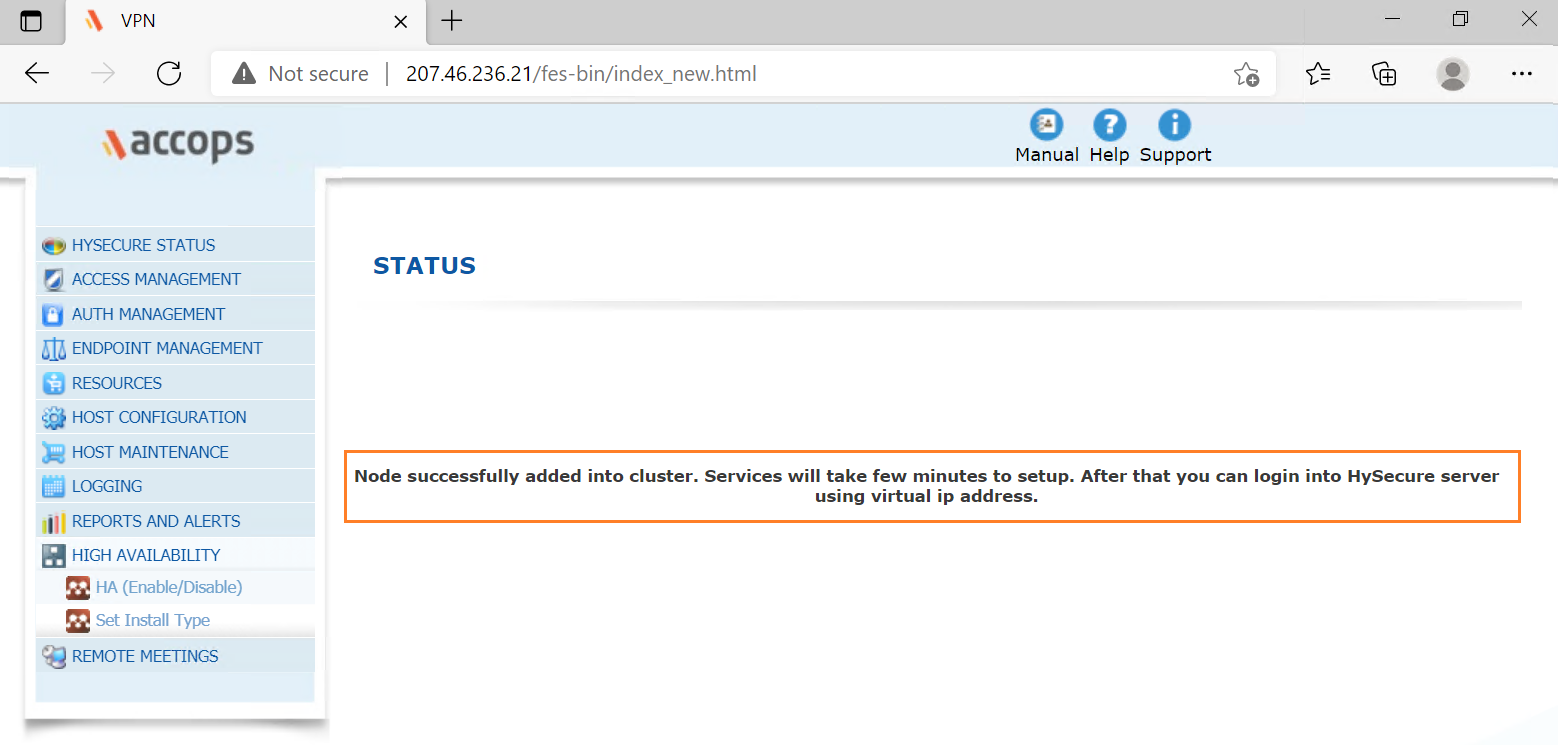
Step 5: Standby Node successfully added into cluster.
Add Real Node to Cluster
Step 1: Follow steps for Enrolling Real Node Passphrase.
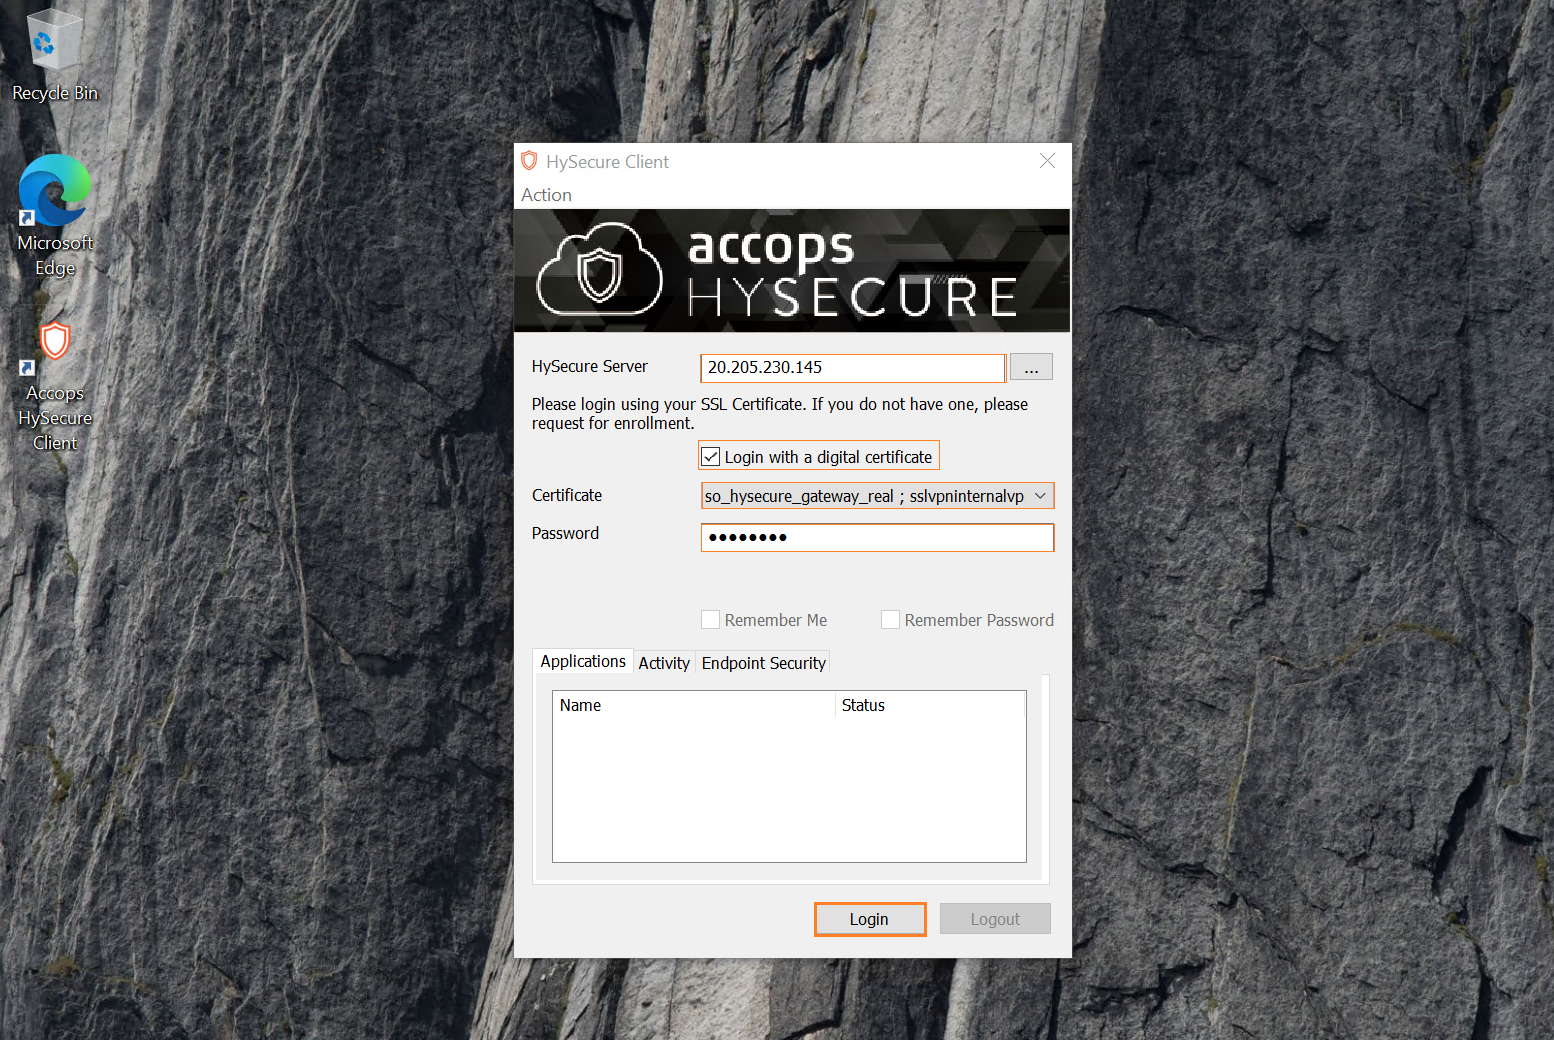
Step 2: Open HySecure client, Enter Server Address, Select Certificate from Dropdown Menu, Enter Password and click on Login.
Example
Hysecure Server: 20.205.230.145
Select Checkbox Login with a digital certificate
Certificate: so_hysecure_gateway_standby
Password: XXXXXXXX
Step 3: Go to High Availability and Set Install Type, Join node to Cluster, Select role of node as HySecure Gateway, Enter VIP(Internal Load Balancer IP Address) & Subnet Mask then click on Submit.
Step 4: Real Node successfully added into cluster.
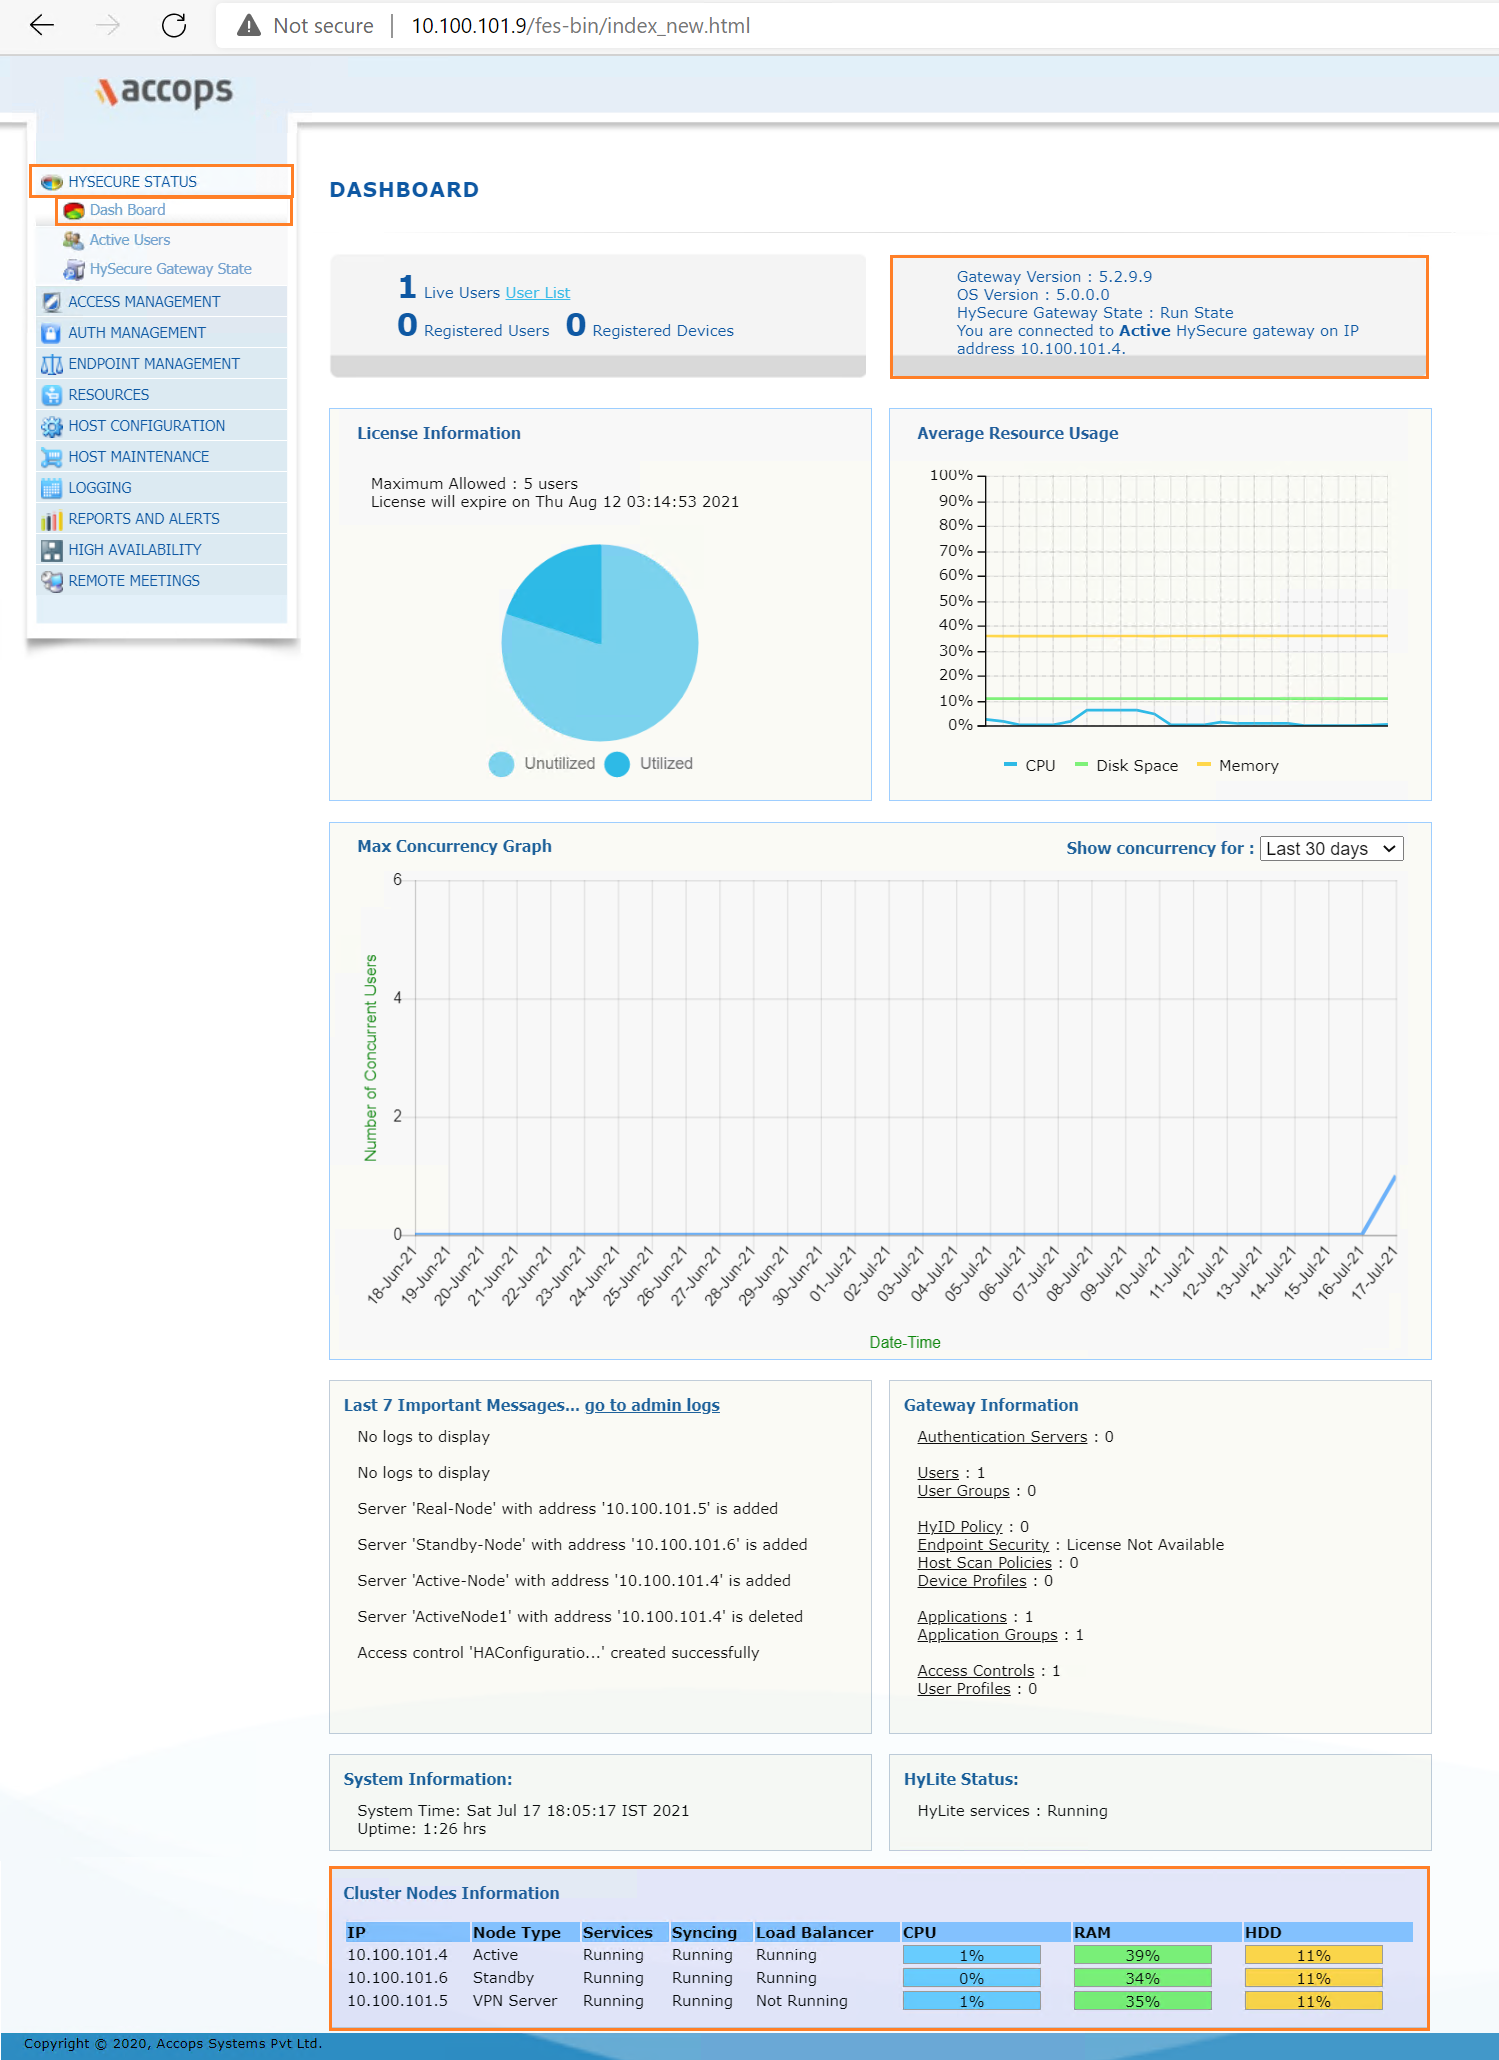
Verify Cluster Status
Add Standby Node to Private Load Balancer
Here we will be adding Standby Node in Internal Load Balancer for HA Failover.
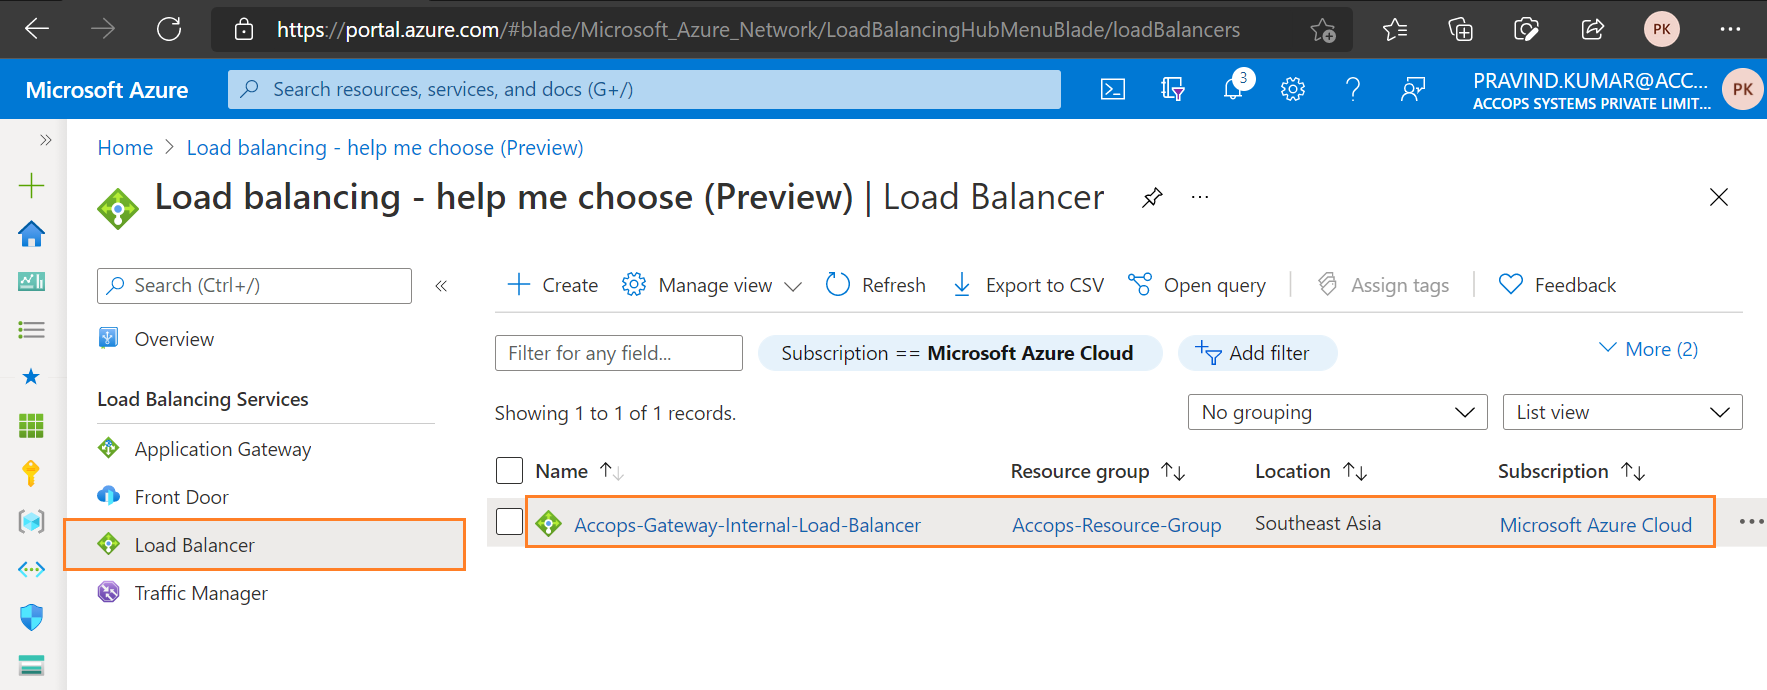
Step 1: Go to Load Balancer and Select Accops-Gateway-Internal-Load-Balancer
Step 2: Select Backend-Accops-Gateway-Active-Passive-Node
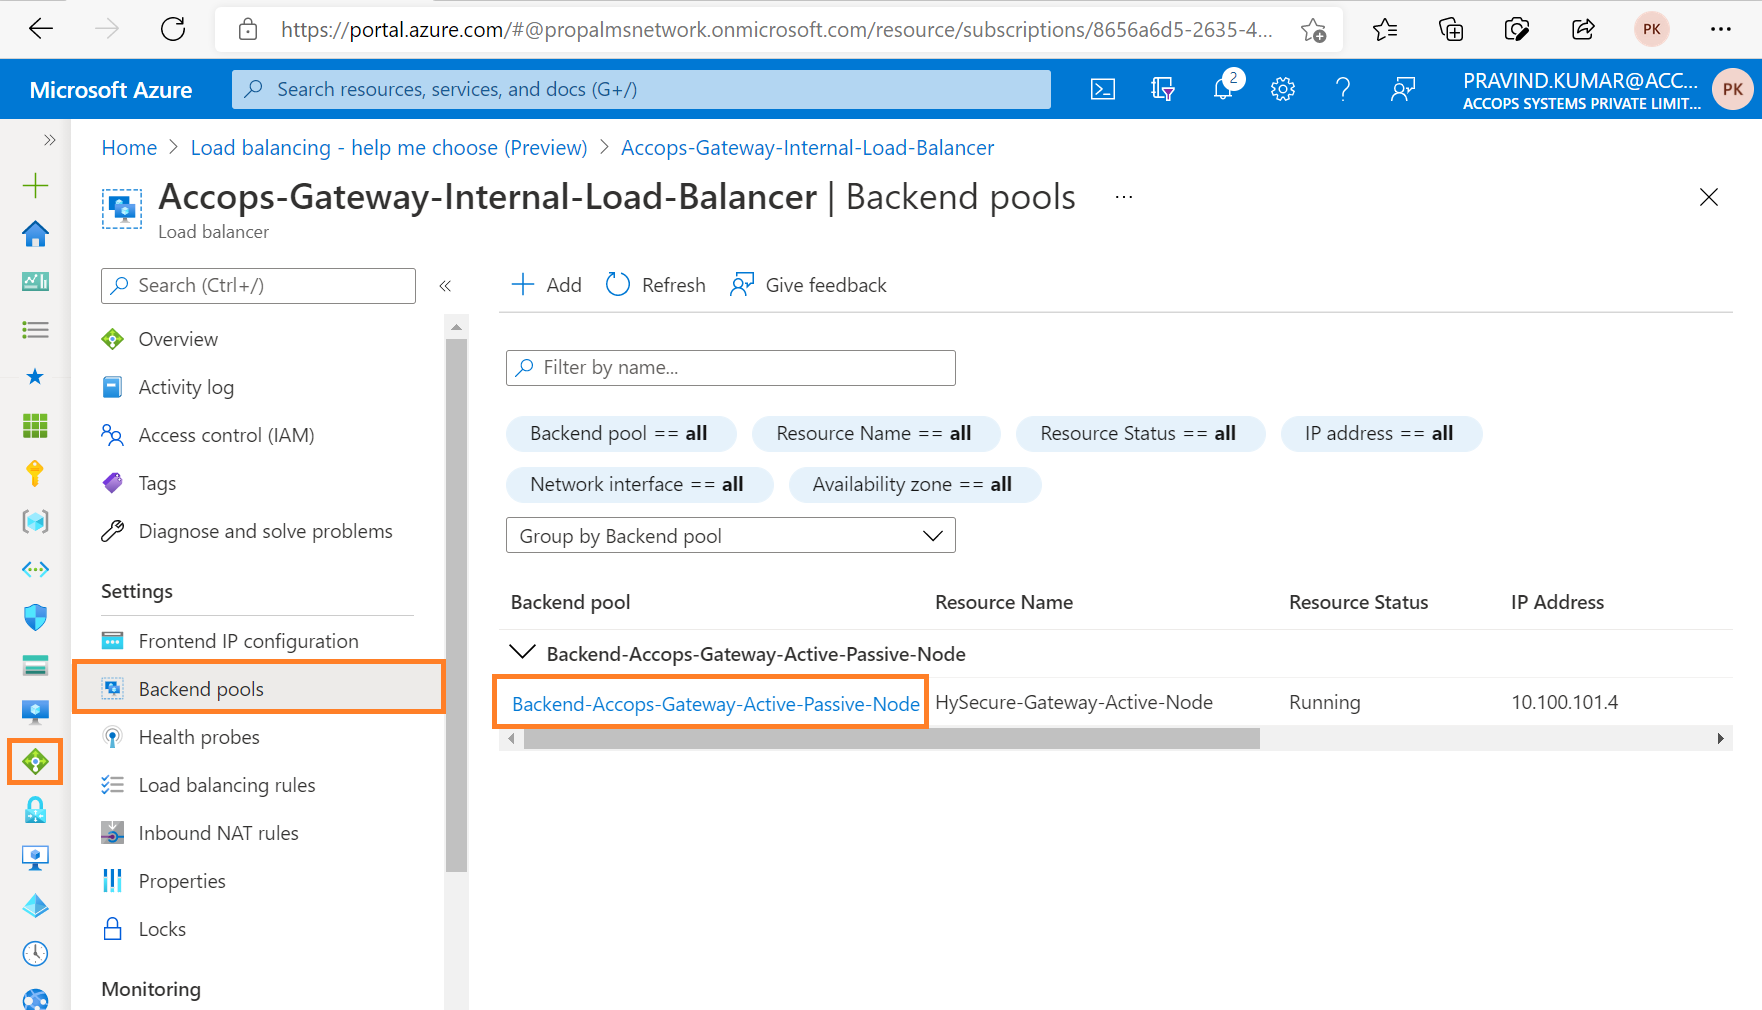
Step 3: Click on Add and select Virtual Machine.
Important
You can only attach virtual machines in southeastasia that have a standard SKU public IP configuration or no public IP configuration. All IP configurations must be on the same virtual network.
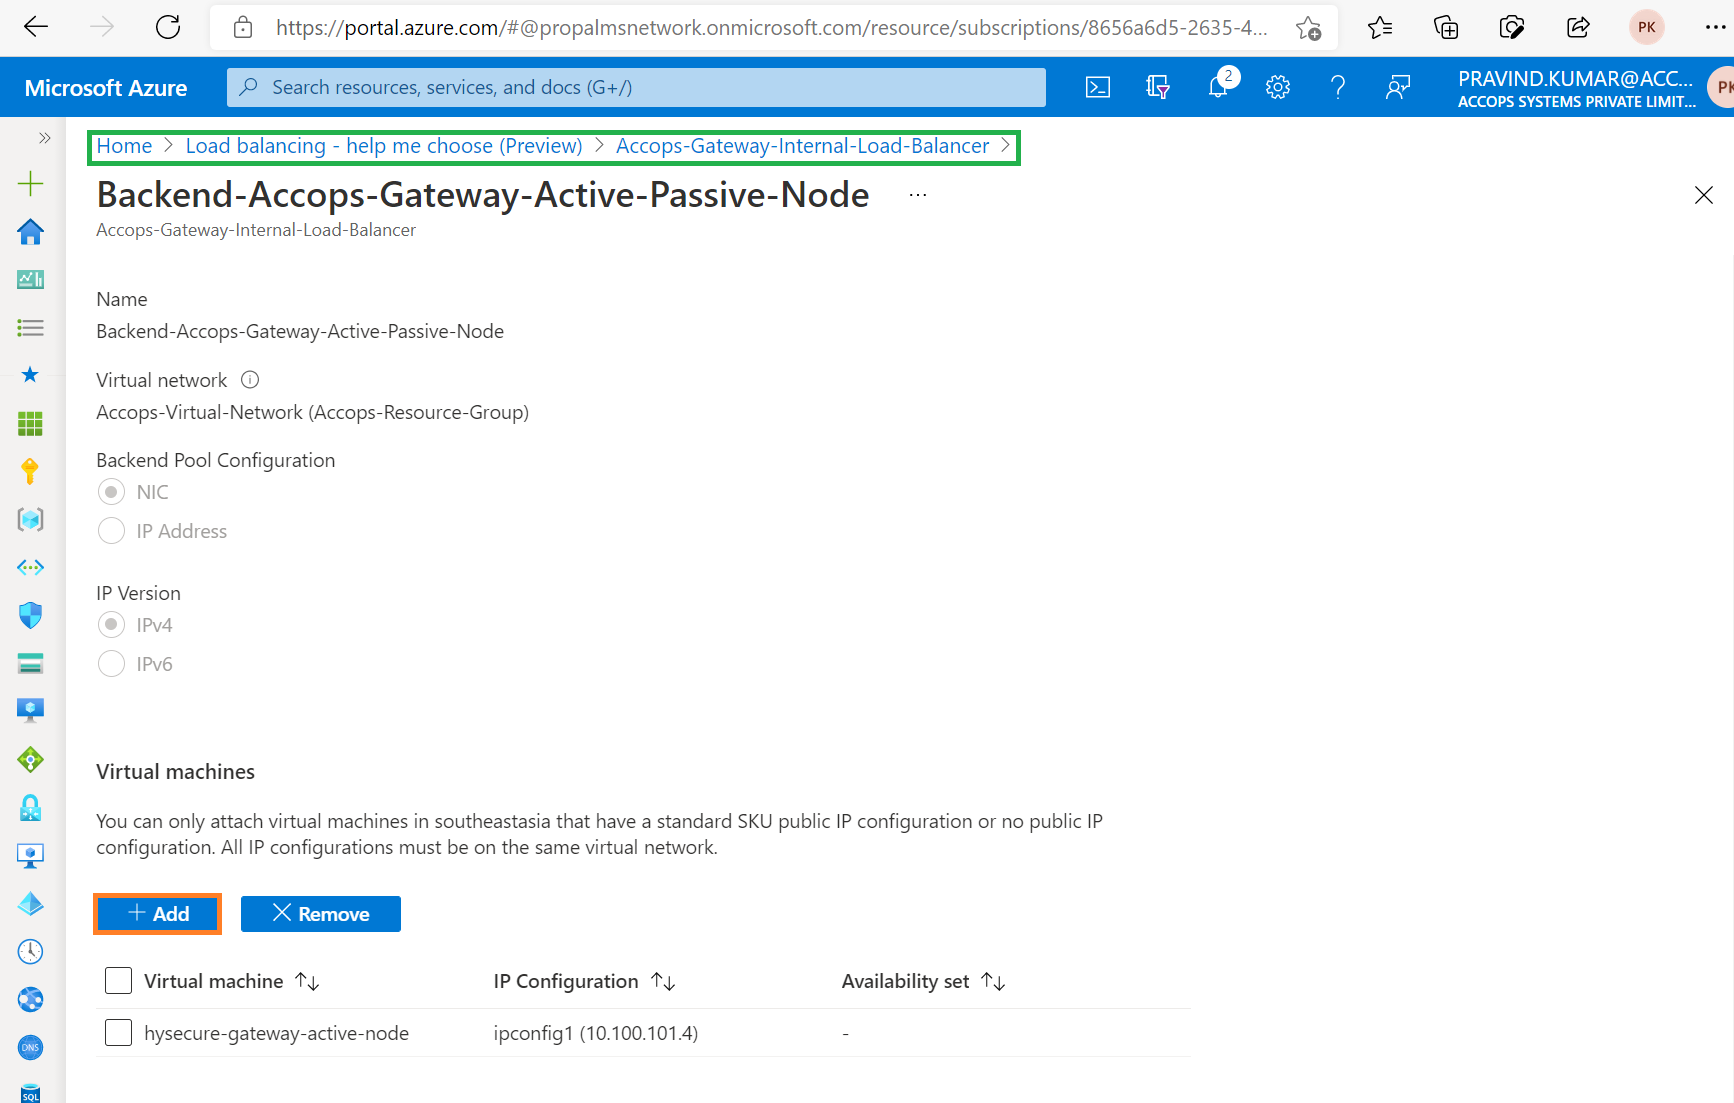
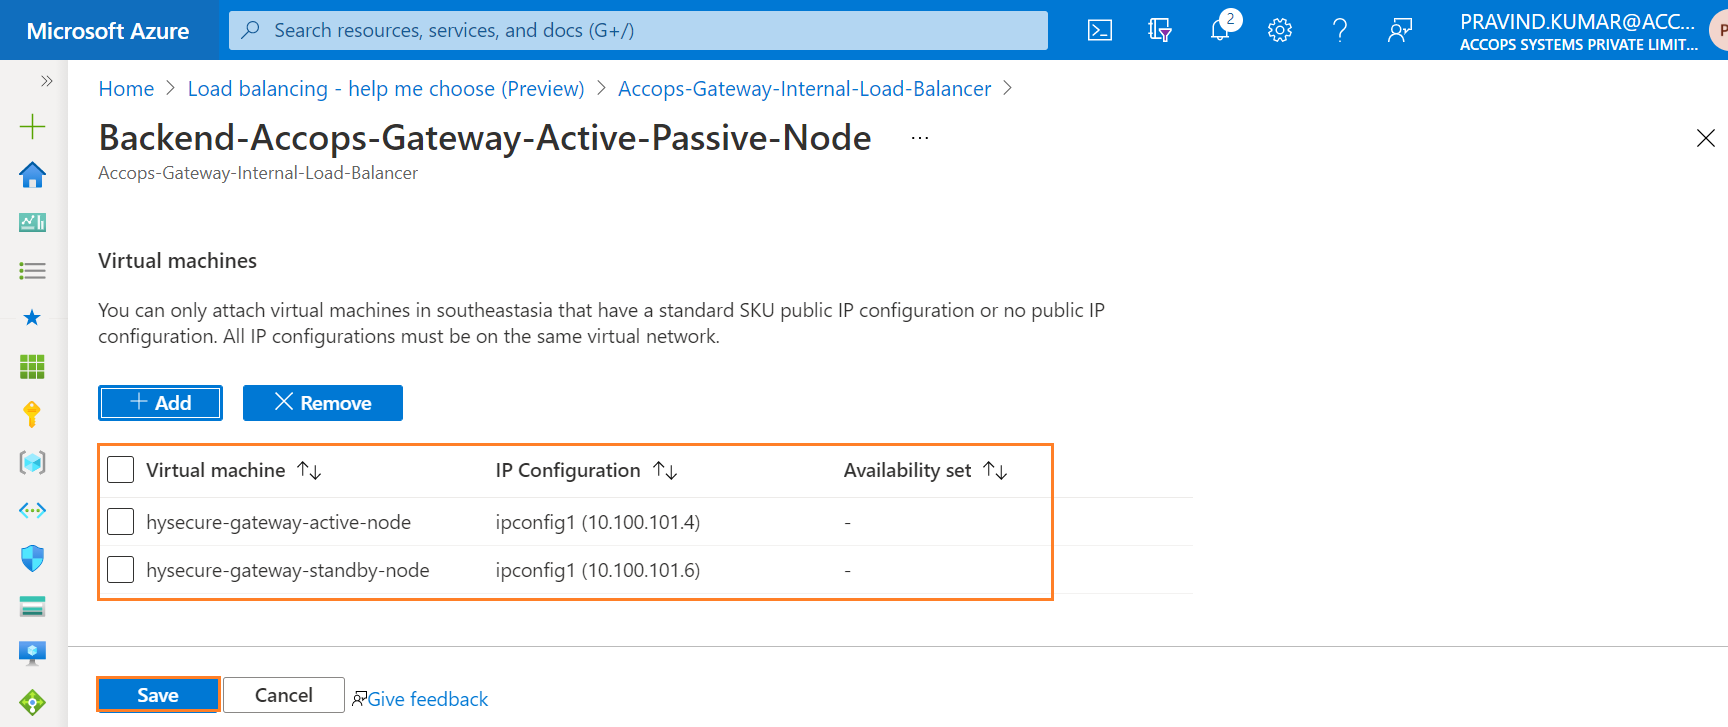
Step 4: Select hysecure-gateway-standby-node to Add virtual machines to backend pool.

Step 5: Verify Accops-Gateway-Active-Passive-Node and click on Save.
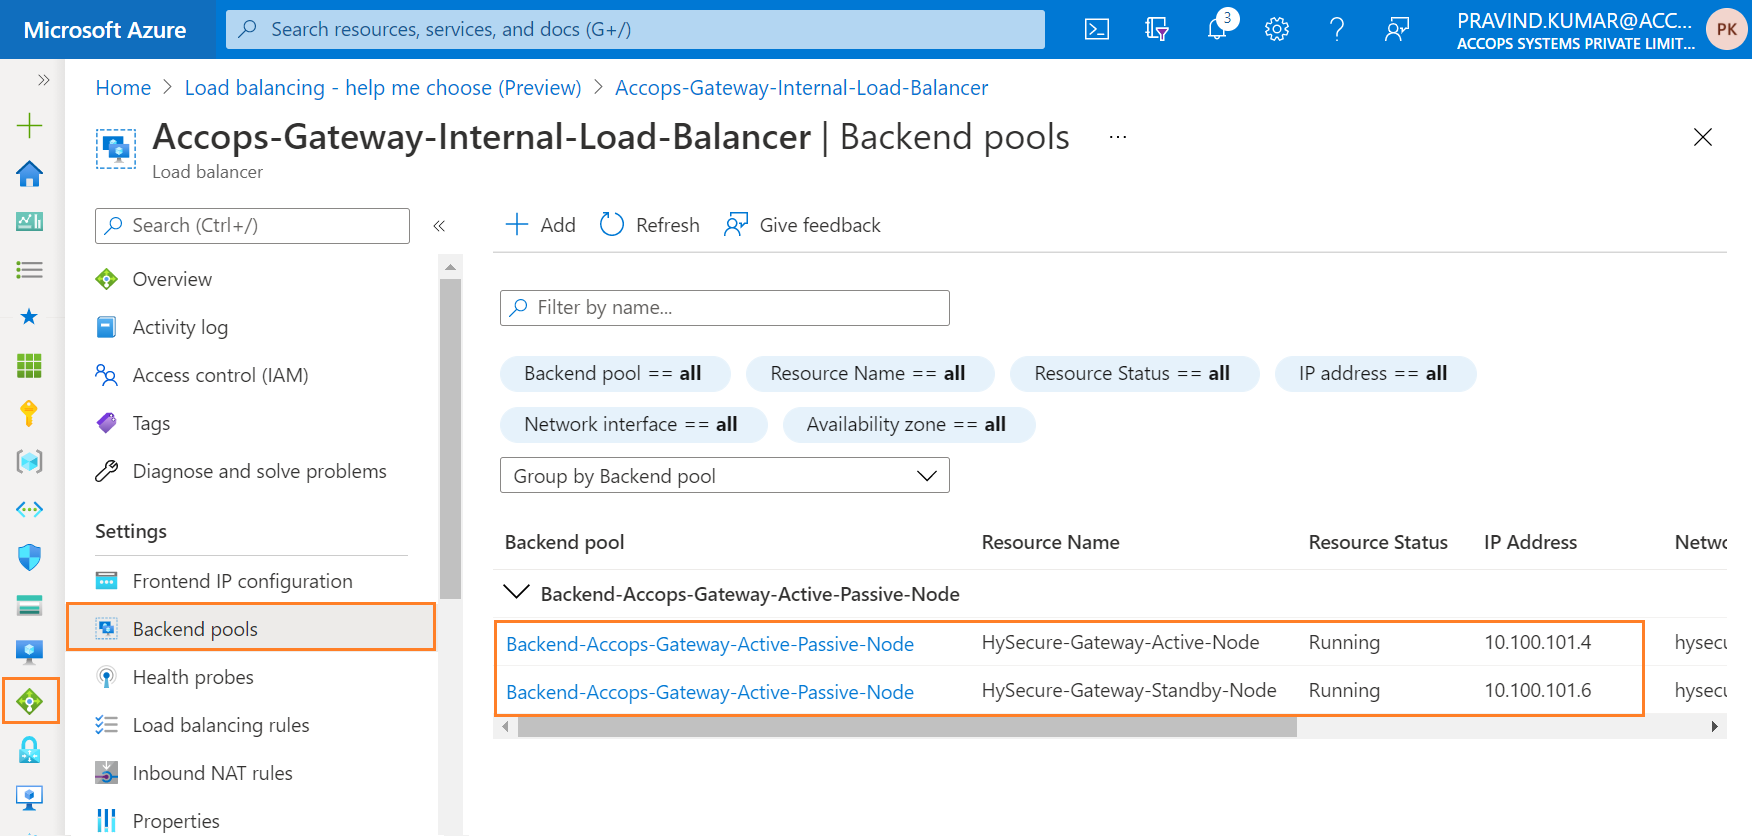
Step 5: Review Backend Pools.
Step 6: Update Accops-Gateway-Internal-Load-Balancer Load Balancing rule Health Probe from Health-Probe-TCP-443 to Health-Probe-Statuscheck
Note
Health Probe need to be updated in Load Balancing Rule once Active Passive HA failover is ready.
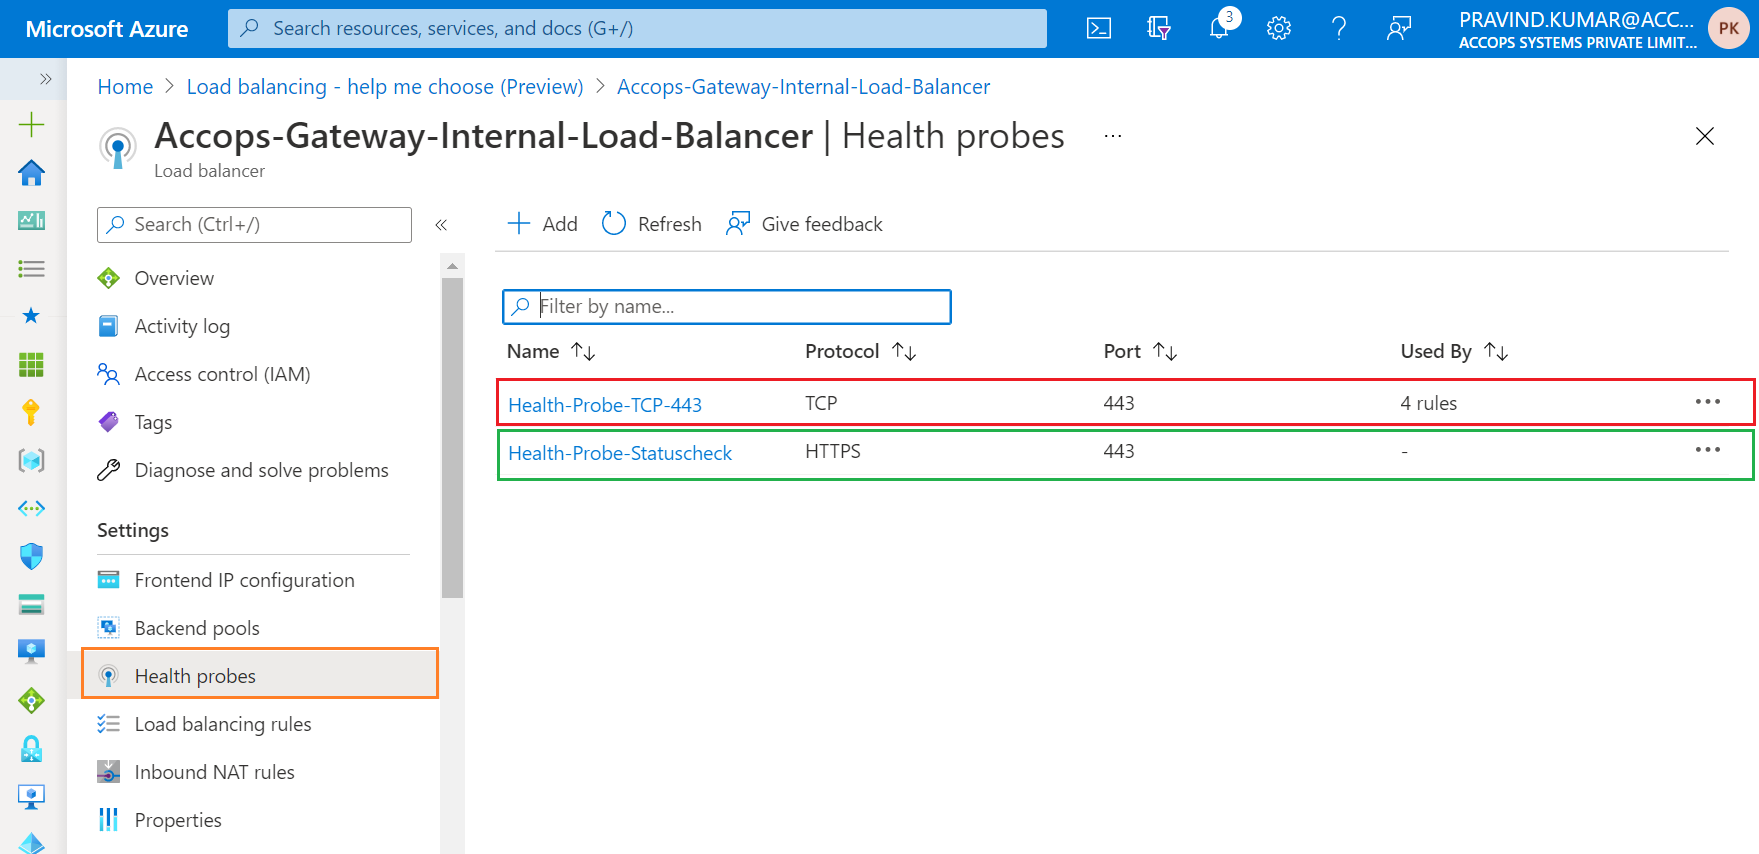
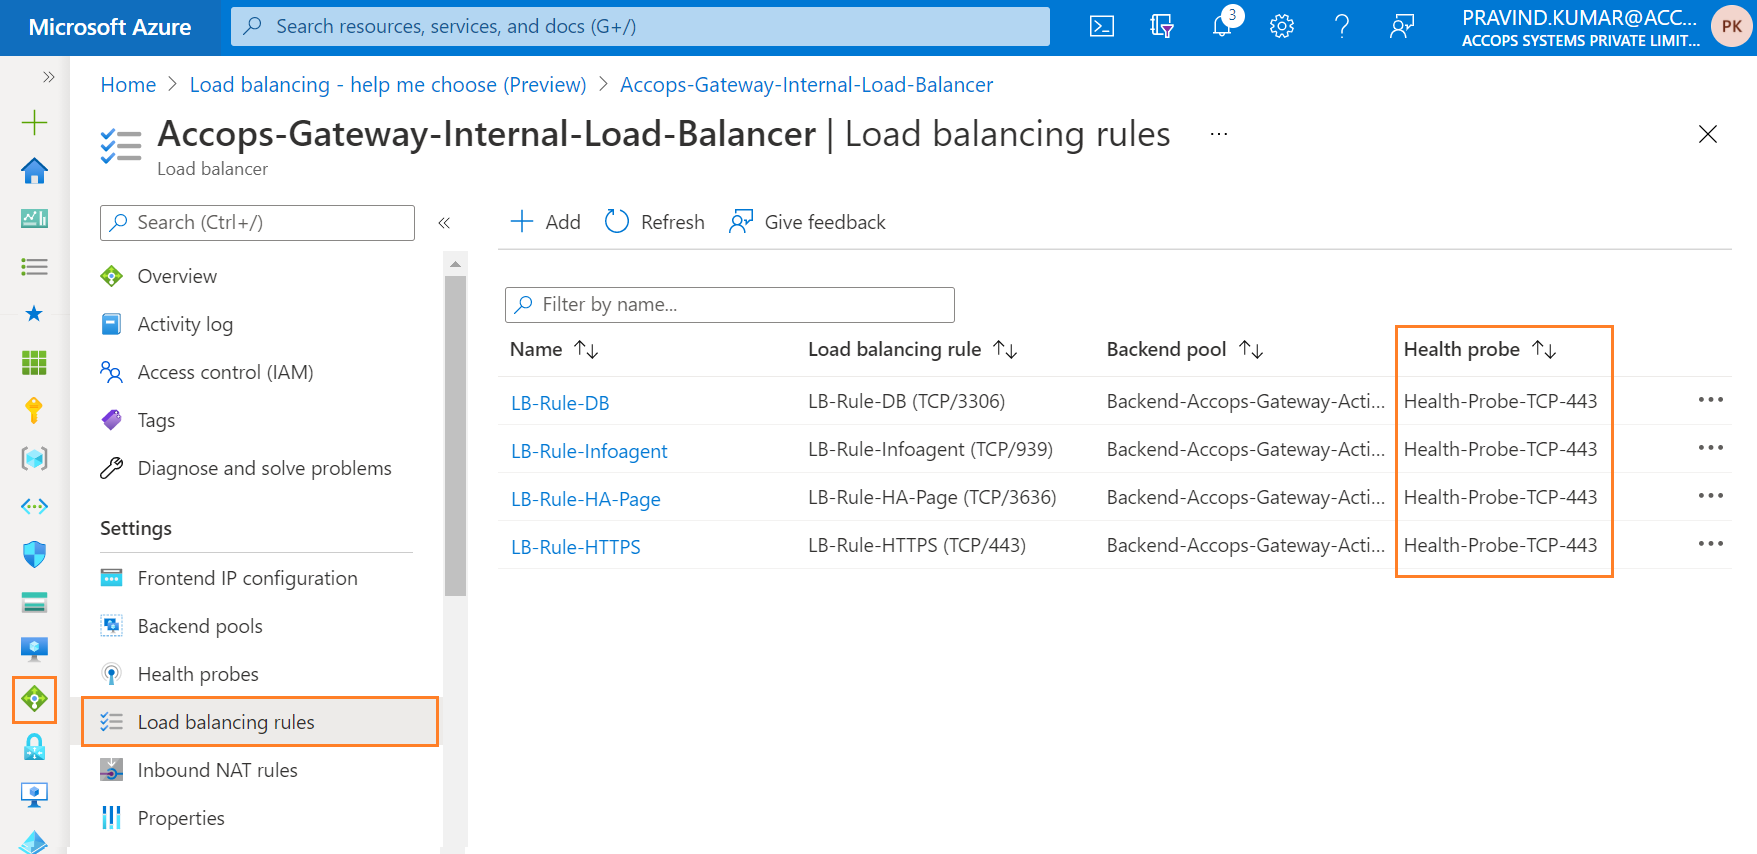
Important
Before Changing Health Probes in Load Balancing Rules
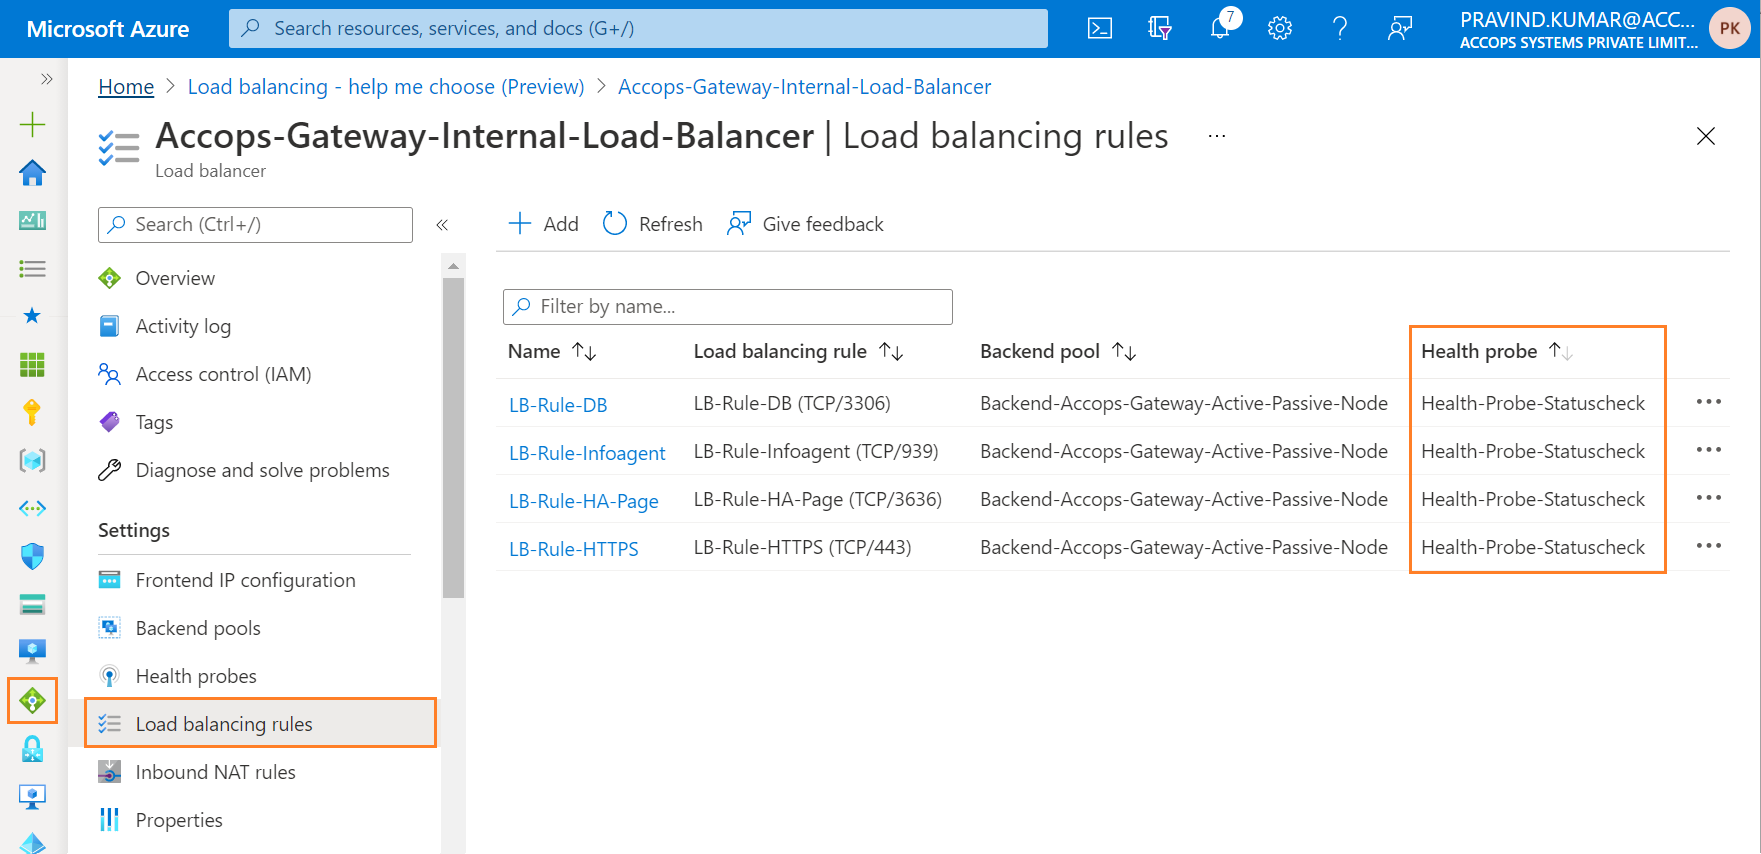
After Changing Health Probes in Load Balancing Rules
Step 7: Verify Internal HA failover using Internal Load Balancer IP for Active and Standby Failover.
Add Web Nodes to Public Load Balancer
Note
HySecure Active, Standby and Real Node can be a part of Web Nodes to handle end user loads.
Once Active cluster* is ready then add all nodes to Public Load Balancer to Accept End User Web Nodes.
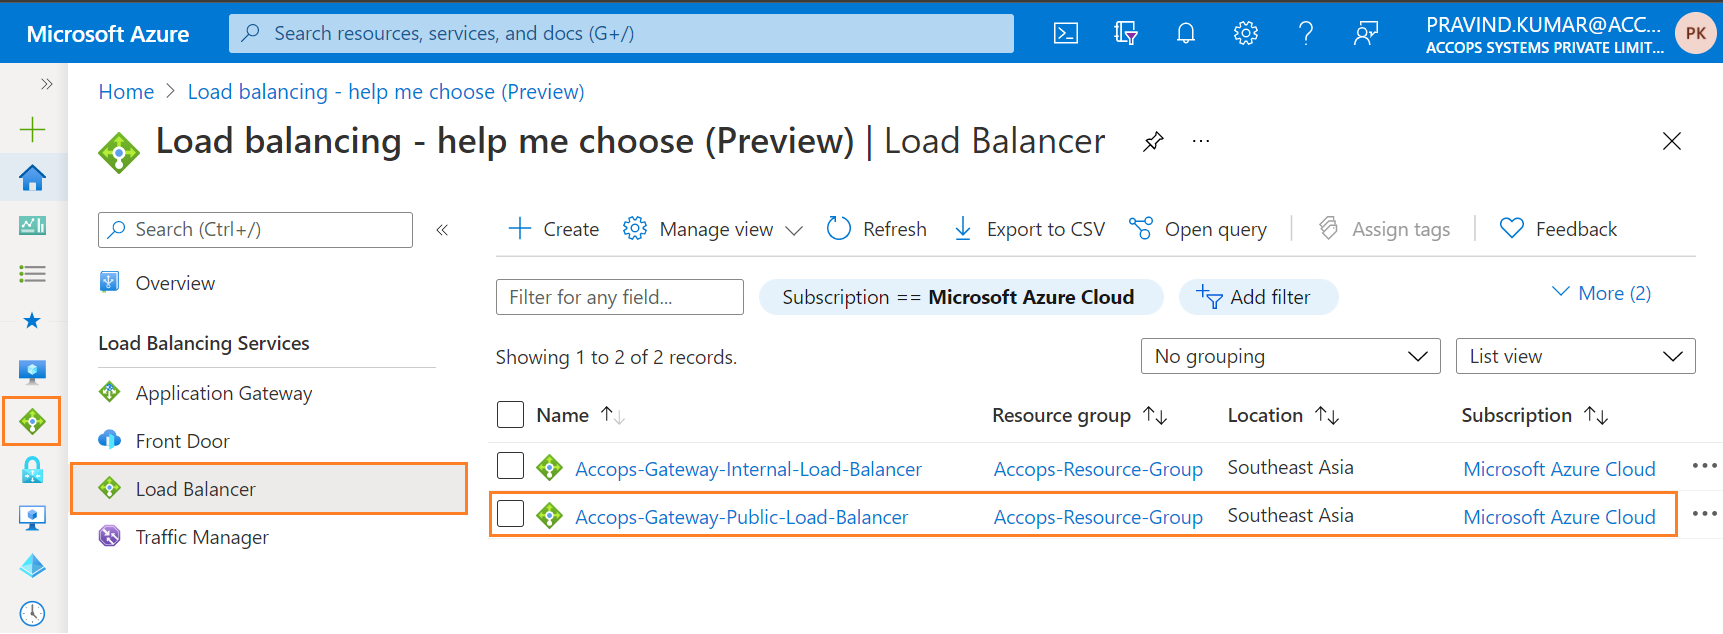
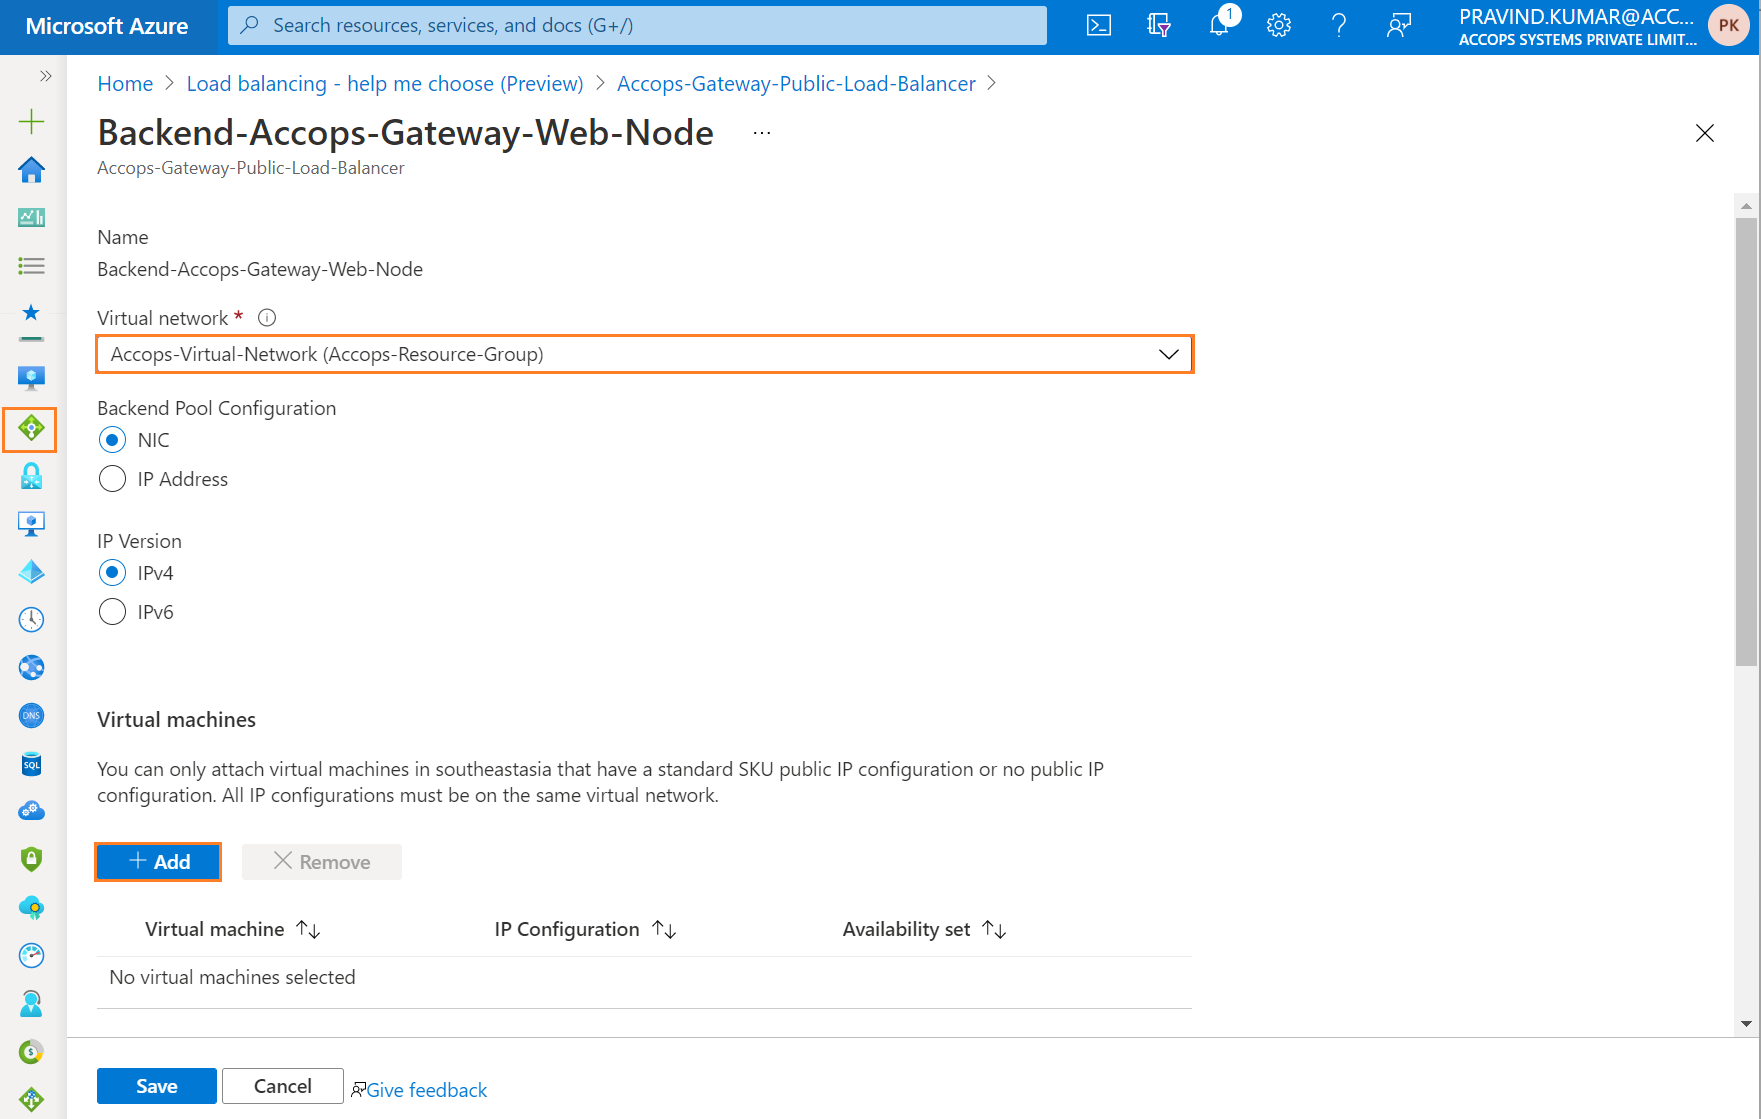
Step 1: Go to Load Balancer and Select Accops-Gateway-Public-Load-Balancer
Step 2: Select Backend-Accops-Gateway-Web-Node

Step 3: Select Virtual Network Accops-Virtual-Network and click on Add
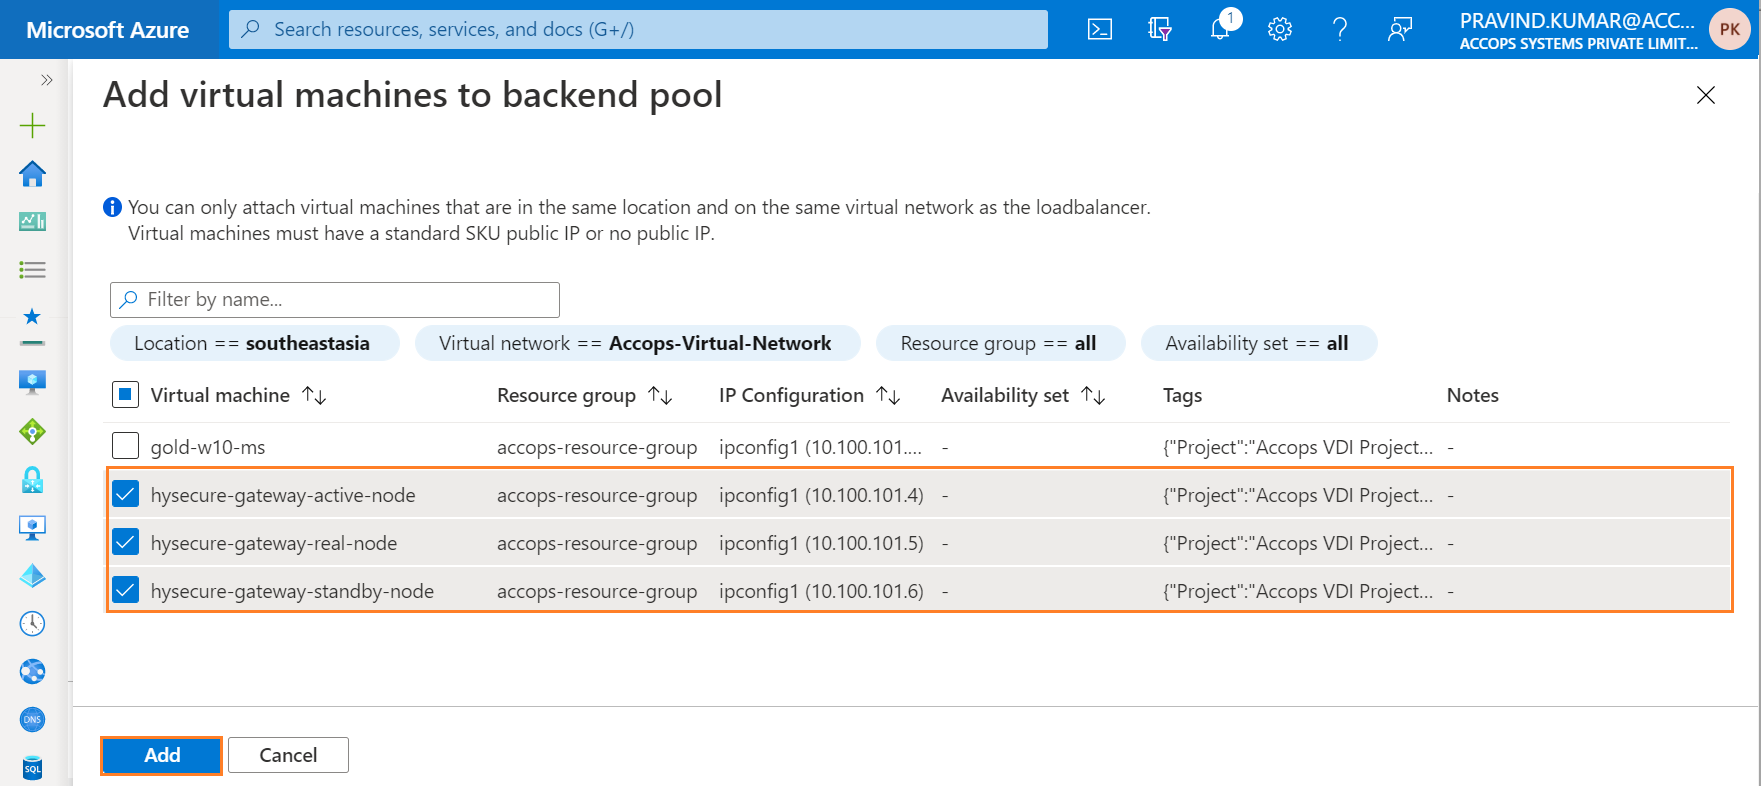
Step 4: Select Virtual Machine from as below then click on Add.
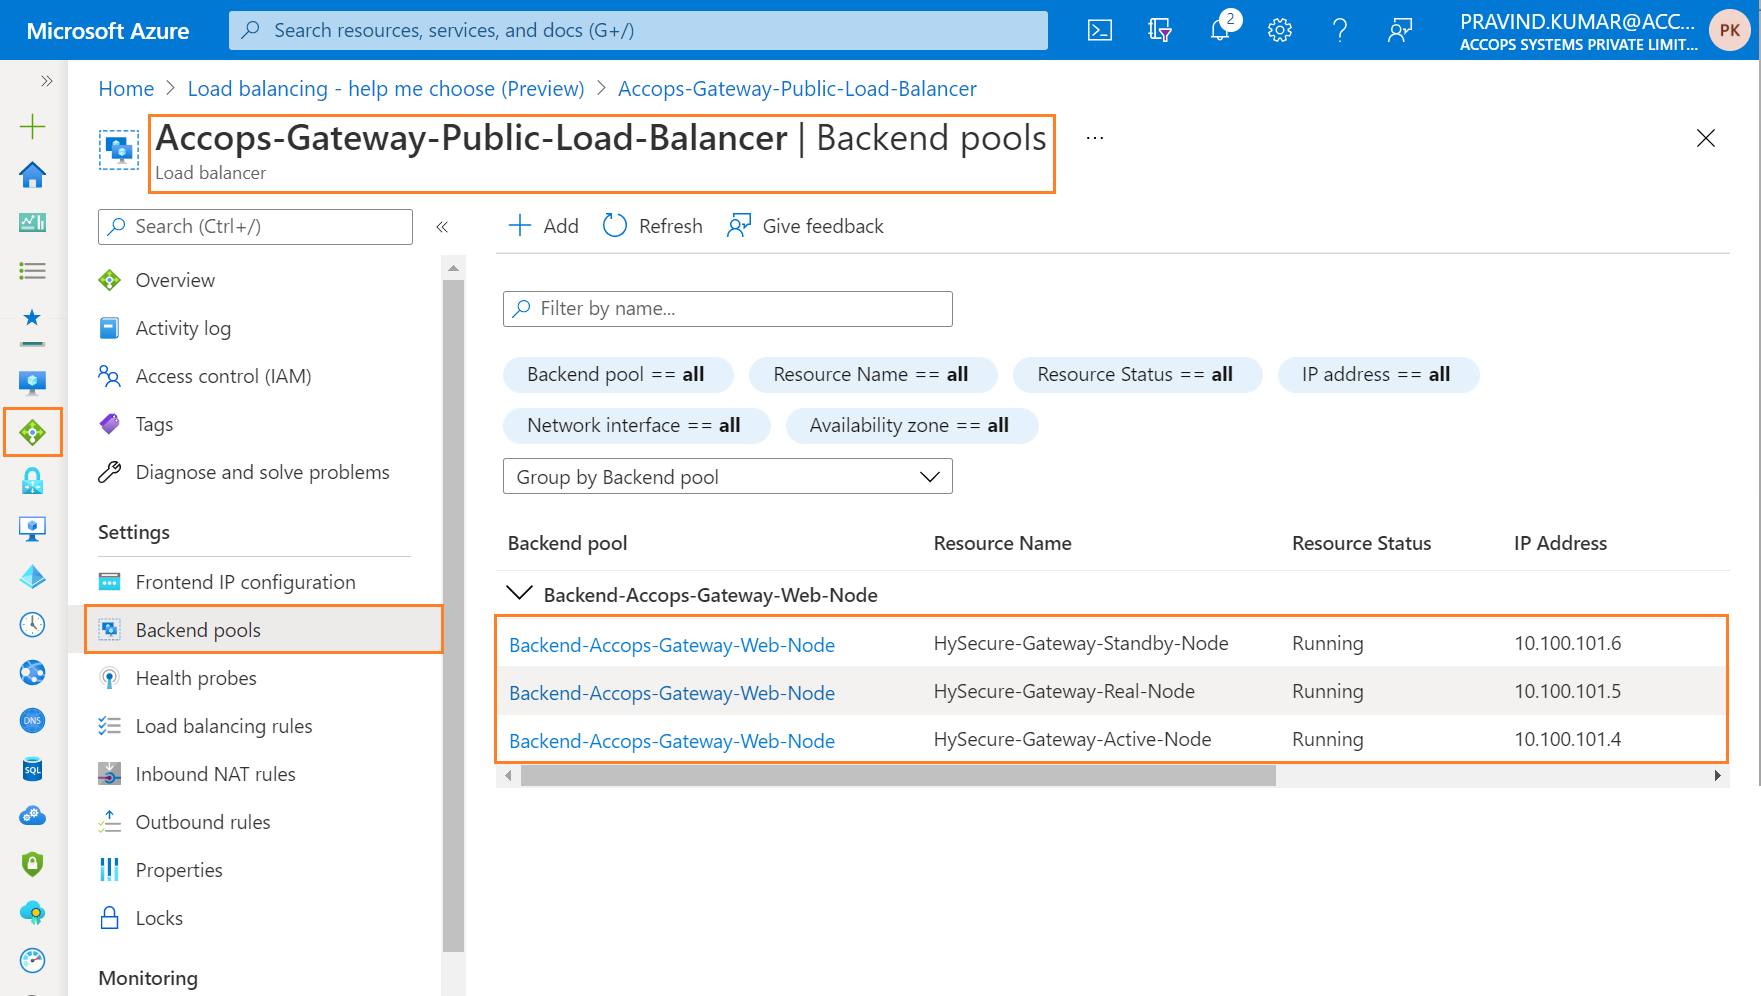
Step 5: Click on Save.

Step 6: Review Web Nodes.
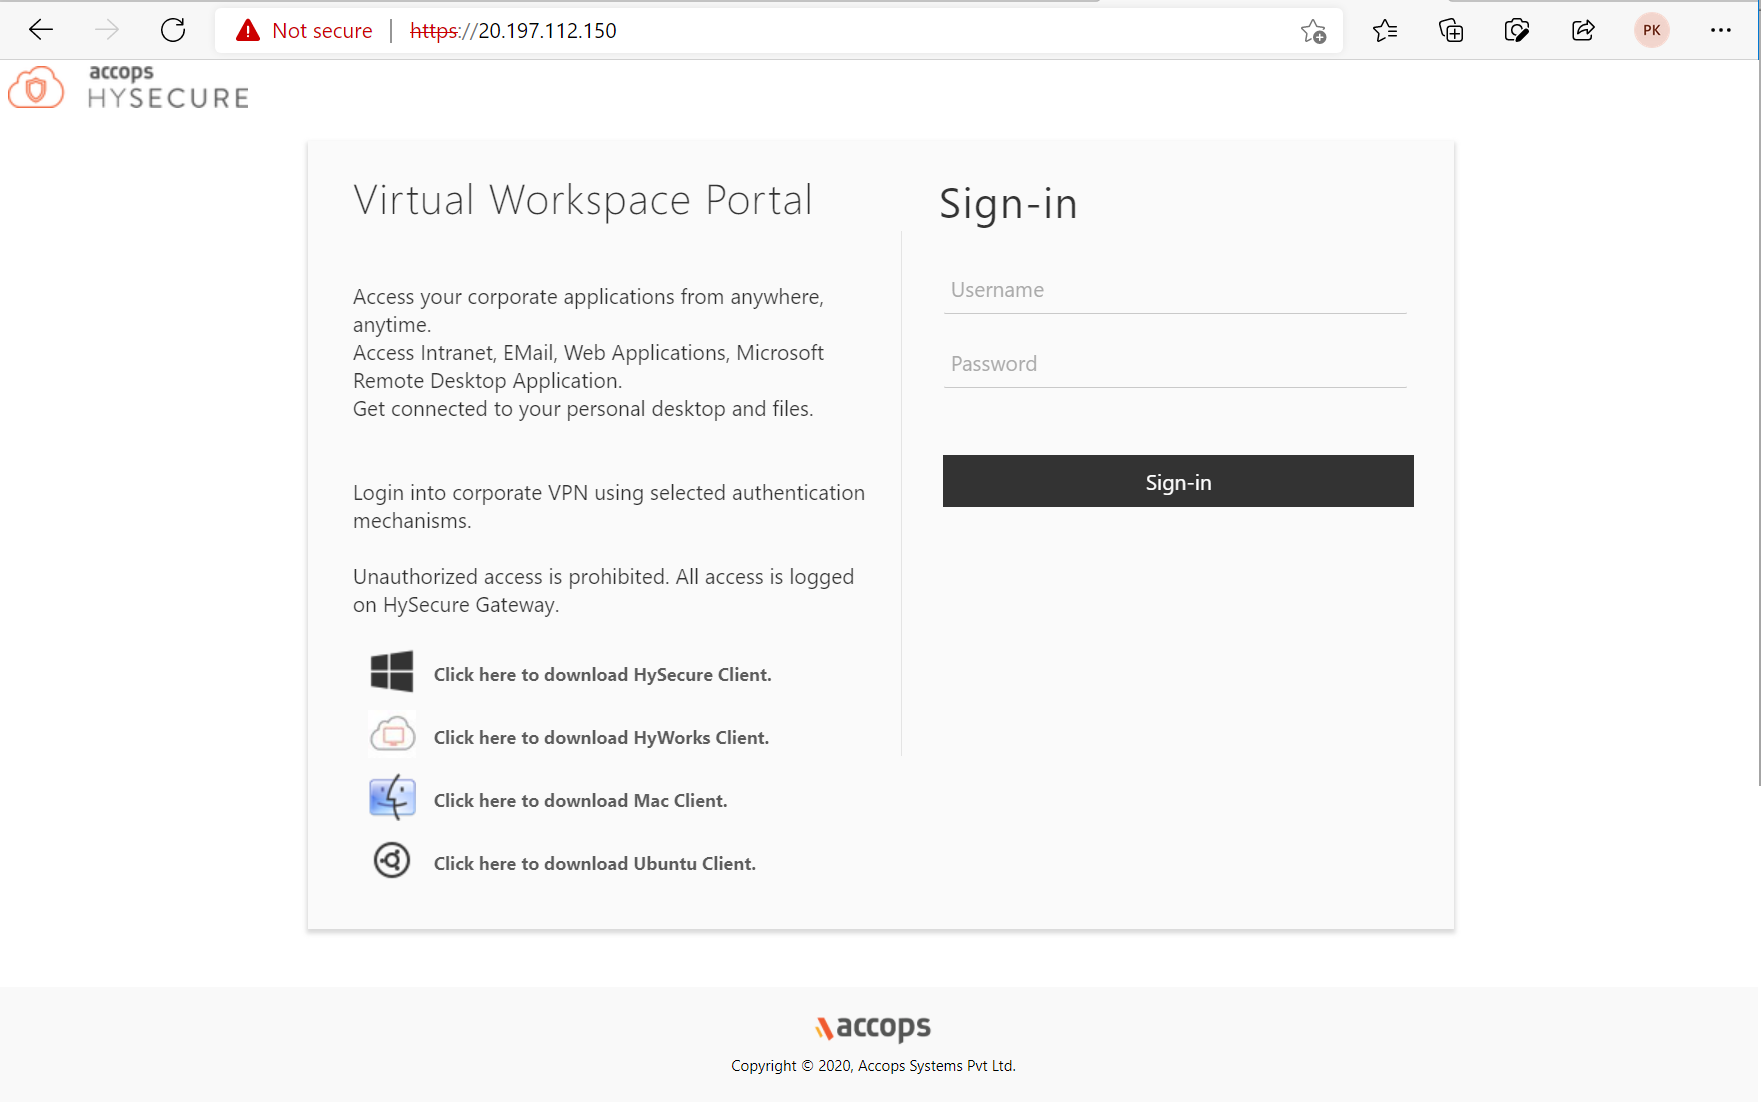
Step 7: Open Web Browser and access using Public Load Balancer IP.
Whats' Next
Help/Support
Please send a mail to support@accops.com for further Help/Support.