Enhancements in Accops Workspace Ubuntu Client version 7.0.1.1050
Post App Launch SSO Dialogue Support
In the previous SAML and Passwordless login workflow, users were prompted to enter their Domain Password immediately after login to access the SSO-based applications assigned to them.
With the latest client update, users will now be prompted for their Domain Password only when launching the first SSO app.
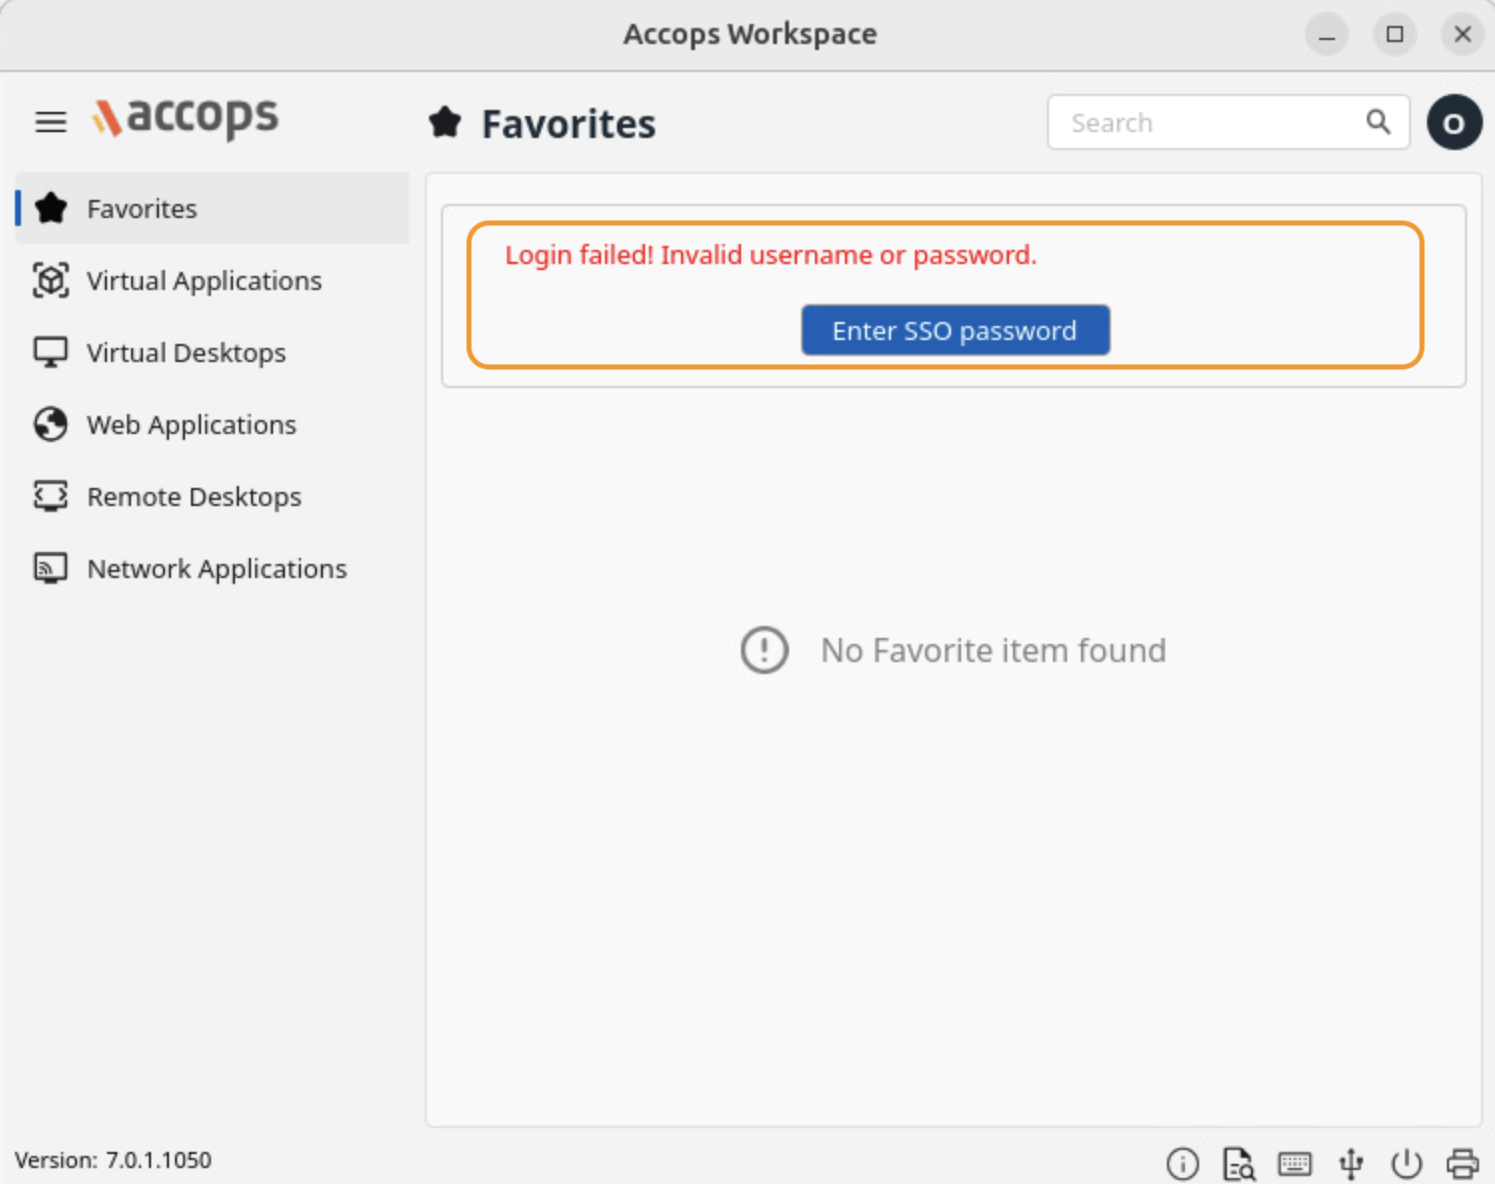
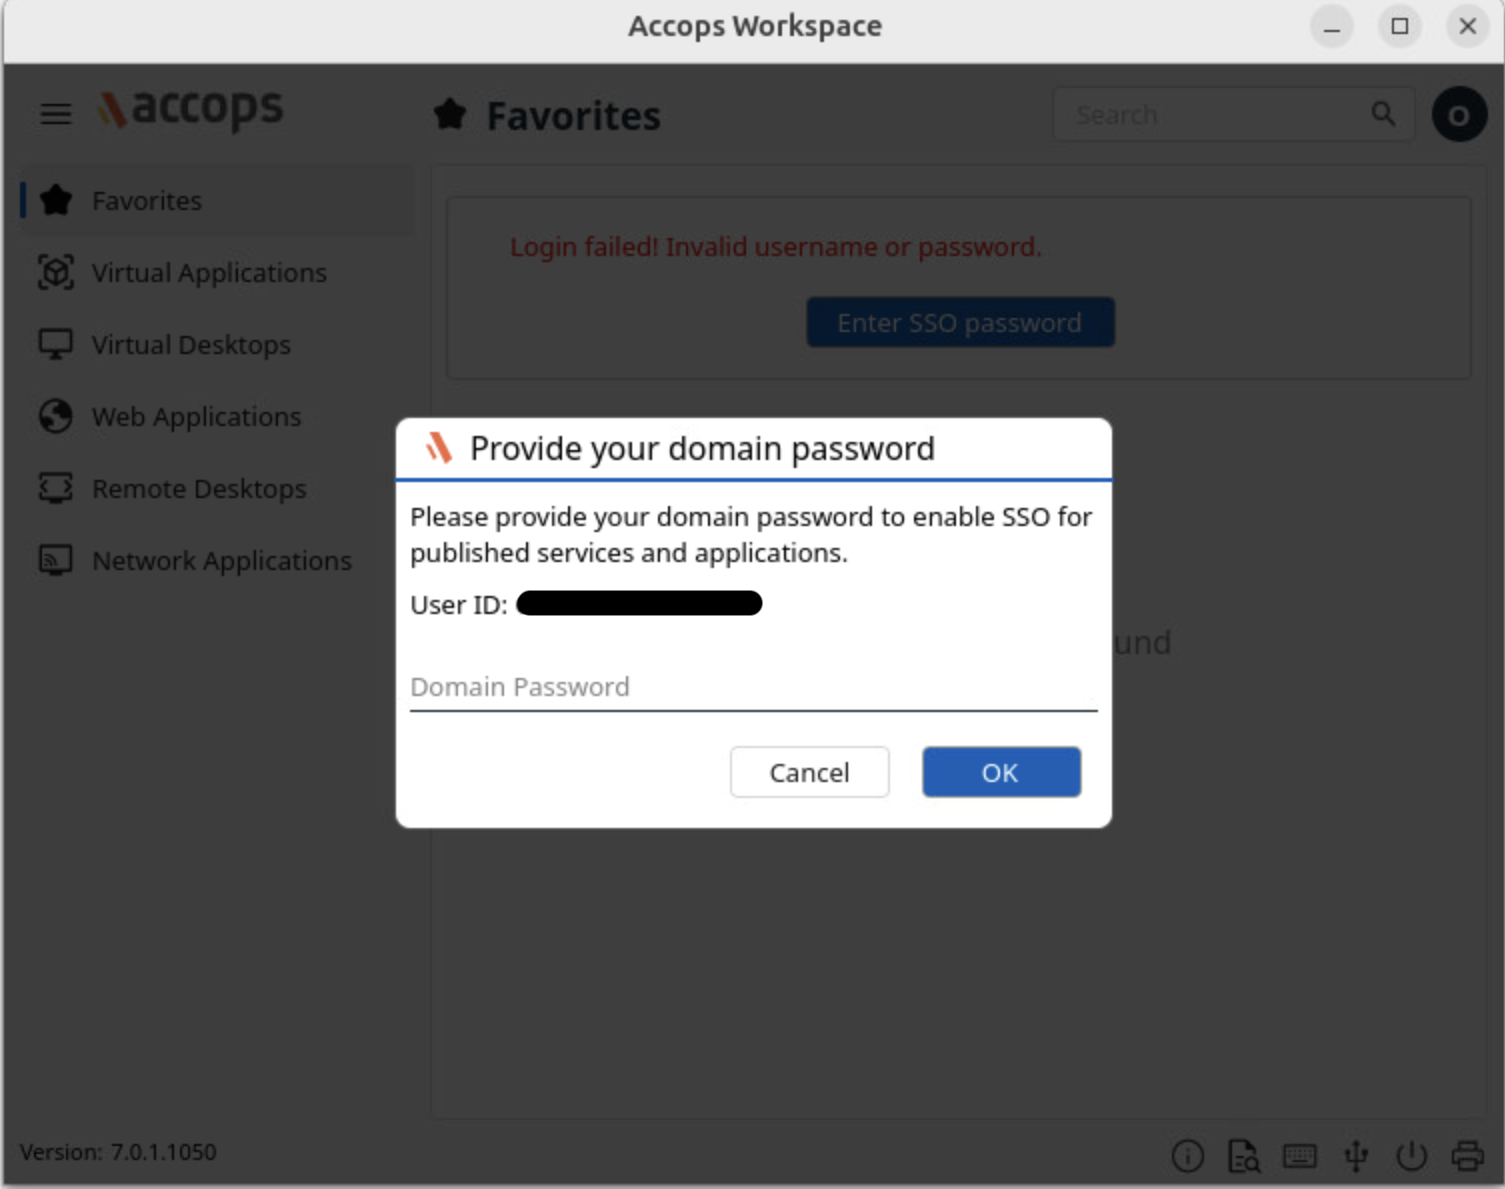
Additionally, users can choose to skip entering the password, or if they submit an incorrect password, they can update it later by selecting the Provide SSO password option in the user menu.

Supported Client Platforms and Gateway Compatibility
This feature is supported by the client modes and types listed below, with HySecure Gateway version 5.4 SP6 and HySecure Gateway version 7.0.
| Supported Client modes on OS | v5299 | v5.3 | v5.4-SP2/v5.4 SP5 | v5.4 SP6 | v7.0 |
|---|---|---|---|---|---|
| Client Modes: Admin/Standard Users | No | No | No | Yes | Yes |
FirstAppLaunch Tag Support for HySecure Gateway Configuration
Starting from this version, the FirstAppLaunch tag is supported.
Contact Accops Support to enable this option.
| Tag | Value | Description |
|---|---|---|
| VPN_SAML_ASK_PASSWORD_ON_EVENT | AfterLogin | The SSO login dialogue will appear after logging in to a client. |
| VPN_SAML_ASK_PASSWORD_ON_EVENT | FirstAppLaunch | The SSO login dialogue will appear when the first SSO application is launched. |
| VPN_SAML_ASK_PASSWORD_ON_EVENT | NoDialog | No SSO dialogue will be shown. |
| VPN_SAML_SKIP_PASSWORD_ON_EVENT | enabled/disabled | This tag provides the option to skip passwords on the SSO prompt. |
Usability and Behaviour of the Tag:
-
Gateway Non-SSO Applications Only: When a user is assigned only Gateway non-SSO applications, no SSO dialogue will appear. The Change SSO Password option will be hidden in the user menu.
-
Gateway Non-SSO and SSO Applications: When a user is assigned both Gateway non-SSO and SSO applications, the SSO dialogue will appear only when launching the first SSO app. The Change SSO Password option will then be available in the user menu.
-
Controller Applications: When a user is assigned Controller Applications, an SSO dialogue will appear after the controller login. This will be triggered by the first app launch, and the Change SSO Password option will be available in the user menu.
-
Gateway Applications with Common Credentials (SSO): When a user is assigned only Gateway applications that use Common credentials for SSO, no SSO dialogue will be triggered. The Change SSO Password option will remain hidden in the user menu.
Other Types of Applications
The latest Workspace client supports other types of applications published over the gateway. The behaviour would be the same as that of the HySecure client, in which the user can access the published network from a third-party tool but not from the client launchpad.
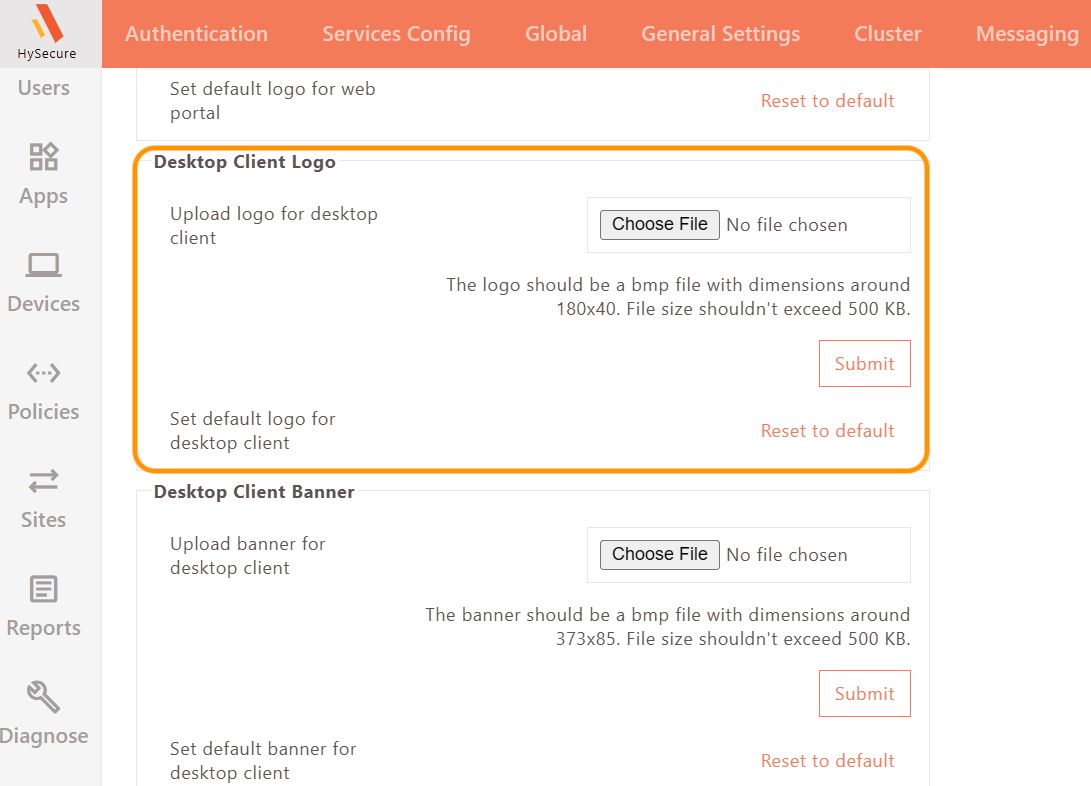
Custom Logo Support
This version allows the addition of customized logos.
HySecure Gateway configuration
-
Log in as an SO user and access the Management Console.
-
Navigate to Settings > Theme > Desktop Client Logo. Upload the custom logo image. Select the file. It should be in .bmp format, with dimensions 180*40, and 500 kb in size.
-
Click Submit.
-
In globalsetting.js, add the tags listed below:
a. WORKSPACE_BANNER_ENABLED=true
b. WORKSPACE_BANNER_VERSION=1
c. WORKSPACE_BANNER_URI=/fes-bin/public/customerlogo.bmp
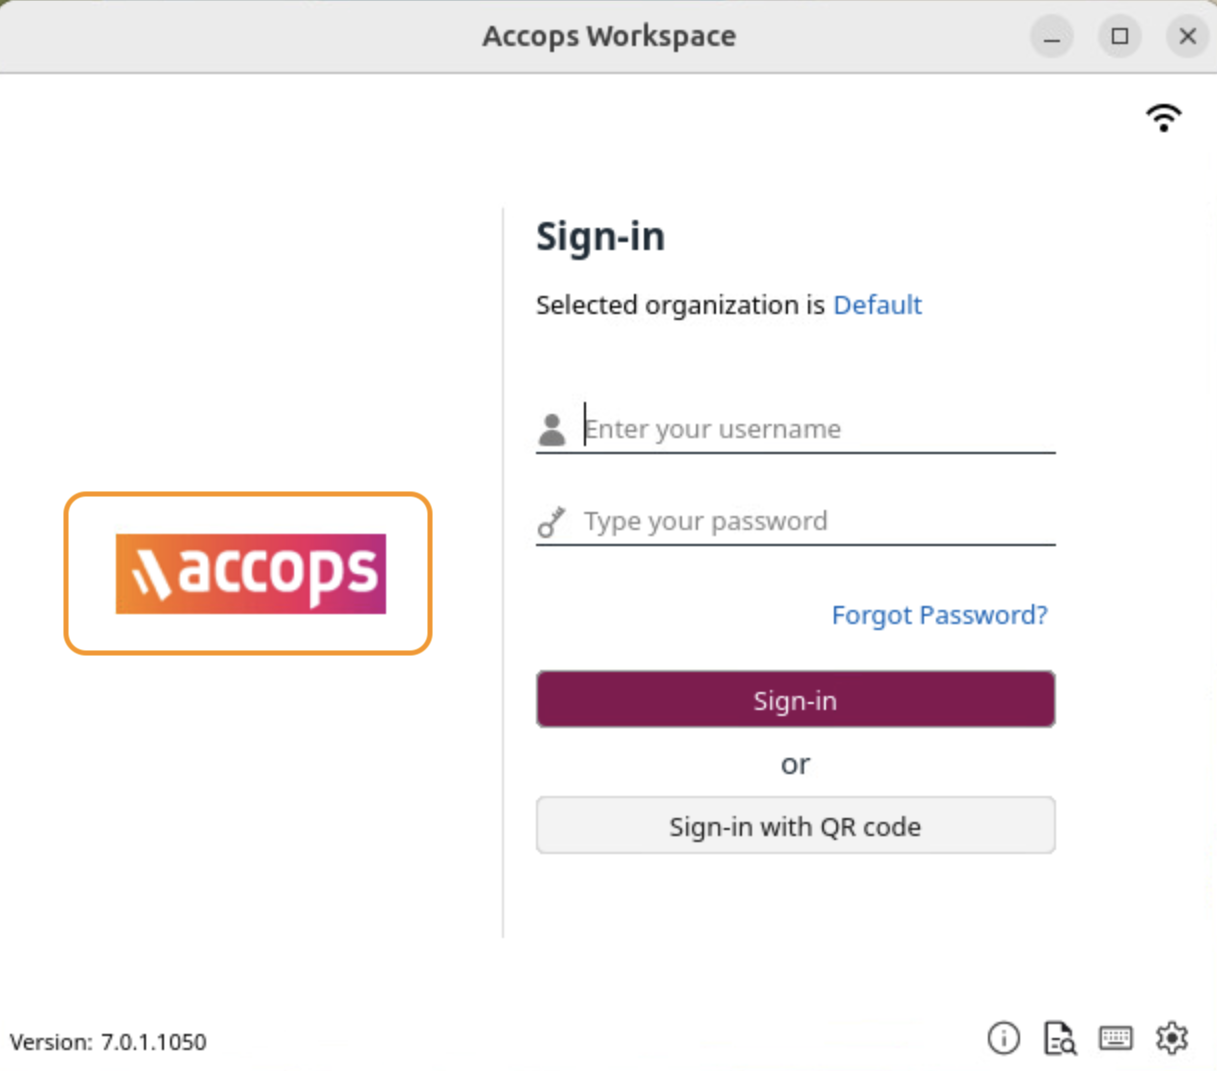
Client Login
Enter the server address and provide the user credentials. The custom logo will be downloaded to the user’s system during realm fetch only.
The location for the custom logo downloaded in the user’s system is: /home/< user >/.edc/logs
UI customization through Gateway
Steps to configure custom colors for the primary buttons in the workspace client:
Configuration Steps on HySecure Gateway
-
Access the Configuration File:
Open the globalsetting.js file on the gateway.
-
Define Color Tags:
Use the following tags to set the colors for different button states. Ensure that each property does not contain spaces and strictly adheres to the specified hex format without alpha values.
Color Tags
-
Default Background Color:
WORKSPACE_PRIMARY_BUTTON_BACKGROUND_DEFAULT=#< RGB >
-
Default Text Color:
WORKSPACE_PRIMARY_BUTTON_TEXT_DEFAULT=#< RGB >
-
Pressed Background Color:
WORKSPACE_PRIMARY_BUTTON_BACKGROUND_PRESSED=#< RGB >
-
Pressed Text Color:
WORKSPACE_PRIMARY_BUTTON_TEXT_PRESSED=#< RGB >
-
Hover Background Color:
WORKSPACE_PRIMARY_BUTTON_BACKGROUND_HOVER=#< RGB >
-
Hover Text Color:
WORKSPACE_PRIMARY_BUTTON_TEXT_HOVER=#< RGB >
-
Disabled Background Color:
WORKSPACE_PRIMARY_BUTTON_BACKGROUND_DISABLE=#< RGB >
-
Disabled Text Color:
WORKSPACE_PRIMARY_BUTTON_TEXT_DISABLE=#< RGB >
Important Notes
-
The RGB values must be in the format of a 6-character hex code (e.g., #RRGGBB).
-
Avoid using any alpha values, as they are not supported. For example, do not use formats like #AARRGGBB.
-
Ensure that all color codes conform strictly to the specified format without any additional characters or spaces.
Tip
Recommended Color Palette Material UI Color Palette
Example
WORKSPACE_PRIMARY_BUTTON_BACKGROUND_DEFAULT=#880E4F WORKSPACE_PRIMARY_BUTTON_TEXT_DEFAULT= WORKSPACE_PRIMARY_BUTTON_BACKGROUND_PRESSED=#9C27B0 WORKSPACE_PRIMARY_BUTTON_TEXT_PRESSED= WORKSPACE_PRIMARY_BUTTON_BACKGROUND_HOVER=#D81B60 WORKSPACE_PRIMARY_BUTTON_TEXT_HOVER=#FFFF00 WORKSPACE_PRIMARY_BUTTON_BACKGROUND_DISABLE=#FF80AB WORKSPACE_PRIMARY_BUTTON_TEXT_DISABLE=#212121 -
Watermark
Steps to configure a watermark on the gateway:
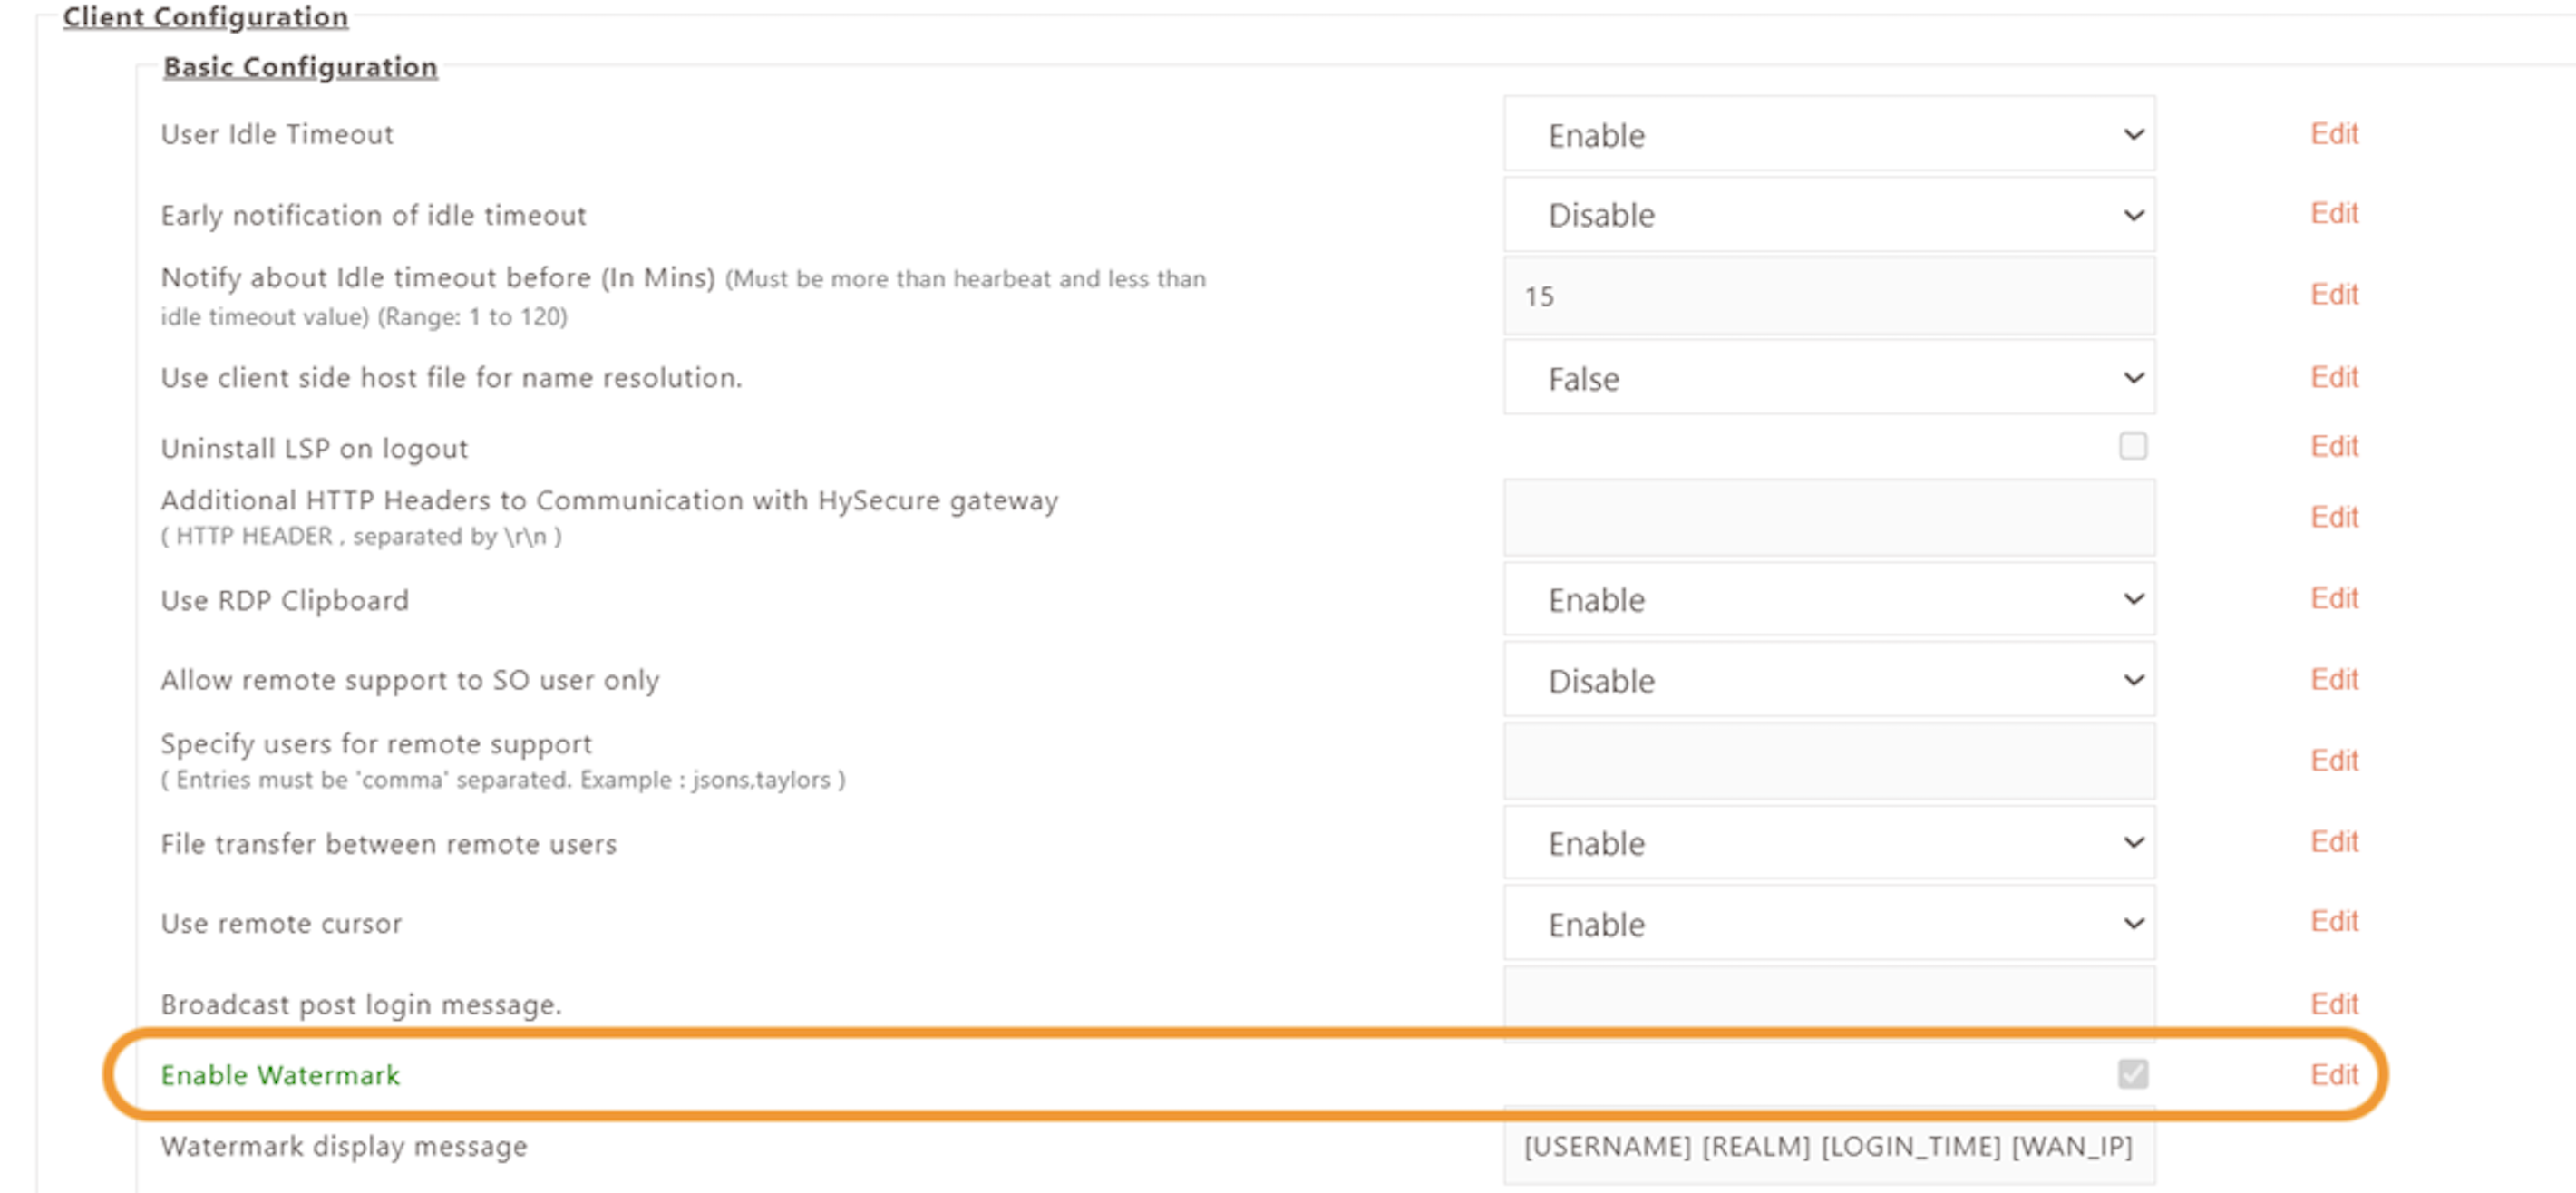
Enable Watermark
-
Access Client Configuration on HySecure Gateway:
-
Navigate the client profile and select Client Configuration.
-
Enable the watermark feature.
-
-
Custom Watermark Text:
-
Enter your desired custom string in the “Watermark display message” field.
-
You can use the following tags within your string:
-
[USERNAME]: Displays the username.
-
[REALM]: Displays the realm.
-
[LOGIN_TIME]: Displays the login time.
-
[WAN_IP]: Displays the WAN IP address.
-
-
Example: "Hi [USERNAME], Domain [REALM], Login time [LOGIN_TIME], WAN IP [WAN_IP]."
-
Create and Configure Watermark File
-
File Creation:
-
Create a file named watermark_linux.conf in the directory /home/fes/public.
-
Ensure this file has permissions set to 755 and is whitelisted in httpd.conf.
-
-
XML Configuration:
- Add the following XML configuration to watermark_linux.conf:
xml

<WATERMARK_CONF_LINUX>

 <IMAGE_INFO>

 <IMAGE_WATERMARK>TRUE</IMAGE_WATERMARK>

 <NUM_OF_ITERATION>1</NUM_OF_ITERATION>

 <OPACITY>0.8</OPACITY>

 </IMAGE_INFO>

 <TEXT_INFO>

 <TITLE_TEXT>Accops</TITLE_TEXT>

 <MESSAGE_TEXT>This is Message Text</MESSAGE_TEXT>

 <NUM_OF_ITERATION>1</NUM_OF_ITERATION>

 <SCALE>2.0</SCALE>

 <OPACITY>0.5</OPACITY>

 <R>0.5</R>

 <G>0.5</G>

 <B>0.5</B>

 </TEXT_INFO>

 </WATERMARK_CONF_LINUX>
- Add the following XML configuration to watermark_linux.conf:
Key Configuration Tags Explained
-
< IMAGE_WATERMARK >: Set to true to display an image watermark.
-
< NUM_OF_ITERATION >: Specifies how many times the watermark appears (range 1-0).
-
< OPACITY >: Controls transparency (0.0 = fully transparent, 1.0 = fully opaque).
-
< TITLE_TEXT > and < MESSAGE_TEXT >: Define the text displayed as a watermark.
-
< SCALE >: Adjusts text size (e.g., 2.0 means double size).
-
< R >, < G >, < B> : Define color values for red, green, and blue (range 0.0-1.0).
Image Watermark Configuration
-
Place your image file named watermark.png in /home/fes/public.
-
Ensure this image also has permissions set to 755 and is whitelisted in httpd.conf.
-
The image must support an alpha channel for transparency.
Watermark Display Logic
-
If a message string is provided on the gateway, it takes precedence and will be displayed.
-
If no message string is provided, the configuration from watermark_linux.conf will apply.
-
If both image and text are configured, the image will take priority if < IMAGE_WATERMARK > is set to true.
After completing these configurations, the watermark will appear when users log into the workspace client and will remain until they log out.
Favorite Applications
Users can now add HySecure Applications published by the HySecure Gateway to the Favorites tab.
Right-click the target application to add it to the Favorites tab.
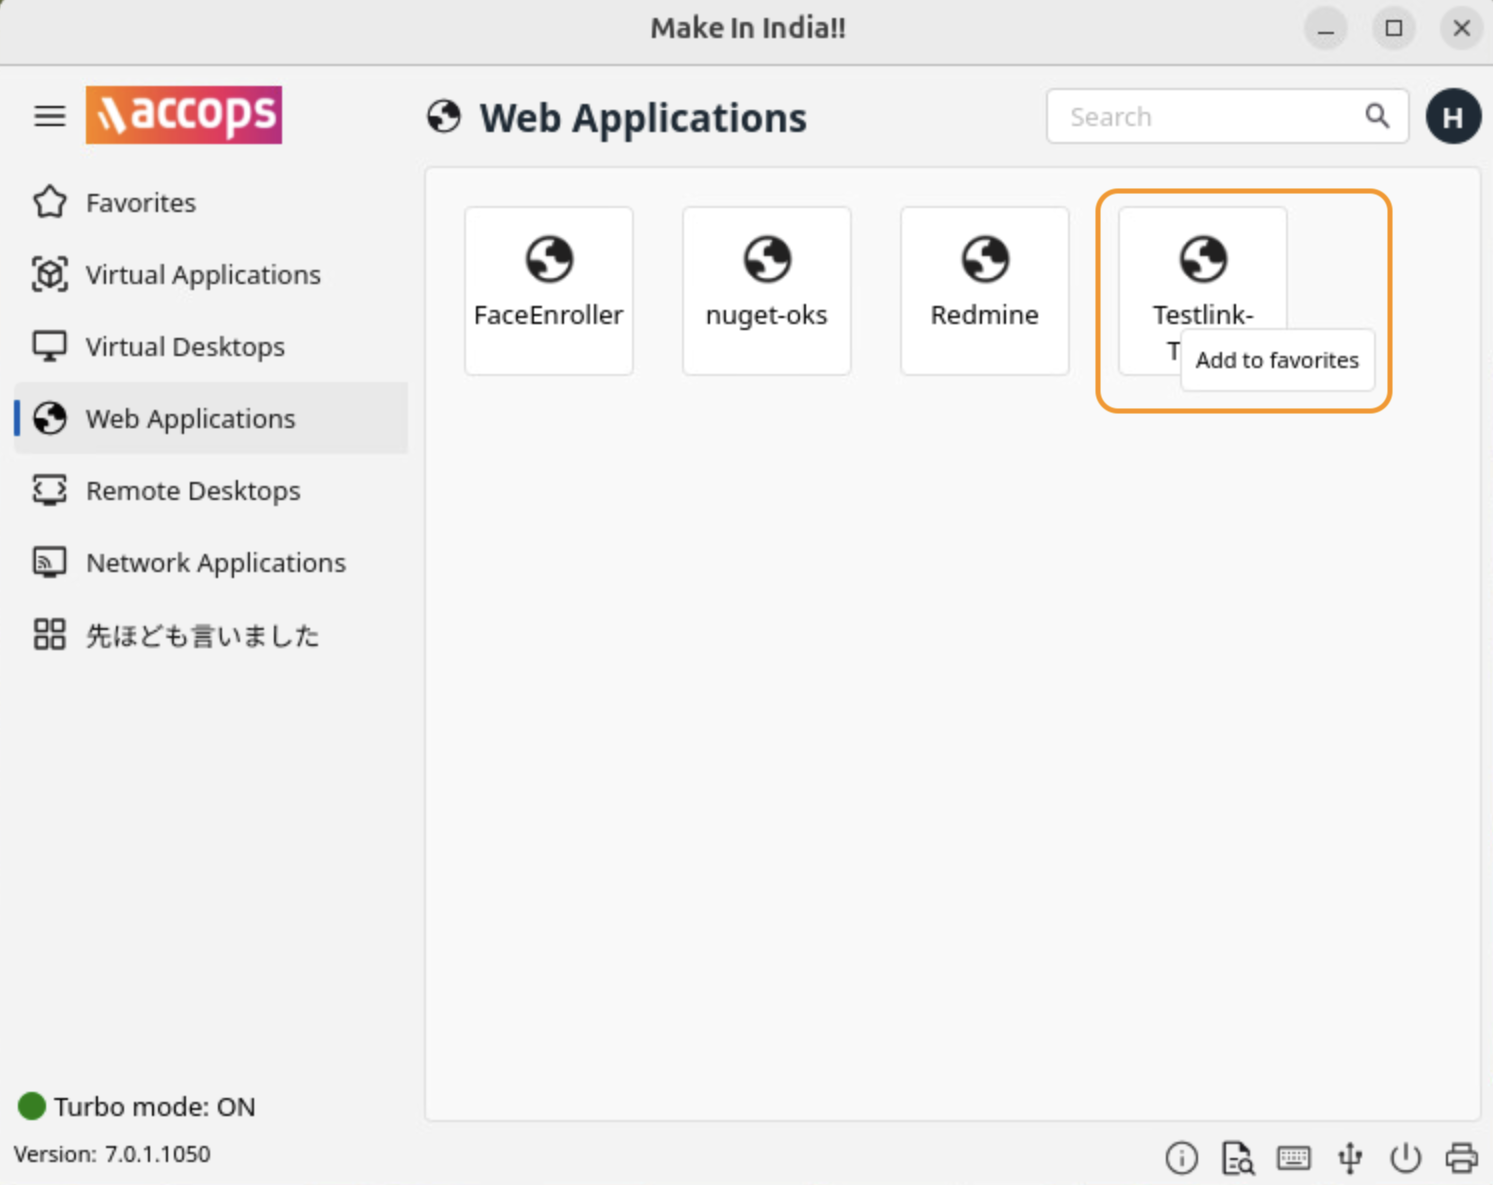
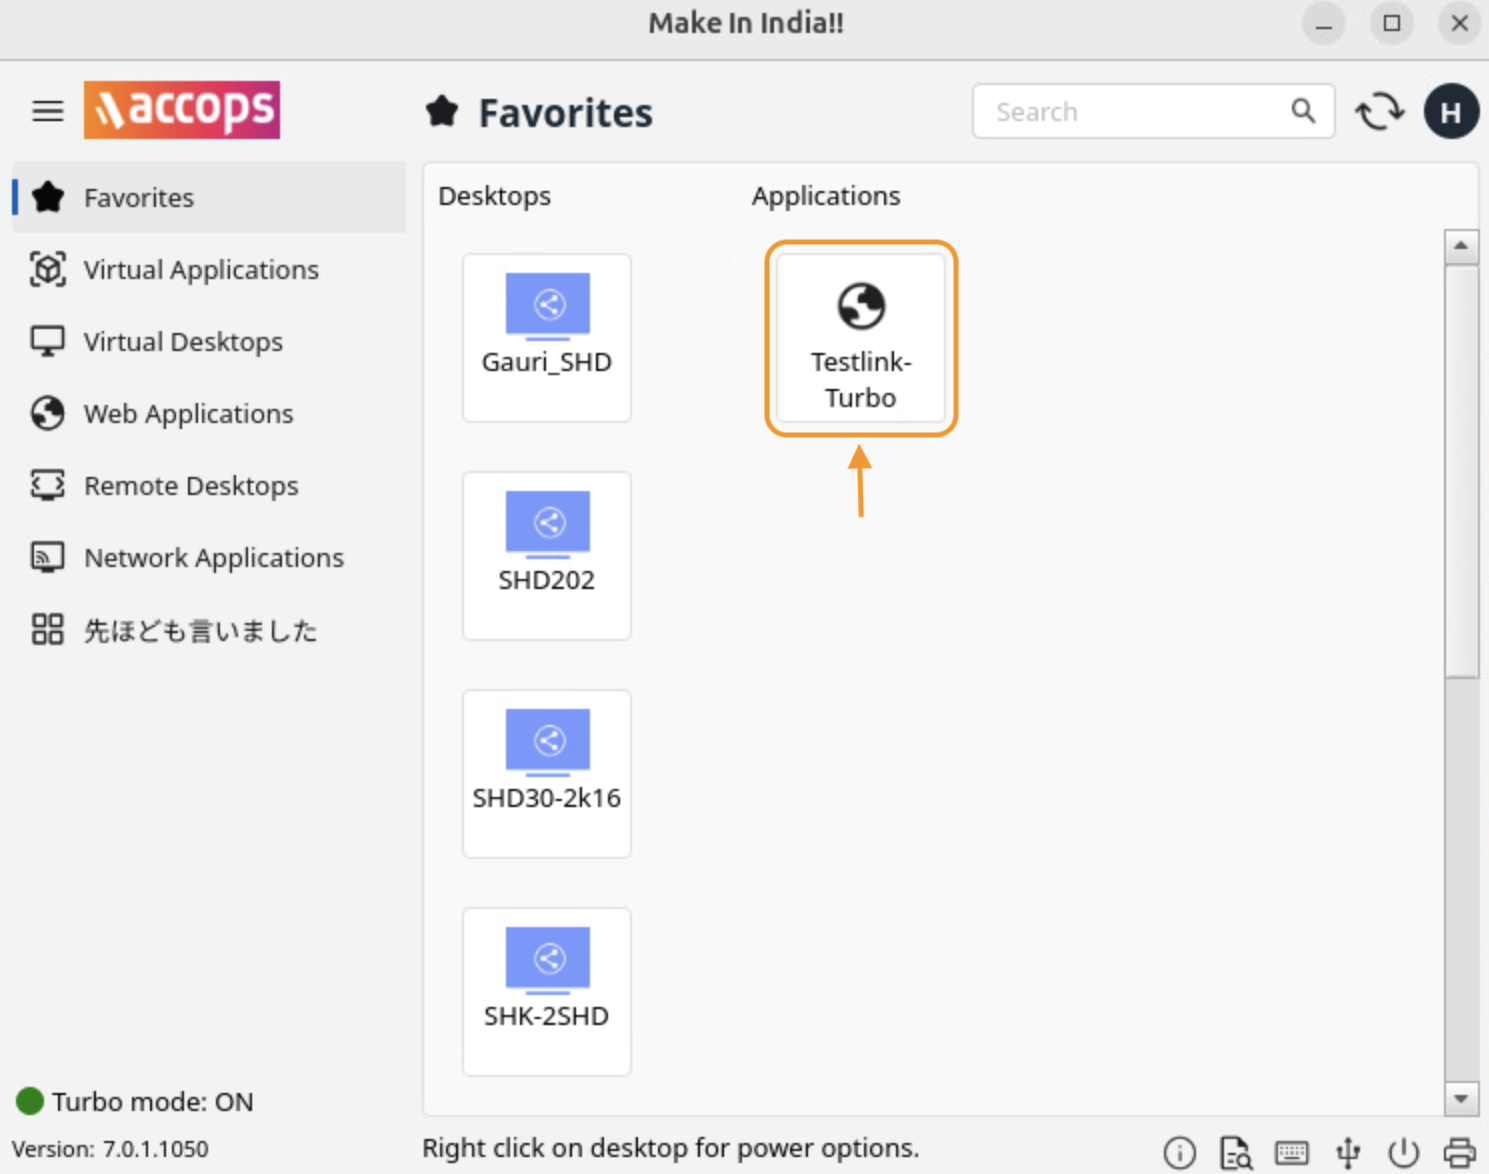
Upon clicking Add to favorites, the application will be added under the Favorites tab.
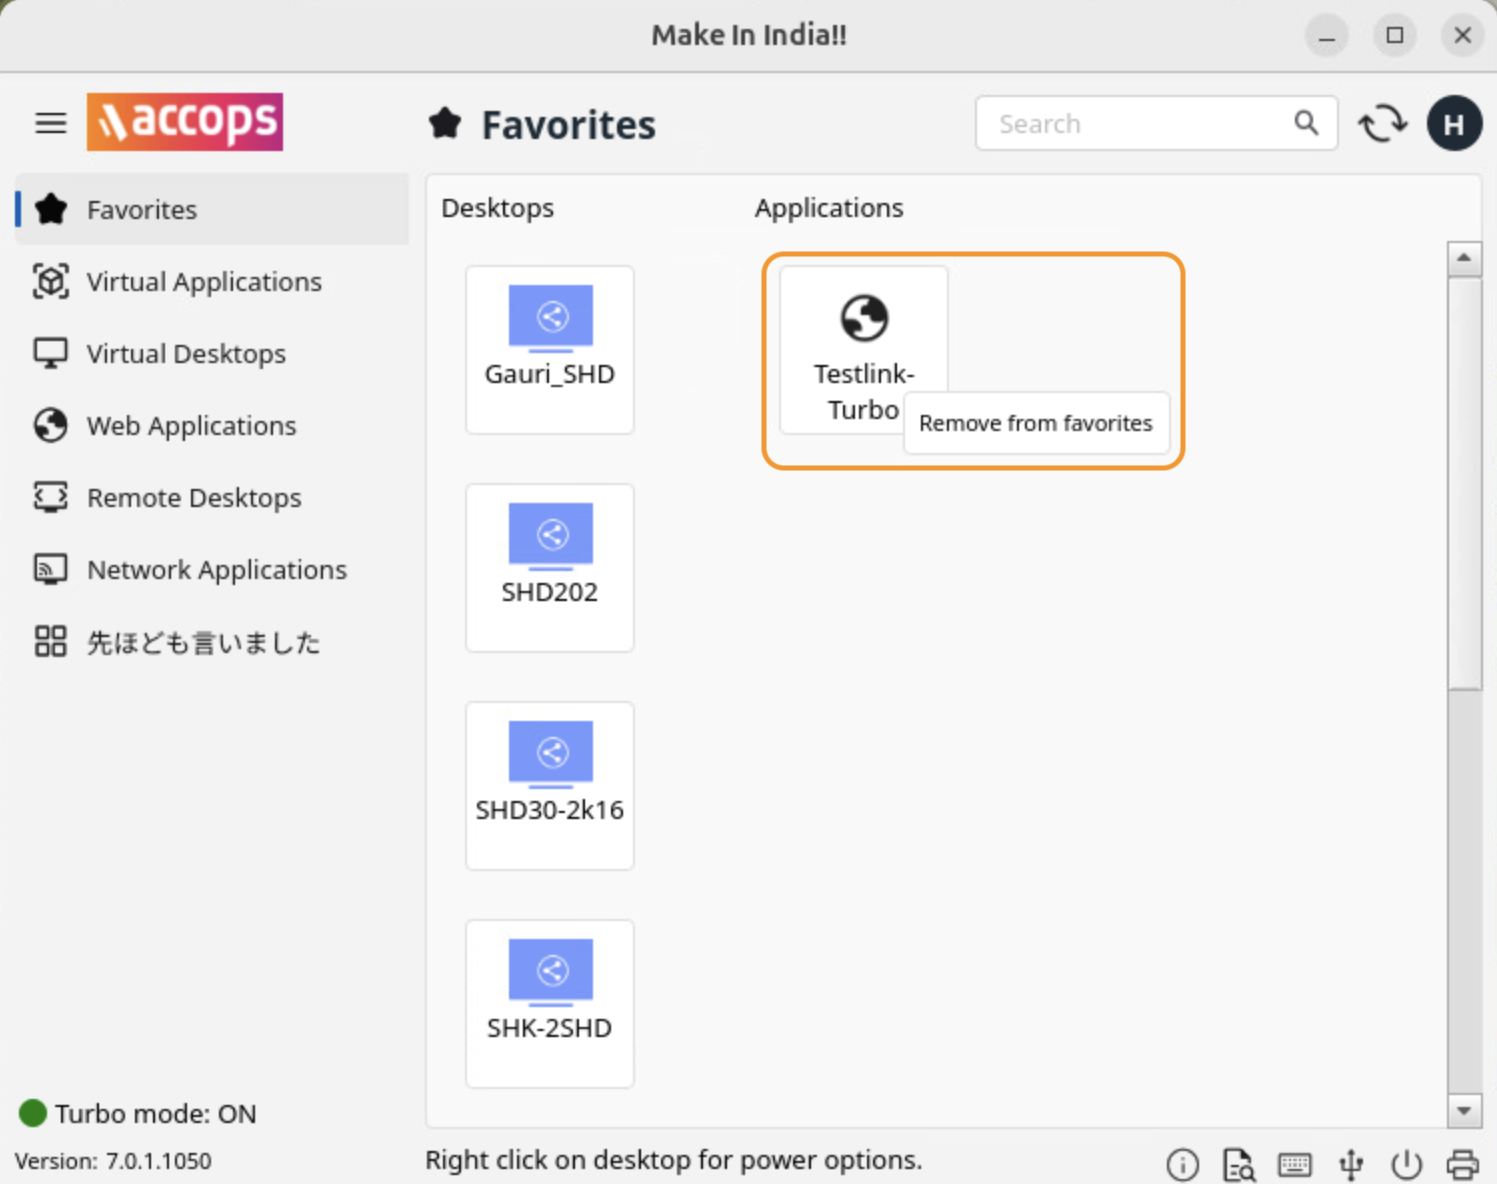
To remove an application from the Favorites tab, right-click the application in the Favorites tab and select Remove from favorites option.
Log viewer
Users can now directly view logs in the Log Viewer.
-
Listing Log files: Users can view various log files such as uac.log, ui.log, and edcservice.log, etc. These logs contain essential information, including:
-
Date and Time: Timestamp of when each event occurred.
-
User Login Details: Information about user authentication and sessions.
-
Application Information: Data related to the applications in use.
-
Problem Severity: Indicators of the severity of issues encountered.
-
Messages: Descriptive messages detailing events or errors.
-
This comprehensive logging allows for effective monitoring and troubleshooting of system activities.
User Idle session timeout
The Accops Linux Workspace Client includes a user idle timeout feature that automatically logs out users after a specified period of inactivity. Below are the key points regarding session idle timeout:
To configure the user idle timeout feature in the Workspace Linux Client, follow these specifications:
The idle timeout feature is designed to automatically log out users who have been inactive for a specified period. This feature helps enhance security by ensuring that unattended sessions are closed.
Configuration on HySecure Gateway
Idle Timeout Configuration: A flag in the version info file controls the idle timeout feature, specifically the USER_IDLE_TIMEOUT_ENABLE tag. This can be set to:
-
Blank: No configuration is present; the feature is disabled by default.
-
false: The idle timeout feature is disabled.
-
true: The idle timeout feature is enabled, and the timeout value will be retrieved from the gateway.
Enable or Disable Idle Timeout:
The idle timeout feature is controlled by a flag in the global settings file.
| Action | Tag | Flag |
|---|---|---|
| To Enable | USER_IDLE_TIMEOUT_ENABLE= | true |
| To Disable | USER_IDLE_TIMEOUT_ENABLE= | false |
Specify Timeout Duration:
-
Use the TIMEOUT tag to define the idle timeout duration in minutes.
-
Example: TIMEOUT=3
This configuration indicates that the user will be logged out after 3 minutes of inactivity.
When Idle Timeout is Disabled:
If USER_IDLE_TIMEOUT_ENABLE = false, the client will not trigger idle timeout, allowing users to remain logged in regardless of inactivity.
When Idle Timeout is Enabled:
If USER_IDLE_TIMEOUT_ENABLE = true, the timeout value is read from the gateway's login response. The specified timeout duration determines how long the user can remain idle before being logged out.
What does "Idle" mean in this context?
A user is considered idle if there is no mouse movement or keyboard input detected on the system.
How can I change the idle timeout period?
Modify the TIMEOUT value in the globalsettings.js file on the gateway to adjust the idle timeout duration.
Definition of Idle: In this context, a user is considered idle if there is no mouse movement or keyboard input.
Behavior During Idle Timeout:
-
If the idle timeout is triggered, the client will log out the user and notify the gateway.
-
Users can change the idle timeout period through the gateway's Management Console.
Considerations:
-
If a user is engaged in Remote Desktop Protocol (RDP) sessions, the idle timeout will not activate.
-
Watching a movie or similar activities that do not involve user input will trigger idle timeout.
Important Note:
It's important to ensure that the idle timeout settings on the HyWorks controller are greater than those on the HySecure gateway to avoid discrepancies in session management.
New UI and Icons
In the latest version of the Accops Linux Workspace Client, several new icons have been introduced to enhance the user interface.
Set MTU support for Linux
To set the Maximum Transmission Unit (MTU) for the Accops Linux Workspace Client, follow these guidelines:
-
Access Client Settings: Open the HySecure Management Console to configure client settings related to MTU.
-
MTU Configuration: Look for the MTU settings in the client configuration options. The recommended MTU size for optimal performance is typically at least 1200 bytes, especially when using HySecure.
-
Adjust MTU Value: If necessary, specify a custom MTU value that suits your network configuration. Ensure that the MTU value is consistent across the network to avoid fragmentation issues.
We can check if the configured MTU exceeds the maximum allowable size and make adjustments as needed.
HySecure Gateway Tags
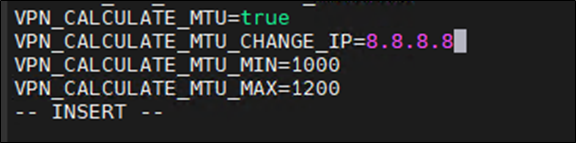
In the /home/fes/public/defaultclientsetting.js file, configure the following tags:
-
VPN_CALCULATE_MTU: Set to True or False.
-
VPN_CALCULATE_MTU_CHANGE_IP: Specify your VPN address (e.g., 8.8.8.8).
-
VPN_CALCULATE_MTU_MIN: Minimum MTU value (e.g., 1000).
-
VPN_CALCULATE_MTU_MAX: Maximum MTU value (e.g., 1500).
Turbo MTU Configuration (Default)
If the MTU is not specified in the interface configuration, the Turbo will automatically set to the default value of 1420.
Important Command Lines
-
Use ifconfig to display the interface created for the Turbo tunnel. This will show the calculated MTU.
HySecure Gateway Configuration
Workspace Client Implementation
-
When a client logs into the Workspace, the MTU will be automatically calculated using the server IP specified in VPN_CALCULATE_MTU_CHANGE_IP. If this IP is absent, the gateway IP will be used.
-
The calculated MTU will then be applied to the Turbo interface.
-
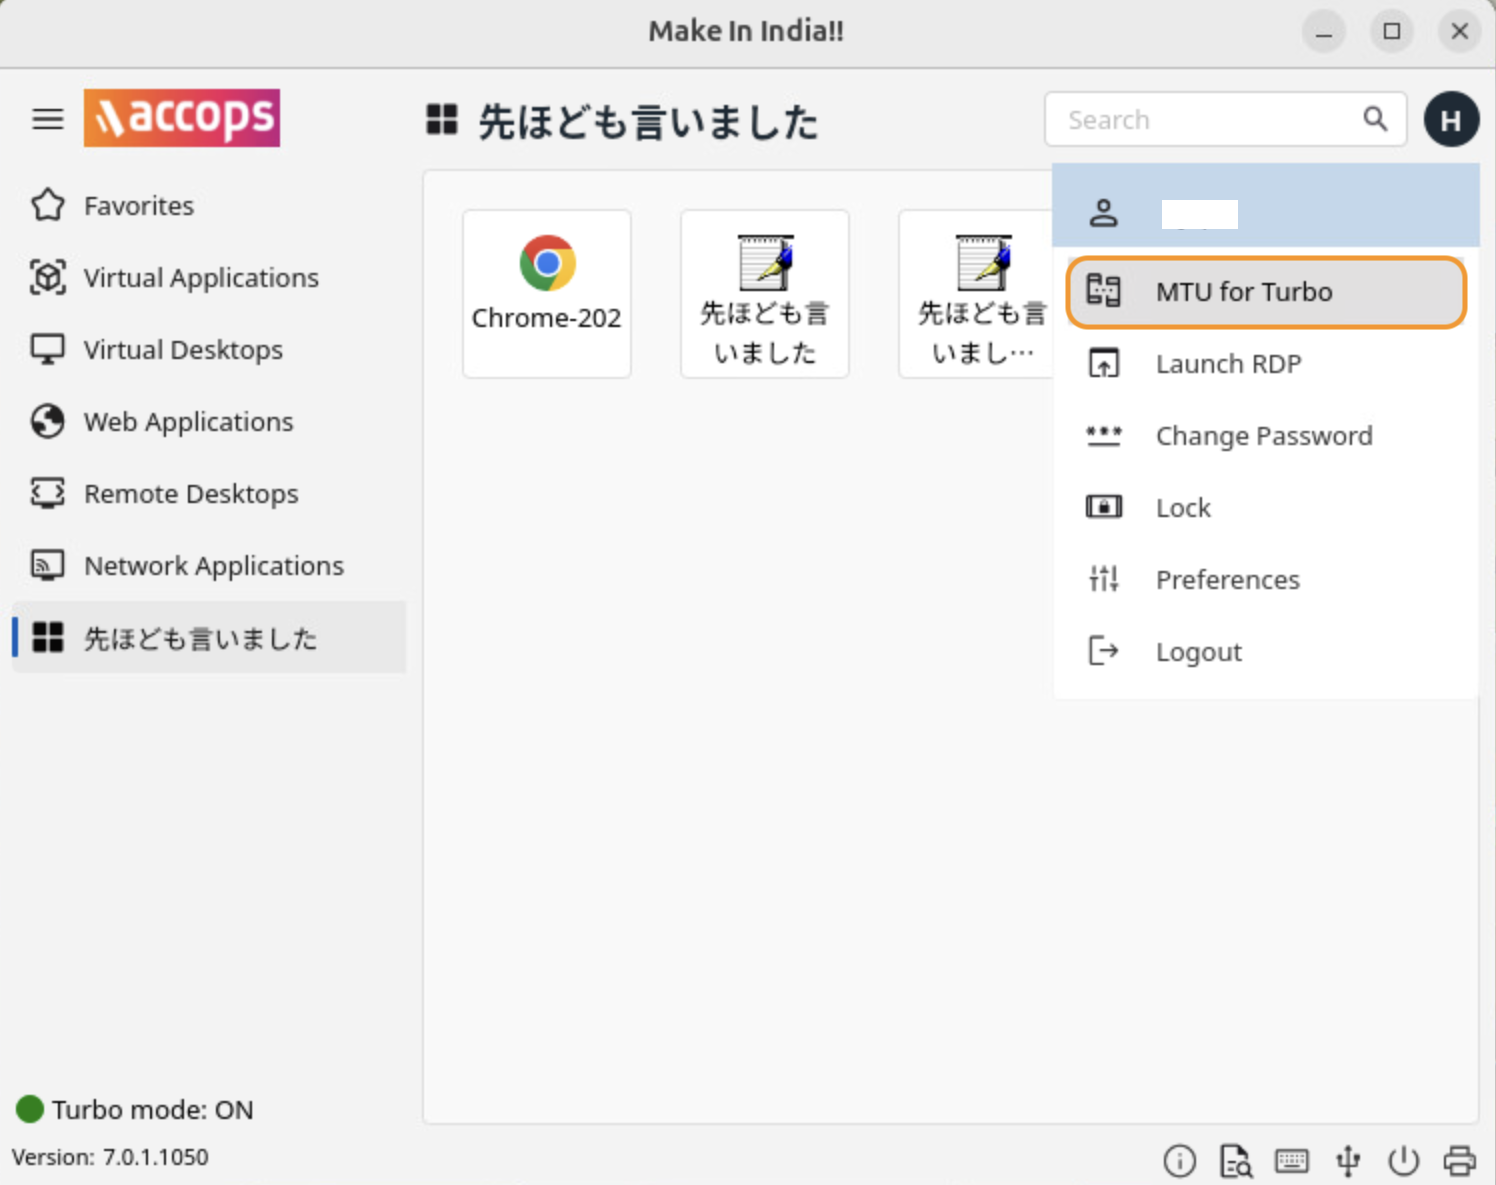
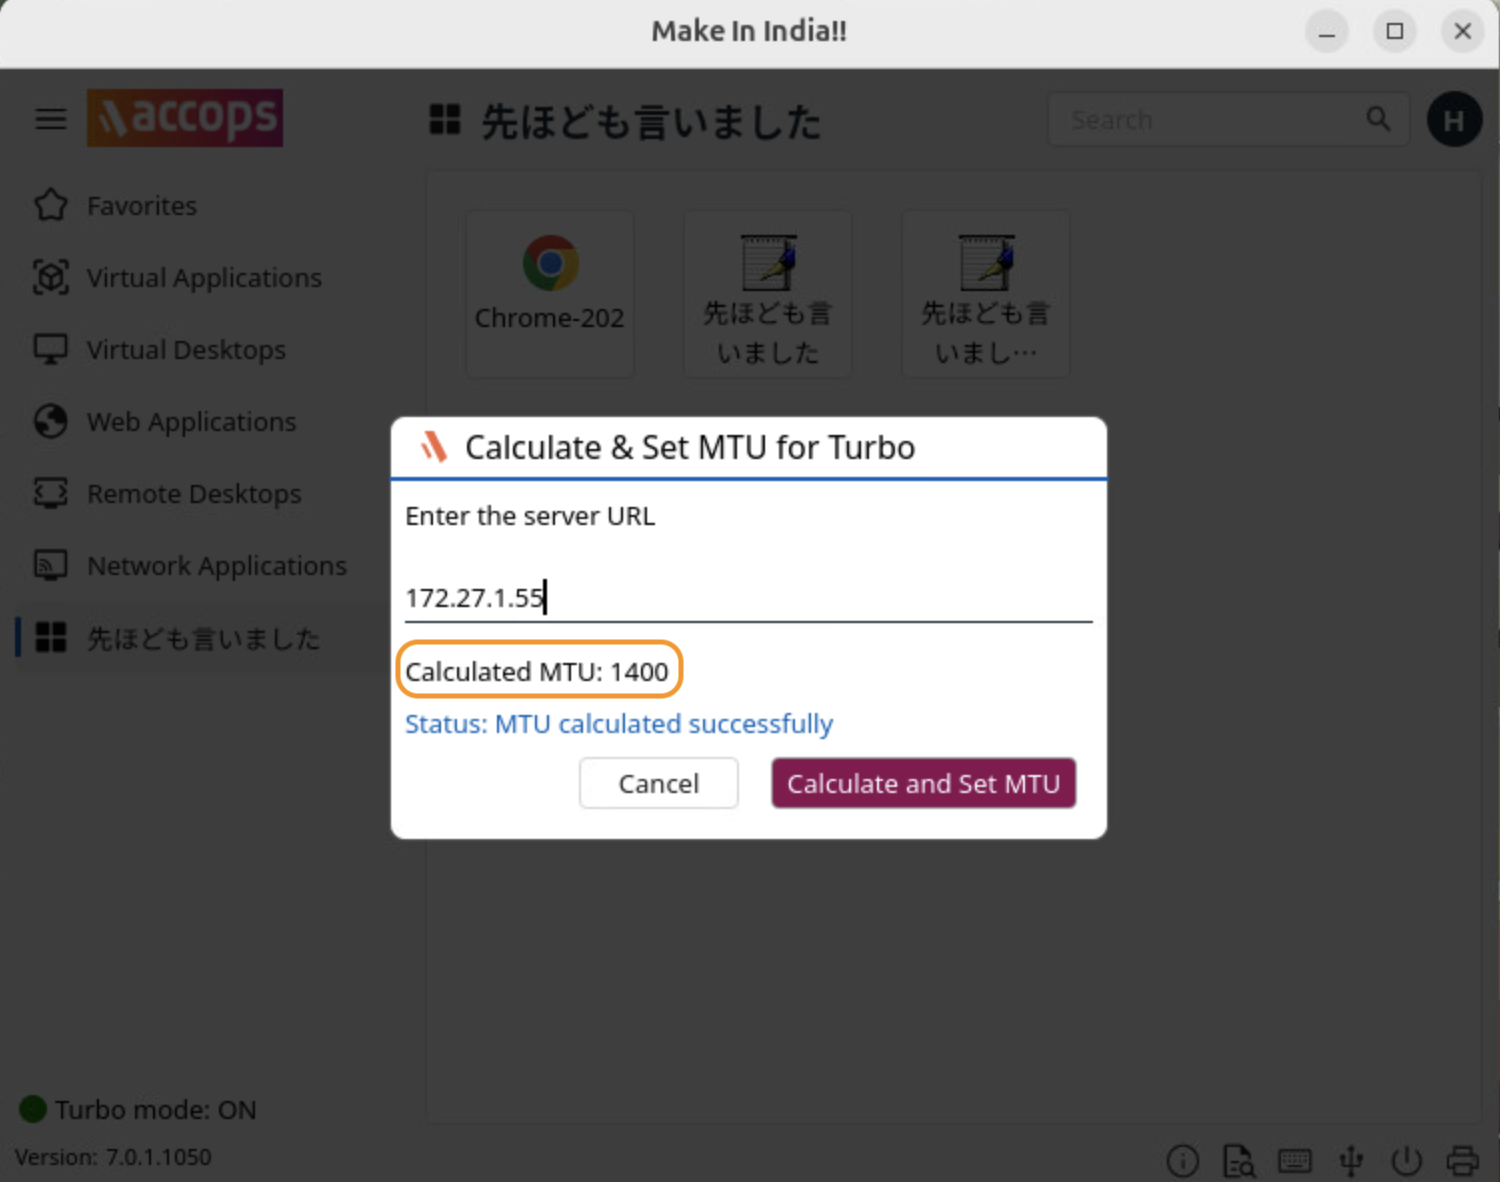
Users will have an option as MTU for Turbo in the Launchpad options menu, allowing them to enter a server IP for MTU calculation. This configuration feature is exclusive to the Workspace Client.
-
The calculated MTU will be displayed to users.
This approach ensures that users have a reliable connection with optimal packet sizes, reducing potential data loss due to fragmentation issues.
Limitations:
- VPN_CALCULATE_MTU_MIN: The minimum MTU can be configured between 1000 and 1300. If a value below 1000 or above 1300 is provided, the default value will be set to 1000.
- VPN_CALCULATE_MTU_MAX: The maximum MTU can be configured between 1301 and 1500. If a value below 1301 or above 1500 is provided, the default value will be set to 1500.
- MTU value: The MTU value is applied only to the turbo adapter.
- IP for MTU Calculation:
The IP address (specified by
VPN_CALCULATE_MTU_CHANGE_IP) used for MTU calculation must be valid and reachable. If the IP or URL is invalid or unreachable, the MTU will be set based on theDEFAULT_MTU_IN_ICMP_PING_FAILUREparameter.