Workspace Windows Client Launchpad
Accops Workspace Windows Client Launchpad is an interface or platform that allows users to access and launch applications, resources, or services quickly. It's a hub where users can see a list of available tools or resources and start them with a single click or action.
It displays a set of virtualized applications like Microsoft Word, Excel, proprietary tools, or even full virtual desktops. The user simply clicks on an icon to launch the desired application or desktop environment.
It serves as a centralized dashboard where users can see and launch their virtual desktops, applications, and other resources from a unified portal.
Key Features of a Launchpad:
-
Centralized Access: A Launchpad brings together a variety of applications, resources, or services in one place for easy access.
-
Quick Launch: Users can quickly start applications or resources with a single click or tap.
-
Customization: It allows users to organize or customize the apps or resources displayed, such as adding them to favorites.
-
Categorization: Apps or services can be grouped into categories or categories based on usage or type, allowing for more efficient navigation.
The following describes the various widgets displayed on the launchpad screen:
-
Burger Menu: Click
 to expand or collapse the main navigation options available. It allows the interface to remain clean and uncluttered. Users can reveal the full navigation when needed in an organized and simplified manner.
 -
Turbo Status: Displays the HySecure turbo connection status. This status will be updated instantly on turbo connect, disconnect, service starting, and stopping.
-
User Profile Menu: Click to view various options available related to the user's account and settings.
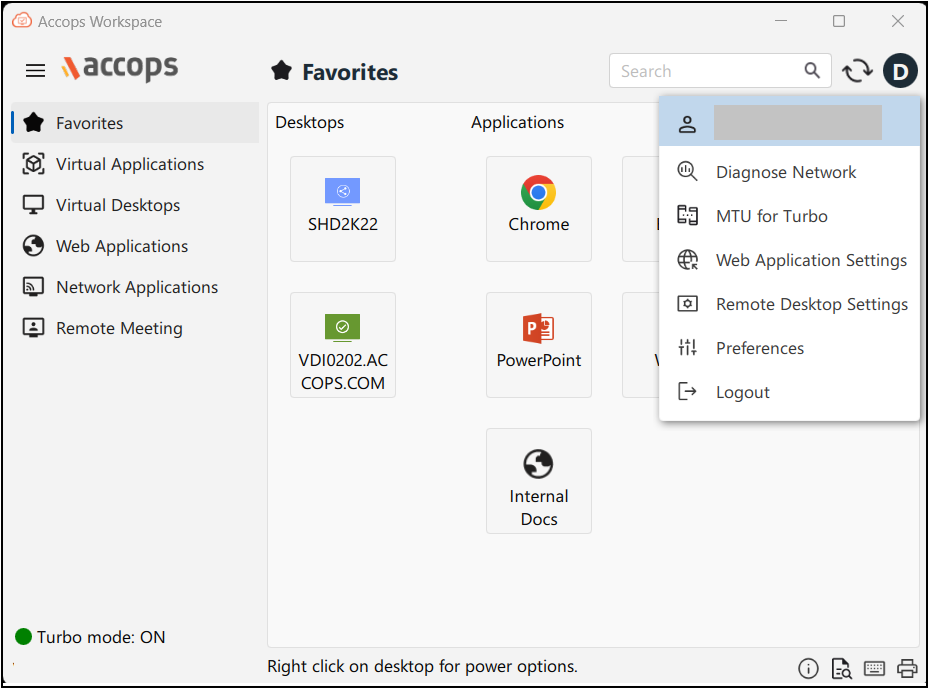
The following are the options available under the user profile:
-
Diagnose Network: Click this option to run the Network Diagnostics Tool.
Note
Make sure that .NET version 5.0 is installed to run the Network Diagnostics Tool.
-
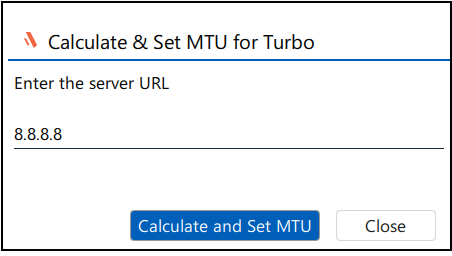
MTU for Turbo: Click this option to enter the server URL or IP to calculate and set the MTU (Maximum Transmission Unit) for turbo accordingly.
-
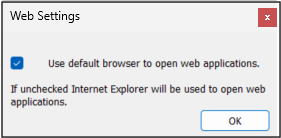
Web Application Settings: Click this option to set the default web browser to open the web applications.
-
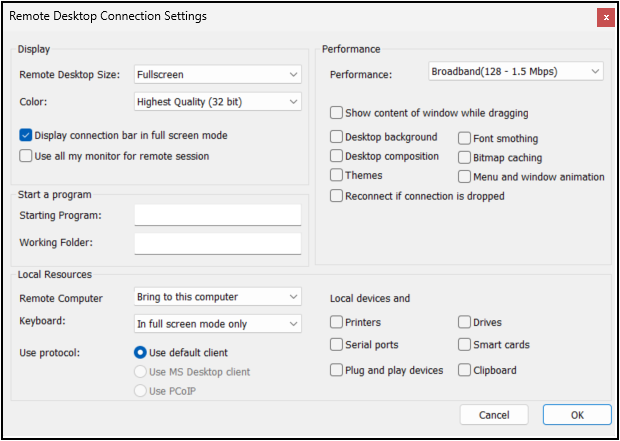
Remote Desktop Settings: Click this option to set the various connection settings such as display, starting program, performance, local resources, and devices, for the remote desktop.
-
Preferences: Click this option to set the user profile preferences settings.
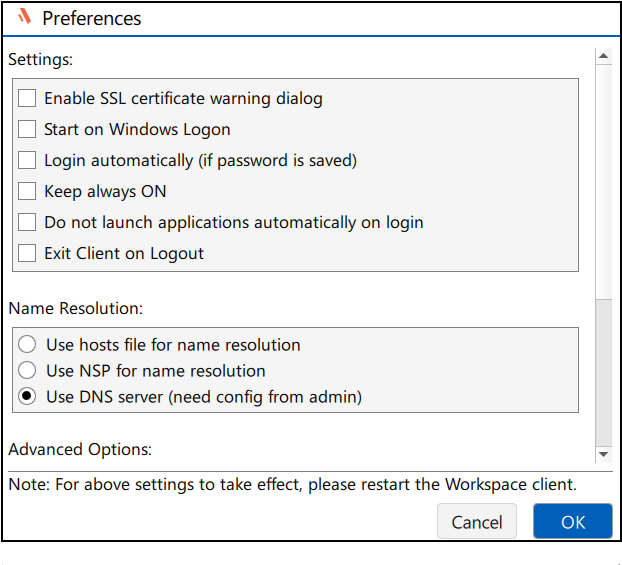
The following are the options available under the Preferences tab:
-
Settings:
-
Enable SSL certificate warning dialog: Enable this option to require verification of the HySecure Server certificate during client login. If the certificate is invalid, users will receive a notification and can choose whether to continue. Their choice will determine whether the login is allowed.
-
Start on Windows Logon: Enable this option if the HySecure client is expected to start automatically on Windows logon. As a result, the HySecure login page will open immediately after the user logs onto Windows.
-
Login automatically (if password is saved): Enable this option to enable auto-login of the user on the client launch.
Note
This option will be effective only if the user's Password is saved on the local device.
-
Keep always ON: Enable this option to keep the exe file in running state always that will keep the Client in ON state always.
-
Do not launch applications automatically on login: Enable this option to allow or prevent the automatic launch of the published applications.
-
Exit Client on Logout: Enable this option, to exit the Client application automatically upon user logout.
-
-
Name Resolution:
-
Use hosts file for name resolution: Select this option to use the local system's host file to resolve domain names to IP addresses, bypassing external services.
-
Use NSP for name resolution: Select this option to use the Network Service Provider (NSP) to resolve domain names, relying on the configured NSP for name lookups.
-
Use DNS server (need config from admin): Select this option to use a DNS server to resolve domain names. It requires configuration details (such as server addresses) from an administrator.
-
-
Advanced Options:
-
Use LSP Mode: Enable this option to allow the client to route traffic through the local service provider (LSP) for better performance or security.
-
Do not use the load-balanced host received from HySecure Gateway: Enable this option to prevent the client from using the load-balanced host information provided by the HySecure Gateway, forcing it to connect to a specific host.
-
Do not connect to alternate HySecure Gateways: Enable this option to restrict the client from connecting to any backup or alternate HySecure Gateways, ensuring connections are only made to the primary gateway.
-
Enable Connection Pool: Enable this option to activate connection pooling, which maintains a pool of reusable connections to improve performance by reducing the overhead of establishing new connections.
-
Alternate Gateway List: It provides a list of alternate HySecure Gateways to connect to if the primary Gateway is down
-
Clear Alternate Gateway List: Click to clear the list of Alternate Gateways.
Note
Ensure to re-login to the Workspace Client for the above settings to take effect.
-
-
Cancel: Click Cancel to close the Preferences window.
-
Ok: Click Ok to apply the settings.
-
-
-
Logout: Click to log off from the Workspace Client application. Choose from the available options:
-
Logout Only: Upon selecting this option, the current session will be removed.
-
Logout from all Active Sessions: Upon selecting this option, it will remove your session from the controller as well.
-
Cancel: Click to close the logout window.
-
-
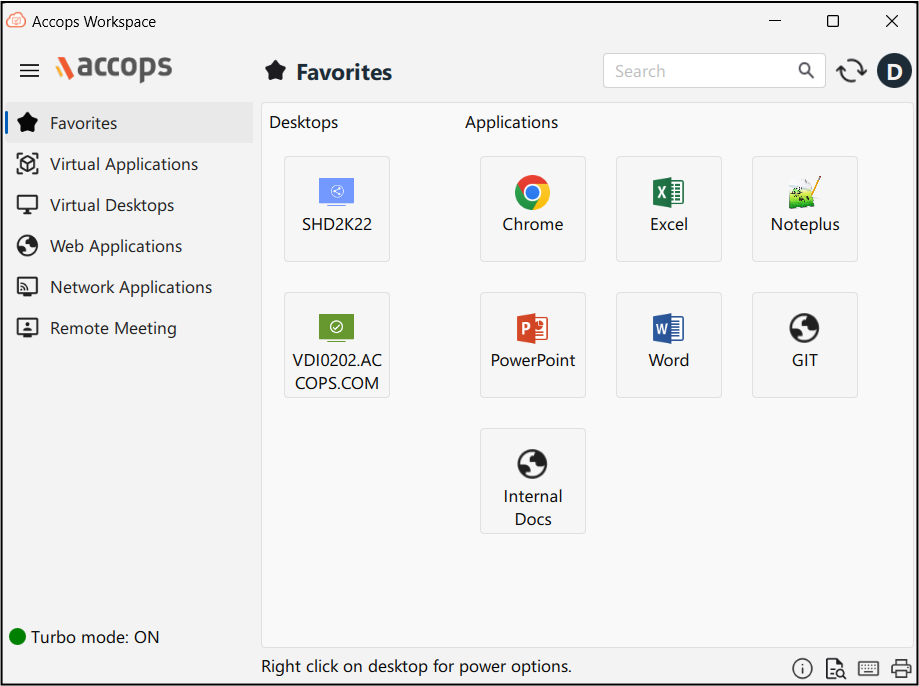
Workspace Application Tray: Once successfully logged in, the user will be presented with the workspace application tray, displaying the following tabs:
-
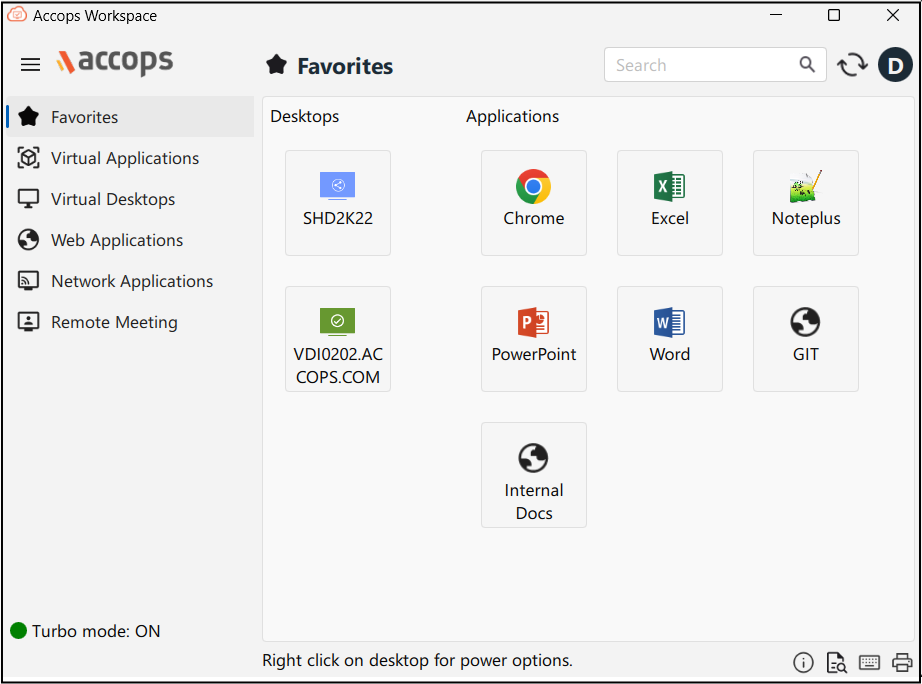
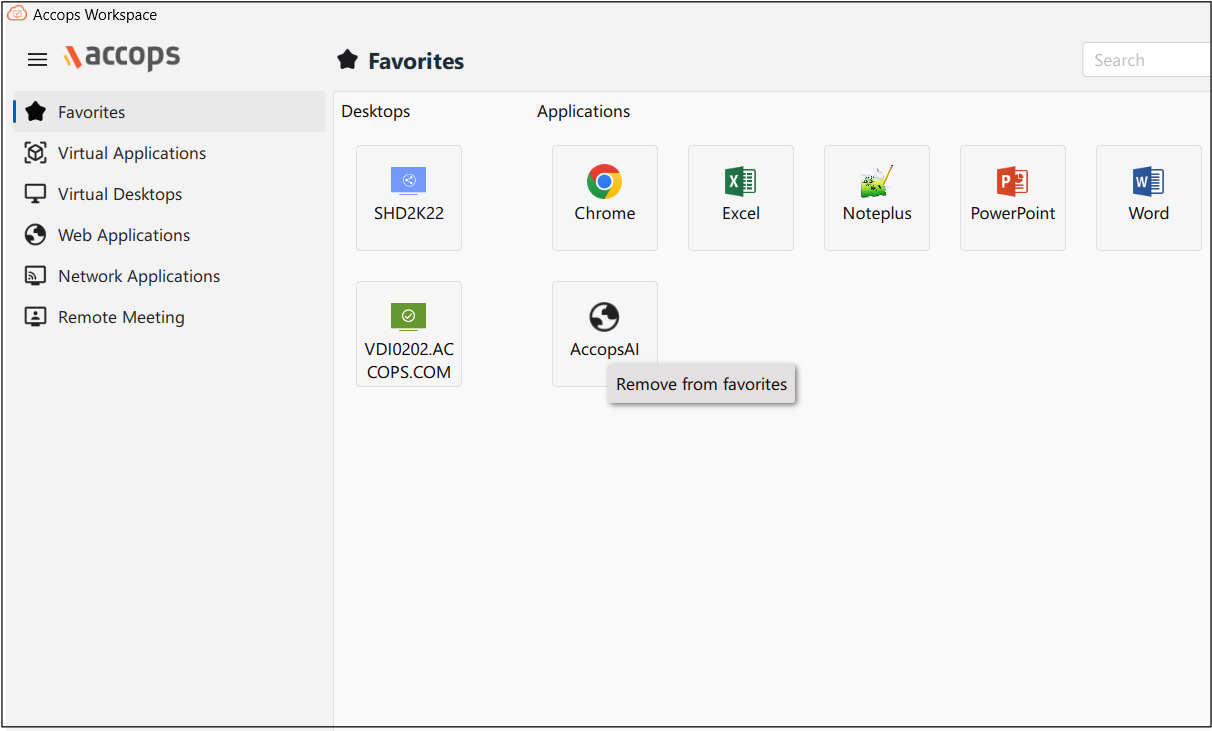
Favorites: This tab allows users to quickly access their most-used or preferred resources, such as Desktops, applications, or websites. Users can mark certain items as "favorites" for easy and immediate access, bypassing the need to search or navigate through multiple directories or menus.
-
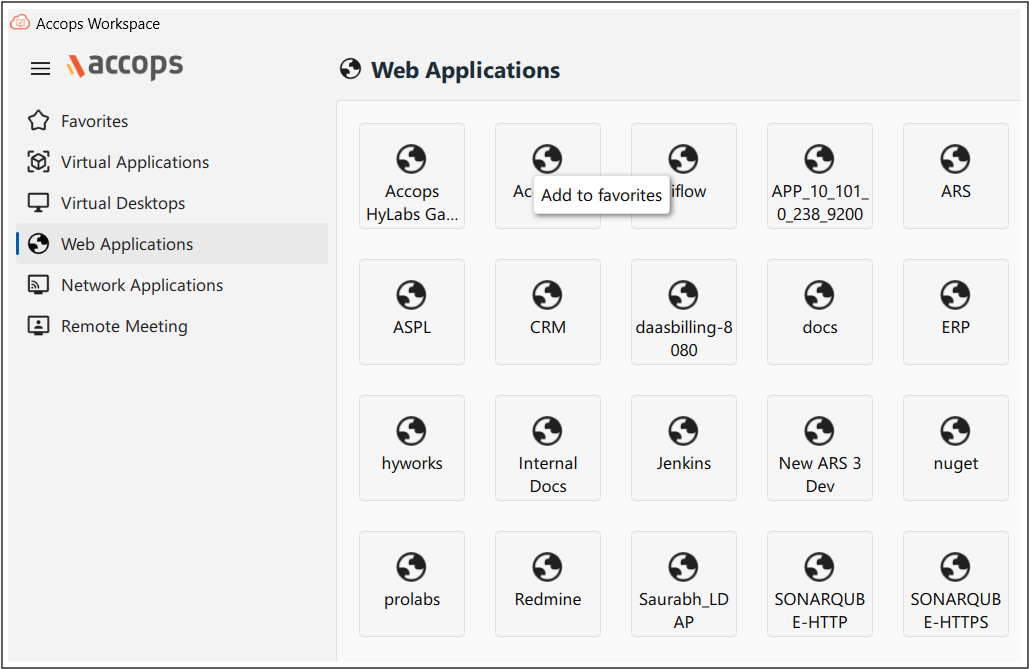
To add a web application to your favorites, right-click the application and select “Add to favorites”.
-
To remove an application from your favorites, right-click and select "Remove from favorites."
-
-
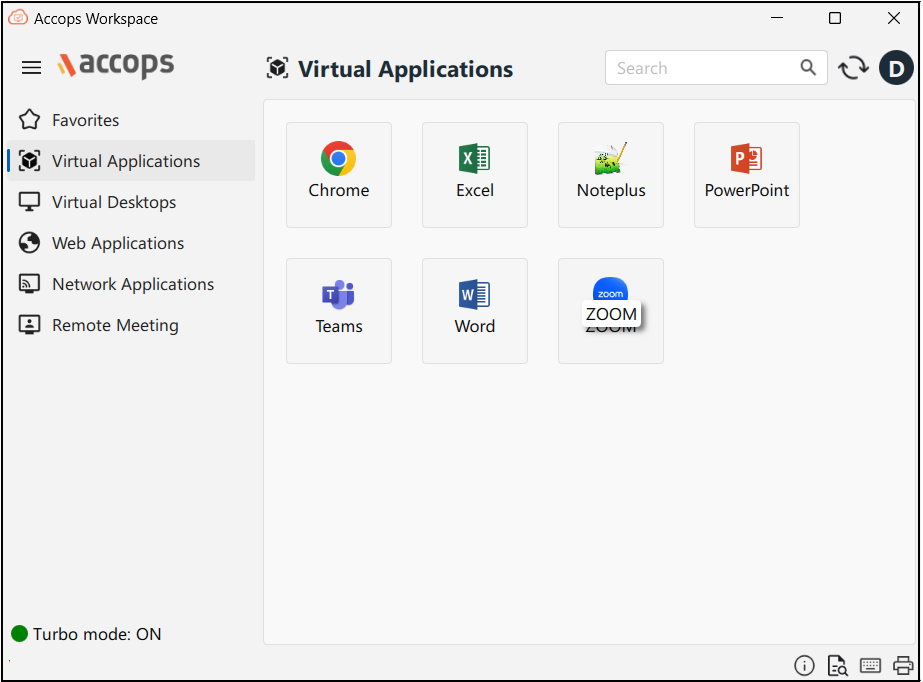
Virtual Applications: This section displays applications that are hosted on a remote server or virtual desktop infrastructure (VDI), rather than running locally on the user's device.
-
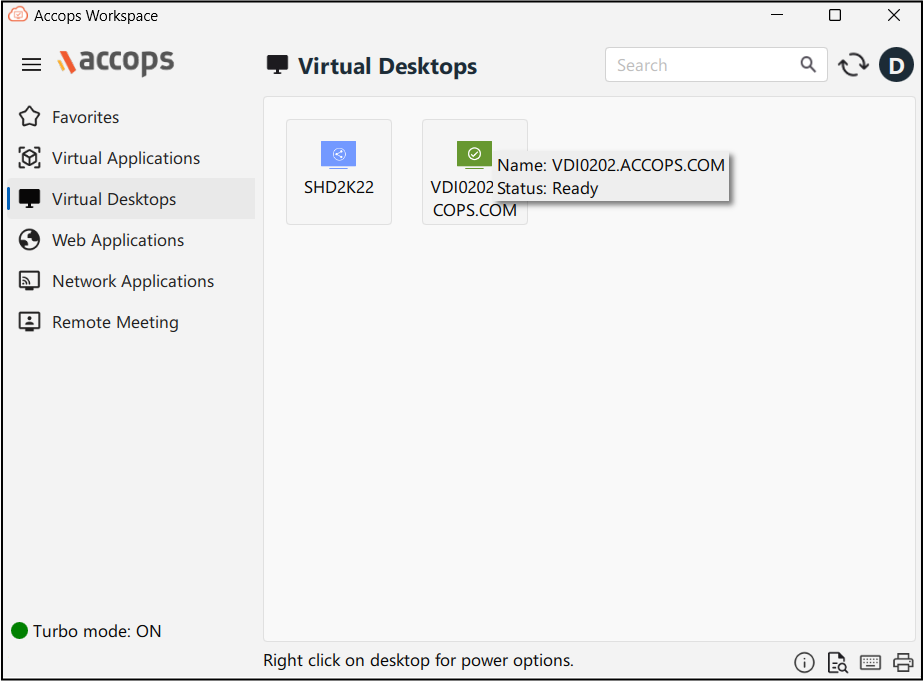
Virtual Desktops: This section displays the desktop environment that is hosted remotely on a server or cloud infrastructure, rather than running locally on a user's device.
-
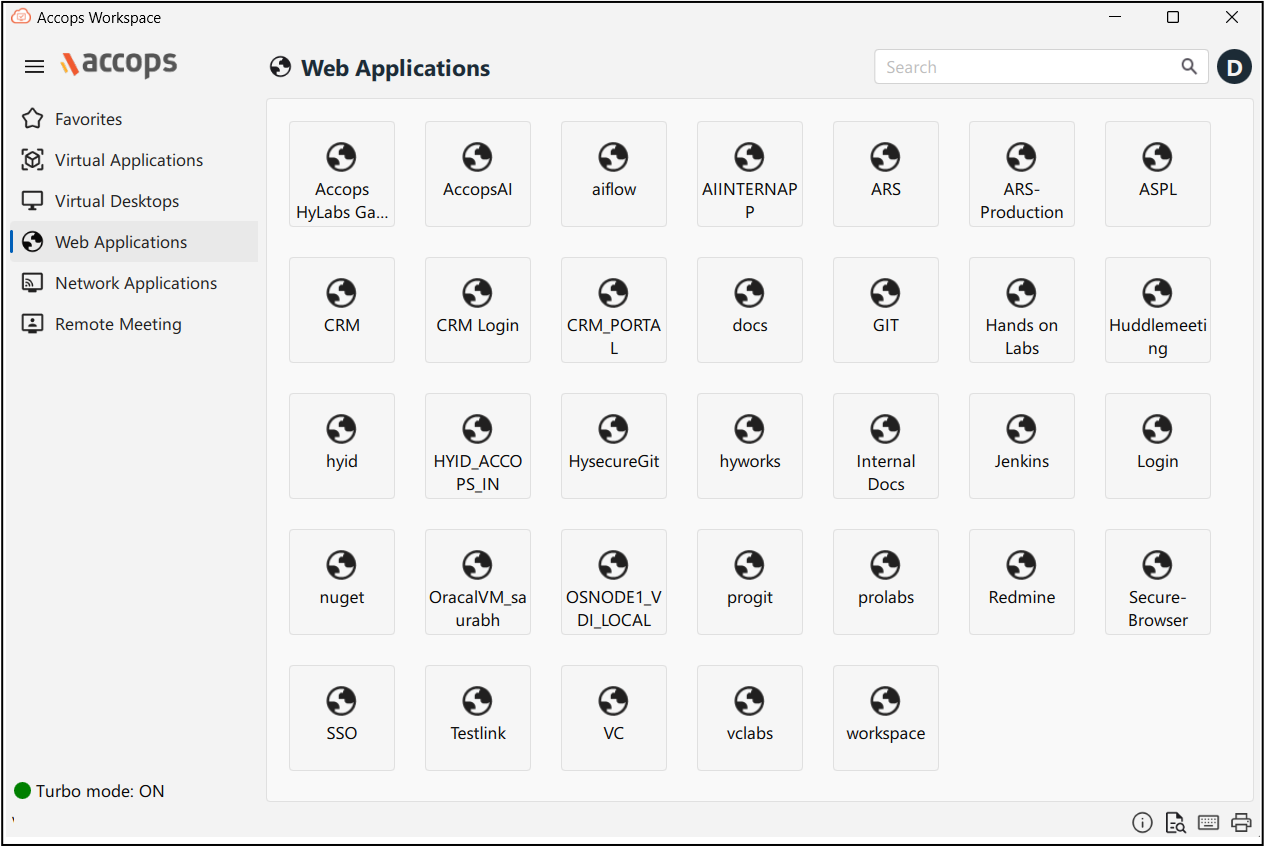
Web Applications: This section displays all the Web applications that run in a web browser rather than being installed on the user's local device. These applications are accessed via URLs.
-
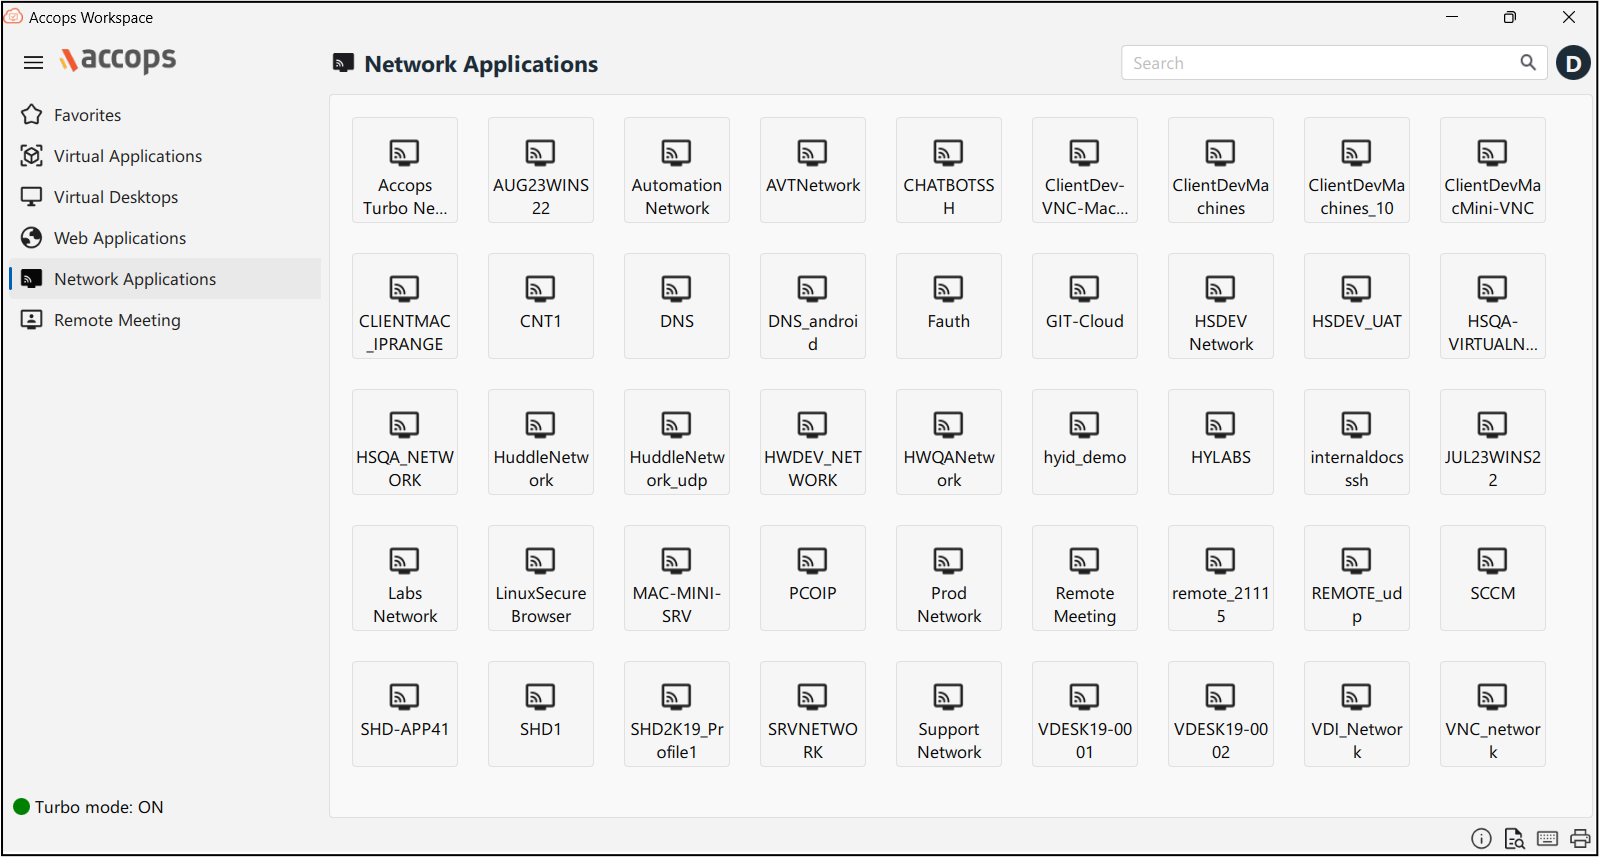
Network Applications: This section displays the software programs that rely on a network connection to function.
-
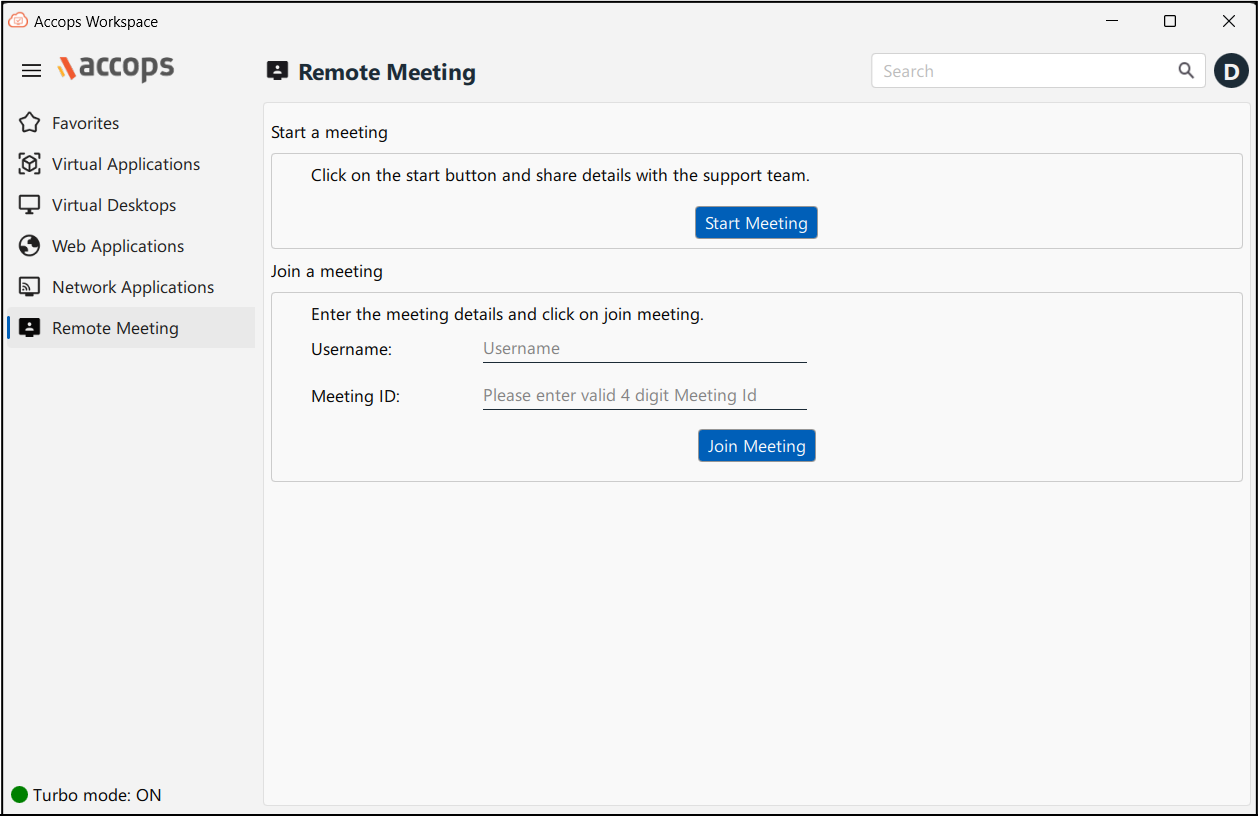
Remote Meeting: This allows users to initiate remote meetings with the support team. Currently allowing them to connect via chat and screen sharing, enabling real-time communication.
-