KB018: Configure Broadcast Messages for HyLite Portal
Last Updated: July 22, 2025
Applies To: HySecure Gateway 7.1 Service Pack 1 and above
Category: User Experience & Interface Enhancements
Overview
This guide explains how to configure broadcast post-login messages for HyLite Portal users. This enhancement extends broadcast message functionality to HyLite Portal, providing consistent communication across all access methods, including both Workspace client and browser-based portal access.
Prerequisites
- HySecure Gateway 7.1 Service Pack 1 or higher.
- Security Officer or Administrator access to the HySecure management console.
- Understanding of Client Profile configuration.
- Knowledge of user communication requirements.
Message Display Behavior
Previous Functionality
Before HySecure 7.1 SP1:
-
Broadcast messages are only visible to Workspace client users.
-
HyLite Portal users did not receive broadcast communications.
-
Inconsistent user experience across access methods.
Enhanced Functionality
HySecure 7.1 SP1 and Above:
-
Broadcast messages are displayed to both Workspace client and HyLite Portal users.
-
Consistent post-login message experience across all access methods.
-
Unified message management through a single configuration.
Procedure
Step 1: Access Client Profile Configuration
-
Log in to HySecure Management Console
-
Log in as Security Officer or Administrator.
-
Navigate to Policies > Client Profiles.
-
-
Select Client Profile
-
Choose DEFAULT CONFIGURATION for system-wide messages.
-
Or select a specific Client Profile for targeted user groups.
-
Click Edit to modify the profile.
-
Step 2: Configure Broadcast Message
-
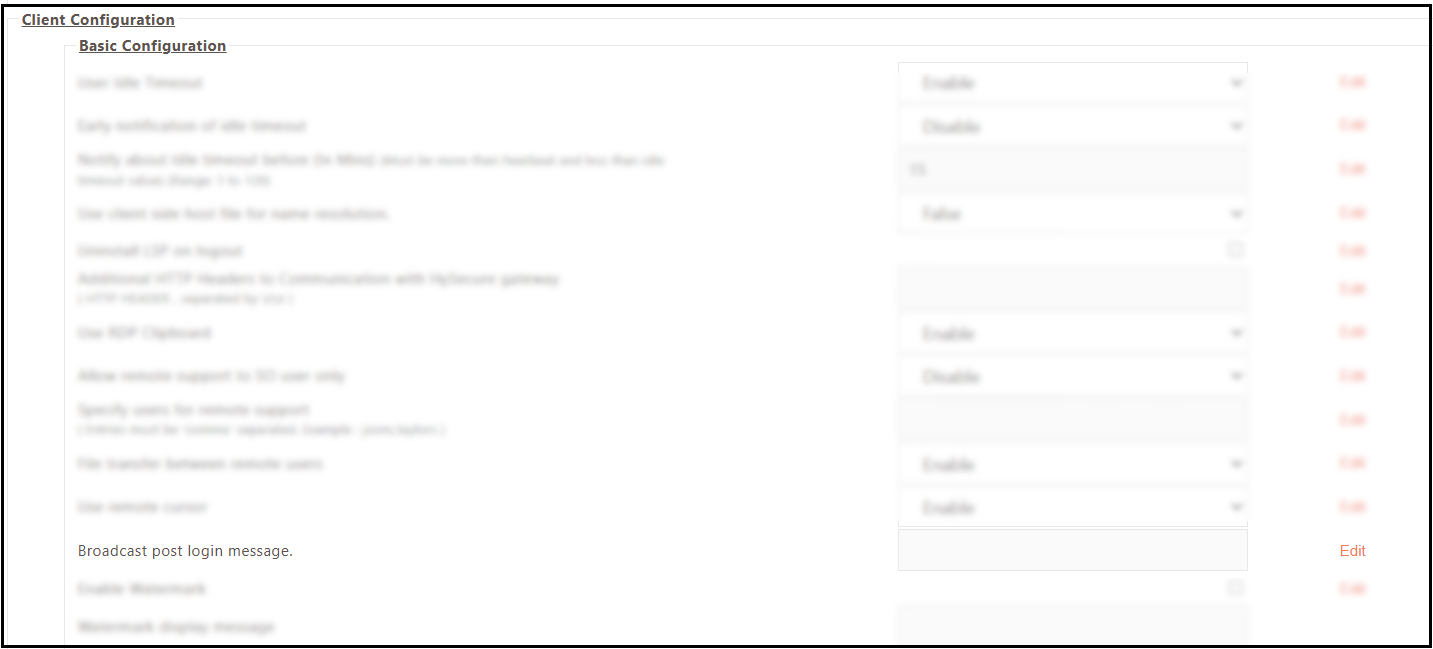
Navigate to Basic Configuration
-
Scroll to the Client Configuration section.
-
Locate the Basic Configuration subsection.
-
Find the Broadcast post login message setting.
-
-
Edit Broadcast Message
-
Click the Edit button next to "Broadcast post login message".
-
The message configuration dialog will appear.
-
Step 3: Create Message Content
-
Enter Message Text
-
Type desired message content in the provided text box.
-
Character Limit: Plan for appropriate message length.
-
Formatting: Plain text format supported.
-
-
Message Content Guidelines
-
Clear and Concise: Keep messages brief and actionable.
-
Professional Tone: Maintain consistency with organizational communication.
-
Actionable Information: Include specific instructions or guidance when applicable.
-
Time-Sensitive Content: Use for announcements, policy updates, and maintenance notices.
-
-
Save Message
-
Click Modify to save the message content.
-
The message is immediately available for display.
-
Step 4: Apply Configuration
-
Save Client Profile
-
Click the SAVE CONFIGURATIONS button to apply changes.
-
Configuration is saved and activated immediately.
-
-
Verify Configuration
-
Check that the Client Profile shows the broadcast message is configured.
-
No service restart required for message changes.
-
Message Display Timing
Post-Login Display
When Messages Appear:
-
Immediately after successful user authentication.
-
Displayed before the user accesses the main portal interface.
-
Shown to both Workspace client and HyLite Portal users.
Message Persistence:
-
Messages are displayed once per login session.
-
Users can dismiss messages to continue.
-
Messages reappear with each new login session.
User Interaction
Message Dismissal:
-
Users can close/dismiss messages to continue.
-
Messages do not block access to applications.
-
No forced reading time or acknowledgment required.
Configuration Scope and Targeting
Client Profile Application
DEFAULT CONFIGURATION:
-
Scope: All users system-wide.
-
Use Case: Organization-wide announcements and policies.
-
Application: Automatically applies to all users.
Specific Client Profiles:
-
Scope: Users/groups assigned to a specific client profile via Client Configuration Access control.
-
Use Case: Department-specific or role-based messaging.
-
Application: Only users with an assigned client profile receive messages.
User Group Targeting
Targeting Options:
-
Configure different messages for different user groups.
-
Create multiple client profiles with targeted messages.
-
Assign client profiles based on user roles or departments.
Example Targeting:
-
Executives: Client Profile with executive-focused messages.
-
IT Staff: Client Profile with technical announcements.
-
General Users: DEFAULT CONFIGURATION for standard communications.
Message Management and Updates
Real-Time Message Updates
Immediate Application:
-
Message changes apply immediately after saving.
-
No service restart or user logout required.
-
The next user login displays the updated message.
Message Modification:
-
Edit messages anytime through Client Profile configuration.
-
Update message content for changing situations.
-
Remove messages by clearing text content.
Diagnostic Steps
Verify Client Profile Configuration:
-
Navigate to Policies > Client Profiles.
-
Check the DEFAULT CONFIGURATION or the specific profile.
-
Verify broadcast message content is configured.
-
Confirm that SAVE CONFIGURATIONS was applied.
Test Message Display:
-
Log in through HyLite Portal with a test account.
-
Verify the message appears post-authentication.
-
Test message dismissal functionality.
-
A check message appears with subsequent logins.
Review User Assignment:
-
Navigate to Policies > ACL.
-
Check the client configuration access control assignment for affected users/user groups.
-
Verify profile assignment is correct.
-
Test login with a properly assigned user.
Note
- Use DEFAULT CONFIGURATION for system-wide messages.
- Messages display once per login session and can be dismissed by users.
Contact Support: support@accops.com for broadcast message configuration assistance.