Azure Multi-Node HA Cluster
A multi-node cluster is an advanced deployment architecture designed to improve application performance, scalability, and reliability. It involves distributing the workload across multiple servers or nodes, which are coordinated by a load balancer to manage the incoming traffic efficiently.
By deploying each application component across the networks, the system enhances redundancy and fault tolerance, ensuring that the failure of a single node doesn't impact the application's overall availability.
This setup is particularly useful for handling high-traffic volumes and ensuring continuous service availability, making it a crucial solution for modern, high-demand applications.
Following are the stages of deployment in a multi-node cluster:
- Deployment of three HySecure VM
- Post VM Deployment (Preboot execution for all the nodes)
- Deploying Load Balancer
- Installing HySecure Client
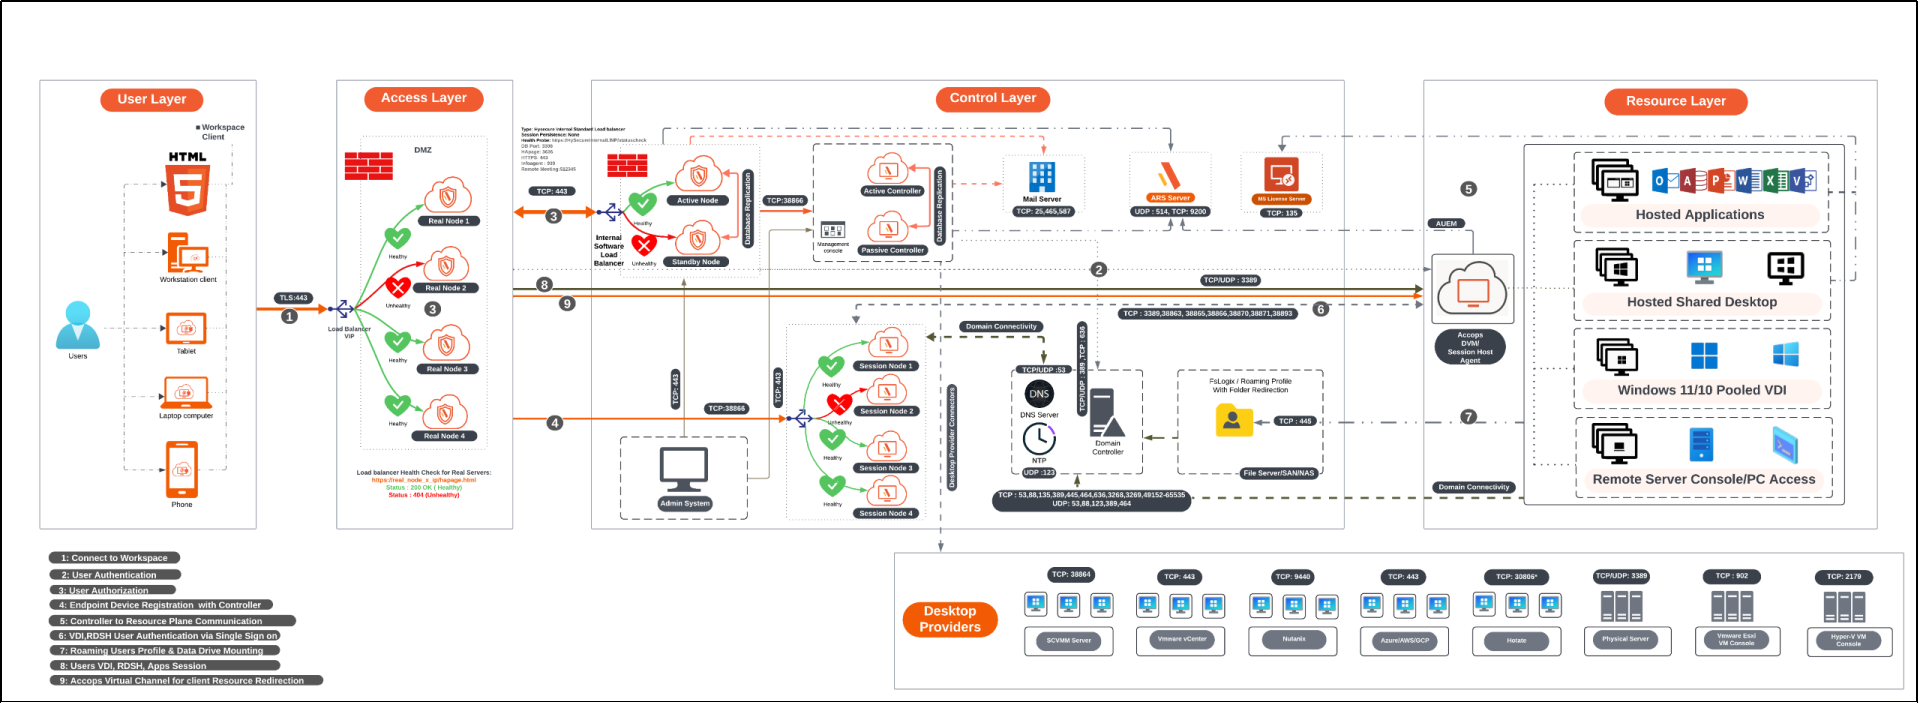
Deployment Architecture
Prerequisites
- Azure Portal access with contributor rights to allow the creation of virtual machines (VMs).
-
Four free Static IP addresses on the LAN:
- Primary node: To be assigned to the primary node of the HySecure.
- Secondary node: To be assigned to the secondary node, which is essential for configuring the cluster.
- Floating IP: This is to be assigned for the load balancing.
- Real node IP: To be assigned to a real node to perform actual data processing or service tasks. For each additional real node added to the cluster, an additional IP address will be required (e.g., If additional real nodes are added, each will require its IP address. Considering only 1 real node is configured, n number of IP addresses will be required for n number of real nodes).
-
Access the HySecure node on port 443 (for HySecure configuration) using a Windows system with an HTML5-supported browser, such as Microsoft Edge, Google Chrome, or Mozilla Firefox, for post-installation configuration.
Note
It is required for the setup to use an HTML5-supported browser. Make sure the browser on the system meets the requirements outlined by HySecure.
- DNS server’s IP address: The IP address of the DNS server that the HySecure gateway will use for domain name resolution. This ensures that HySecure can resolve domain names to IP addresses.
- NTP Server address: The Network Time Protocol (NTP) server address with which the HySecure will synchronize. This is crucial for maintaining accurate time across the network and ensuring that certificates and system logs are correctly timestamped.
- External certificate in PEM format with a private key (Optional): You can optionally use an external SSL/TLS certificate (in PEM format) with a private key for secure HTTPS connections to the HySecure. HySecure can also create a self-signed certificate post-installation for Security Officer user login if an external certificate is not available.
Network Ports
| Source | Destination | Purpose | Port No | Protocol | If the port is not open |
|---|---|---|---|---|---|
| HySecure nodes | HySecure nodes | Internal management (file sync, monitoring, real-time status, clustering, etc.) | 22; 443; 539; 939; 3306; 3636; 4002; 5536; 5124 | TCP | User login fails |
| HySecure nodes | AD/LDAP | User authentication | 389 or 636 | TCP | User login fails |
| HySecure Web nodes | AD/LDAP | User authentication | 389 or 636 | TCP | User login fails |
| HyLite Portal or HySecure Client | HySecure nodes | User login | 443 | TCP | User login fails |
Sizing Guidelines
The sizing of the cluster depends upon the number of sessions.
For more details refer to the Sizing Guidelines section.
Deployment Steps
Primary HySecure Node Deployment
Follow the steps below to deploy the primary HySecure node:
-
Log into the Azure Portal:
- Go to https://portal.azure.com and sign in with your Azure account.
-
Navigate to Virtual machines:
- Select Virtual machines from the Azure services section. You can also type Virtual machines in the search bar.
- On the Virtual machines page, click on the + Create button and select Azure virtual machines.
-
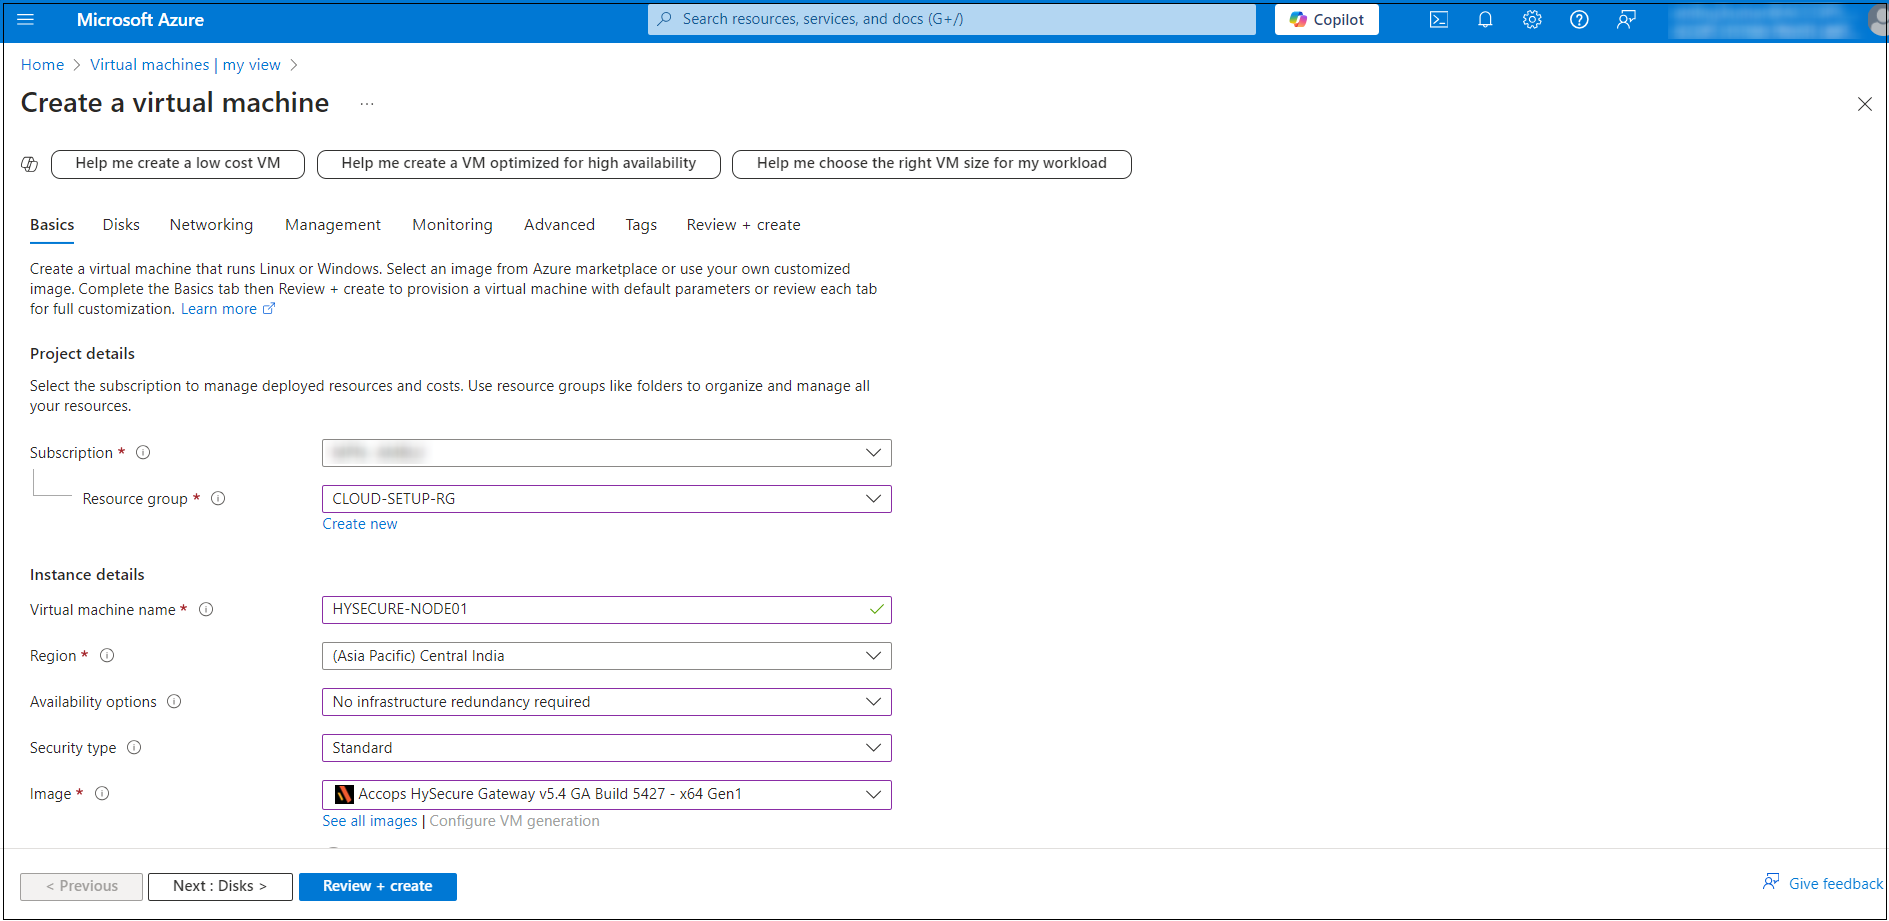
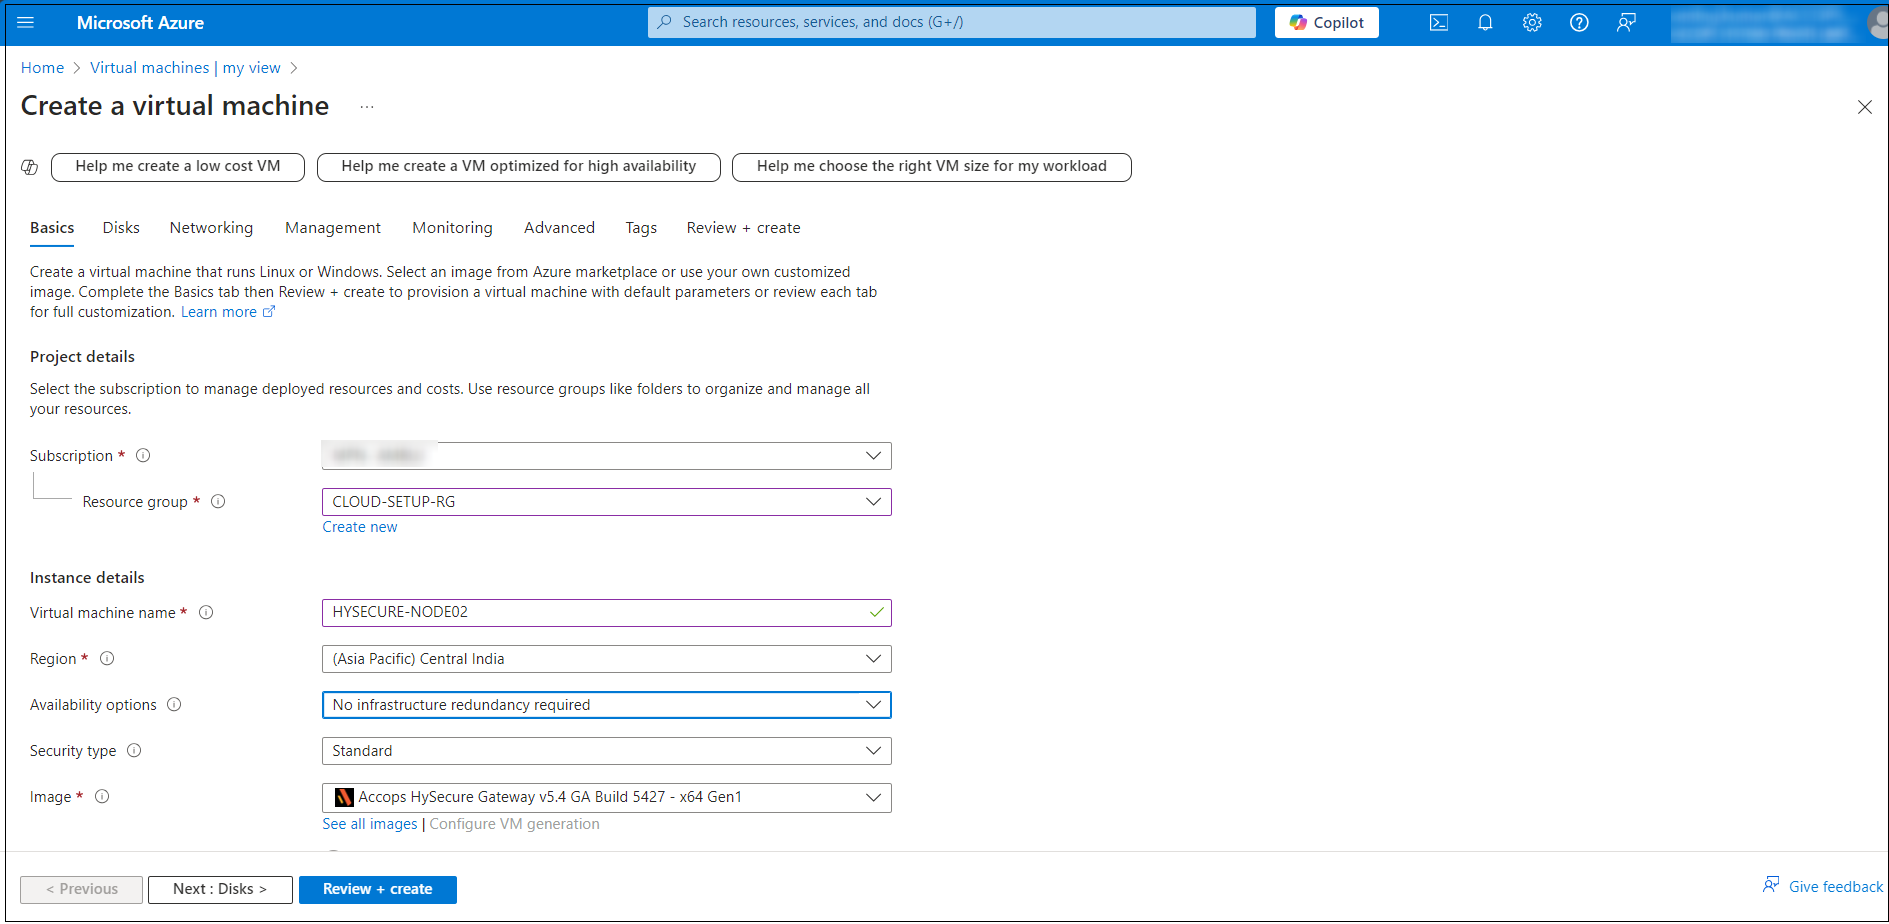
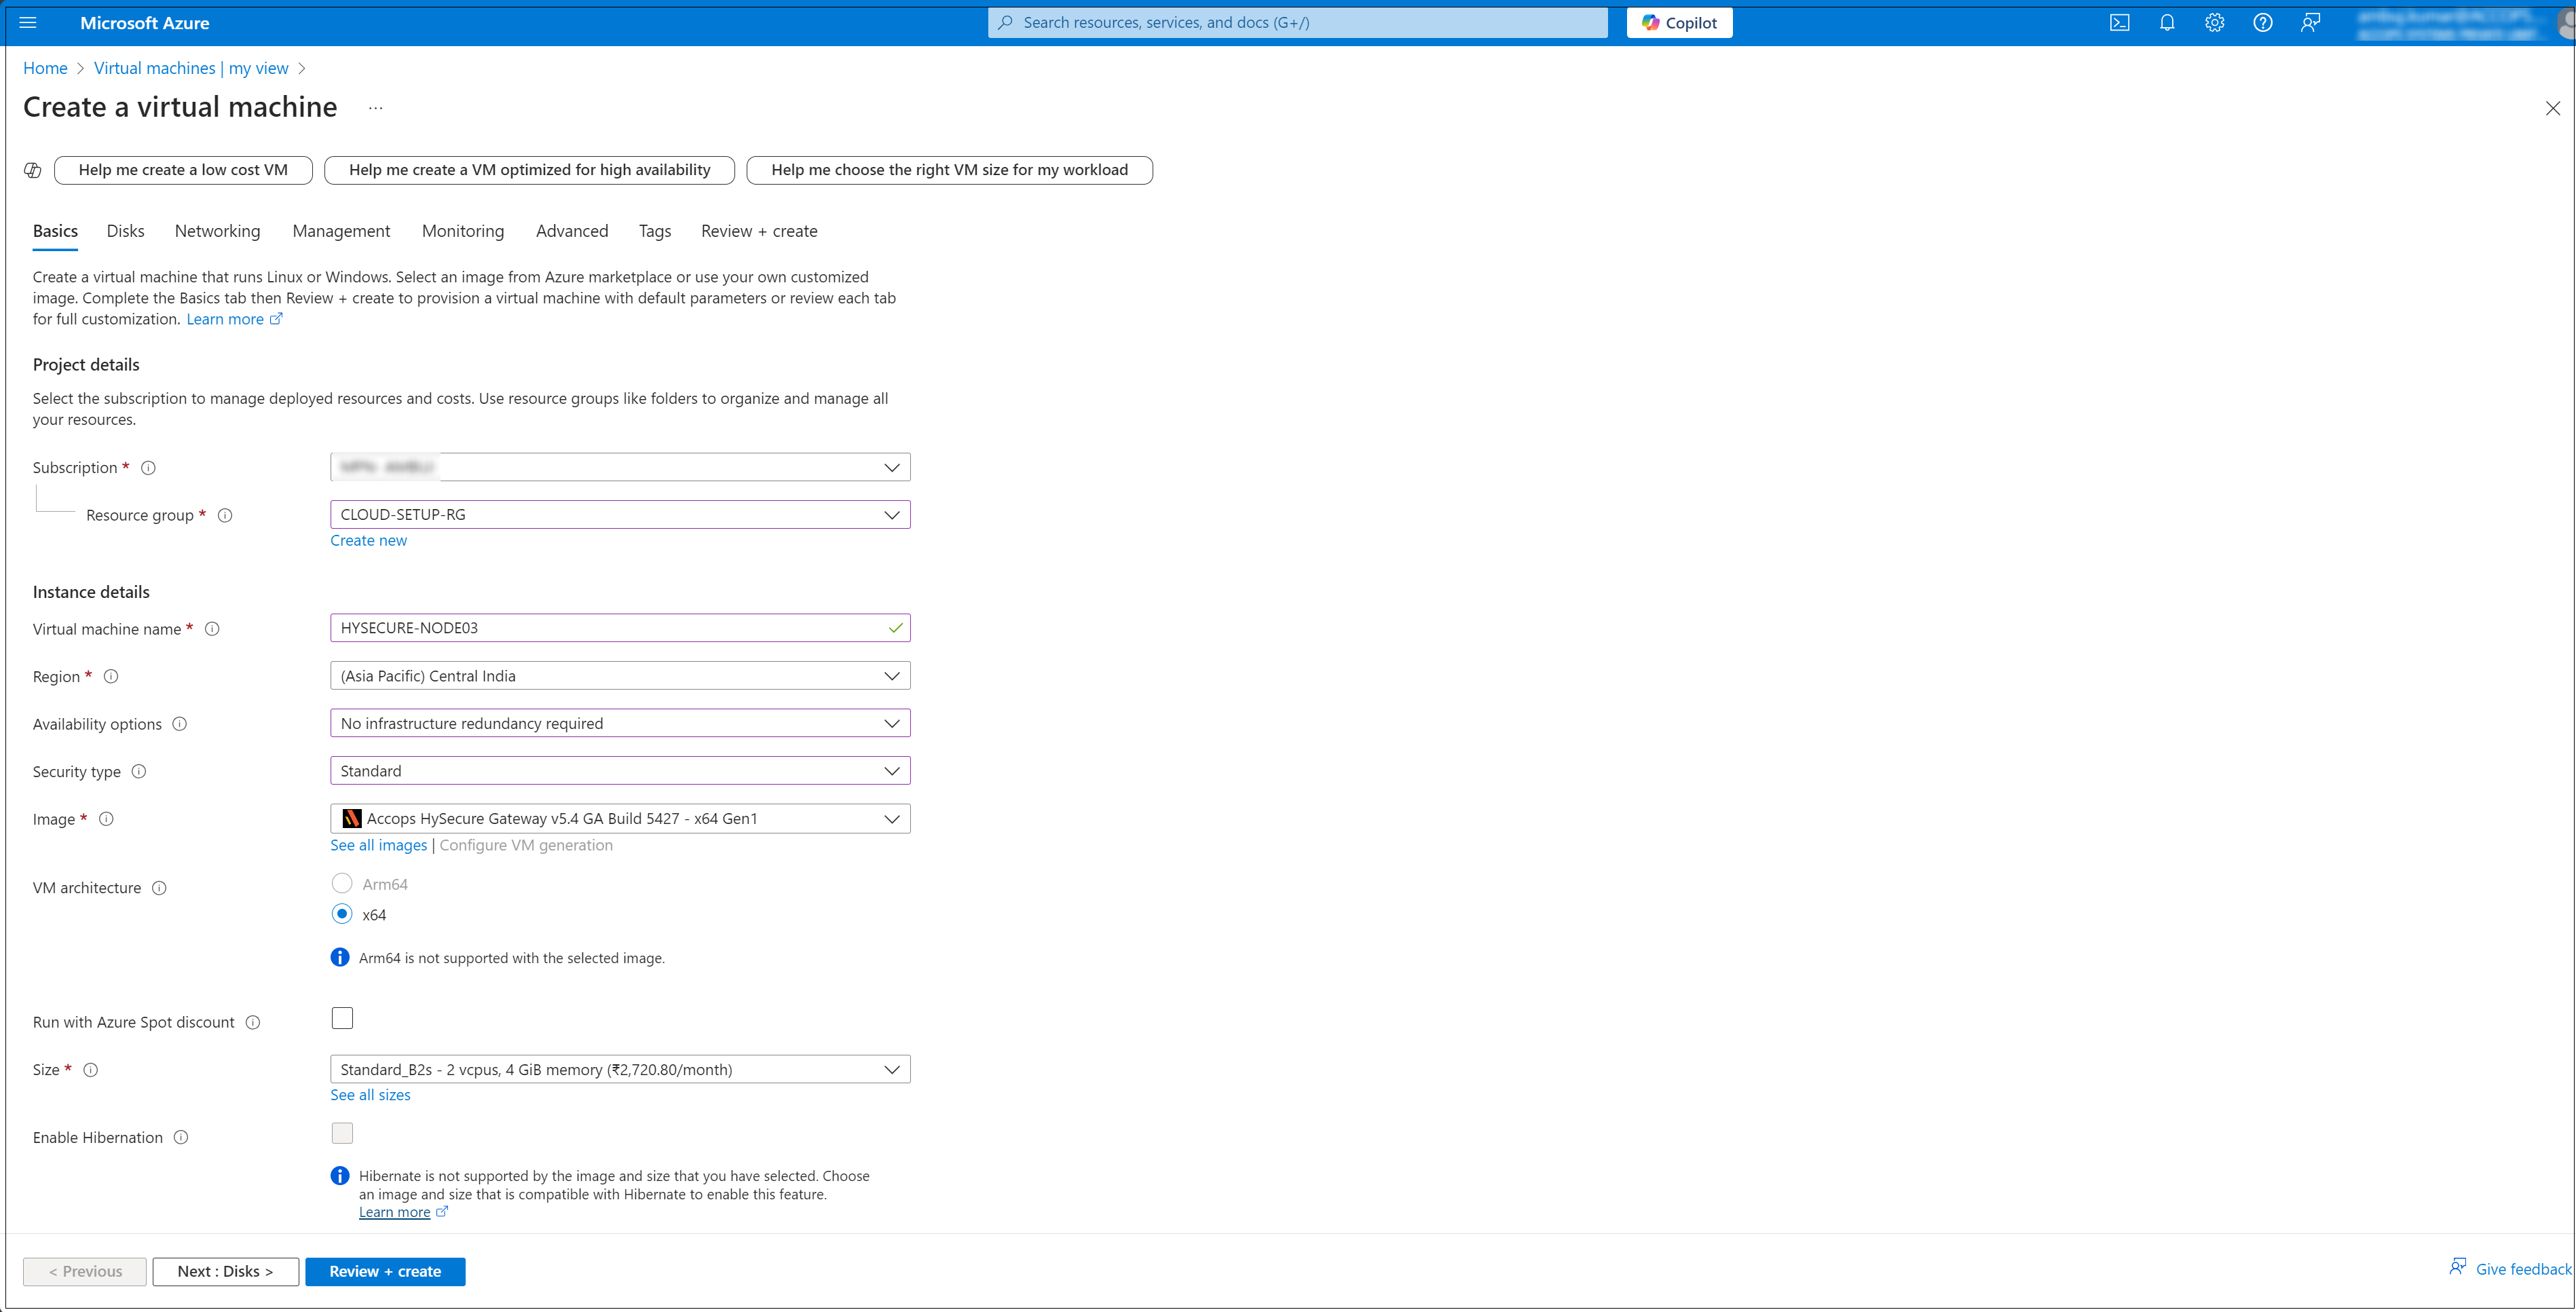
Configure Basic Settings: In the Basics tab, configure the following Instance details:
- Subscription: Select your Azure subscription.
- Resource Group: Select an existing resource group or create a new one (e.g. CLOUD-SETUP-RG).
- Virtual machine name: Name your VM (e.g. HYSECURE-NODE01).
- Region: Select the location where your VM will be hosted (e.g. Central India).
- Availability options: Select based on your need (e.g. No infrastructure redundancy required).
- Image: Select the operating system image (e.g. Accops HySecure Gateway v5.4 GA Build 5427 - x64 Gen1).
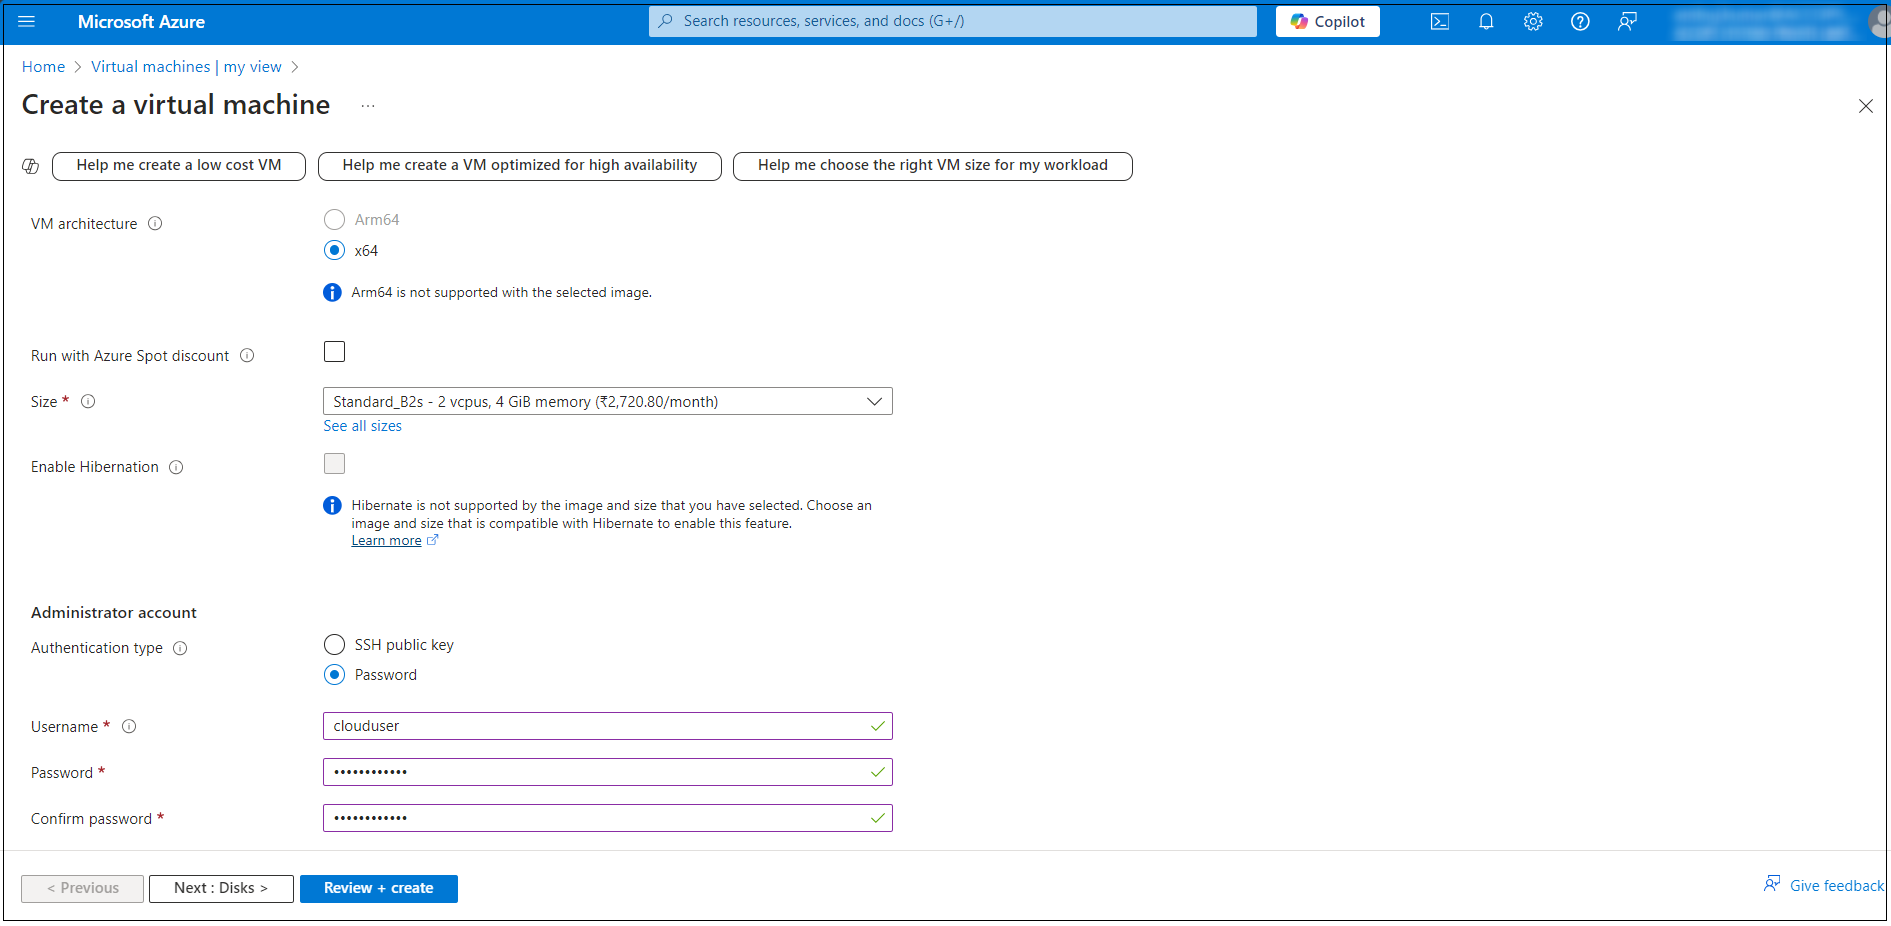
- Size: Select a VM size based on your workload requirements.
-
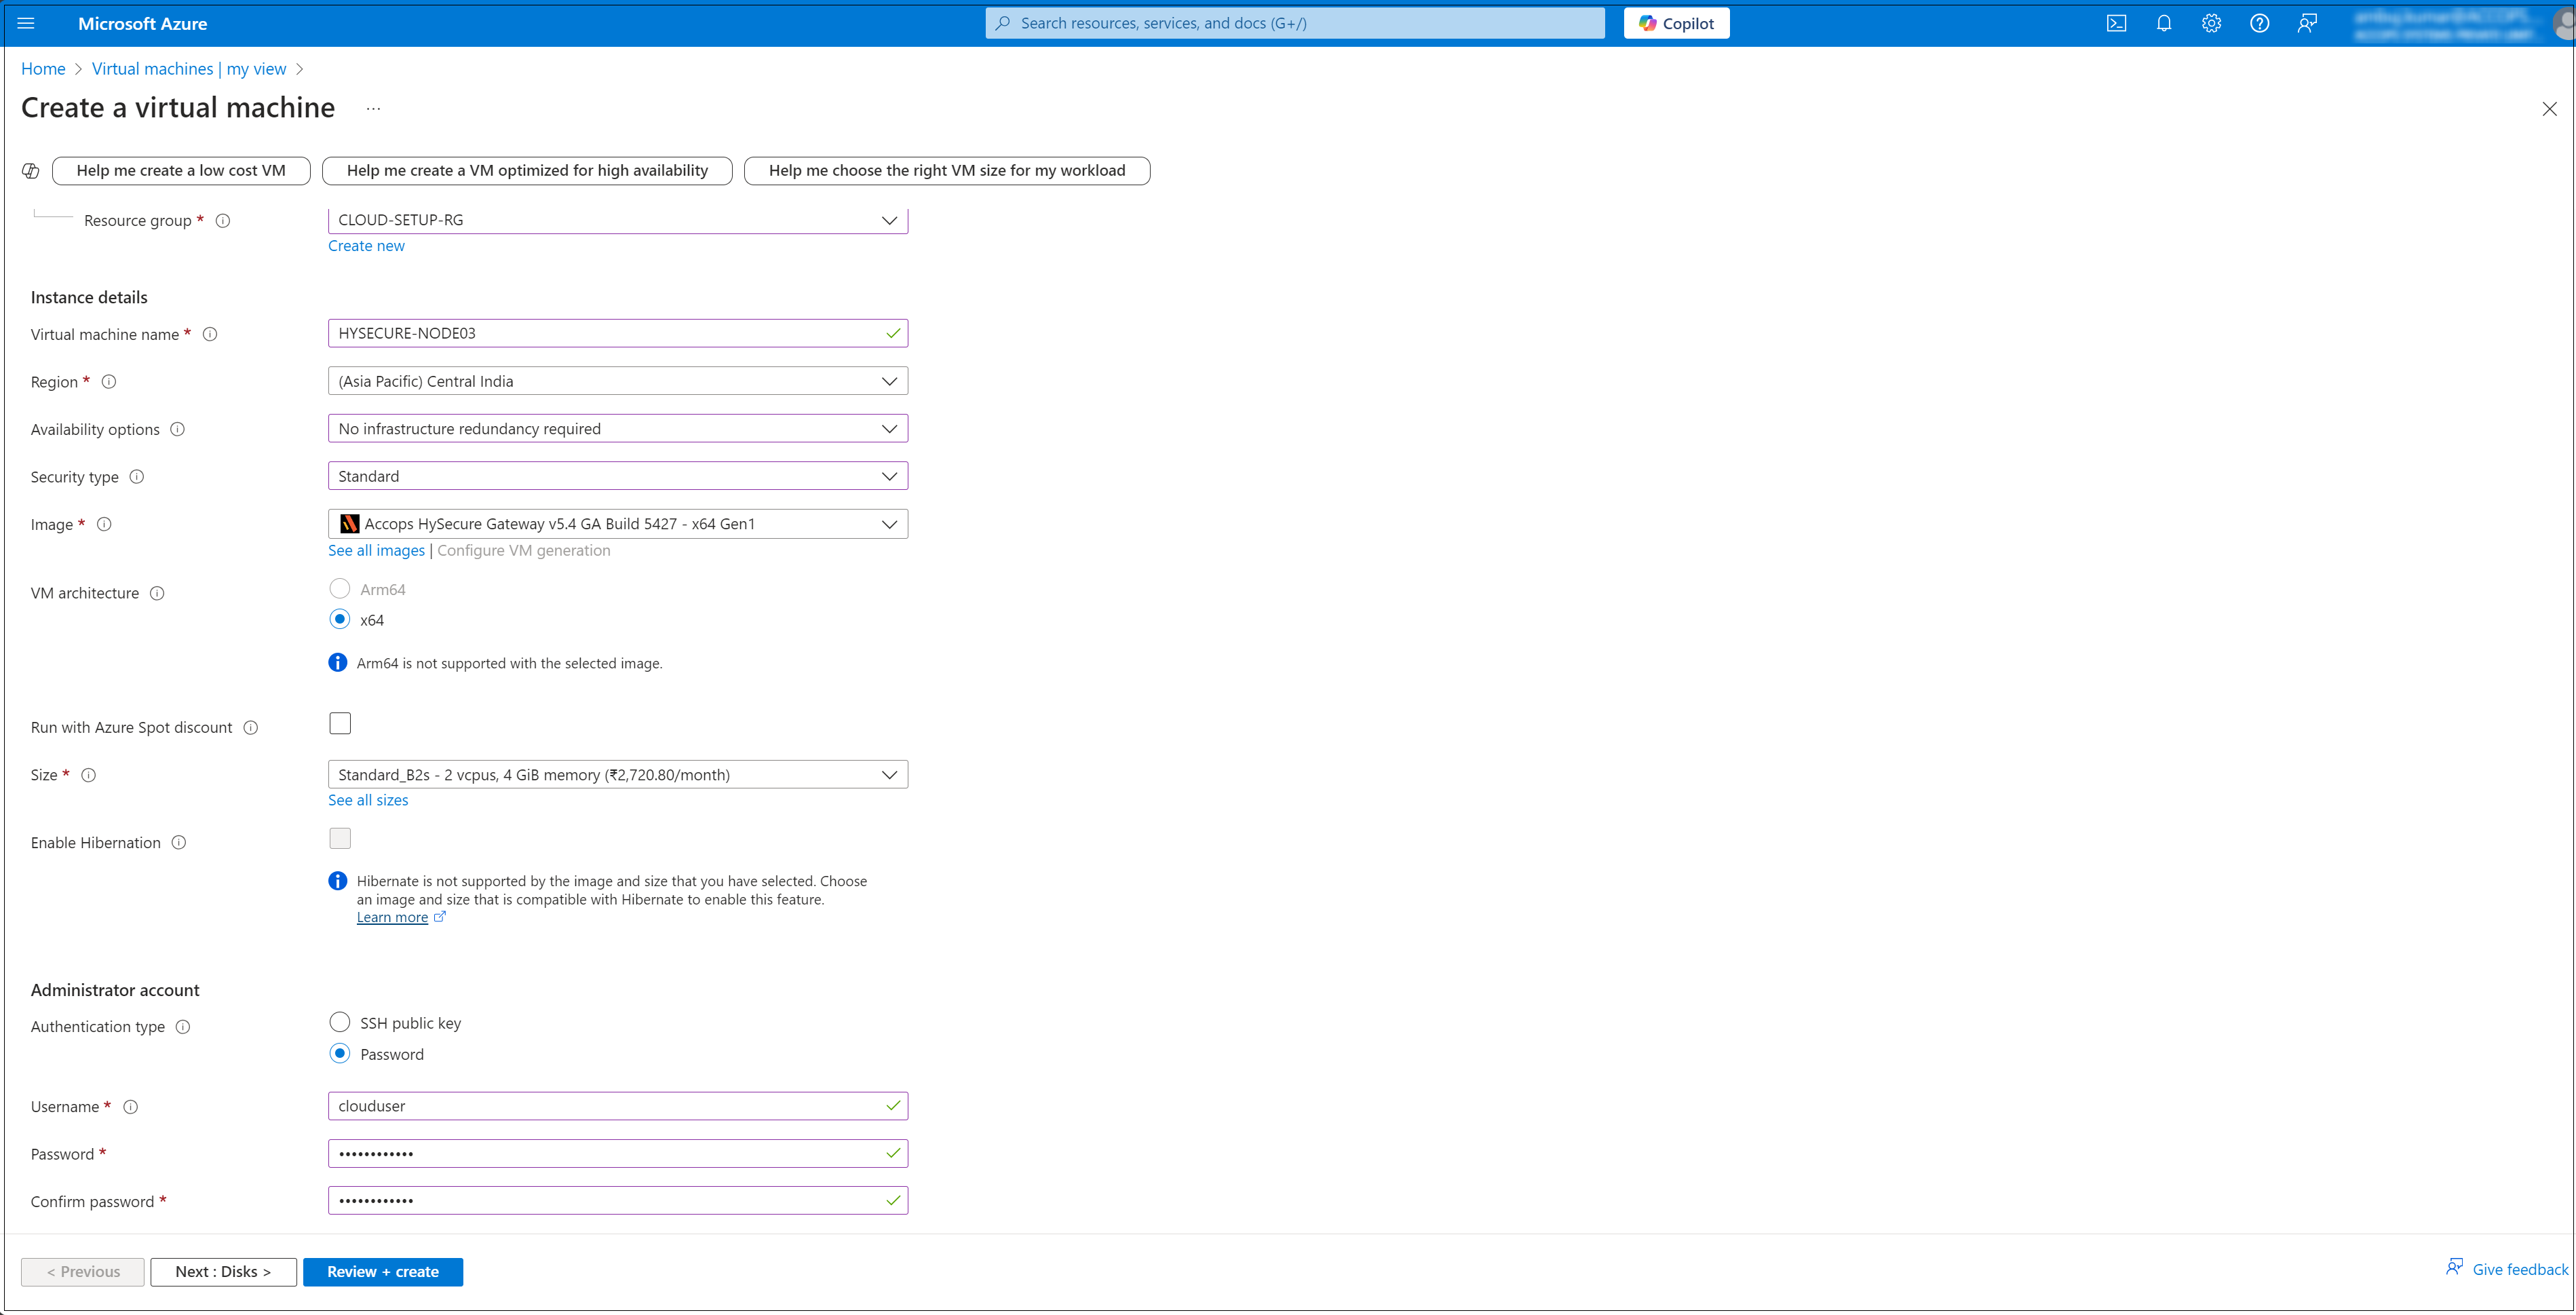
Under Administrator account section, enter a Username, such as clouduser and a Password. The password must be at least 12 characters long.

-
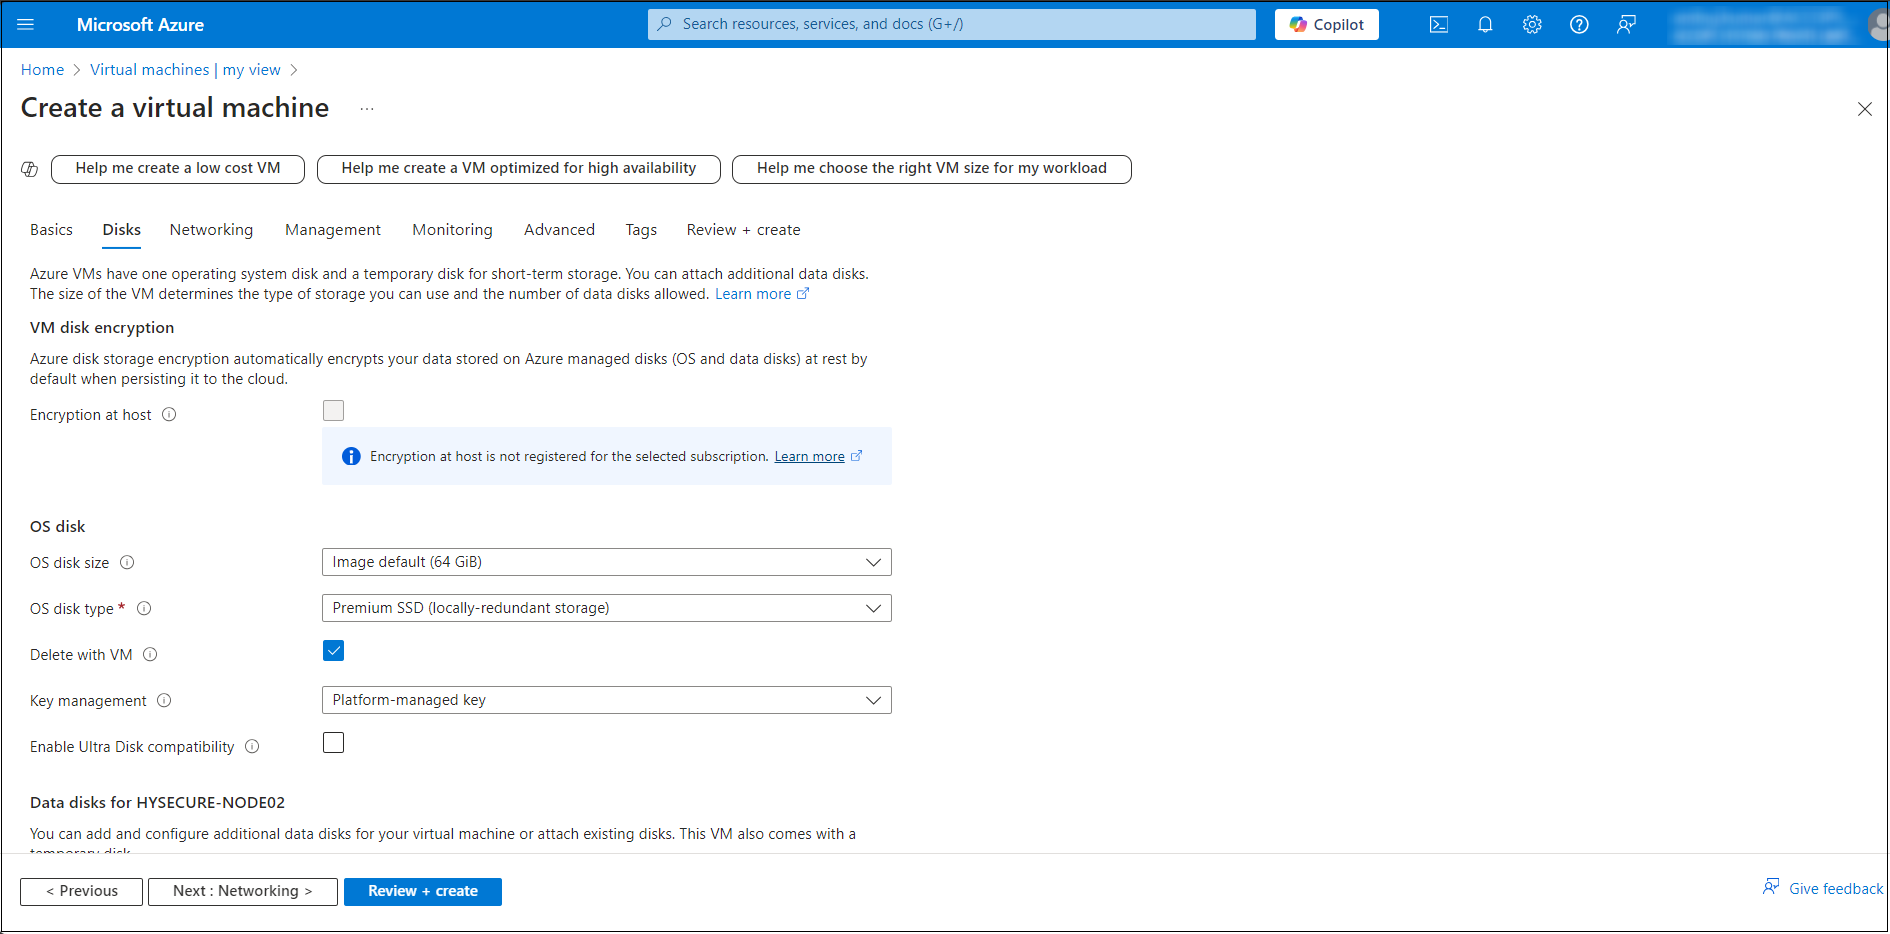
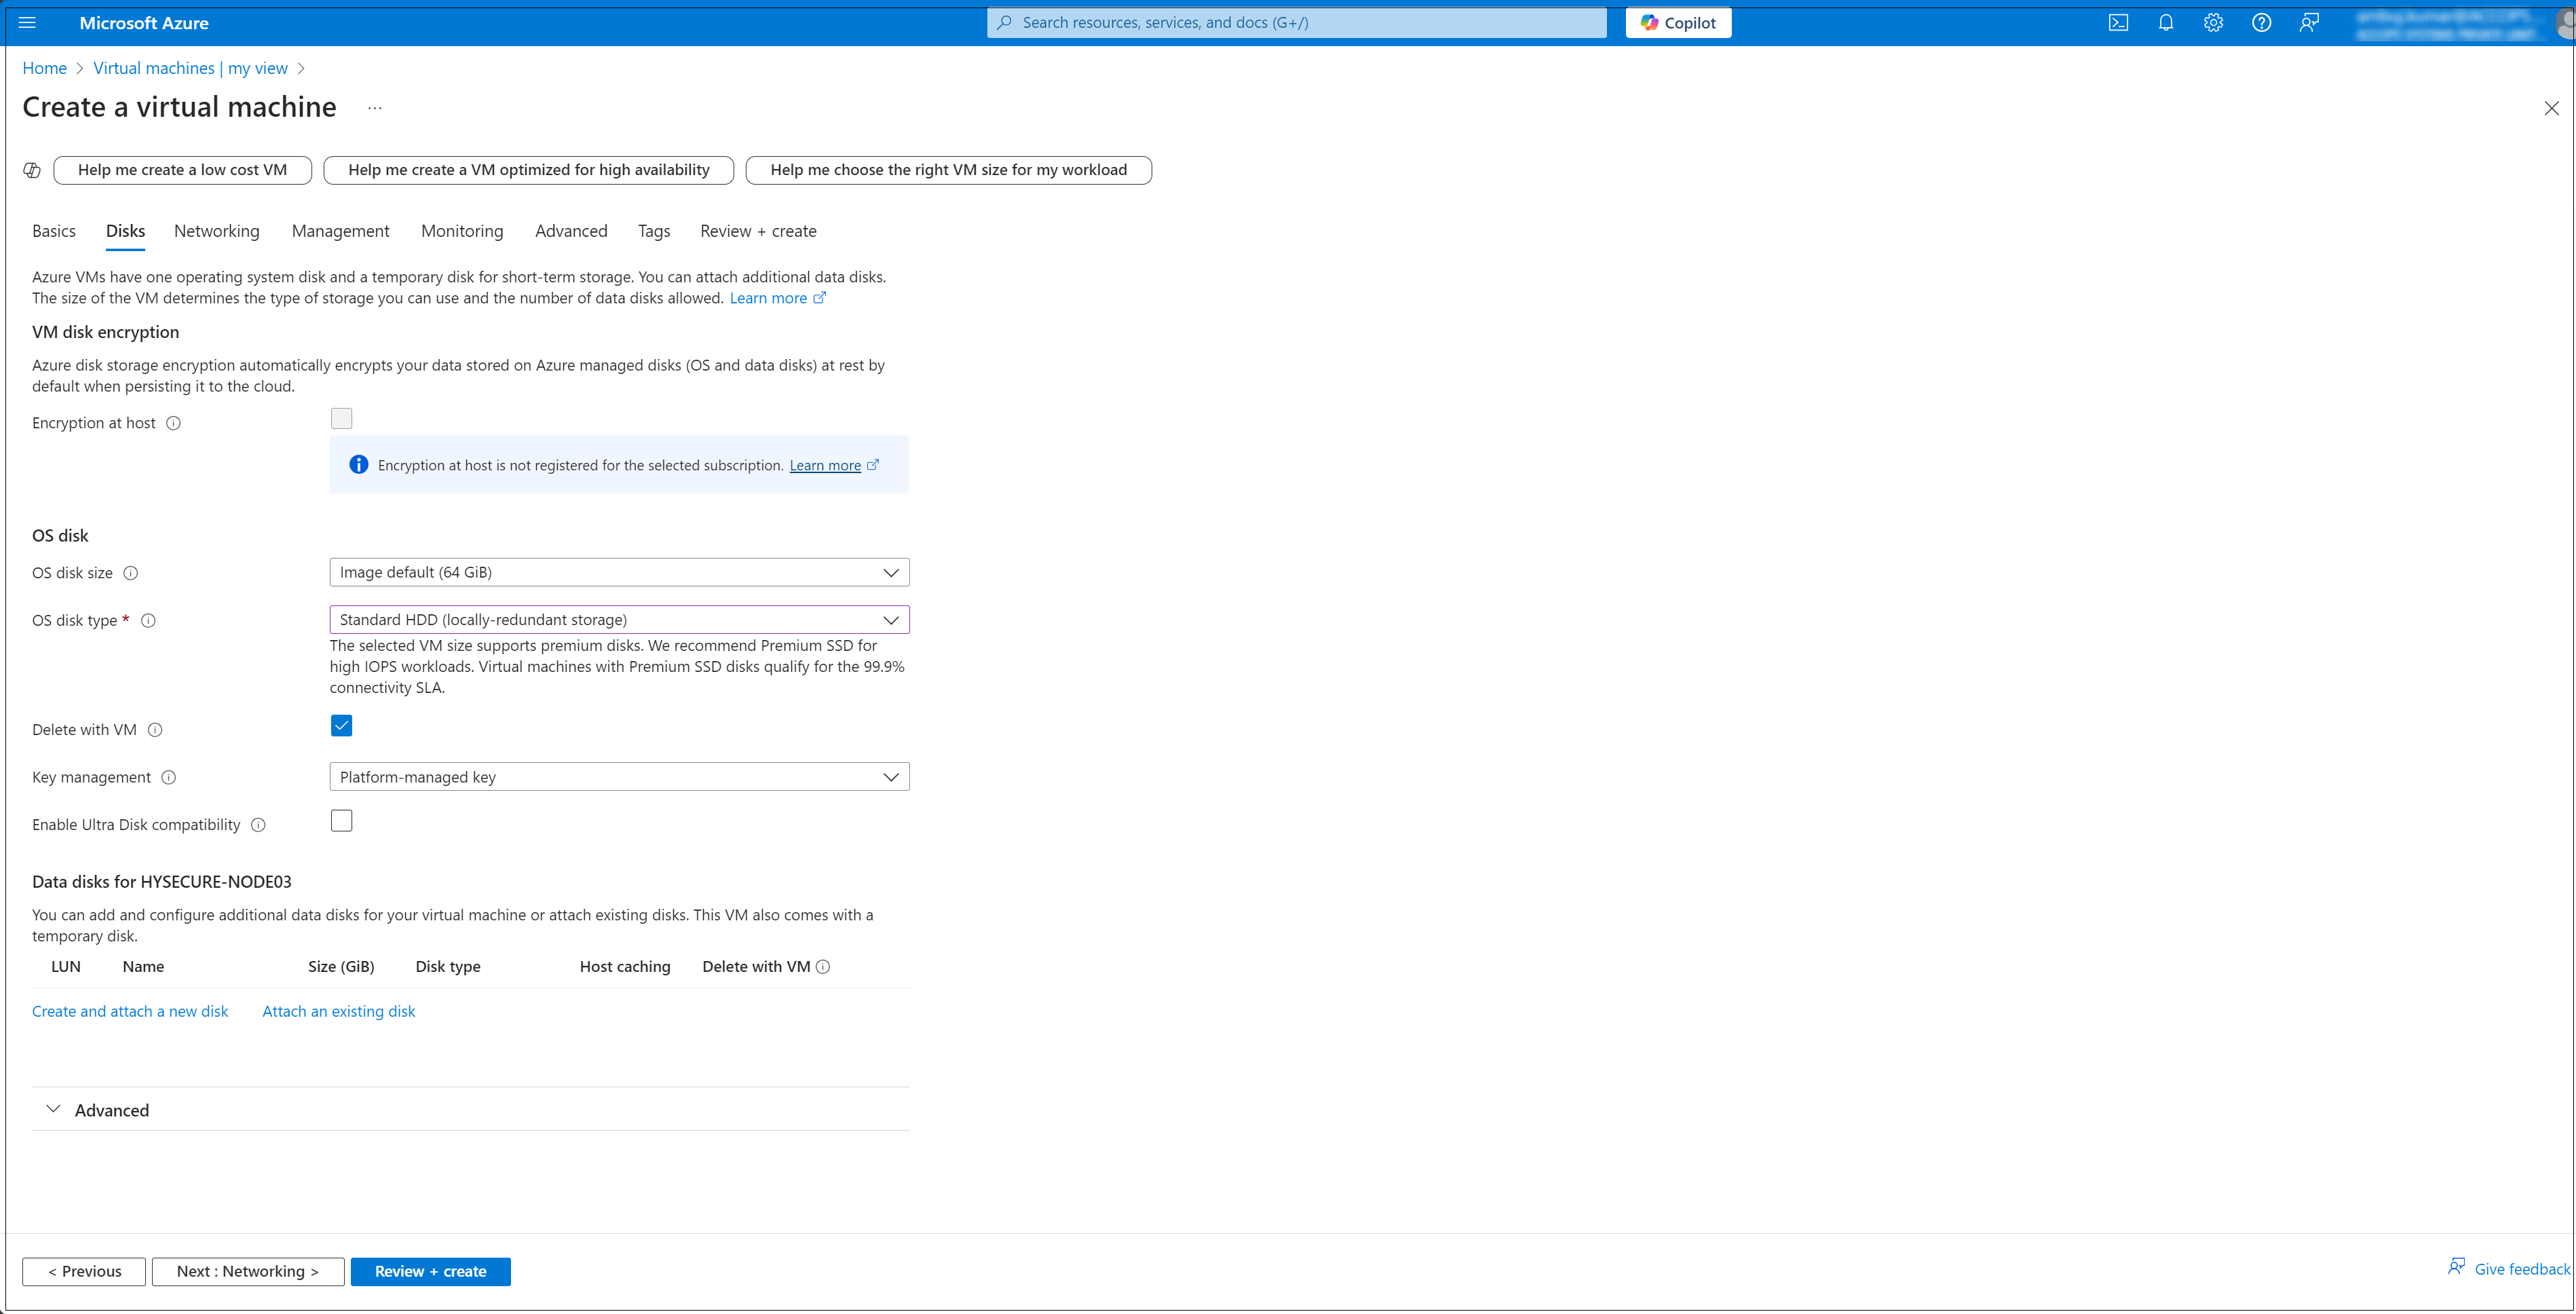
Configure Disk Settings: Navigate to the Disks tab, and select the OS disk type (e.g., Standard SSD, Premium SSD).

-
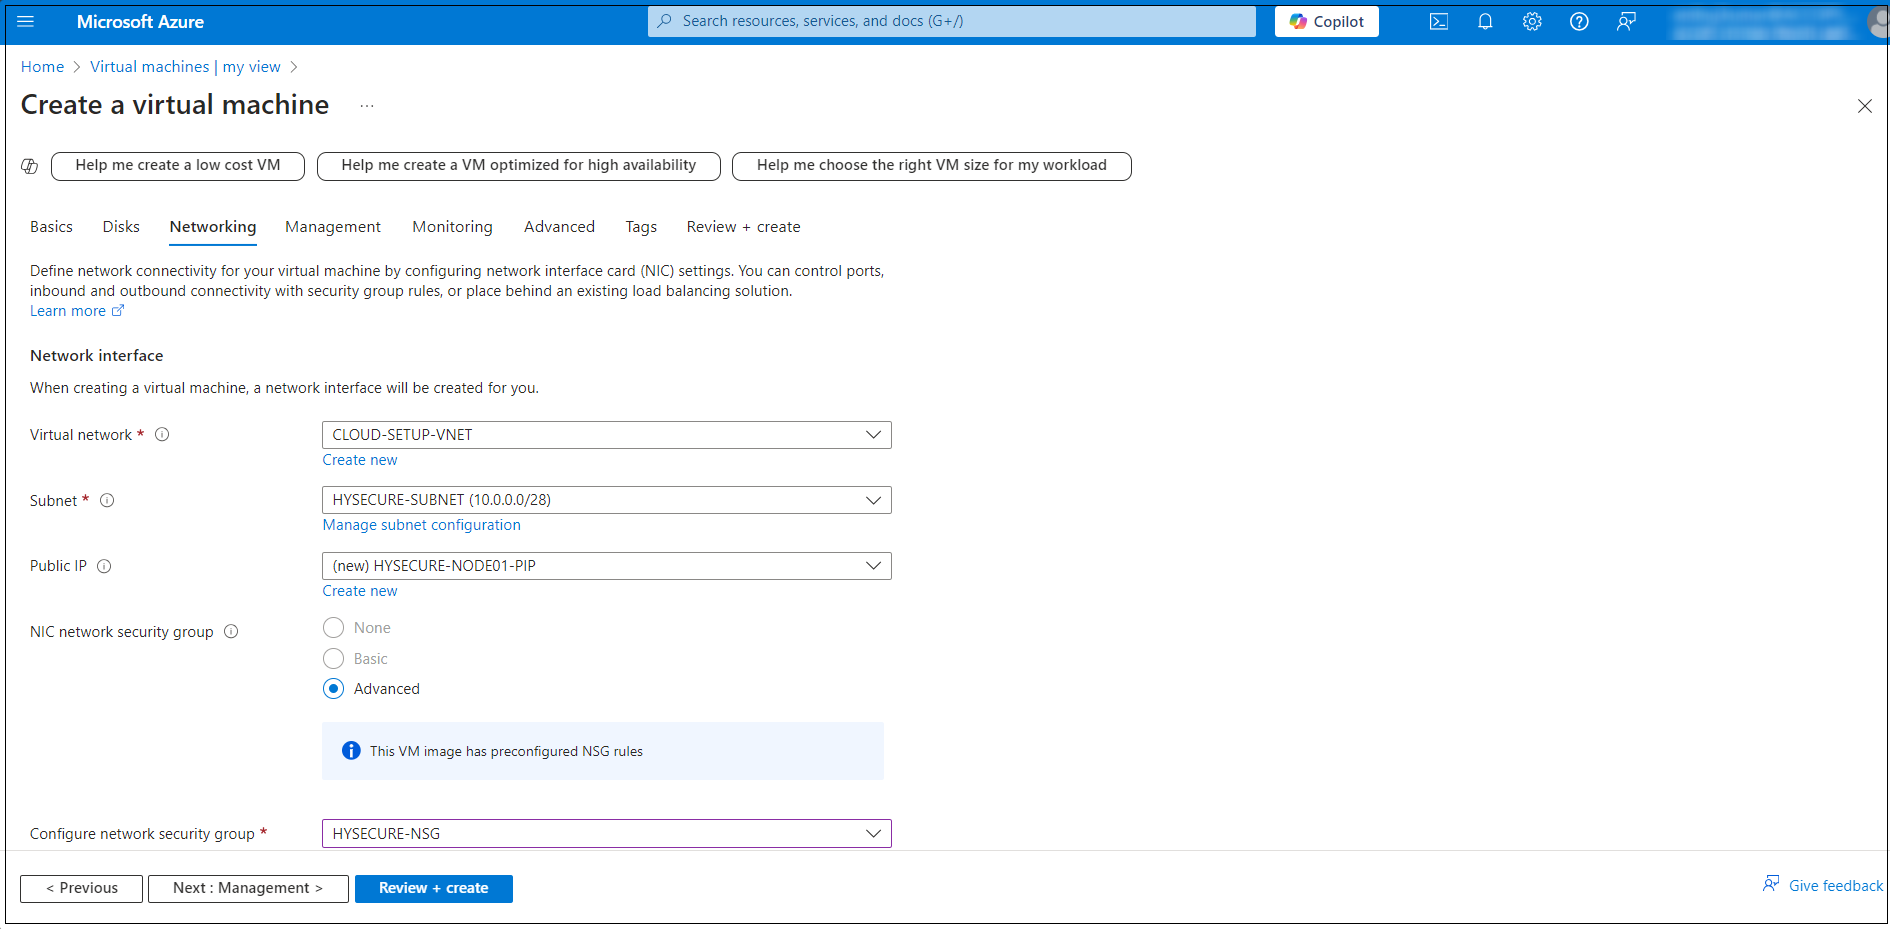
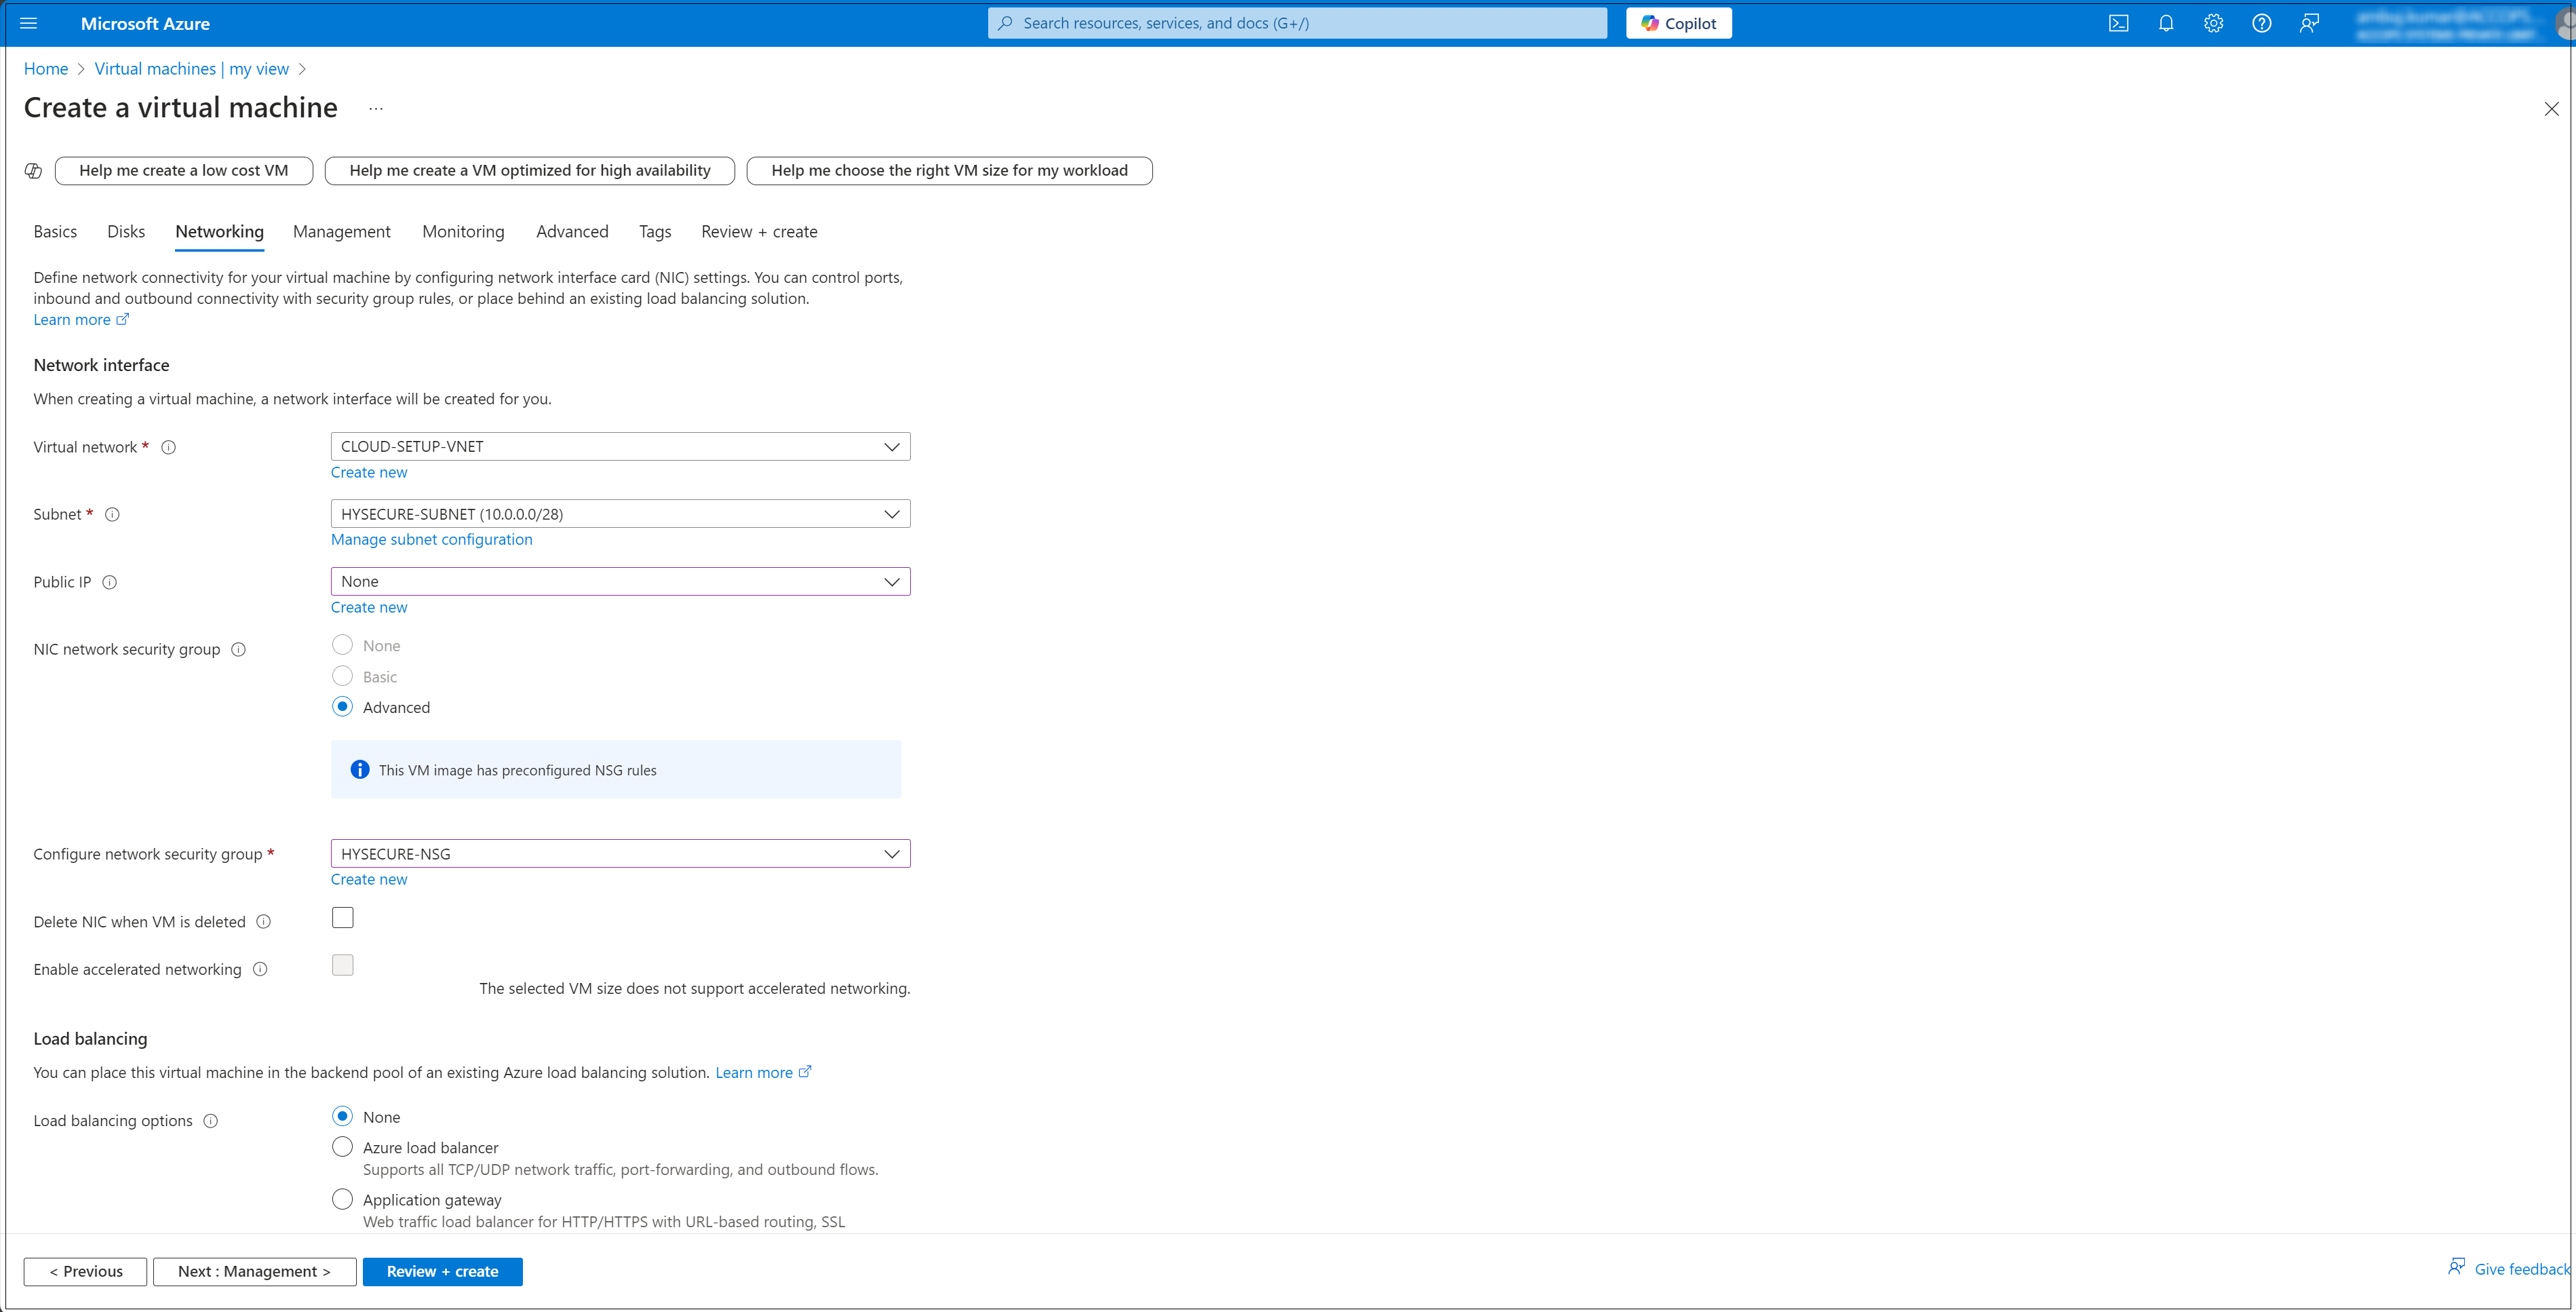
Configure Networking: In the Networking tab, configure the following:
- Virtual network: Select an existing network or create a new one.
- Subnet: Select a subnet within the virtual network.
- Public IP: Assign a public IP if you want external access.
- NIC network security group (NSG): Set inbound/outbound rules to control the network access.
-
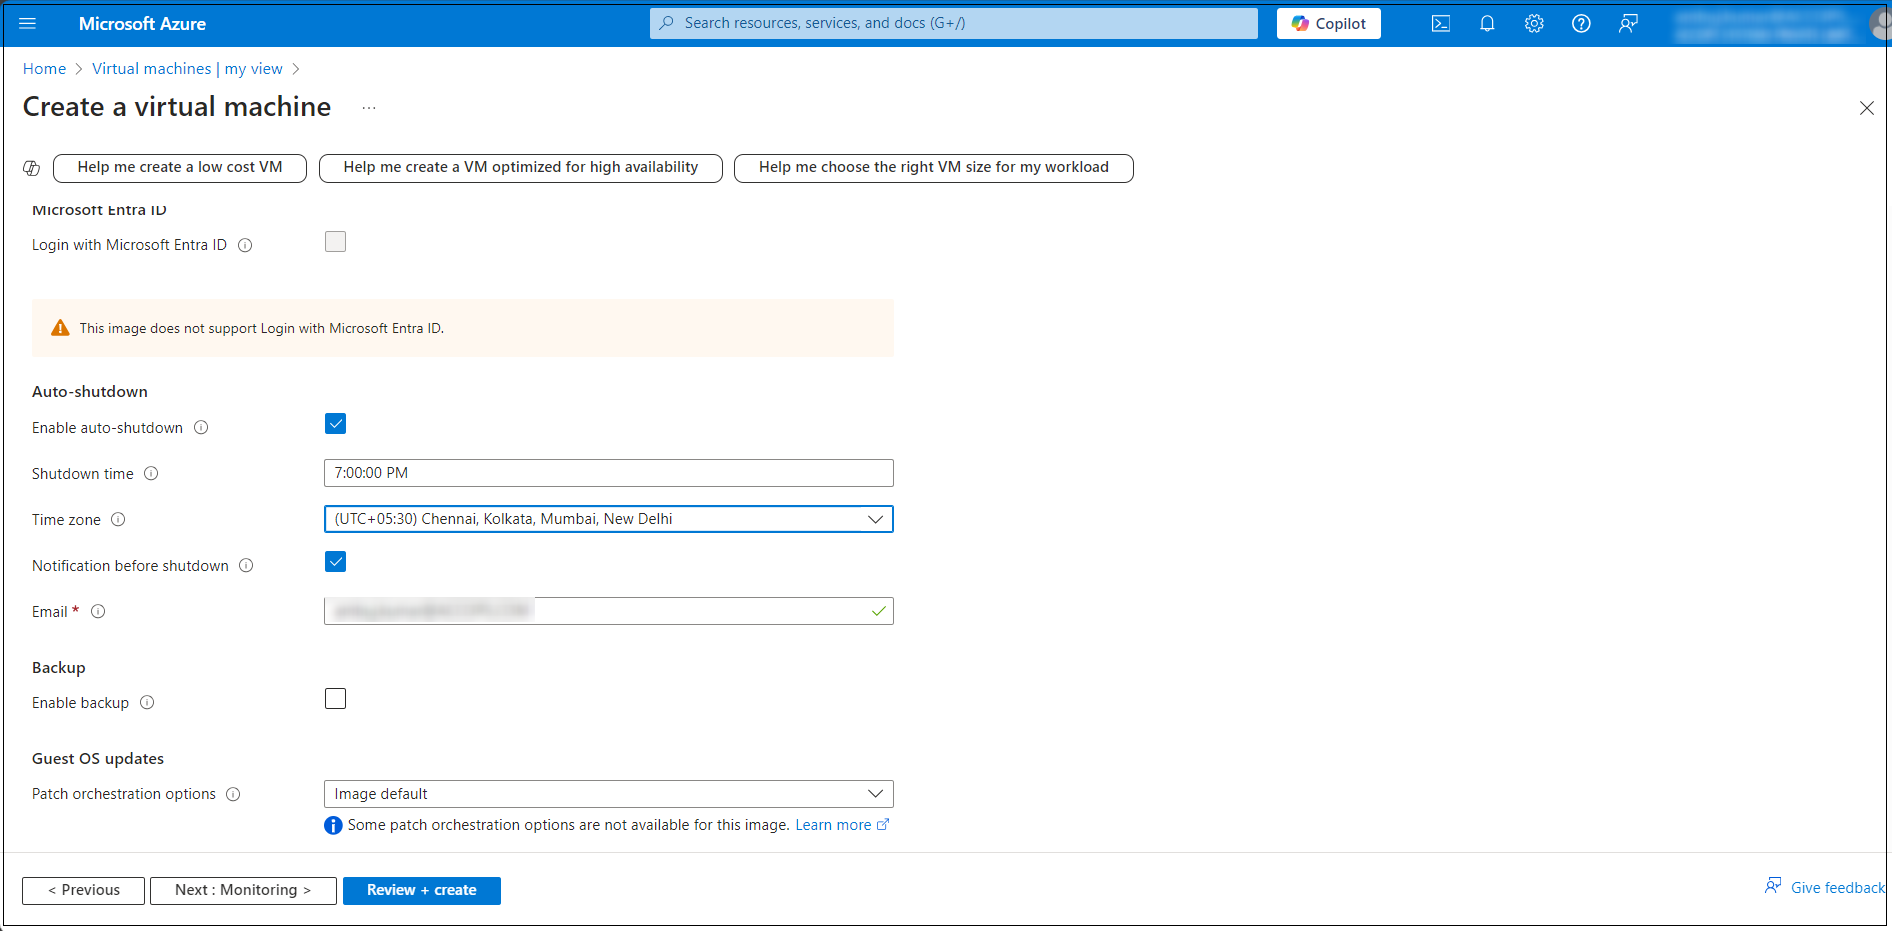
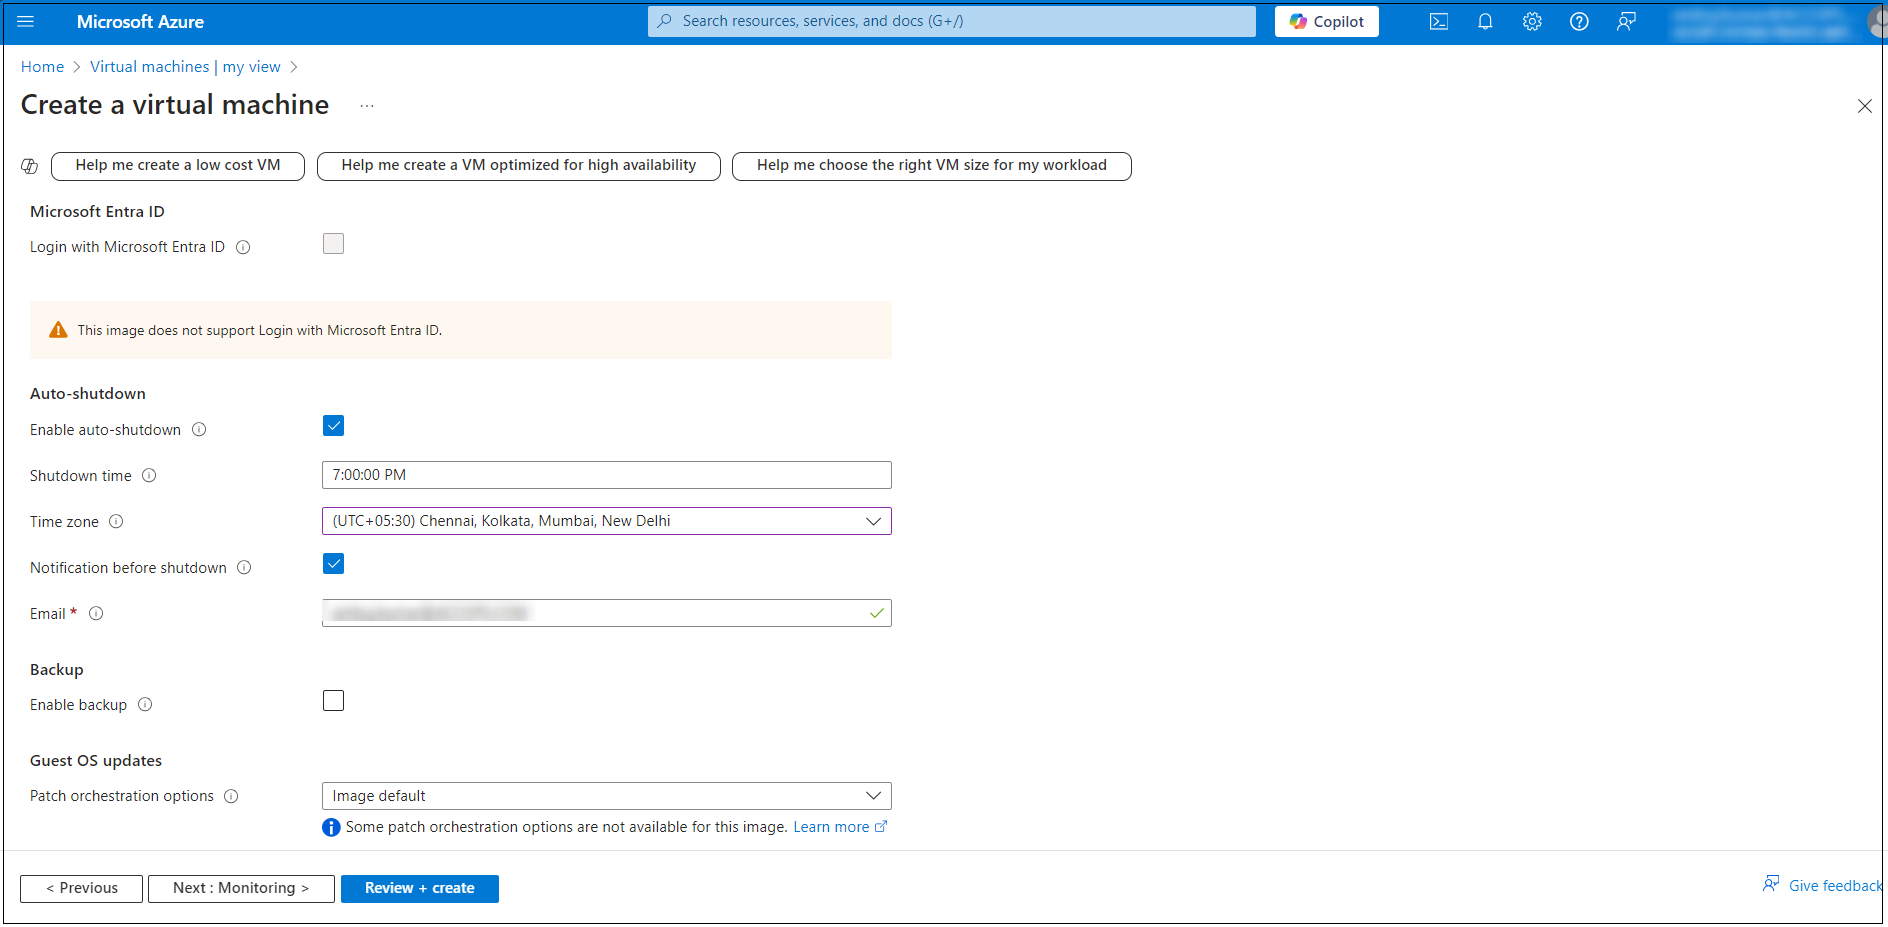
In the Management tab, configure the additional options such as Auto-shutdown to set a specific time for automatically shutting down the VM.
-
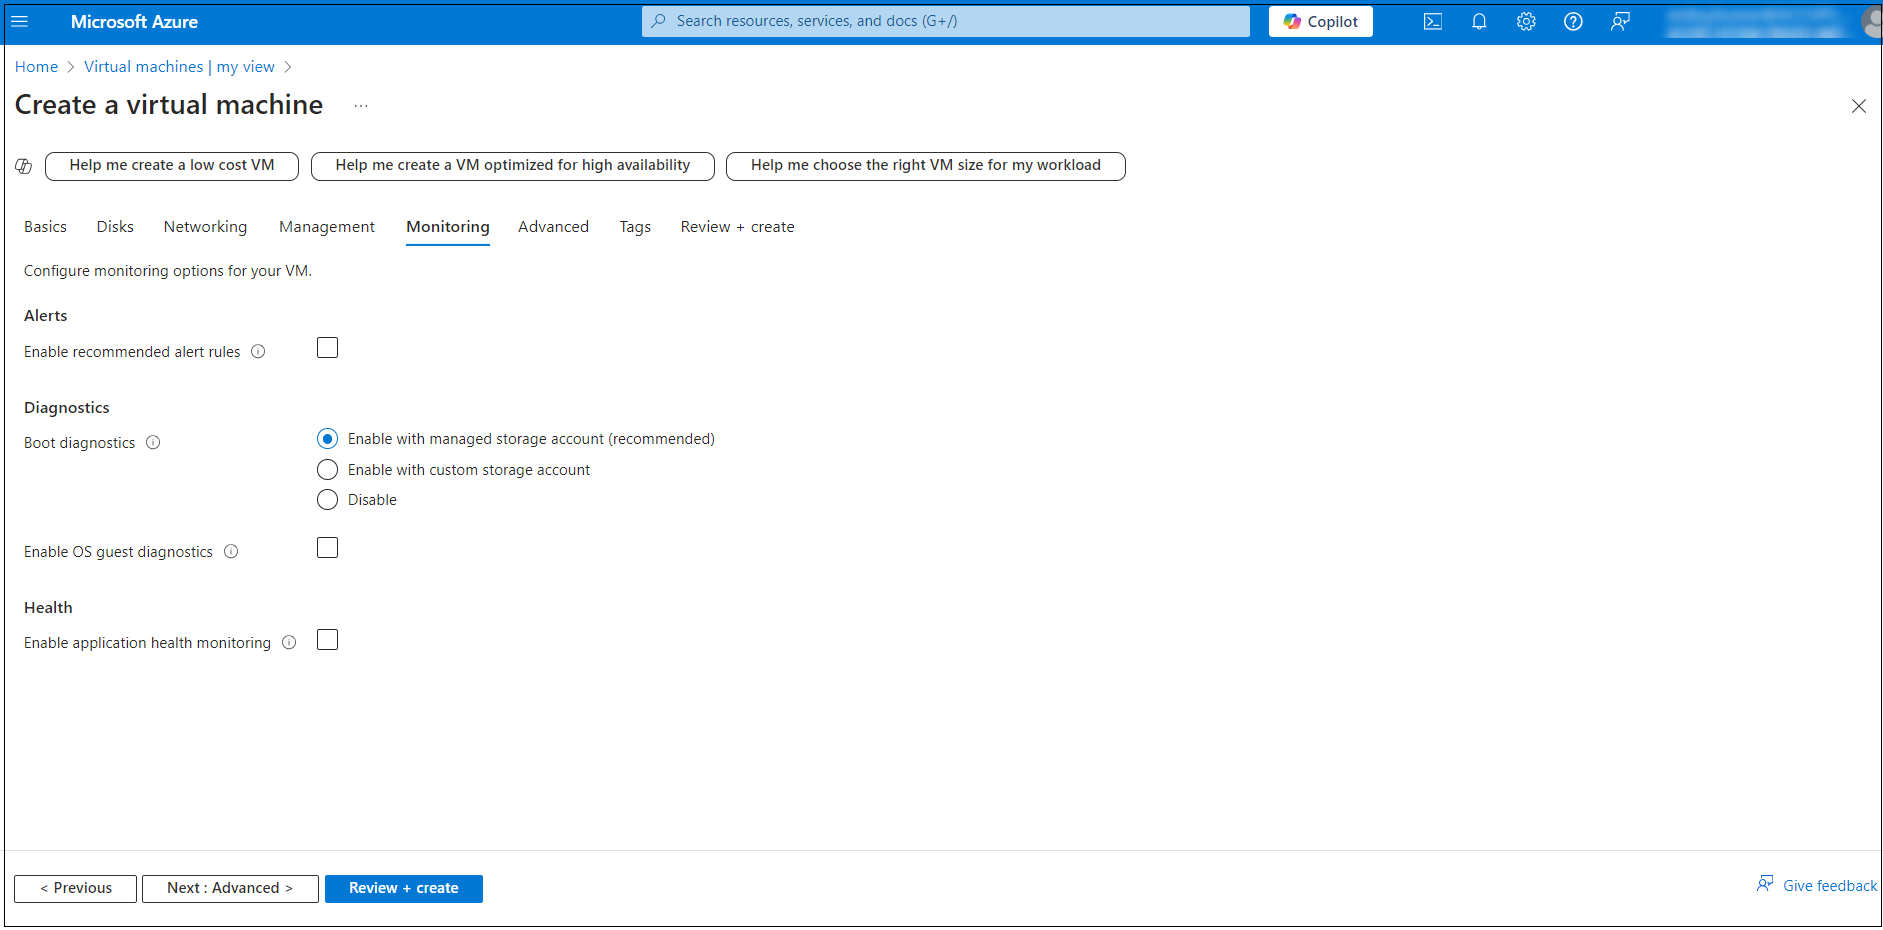
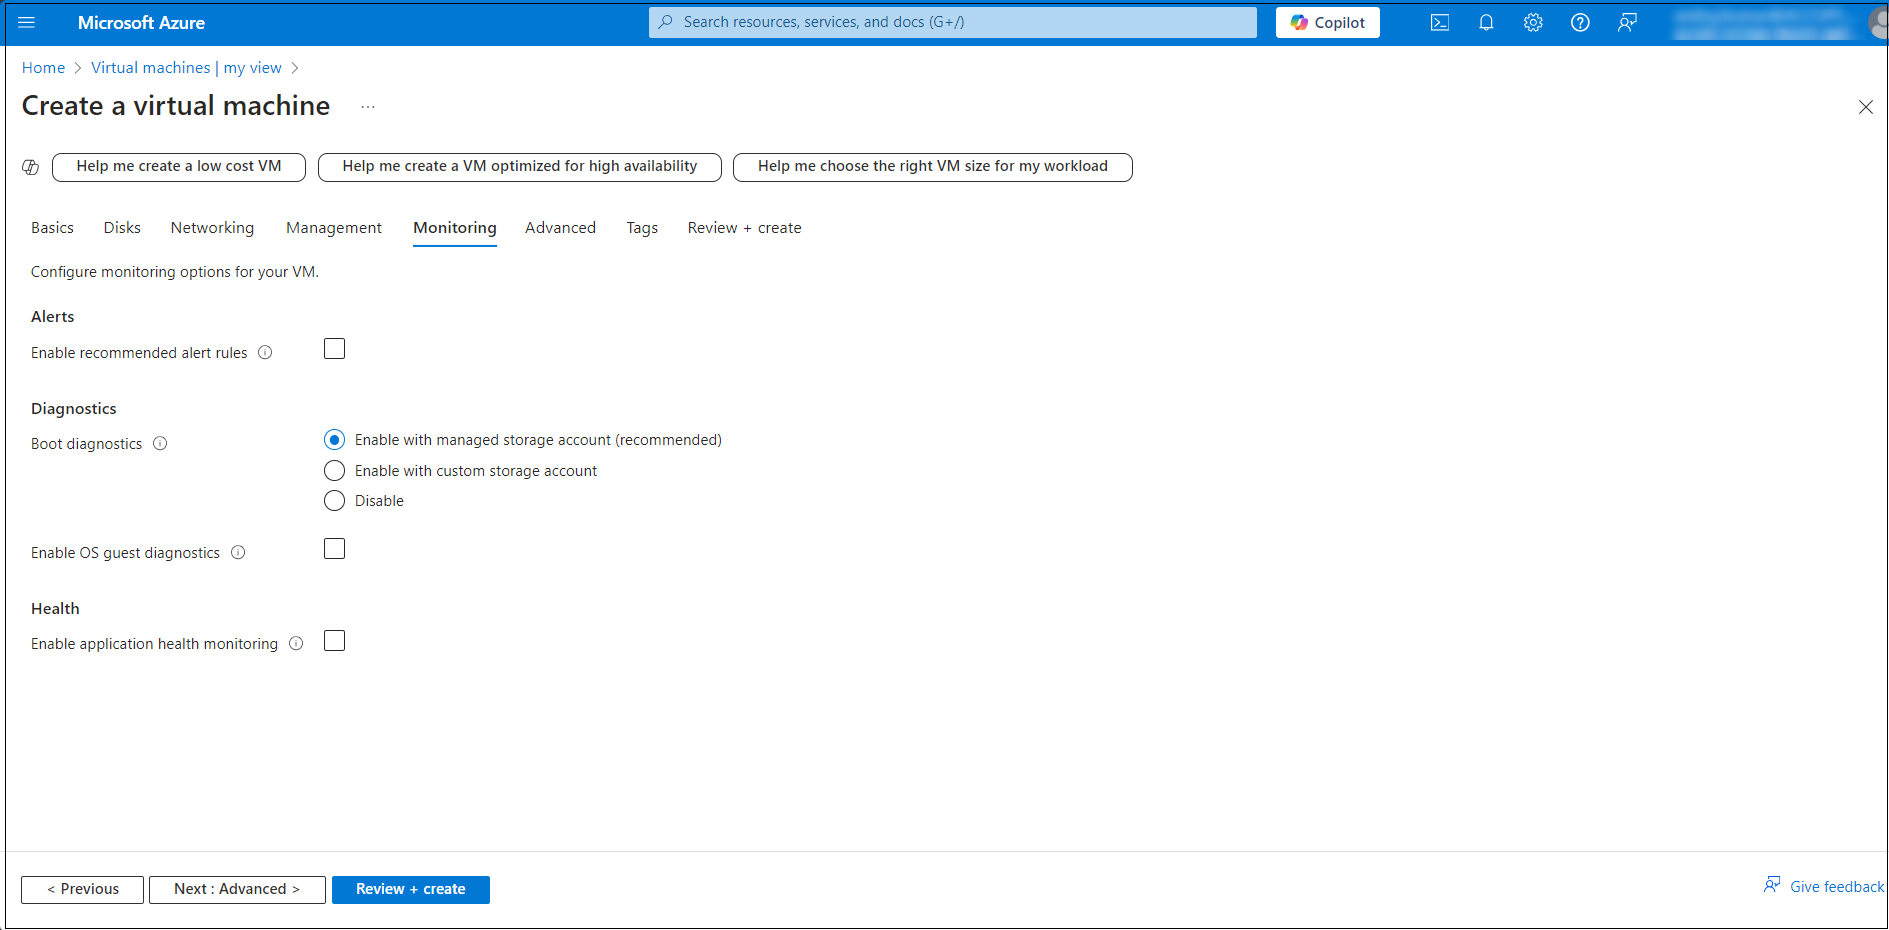
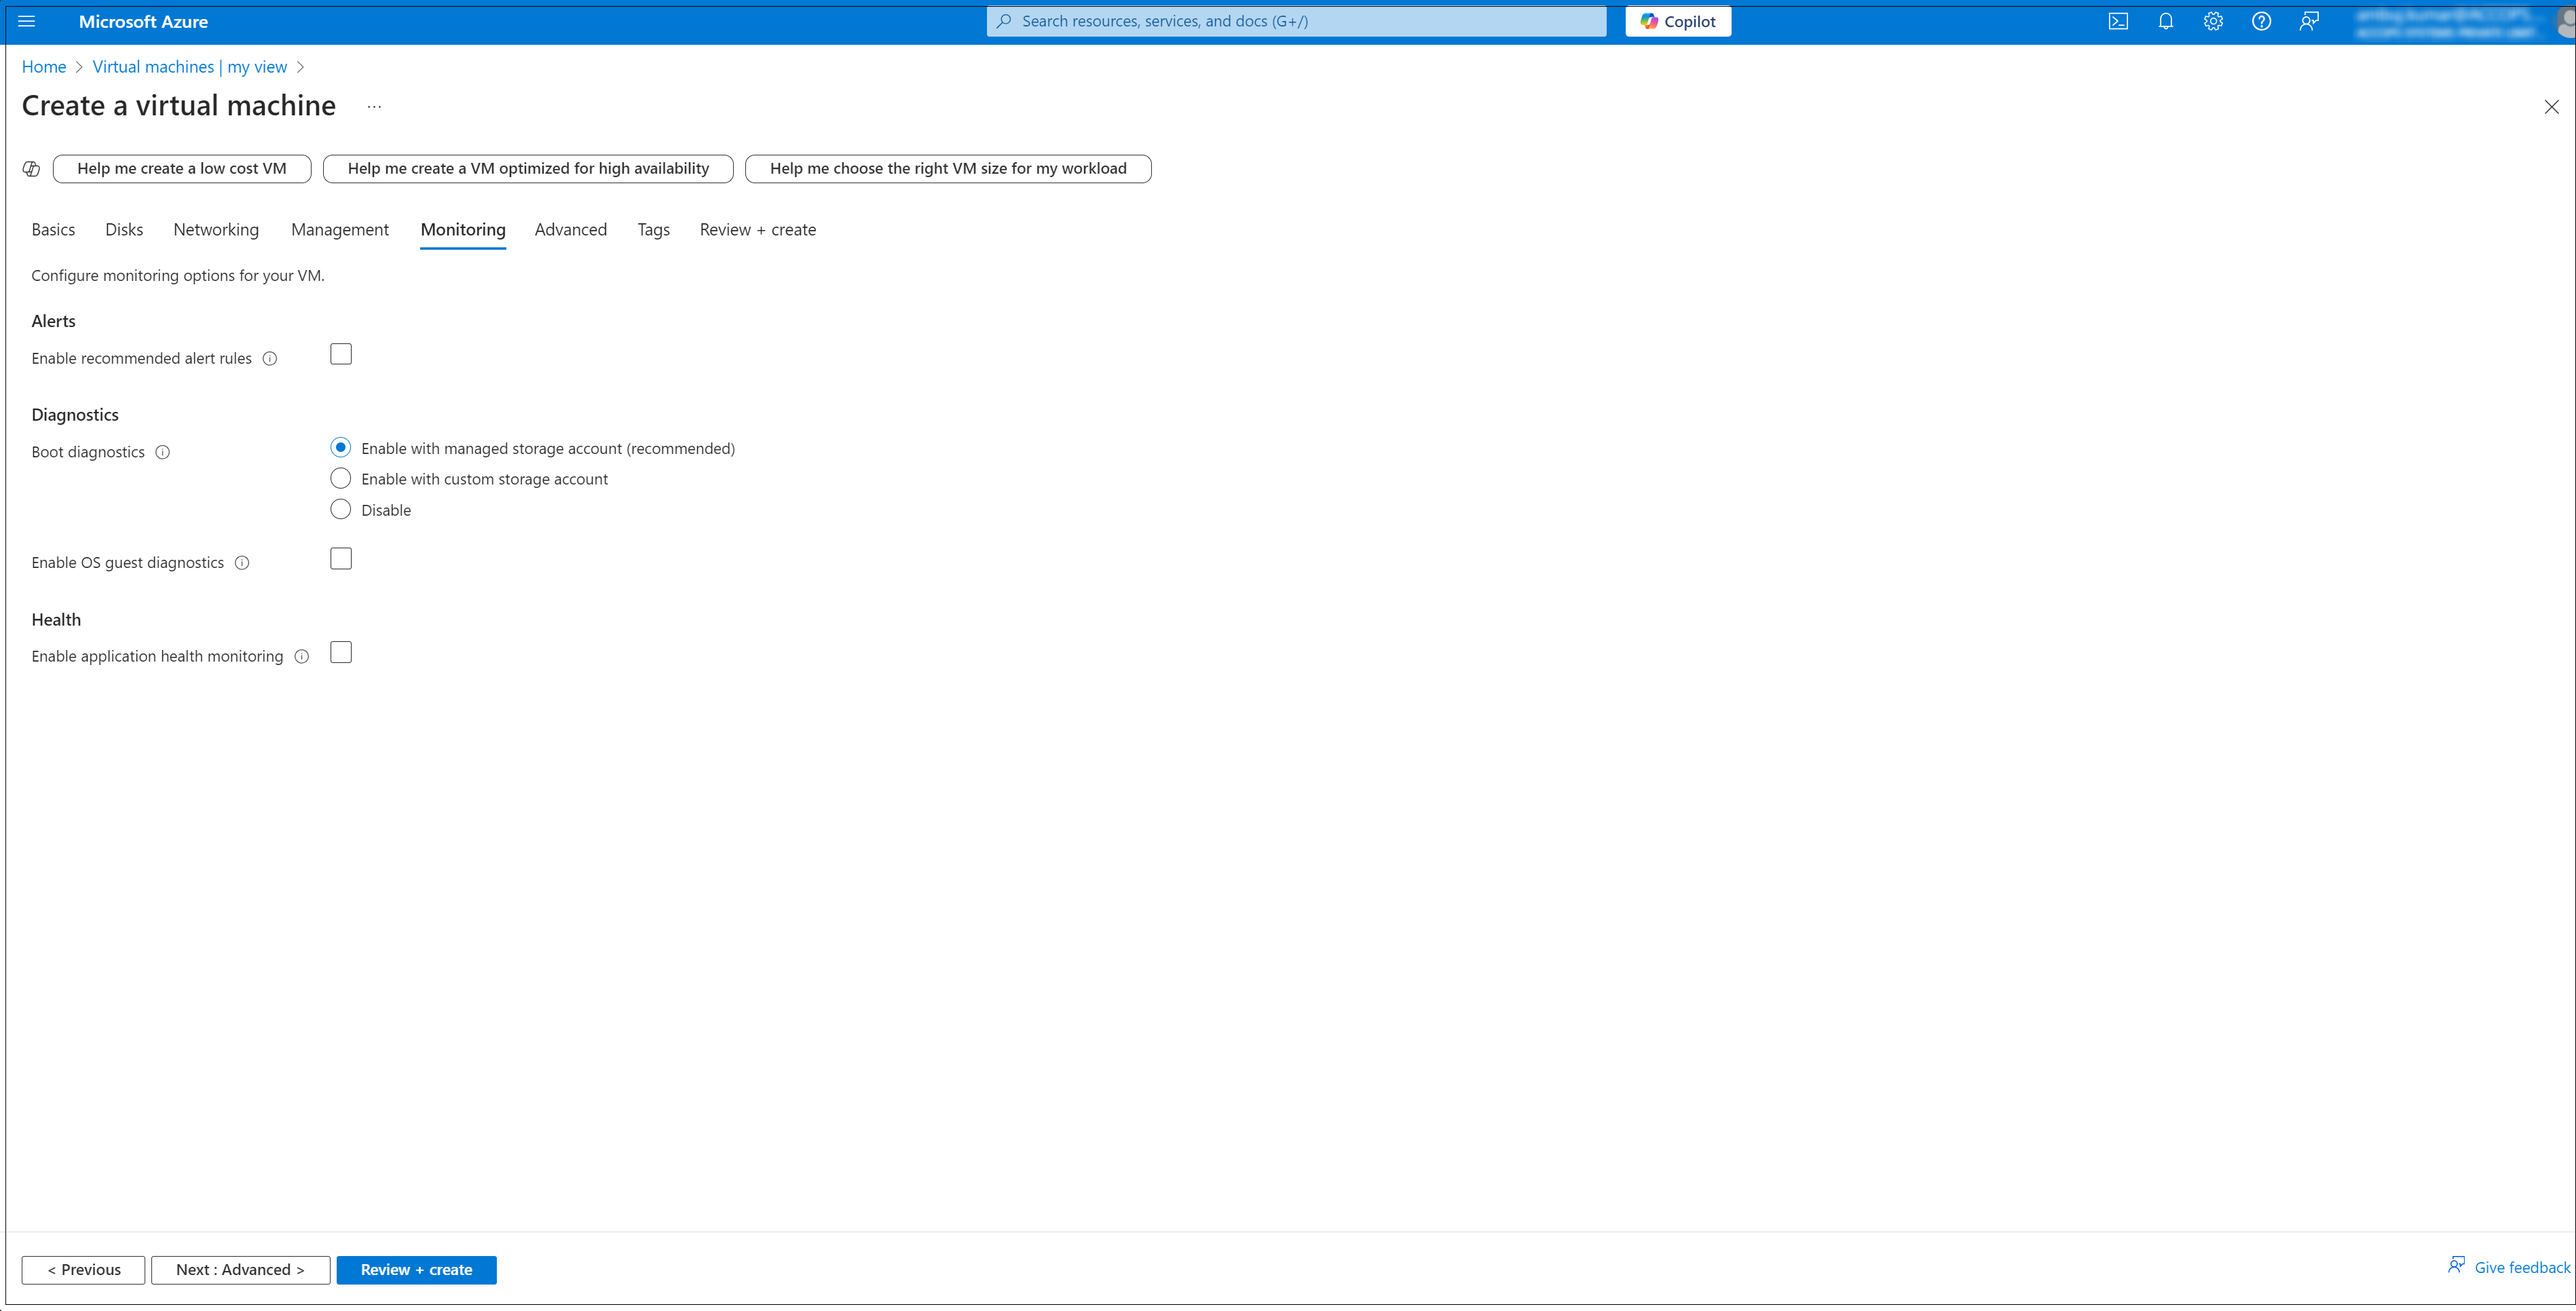
In the Monitoring tab, Enable the Boot diagnostics options for troubleshooting.
-
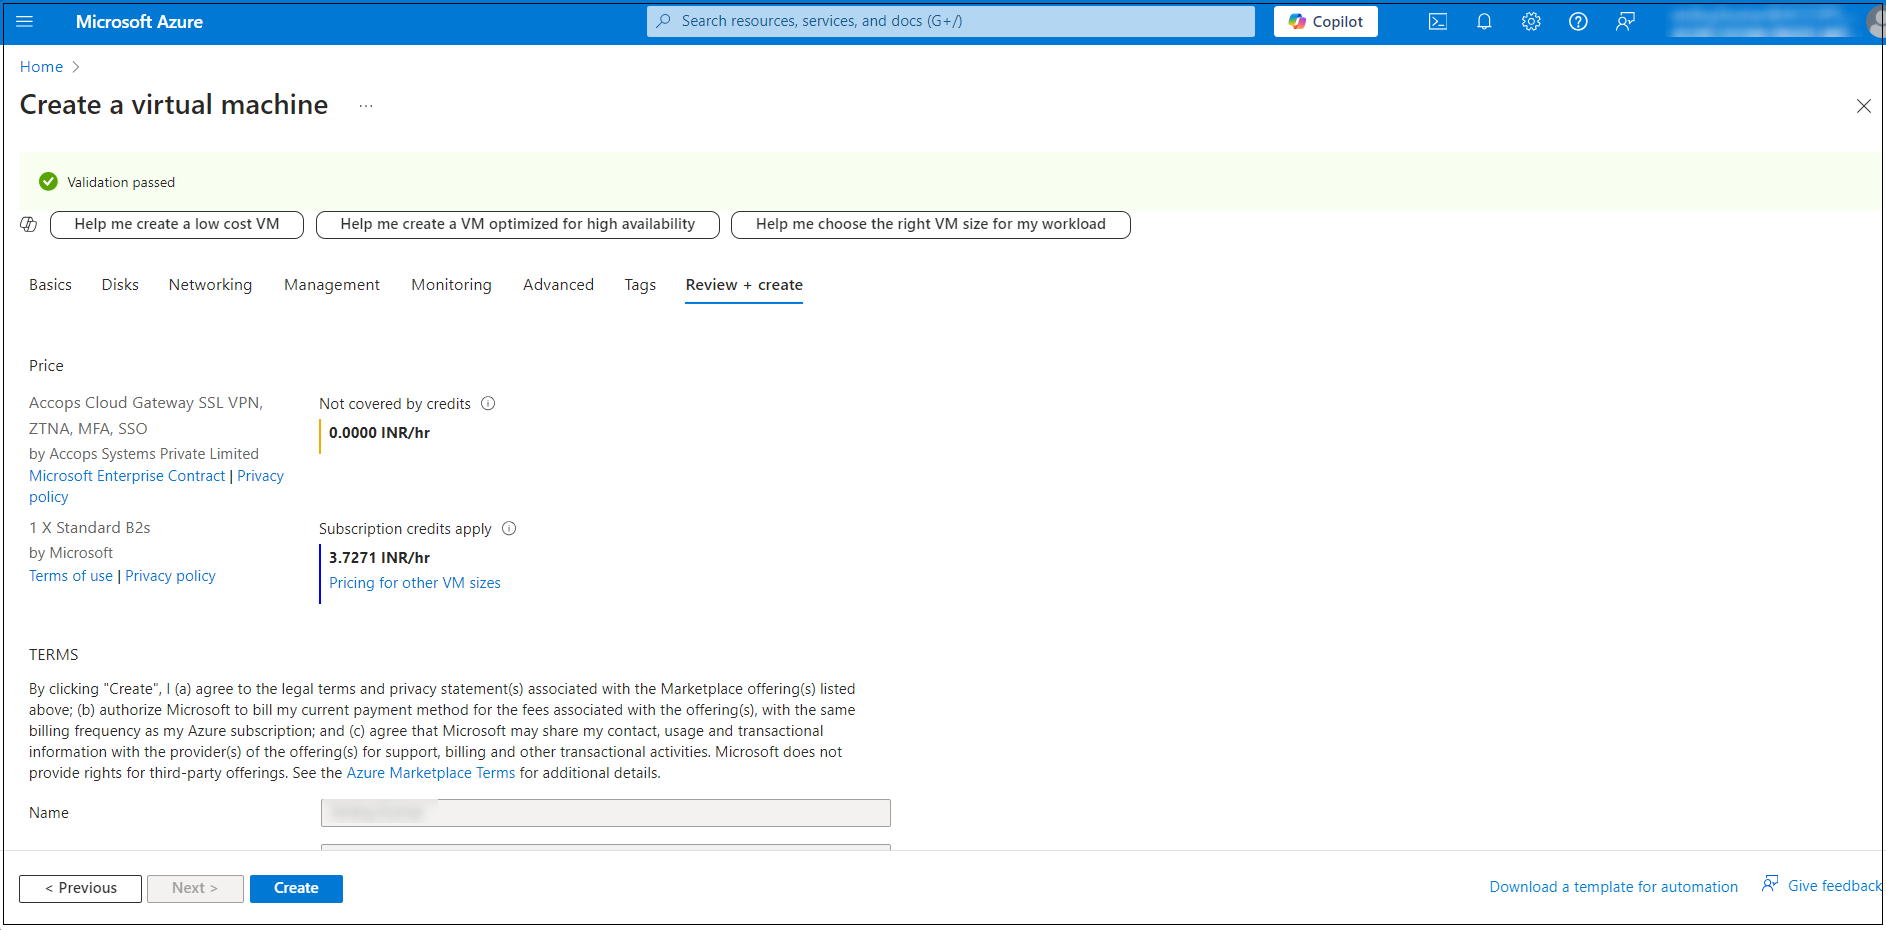
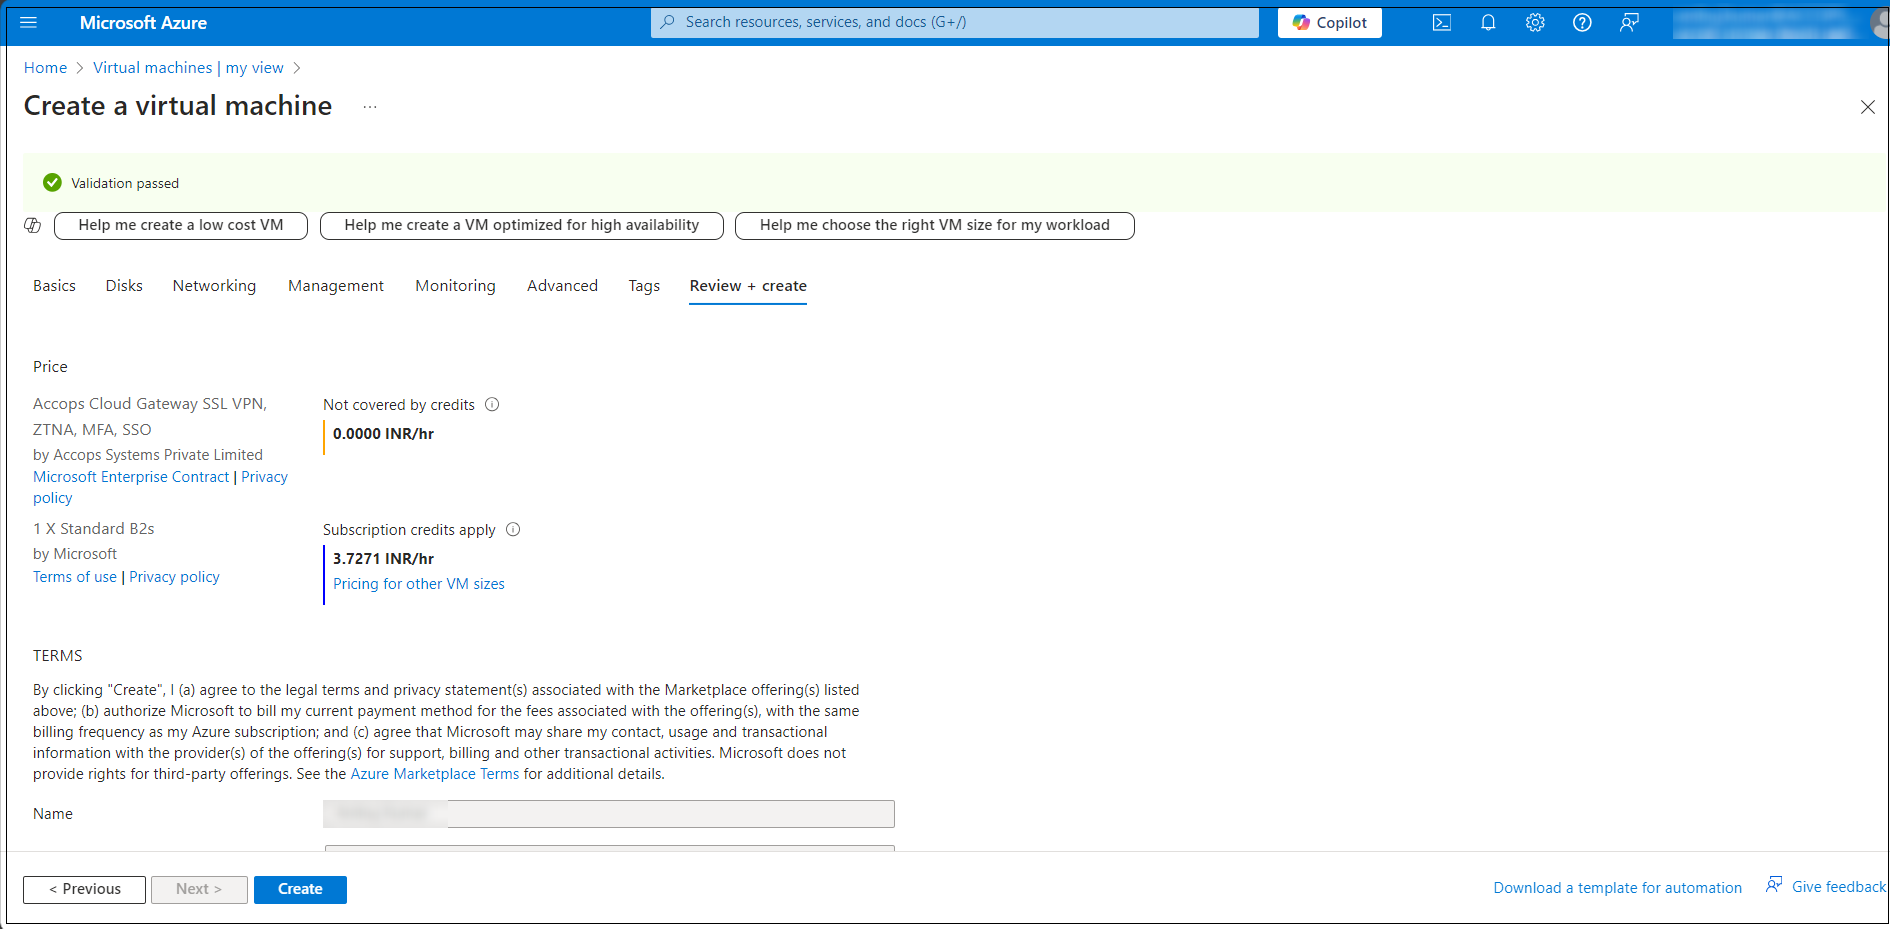
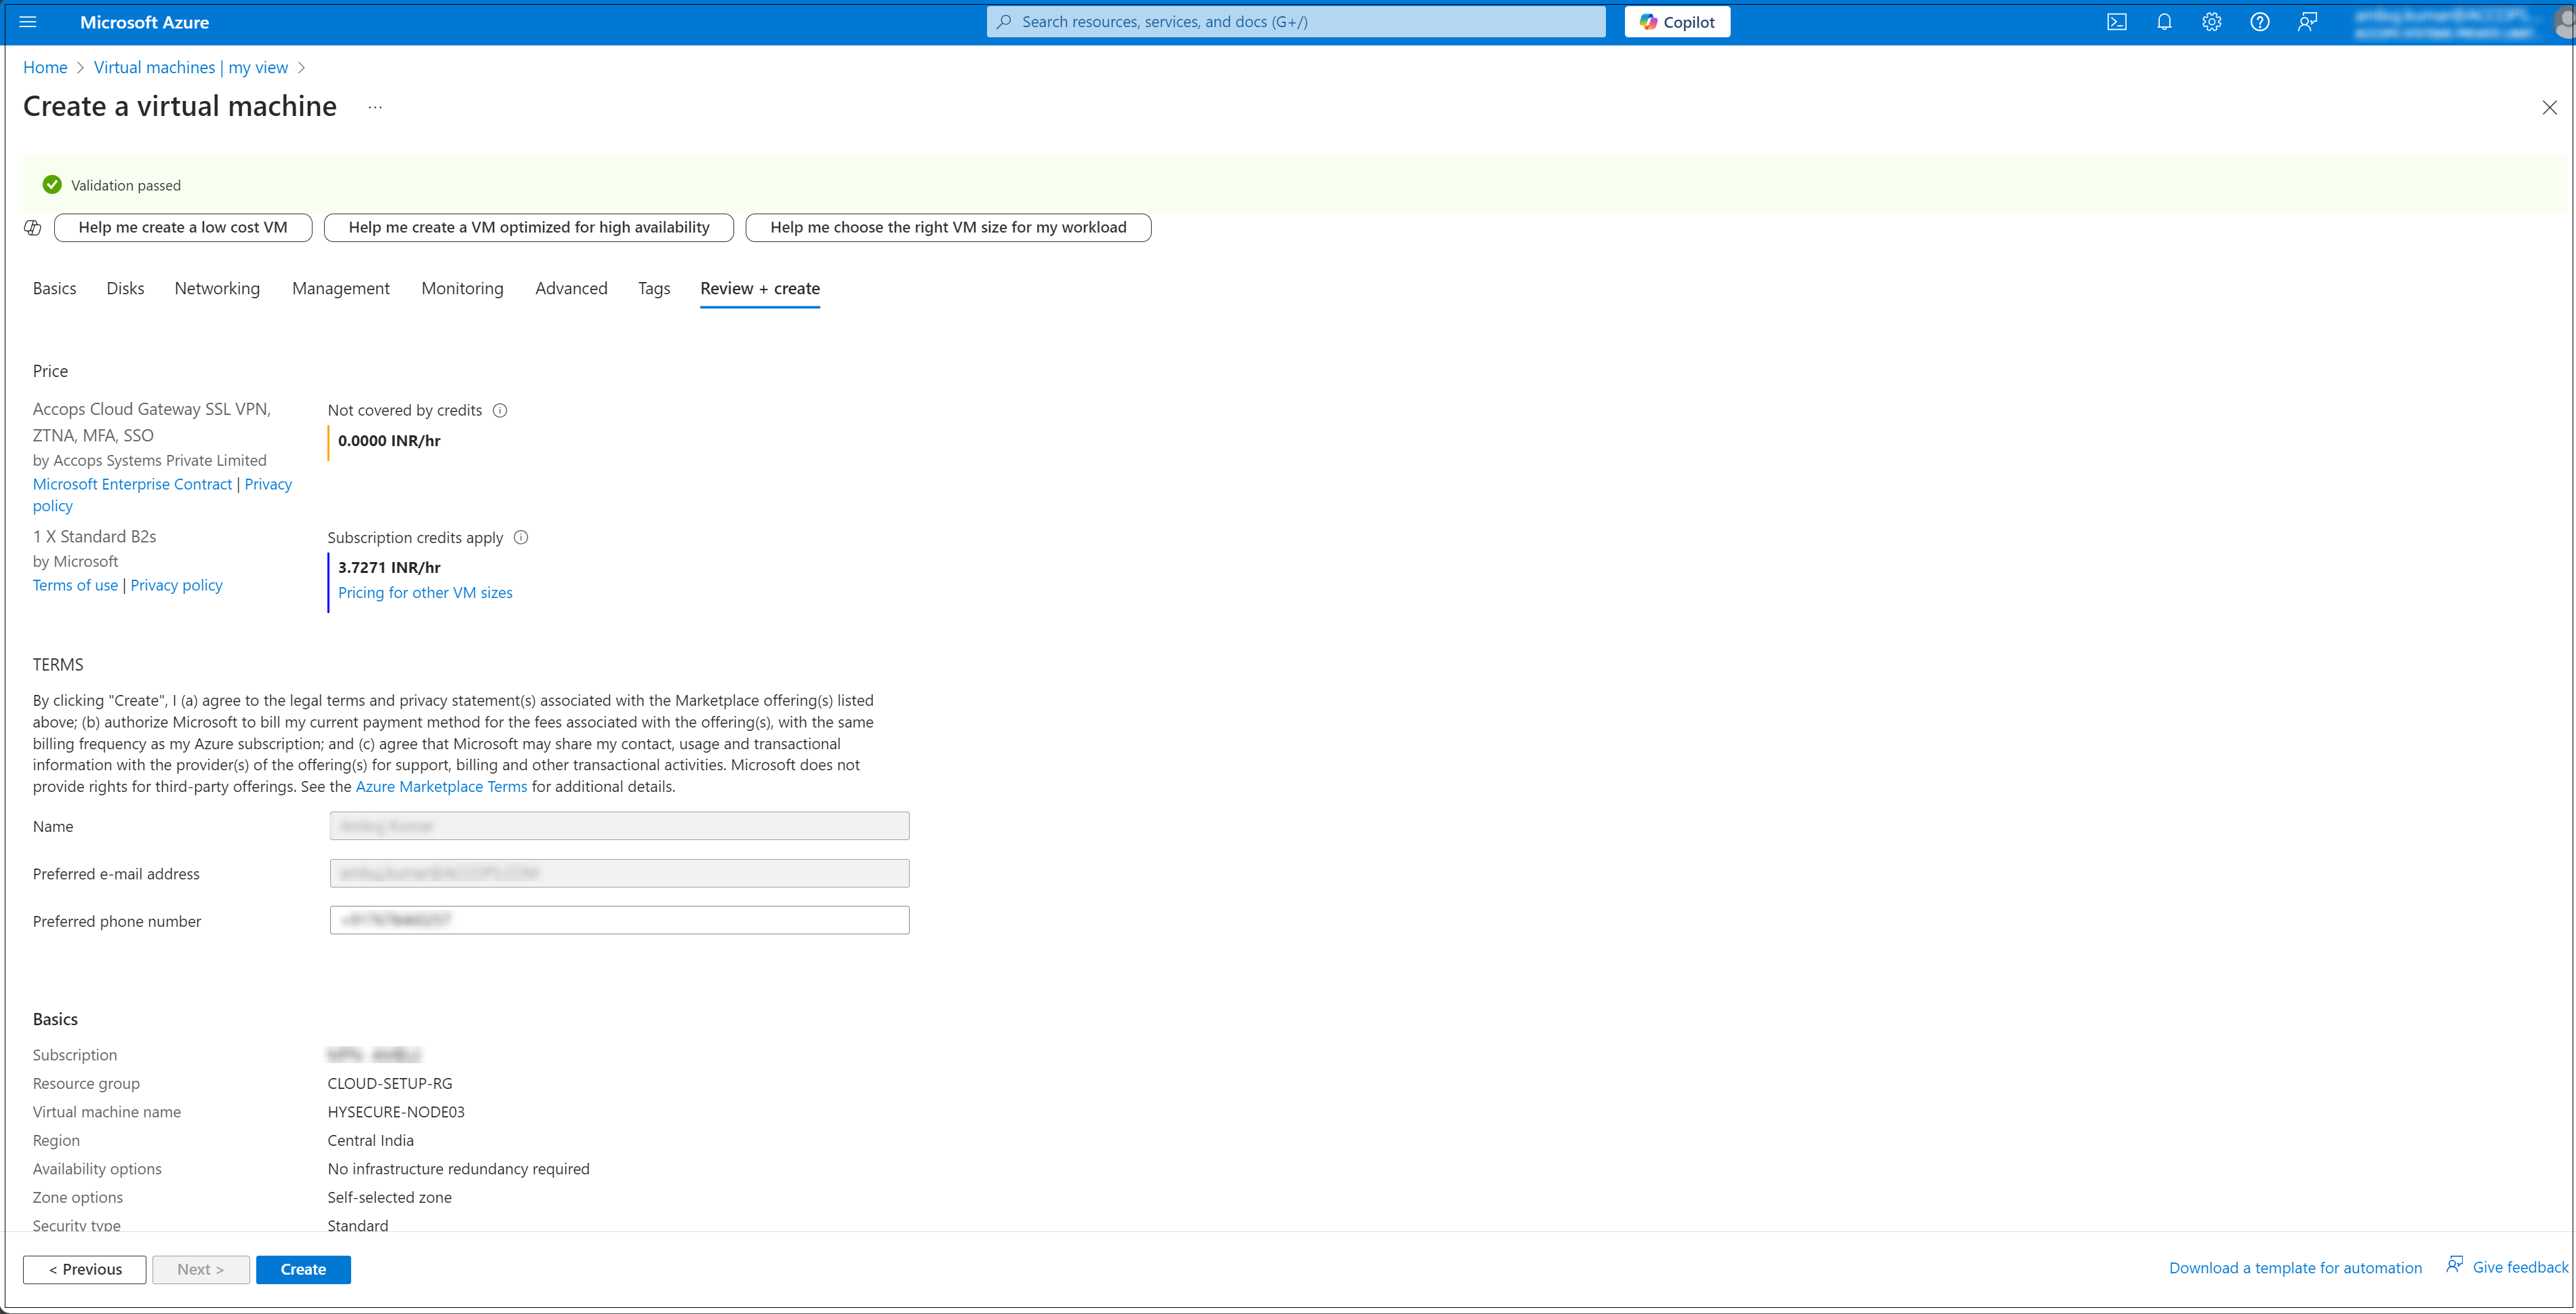
Review and Create: Once all the settings are configured, click Review + create.
Secondary HySecure Node Deployment
Follow the steps below to deploy the secondary HySecure node:
-
Log into the Azure Portal:
- Go to https://portal.azure.com and sign in with your Azure account.
-
Navigate to Virtual machines:
- Select Virtual machines from the Azure services section. You can also type Virtual machines in the search bar.
- On the Virtual machines page, click on the + Create button and select Azure virtual machines.
-
Configure Basic Settings: In the Basics tab, configure the following Instance details:
- Subscription: Select your Azure subscription.
- Resource Group: Select an existing resource group or create a new one (e.g. CLOUD-SETUP-RG).
- Virtual machine name: Name your VM (e.g. HYSECURE-NODE02).
- Region: Select the location where your VM will be hosted (e.g. Central India).
- Availability options: Select based on your need (e.g. No infrastructure redundancy required).
- Image: Select the operating system image (e.g. Accops HySecure Gateway v5.4 GA Build 5427 - x64 Gen1).
- Size: Select a VM size based on your workload requirements.
-
Under Administrator account, enter a username, such as clouduser and a password. The password must be at least 12 characters long.
-
Configure Disk Settings: Navigate to the Disks tab, and select the OS disk type (e.g. Standard SSD, Premium SSD).
-
Configure Networking: In the Networking tab, configure the following:
- Virtual network: Select an existing network or create a new one.
- Subnet: Select a subnet within the virtual network.
- Public IP: Assign a public IP if you want external access.
- NIC network security group (NSG): Set inbound/outbound rules to control the network access.

-
In the Management tab, configure the additional options such as Auto-shutdown to set a specific time for automatically shutting down the VM.
-
In the Monitoring tab, Enable the diagnostics options for troubleshooting.
-
Review and Create: Once all the settings are configured, click Review + create.
Third HySecure Node Deployment
Follow the steps below to deploy the third HySecure node:
-
Log into the Azure Portal:
- Go to https://portal.azure.com and sign in with your Azure account.
-
Navigate to Virtual machines:
- Select Virtual machines from the Azure services section. You can also type Virtual machines in the search bar.
- On the Virtual machines page, click on the + Create button and select Azure virtual machines.
-
Configure Basic Settings: In the Basics tab, configure the following Instance details:
- Subscription: Select your Azure subscription.
- Resource Group: Select an existing resource group or create a new one (e.g. CLOUD-SETUP-RG).
- Virtual machine name: Name your VM (e.g. HYSECURE-NODE02).
- Region: Select the location where your VM will be hosted (e.g. Central India).
- Availability options: Select based on your need (e.g. No infrastructure redundancy required).
- Image: Select the operating system image (e.g. Accops HySecure Gateway v5.4 GA Build 5427 - x64 Gen1).
- Size: Select a VM size based on your workload requirements.
-
Under Administrator account, enter a username, such as clouduser and a password. The password must be at least 12 characters long.
-
Configure Disk Settings: Navigate to the Disks tab, and select the OS disk type (e.g. Standard SSD, Premium SSD).
-
Configure Networking: In the Networking tab, configure the following:
- Virtual network: Select an existing network or create a new one.
- Subnet: Select a subnet within the virtual network.
- Public IP: Assign a public IP if you want external access.
- NIC network security group (NSG): Set inbound/outbound rules to control the network access.
-
In the Management tab, configure the additional options such as Auto-shutdown to set a specific time for automatically shutting down the VM.
-
In the Monitoring tab, Enable the diagnostics options for troubleshooting.
-
Review and Create: Once all the settings are configured, click Review + create.
Post VM installation (preboot execution)
After the HySecure VM is successfully deployed, the next step is preboot execution. This ensures that the VM is correctly configured and prepared for operational use.
The following steps will guide you through the necessary actions to complete the post-installation setup and prepare the HySecure VM.
Preboot Primary HySecure Node
-
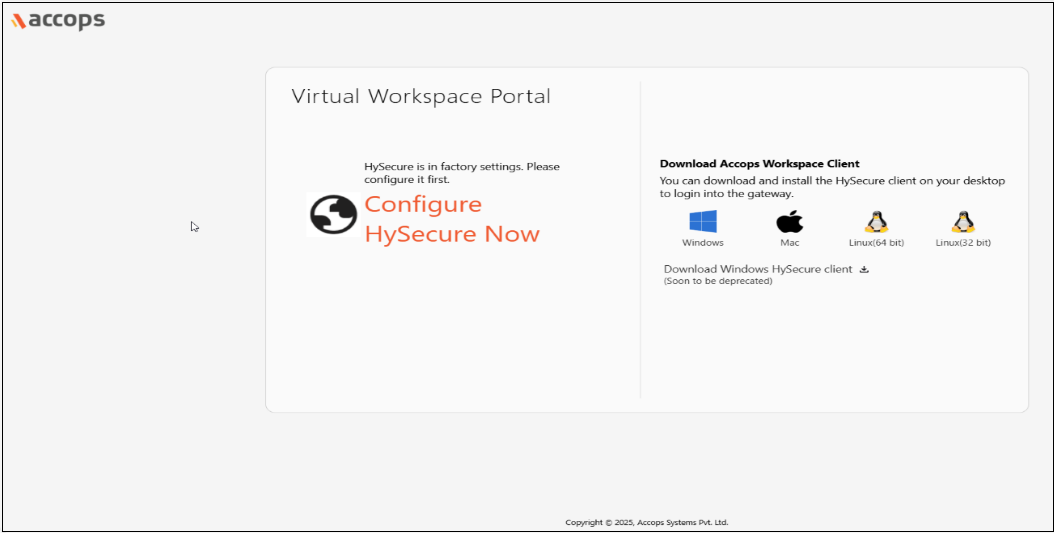
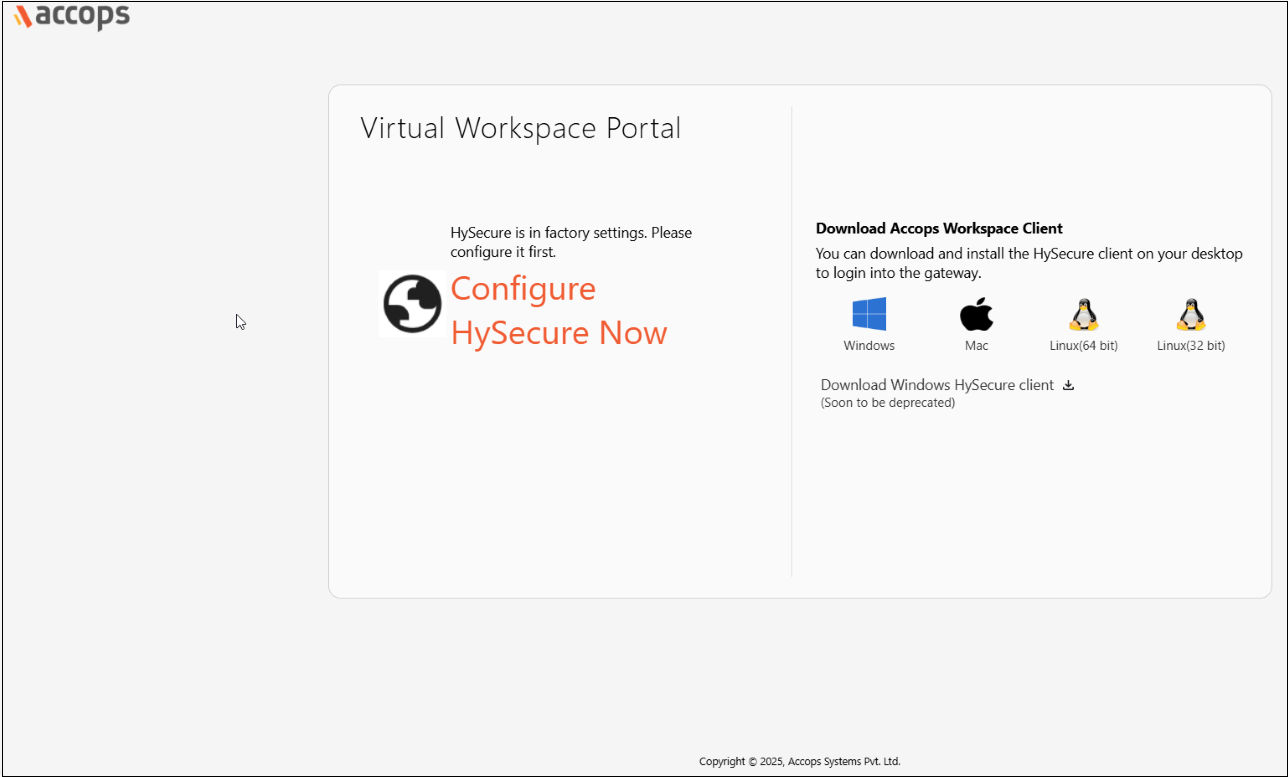
Open the Web browser and enter the website address as the static IP configured on the VM. For example, browse https://10.0.0.4 and click Configure HySecure Now.
-
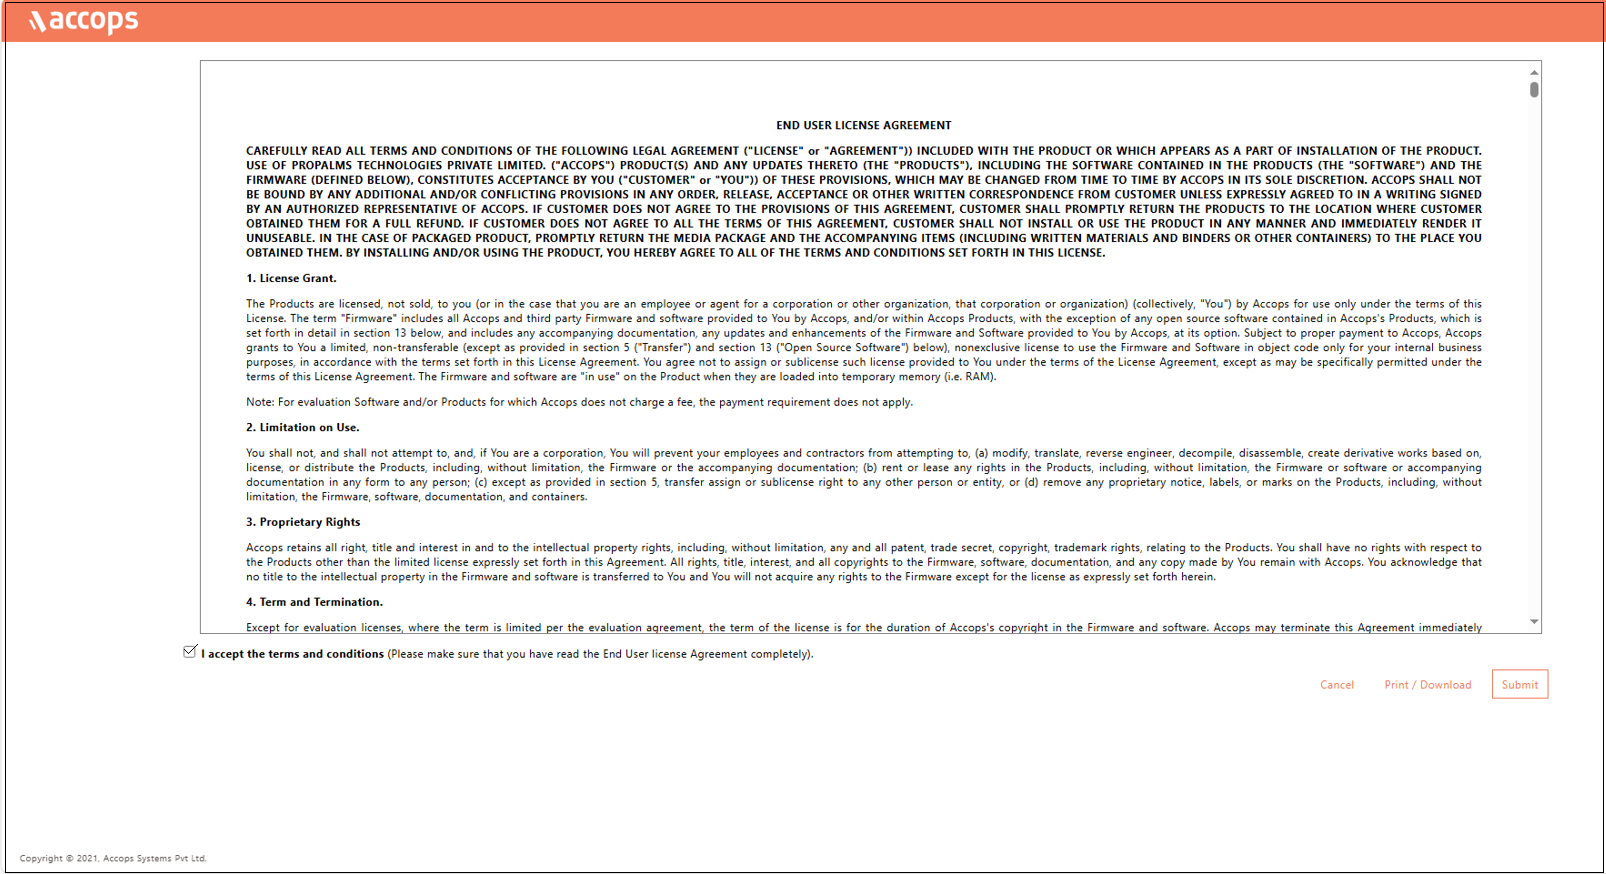
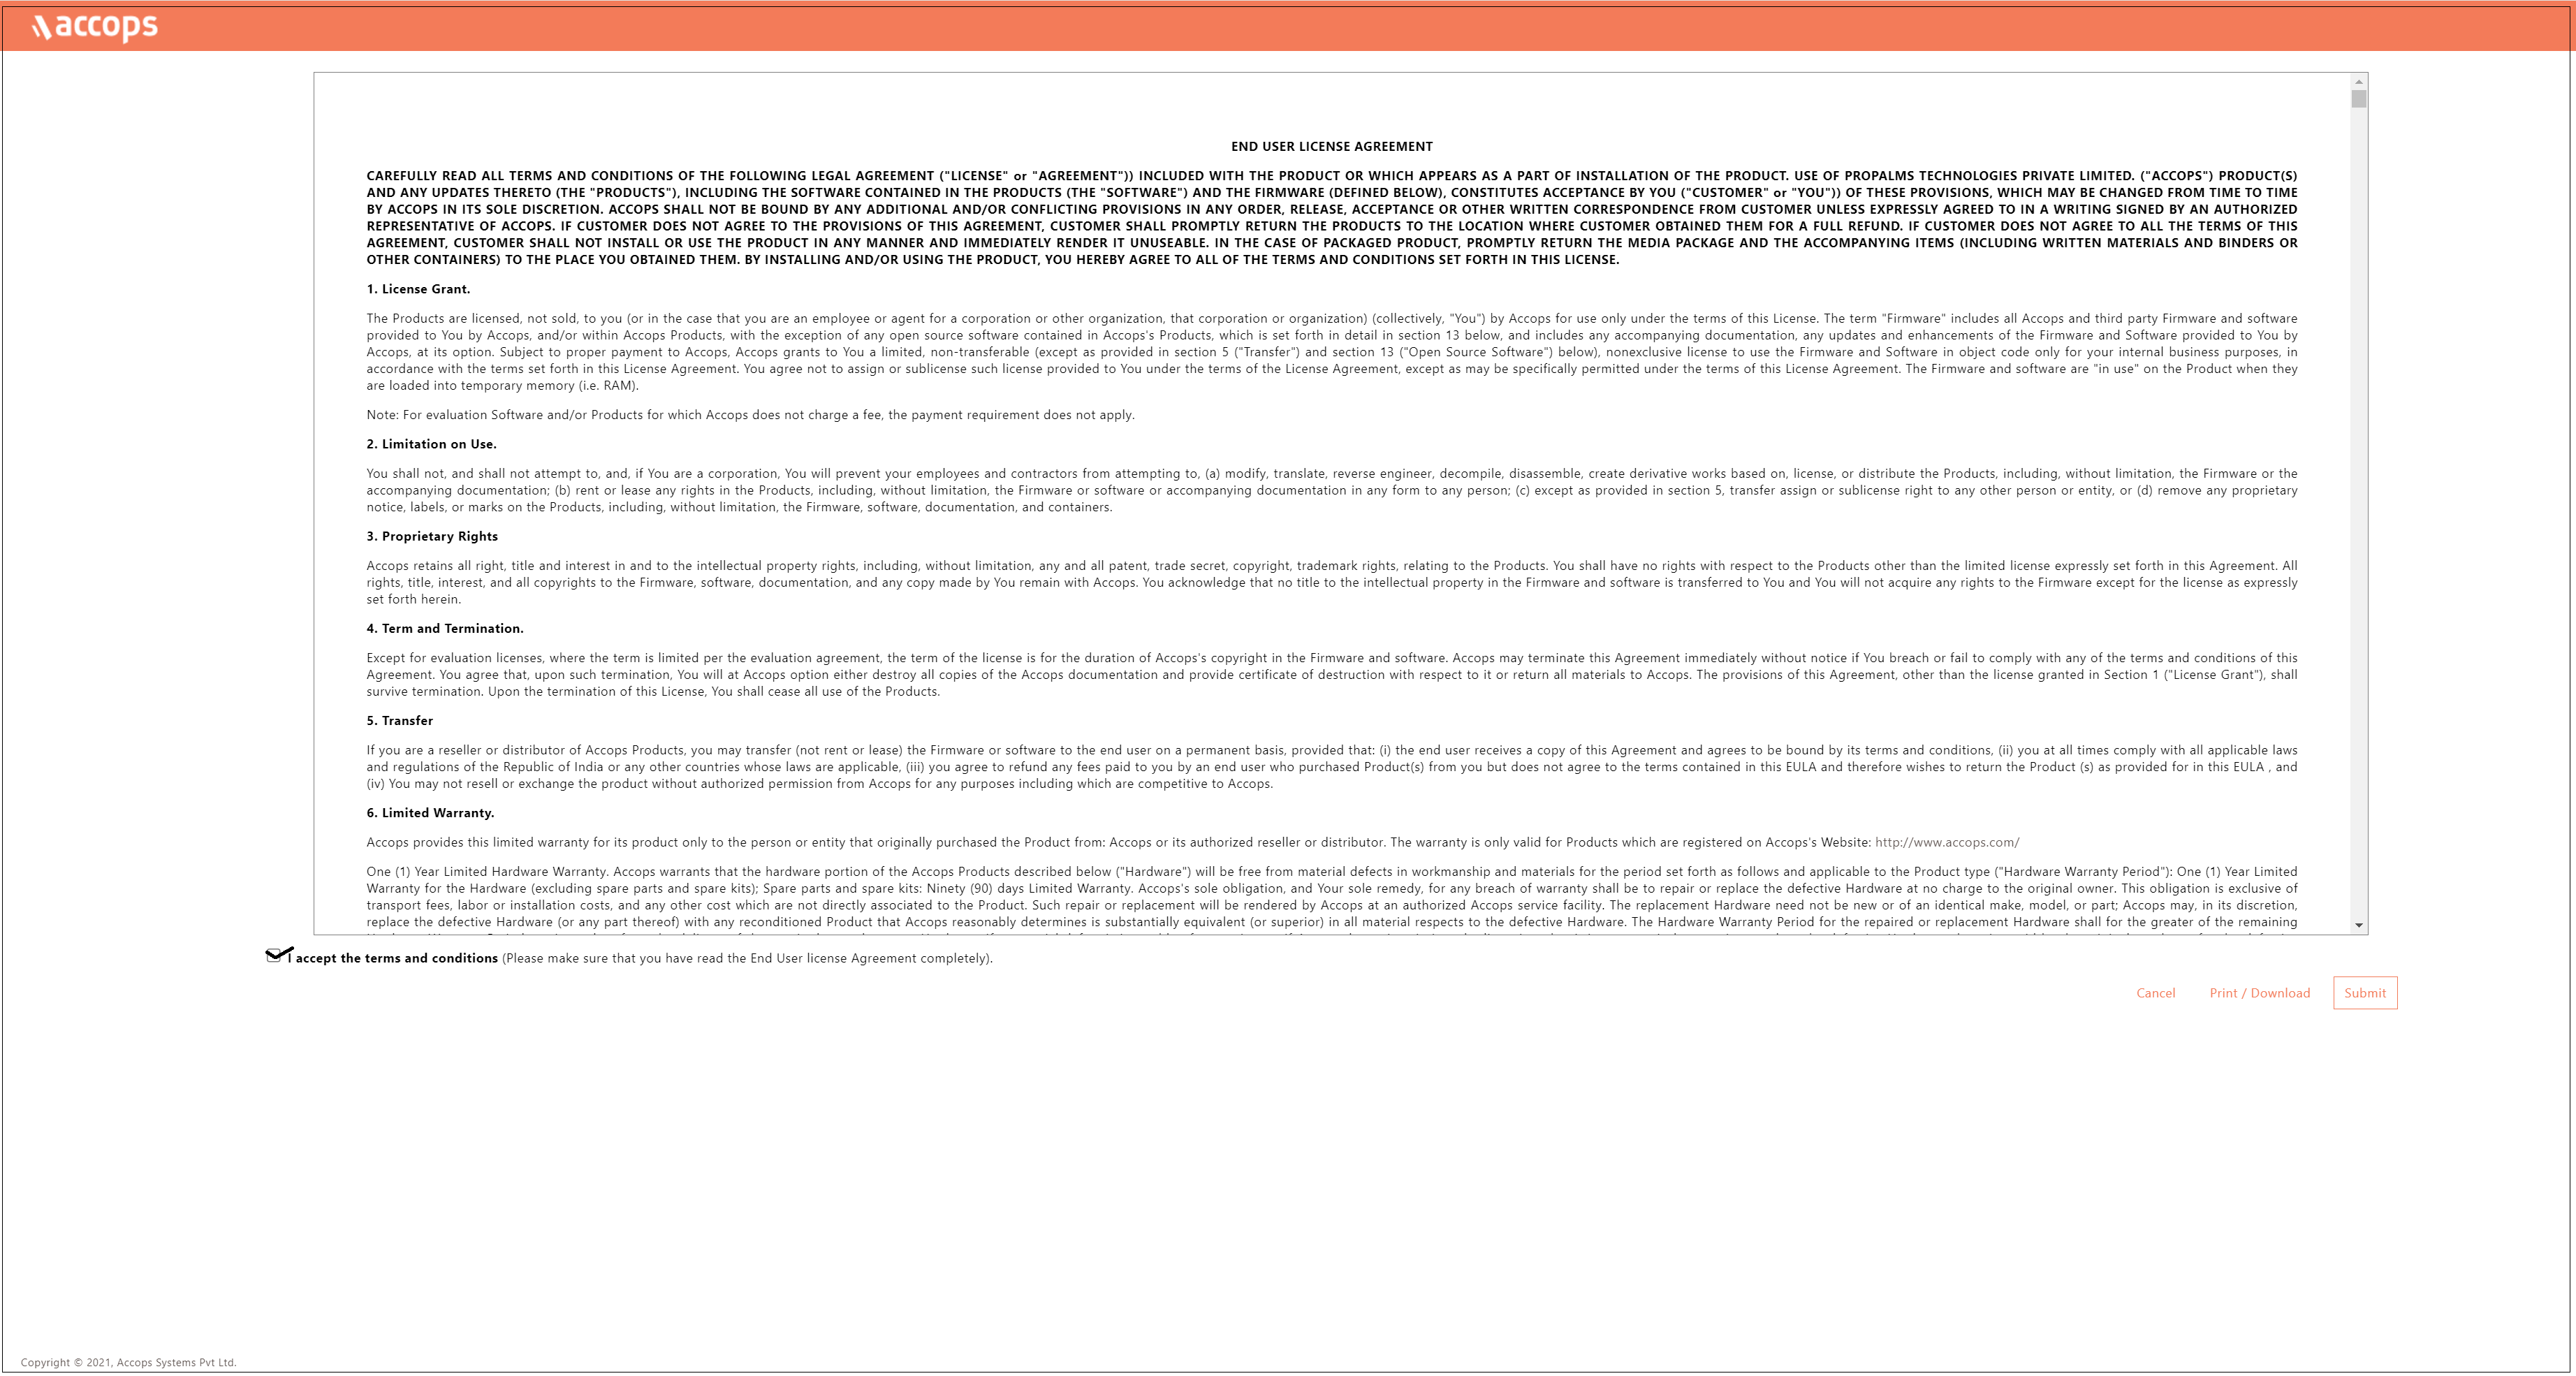
Check the I accept the terms and conditions box and click Submit.
-
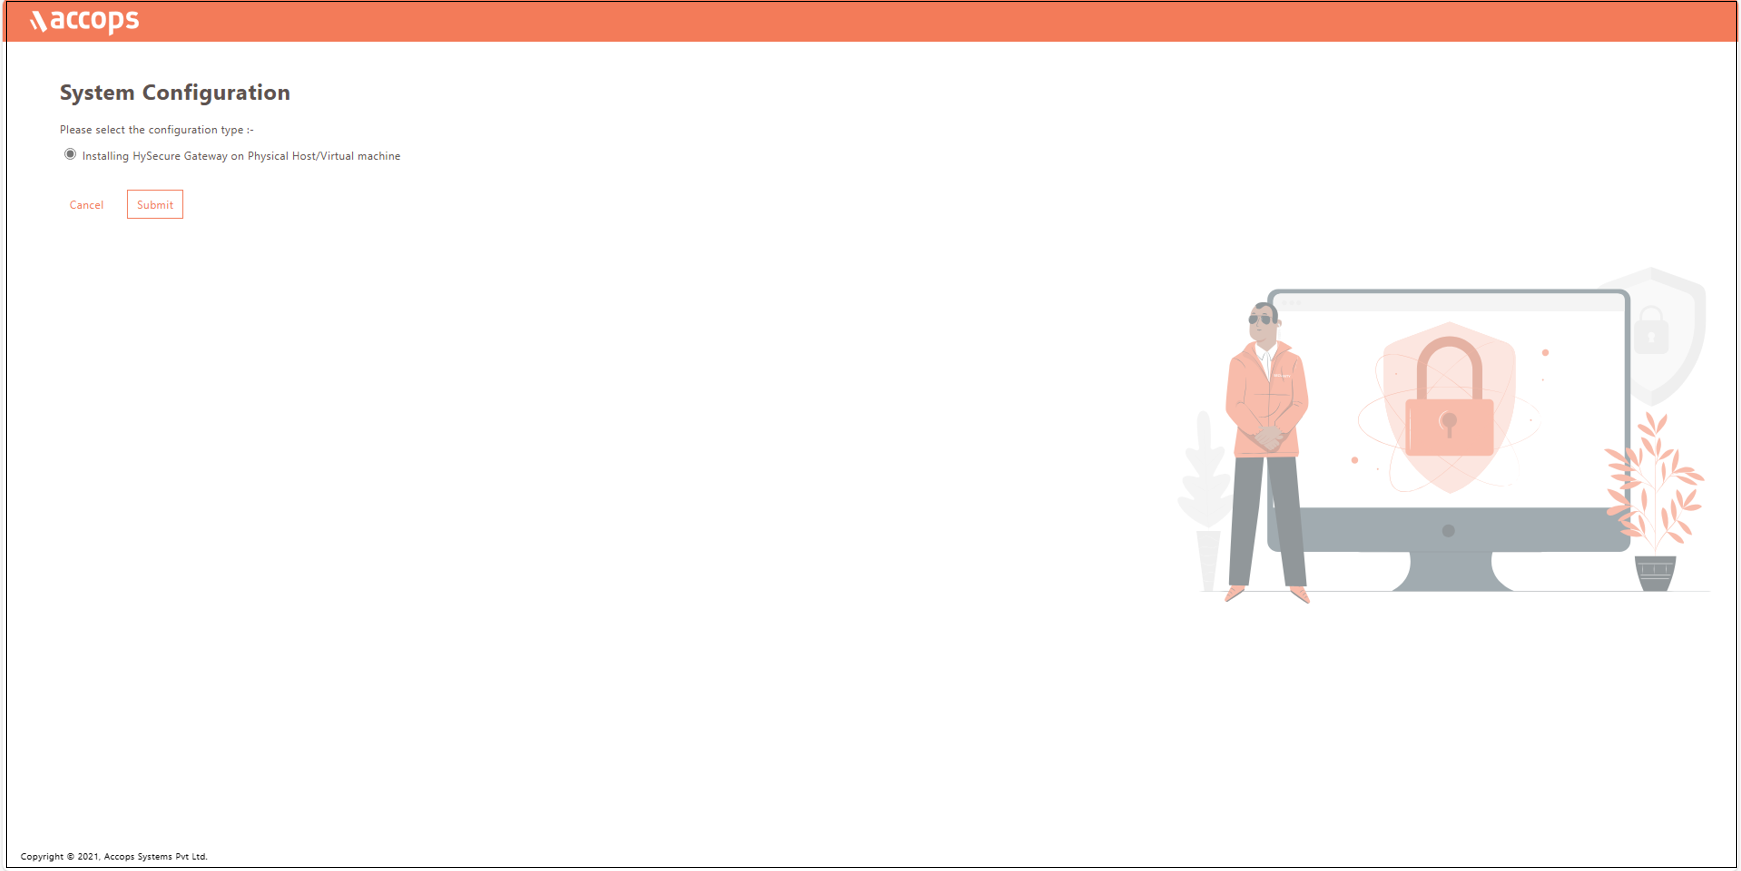
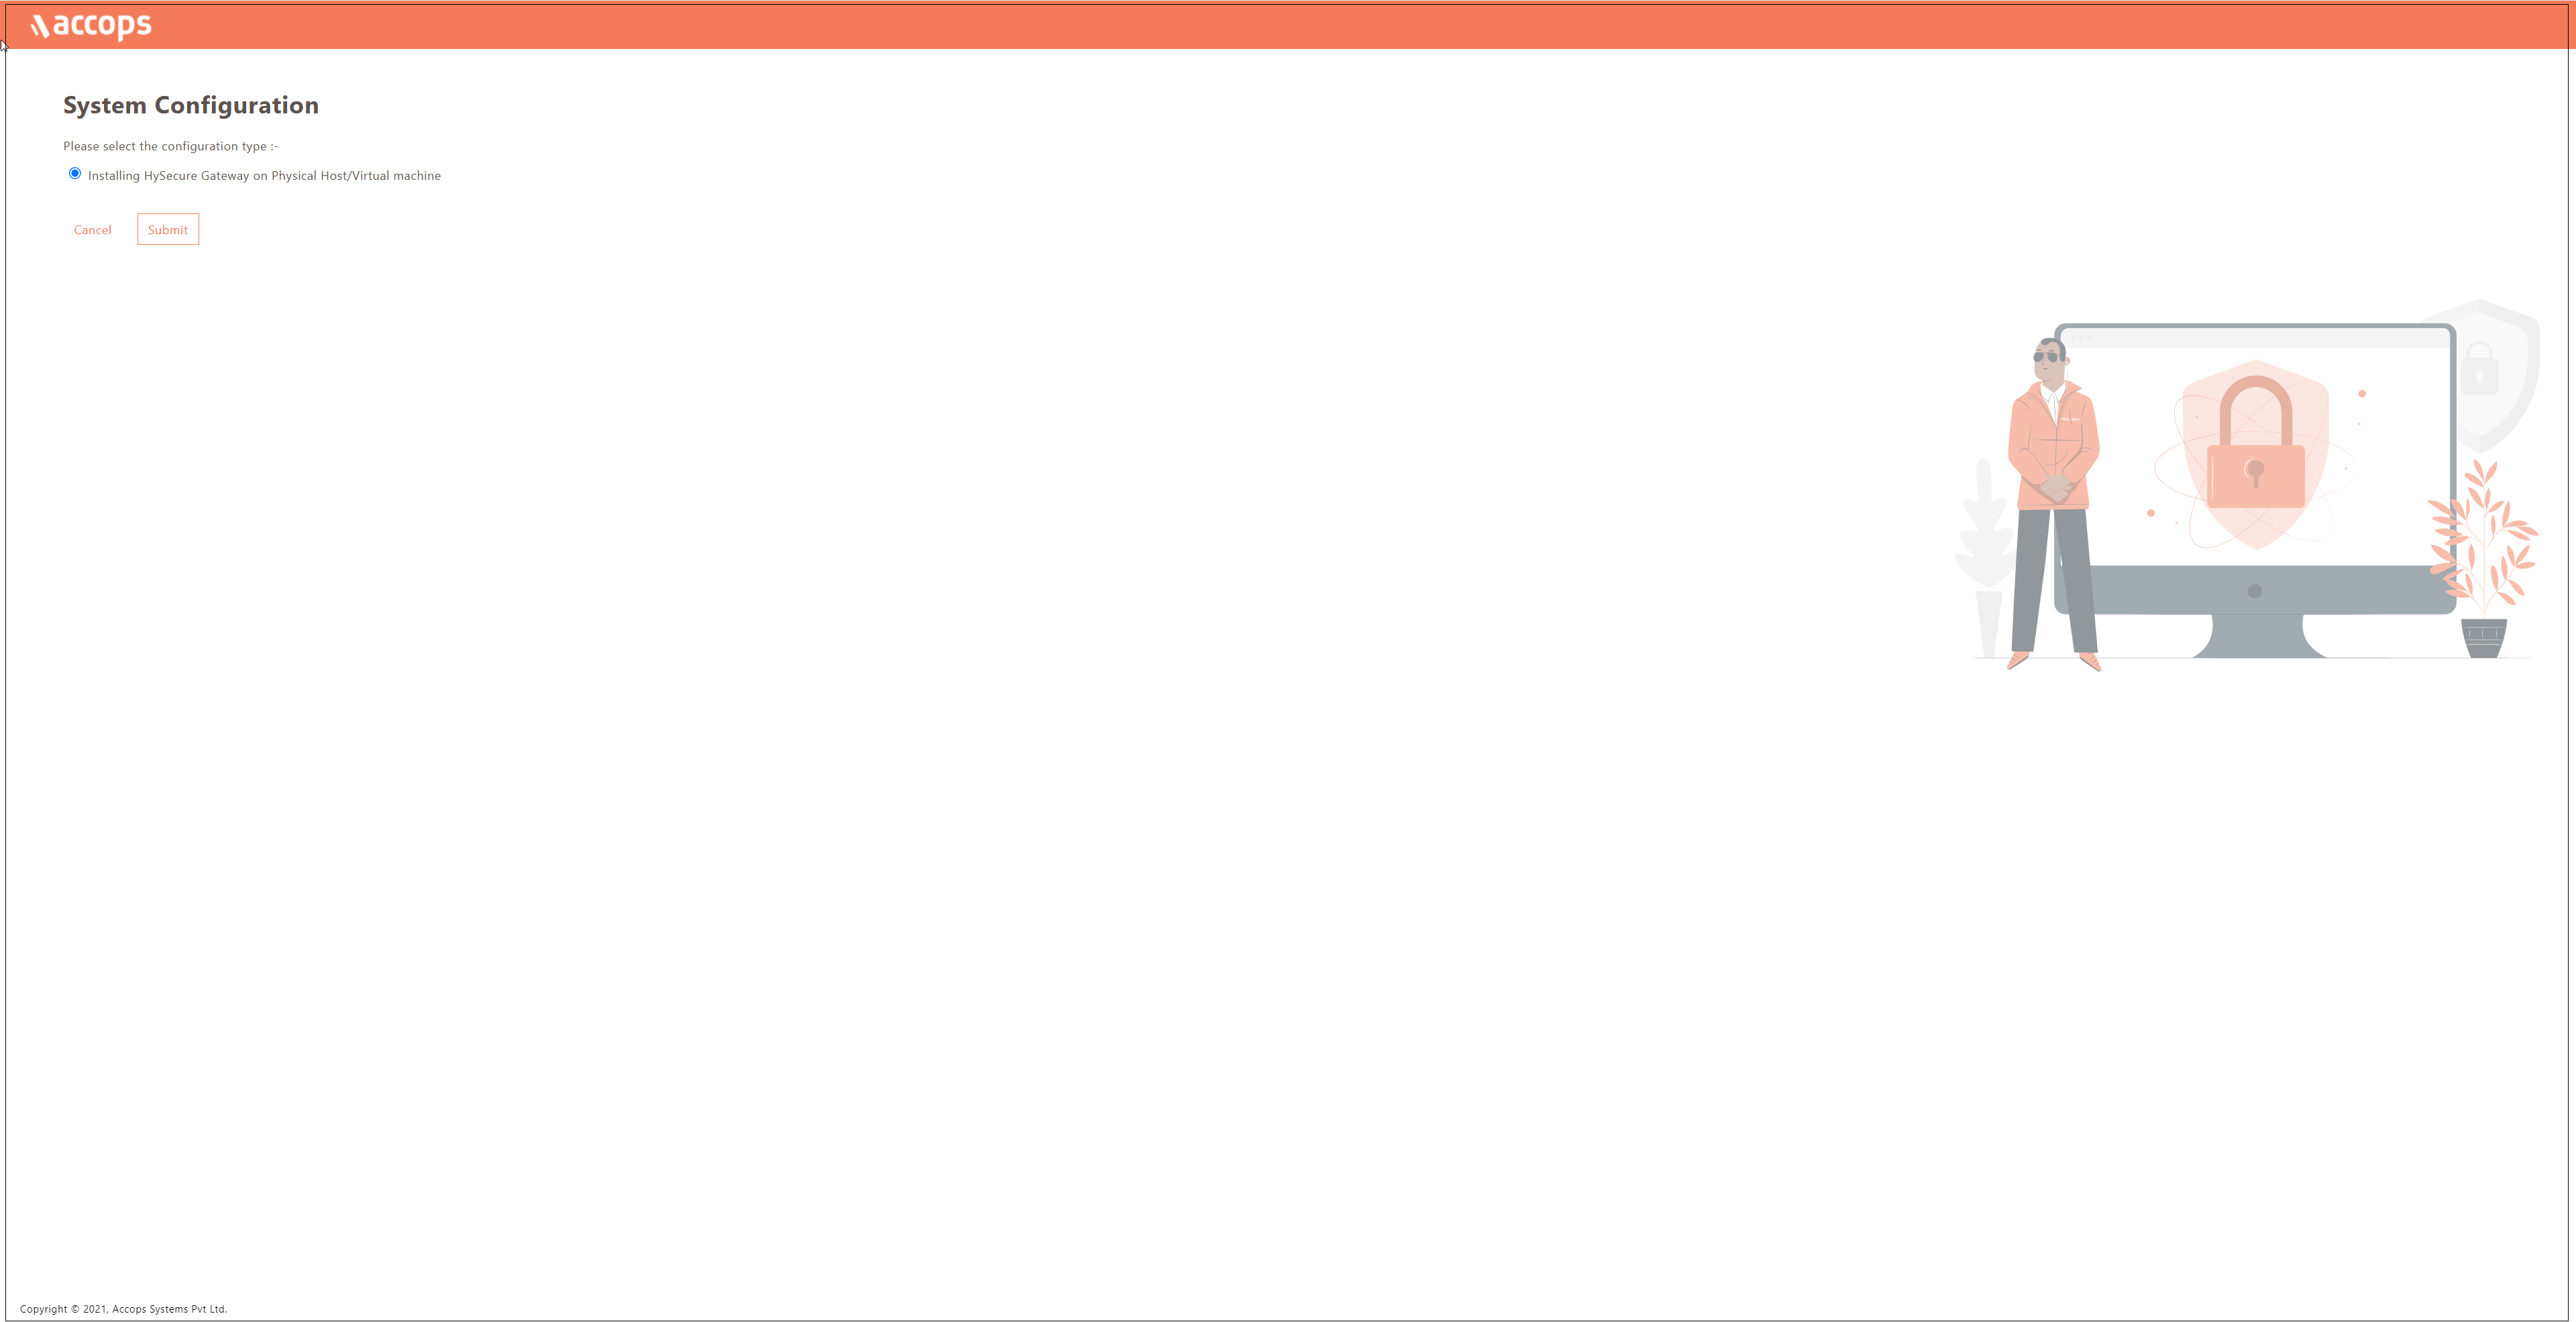
Select the configuration type Installing HySecure Gateway on Physical Host/Virtual machine from the System Configuration window and click Submit.
-
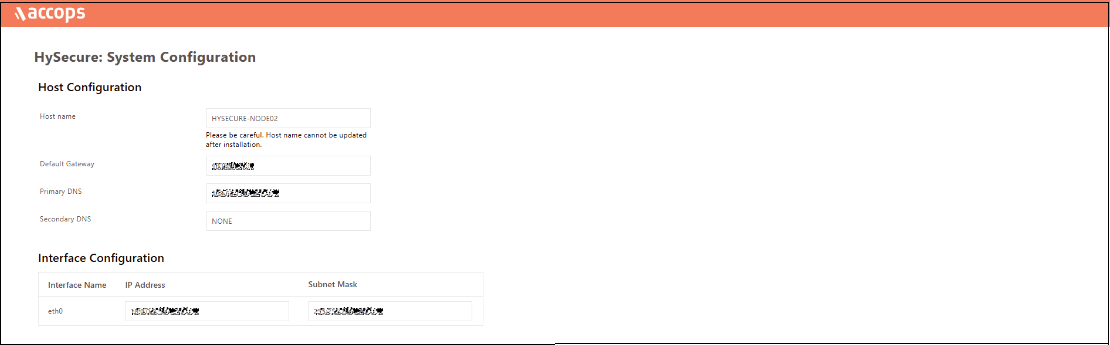
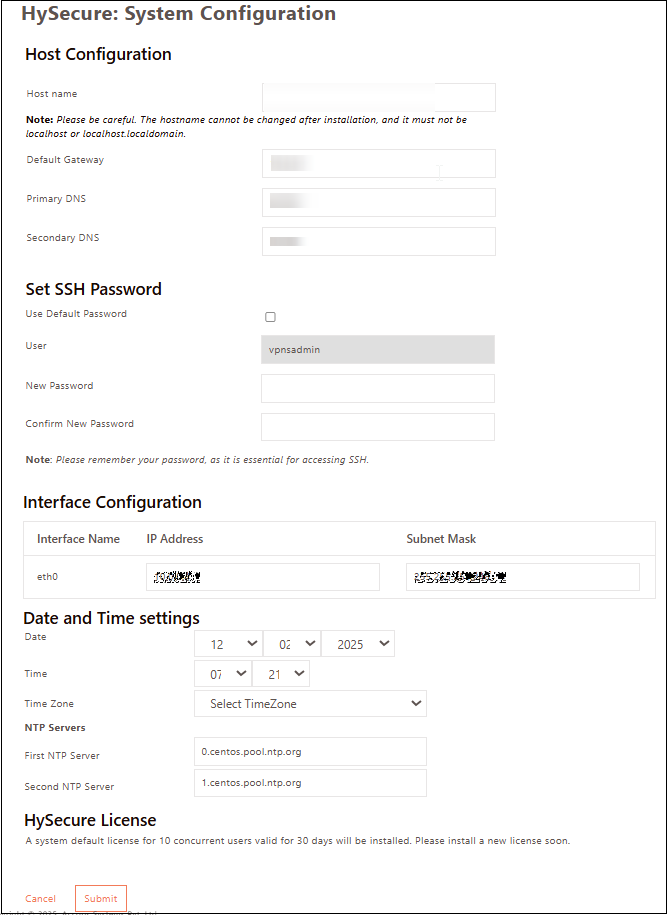
Set the Hostname, DNS server IP address, Time Zone, and NTP Servers. Set an SSH password for the gateway. If you prefer not to set a password, check the Use Default Password option. Click Submit.
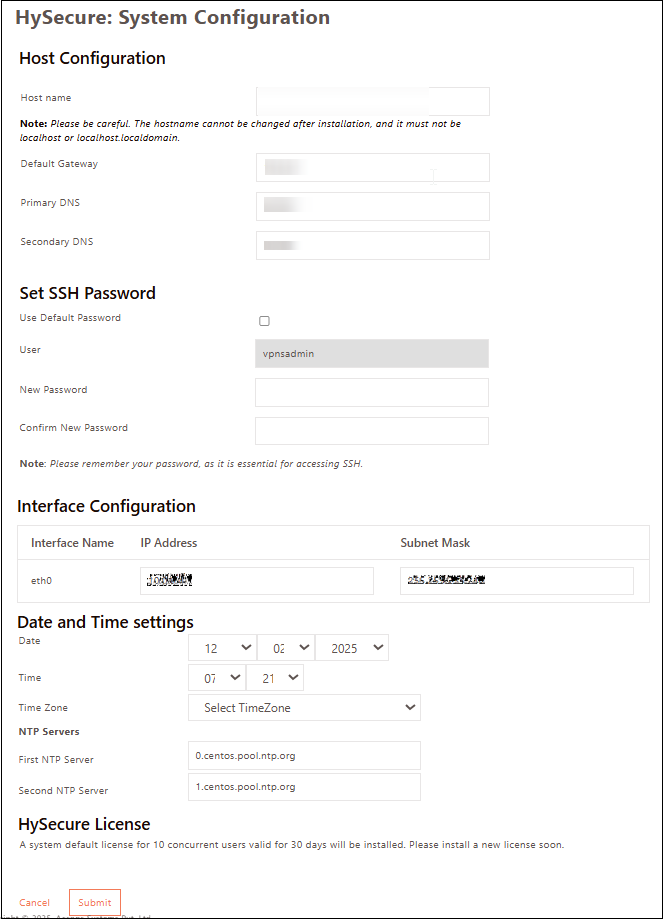
Note
- Configure the internal NTP Server. Internet access is required to reach the external NTP server.
- NTP Server configuration is a must to ensure TIME on all nodes in the cluster are in sync.
-
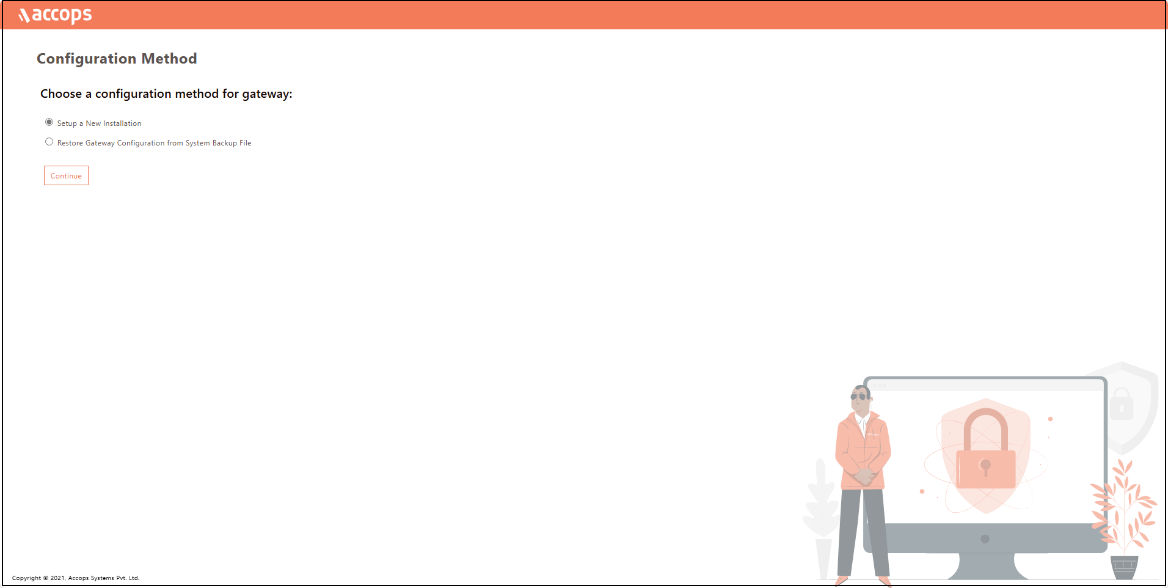
Select the Configuration Method for the gateway as Setup a New Installation and click Continue.
-
On the Certificate Authority Mode selection window, select Default Accops Internal CA for a self-signed certificate by HySecure gateway. Otherwise, select External CA to upload an External certificate in PEM format with a private key if it is available. Click Submit.

-
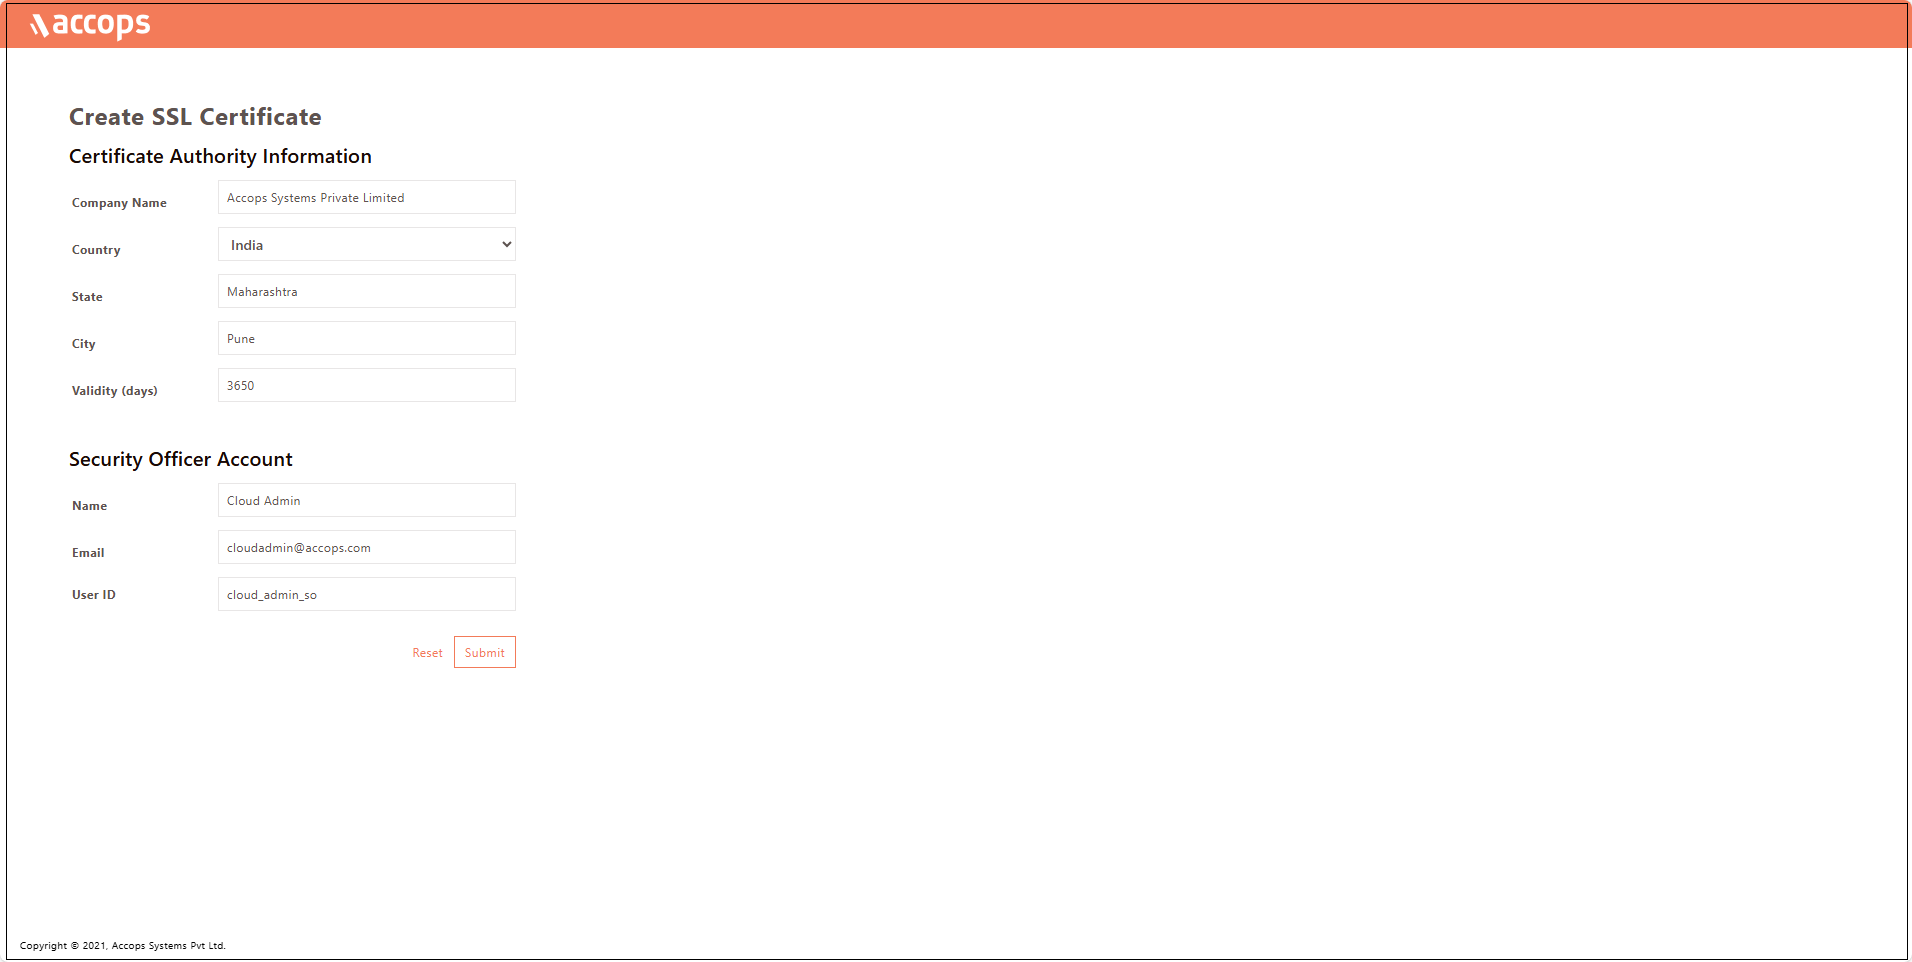
Navigate to the SSL Certificate creation platform provided by the Certificate Authority (CA).
-
Enter the details to Create SSL Certificate. The CA created is used to create a certificate for HySecure admin, which is called a Security Officer Account (SO account). Click Submit and wait for a few seconds for the operation to complete.
-
A success message and the Passphrase will be displayed. Copy the Passphrase before closing the browser window.

Preboot Secondary HySecure Node
-
Open the Web browser and enter the website address as the static IP configured on the VM. For example, browse https://10.0.0.5 and click Configure HySecure Now.
-
Check the I accept the terms and conditions box and click Submit.
-
Select the configuration type Installing HySecure Gateway on Physical Host/Virtual machine from the System Configuration window and click Submit.
-
Set the Hostname, DNS server IP address, Time Zone, and NTP Servers. Set an SSH password for the gateway. If you prefer not to set a password, check the Use Default Password option. Click Submit.
Note
- Configure the internal NTP Server. Internet access is required to reach the external NTP server.
- NTP Server configuration is a must to ensure TIME on all nodes in the cluster are in sync.
-
Select the Configuration Method for the gateway as Setup a New Installation and click Continue.
-
On the Certificate Authority Mode selection window, select Default Accops Internal CA for a self-signed certificate by HySecure gateway. Otherwise, select External CA to upload an External certificate in PEM format with a private key if it is available. Click Submit.
-
Navigate to the SSL Certificate creation platform provided by the Certificate Authority (CA).
-
Enter the details to Create SSL Certificate. The CA created is used to create a certificate for HySecure admin, which is called a Security Officer Account (SO account). Click Submit and wait for a few seconds for the operation to complete.
-
A success message and the Passphrase will be displayed. Copy the Passphrase before closing the browser window.
Preboot Third HySecure Node
-
Open the Web browser and enter the website address as the static IP configured on the VM. For example, browse https://10.0.0.7 and click on Configure HySecure Now.
-
Check the I accept the terms and conditions box and click Submit.
-
Select the configuration type Installing HySecure Gateway on Physical Host/Virtual machine from the System Configuration window and click Submit.
-
Set the Hostname, DNS server IP address, Time Zone, and NTP Servers. Set an SSH password for the gateway. If you prefer not to set a password, check the Use Default Password option. Click Submit.
Note
- Configure the internal NTP Server. Internet access is required to reach the external NTP server.
- NTP Server configuration is a must to ensure TIME on all nodes in the cluster are in sync.
-
Select the Configuration Method for the gateway as Setup a New Installation and click Continue.

-
On the Certificate Authority Mode selection window, select Default Accops Internal CA for a self-signed certificate by HySecure gateway. Otherwise, select an External CA to upload an External certificate in PEM format with a private key if available. Click Submit.

-
Navigate to the SSL Certificate creation platform provided by the Certificate Authority (CA).
-
Enter the details to Create an SSL Certificate. The CA created is used to create a certificate for HySecure admin, which is called a Security Officer Account (SO account). Click Submit and wait for a few seconds for the operation to complete.

-
A success message and the Passphrase will be displayed. Copy the Passphrase before closing the browser window.

Following the above steps, you can complete the Preboot execution post-VM deployment.
Installing HySecure Client
After completing the preboot process, the next essential step is to install the Windows HySecure Client.
The Windows HySecure Client is imperative for secure access to the HySecure management console. This ensures that all administrative operations are executed securely, thereby protecting the cluster from unauthorized access and potential security threats.
Note
- Administrative privileges are NOT supported on Mac and Linux platforms.
- It is recommended to use the latest version of HTML 5-supported browsers like Edge, Chrome or Firefox to access the HySecure Management Console.
Follow the steps below to install the HySecure Client:
-
Download HySecure Client:
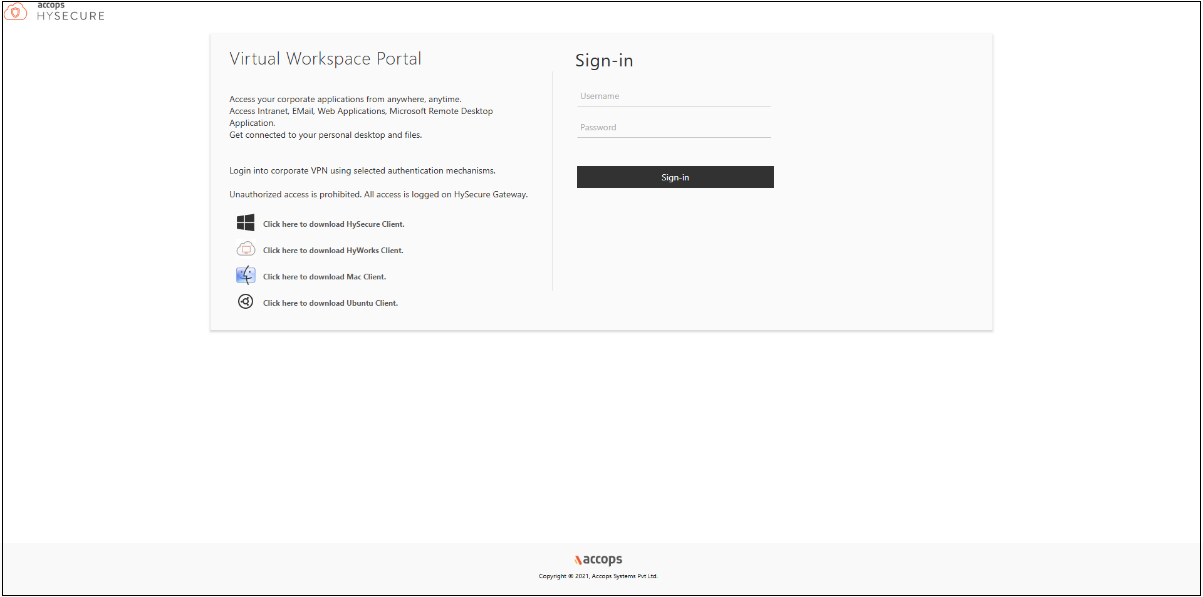
- From the Windows system, open an HTML5-supported web browser (Microsoft Edge, Google Chrome, or Mozilla Firefox).
- Enter the HySecure VM IP address to access the download page.
- Download the HySecure Client.
-
Install the HySecure Client (Admin privileges required):
- Locate the downloaded executable file and run it.
- Follow the installation wizard steps to complete the installation.
Enroll the Primary HySecure Gateway Certificate
-
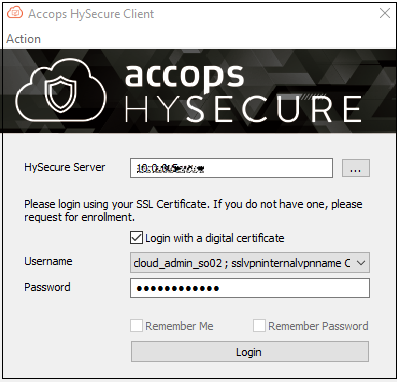
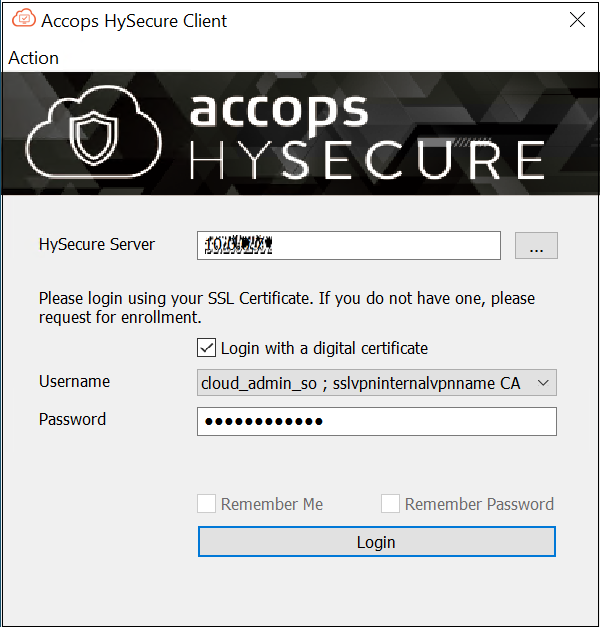
Launch the HySecure Client:
- After installation, launch the HySecure Client by entering the HySecure VM IP address in the client interface.
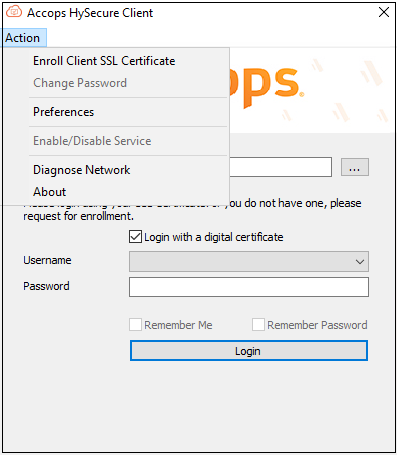
- Select the option Login with a digital certificate.
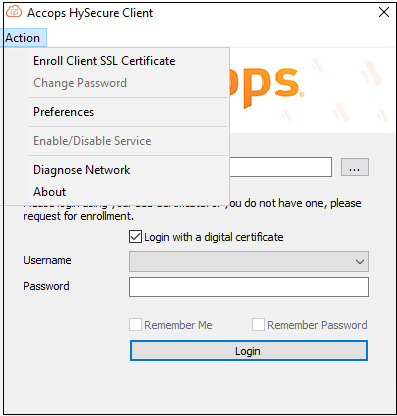
- Click Action to enroll the Security Officer (SO) account.
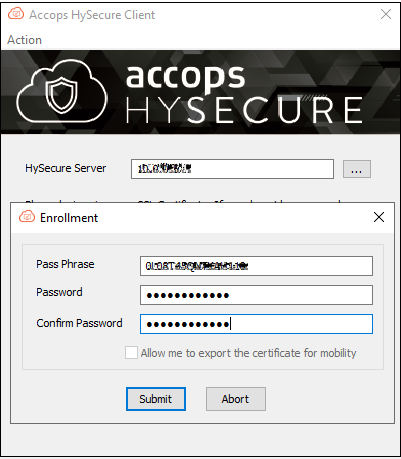
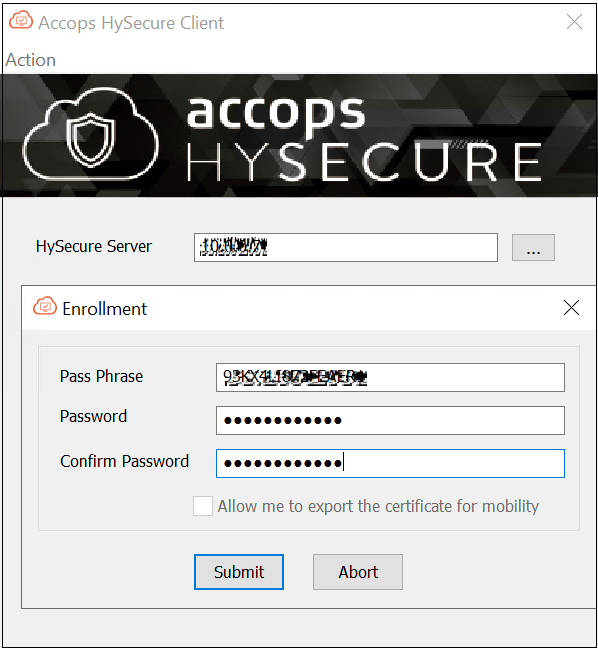
-
Enter the Passphrase and Set a Password:
- Enter the Passphrase that was created during the preboot execution process.
- Set a new password for the Security Officer (SO) account.
- Click Submit to complete the Enrollment.

-
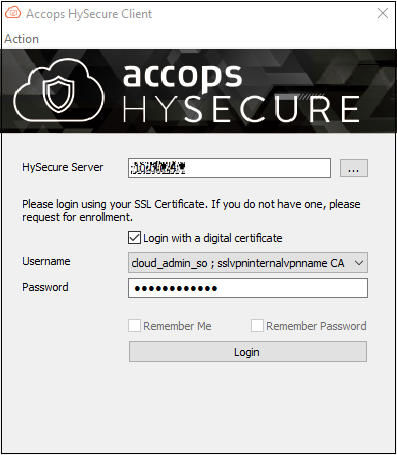
Login and Access the Management Console:
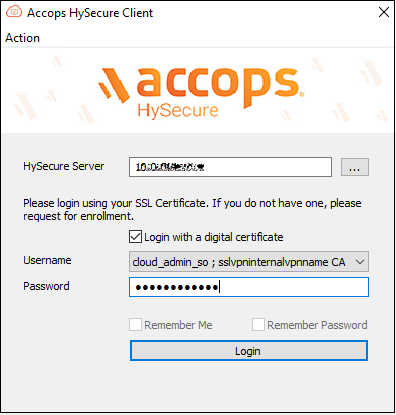
- Open a HySecure client instance. Select the box Login with a digital certificate and enter the password. Click Login.
- The browser will open automatically and display the HySecure Management Console.
Enroll the Secondary HySecure Gateway Certificate
-
Launch the HySecure Client:
- After installation, launch the HySecure Client by entering the HySecure VM IP address in the client interface.
- Select the option Login with a digital certificate.
- Click Action to enroll the Security Officer (SO) account.
-
Enter the Passphrase and Set a Password:
- Enter the Passphrase that was created during the preboot execution process.
- Set a new password for the Security Officer (SO) account.
- Click Submit to complete the Enrollment.
-
Login and Access the Management Console:
- Open a HySecure client instance. Select the box Login with a digital certificate and enter the password. Click Login.
- The browser will open automatically and display the HySecure Management Console.
Enroll the Third HySecure Gateway Certificate
-
Launch the HySecure Client:
- After installation, launch the HySecure Client by entering the HySecure VM IP address in the client interface.
- Select the option Login with a digital certificate.
- Click Action to enroll the Security Officer (SO) account.
-
Enter the Passphrase and Set a Password:
- Enter the Passphrase that was created during the Preboot execution process.
- Set a new password for the Security Officer (SO) account.
- Click Submit to complete the Enrollment.
-
Login and Access the Management Console:
- Open a HySecure client instance. Select the box Login with a digital certificate and enter the password. Click Login.
- The browser will open automatically and display the HySecure Management Console.
The HySecure Client is now installed successfully.
Creating an Internal Load Balancer for the HA Configuration
-
Log into the Azure Portal:
- Go to https://portal.azure.com and sign in with your Azure account.
-
Navigate to Load Balancers and click Create.
-
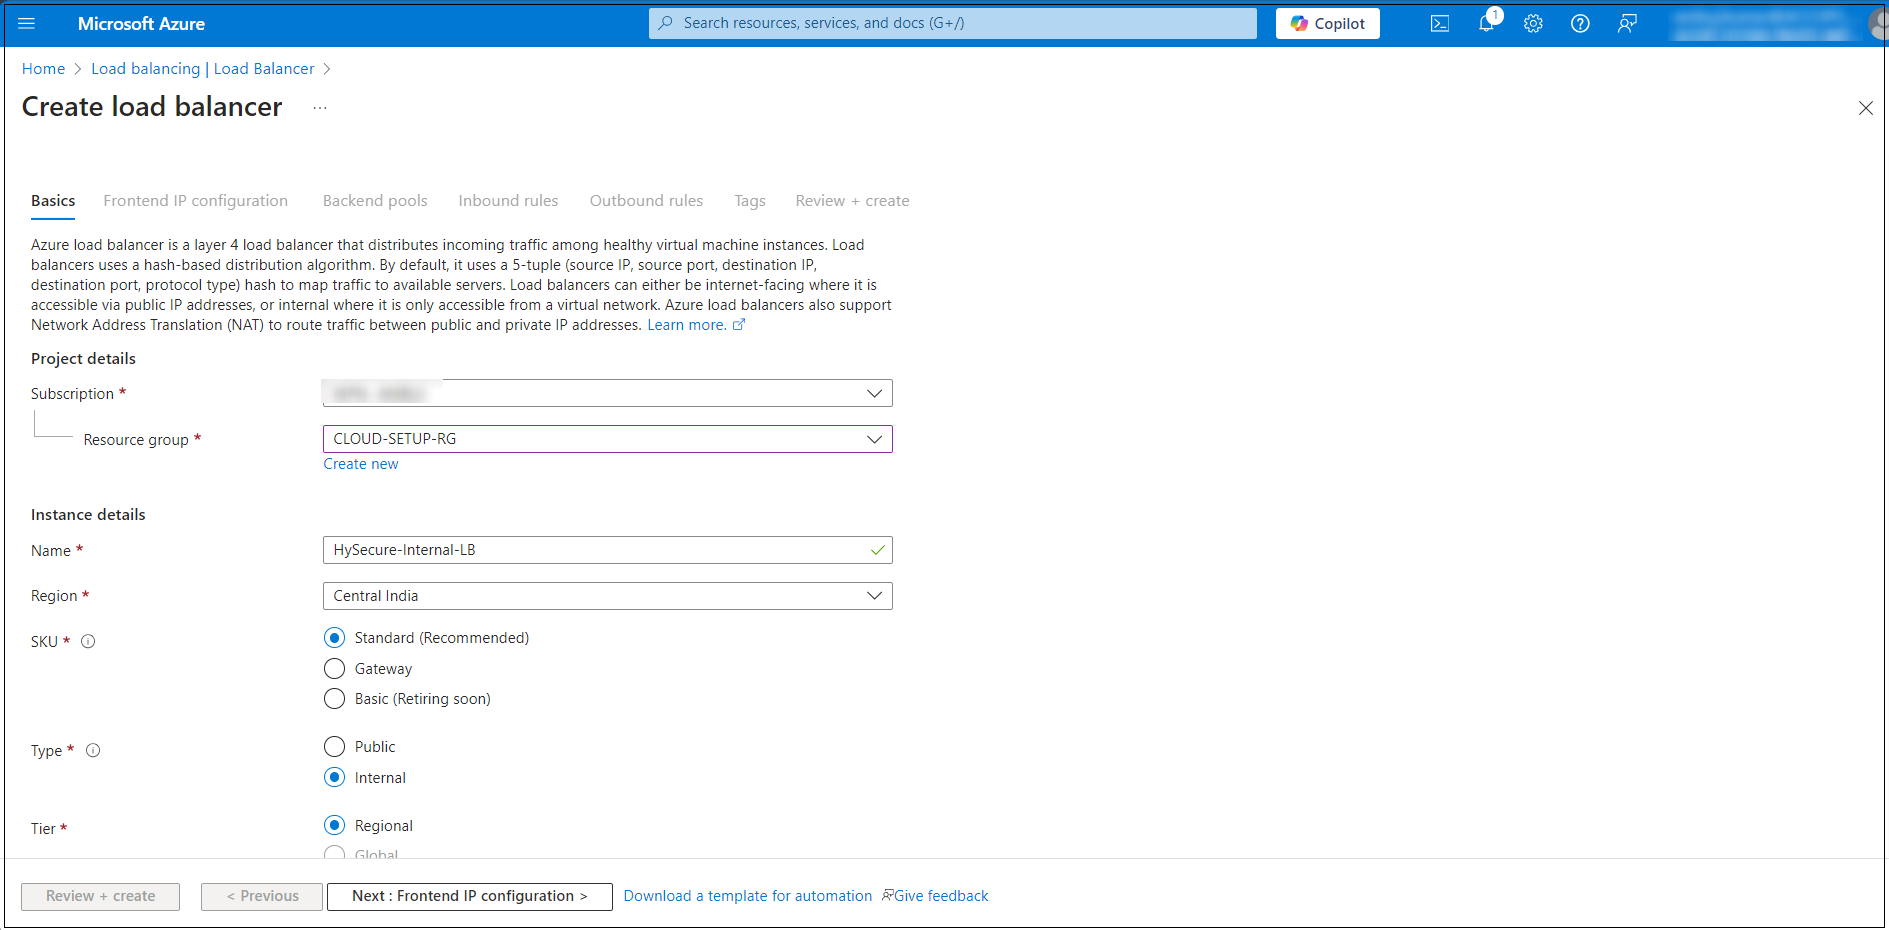
Configure the following:
- Resource Group: Select the one same as used earlier (e.g. CLOUD-SETUP-RG).
- Name: Enter a name for the Load Balancer.
- Region: Same as the VNet.
- SKU: Choose Standard for production or Basic for testing.
-
Type: Select Internal.
-
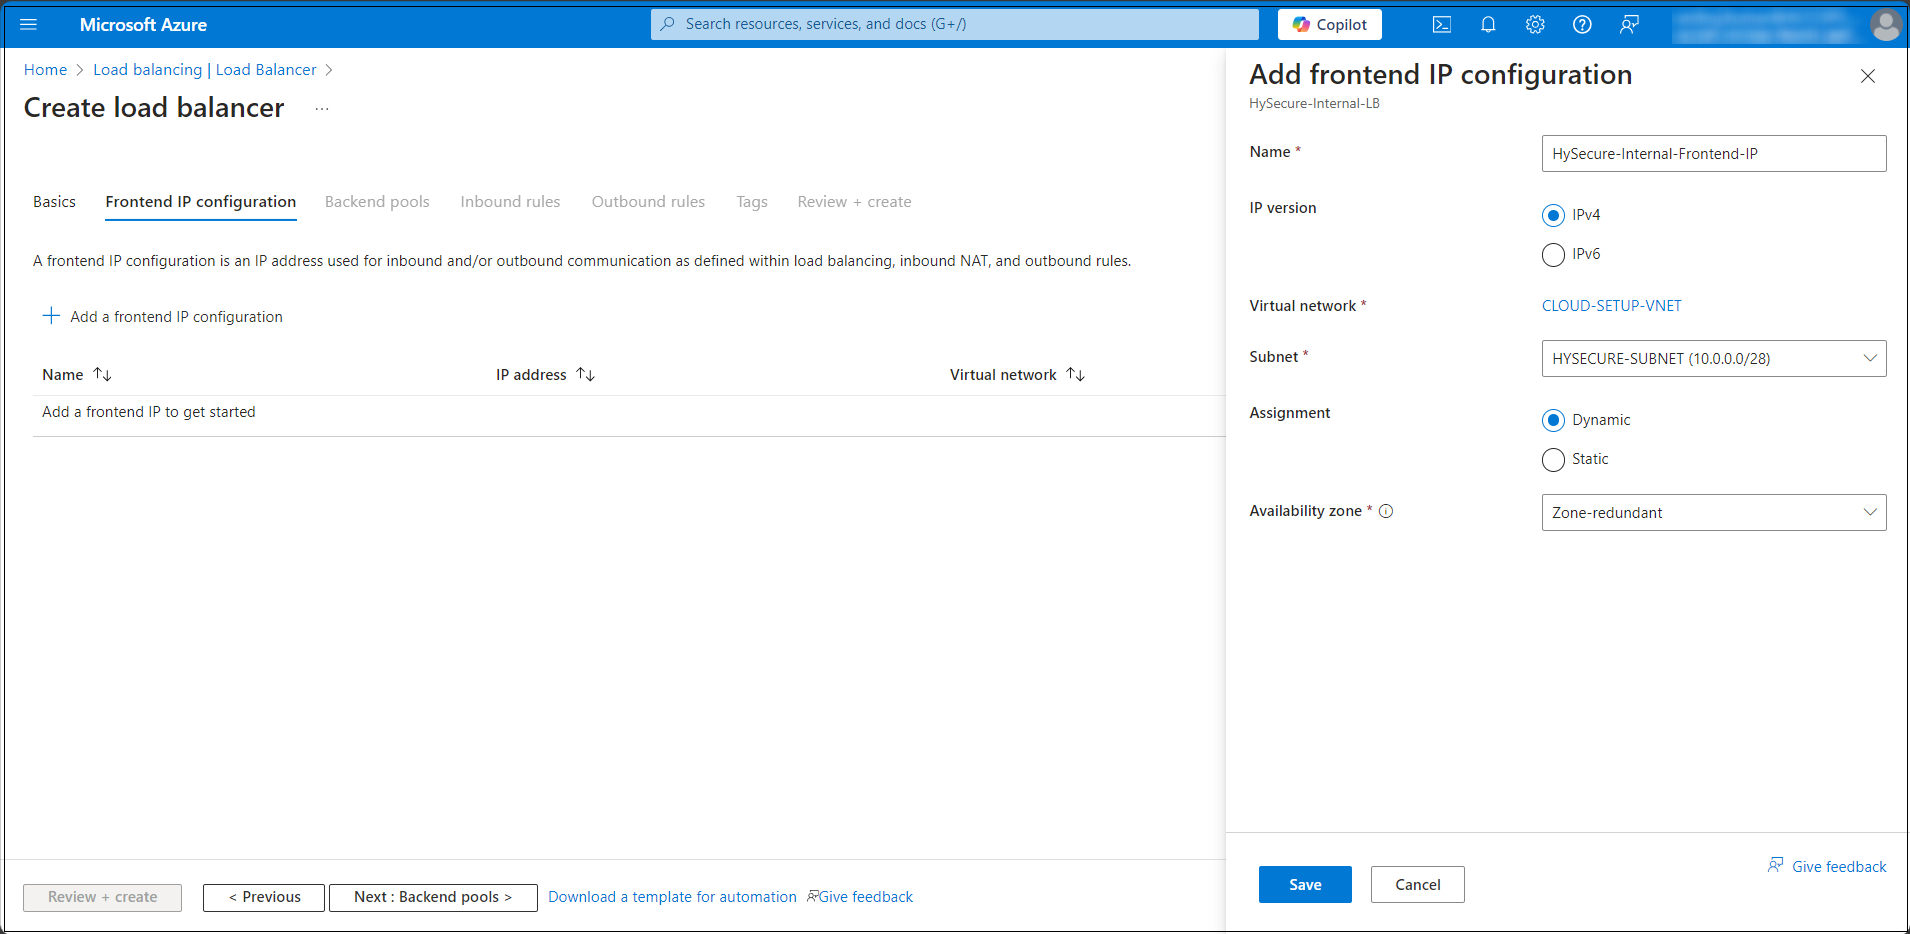
After completing the Internal Load Balancer’s initial setup, click the Frontend IP configuration tab. Enter the details and click Save.
-
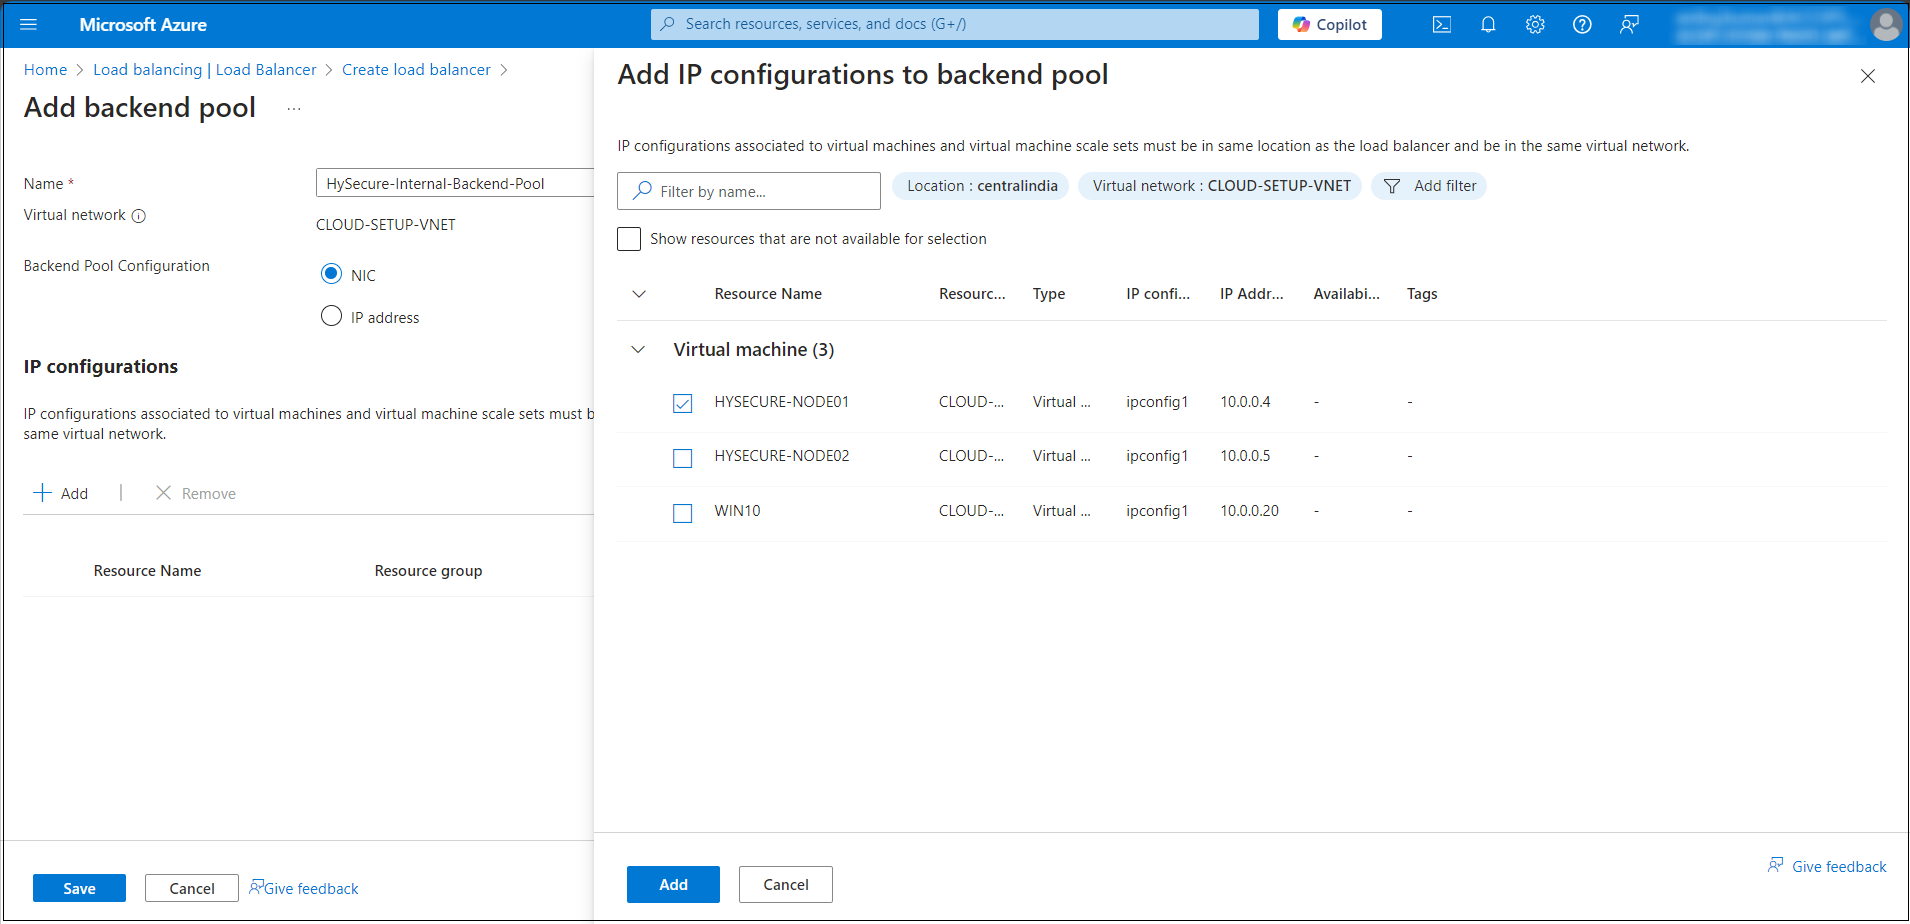
Configuring the Internal Load Balancer Backend Pool:
- In the Load Balancer creation wizard, navigate to the Backend Pools tab.
- Click Add to create a new backend pool.
- In the Add Backend Pool window enter the following details:
- Name: Enter a descriptive name for the backend pool (e.g. BackendPool).
- Virtual Network: Select the Virtual Network where the backend resources (VMs) are deployed (e.g., CLOUD-SETUP-VNET).
- Associated Subnet: Select the subnet where the backend VMs reside (e.g. Backend-Subnet).
- Add Virtual Machines: Select the VMs or availability sets you want to add to the backend pool (e.g., HYSECURE-NODE01).
-
Review and Create: After configuring the backend pool click Review & Create.
-
Select the Internal LB from the Load Balancer page to proceed with any further configurations.
-
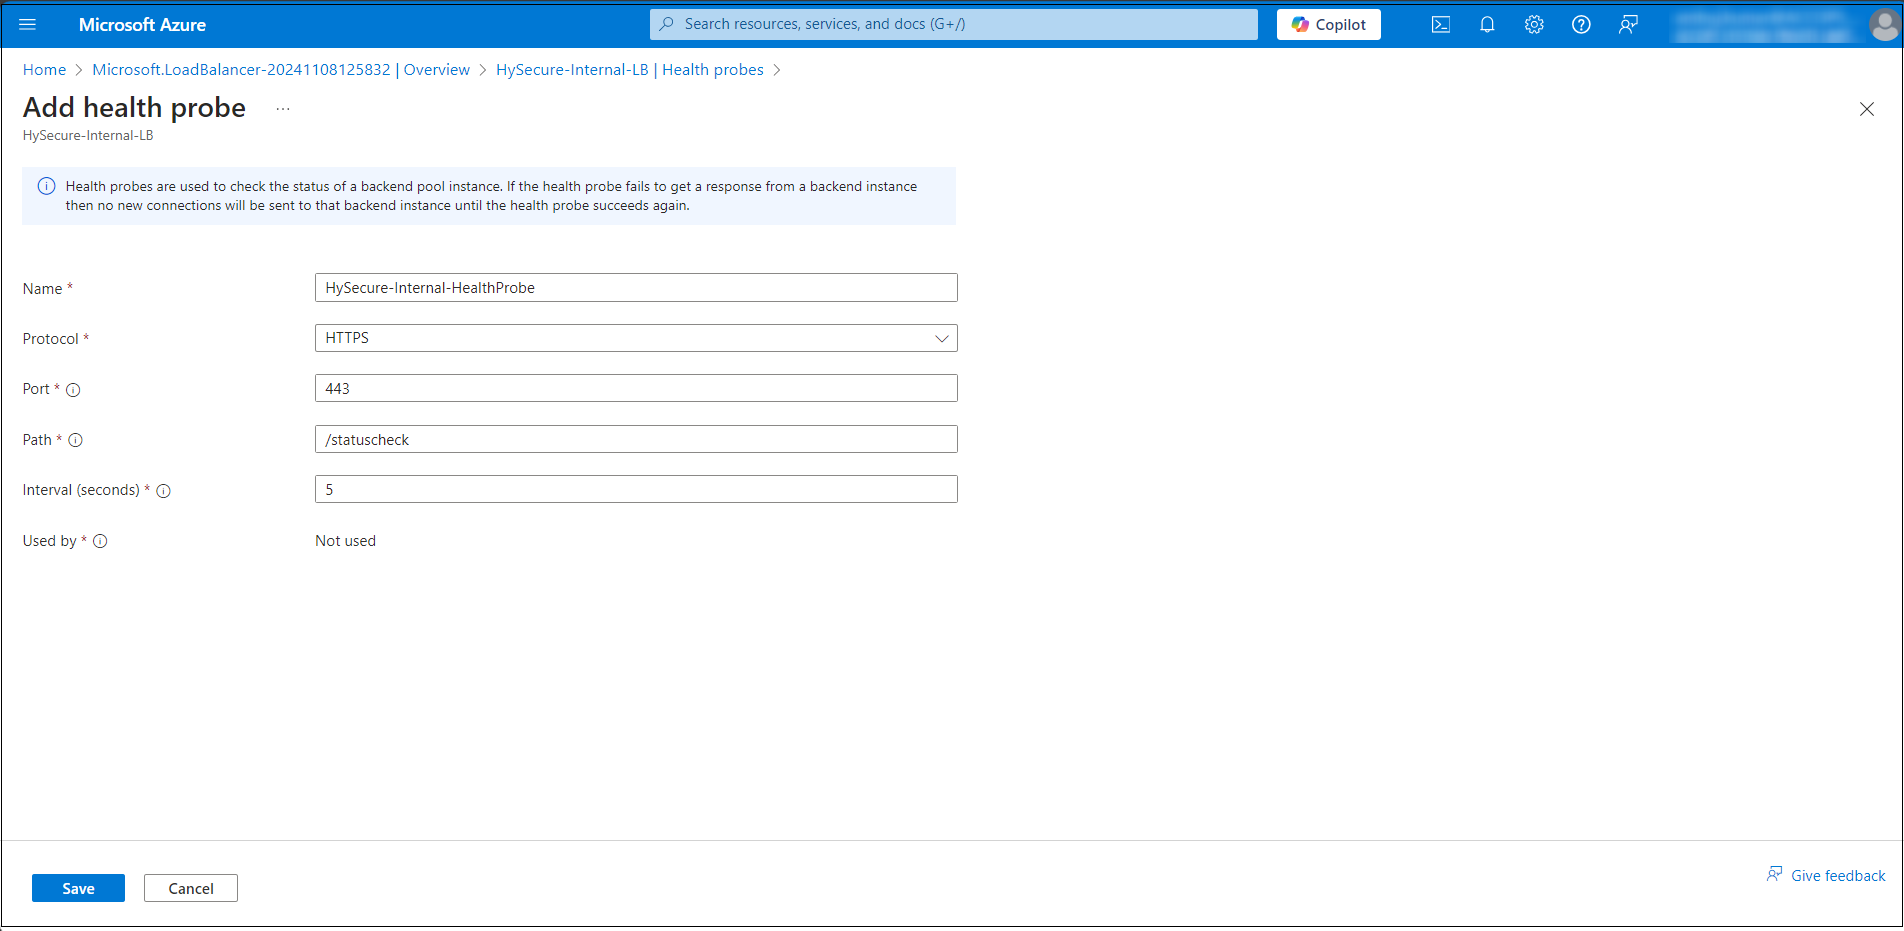
Configure the Health Probe Details. Click Add health probe and enter the following details:
- Name: Enter a name for the health probe (e.g., HySecure-Internal-HealthProbe). This is a name you get to define for your health probe.
- Protocol: Select the protocol to monitor the backend health (e.g. HTTPS: Monitors HTTPS response status). This is the protocol type you would like the health probe to leverage. Available options are TCP, HTTP, and HTTPS.
- Port: Specify the port number that the probe will check (e.g. 443 for HTTPS). The destination port you would like the health probe to use when it connects to the virtual machine to check the virtual machine's health status. You must ensure that the virtual machine is also listening on this port (that is, the port is open).
- Path (for HTTPS protocols): Enter the path to monitor (e.g. /status check). The health probe uses the URI to request health status from the virtual machine instance (only applicable for HTTP(s) probes).
- Interval (seconds): Specify the interval (in seconds) between health probe attempts (e.g. 5 seconds). The amount of time (in seconds) between consecutive health check attempts to the virtual machine.
- Used by: The list of load balancer rules using this specific health probe. You should have at least one rule using the health probe for it to be effective
- Save the Health Probe Configuration: Click OK to save the health probe after filling out the required details.
-
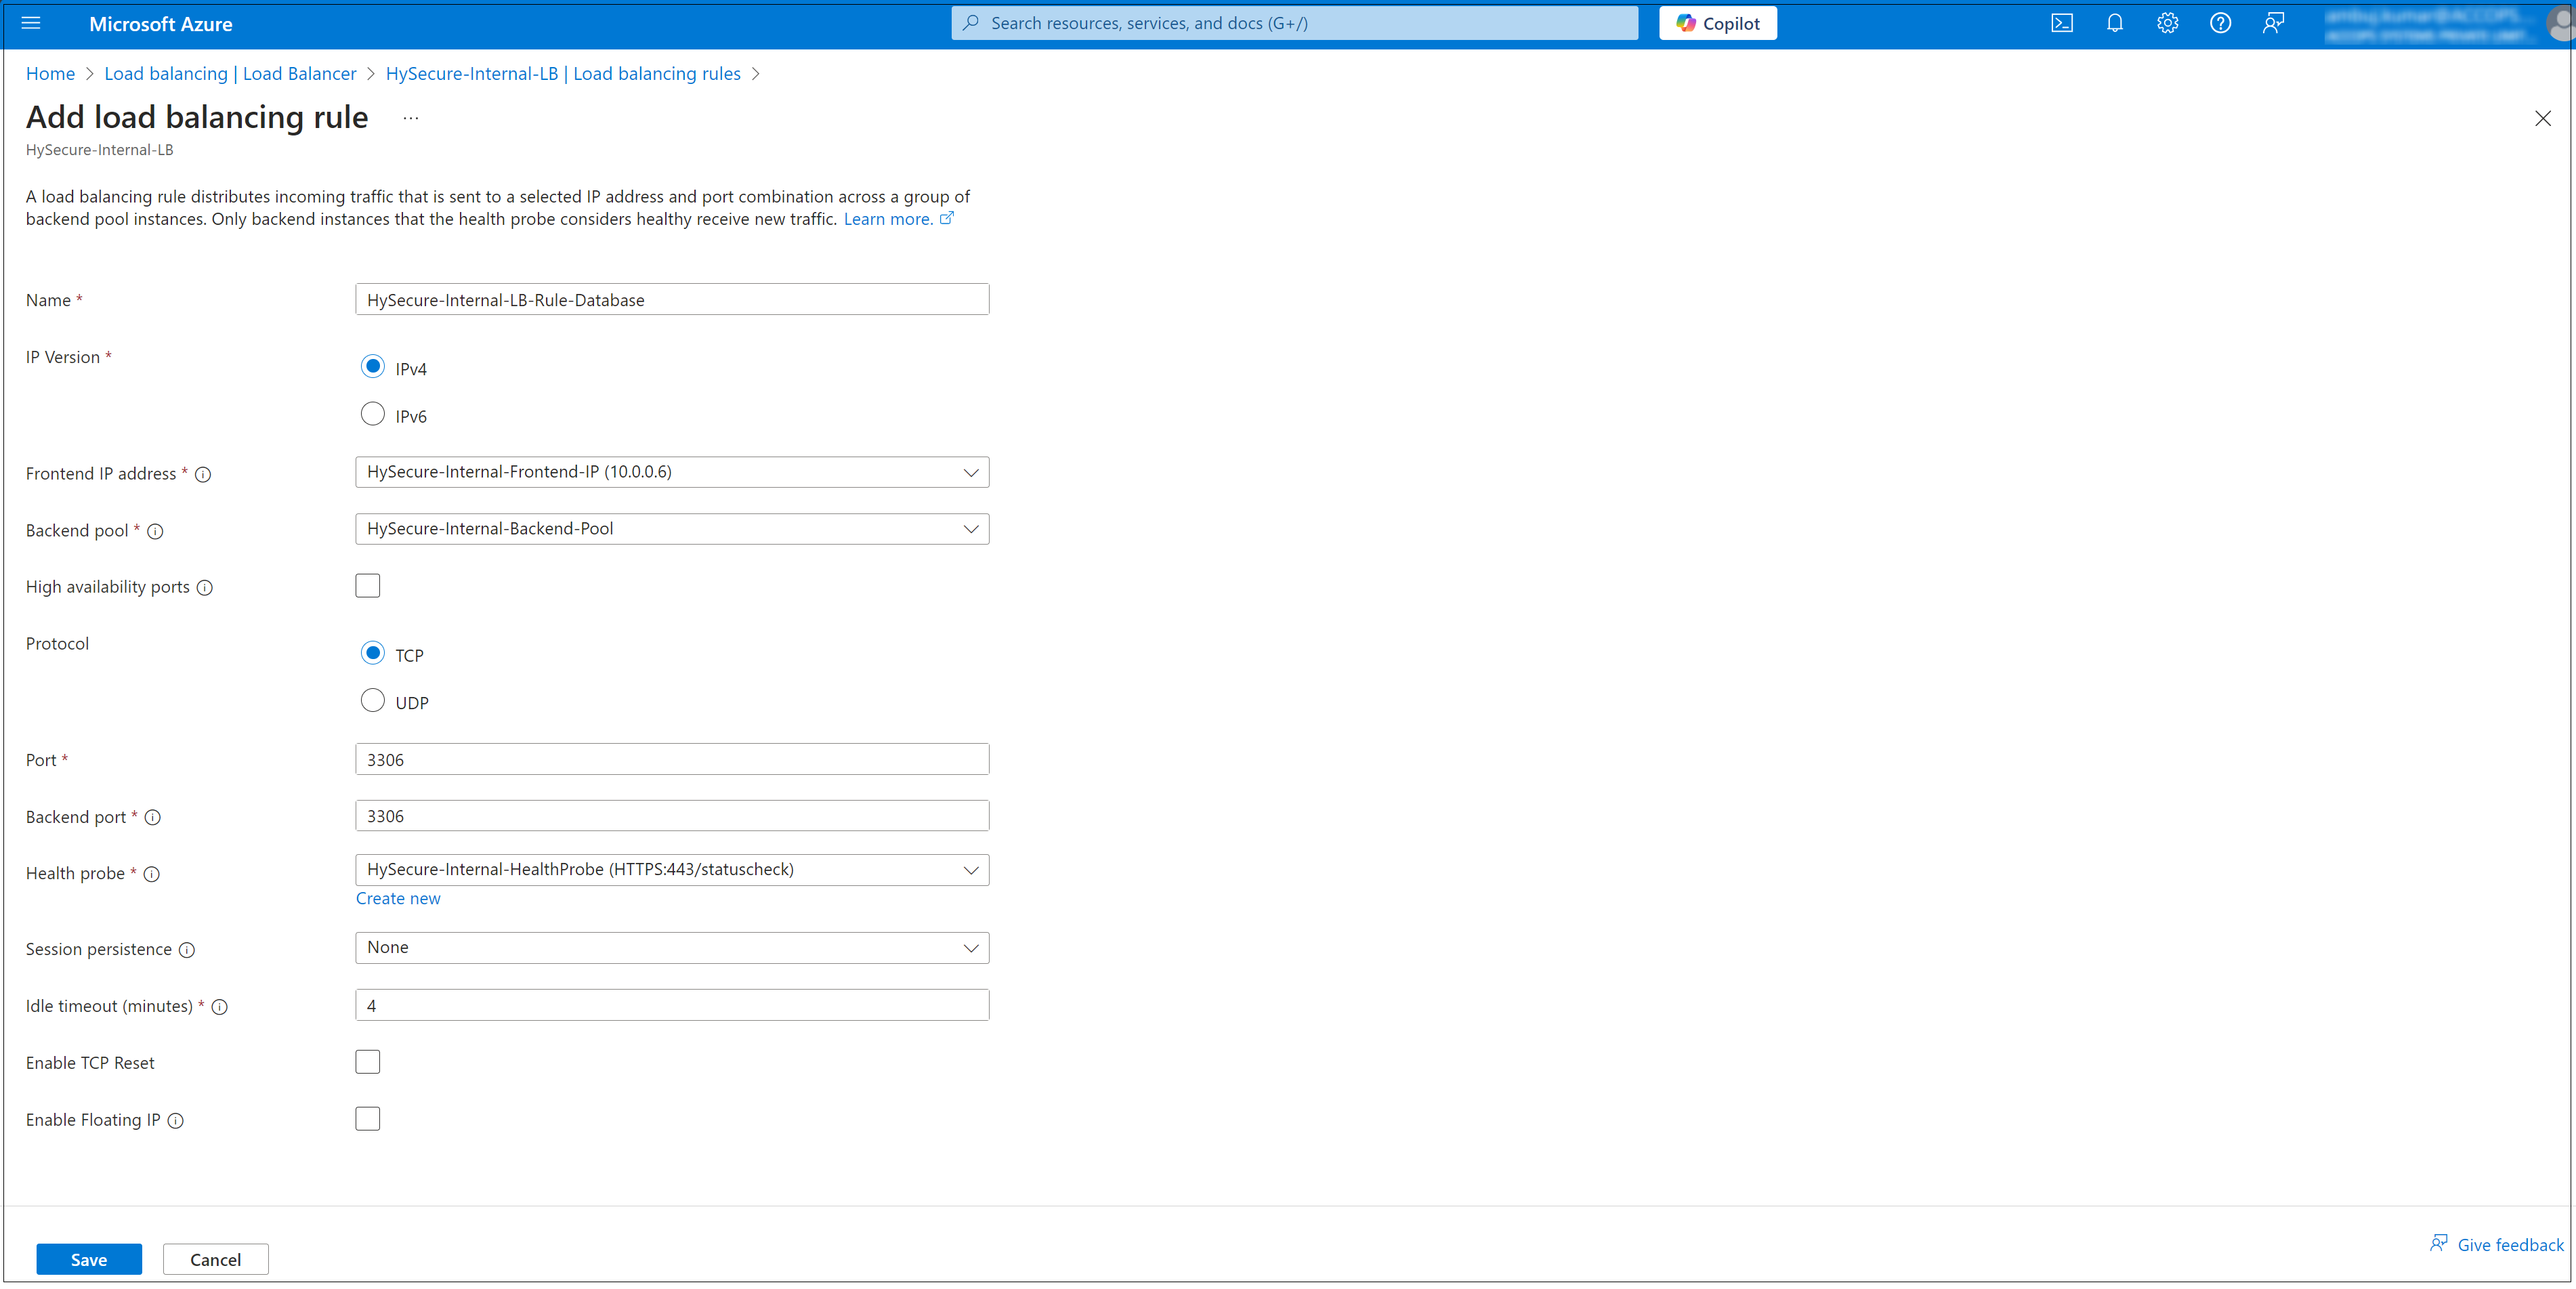
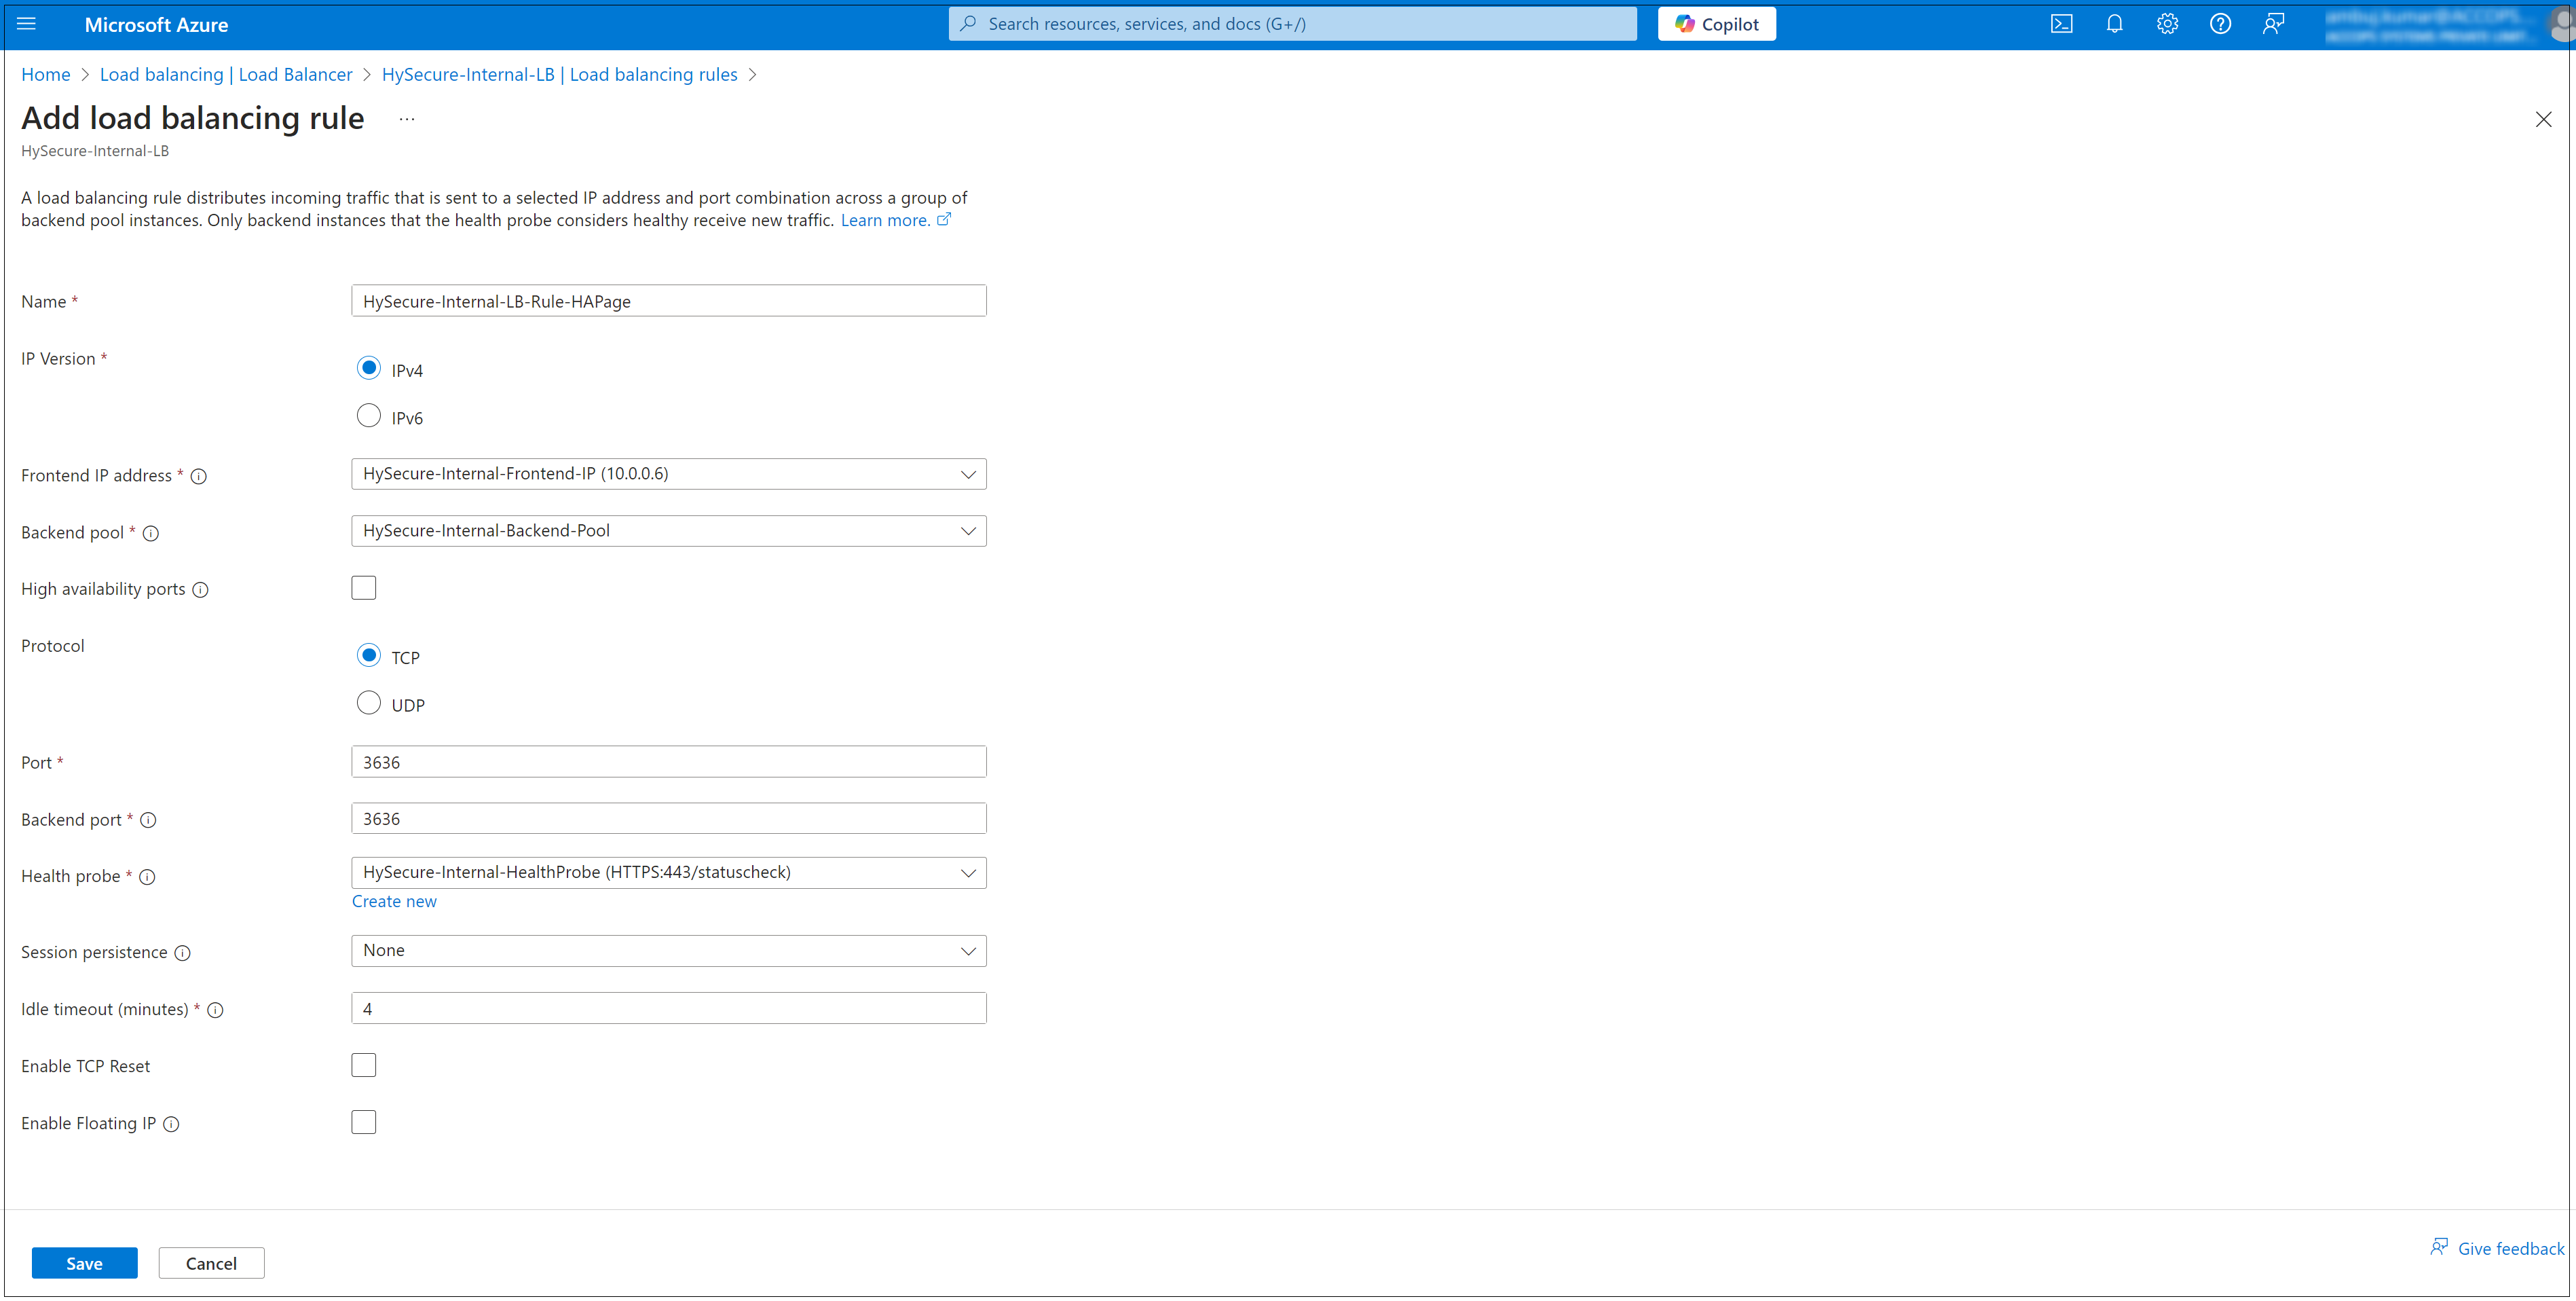
Configure the Rule Settings: Enter the following details to configure the rule settings:
-
Name: Provide a descriptive name for the rule. We have to create three rules here.
- HySecure-Internal-LB-Rule-Infoagent
- HySecure-Internal-LB-Rule-Database
- HySecure-Internal-LB-Rule-HAPage
-
Frontend IP Address: Select the frontend IP configuration (e.g., Private IP i.e. VIP).
- Protocol: Select the protocol (TCP).
- Port: Specify the port for the traffic to balance (e.g., 3636 for HAPage, 939 for infoAgent, or 3306 for DB).
- Backend Port: Specify the port on the backend VMs (typically the same as the frontend port).
- Backend Pool: Select the backend pool associated with your virtual machines.
- Health Probe: Select the existing health probe to monitor backend VMs.
- Session Persistence: Select how the Load Balancer maintains client connections:
- None (default)
- Client IP
- Client IP and Protocol
- Idle Timeout (minutes): Define the idle timeout duration (default is 4 minutes).
- Floating IP: Enable or disable depending on whether you need Direct Server Return (DSR).
-
HySecure-Internal-LB-Rule-Infoagent

HySecure-Internal-LB-Rule-Database
HySecure-Internal-LB-Rule-HAPage
Configuring Cluster Services
In high-availability (HA) clustering, Active, and Standby nodes play crucial roles in ensuring continuous service availability and fault tolerance.
Here, we will briefly explain the Active and Standby nodes in an HA cluster and understand the failover mechanism.
-
Active Node: The Active node in an HA cluster serves client requests, runs applications, processes data, executes transactions, and handles user interactions. It is the primary instance responsible for ensuring that services are operational and accessible.
-
Standby Node: The Standby node in an HA cluster is ready to take over operations from the Active node in case of failure or planned maintenance. It mirrors the configuration and state of the Active node to ensure seamless continuity of services and monitors its health status to assume the Active role when needed quickly.
-
Failover Mechanism: A failover mechanism switches roles between Active and Standby nodes in an HA cluster. When the Active node encounters hardware failure, software crash, or scheduled maintenance, the Standby node is automatically promoted to the new Active node, ensuring uninterrupted end-user services.
Active and Standby nodes are crucial for maintaining uninterrupted service delivery in HA clustering. Their coordinated operation and failover capabilities are essential for business continuity and meeting SLAs in various industries and applications.
Note
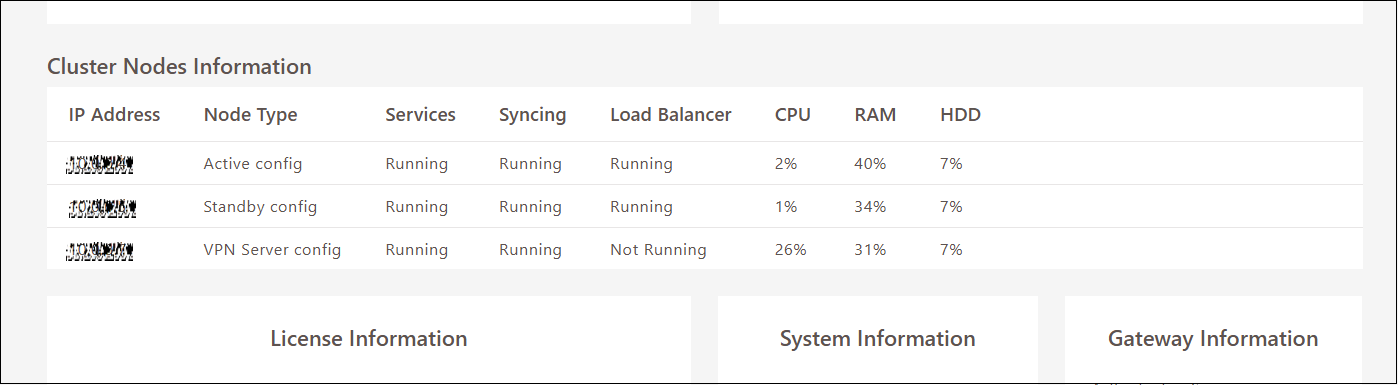
- All the available nodes will be visible under Cluster Information on the Dashboard.
- After a cluster is formed, only the Active Node SSL Certificate is required to log in to Standby & Web/Real nodes.
To create and configure cluster services on the HySecure VM, follow the steps below:
-
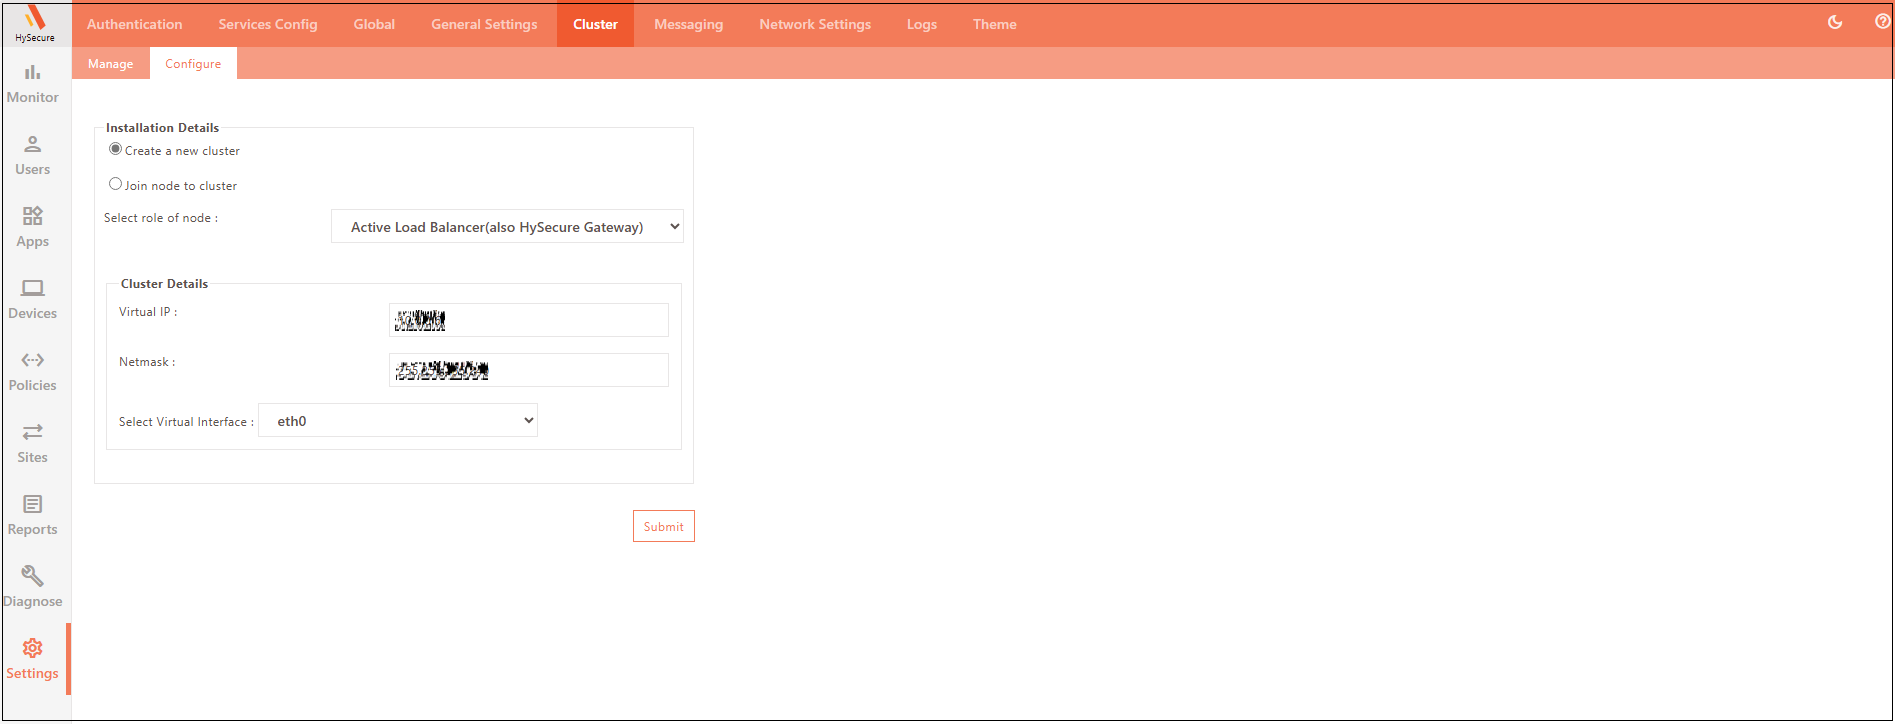
Launch the HySecure Client and log in as a Security Officer (SO). To create a new cluster from the HySecure Management console, navigate to Settings > Cluster > Configure.
- Click Create a new cluster and select the node role as Active Load Balancer.
- Enter the following Cluster Details:
- Virtual IP: Select the frontend IP address of the internal load balancer as the VIP (e.g., HySecure-Internal-Frontend-IP). It should be from the same subnet of the HySecure VM.
- Netmask: Enter the Subnet mask.
- Select Virtual Interface: Select the virtual interface option eth0.
- Click Submit.
- The following STATUS message will appear after enabling the cluster: Successfully converted to HA Primary Node.

-
Configure the cluster:
- Open a new tab in the browser.
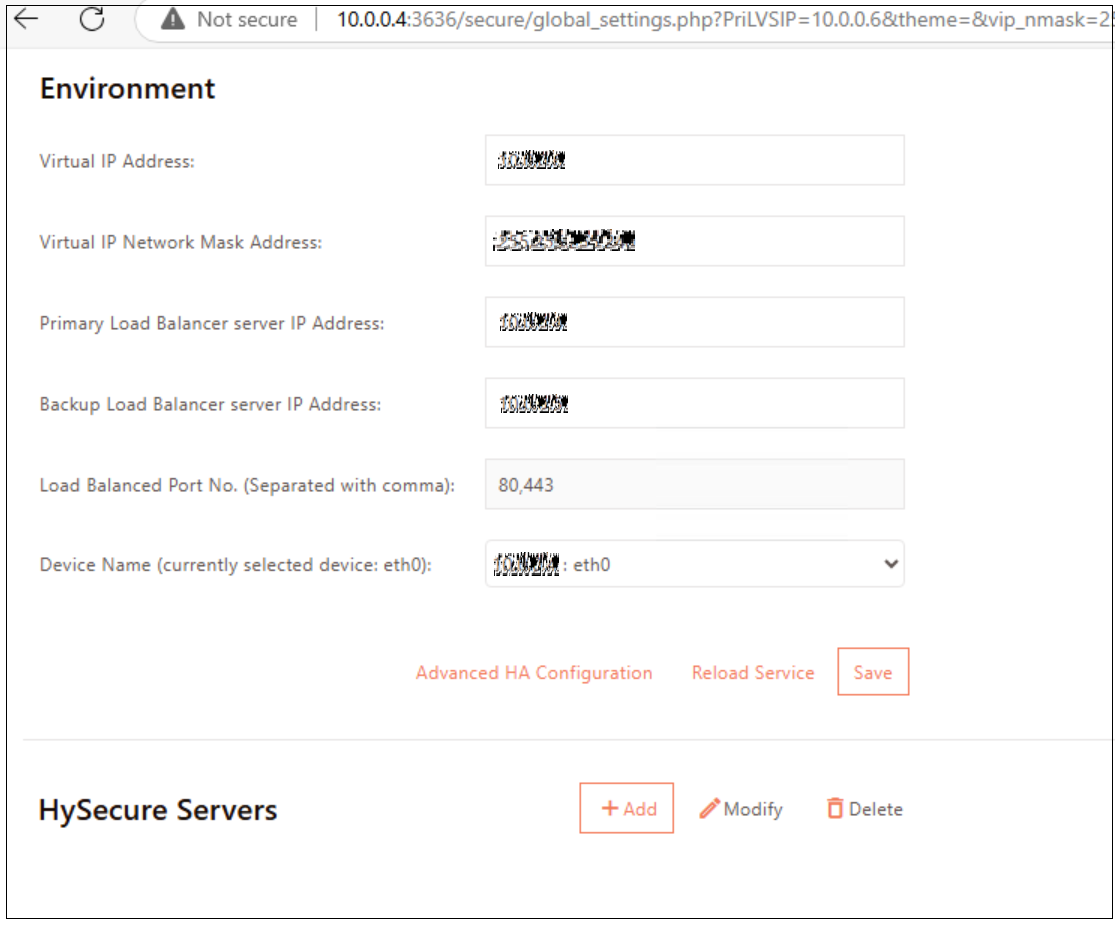
- Enter the following URL: http://10.0.0.4:3636/secure/global_settings.php
-
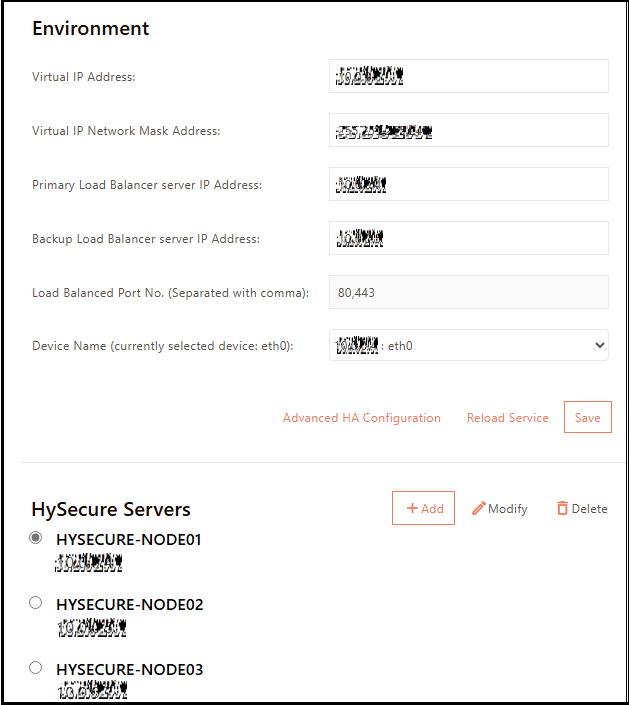
Enter the environment details and Click SAVE.
-
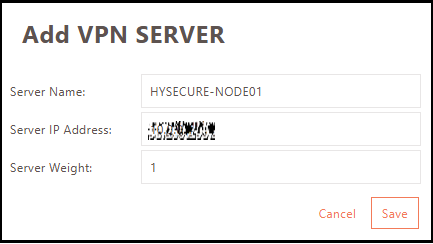
Click Add to add the Active node behind the load balancer.
-
Enter the first HySecure Gateway server hostname and its IP address.
-
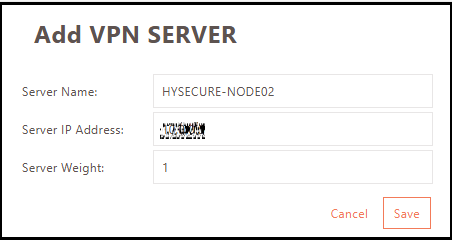
Repeat the above step to add Standby node.
-
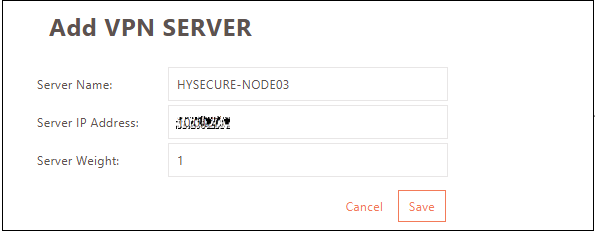
Repeat the above step to add Real node.
-
Click Save then click Reload Service.
-
-
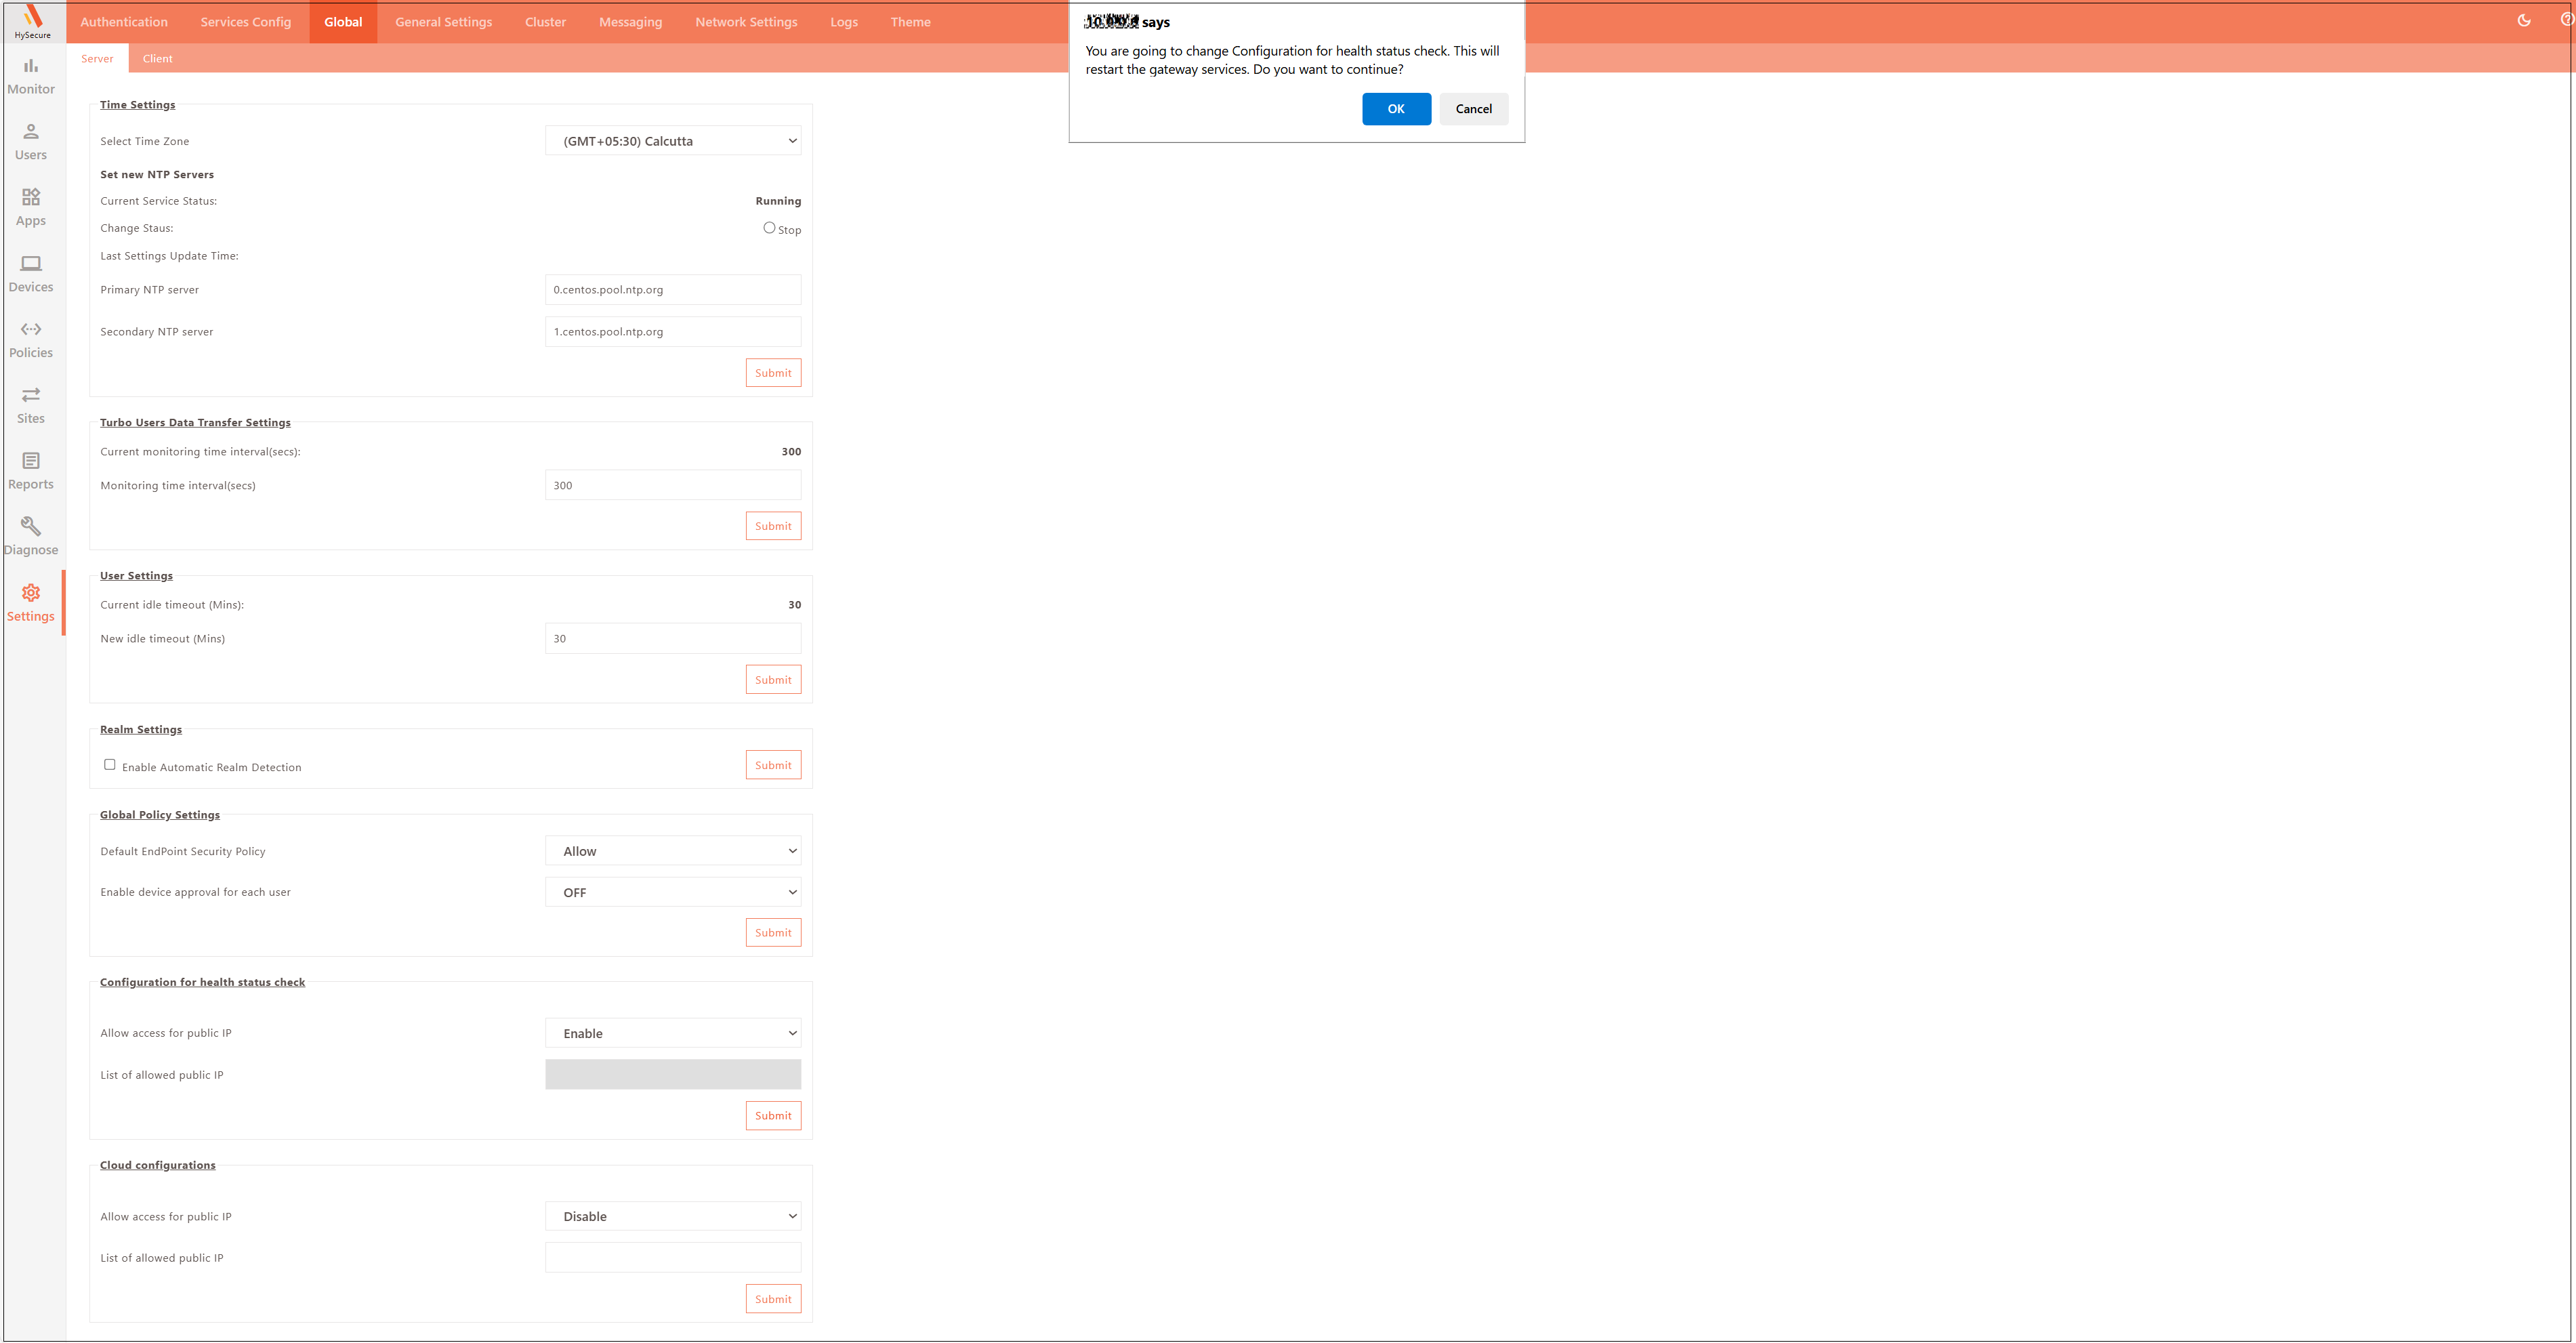
Configure Global Settings:
-
Navigate to Settings > Global > Server and Enable the option for Configuration for health status check.
-
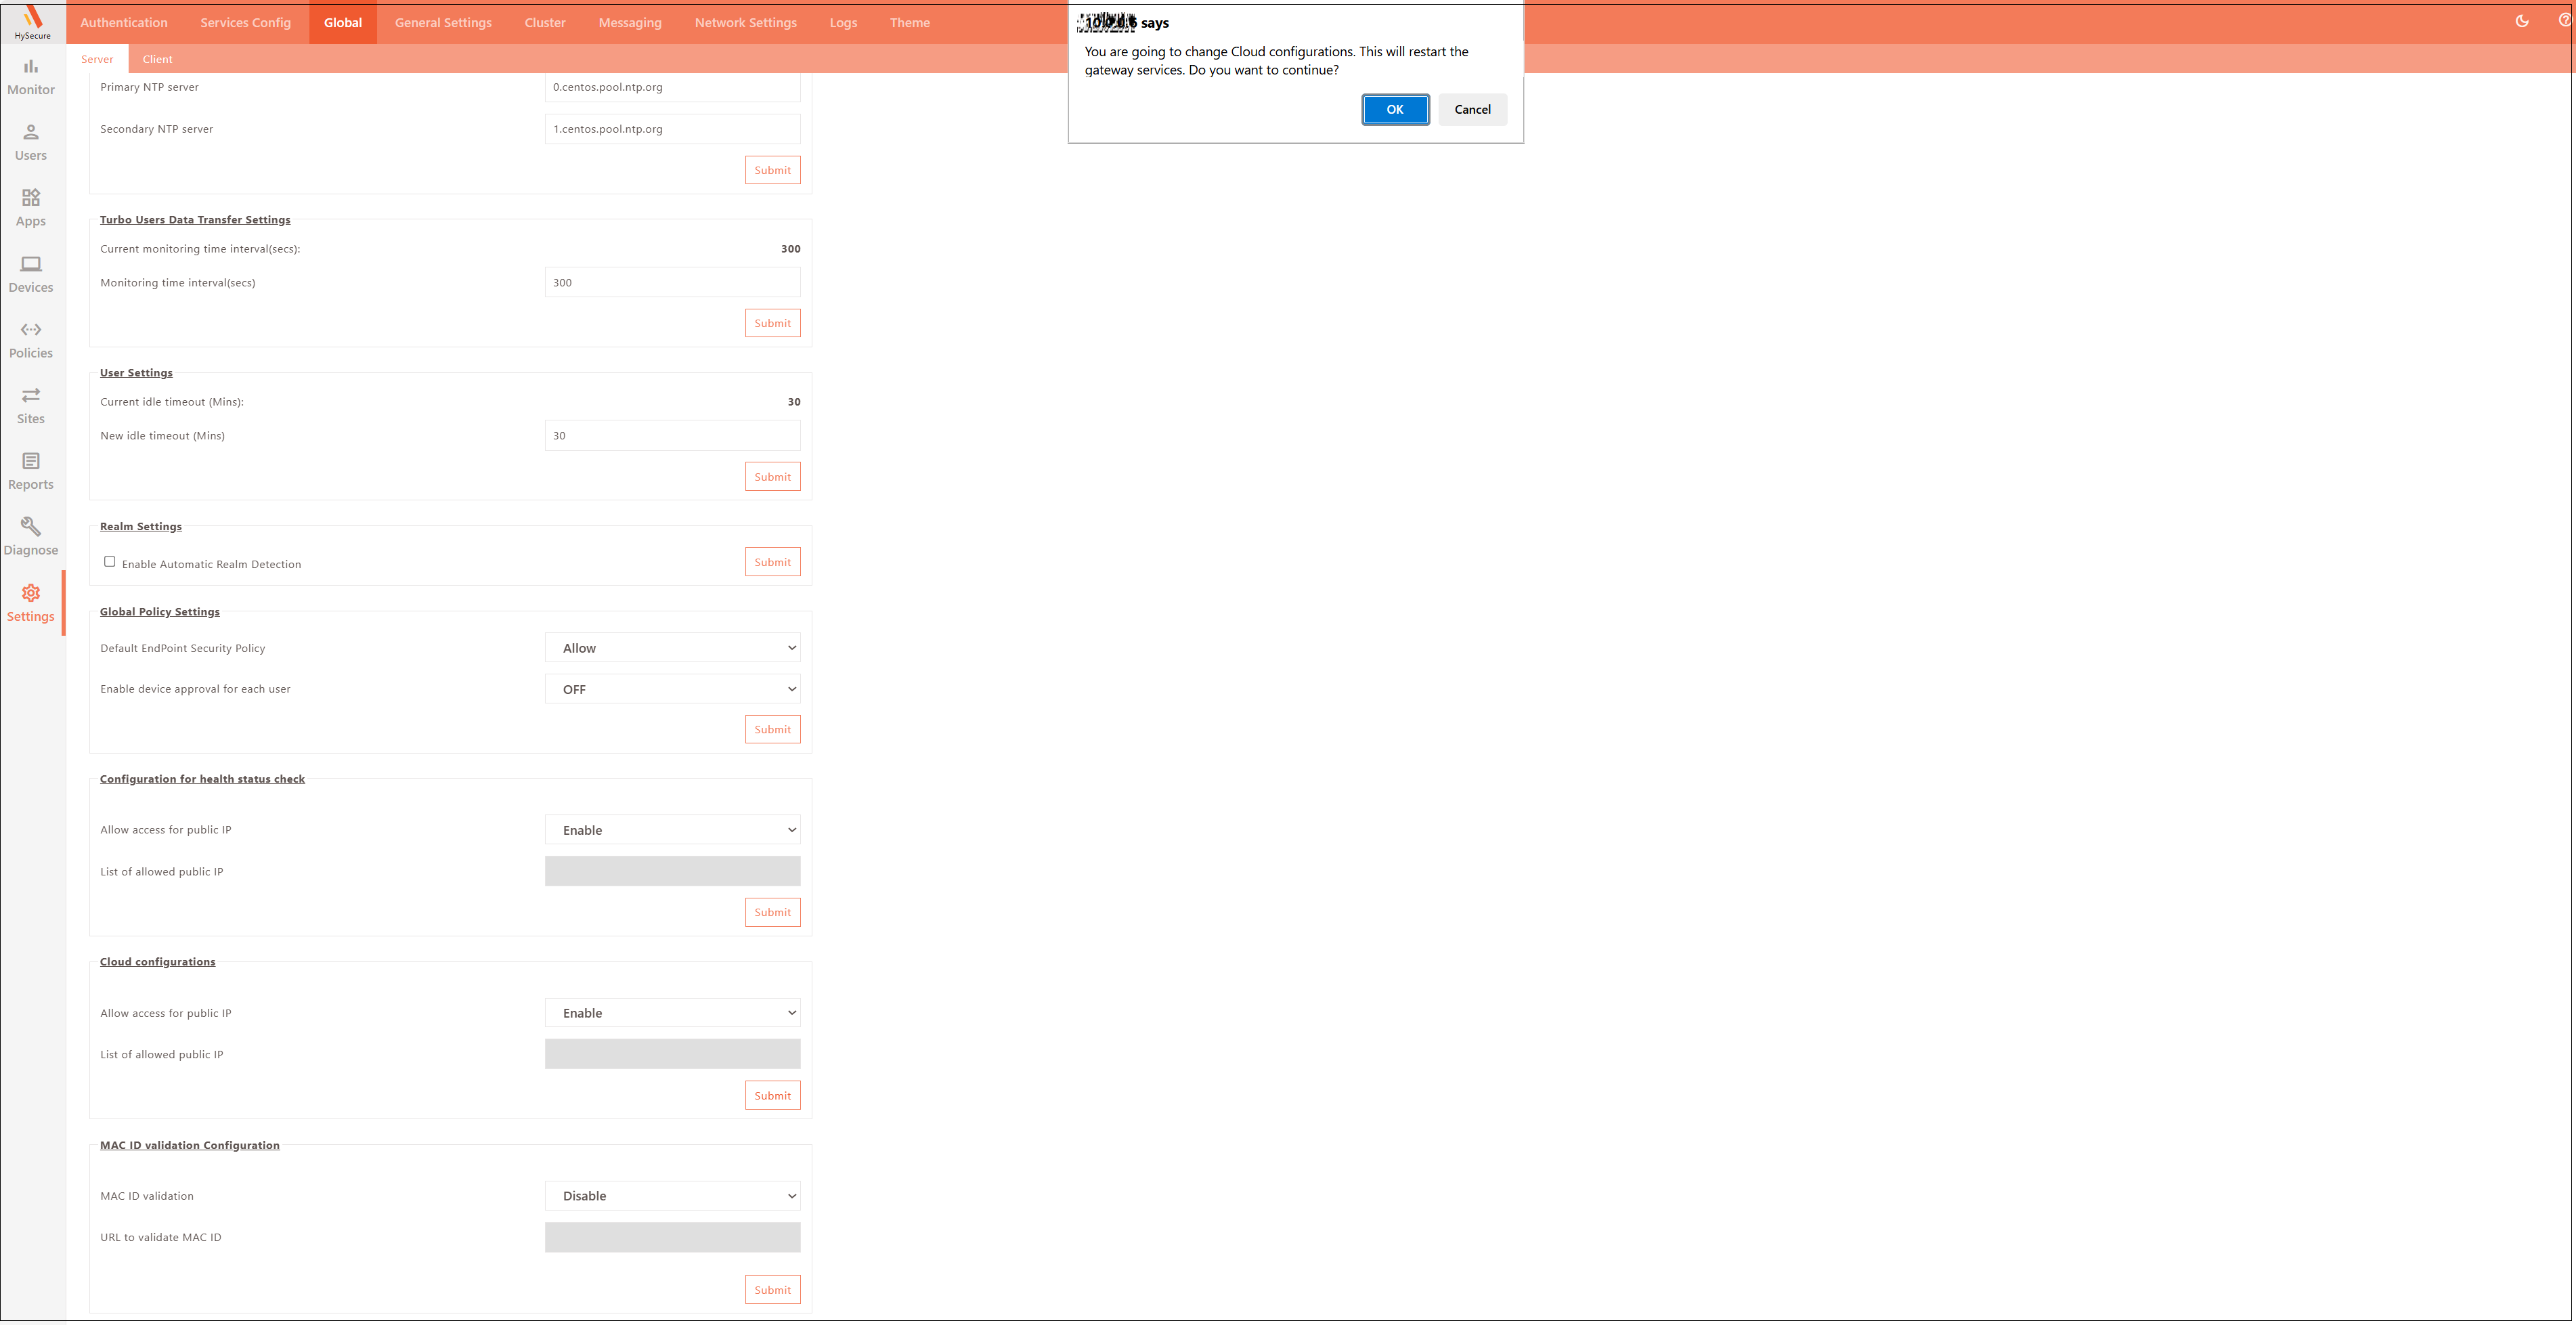
Enable the option for Cloud Configurations.
-
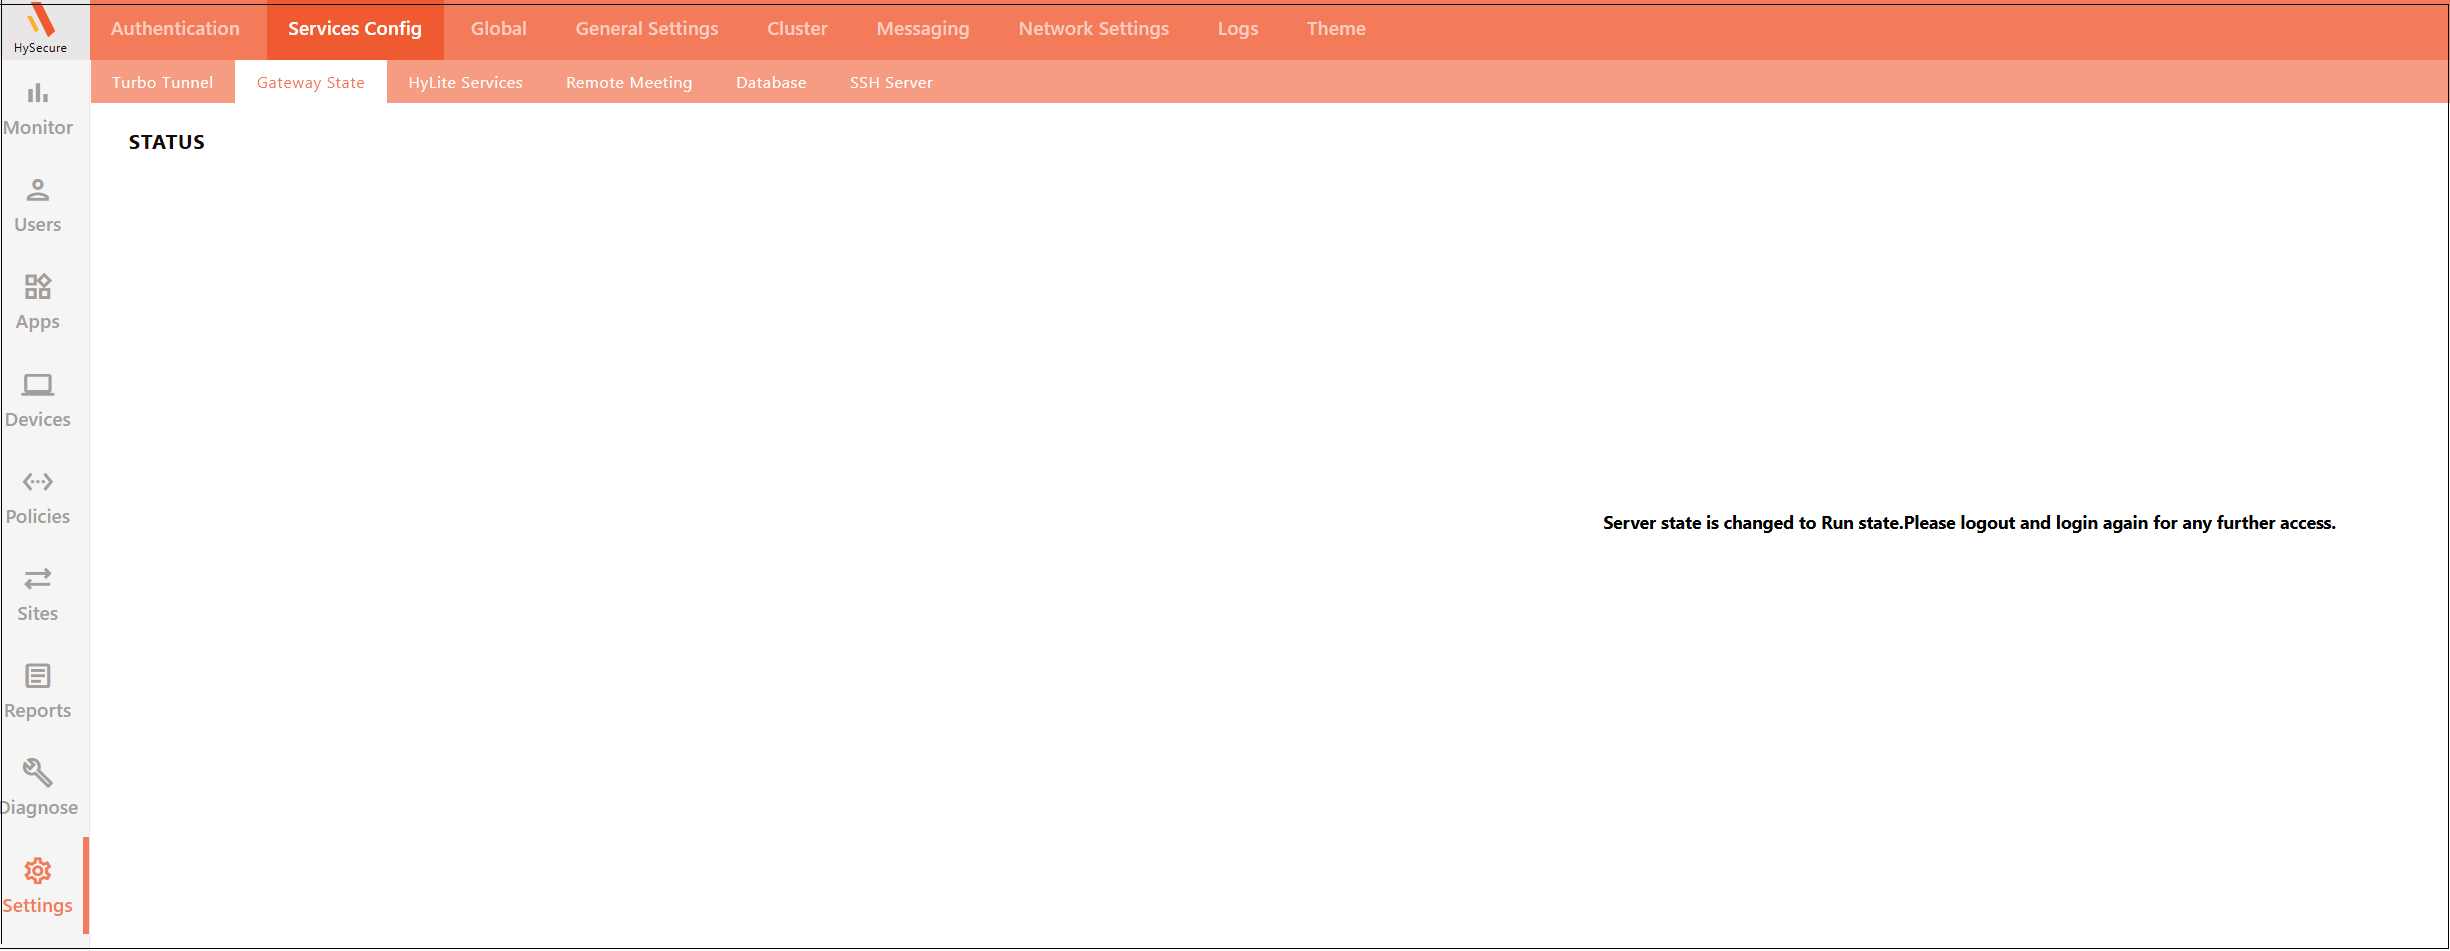
Navigate to Settings > Cluster > Gateway State and set the current server state to RUN state.
-
-
Verify the cluster status.
-
Close the current open browser window, sign out from the VPN client, and re-login as the SO user in Active Gateway.
-
-
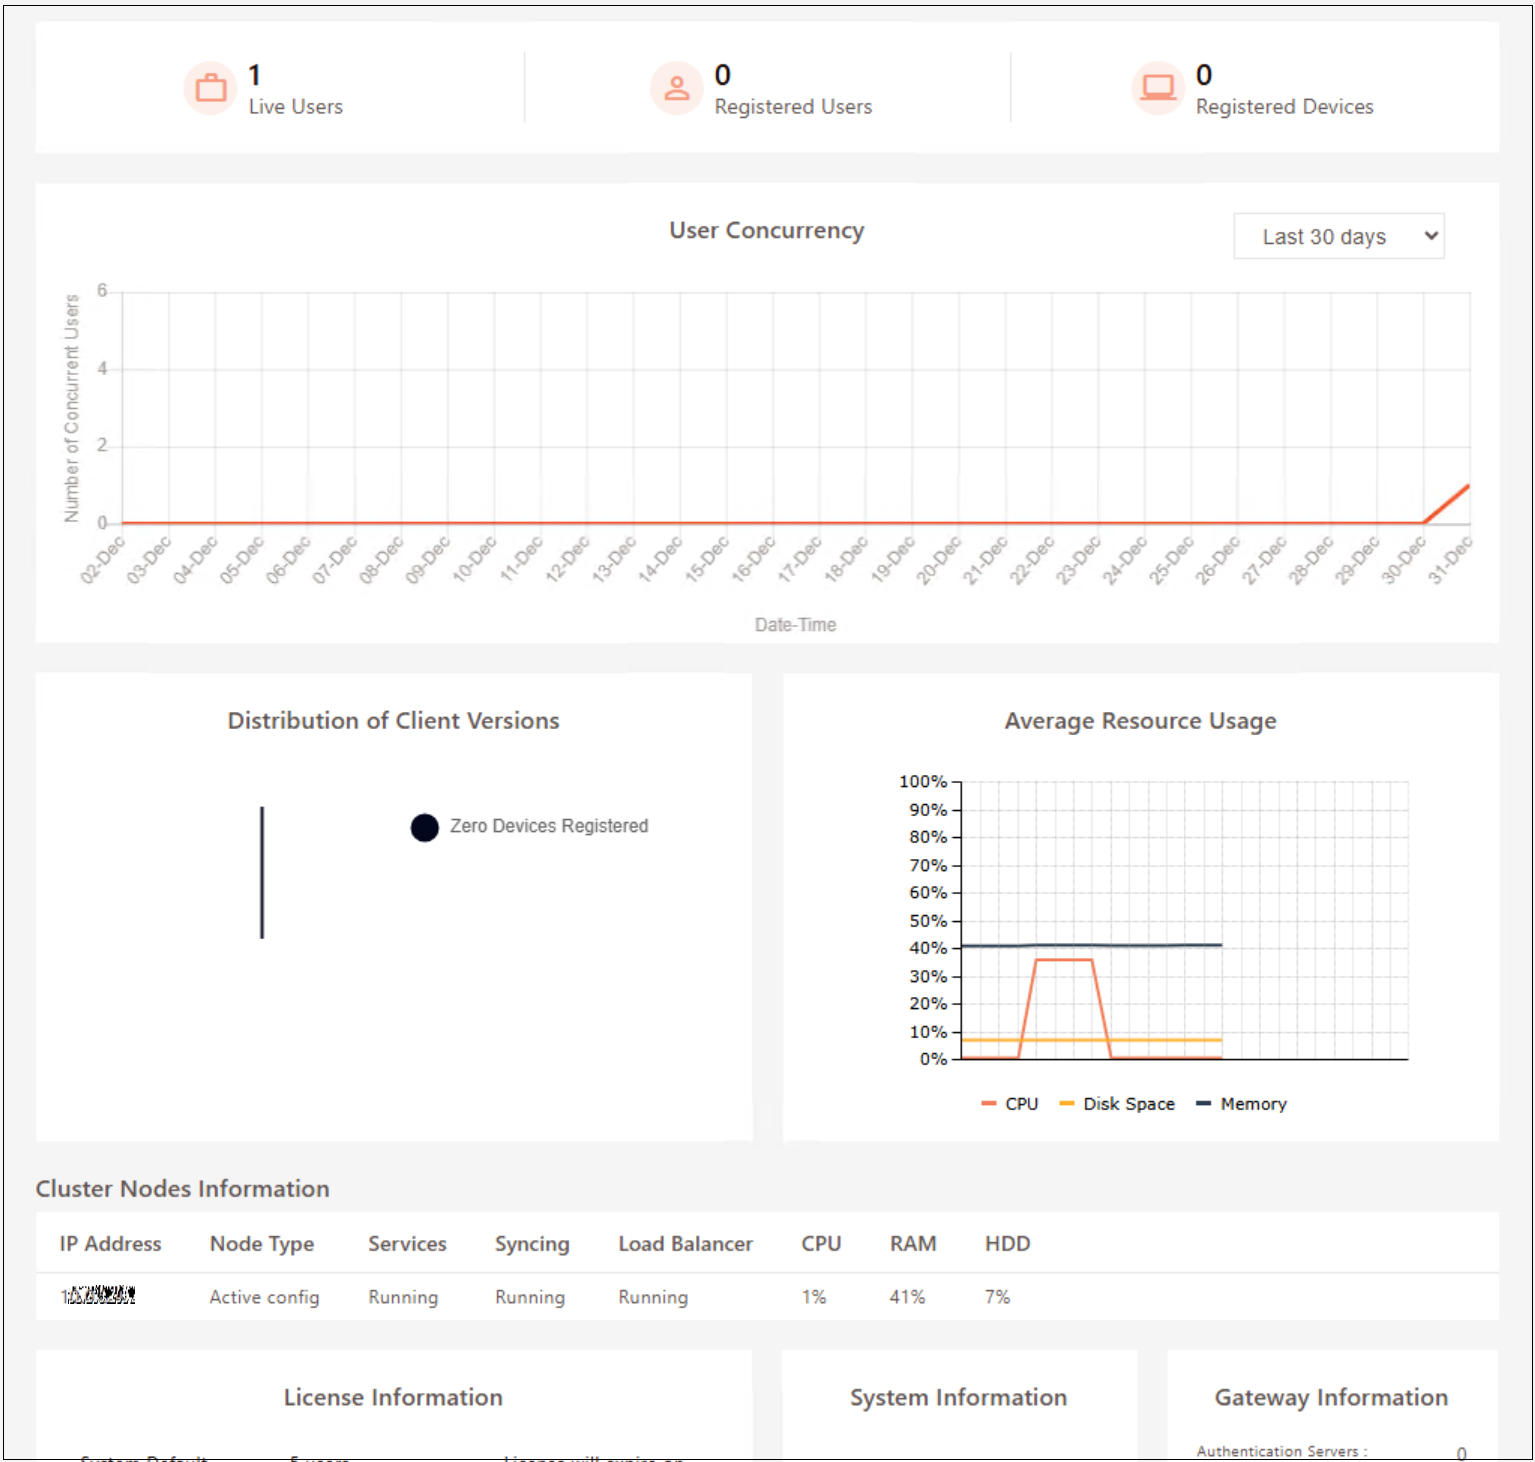
Navigate to the Management Console Dashboard and verify the following:
- The Gateway State must be in the Run state.
-
Cluster Node Information shows as Active Config and Services are running.
-
Add a Standby node to the HA cluster.
- Launch Accops HySecure Client and log in as a Security Officer (SO) user in Standby Gateway – 10.0.0.5
-
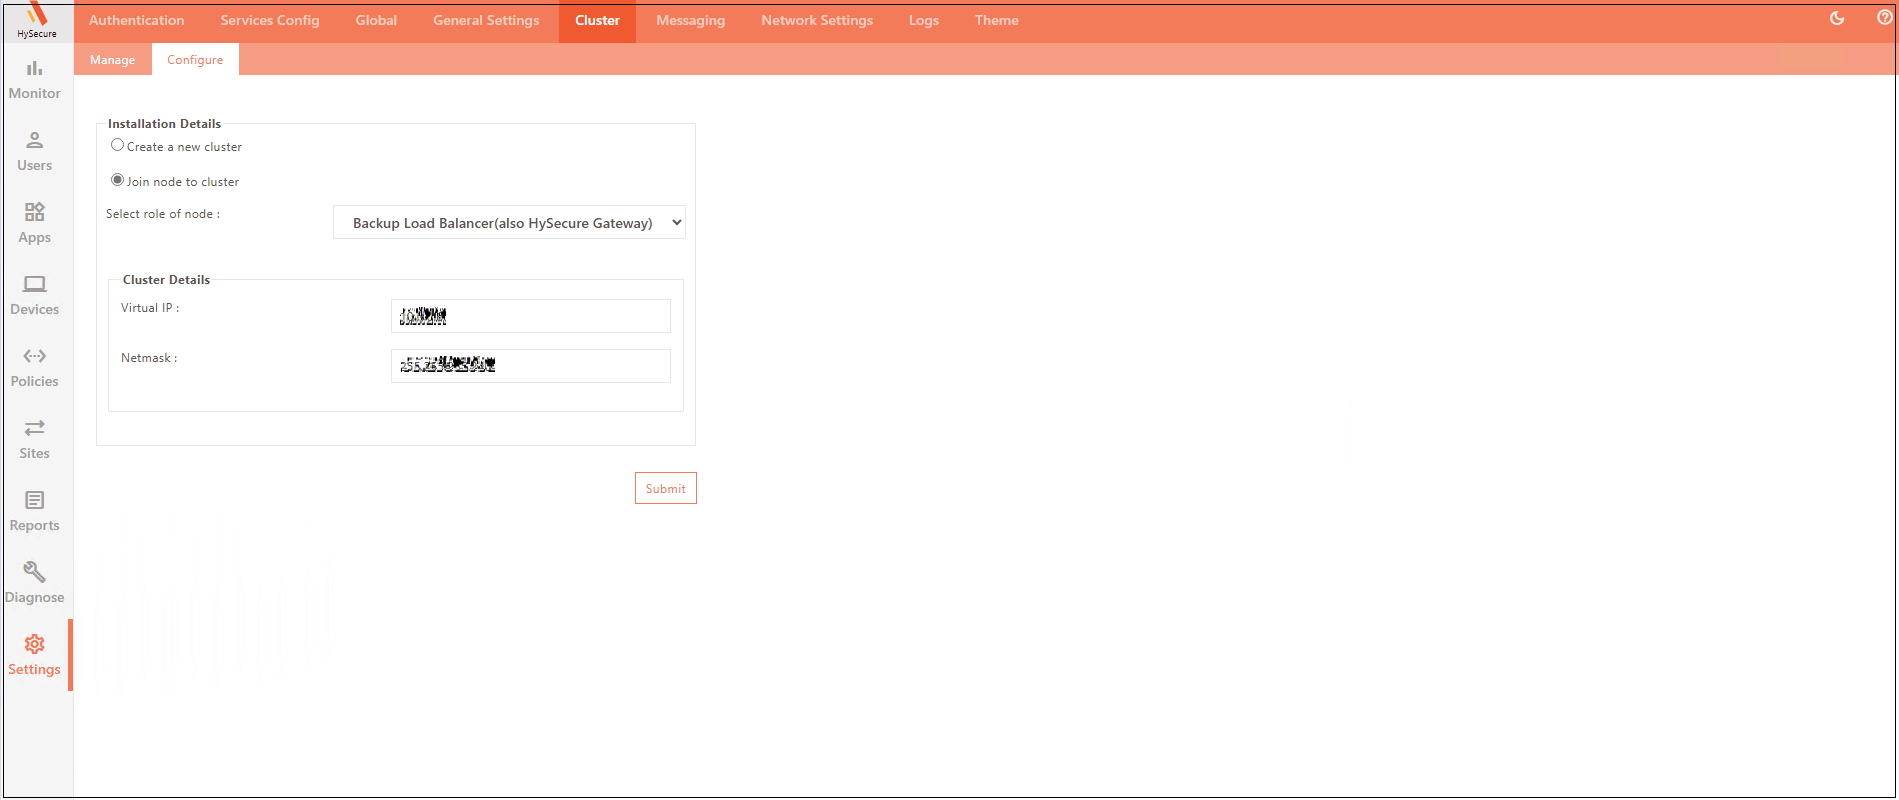
Join the node to a new cluster.
- Navigate to Settings > Configure.
- Click Join node to cluster with the role set as Backup Load Balancer.
- Enter Cluster Details and click Submit.
- Virtual IP: Enter the existing VIP (IP address on the internal load balancer on Azure) used during new cluster creation.
- Wait for a few seconds for the synchronization to complete.
-
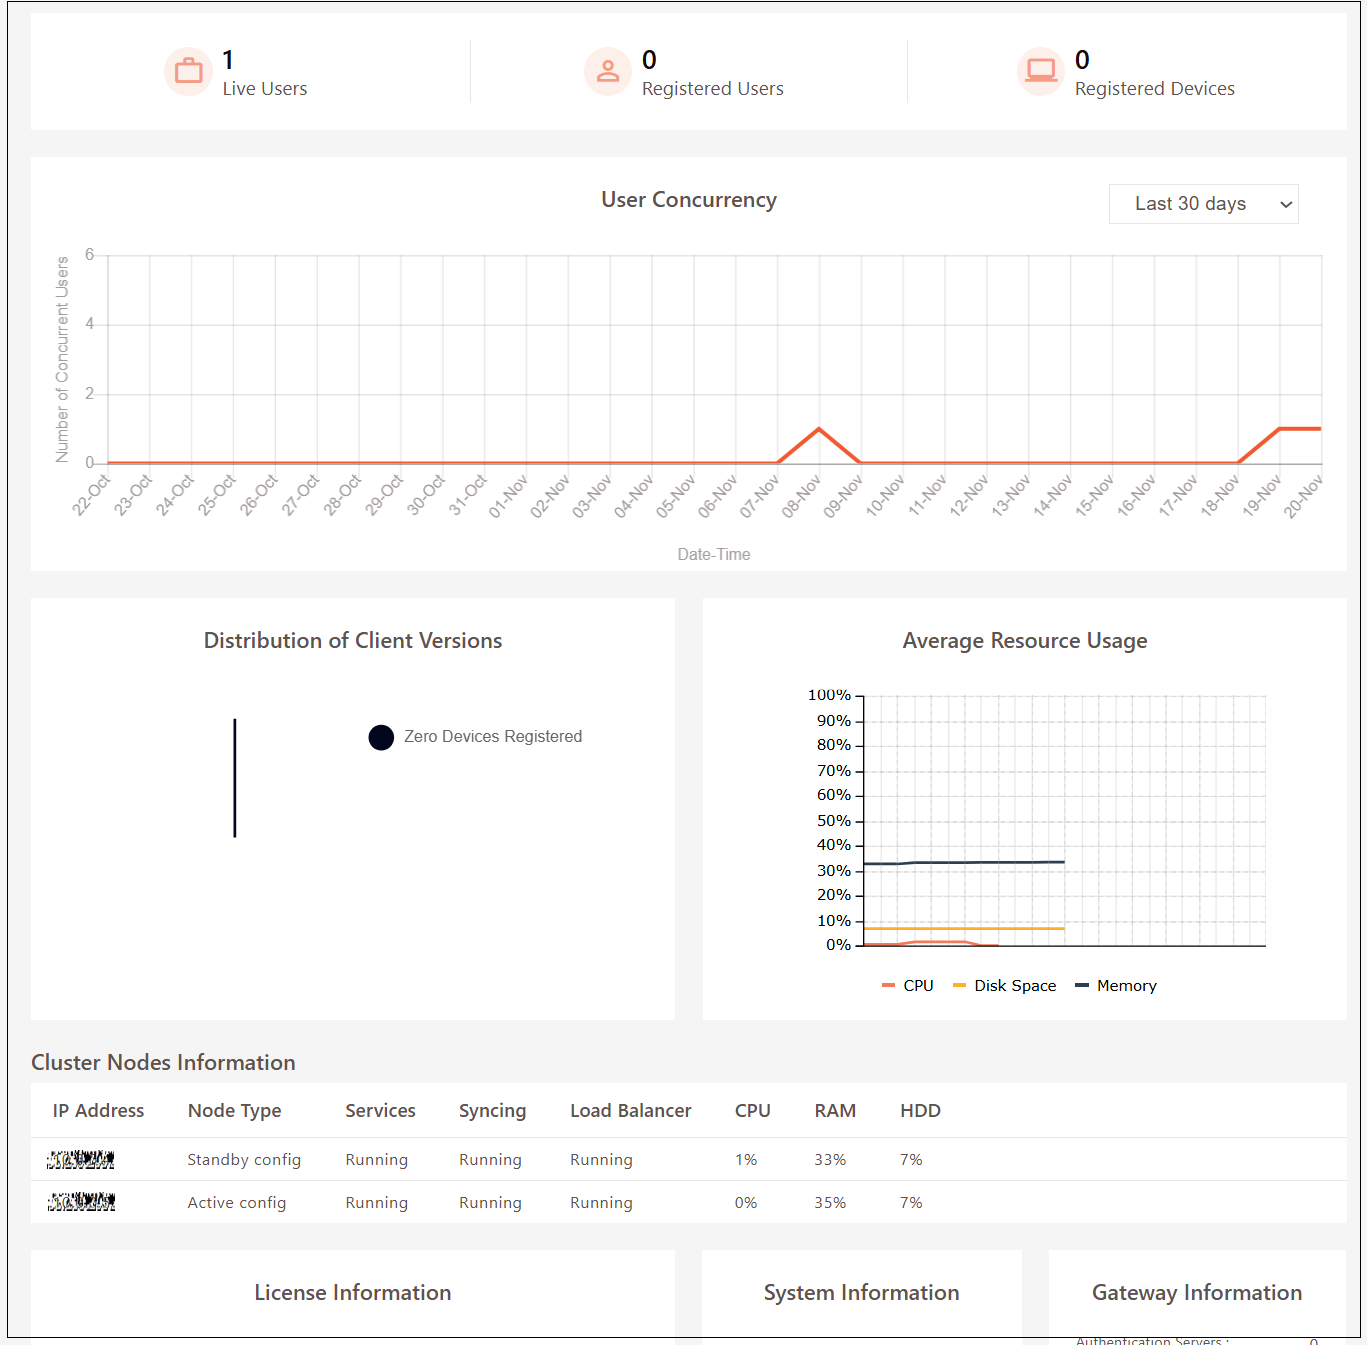
Verify the two-node cluster status.
- Launch Accops HySecure Client and log in as a Security Officer (SO) user in Active Gateway – 10.0.0.4
- On the DASHBOARD scroll down to verify node(s) in the cluster.
-
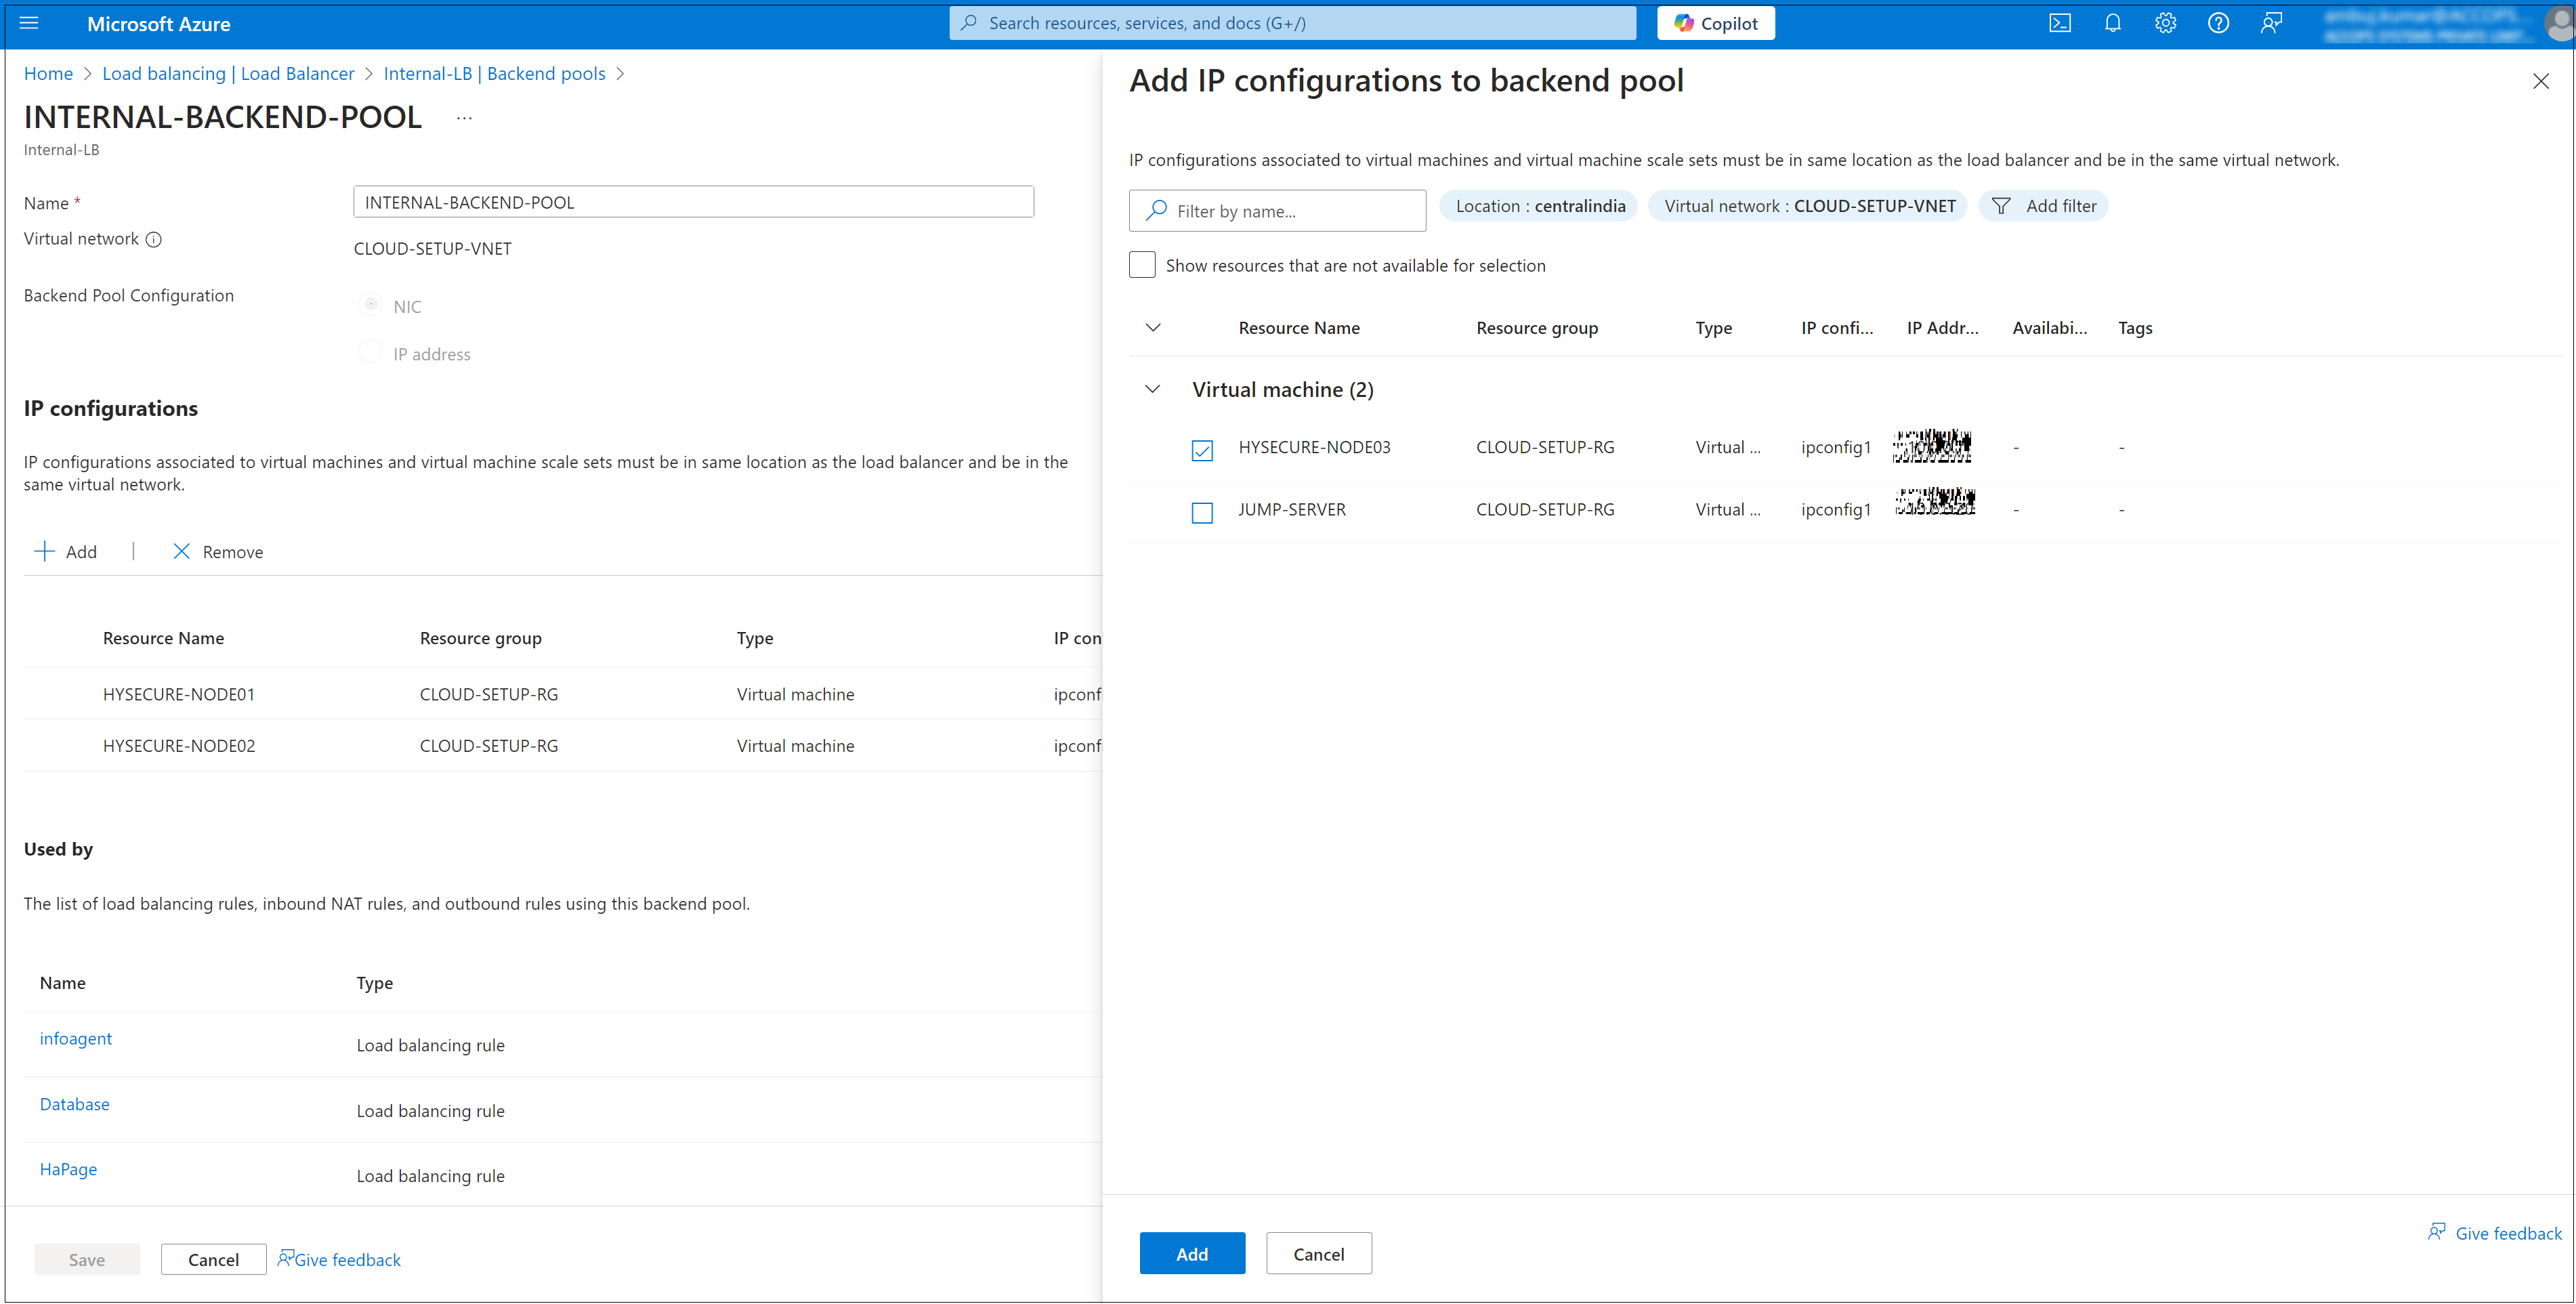
Add StandBy node to Azure internal load balancer Backend.
- From the Azure Dashboard, navigate to Load Balancers.
- Select the internal load balancer (HySecure-Internal-LB).
- Navigate to Backend Pools.
- Click Add, select the Standby Node (HYSECURE-NODE02), and click Save to finish adding the node to the backend pool.

-
Click ADD to add the Real node behind the Cluster Configuration:
- Launch Accops HySecure client and log in as a Security Officer (SO) user in Real Node Gateway – 10.0.0.7
- Join the node to a new cluster.
- Navigate to Settings > Configure.
- Click Join node to cluster with the role set as HySecure Gateway.
- Enter Cluster Details and click Submit.
- Virtual IP: Enter the existing VIP (IP address on the internal load balancer on Azure) used during new cluster creation.
- Wait for a few seconds for the synchronization to complete.

-
Verify the multi-node cluster status.
- Launch Accops HySecure client and log in as a Security Office (SO) in Active Gateway – 10.0.0.4
-
On the DASHBOARD scroll down to verify node(s) in the cluster.
-
Add the Real node to Azure internal load balancer backend.
- From the Azure Dashboard, navigate to Load Balancers. Select the internal load balancer (HySecure-Internal-LB), then go to Backend Pools.
-
Click Add, select the Standby Node (HYSECURE-NODE03), and click Save to finish adding the node to the backend pool.
Create and Configure External Network Load Balancer on Azure
An External Network Load Balancer on Azure is needed to manage External HTTPS traffic and distribute incoming traffic across multiple servers, ensuring high availability, reliability, and scalability of applications. It helps prevent downtime by automatically rerouting traffic if one server fails and optimizes performance by balancing load based on server health and traffic demand.
Follow the steps listed below to create and configure an External Network Load Balancer:
-
Navigate to Load Balancers Service.
- In the left-hand menu, select Load Balancers. If it's not visible, search for it using the search bar.
-
Create a New Load Balancer.
-
Click + Create on the top of the Load Balancers page.
-
Select the Subscription and Resource Group where the Load Balancer will be created.
-
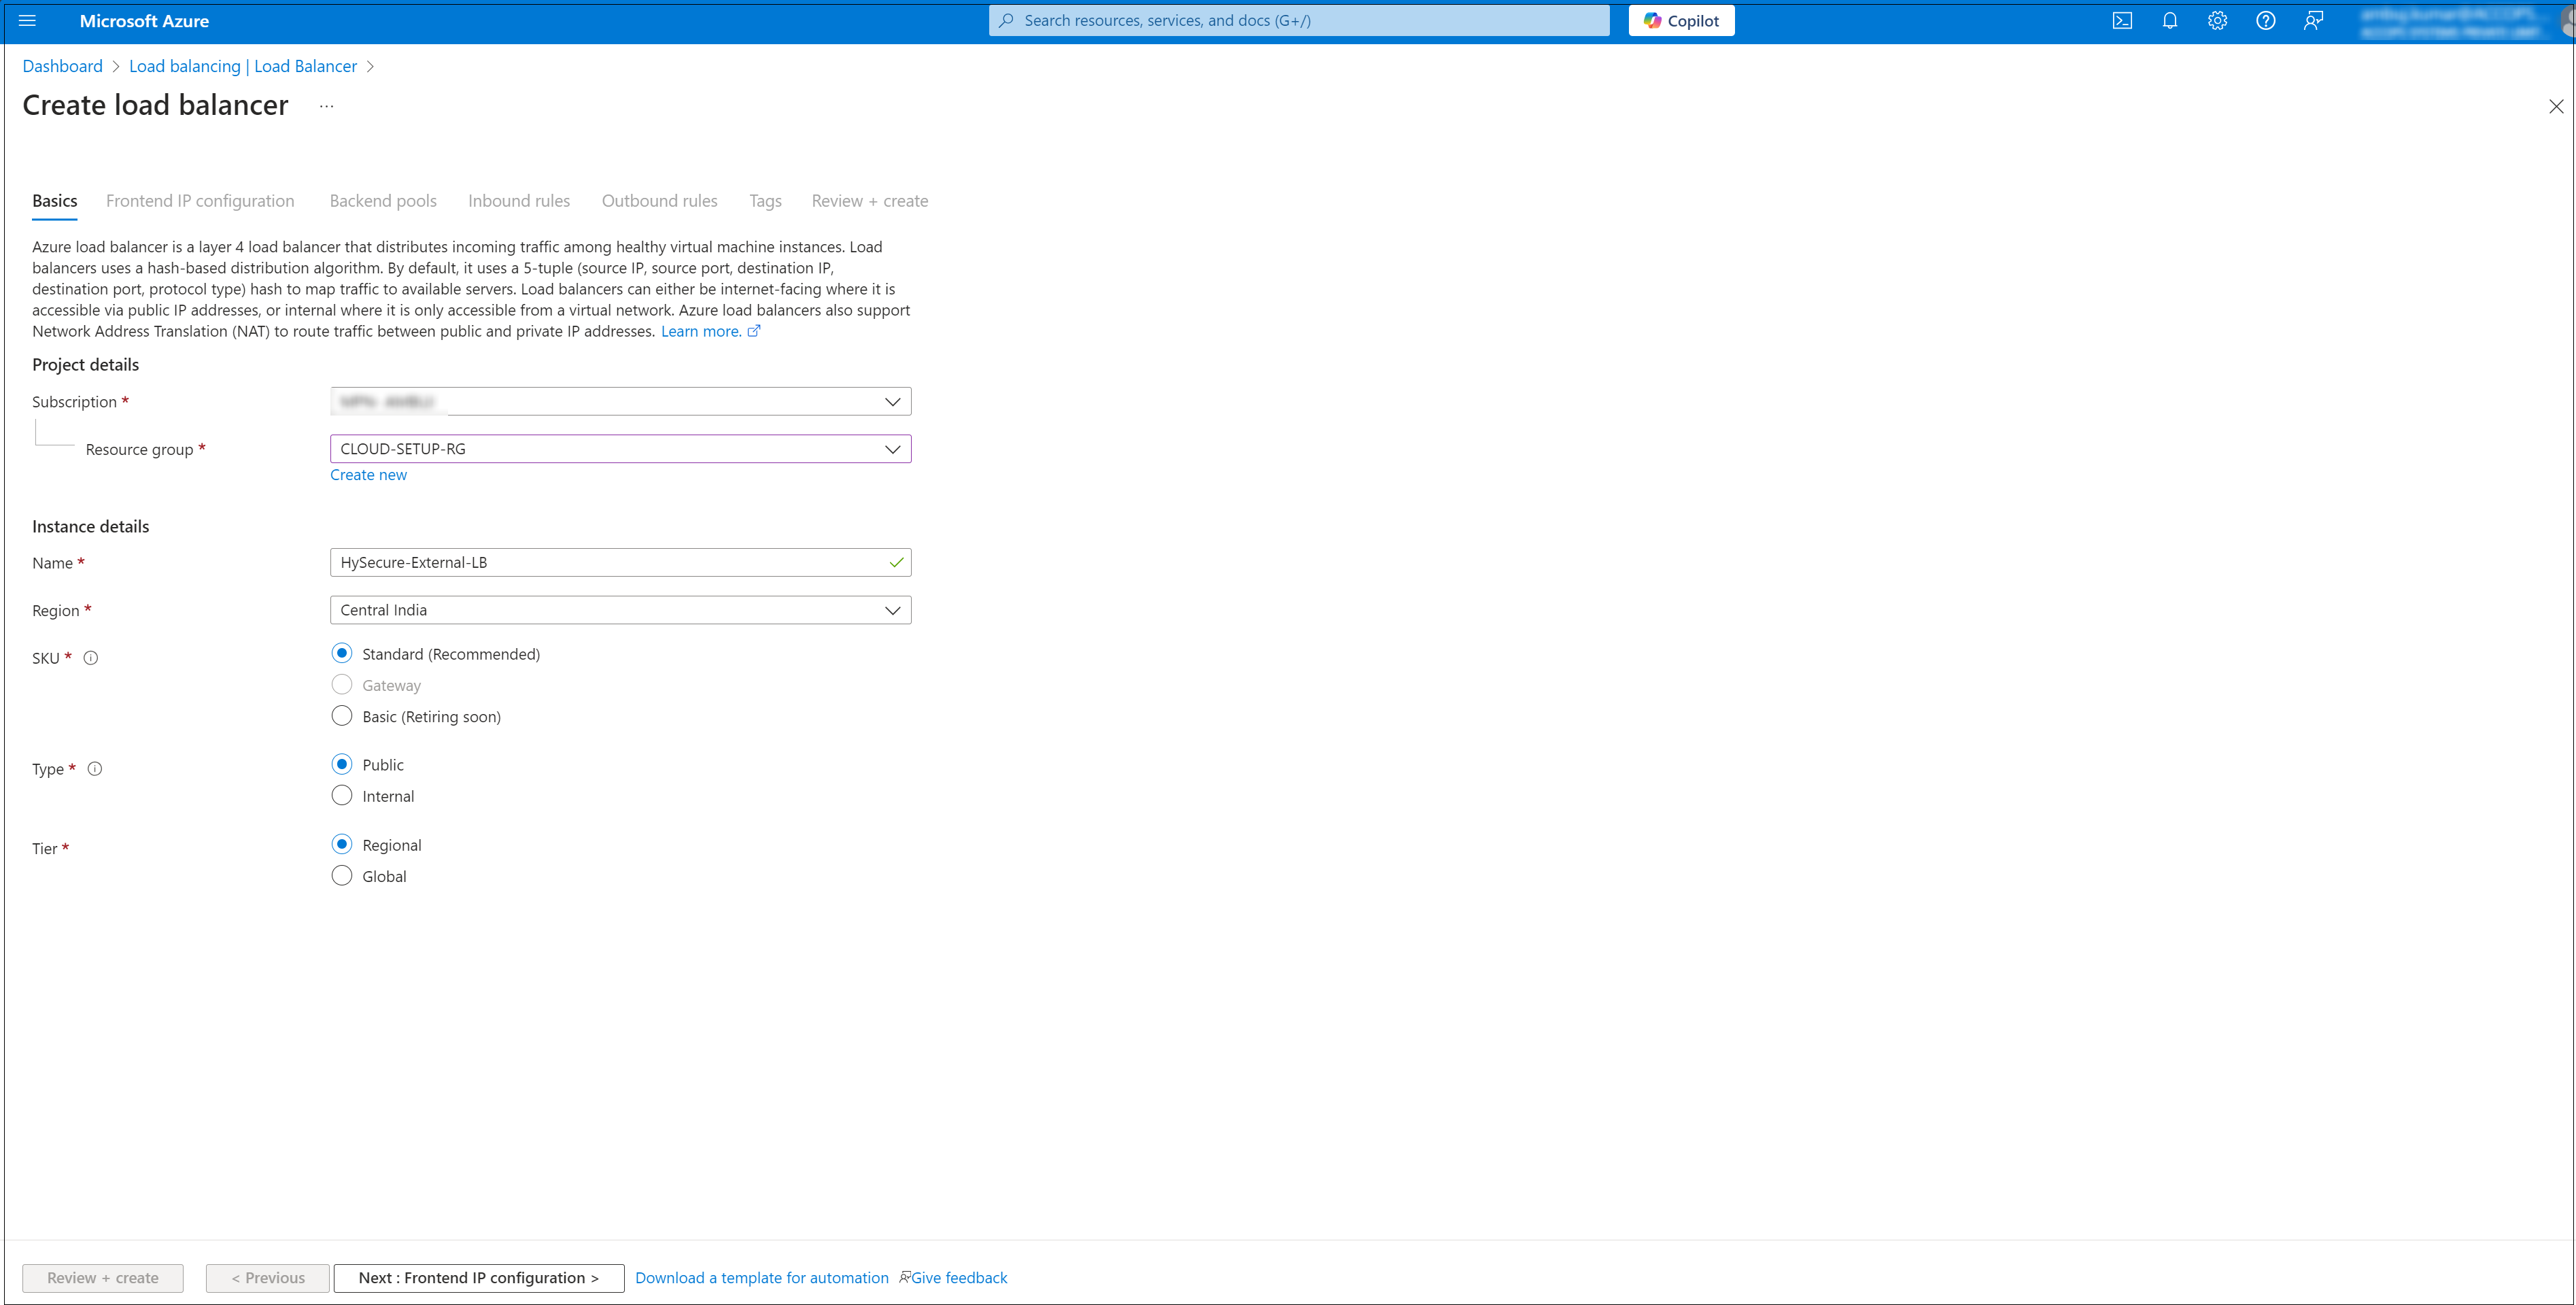
Fill in the required details:
- Name: Enter a name for your Load Balancer (e.g., HySecure-External-LB).
- Region: Choose the area where you want to deploy the Load Balancer (e.g., Central India).
- Type: Select Public for an external load balancer.
- SKU: Choose the appropriate SKU (e.g., Basic or Standard) based on your requirements.
-
-
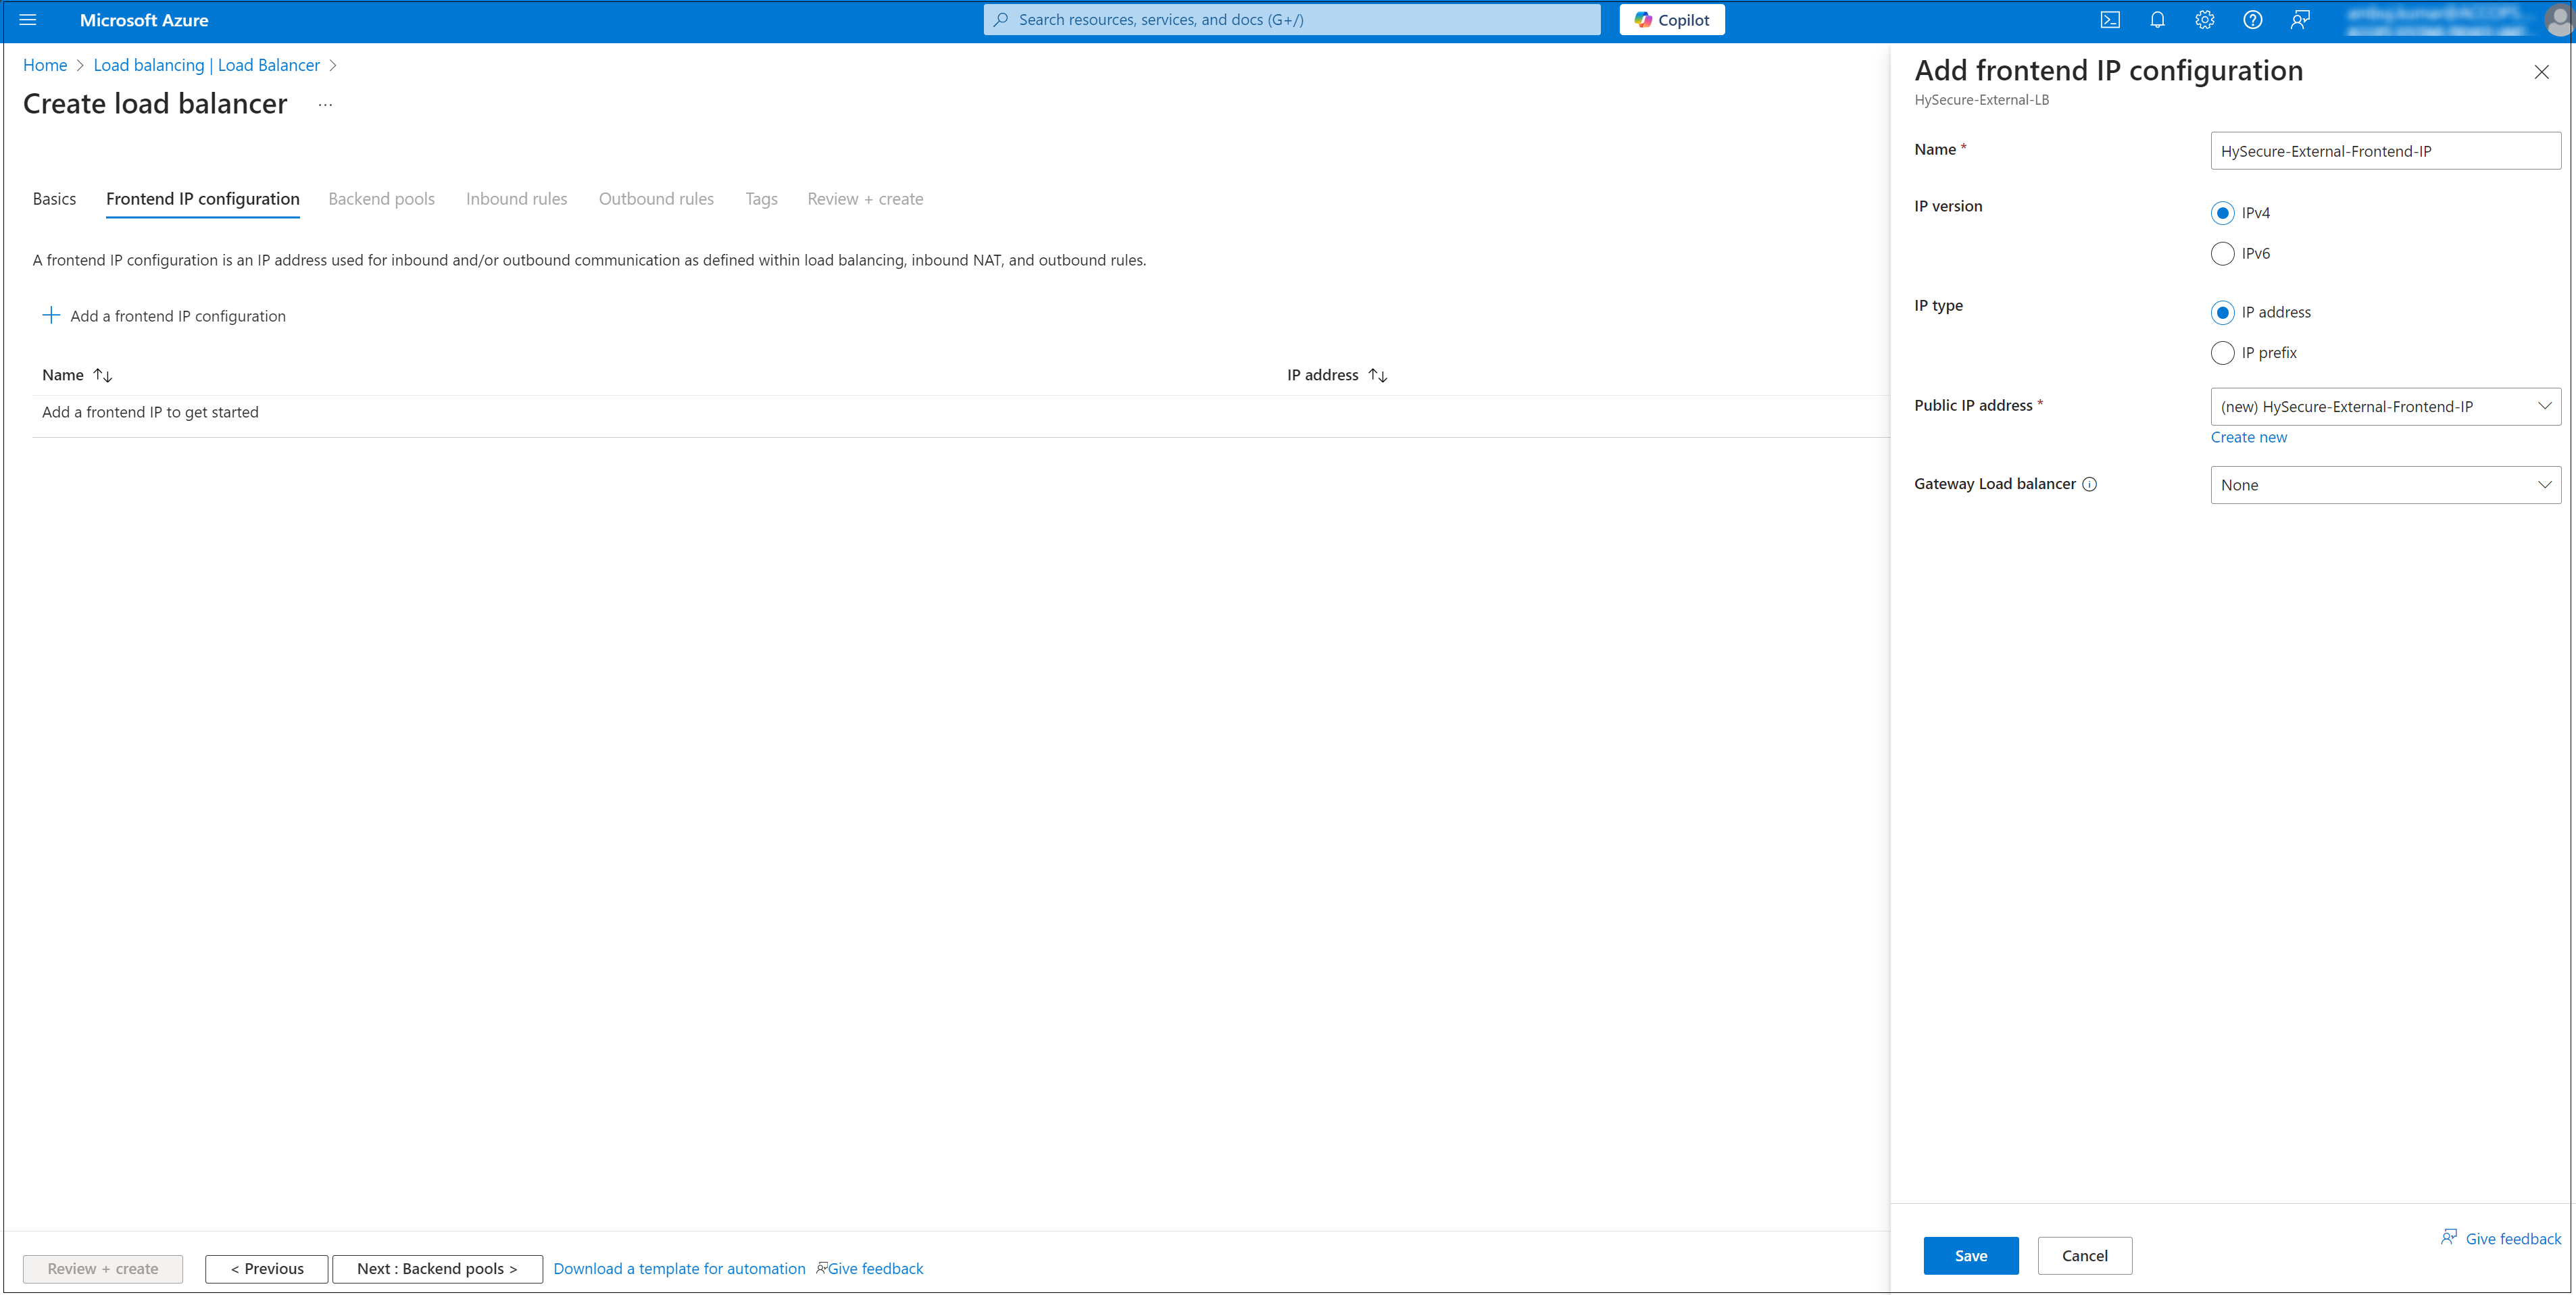
Add a Frontend IP Configuration.
- In the Load Balancer menu, select Frontend IP Configuration.
- Click + Add to create a new configuration.
-
Enter the following details:
- Name: Enter a descriptive name (e.g., HySecure-External-Frontend-IP).
- IP Version: Select IPv4.
- IP Type: Click to Create a new Public IP.
- Virtual Network: The load balancer must be associated with a virtual network.
- Click Save to apply the configuration.
-
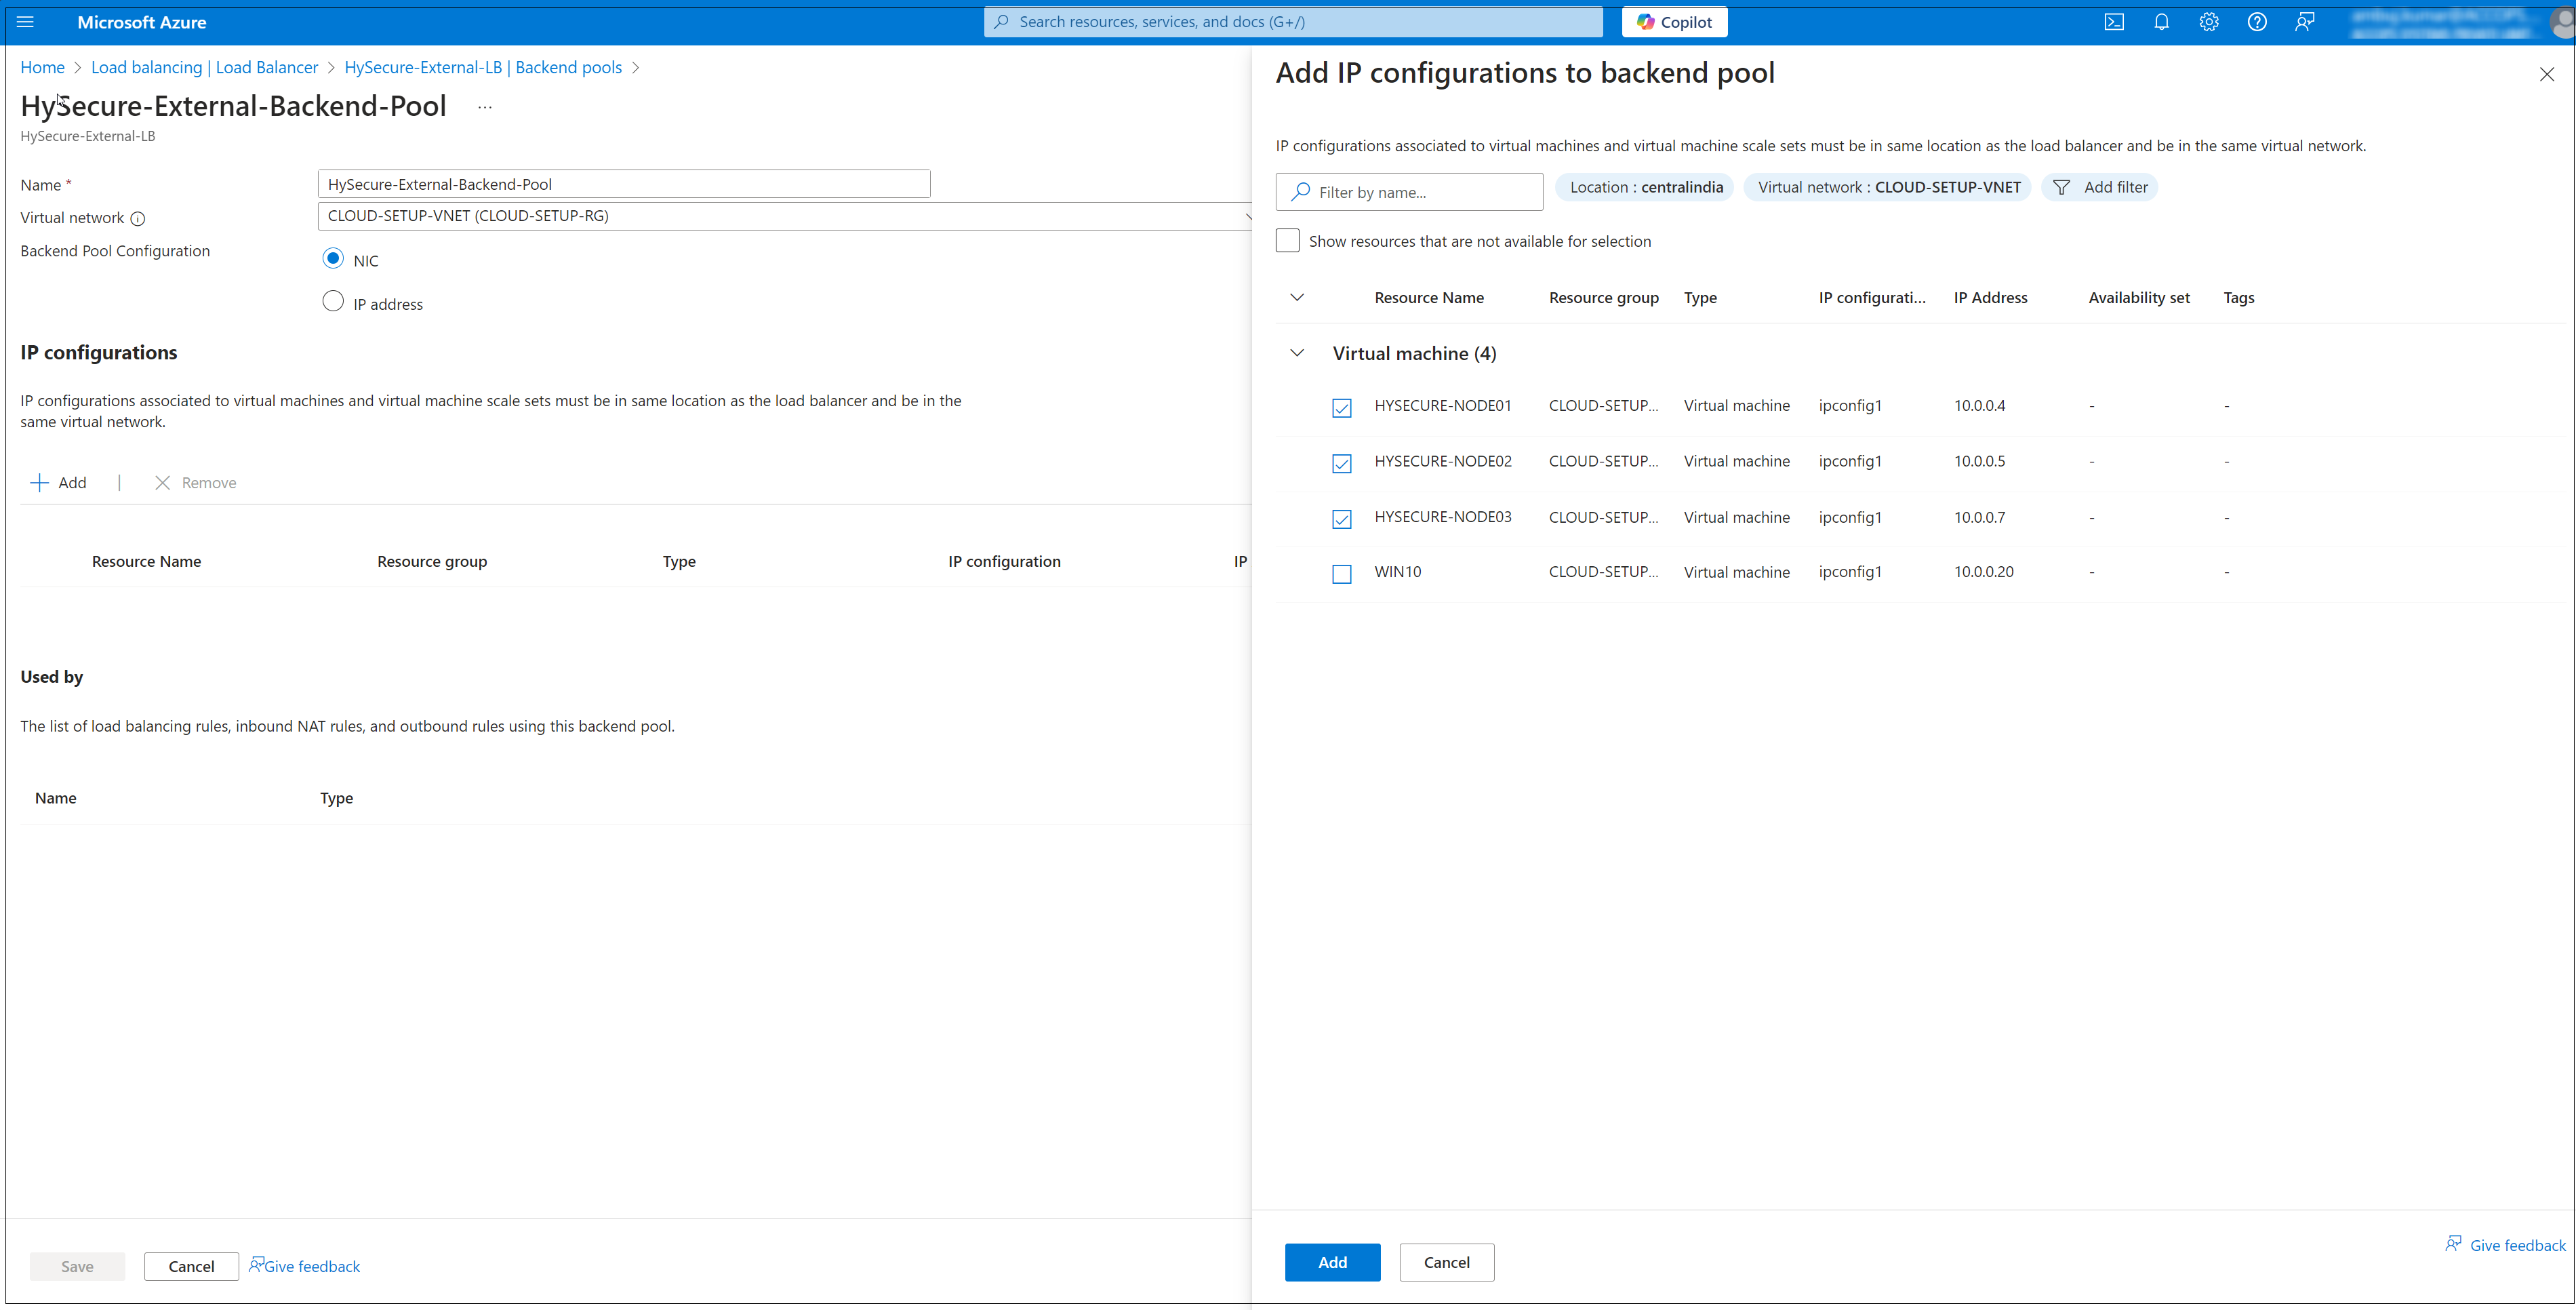
Configure Backend Pool.
- Once the Load Balancer is deployed, navigate to the Backend Pools section.
- Click Add to create a backend pool.
- Provide a Name for the backend pool (e.g. HySecure-External-Backend-Pool).
- Select the Virtual network and associate the backend pool with the virtual machines or virtual machine scale set you want to use. (e.g. CLOUD-SETUP-VNET).
- Click Add to complete the configuration.
- After configuring the backend pool in External LB.
-
Click Review & Create.
-
Select the External LB from the Load Balancer page to proceed with further configurations.
-
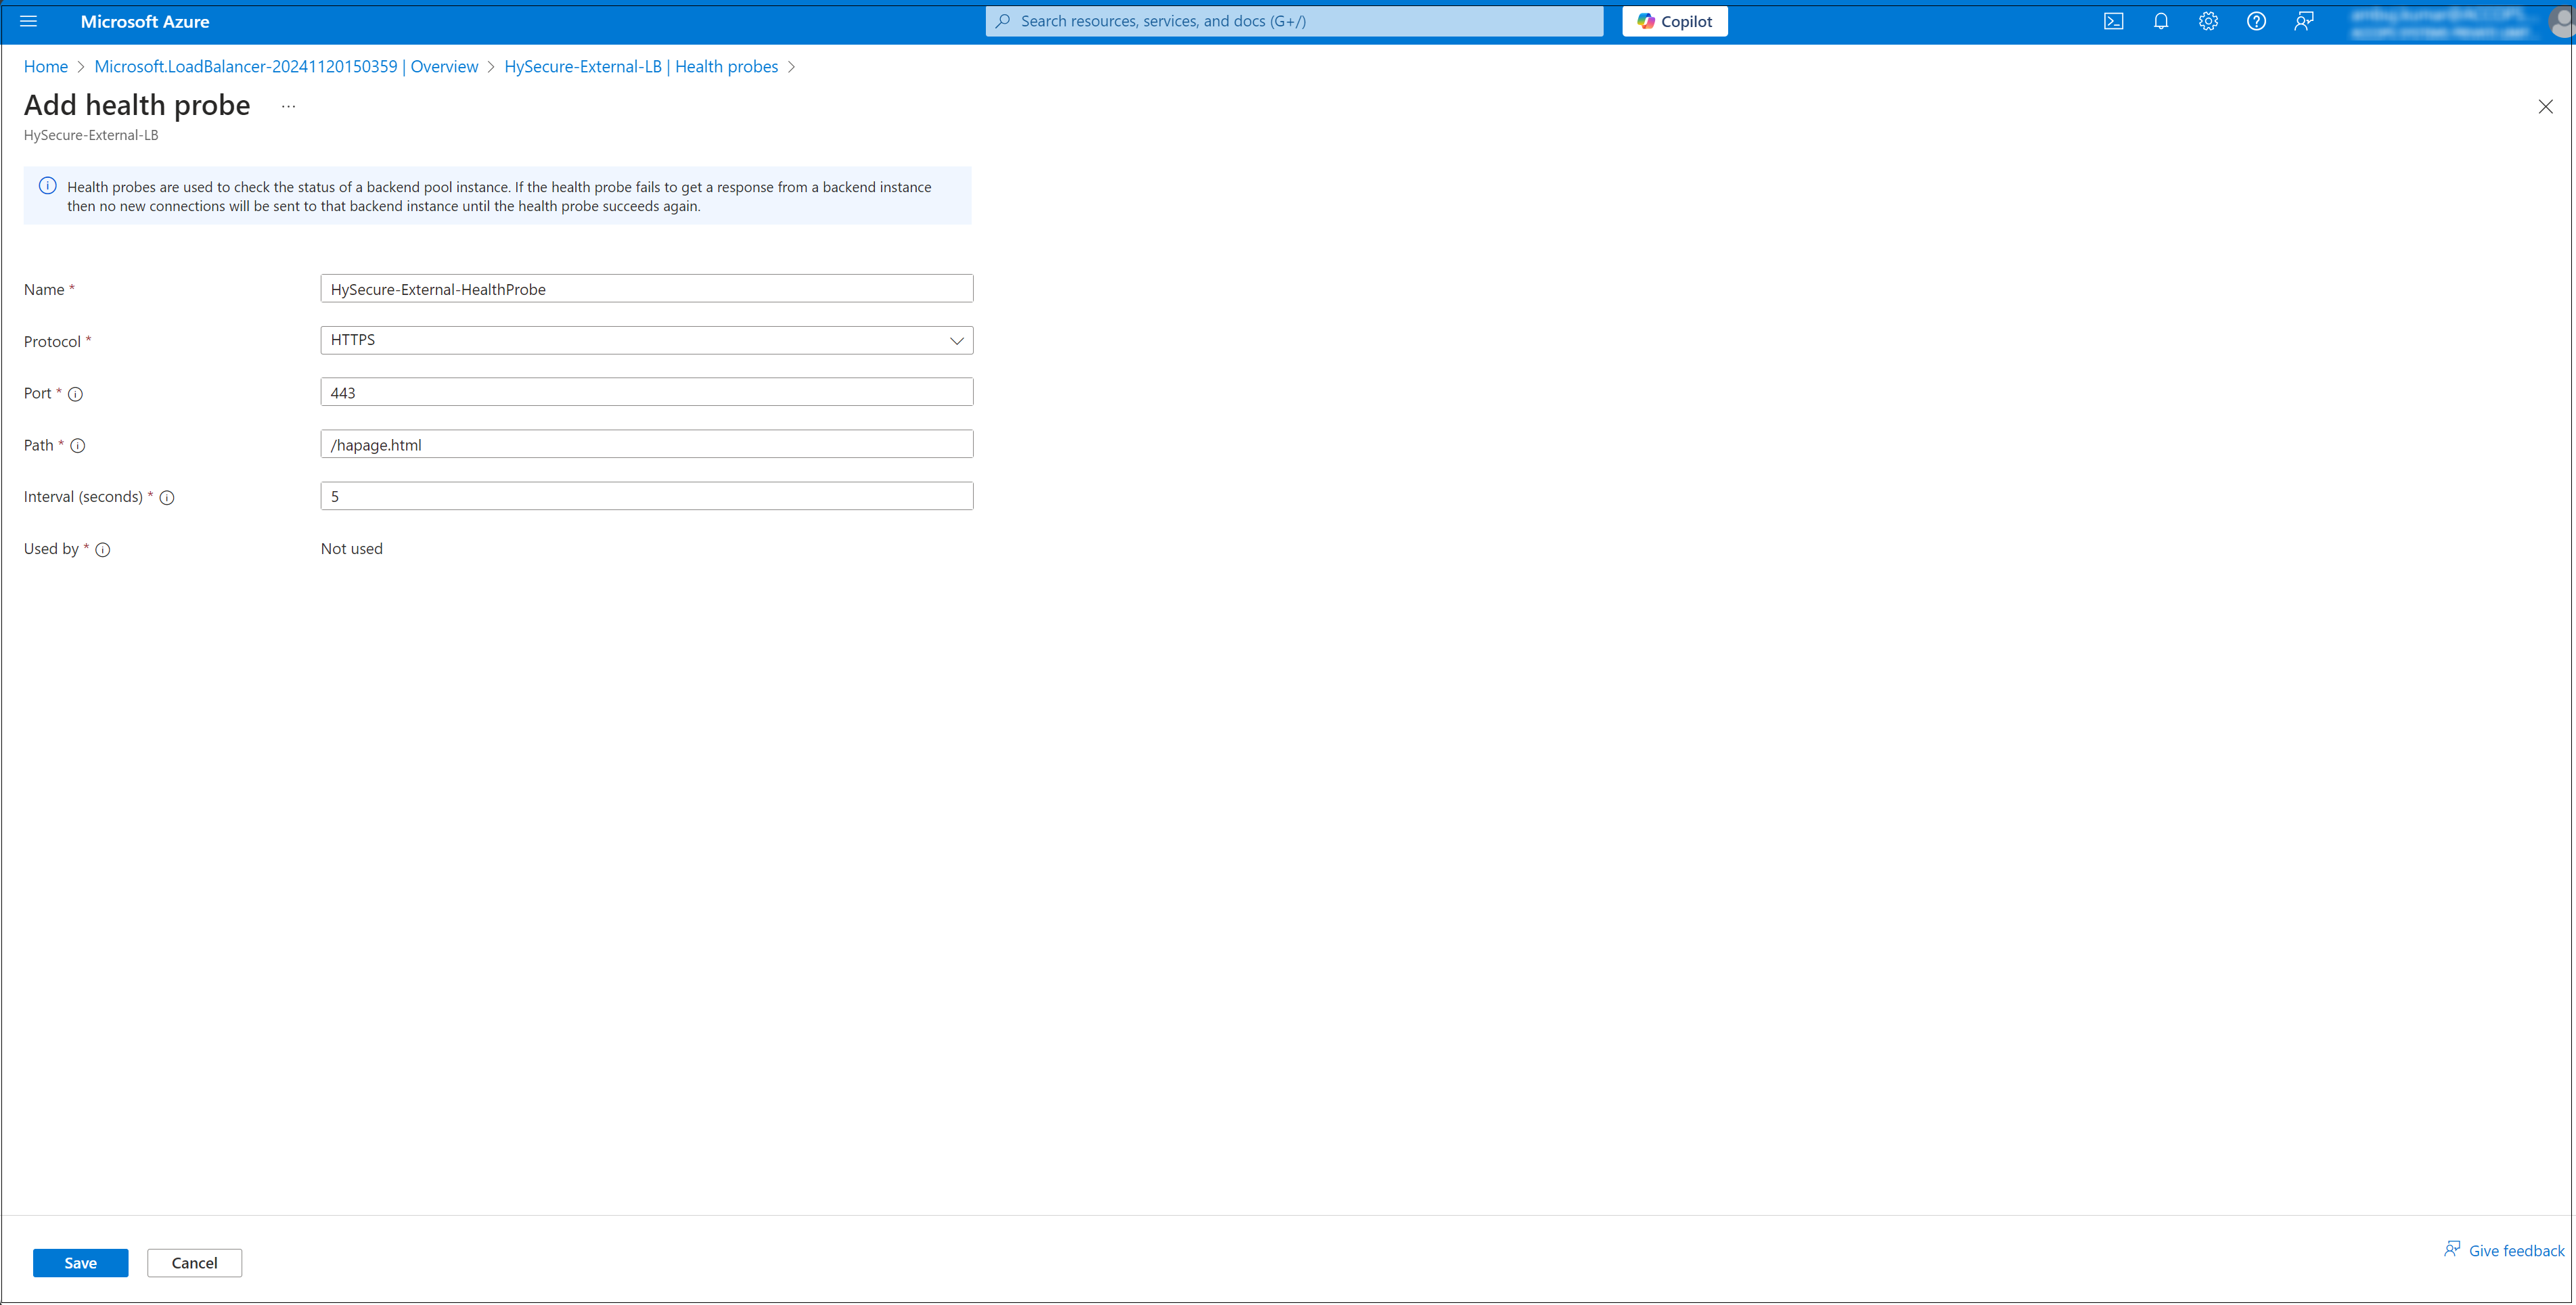
Create a Health Probe.
- Navigate to the Health Probes section of the Load Balancer.
- Click Add to create a new health probe.
- Enter a Name, Protocol (e.g. HTTP) and, configure the Port and probe Interval.
-
Click Save to save the health probe configuration.
-
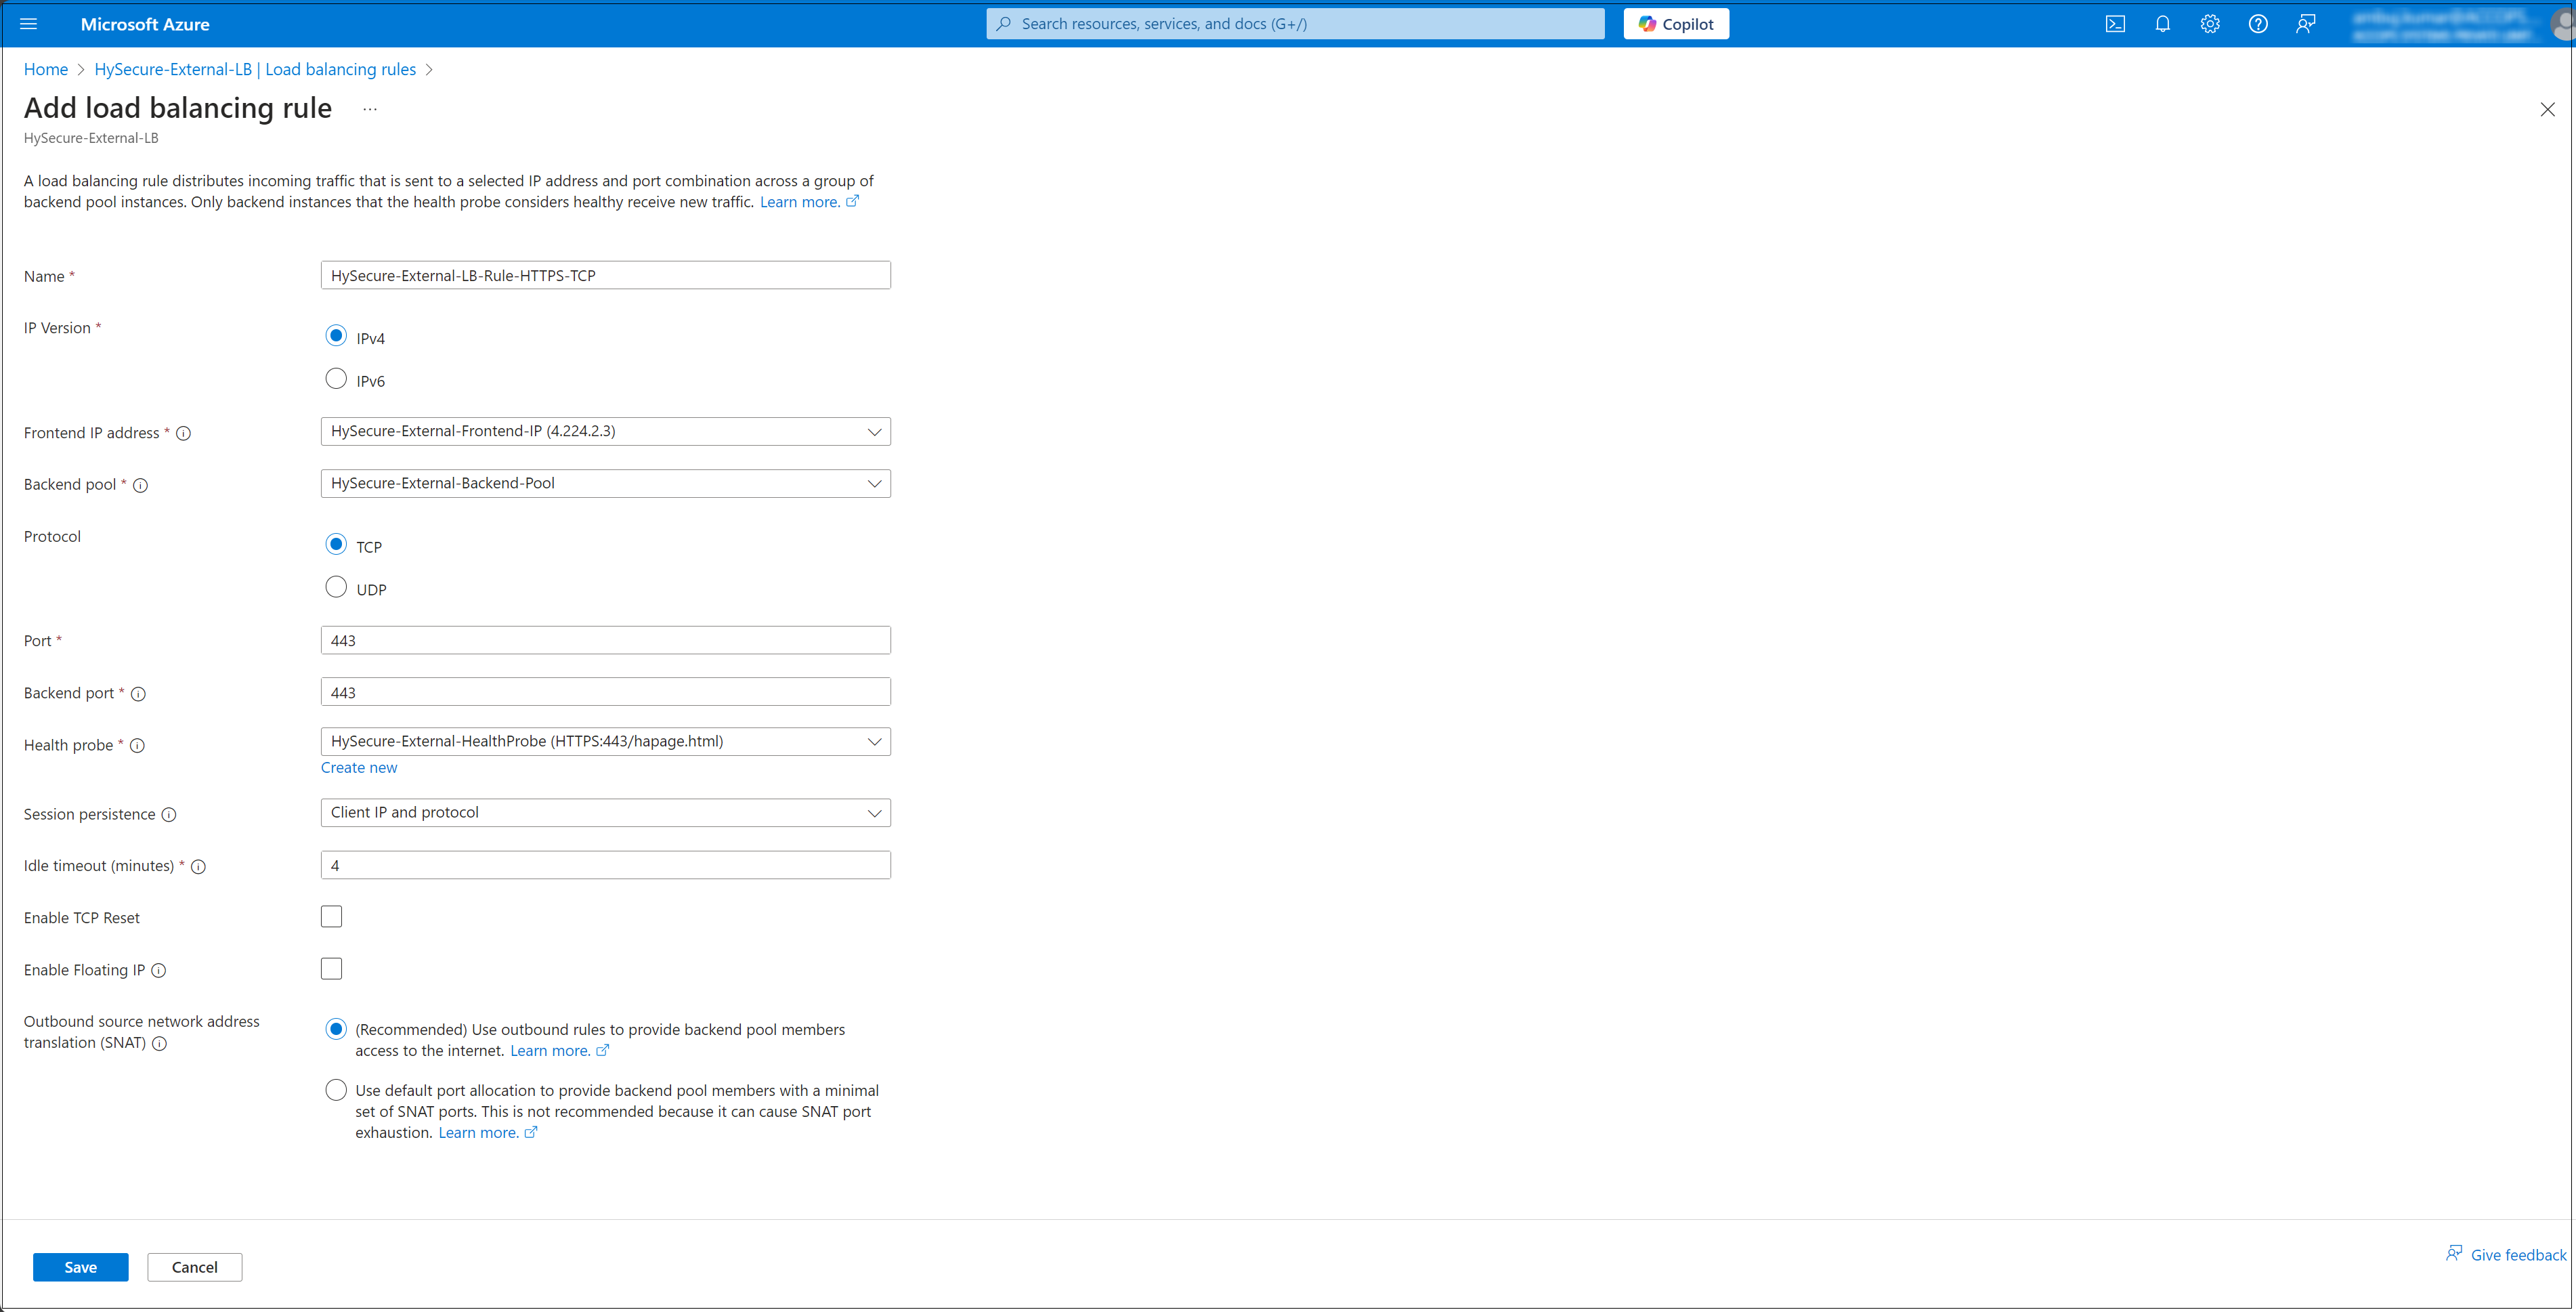
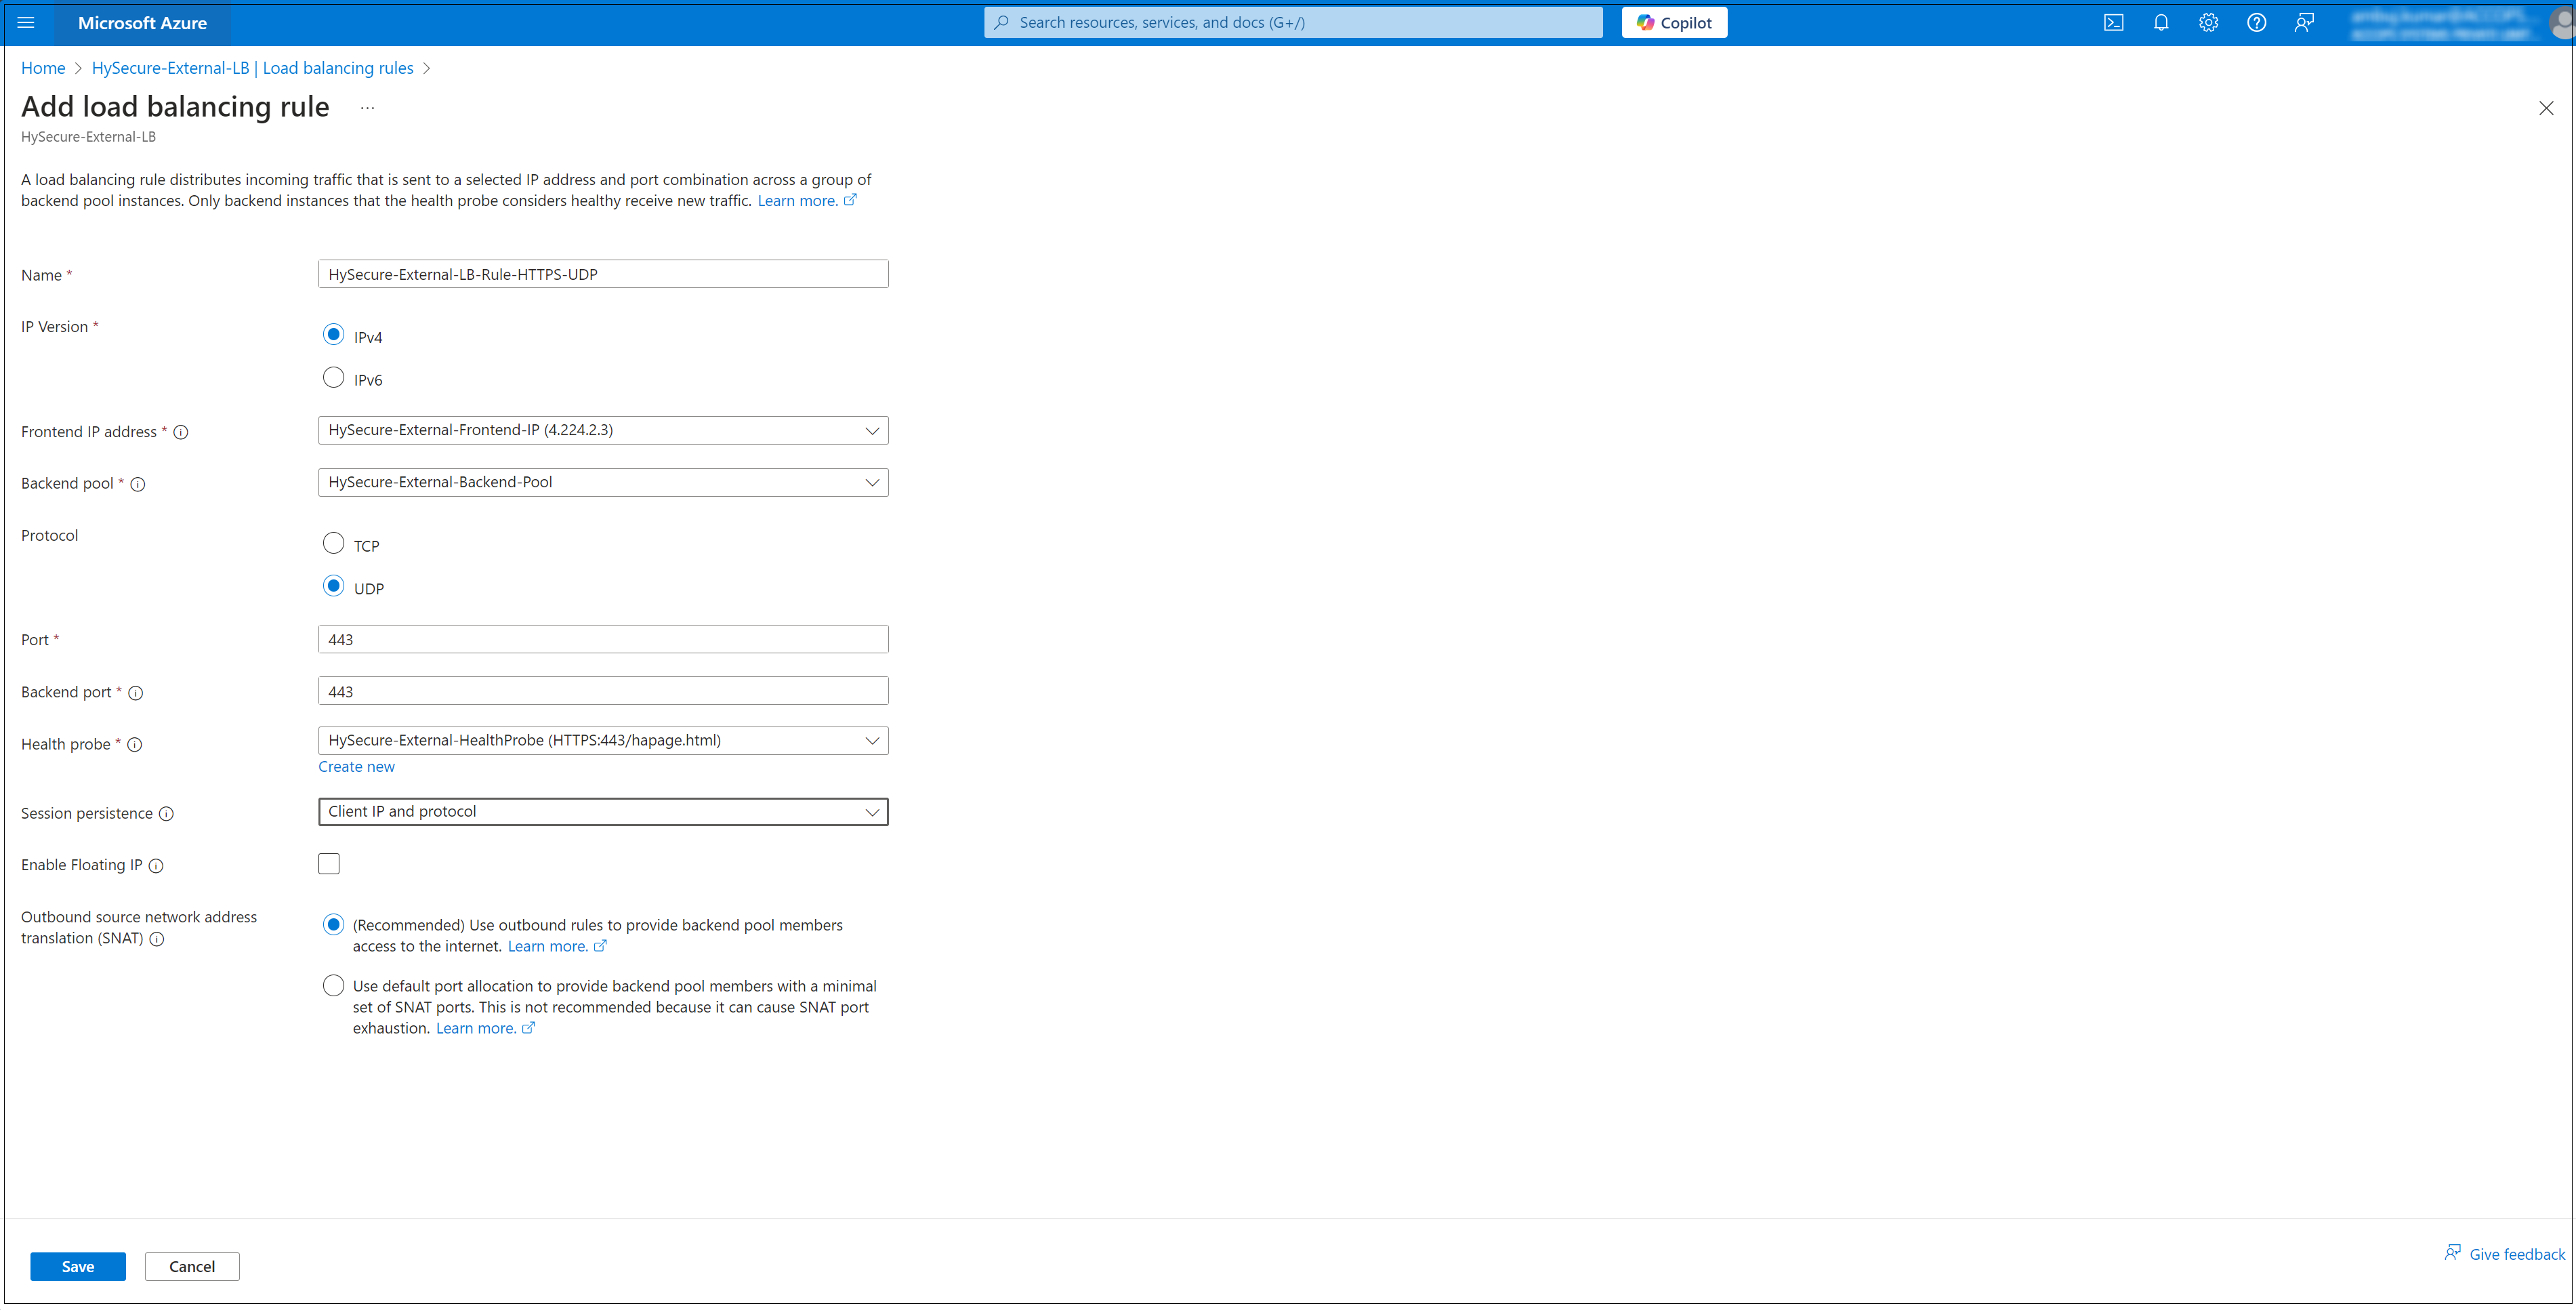
Set up Load Balancing Rules.
- Navigate to the Load Balancing Rules section. Create two new Rules.
- HySecure-External-LB-Rule-HTTPS-TCP
- HySecure-External-LB-Rule-HTTPS-UDP
- Click Add to create a new rule.
- Configure the following:
- Name: Provide a rule name (e.g. LBRule).
- Frontend IP Address: Select the public IP configured earlier.
- Backend Pool: Select the backend pool created in Step 3.
- Protocol: Choose the protocol (e.g., TCP).
- Port: Specify the frontend and backend port numbers.
- Session Persistence: Configure as needed (e.g., None, Client IP).
- Idle Timeout (minutes): Set the timeout duration.
- Click add to Save the rule.
HySecure-External-LB-Rule-HTTPS-TCP
HySecure-External-LB-Rule-HTTPS-UDP
- Navigate to the Load Balancing Rules section. Create two new Rules.
-
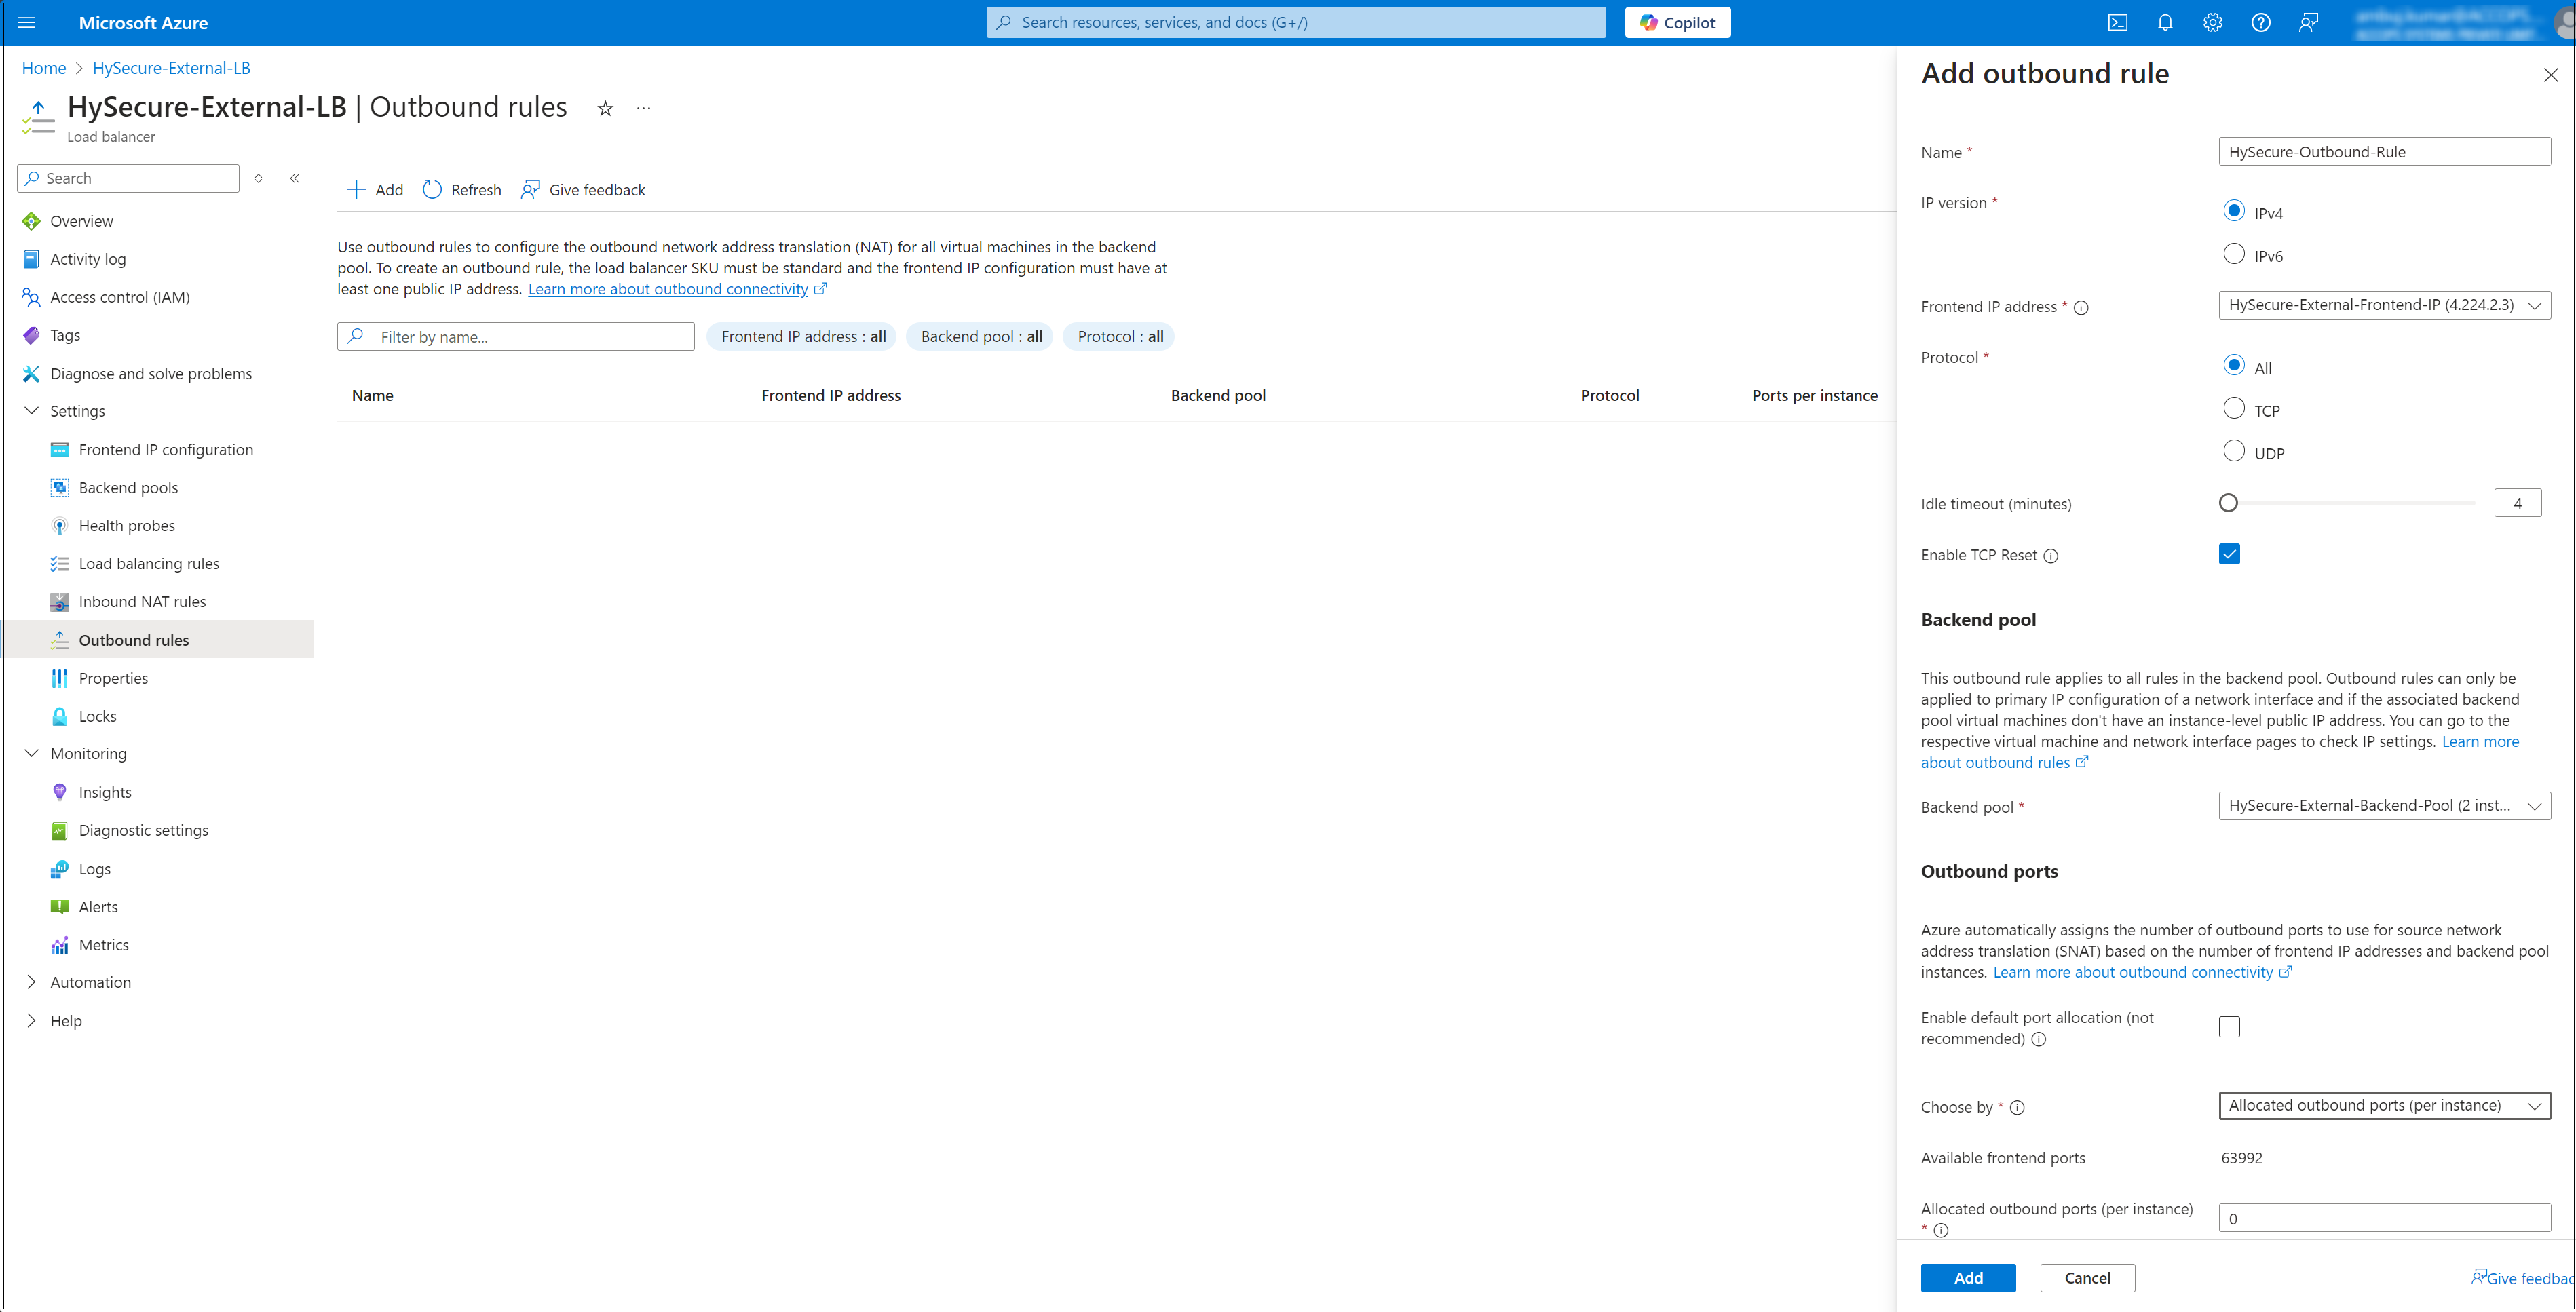
Configure the Outbound Rule.
- Basics Name: Enter a name for the outbound rule (e.g., HySecure-Outbound-Rule).
- Outbound Rule Type: Leave as default (Load Balancer).
- Frontend IP Address: Select the public IP address associated with your load balancer.
- Backend Pool: Select the backend pool for which you want to apply the outbound rule.
- Protocol: Choose between All, TCP, or UDP, depending on your needs.
- Idle Timeout (minutes): Specify the idle timeout duration (e.g. 4 minutes).
- Review and Create:
- Click Review + create.
- Verify all the settings, and click Create to finalize the outbound rule.
Conclusion
In this way, a multi-node HA cluster deployment offers a viable solution for small to medium businesses seeking to enhance the reliability and availability of their production environments.
By following these deployment steps, businesses can ensure critical services remain accessible, achieving a robust high availability solution for their production environments.