3rd Party SAML-supported Application Integration
This document describes the steps to integrate Pulse Secure with Accops HyID Two-Factor Authentication. The steps will remain similar for integrating any third-party SAML-supported Application.
The document is prepared for the HySecure Version 5.4 SP6 release.
Create Identity Provider for SAML Application in Accops HySecure
-
Log in to the HySecure Management console.
-
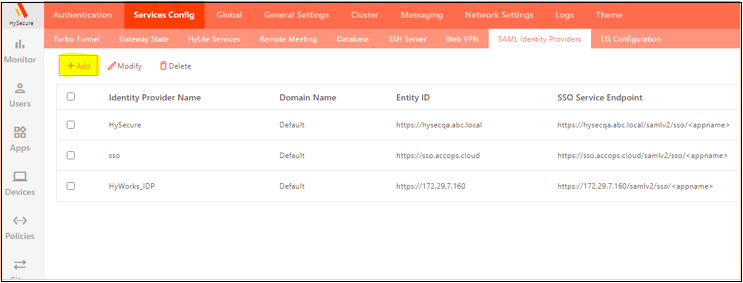
Navigate to Settings > Service Config > SAML Identity Provider and click Add to create a new Identity Provider.
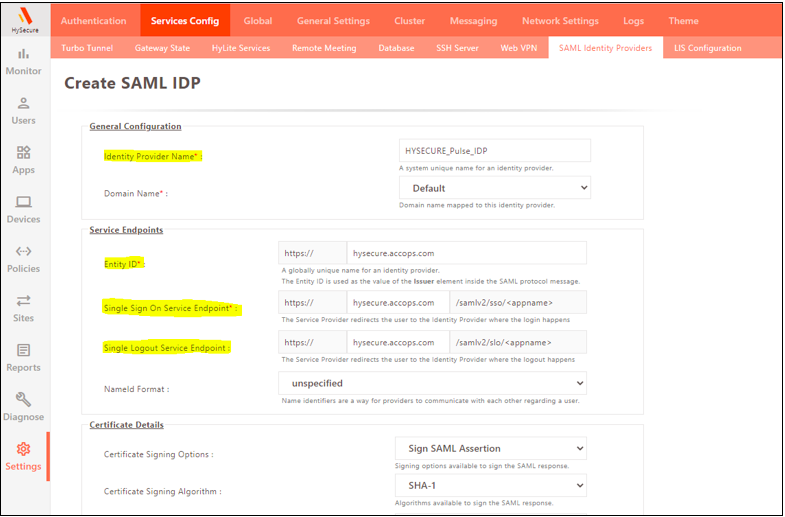
Provide the following information:
- Identity Provider name: Enter a unique name for the Identity Provider.
- Domain name: Select Default.
- Entity ID: Public DNS or FQDN name of HySecure Gateway.
- Single Sign-On Service Endpoint: Enter the Public DNS or FQDN name of HySecure Gateway.
-
Single Logout Service Endpoint: Enter the Public DNS or FQDN name of HySecure Gateway
-
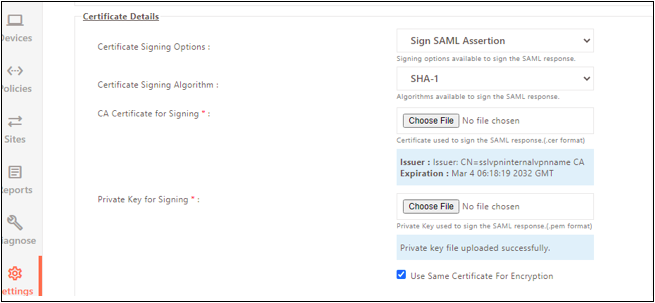
Enter the Certificate Details. Select the default certificate.
Note
Upload the SSL certificate on the HySecure gateway before creating the SAML Identity provider in the production environment.
-
Click Submit.
-
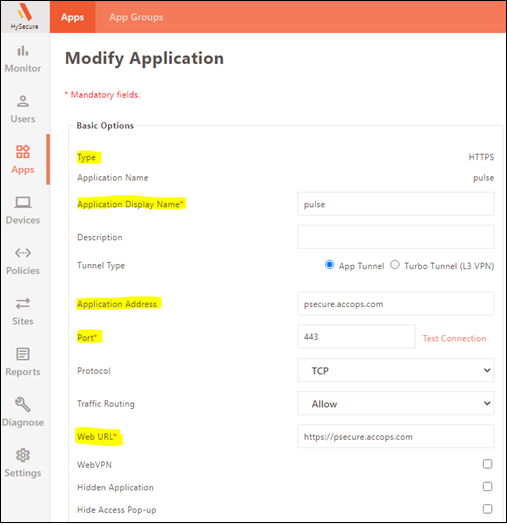
Navigate to Apps > Apps and create a new Application for the Pulse Secure gateway. Provide the following information:
- Type: Enter HTTPS.
- Application Name: Give a Unique name to the application.
- Application Address: Enter the public DNS of the Pulse Secure gateway.
- Port: Enter the Public port (The default port for https is 443).
- Web URL: Enter FQDN of Pulse Secure gateway.
-
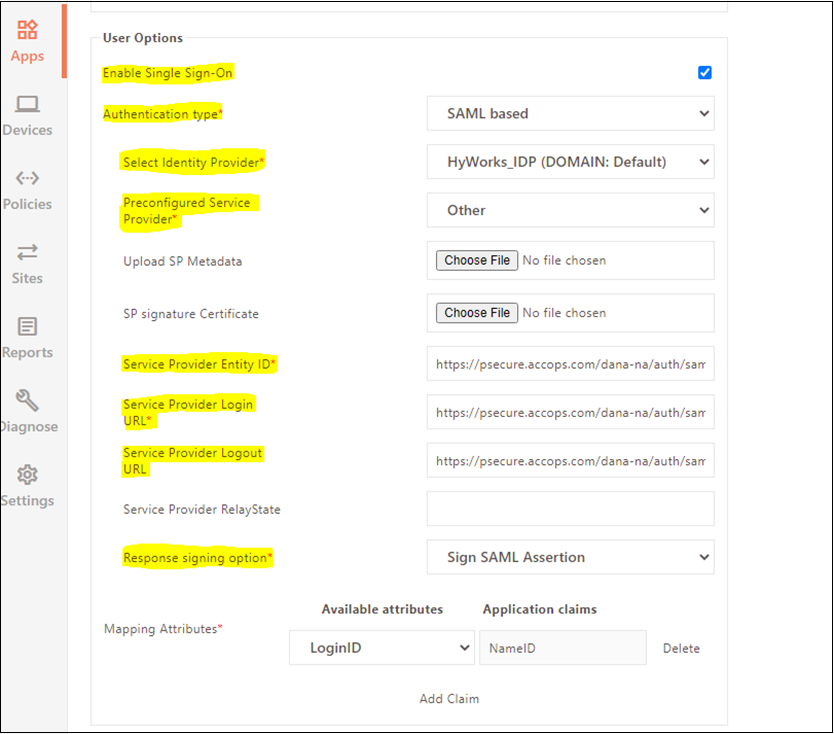
Enter the following details in the User Options:
- Enable Single Sign.
- Authentication Type: Select SAML based.
- Preconfigured Service Provider: Select Other option.
- Service Provider Entity ID: Enter the URL of the Service provider provided by the Pulse VPN team or from the Metadata generated in the Pulse VPN Portal.
- Service Provider Login URL: Enter the Login URL of the Service provider provided by the Pulse VPN team or from the Metadata generated in the Pulse VPN Portal.
- Service Provider Logout URL: Enter the Logout URL of the Service provider provided by the Pulse VPN team or from the Metadata generated in the Pulse VPN Portal.
-
Response signing option: Select Sign SAML Assertion.
-
Click Submit and add the application to the Application Group.
-
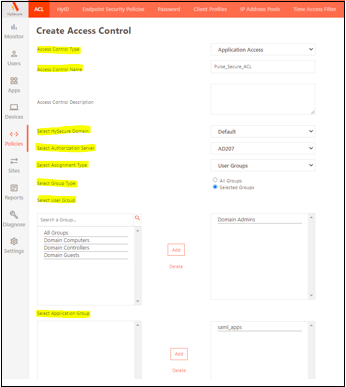
Navigate to Policies and create a new policy for the Pulse Secure gateway using the information mentioned below:
- Access Control Type: Select the option Application Access.
- Access Control Name: Provide a unique name to ACL.
- Select HySecure Domain: Select the domain where you have added your Active Directory.
- Select Authorization Server: Select AD as your Authorization Server.
- Select Assignment Type : Select Users or Group depending on the requirement.
- Select User Group: Select the appropriate Group from the list.
-
Select Application group: Select the application group in which you have added the Pulse application created in previous steps.
-
Save the configurations.
Pulse Secure Configuration
- Log in to the Pulse Secure Management Console.
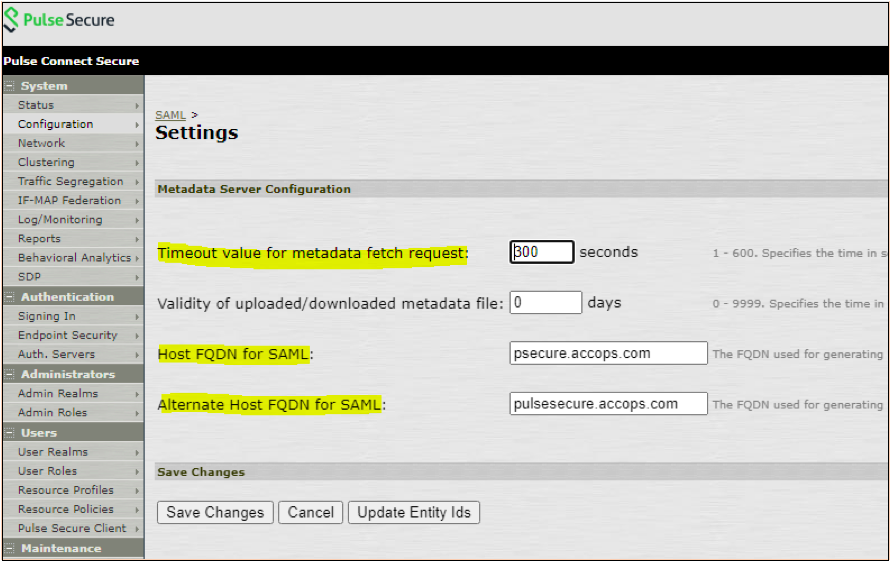
- Navigate to System > Configuration > SAML > Settings > Metadata Server Configuration enter the following details:
- Timeout value for metadata fetch request: Keep it as default (300ms).
- Host FQDN for SAML: Enter the public hostname of Pulse Secure gateway.
- Alternate Host FQDN for SAML: Enter the alternate public hostname of Pulse Secure gateway.
-
Click Save Changes.
-
Navigate to Authentication > Auth Servers select SAML Server from the drop-down menu, and click New Server....

-
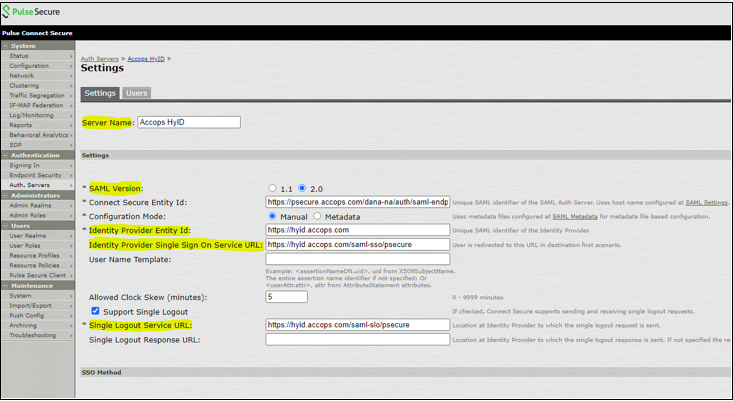
Configure the Server. Enter the following details:
- Server Name: Enter a unique Server Name.
- SAML Version: Select version 2.0.
- Configuration Mode: Select Manual or Metadata. We have selected the manual mode for demonstration purposes.
- Identity Provider Entity ID: Enter the HySecure Public URL provided by the Accops Admin team.
- Identity Provider Single Sign-On Service URL: Change the Hostname with the HySecure Public FQDN and the /psecure with the same application name created in the HySecure Management Console.
- Single Logout Service URL: Enter the logout URL.
-
Use the metadata to add the information as follows:
- To download the metadata file, log in to the HySecure Management console.
- Navigate to Settings > Service config > SAML Identity Provider and download the Metadata and Certificate file from the SAML Identity Provider.

- Upload this metadata file to the Pulse Secure SAML, and in the Service Provider Sign-in and Sign-out URL, mention the application name at the end.
-
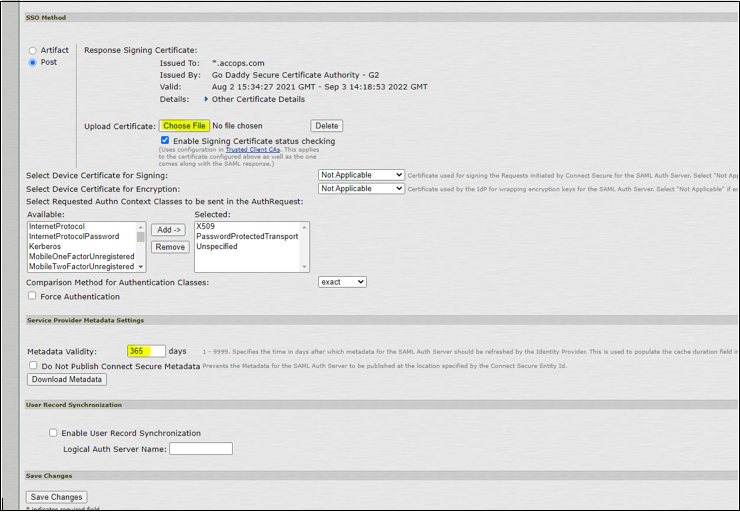
In the SSO Method section, upload the Certificate generated in the previous step and set the Metadata validity as 365 days. Save the settings.
-
Navigate to User > User Realm > Users > General. Select the existing user realm and modify it as follows:
- Authentication Server: Select the SAML server we have created.
- User Directory/Attribute: You can select your LDAP server to give users group-based access; otherwise, select None.

-
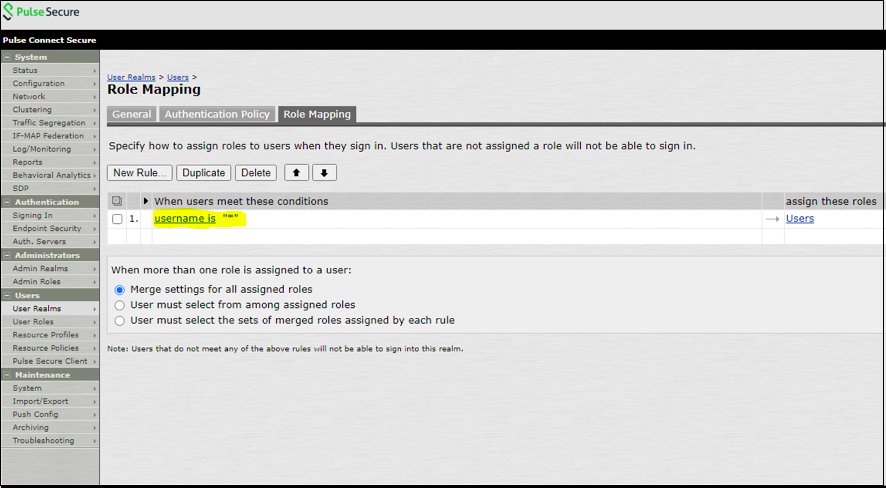
Navigate to User > User Realm > Users > Role mapping and create or modify a new role. For demonstration purposes, we have assigned all the users to log in.
When a user tries to log in to the Pulse Secure VPN, the user will be redirected to the HySecure Login Page, prompting for login credentials for Multifactor Authentication.
After successful authentication, the User will log in to the Pulse VPN client.