Setting Up MFA Push for VMware vCenter Using Accops HyID
Overview
This document provides step-by-step instructions on configuring Multi-Factor Authentication (MFA) Push for VMware vCenter using Accops HyID Server. The configuration ensures secure authentication for users accessing vCenter.
Prerequisites
Ensure the following components and information are available before proceeding:
-
HyID Server IP: 192.168.100.100 (VIP)
-
Active Directory (AD) Server: ldap.xyz.com (Port 389)
-
Domain Name: xyz.com
-
vCenter Server: vcenter.xyz.com
-
HyID Server LDAP: 192.168.100.100
-
HyID Port: 389 (For SSL, use Port 636 and import the required certificate)
Note
The IP Addresses and the configuration values shown here are for demonstration purposes only.
Configuration Steps
Step 1: Create an SSO Server
Configure the Accops HyID Server as an SSO Server.
Step 2: Verify OpenLDAP Configuration
Check the slapd.conf file in the gateway by executing:
vi /usr/local/etc/openldap/slapd.conf
Ensure the following parameters are configured:
suffix                          "DC=XYZ,DC=COM"
uri                             "ldaps://ldap.xyz.com"
chase-referrals                 no
idassert-bind                   bindmethod=simple
                                mode=self
                                binddn="CN=HYIDServiceAccount,OU=ACCOPS,OU=INDIA,DC=XYZ,DC=COM"
                                credentials="*********"
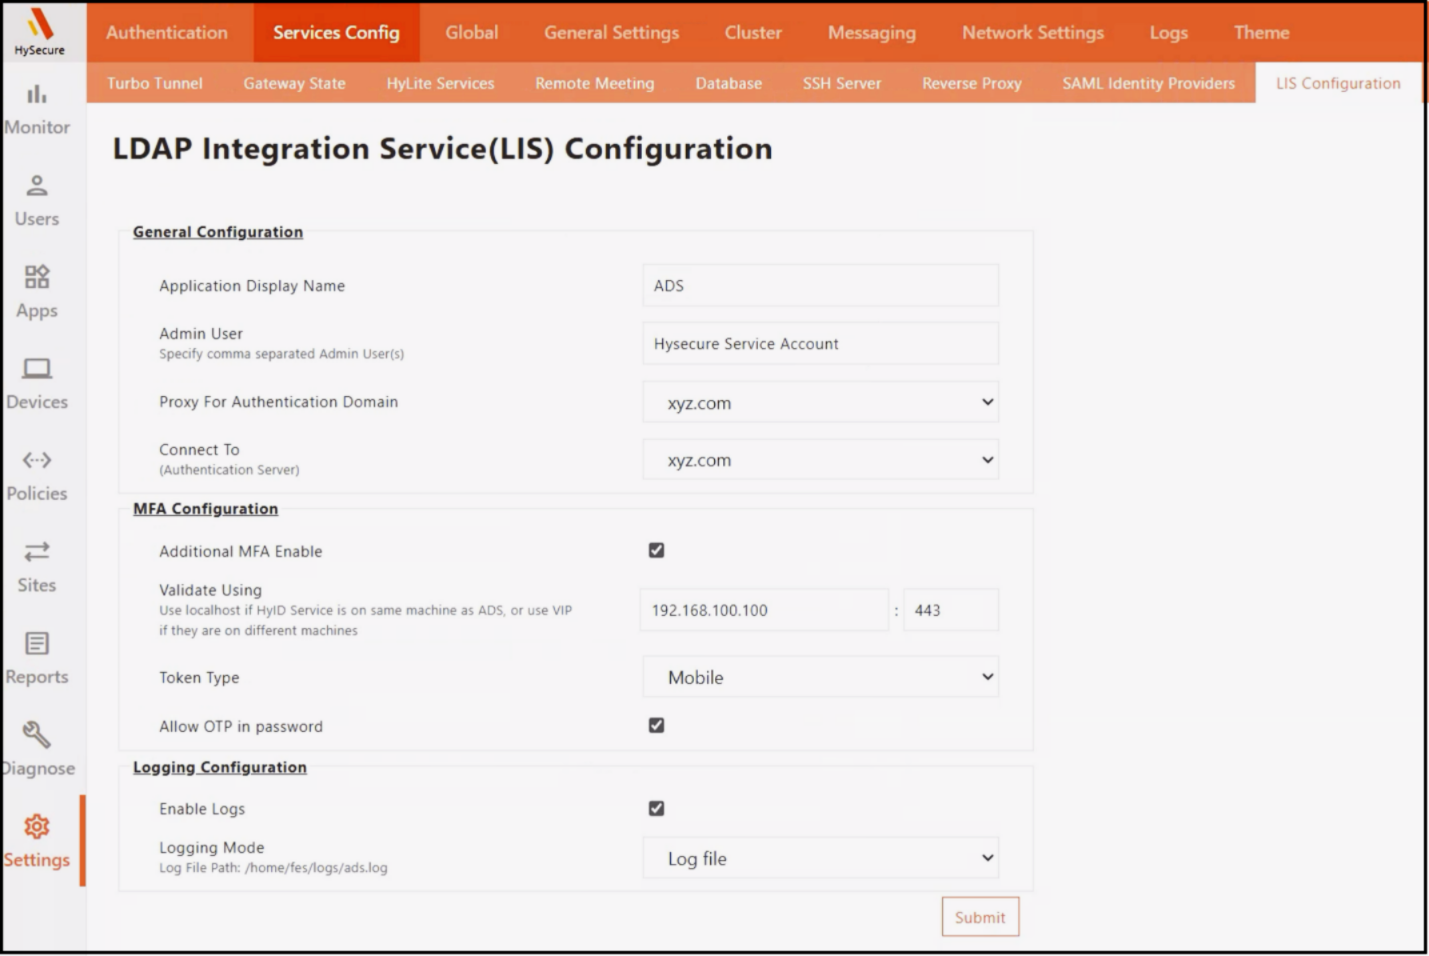
Step 3: Create an MFA Policy in the HyID Server
Configure MFA policies for users in the HyID Server. You can apply these policies on a per-user or group basis.
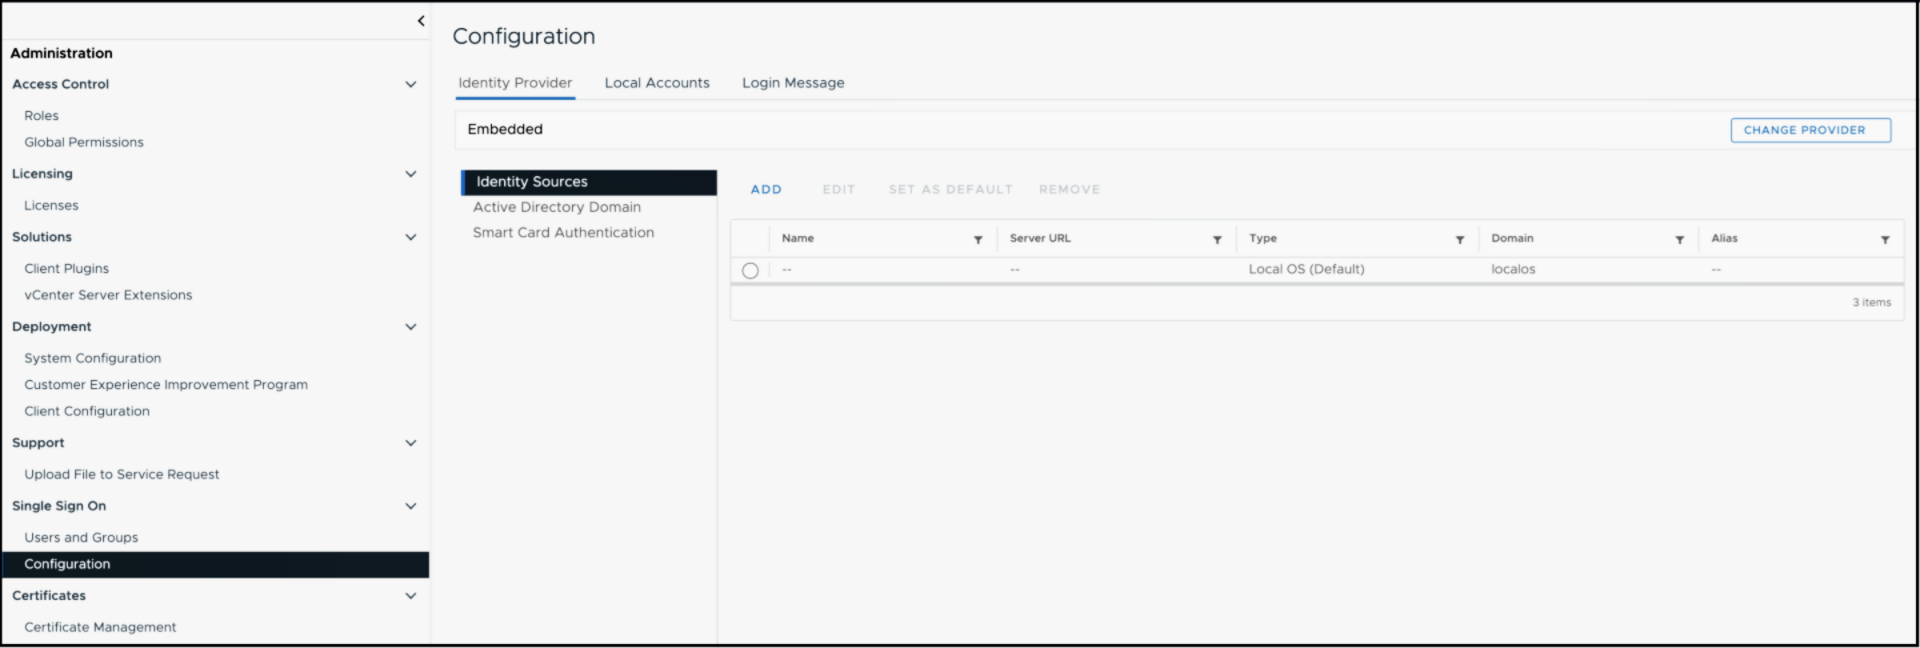
Step 4: Add HyID Server as an LDAP Identity Provider in vCenter
-
Log in to vCenter as an administrator.
-
Navigate to Administration > Single Sign-On > Configuration > Identity Provider.
-
Click Add.
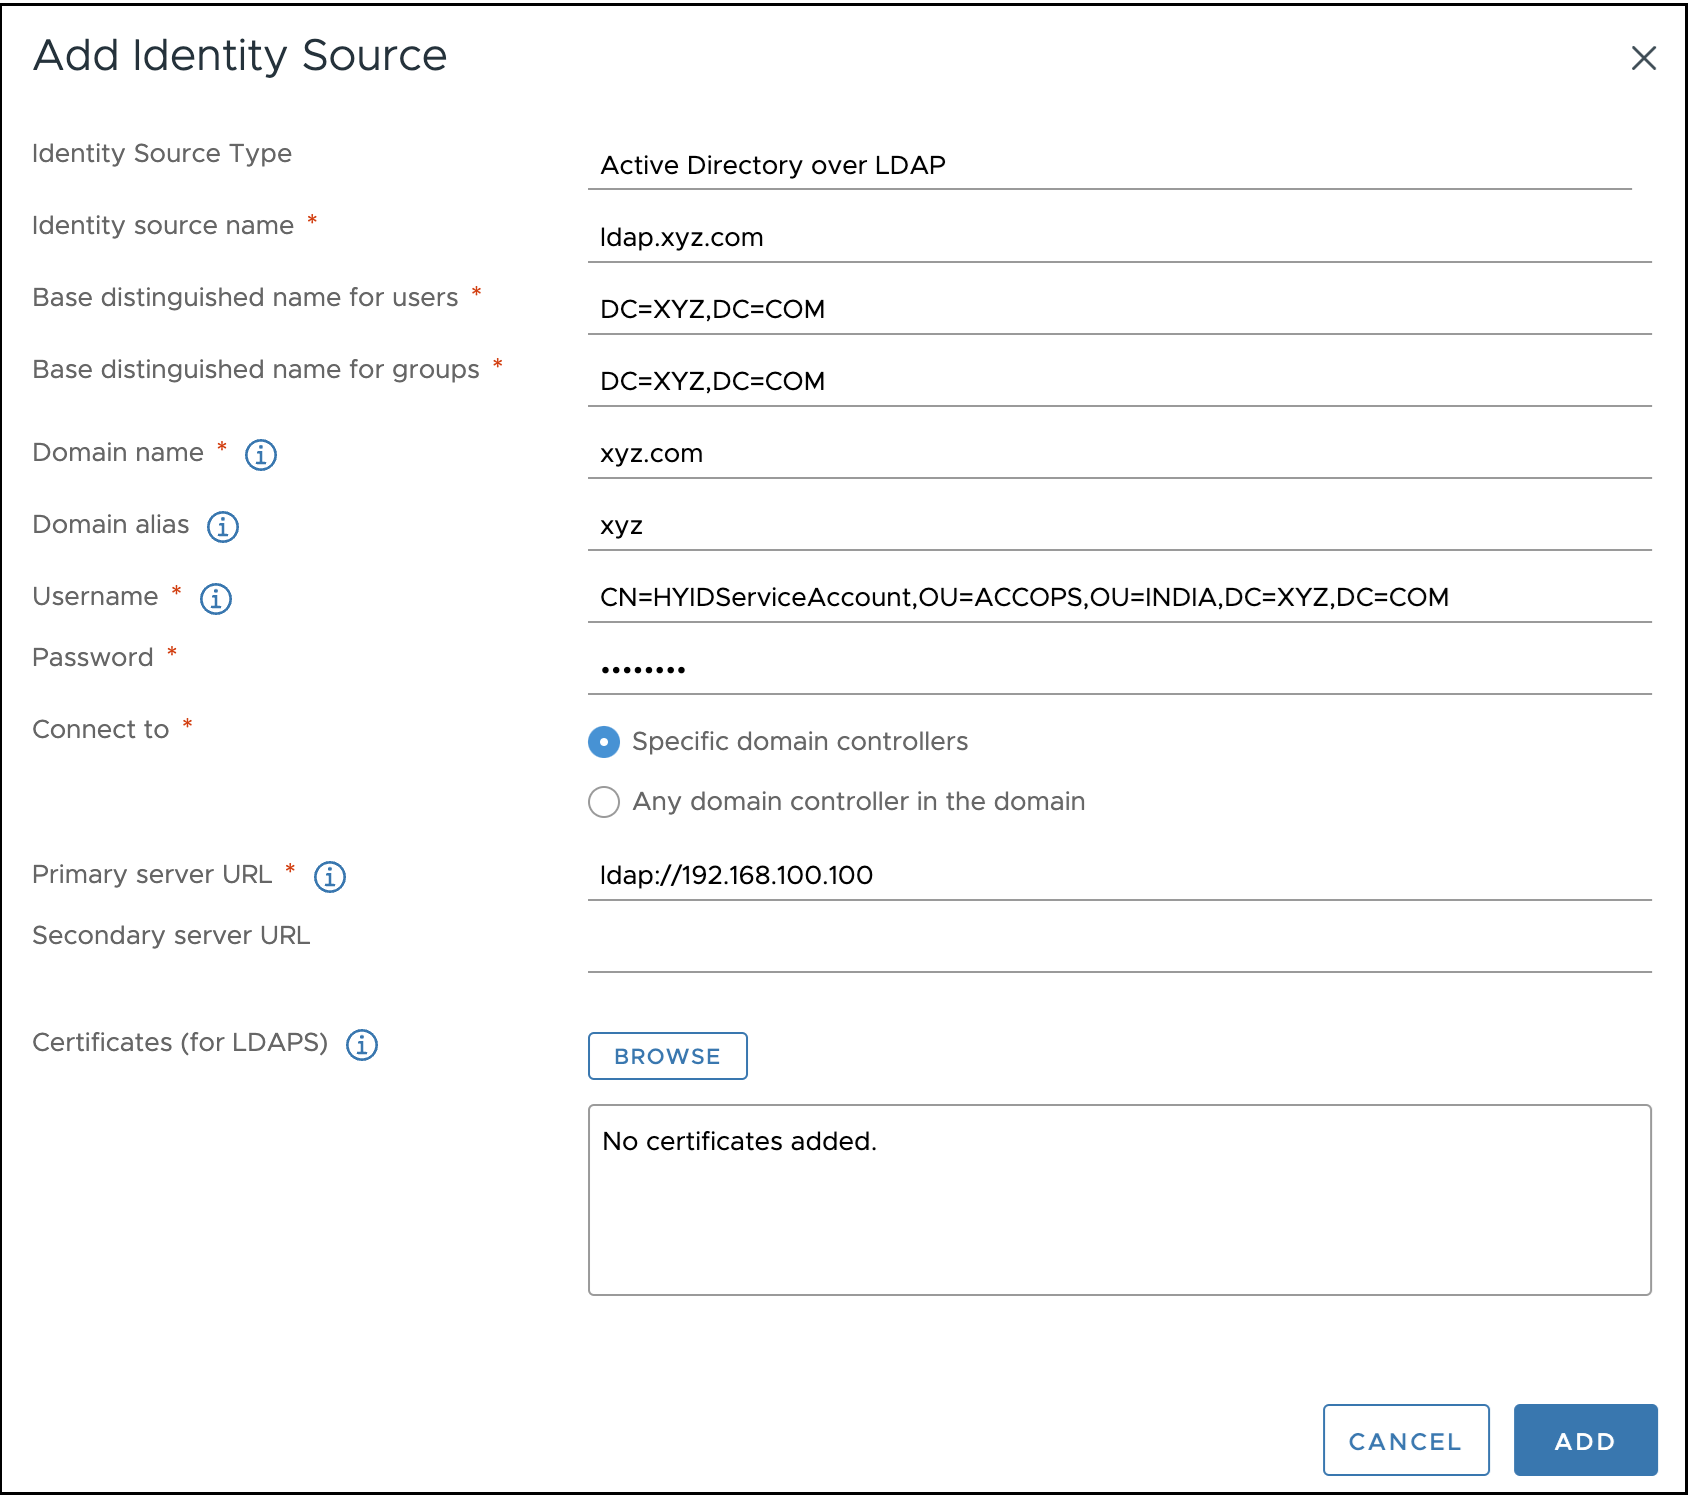
Step 5: Configure Identity Source
-
Select Identity Source Type as Active Directory over LDAP.
-
Enter the service account details that match the configuration in slapd.conf.
-
Click ADD.
-
Configure the Primary Server URL as the Accops HyID Server.
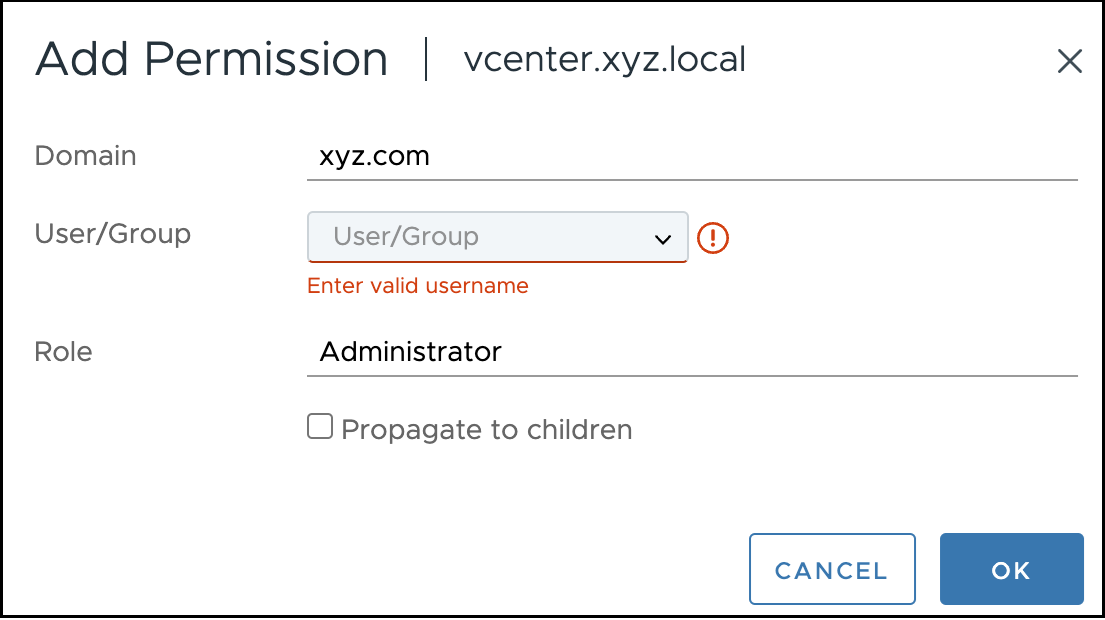
Step 6: Assign Permissions in vCenter
-
In vCenter, navigate to Permissions.
-
Select the appropriate Domain.
-
Add Users/Groups.
-
Assign a Role and click OK.
Authentication Process: Login into Vcenter with Accops HyID MFA
Option 1: Login via Push Notification
-
Open a browser and go to
https://vcenter.xyz.com. -
Enter:
-
Username: user@xyz.com
-
Password: Domain password
-
-
The user will receive a Push Notification in the Accops HyID App.
-
Approve the notification to complete authentication.
Option 2: Login via OTP
-
Open
https://vcenter.xyz.com -
Enter:
-
Username: user@xyz.com
-
Password: 123456.Password
Where:
123456is the OTP generated by the Accops HyID App.Passwordis the user’s domain password.
-
Conclusion
By following these steps, you can successfully configure and use MFA Push authentication for vCenter using Accops HyID, ensuring enhanced security for user logins.