Integrate Accops HYID 2FA with Netskope SAML-Supported Applications
This configuration guide provides detailed instructions for integrating Accops HyID 2FA and SSO with an application supported by Netskope's SAML.
These settings are configured explicitly for demonstration purposes only. Do not copy these values, as they vary depending on the setup. They are provided for reference purposes only.
The document is divided into two parts:
This document was prepared using the release of HySecure Version 5.4 SP6 with HA setup.
Creating Identity Provider for SAML Application in Accops HySecure
Follow the below steps to configure SAML IDP.
Note
Don't forget to upload the SSL certificate to the HySecure gateway before creating the SAML Identity provider in the production environment.
-
Log in to the HySecure management console using Admin credentials.
-
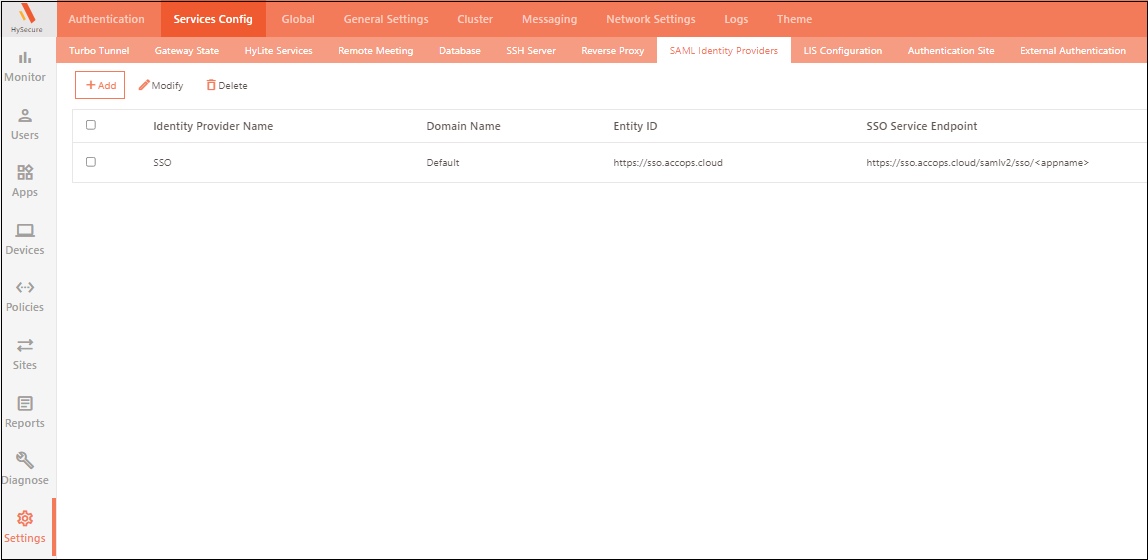
Navigate to Settings > Service Config > SAML Identity Providers.
-
Click Add to create a new SAML Identity Provider (IDP).
-
In the new window, add the details to create the SAML IDP. For more information on SAML IDP configuration, click here.
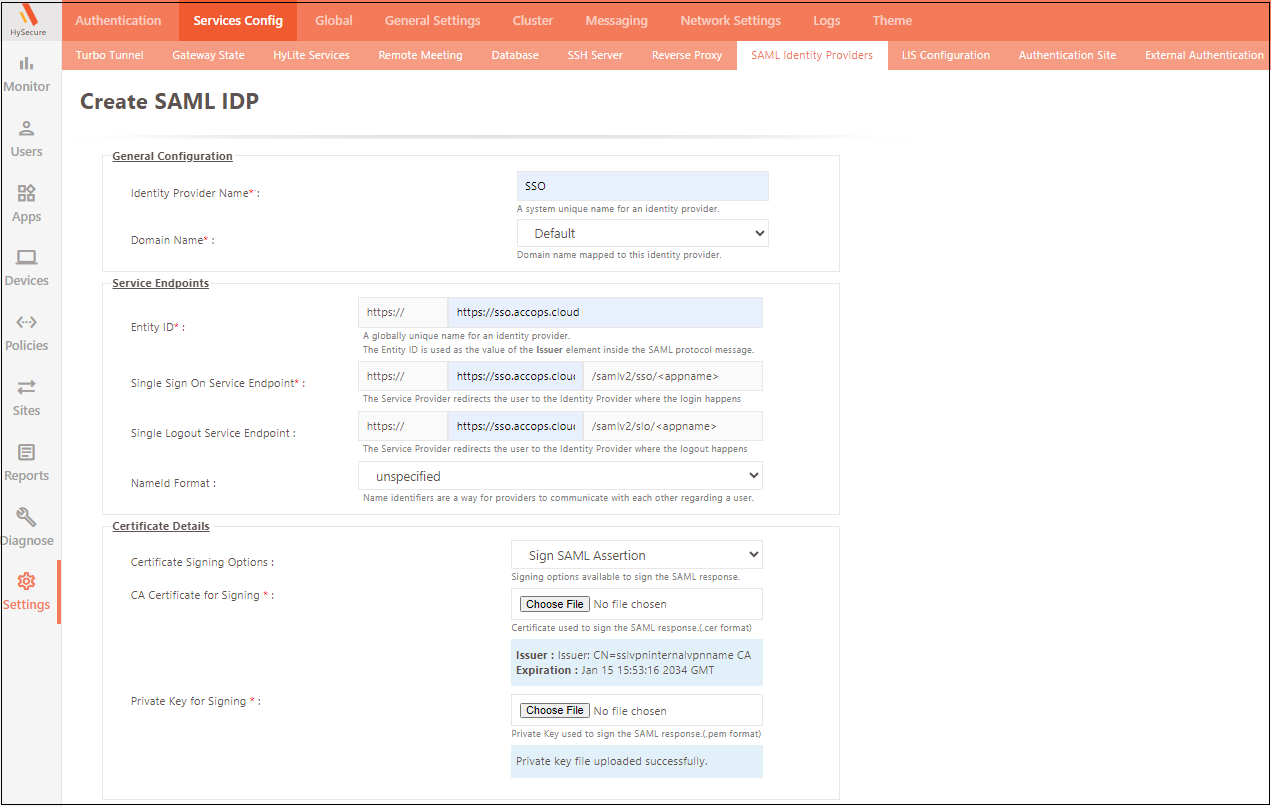
Field Description Identity Provider Name Name of the IDP service provider. Domain Name Select the domain name as the Default. Entity ID The IDP’s unique identification. It is shared and configured as an IdP Entity ID in the SAML Service Provider (SAML SP). Enter the Public DNS or FQDN name of HySecure Gateway. SSO Service Endpoint The SAML IDP endpoint address where SAML SP would redirect users for authentication. Enter the Public DNS or FQDN name of the HySecure Gateway. Single Logout Service Endpoint SAML IdP Endpoint address at which SAML SP informs IdP about user logout event. Enter the Public DNS or FQDN name of HySecure Gateway. Certificate Details Select the default certificate. - Click on Submit.
Once the IDP is created successfully, download the certificate. You will need it to configure SAML on the Netskope Portal.

-
After creating the SAML IDP, navigate to the Application section in the Management Console and create a new application for Netskope. Enter the configuration as shown here. For more information, click here.
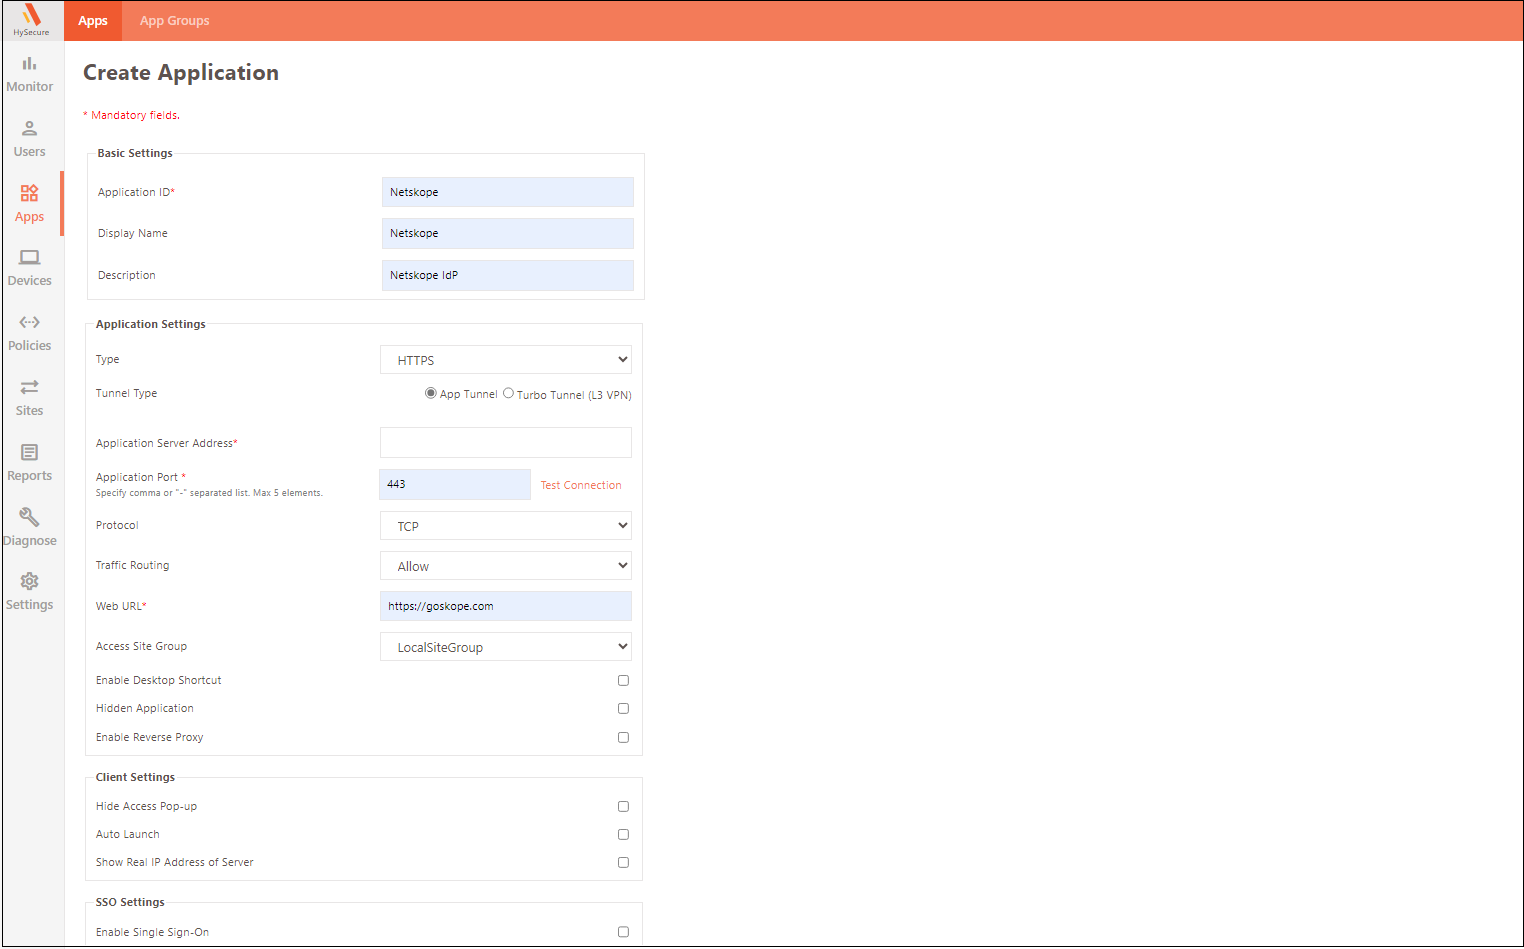
Field Description Display Name Enter a Unique name for the application. Type Select the type as HTTPS. Application Server Address Enter the public DNS of the Netskope Application. Application Port Enter the public port number (The default port for https is 443). Web URL Enter the complete FQDN of Netskope. -
After entering the application details, scroll down to the SSO Settings, where the SAML details must be entered. Admin will see the details below.

Field Description Enable Single Sign-On This option enables the SSO. Authentication Type Select SAML based. Preconfigured Service Provider Select the Other option. Service Provider Entity ID Enter the Service provider’s URL (the Netskope team will provide these details OR from the Metadata generated in the Netskope Portal). Service Provider Login URL Enter the service provider's login URL (the Netskope team or the Metadata generated in the Netskope Portal will provide these details). Service Provider Logout URL Enter the service provider's logout URL (the Netskope team will provide these details or from the Metadata generated in the Netskope Portal). -
Click Submit and add the application to the Application Group.
-
Navigate to the Policies section and create a new policy for Netskope. For more information on Policies, click here.

Field Description Access Control Type Select the option Application Access. Access Control Name Give the ACL a unique name. This name helps distinguish the ACL in listings, searches, and logs. Select HySecure Domain Select the domain added to your Active Directory or Native User. Select Authorization Server Select AD or Native as the Authorization Server. Select Assignment Type It depends on the requirement, such as select users or user groups. Select Users Select the assigned users or groups. Select Application Group Select the Application Group in which you have added the Netskope Application. That was created in the previous steps. -
Once the Application is created successfully download the Metadata. This will be required while configuring SAML on the Netskope Portal.

Netskope SAML Configuration
Configure the Forward Proxy feature in Netskope to deploy Netskope and continue using your current SAML deployment for authentication. You can use Netskope as an authentication mode to integrate with an Identity Provider (IdP). For more details on this configuration, refer to SAML Forward Proxy.
Once the Forward Proxy feature is configured in Netskope, follow the steps below to finalize the configuration.
These settings are configured explicitly for demonstration purposes only.
-
Log in to the Netskope admin portal and navigate to Settings > Security Cloud Platform > Forward Proxy > SAML.
-
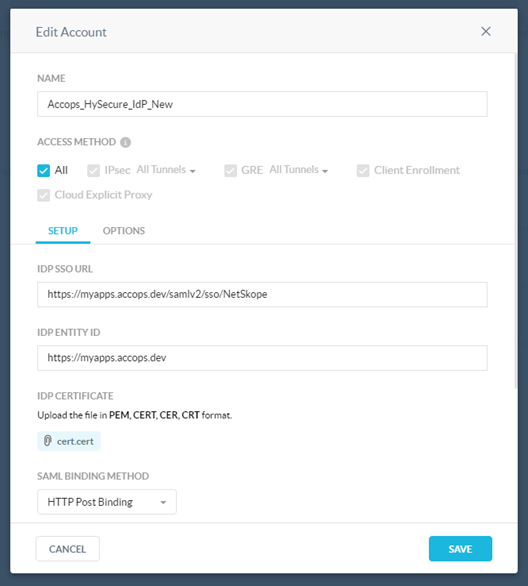
Select New account. Enter the following details and click SAVE.:
Field Description Name Provide a unique identifier. Access Method Applicable as per the Netskope Setup. Here, we have selected All. IDP SSO URL Enter the HySecure IdP SSO URL, which we got in the steps above. IDP ENTITY ID Enter HySecure Entity ID. IDP Certificate: Upload the HySecure IDP certificate. SAML Binding Method Select HTTP Post Binding. Status Select Enabled.
Now, Set the user system proxy to the Netskope-provided proxy URL. Try browsing the internet; the page will be redirected to the HySecure Login Page, asking for user credentials, and then will be prompted for Multifactor Authentication.
After successful authentication, the user can log in to the Netskope Proxy portal or the services selected per Netskope’s SAML configuration.